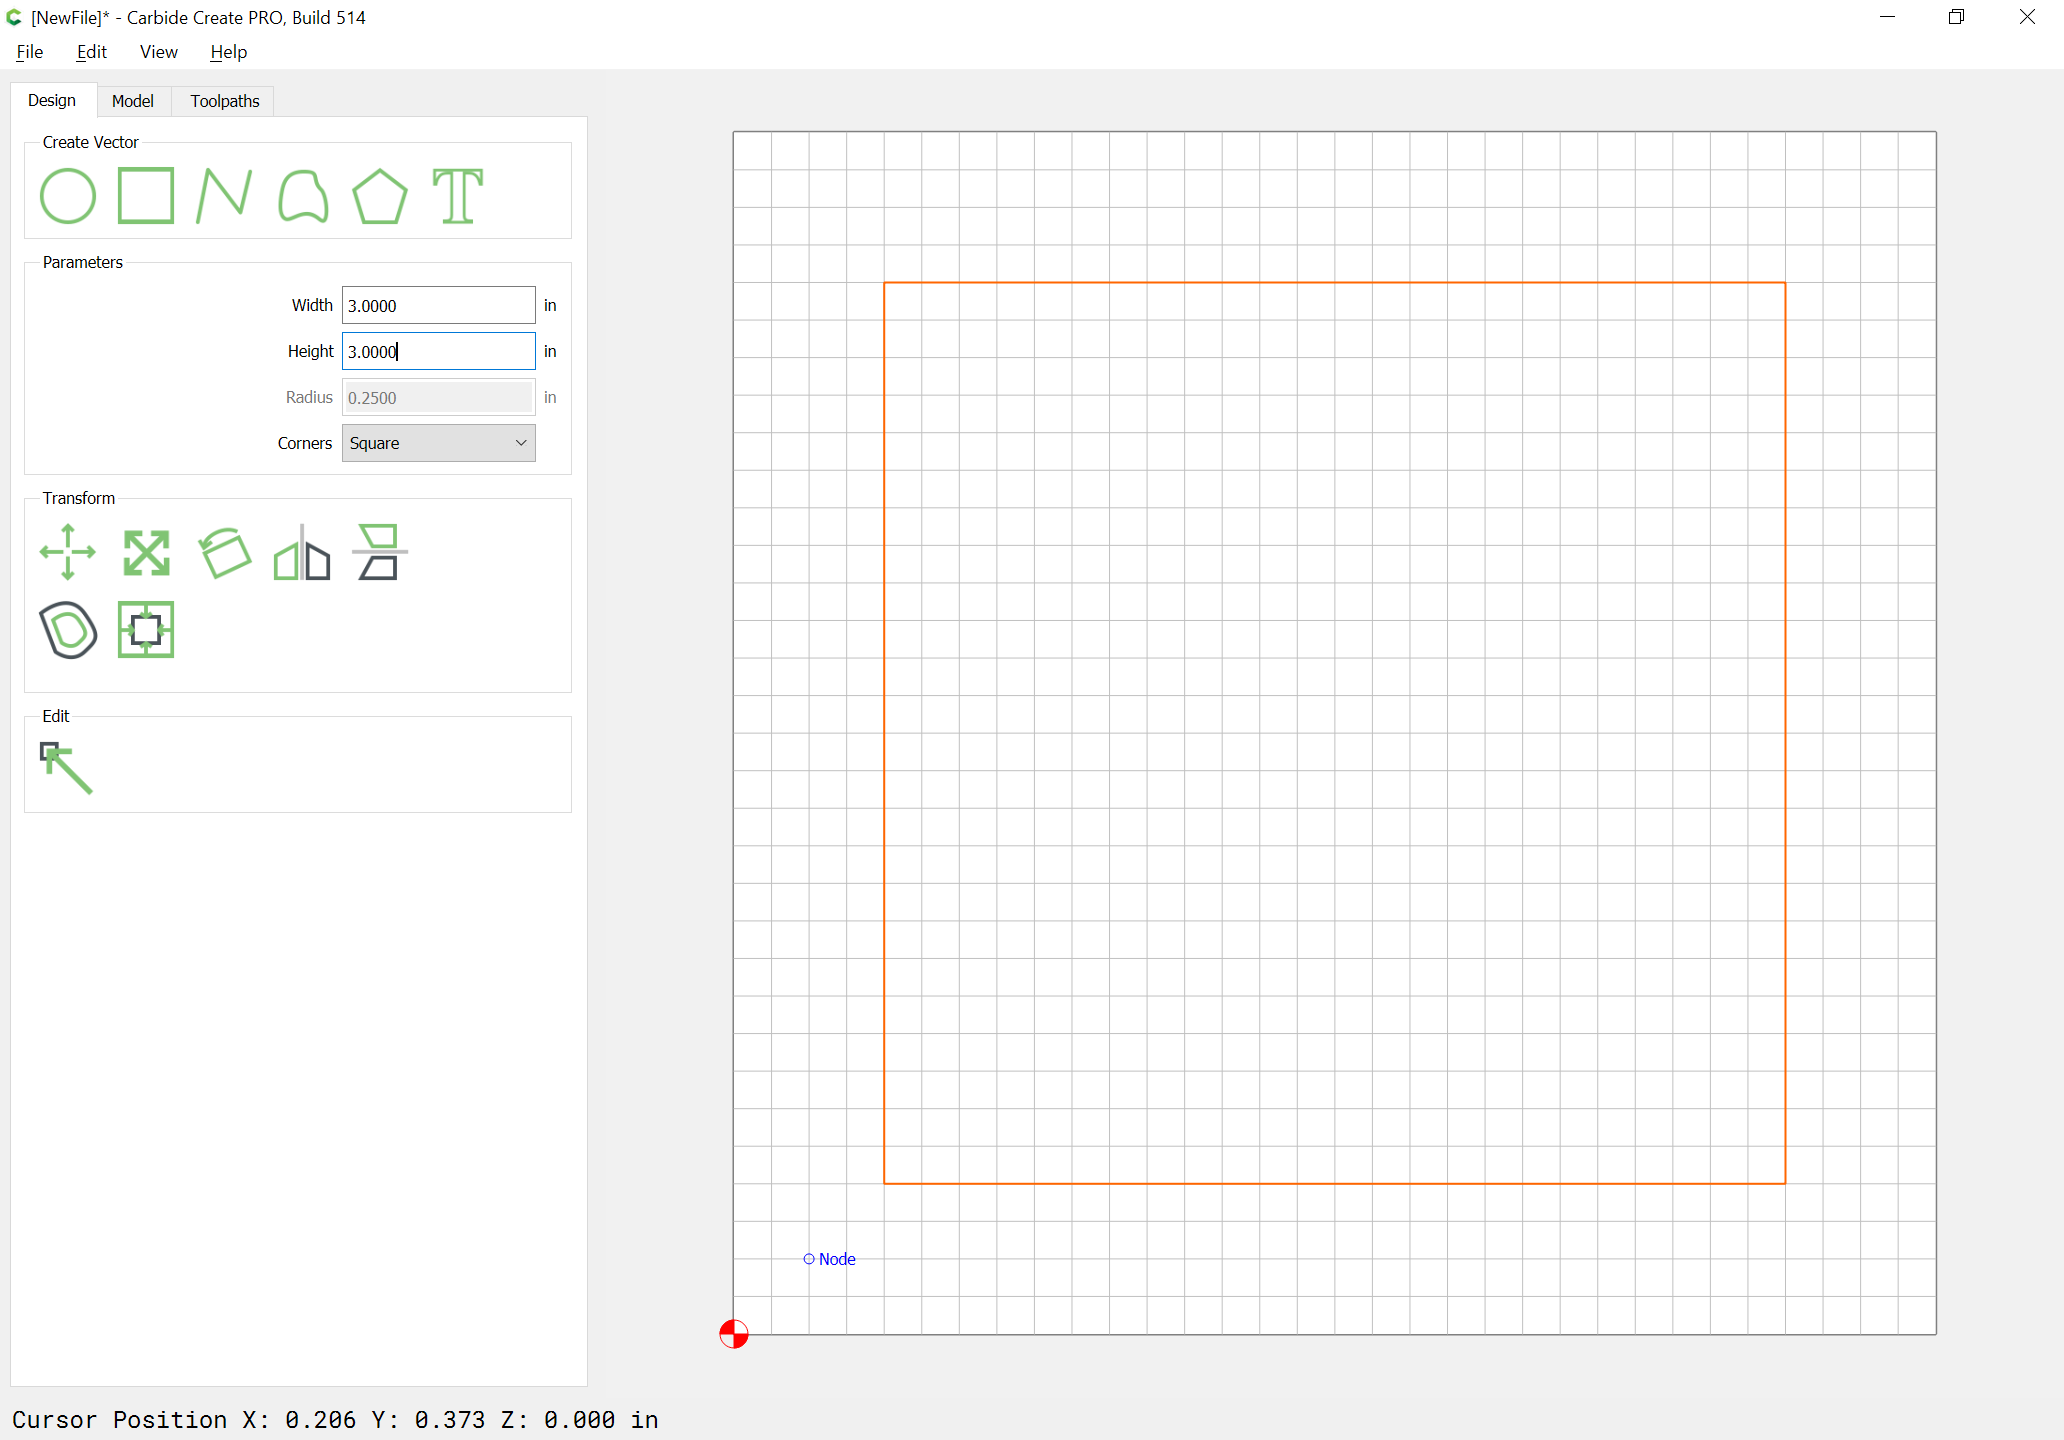
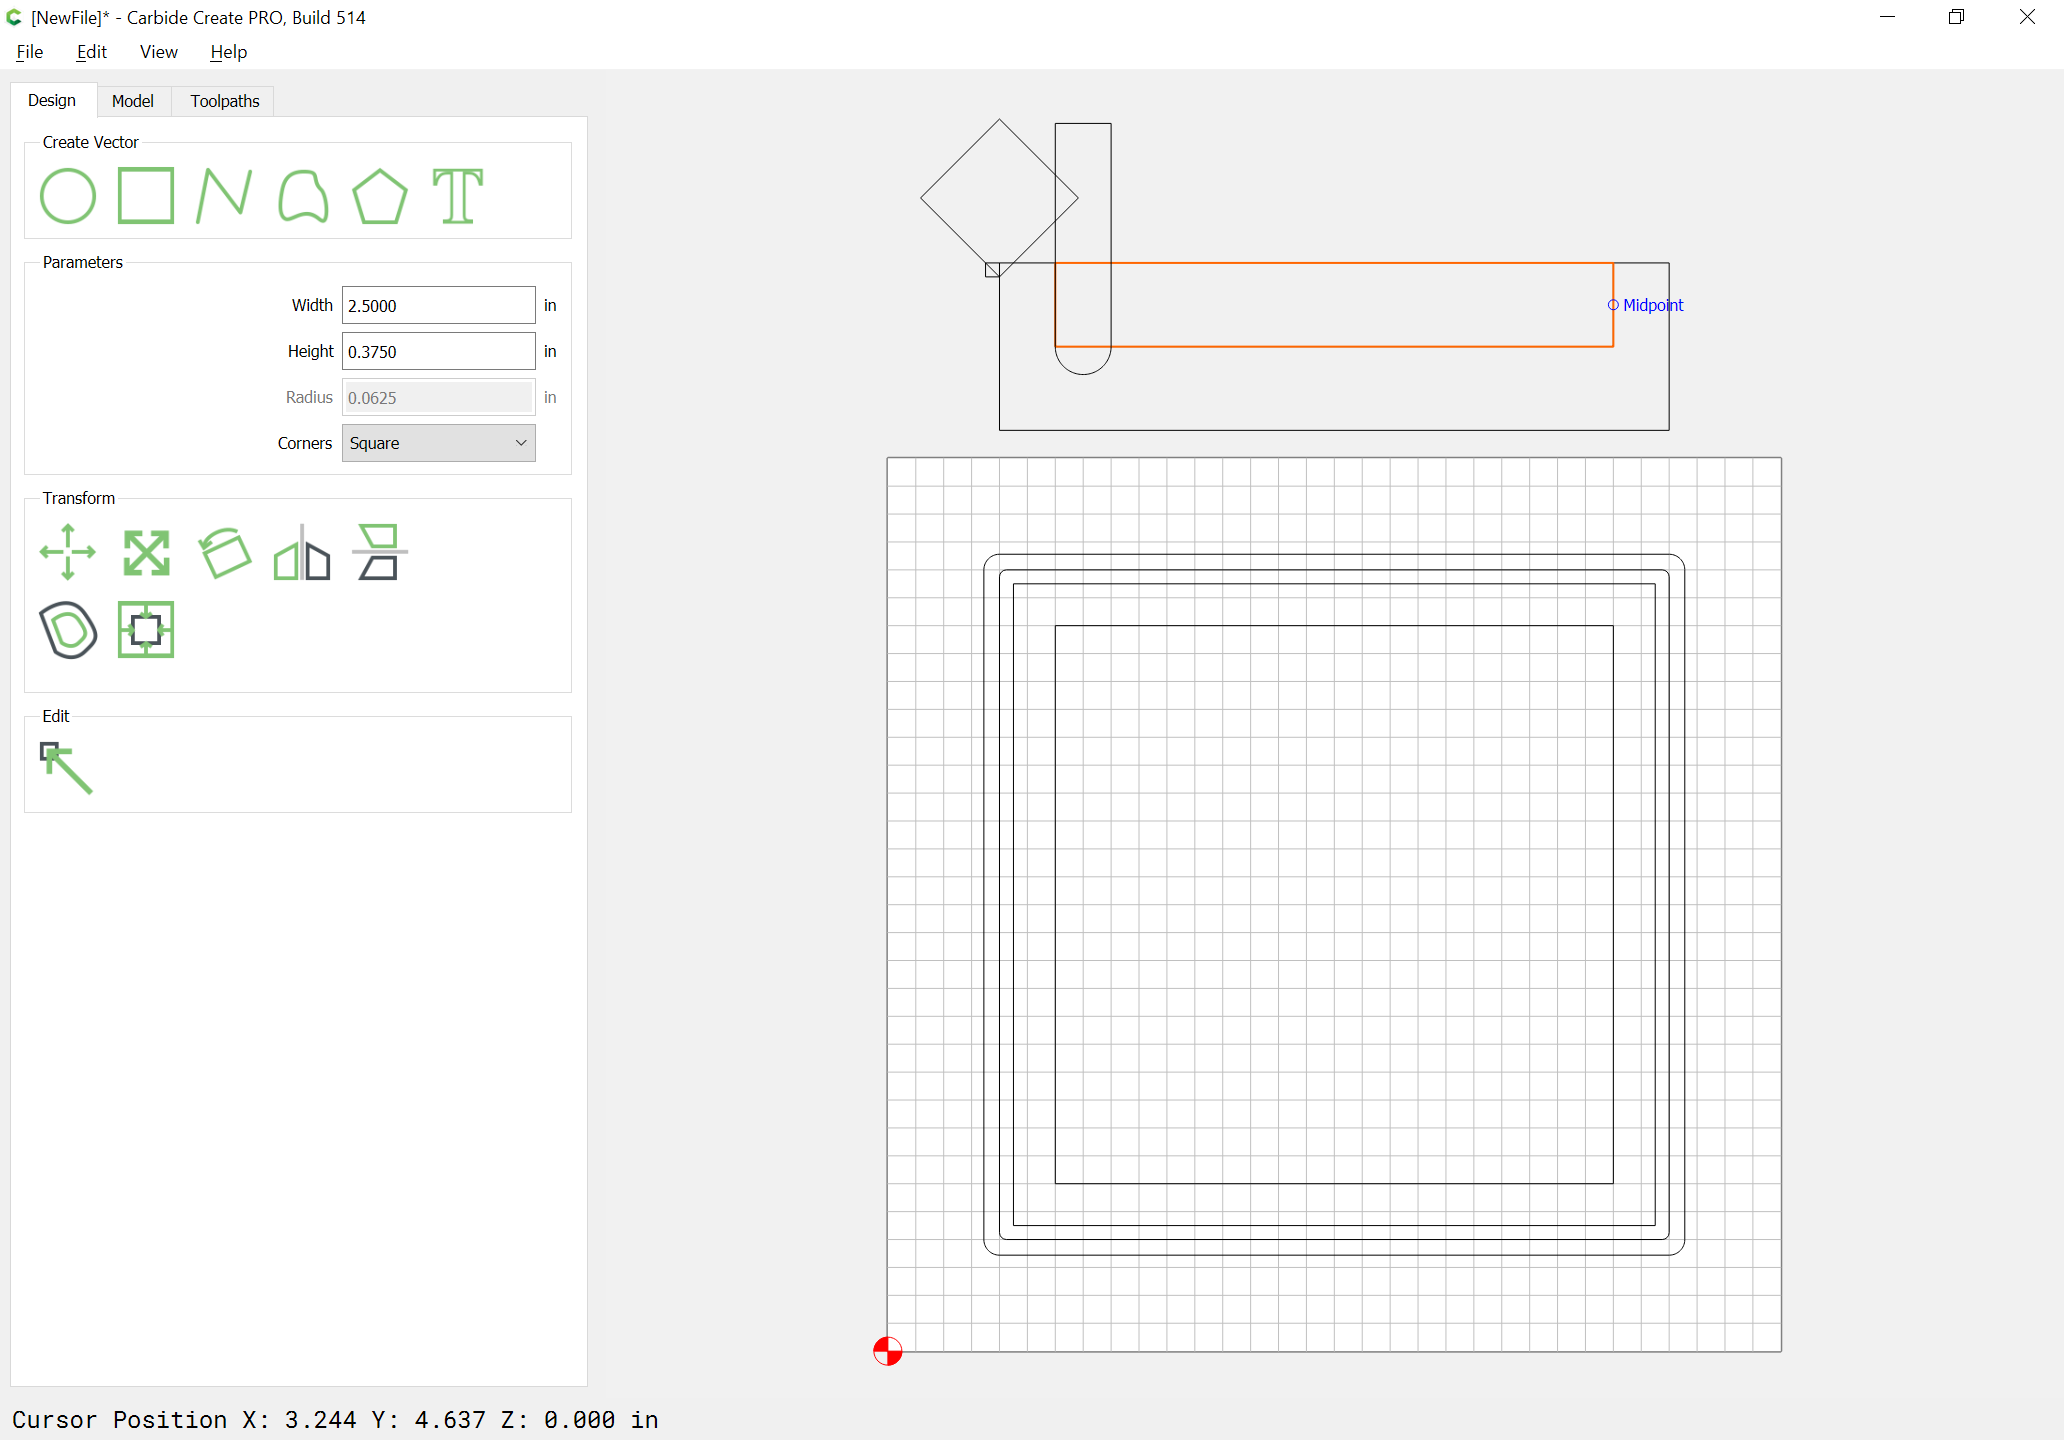
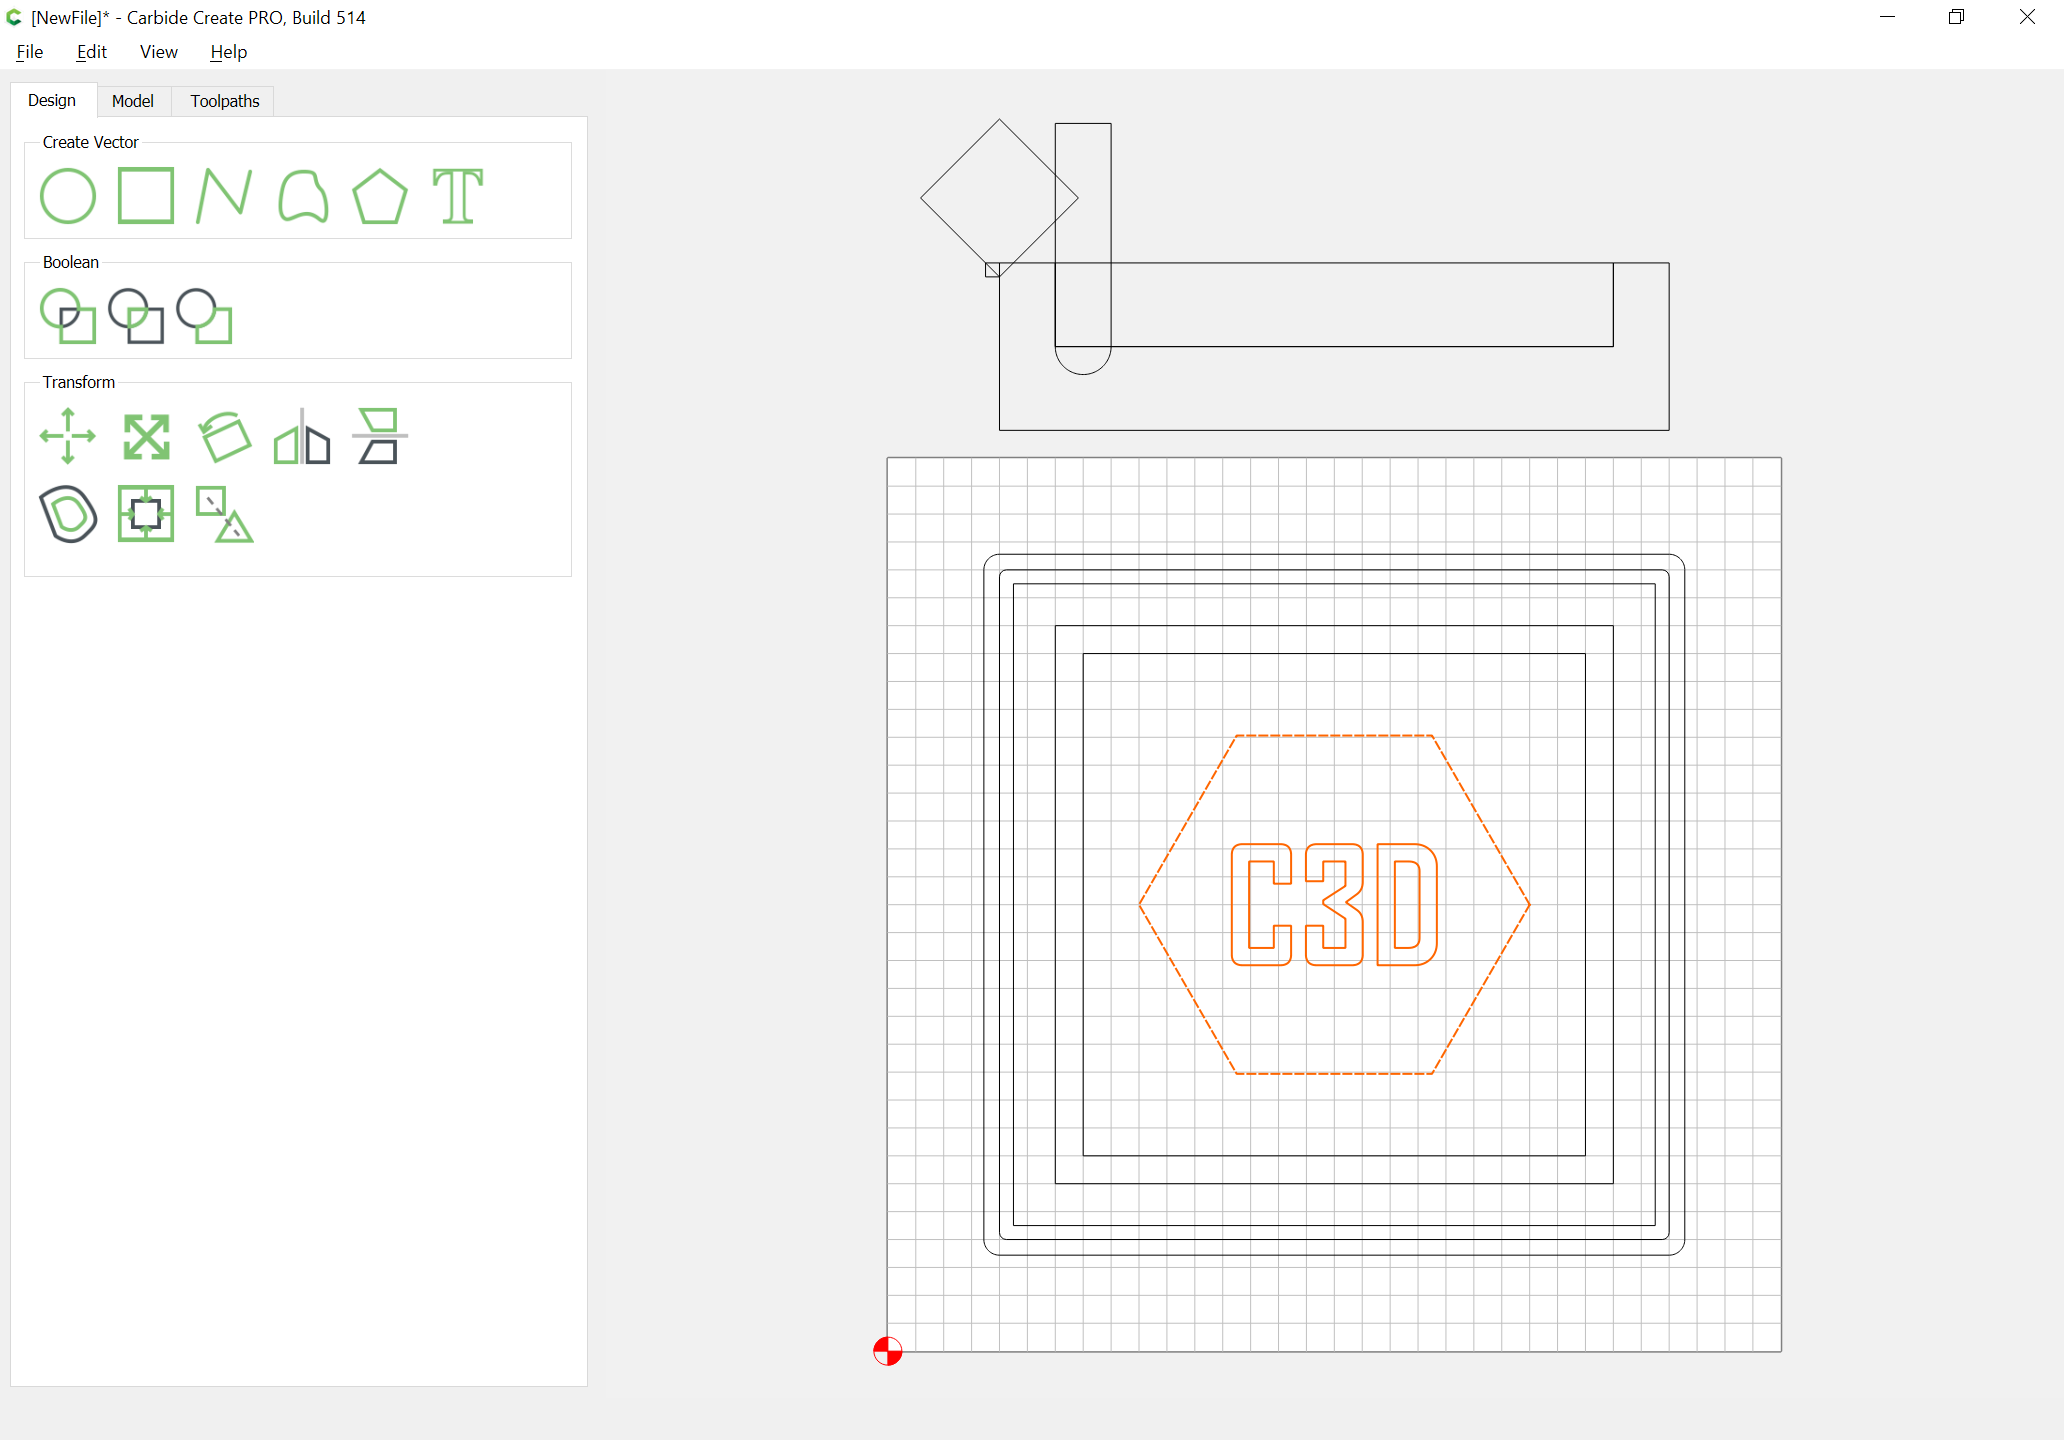
The interior pocket will be 2.5" x 2.5" x 0.5" resulting in 0.5" thick sides and an 0.25" thick bottom, so draw that in again centered on the working area:
At this point, one could select the center square and assign an 0.5" deep Pocket and the outer and assign an 0.75" Contour Outside / Right toolpath and be done, but where’s the fun in that?
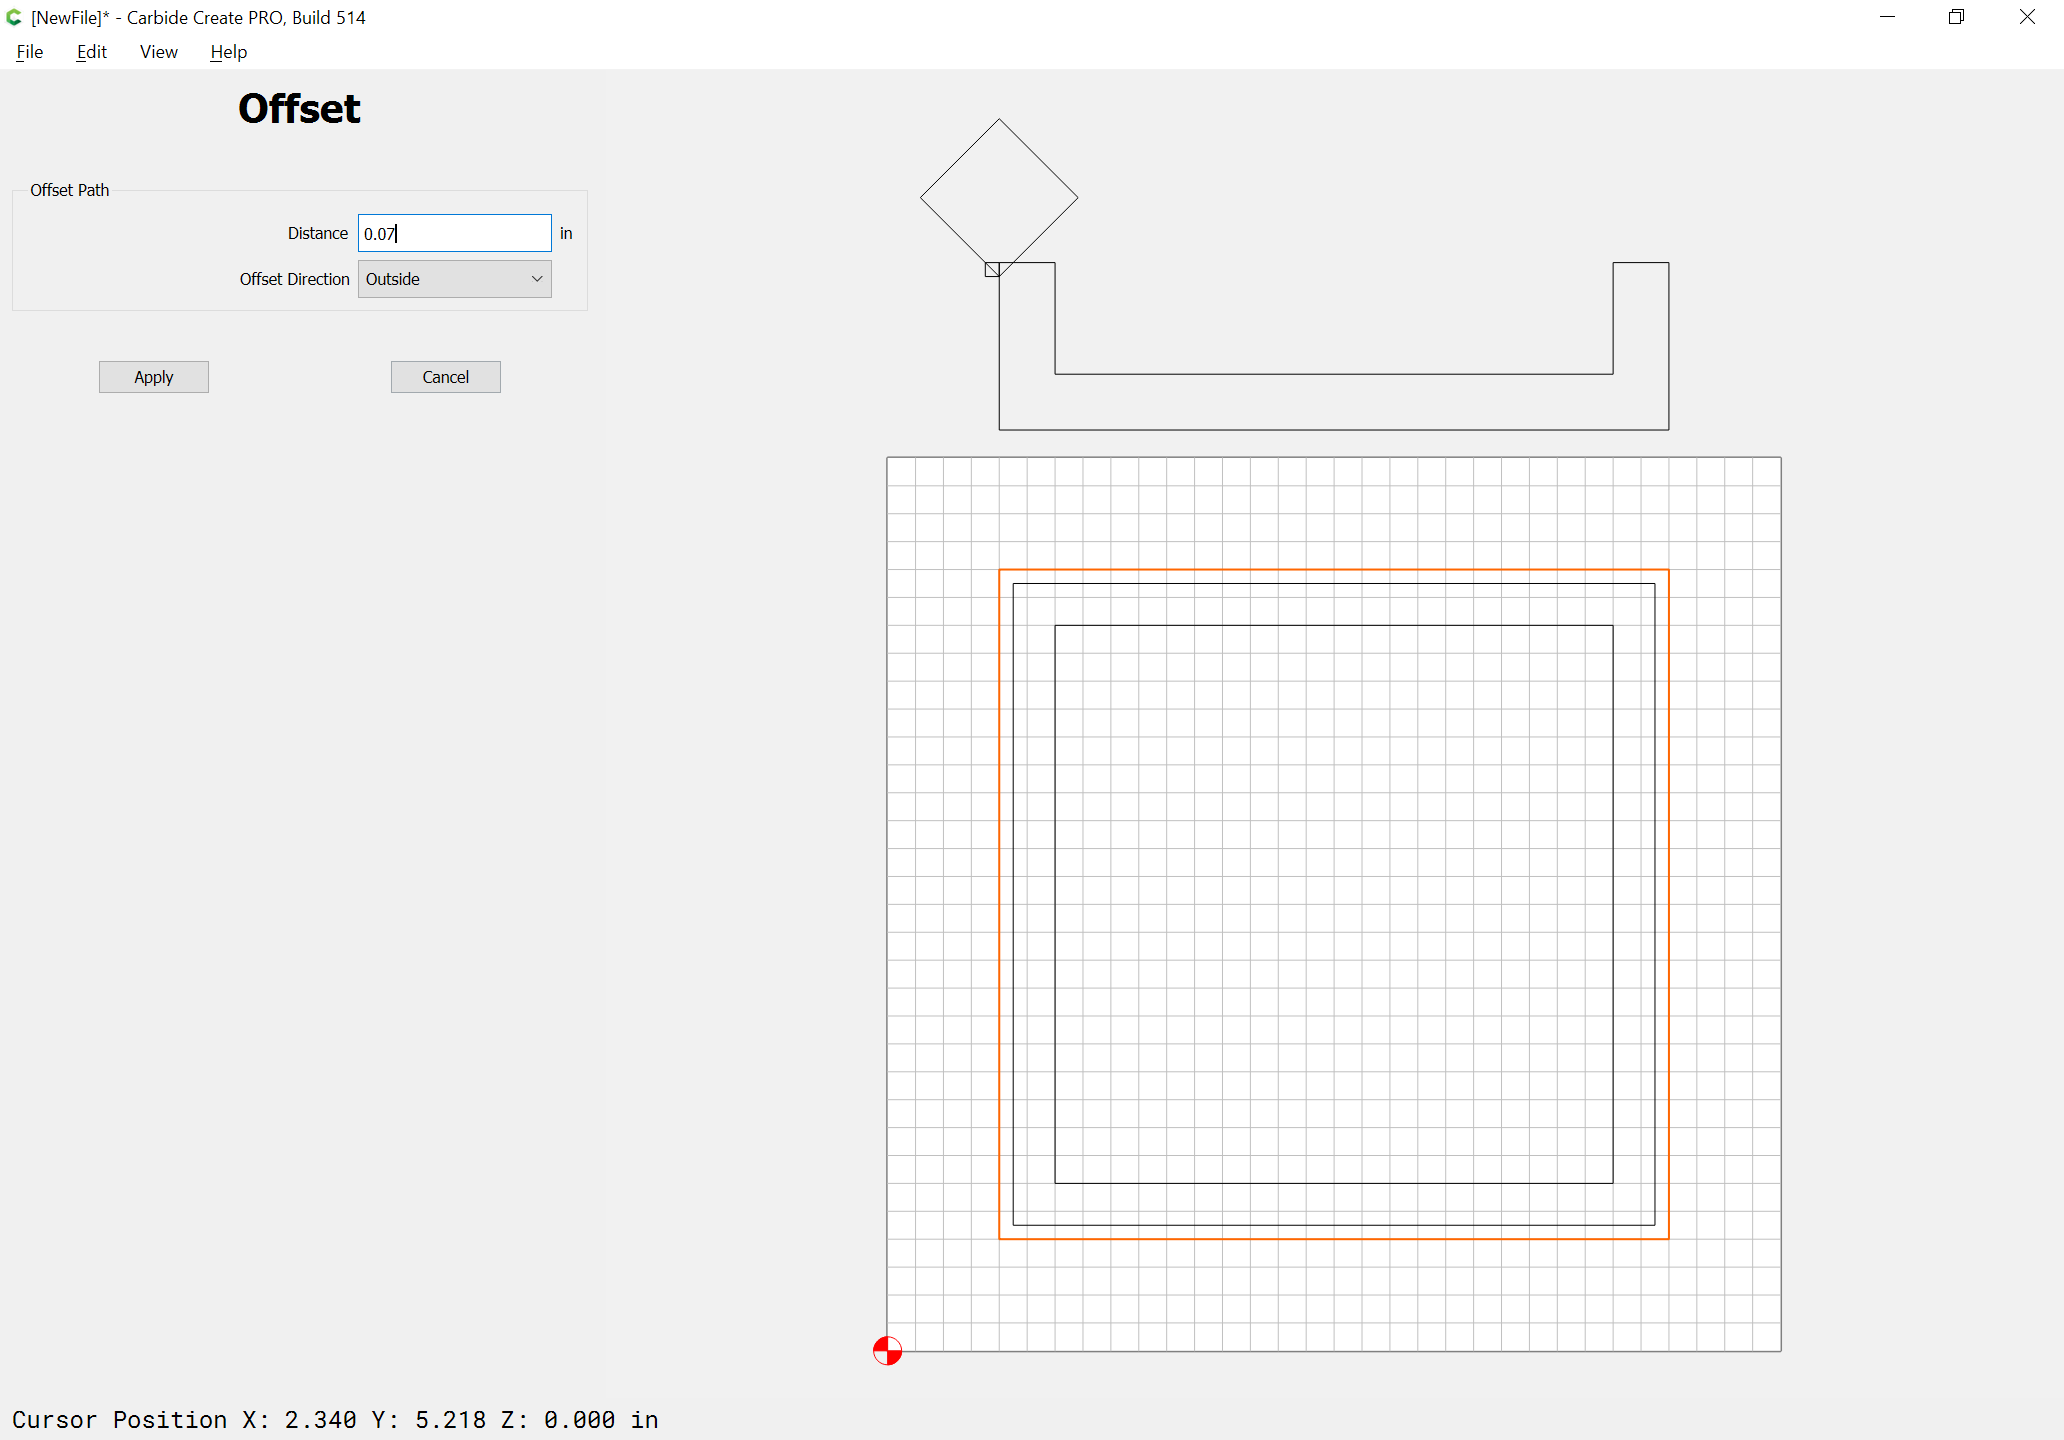
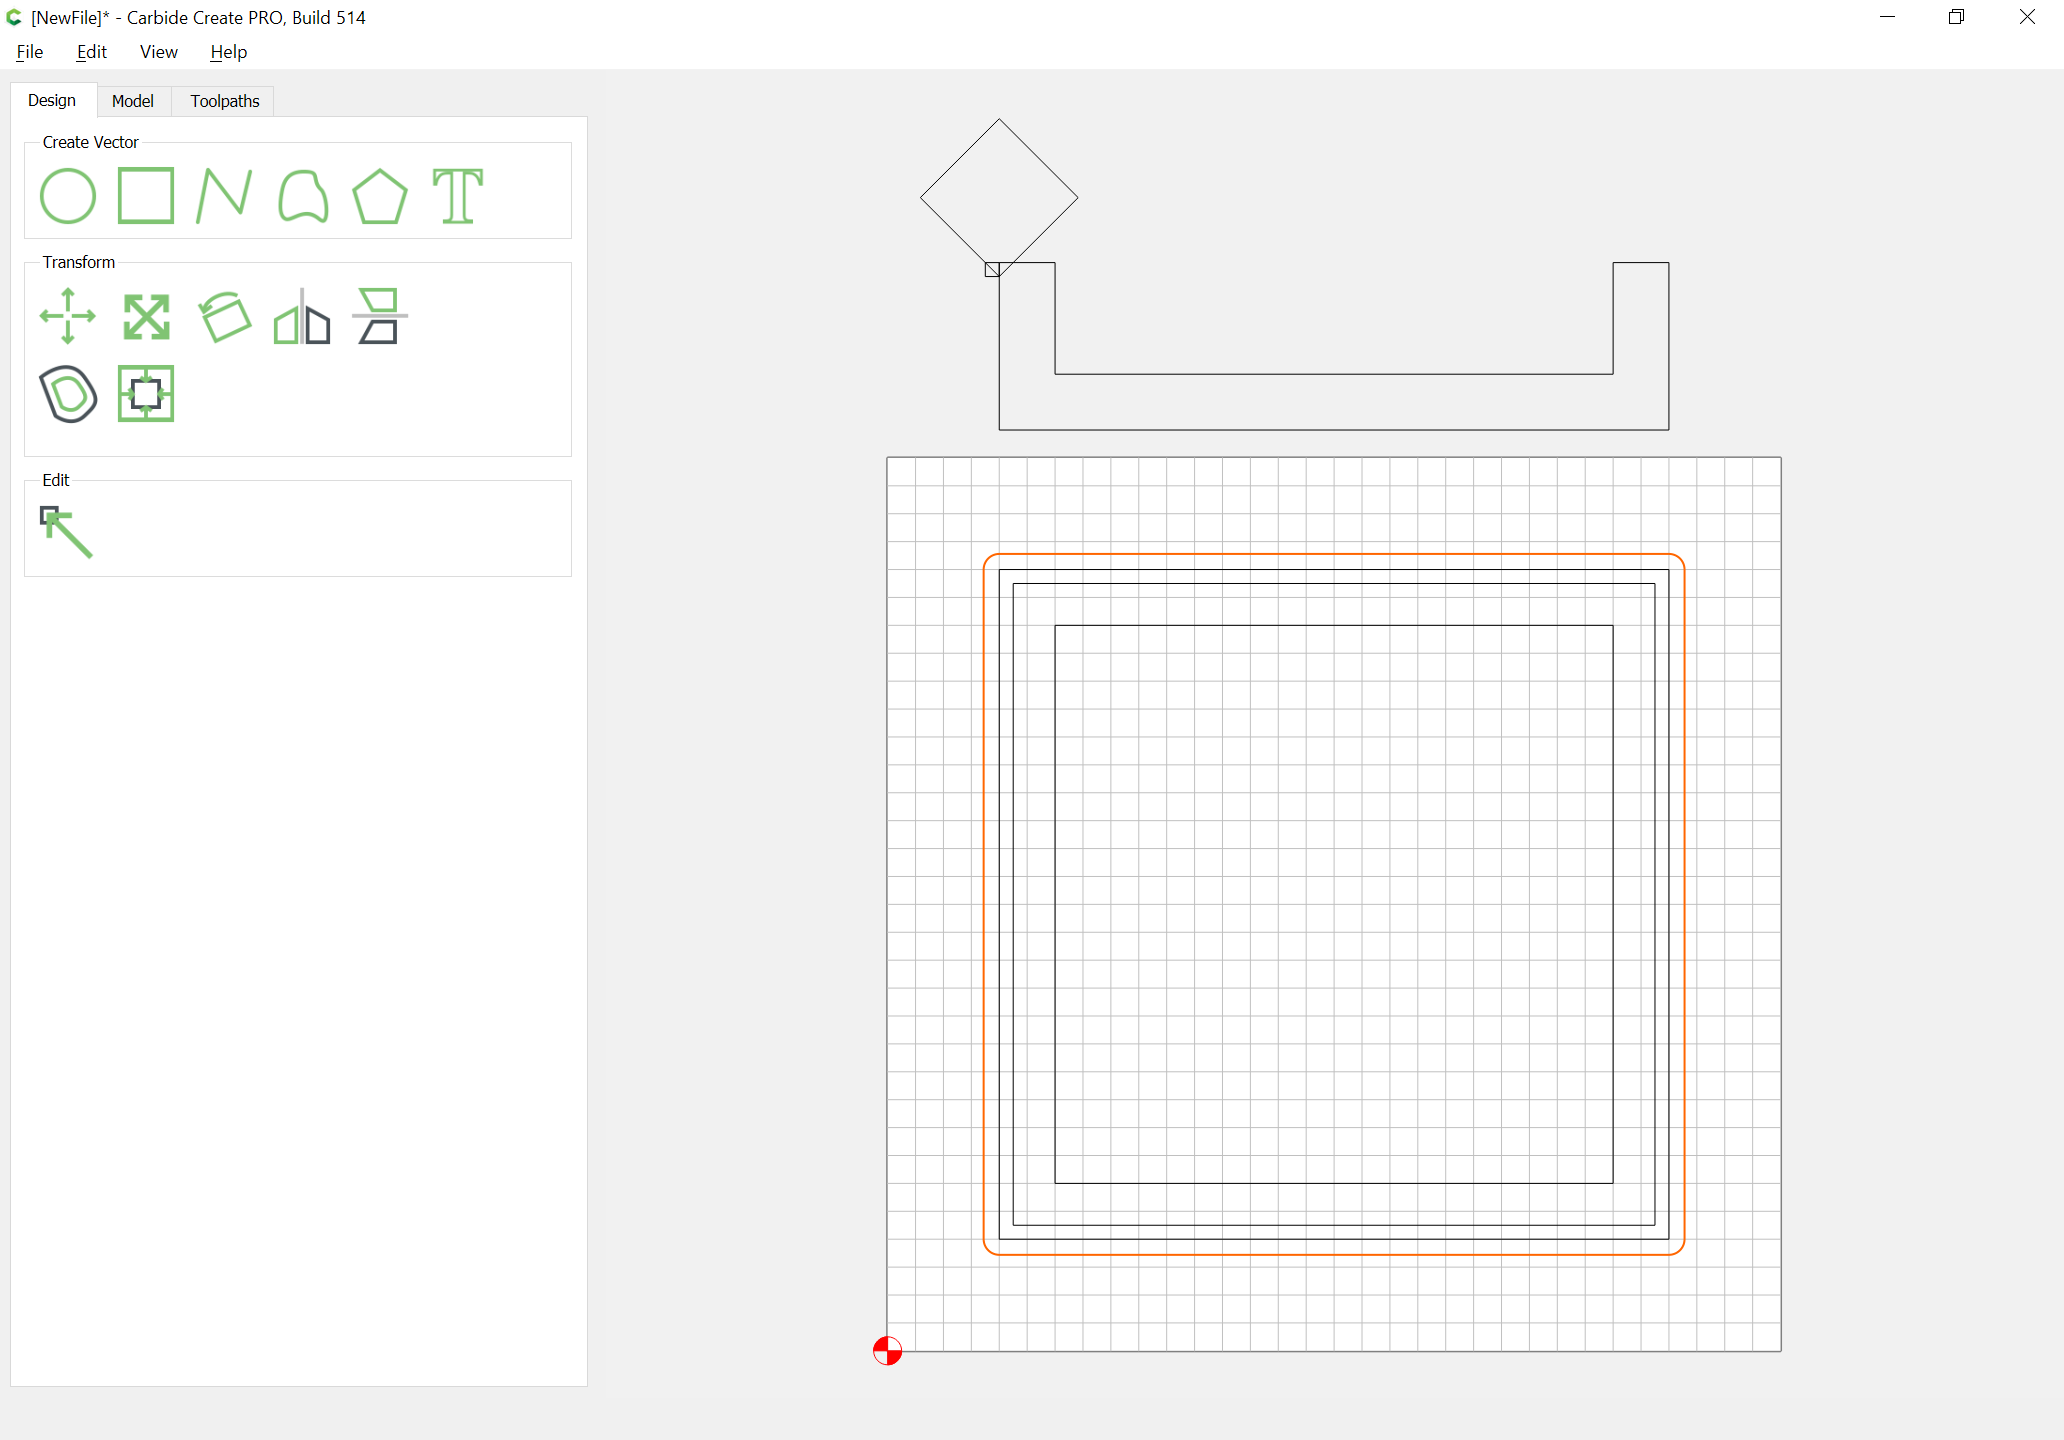
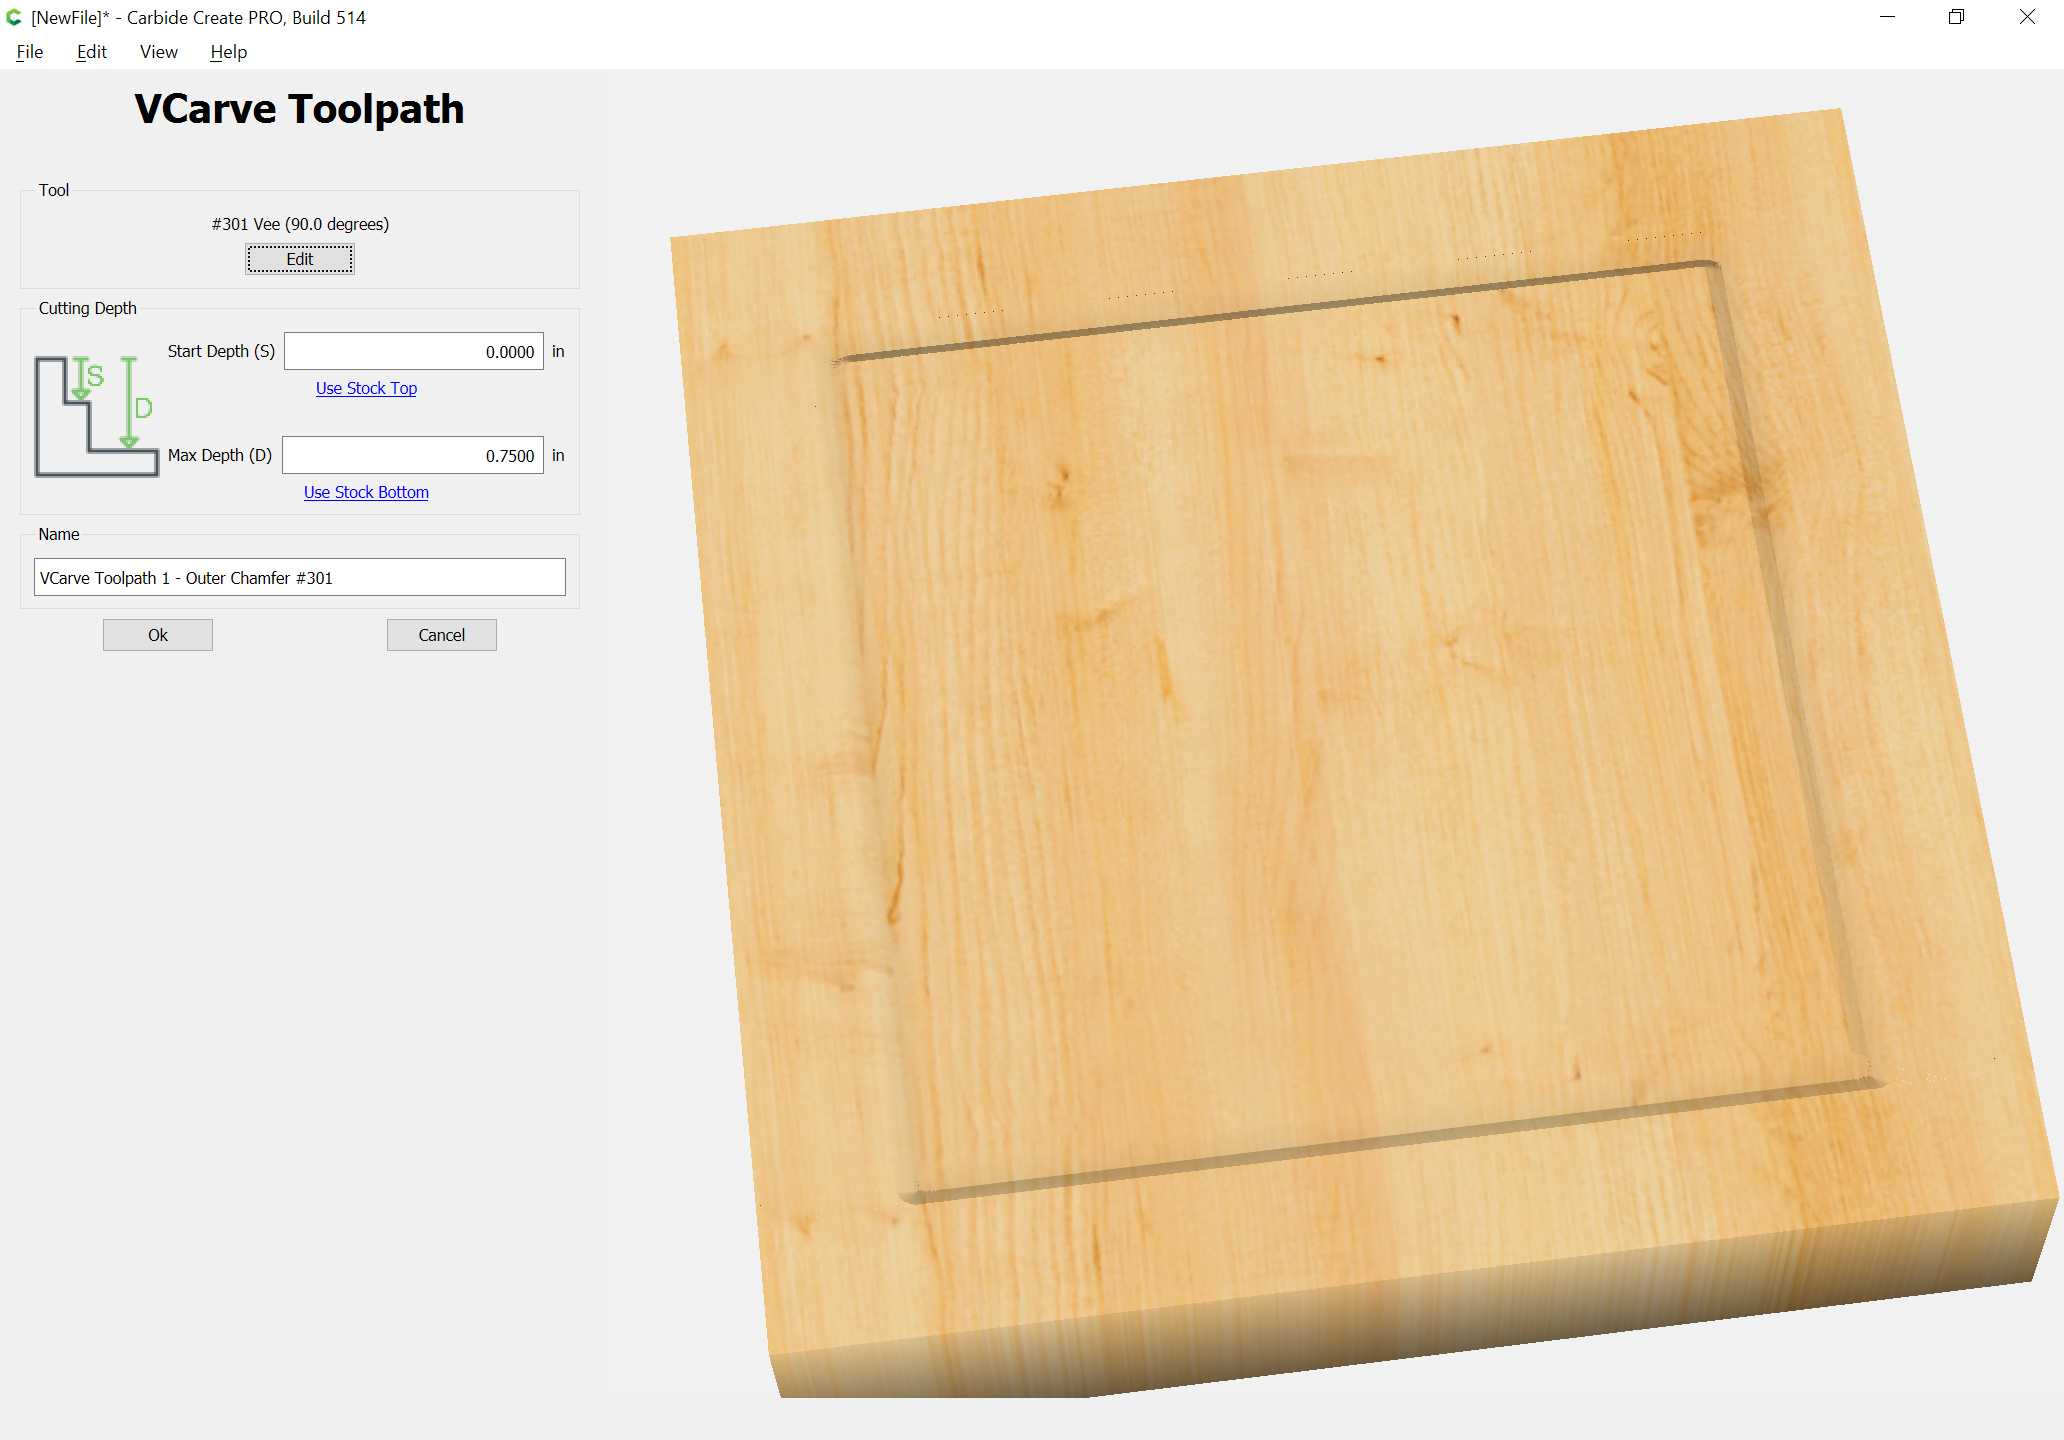
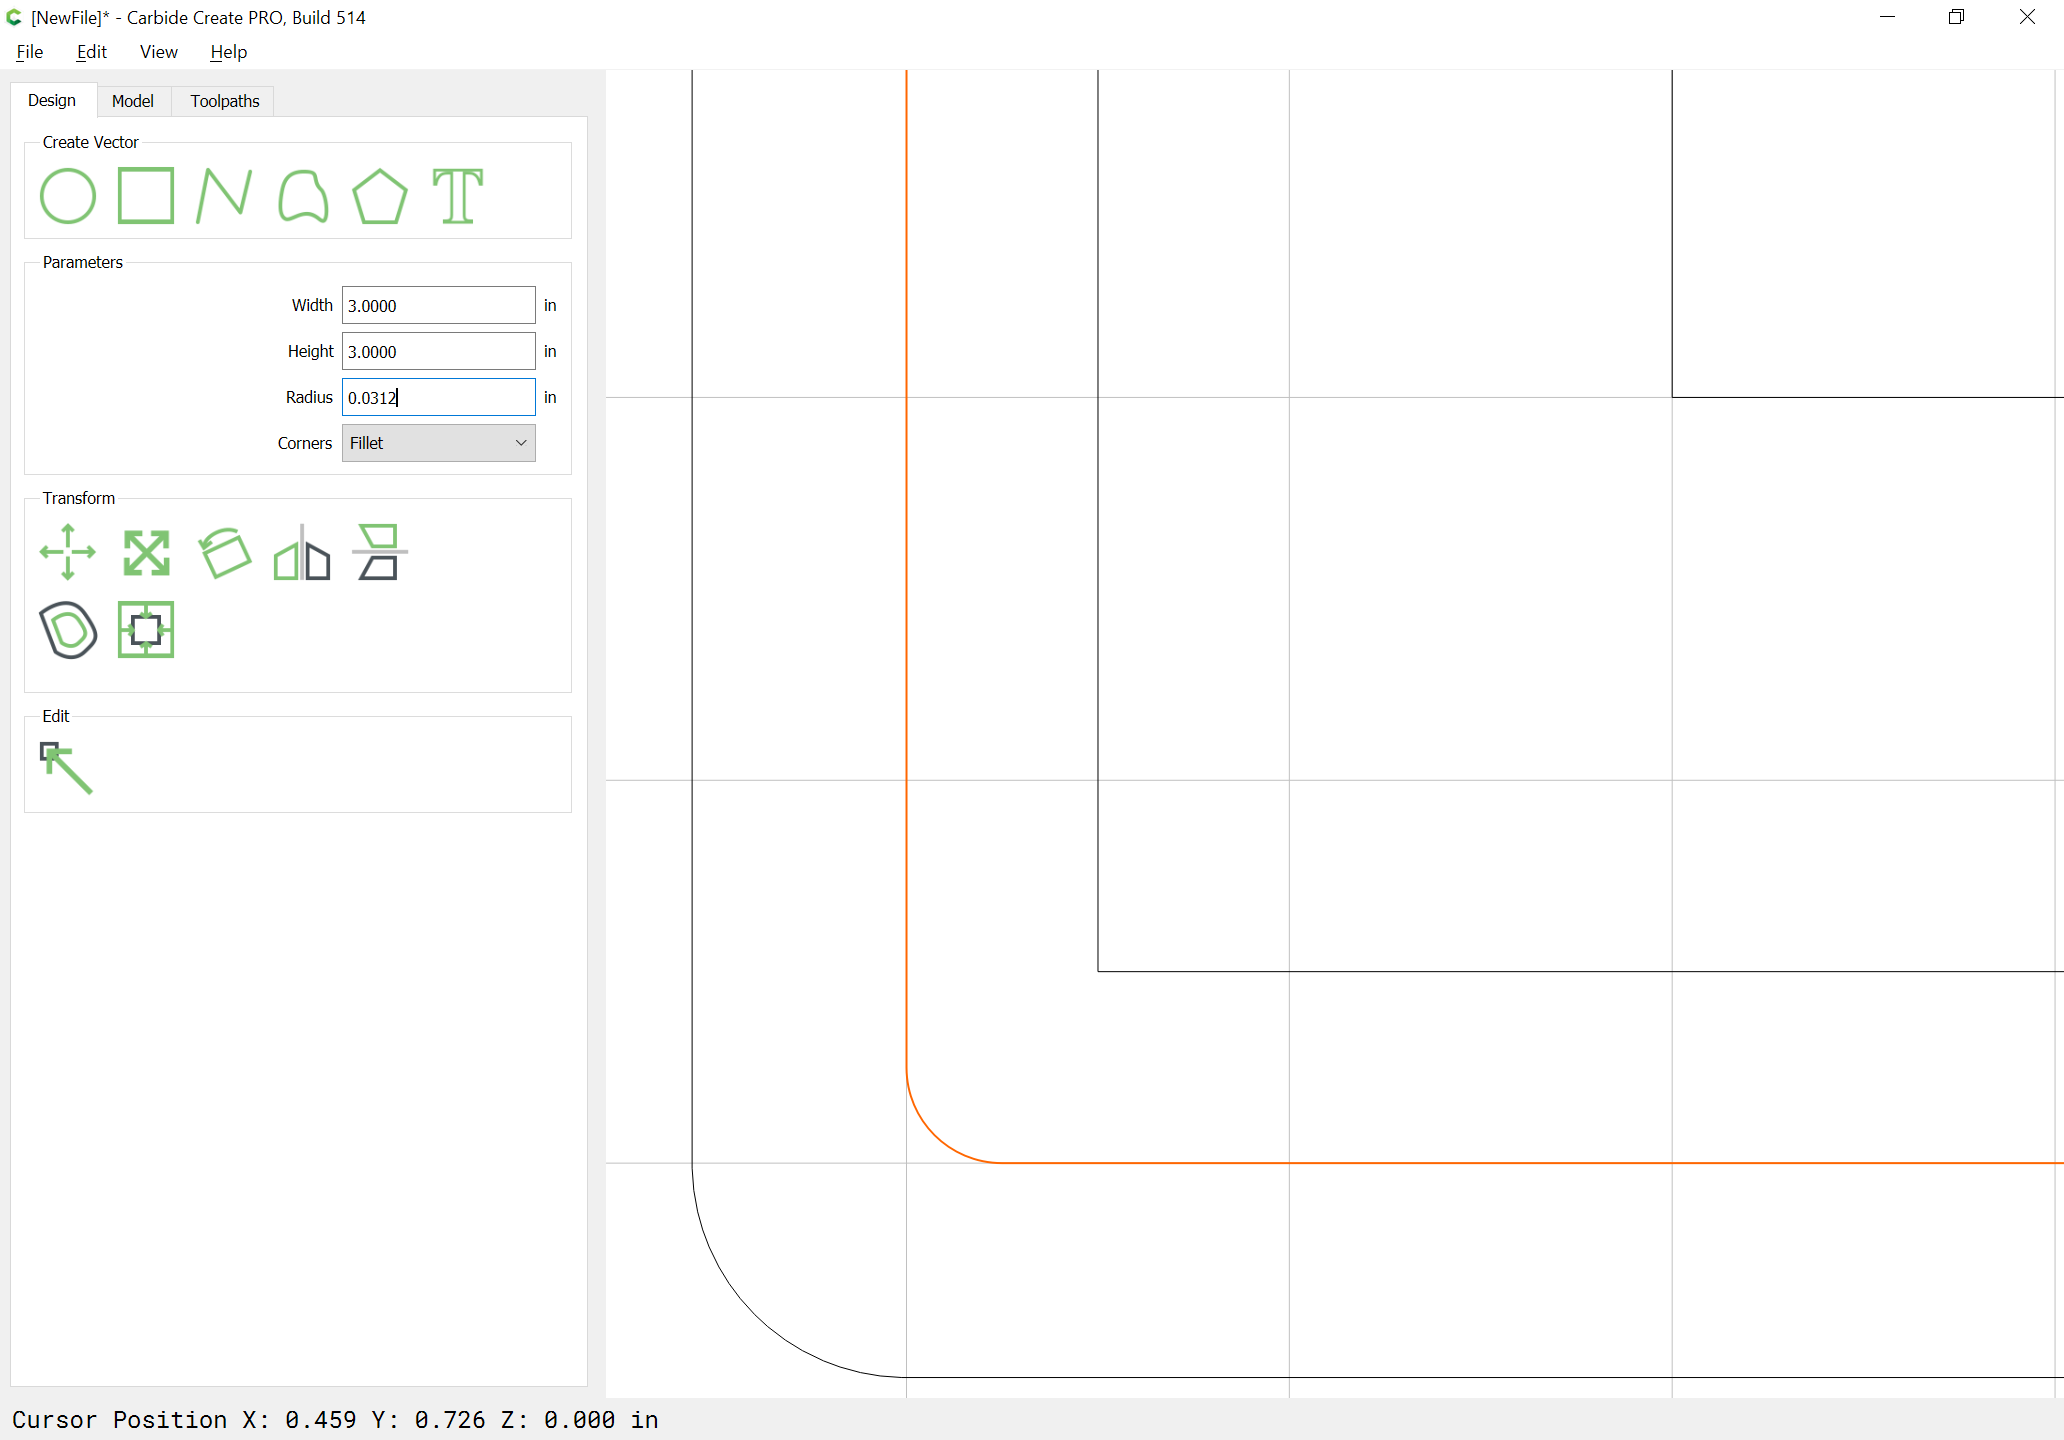
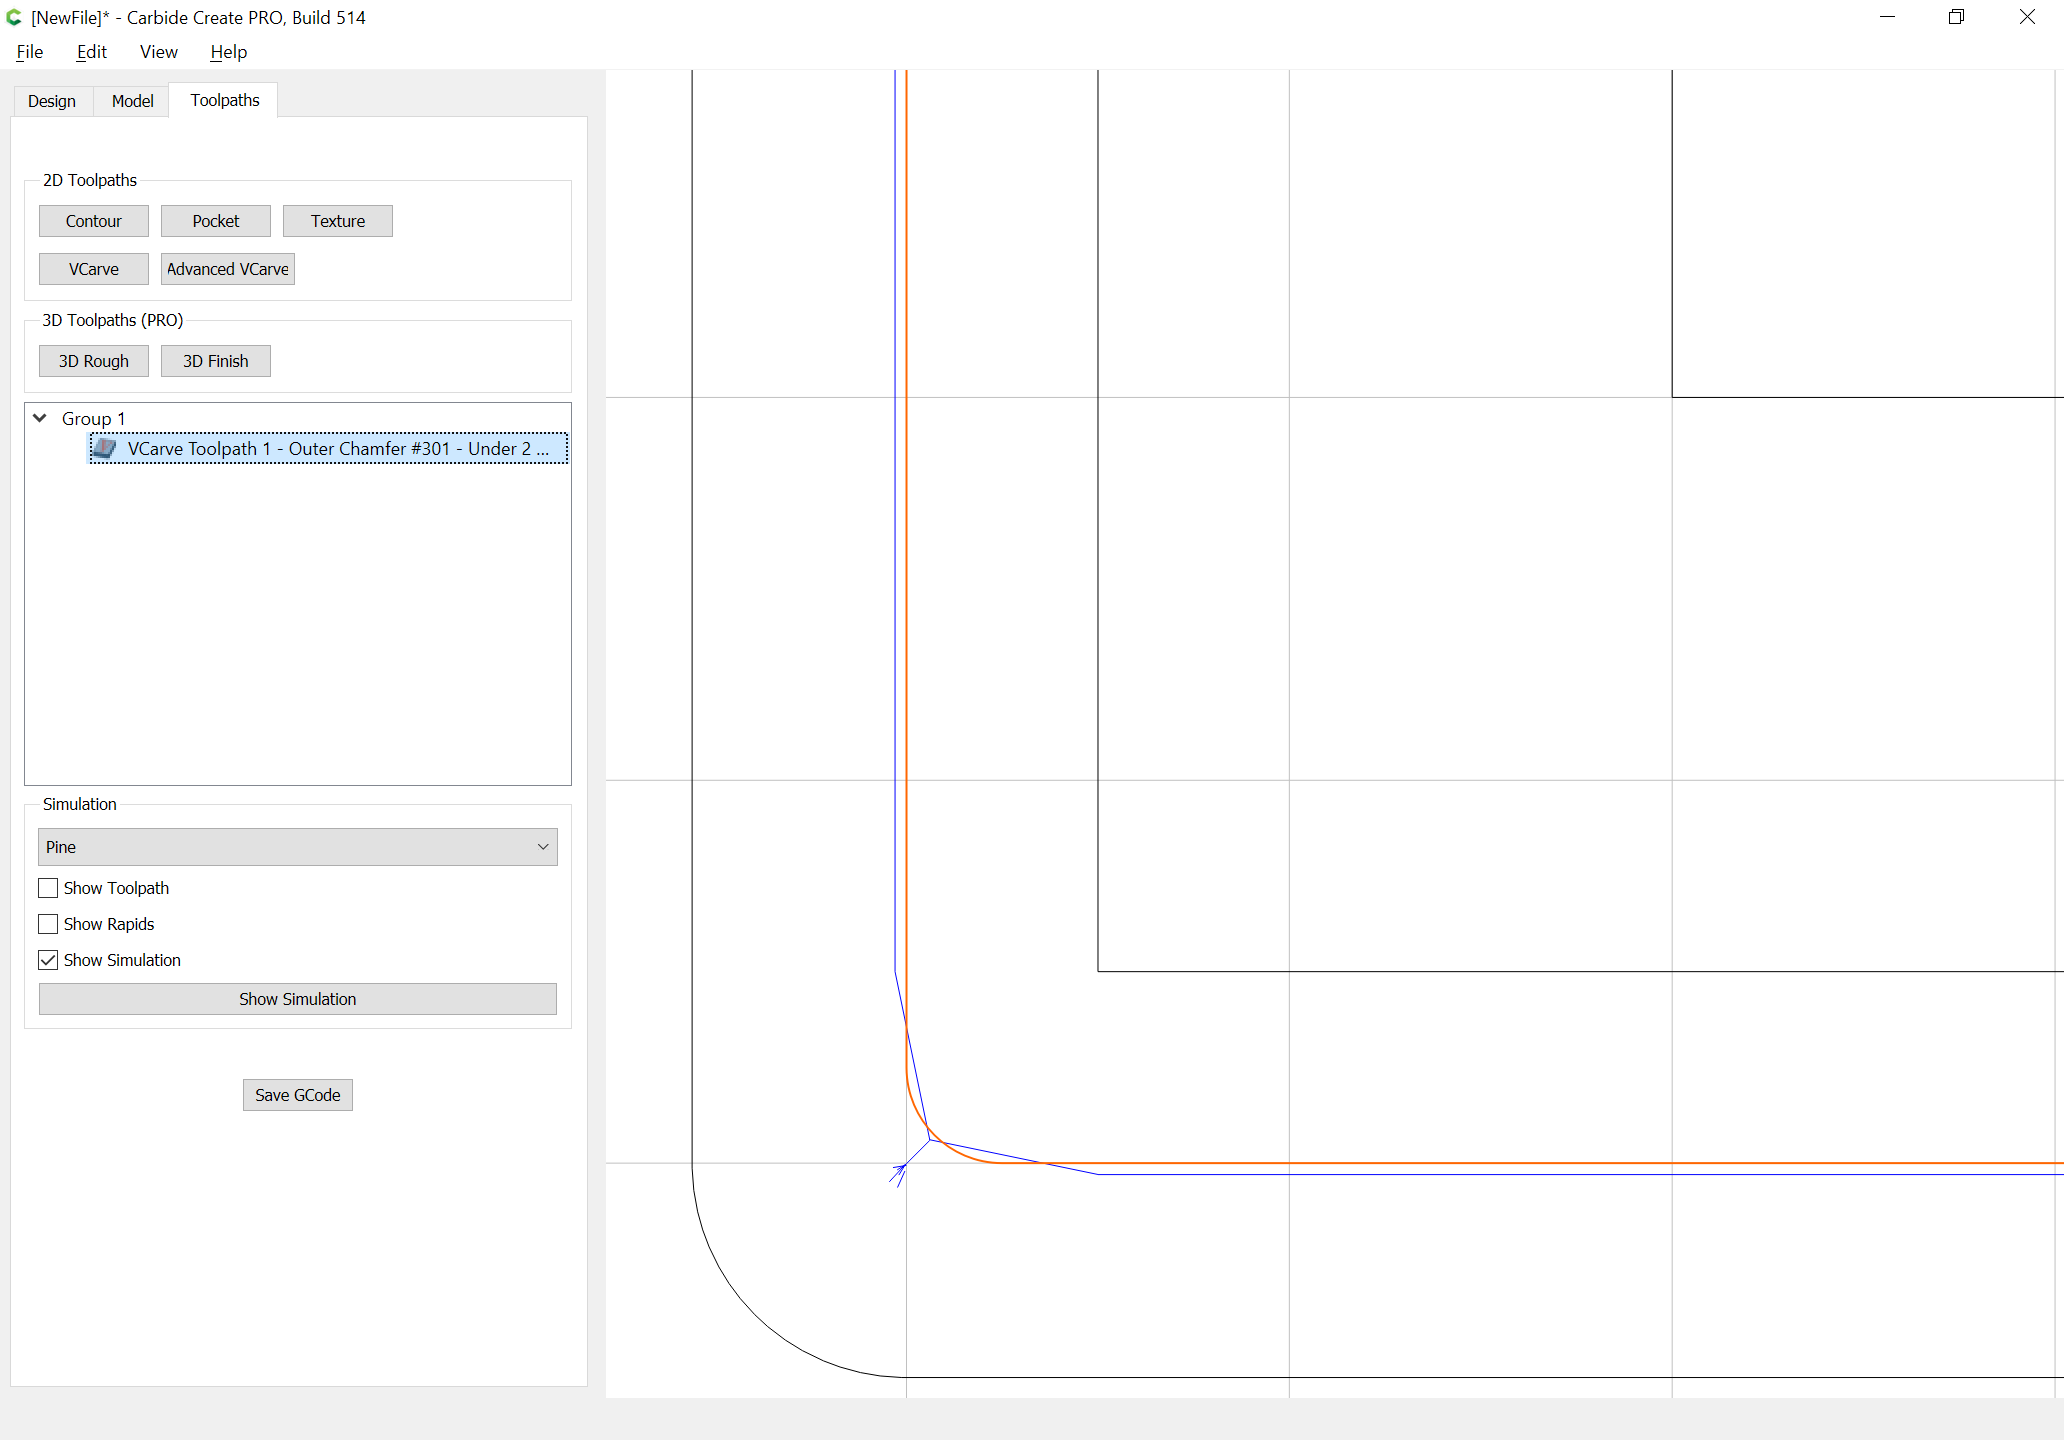
The first effect we want is a V chamfer along the outside edge — this will be done with a V carving and will require adding two bits of geometry, and modifying the outer geometry for a reason which will become clear upon previewing.
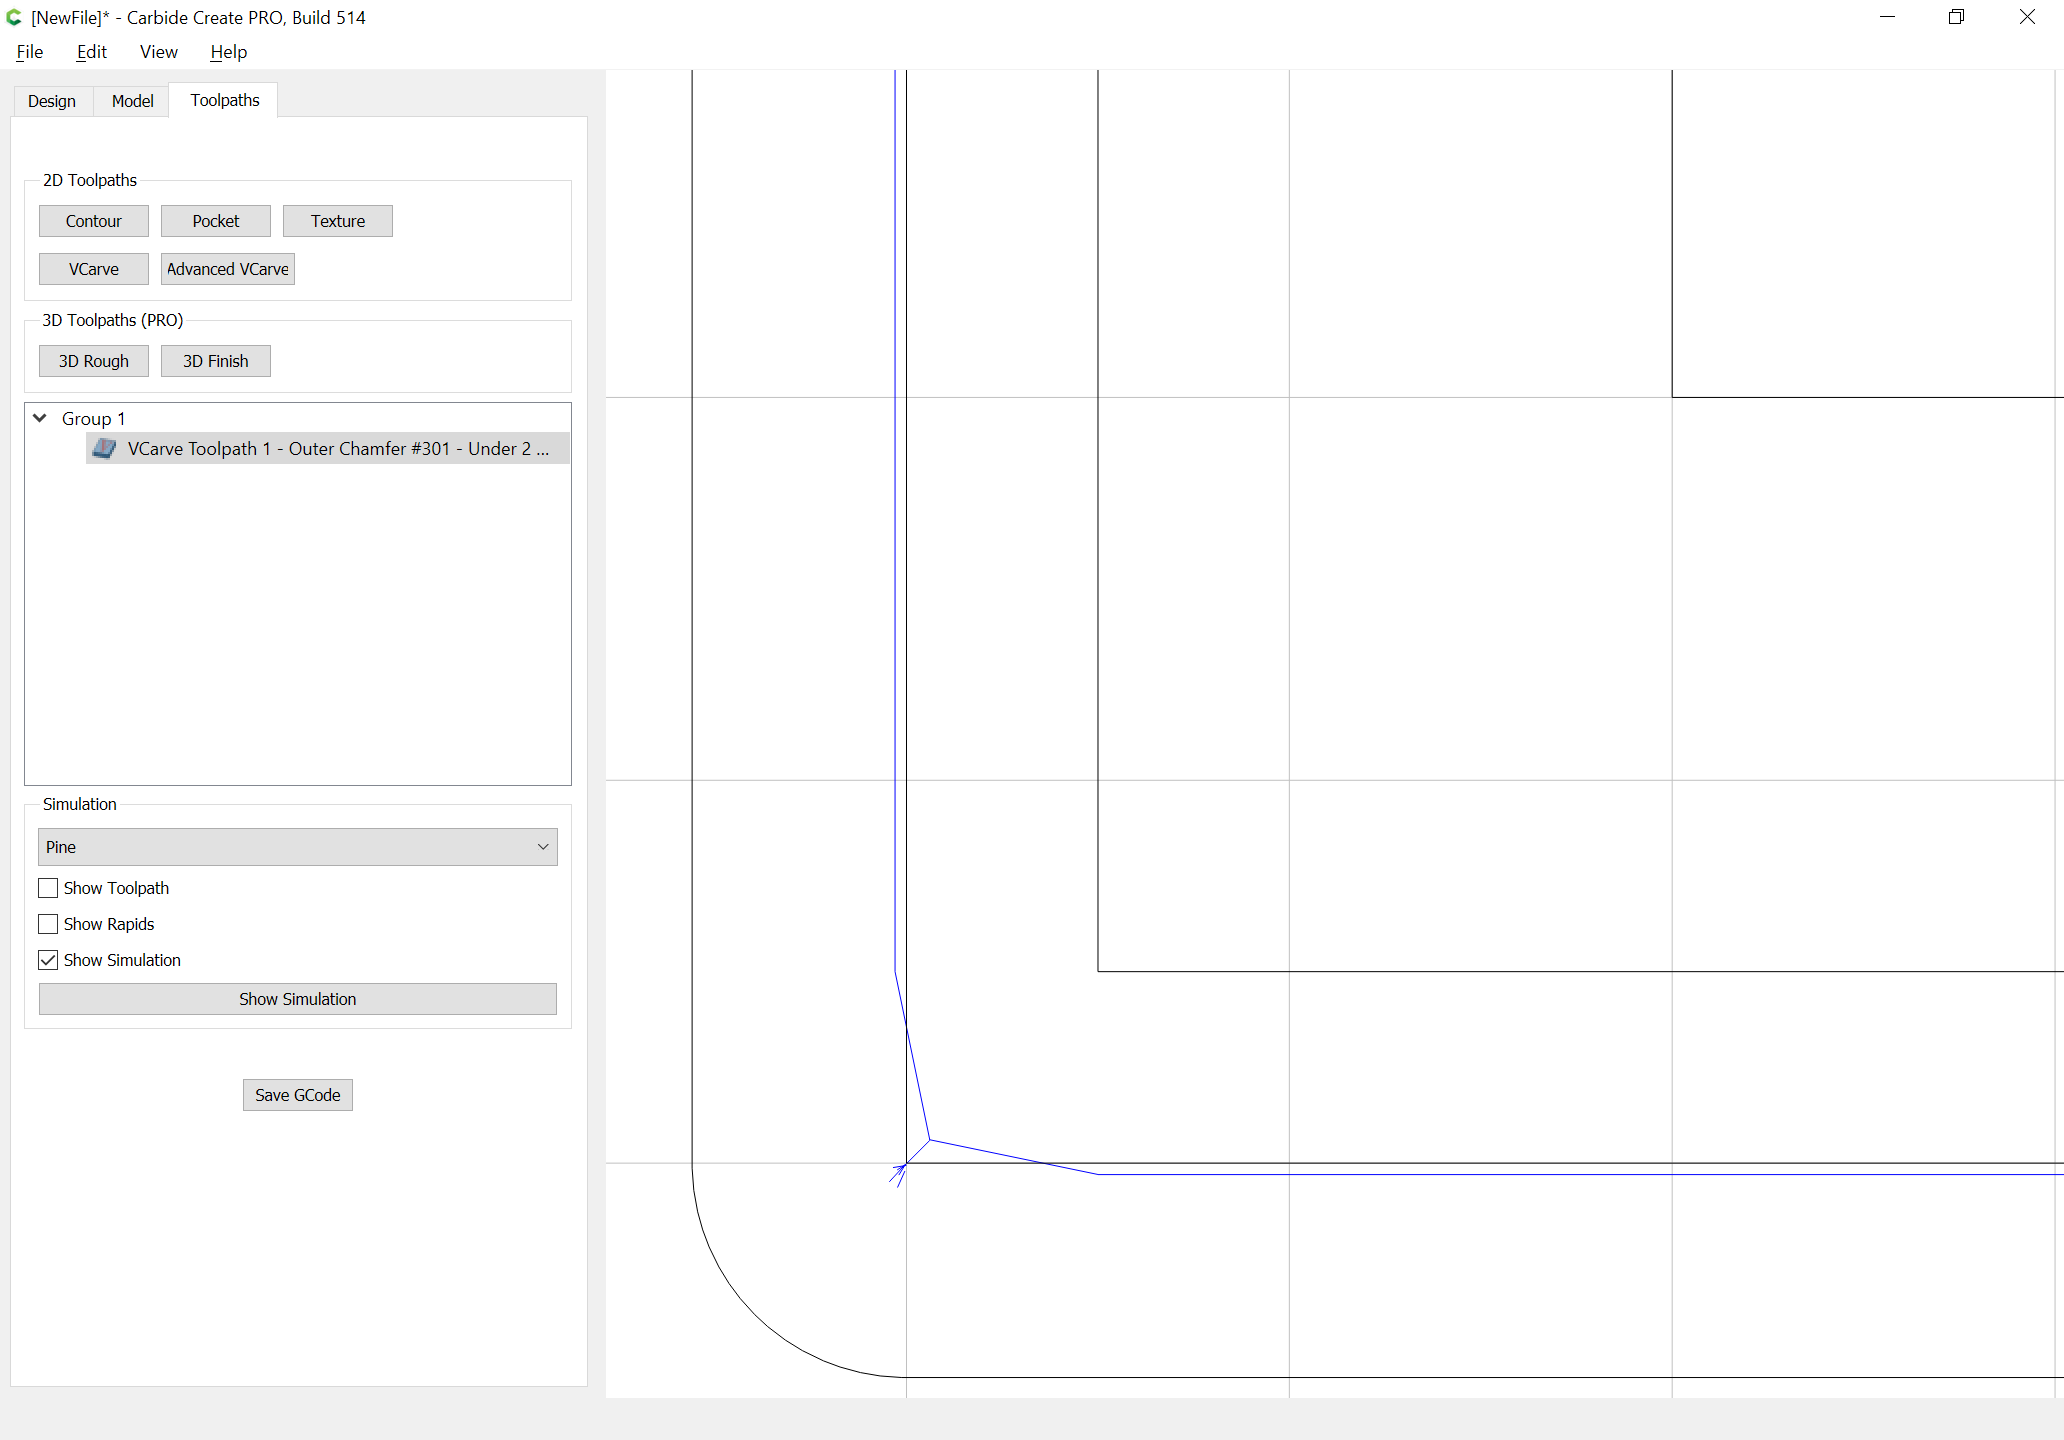
When chamfering with a V endmill it is preferable that the tip of the endmill be positioned beyond where the vertical cut will be made for a cleaner edge — drawing things up in profile will help make things clearer:
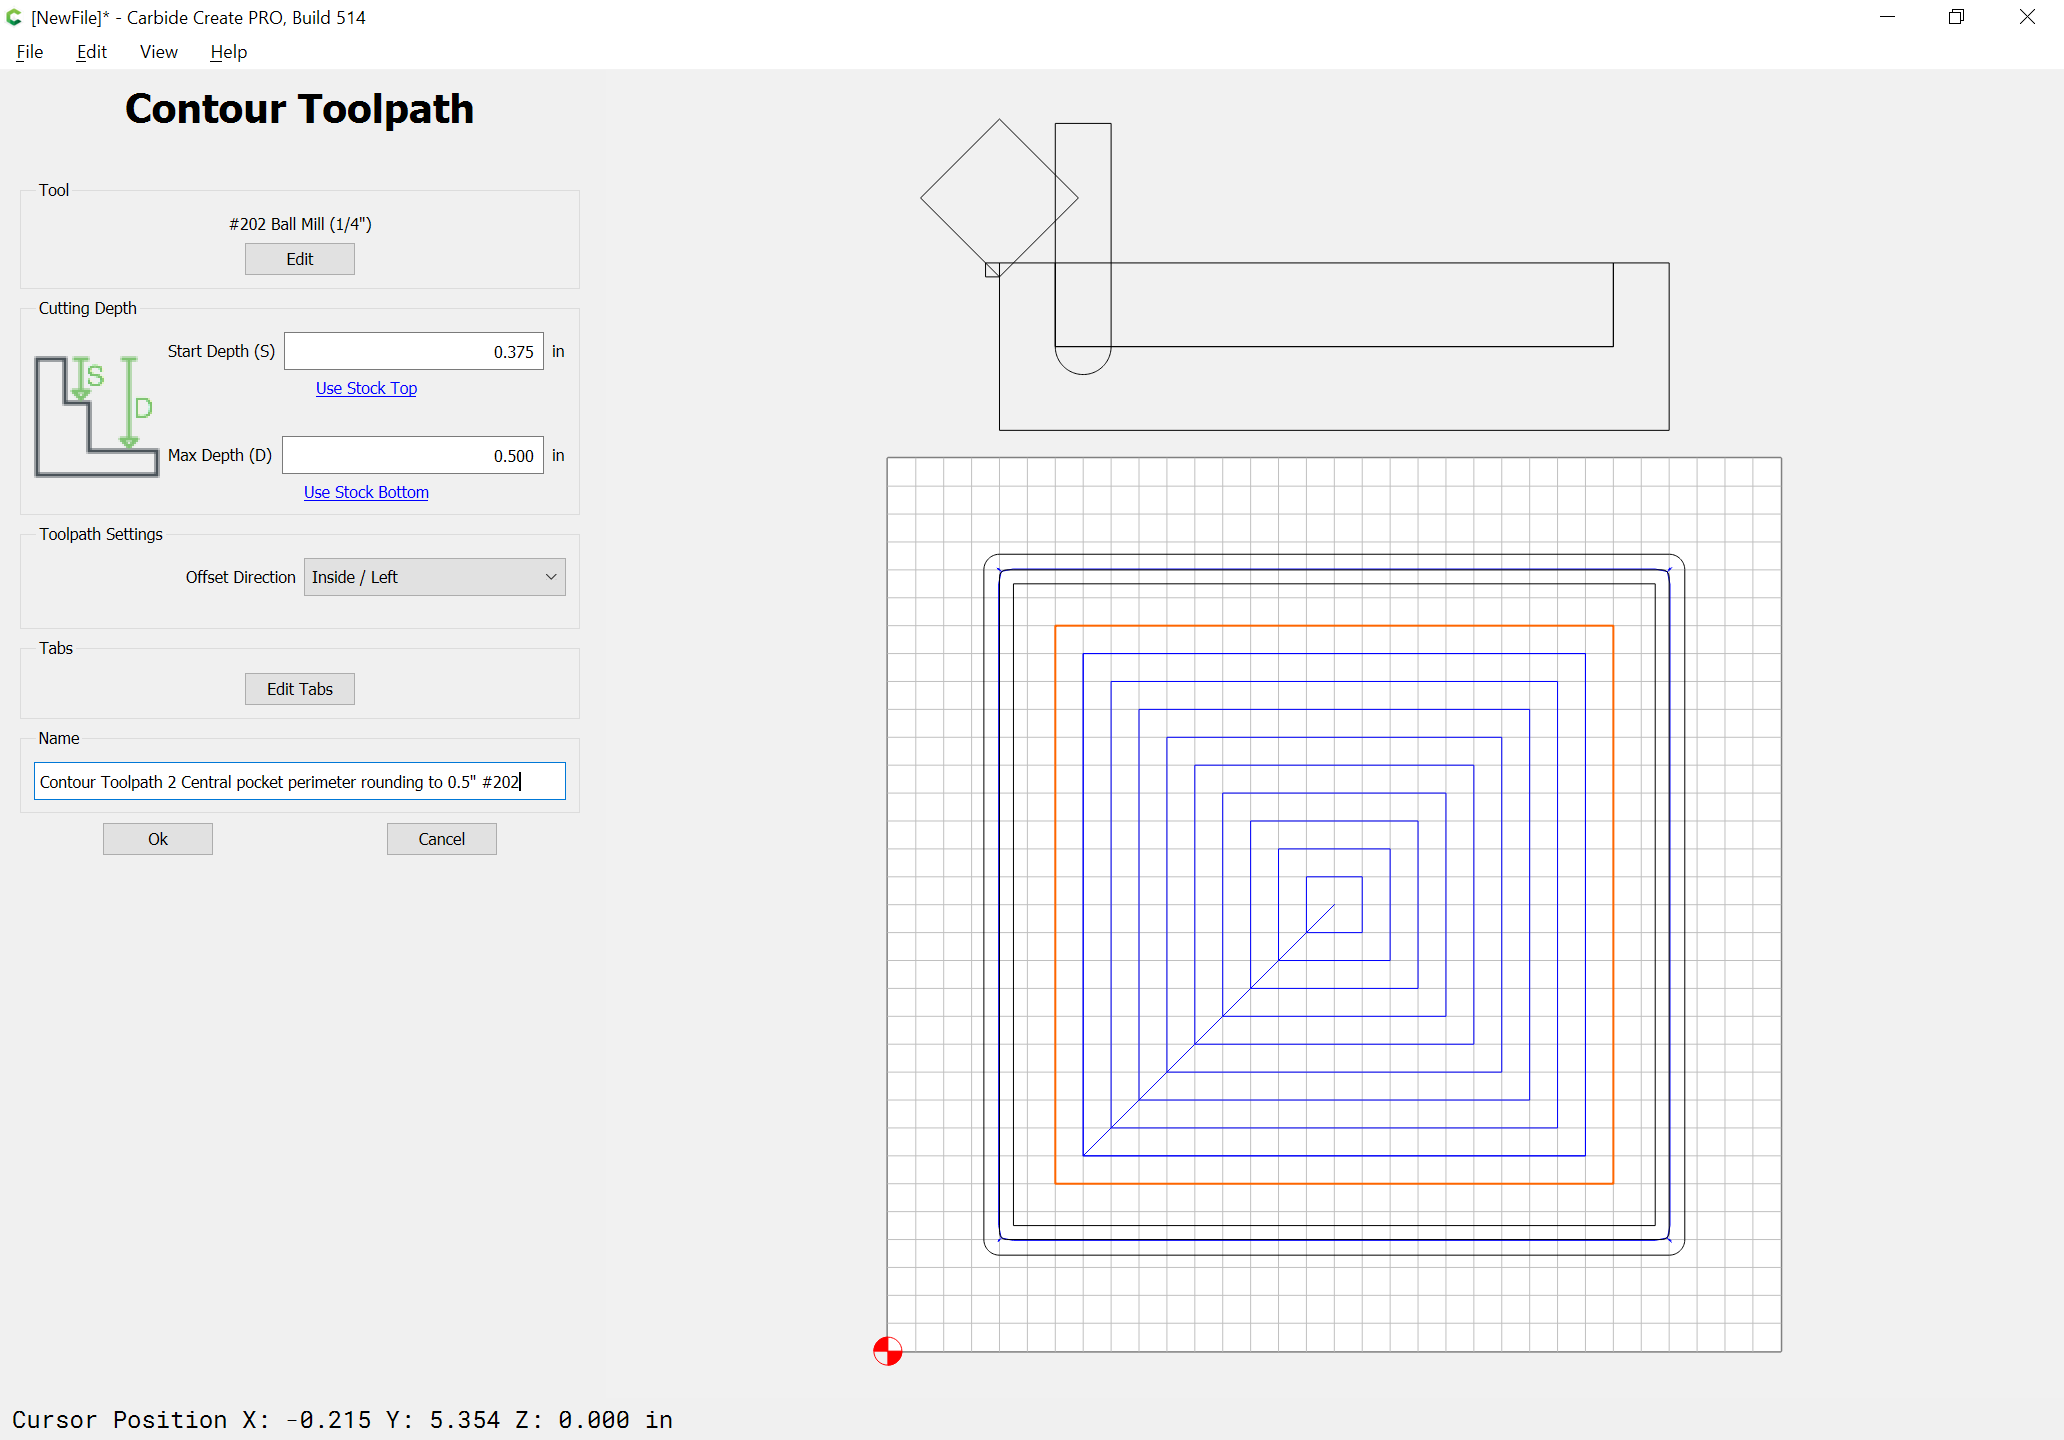
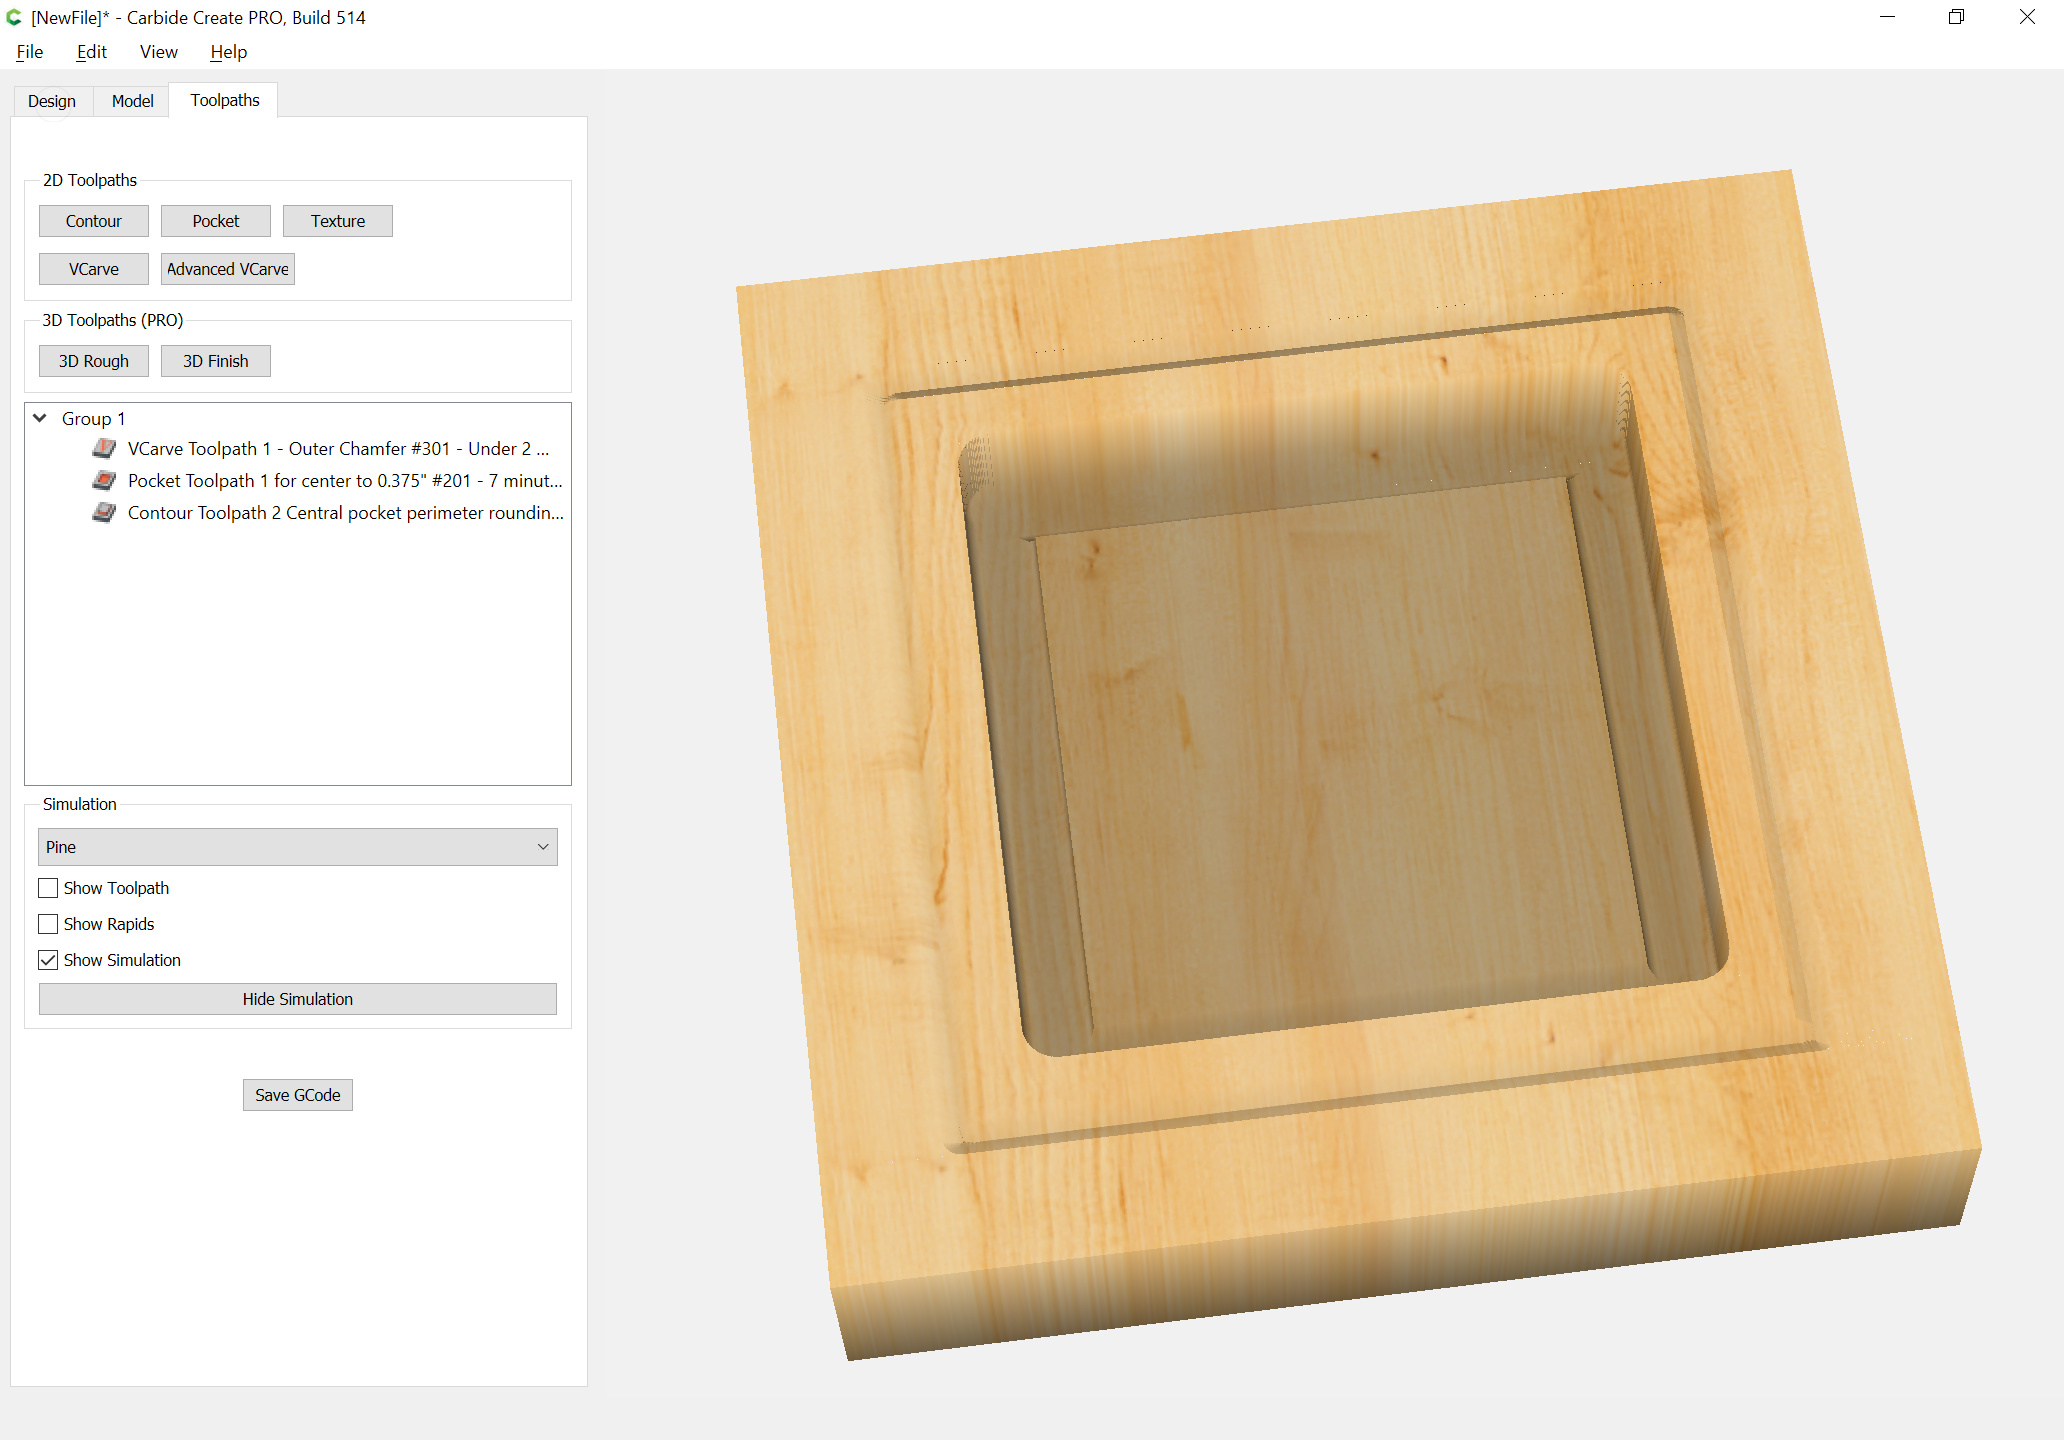
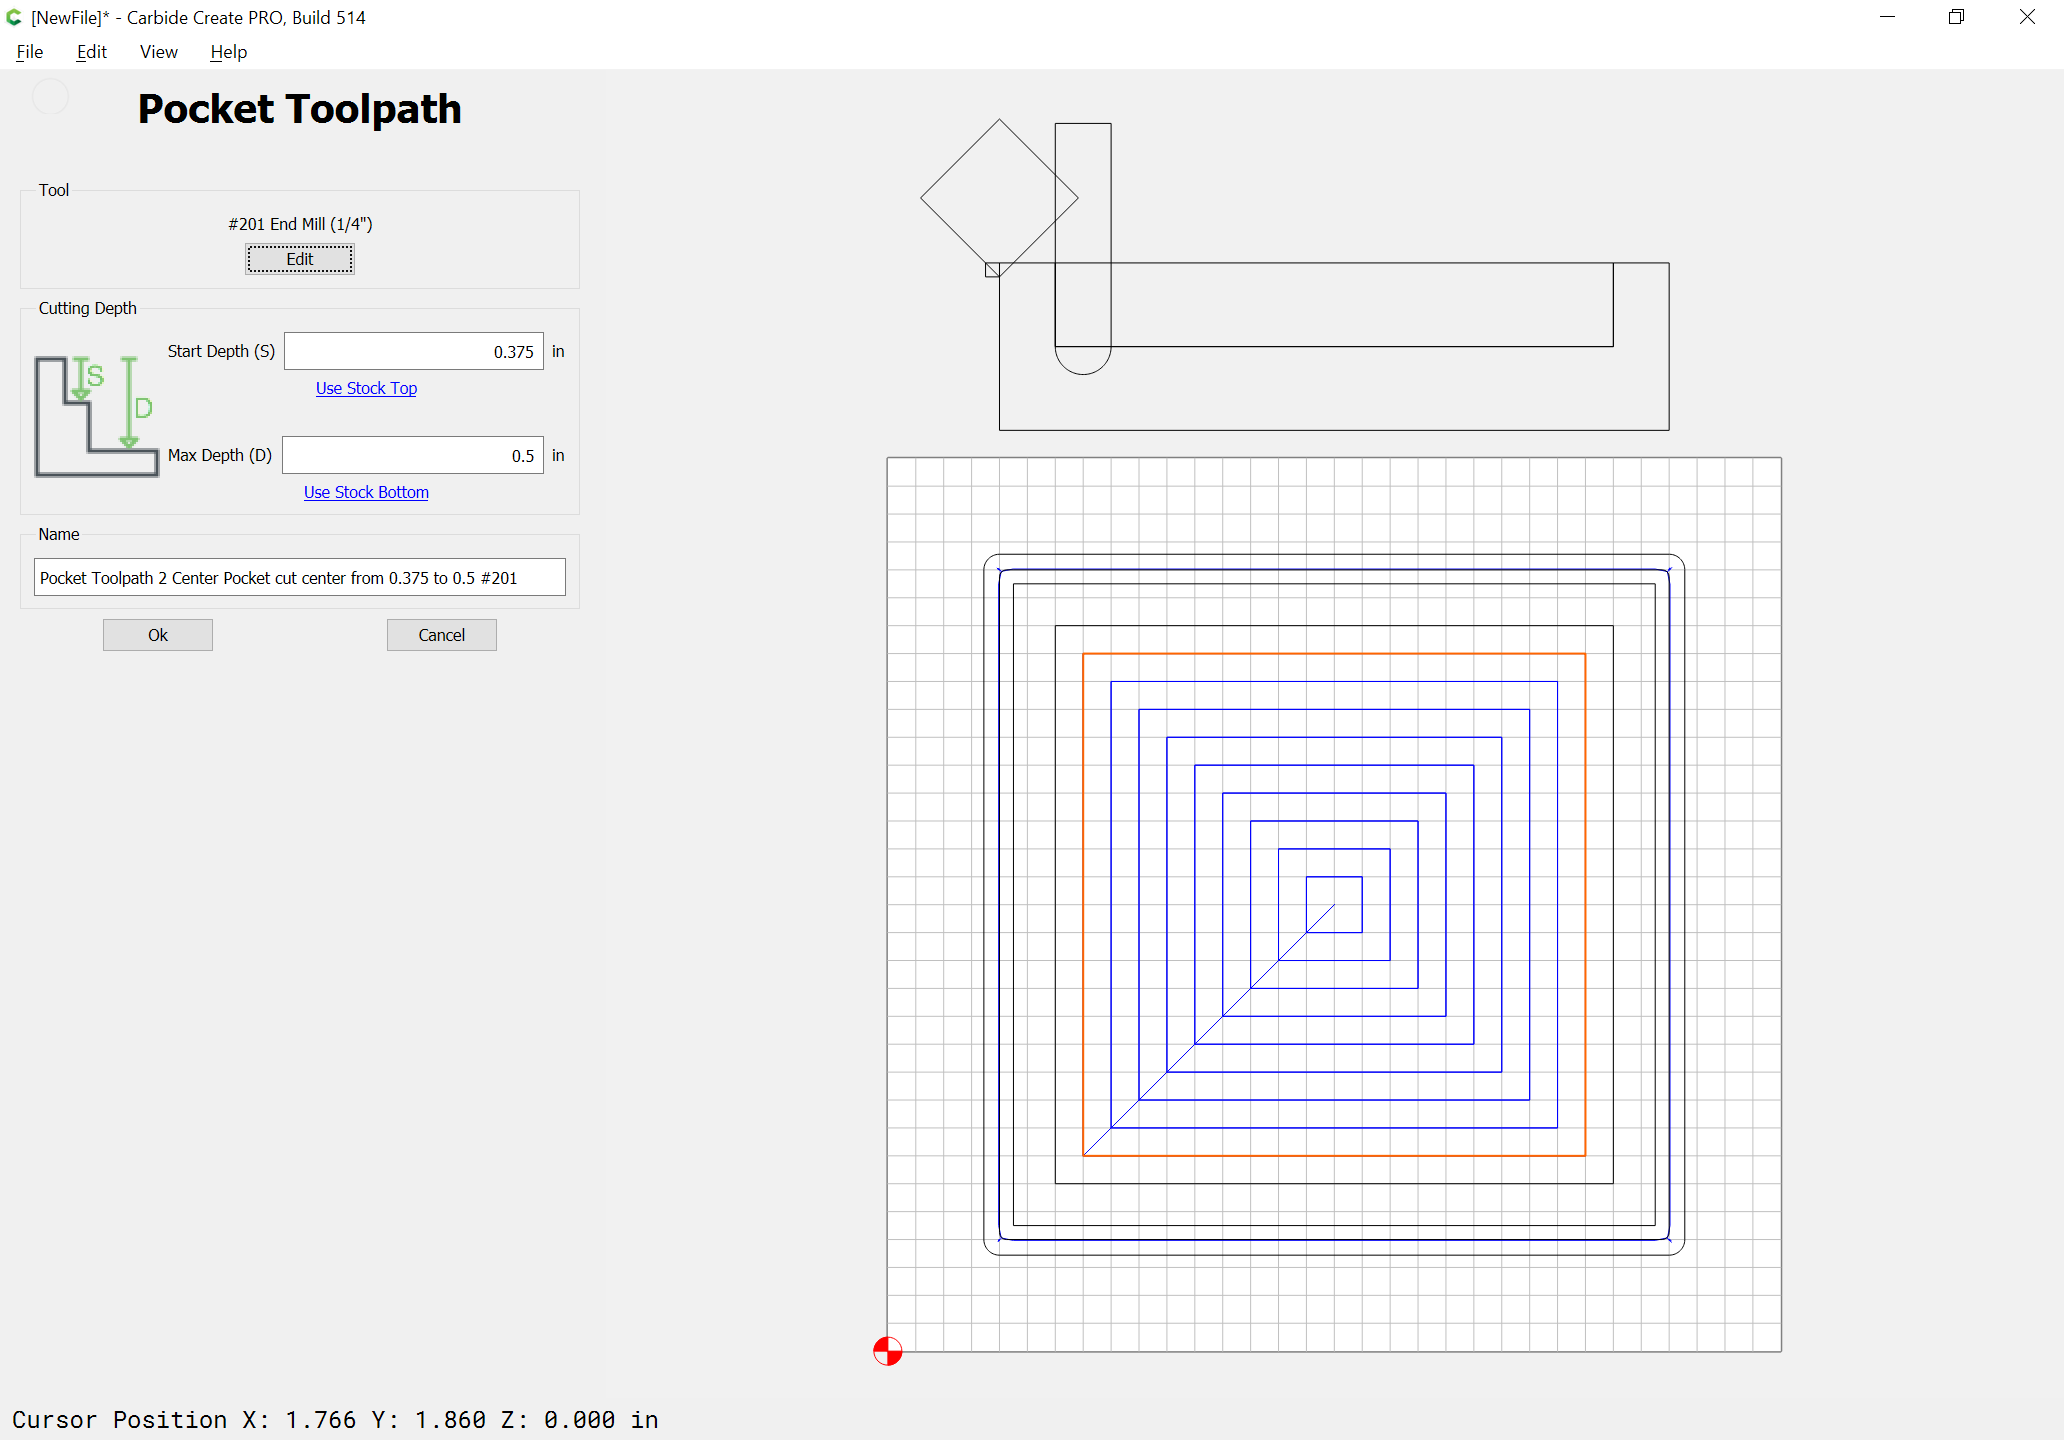
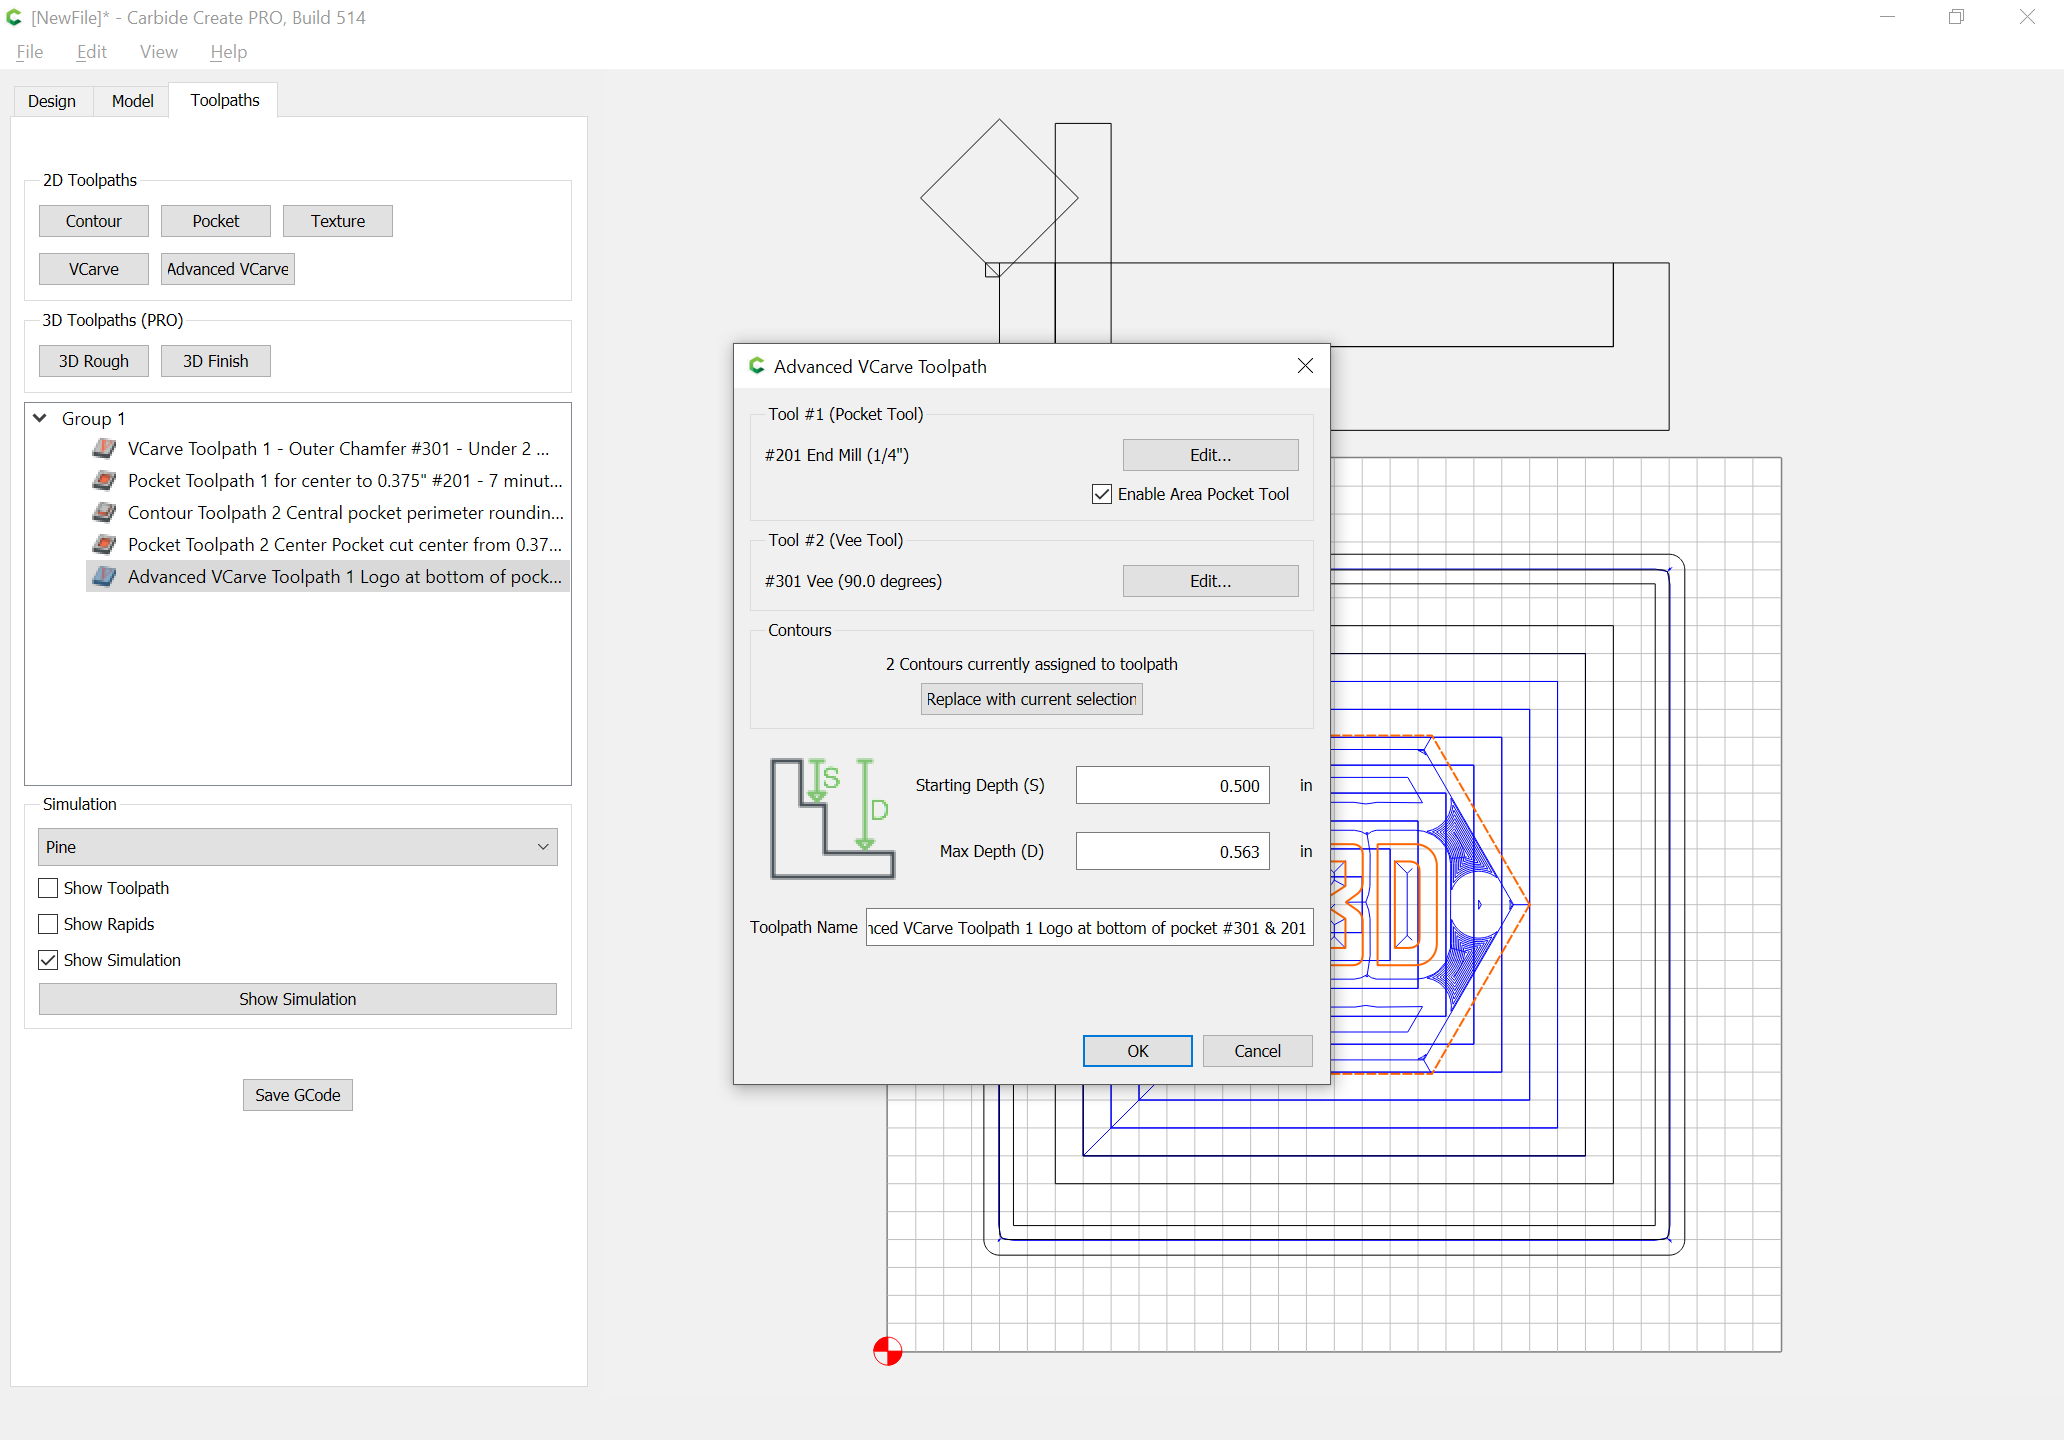
Next, we cut the central pocket — we want this to fall a bit short, since we want to round the bottom with a ball-nosed endmill, but it’s initially a simple selection and assignment of an operation to cut to the appropriate depth — again, drawing up the cut in profile will help establish how deeply to cut:
Next, select the same geometry and create a Contour | Inside / Left Toolpath which starts at the bottom of the previous pocket (0.375") and cuts down deeply enough to fully define the rounding (an additional 0.125", the radius of the ball-nose, so 0.5" deep):
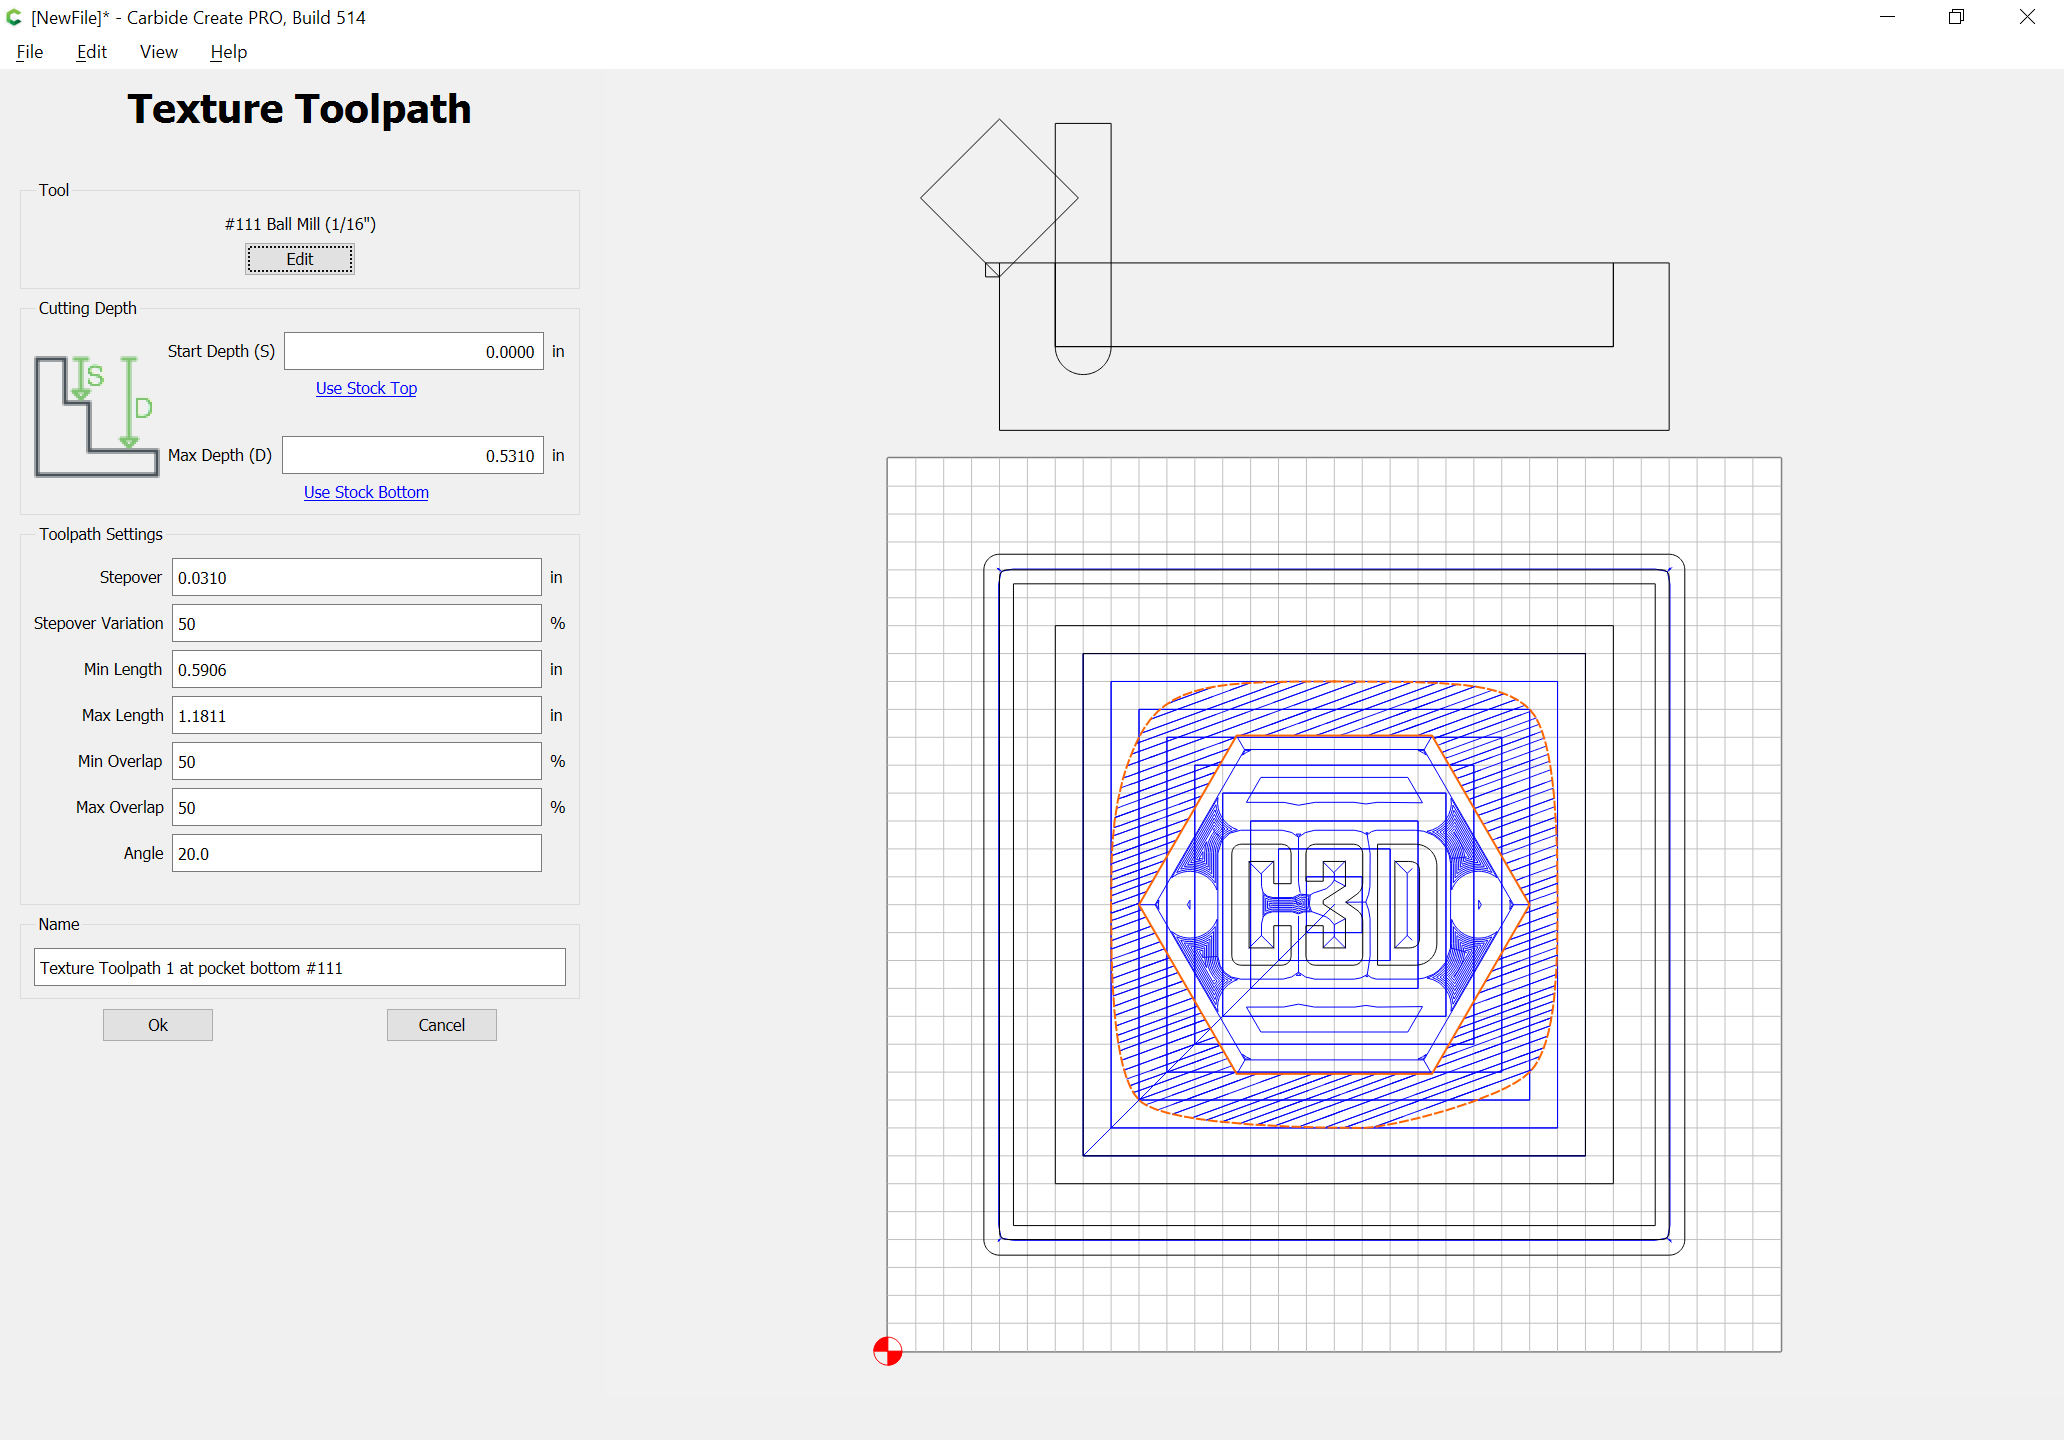
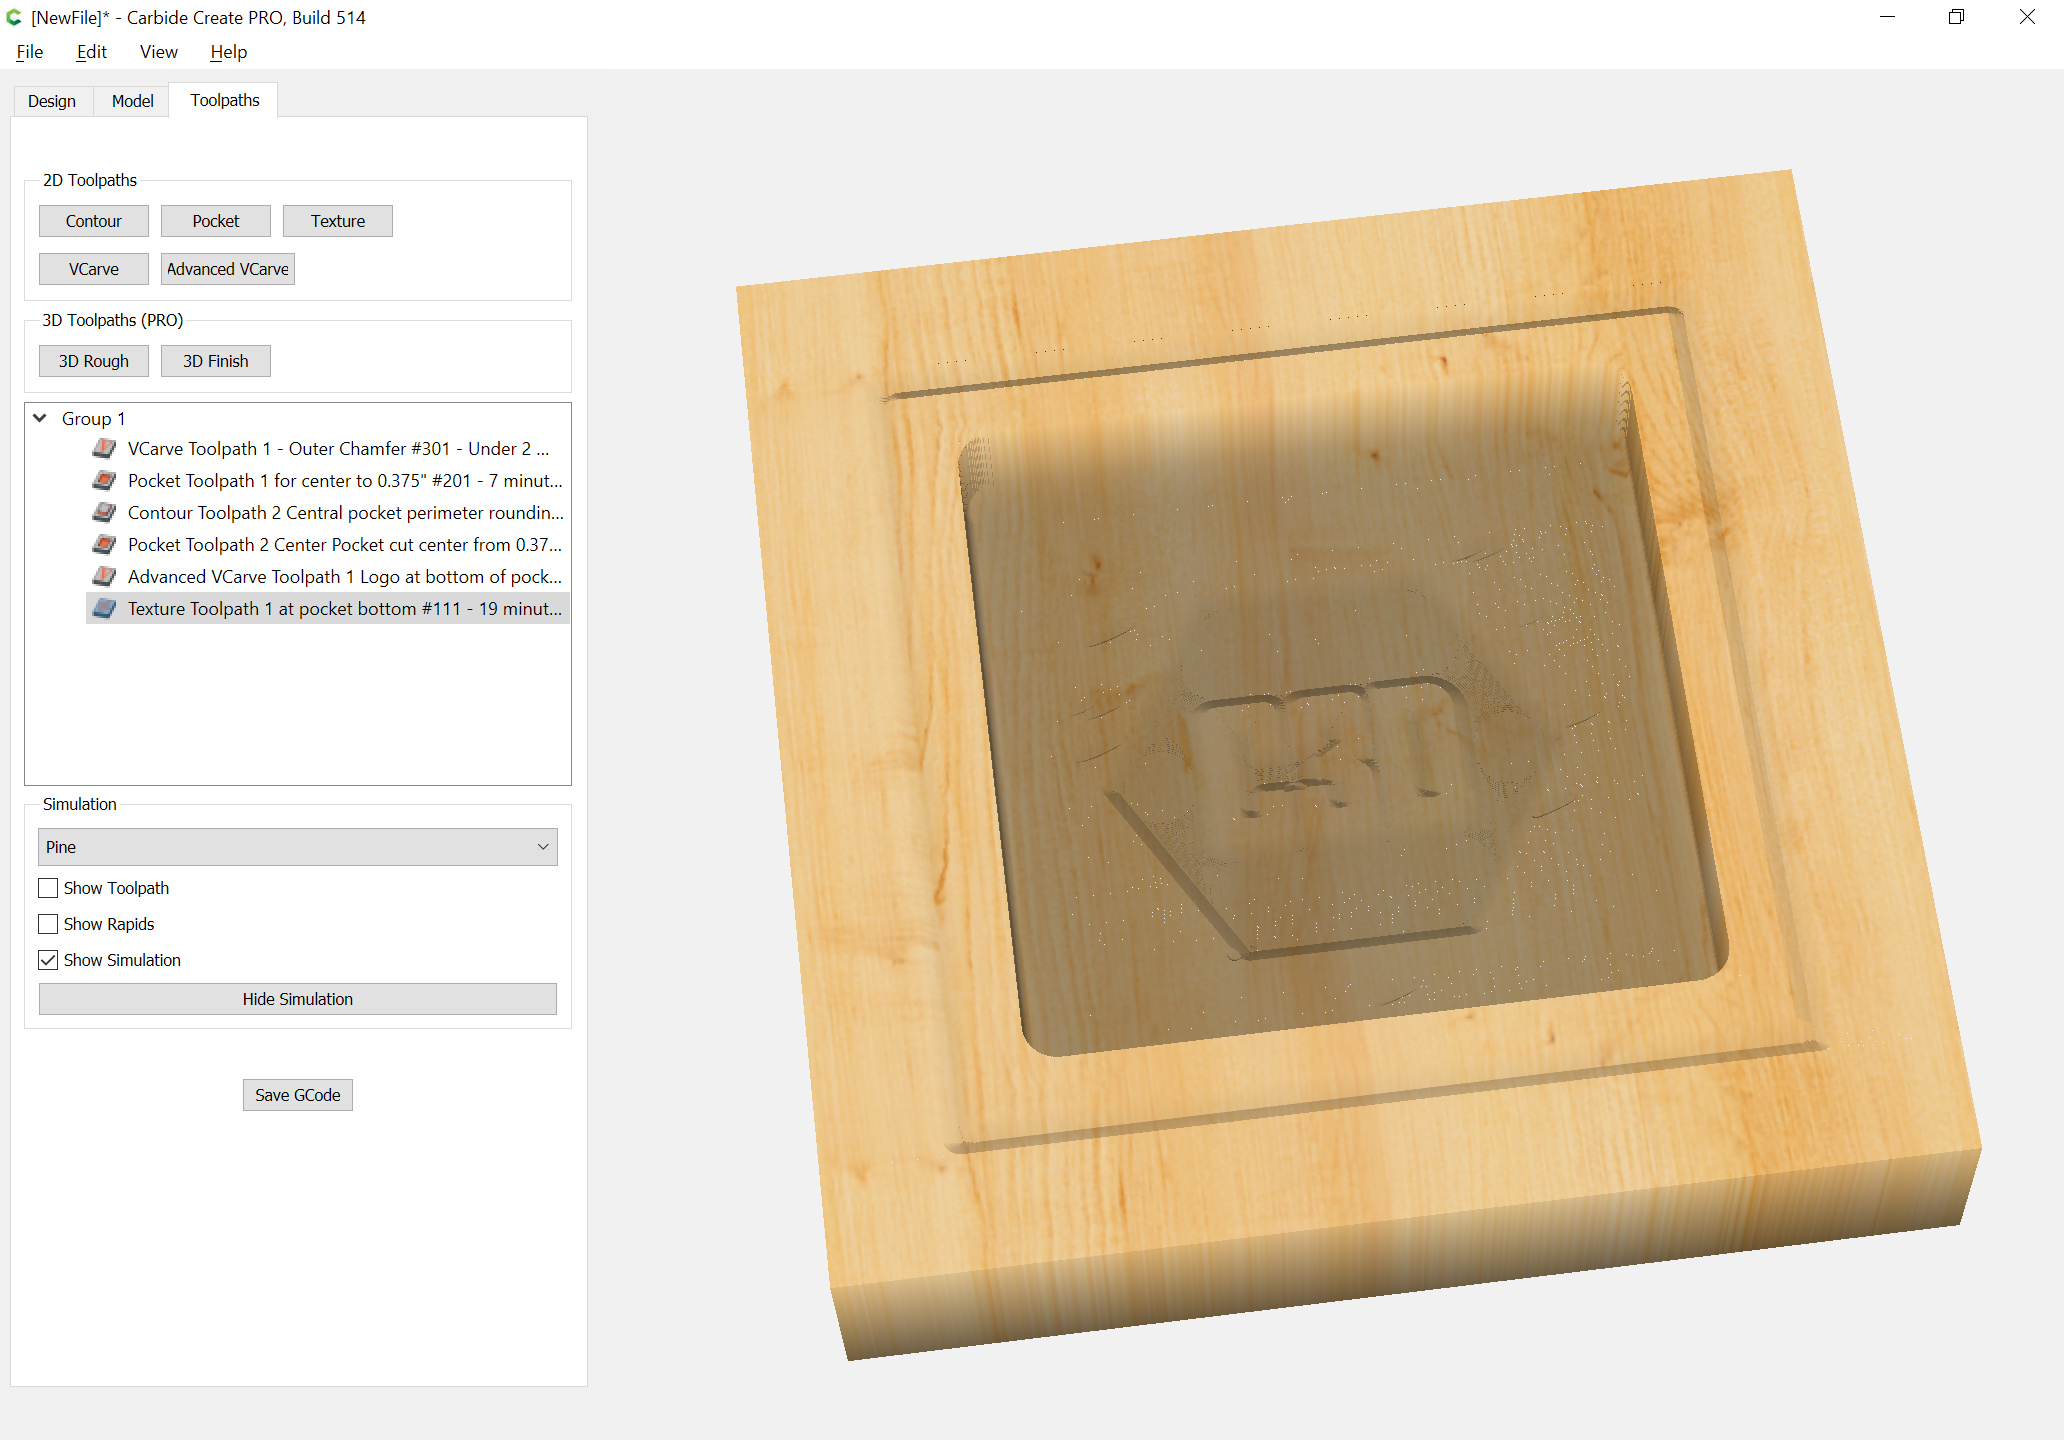
To create some visual interest around the design, assign a texture toolpath which starts at the bottom, and doesn’t cut too deeply by selecting the hexagon and an outer geometry inside that which defines the lowest cut (0.5"):
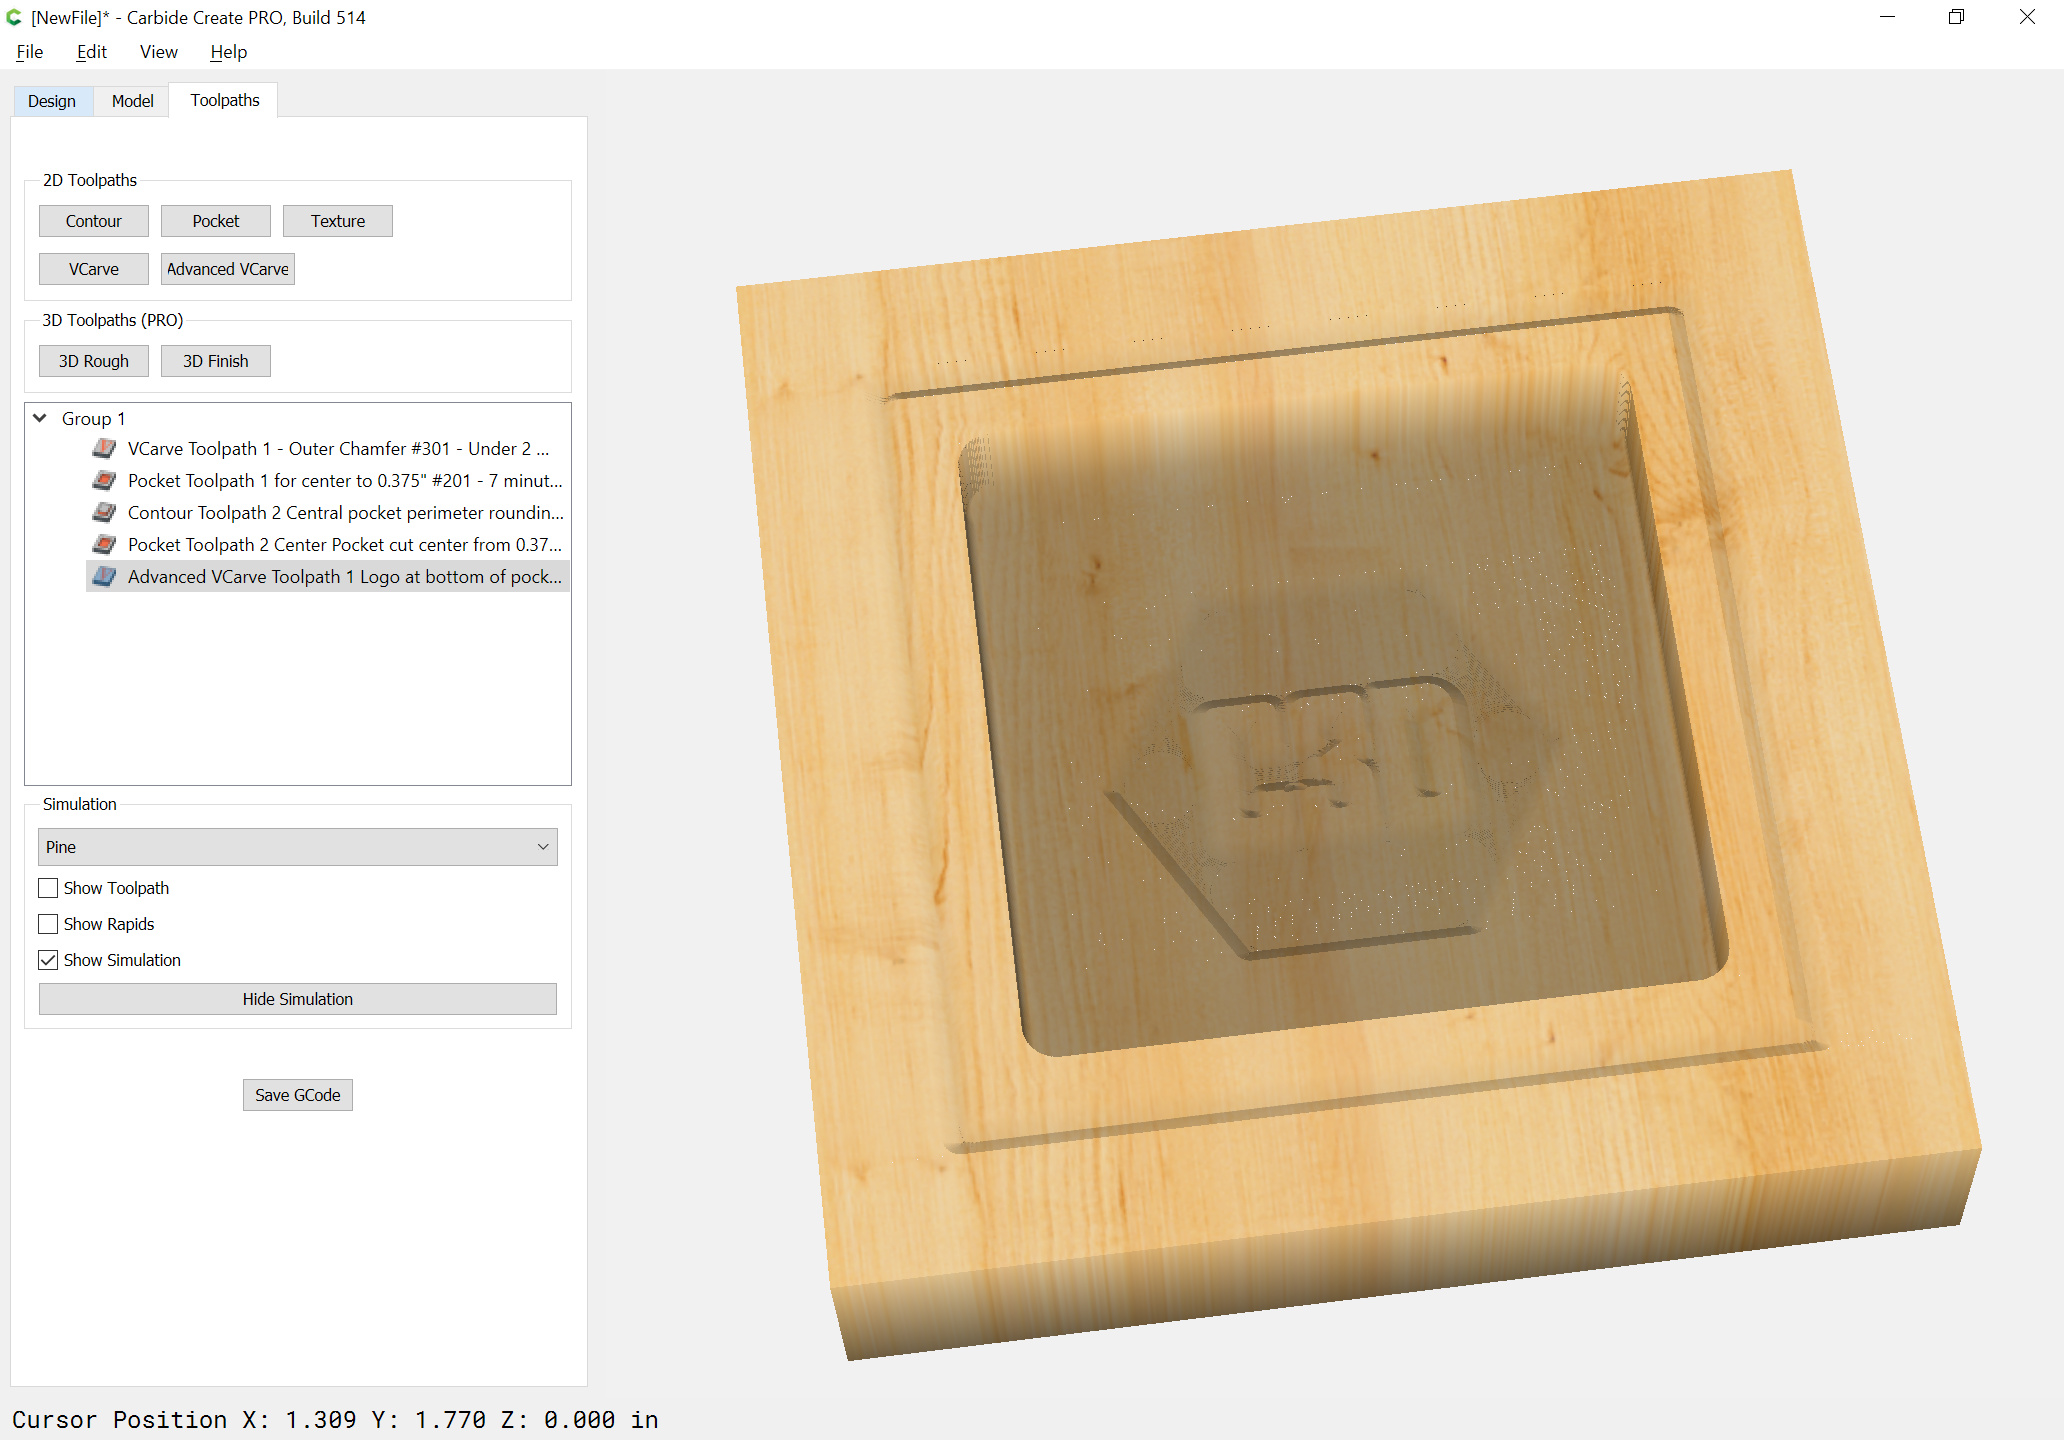
Note that this may be a close thing depending on how long your reach is with your selected endmill, and how wide your collet nut is — it will probably be necessary to at least remove your Sweepy if using that for dust collection (or lift it up or use the transparent base if using v2.0)
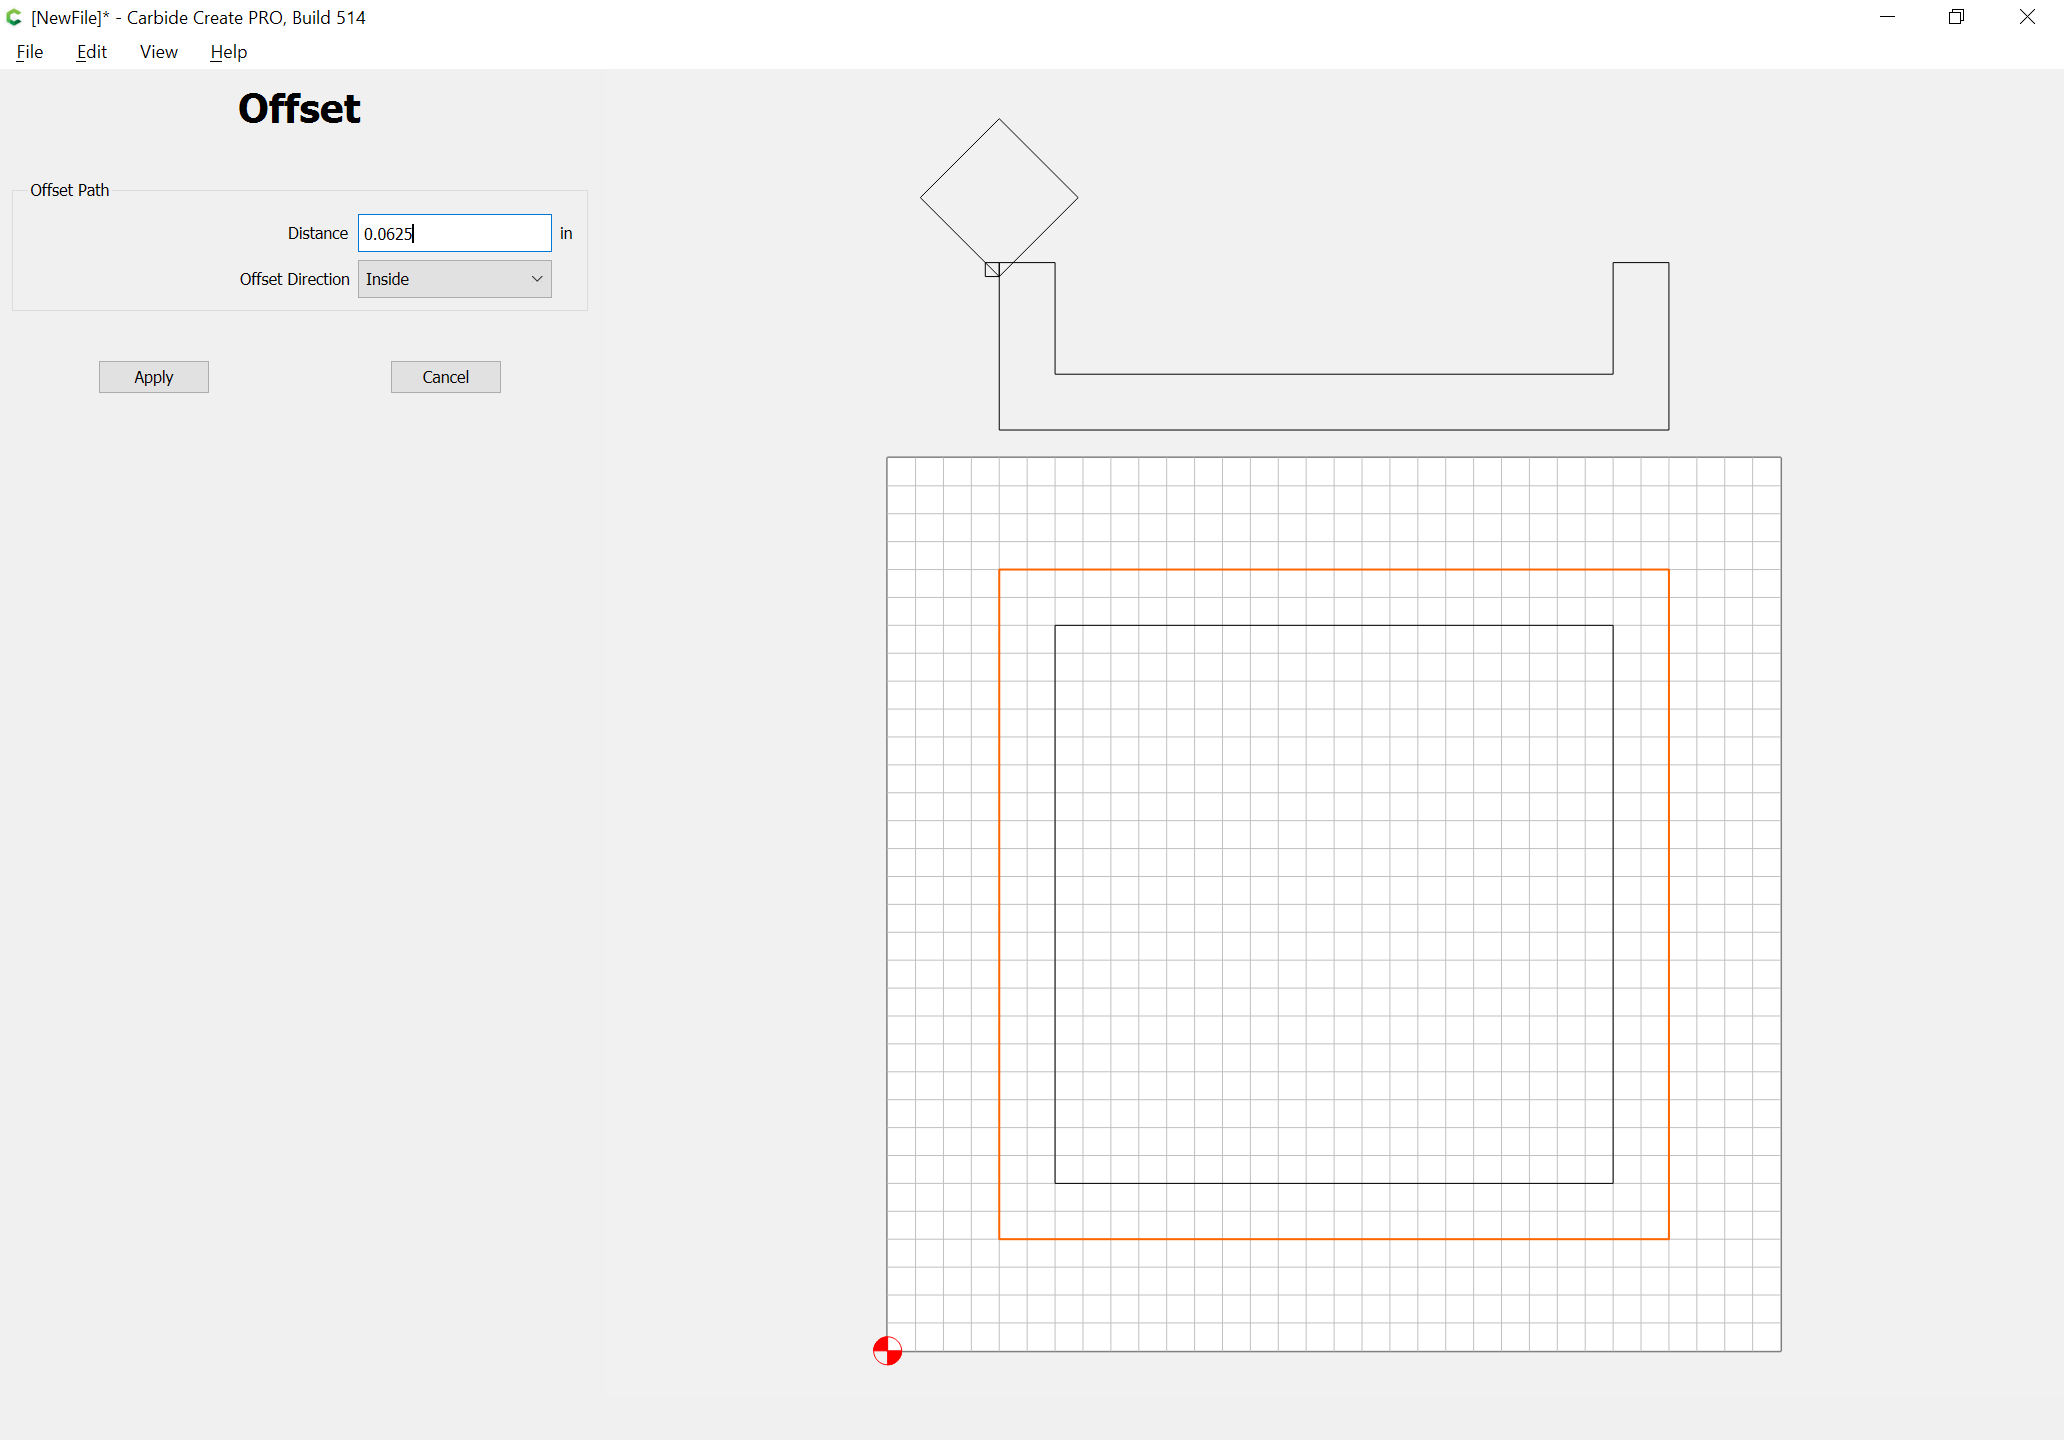
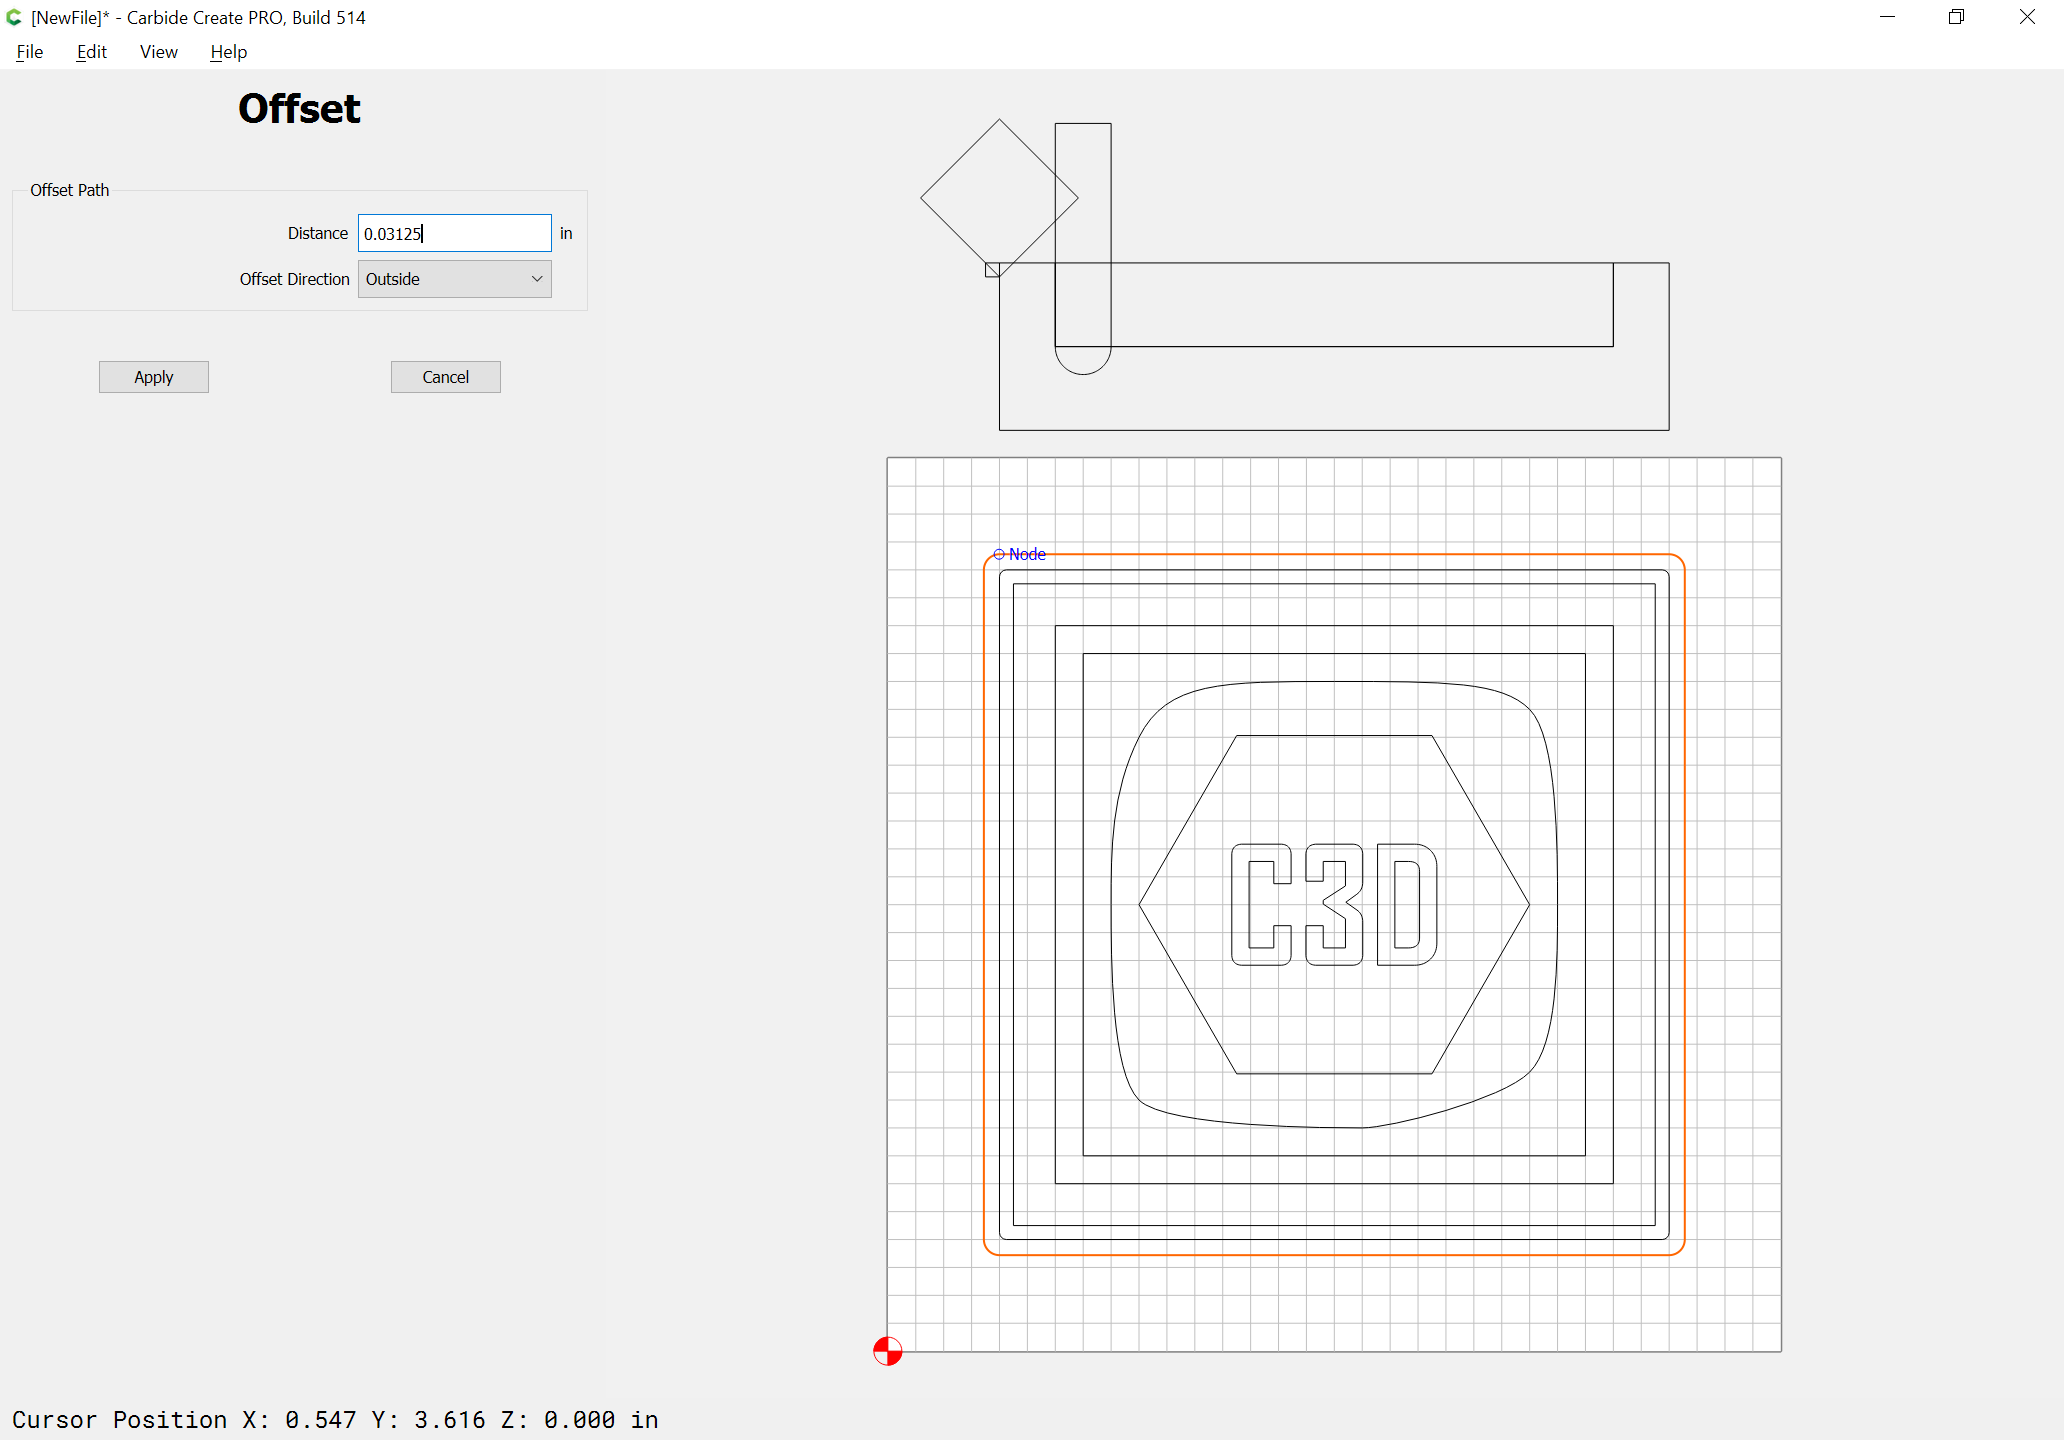
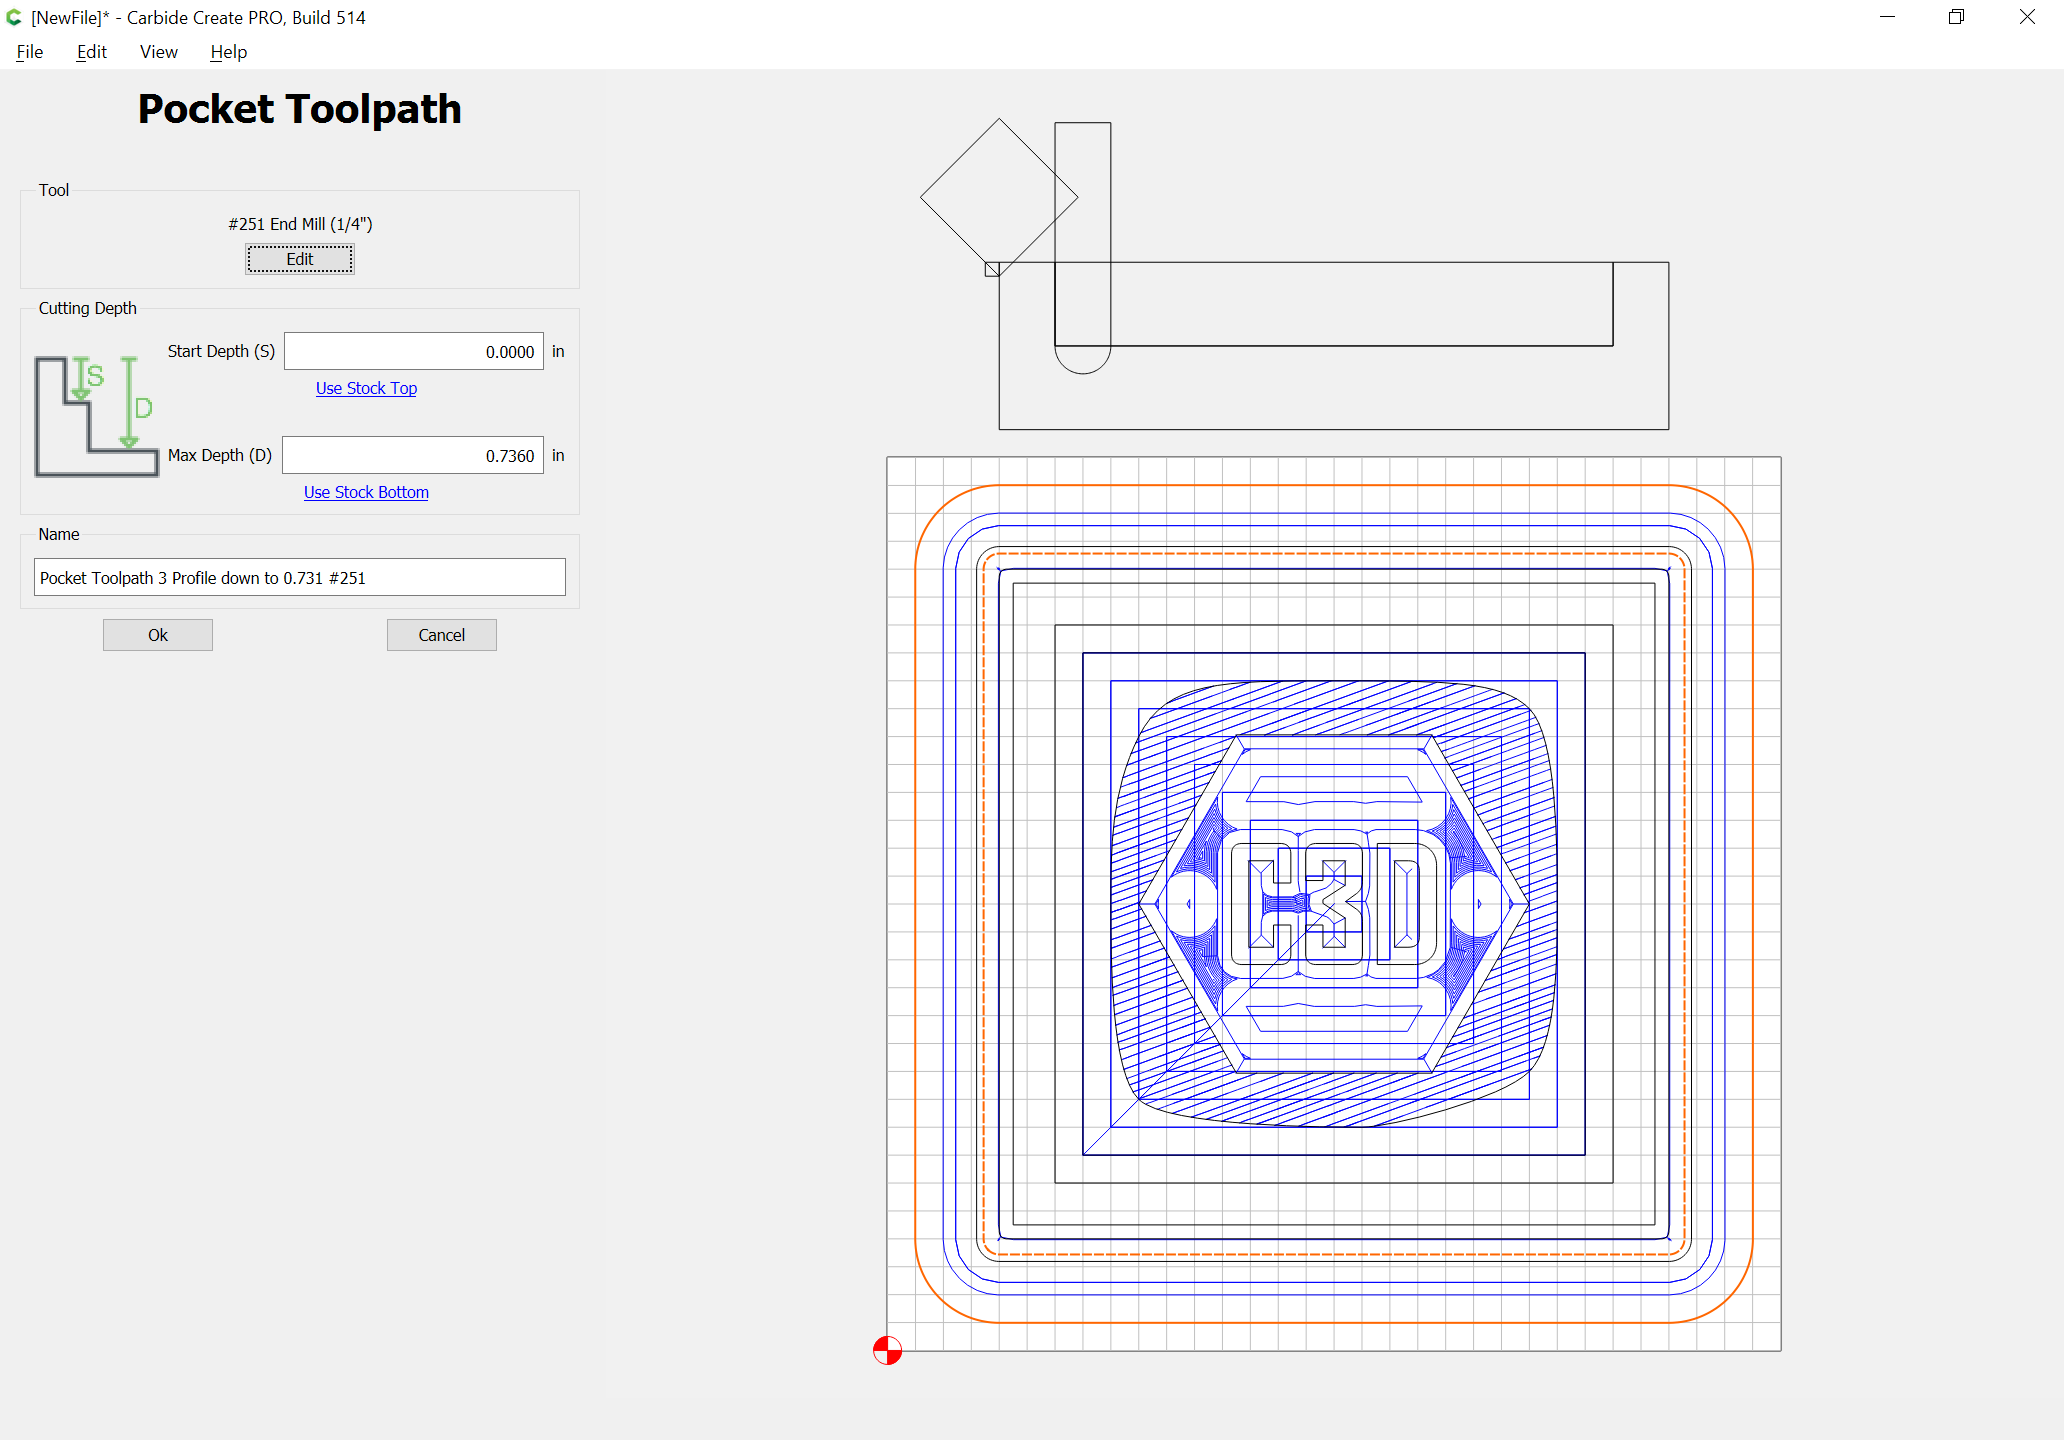
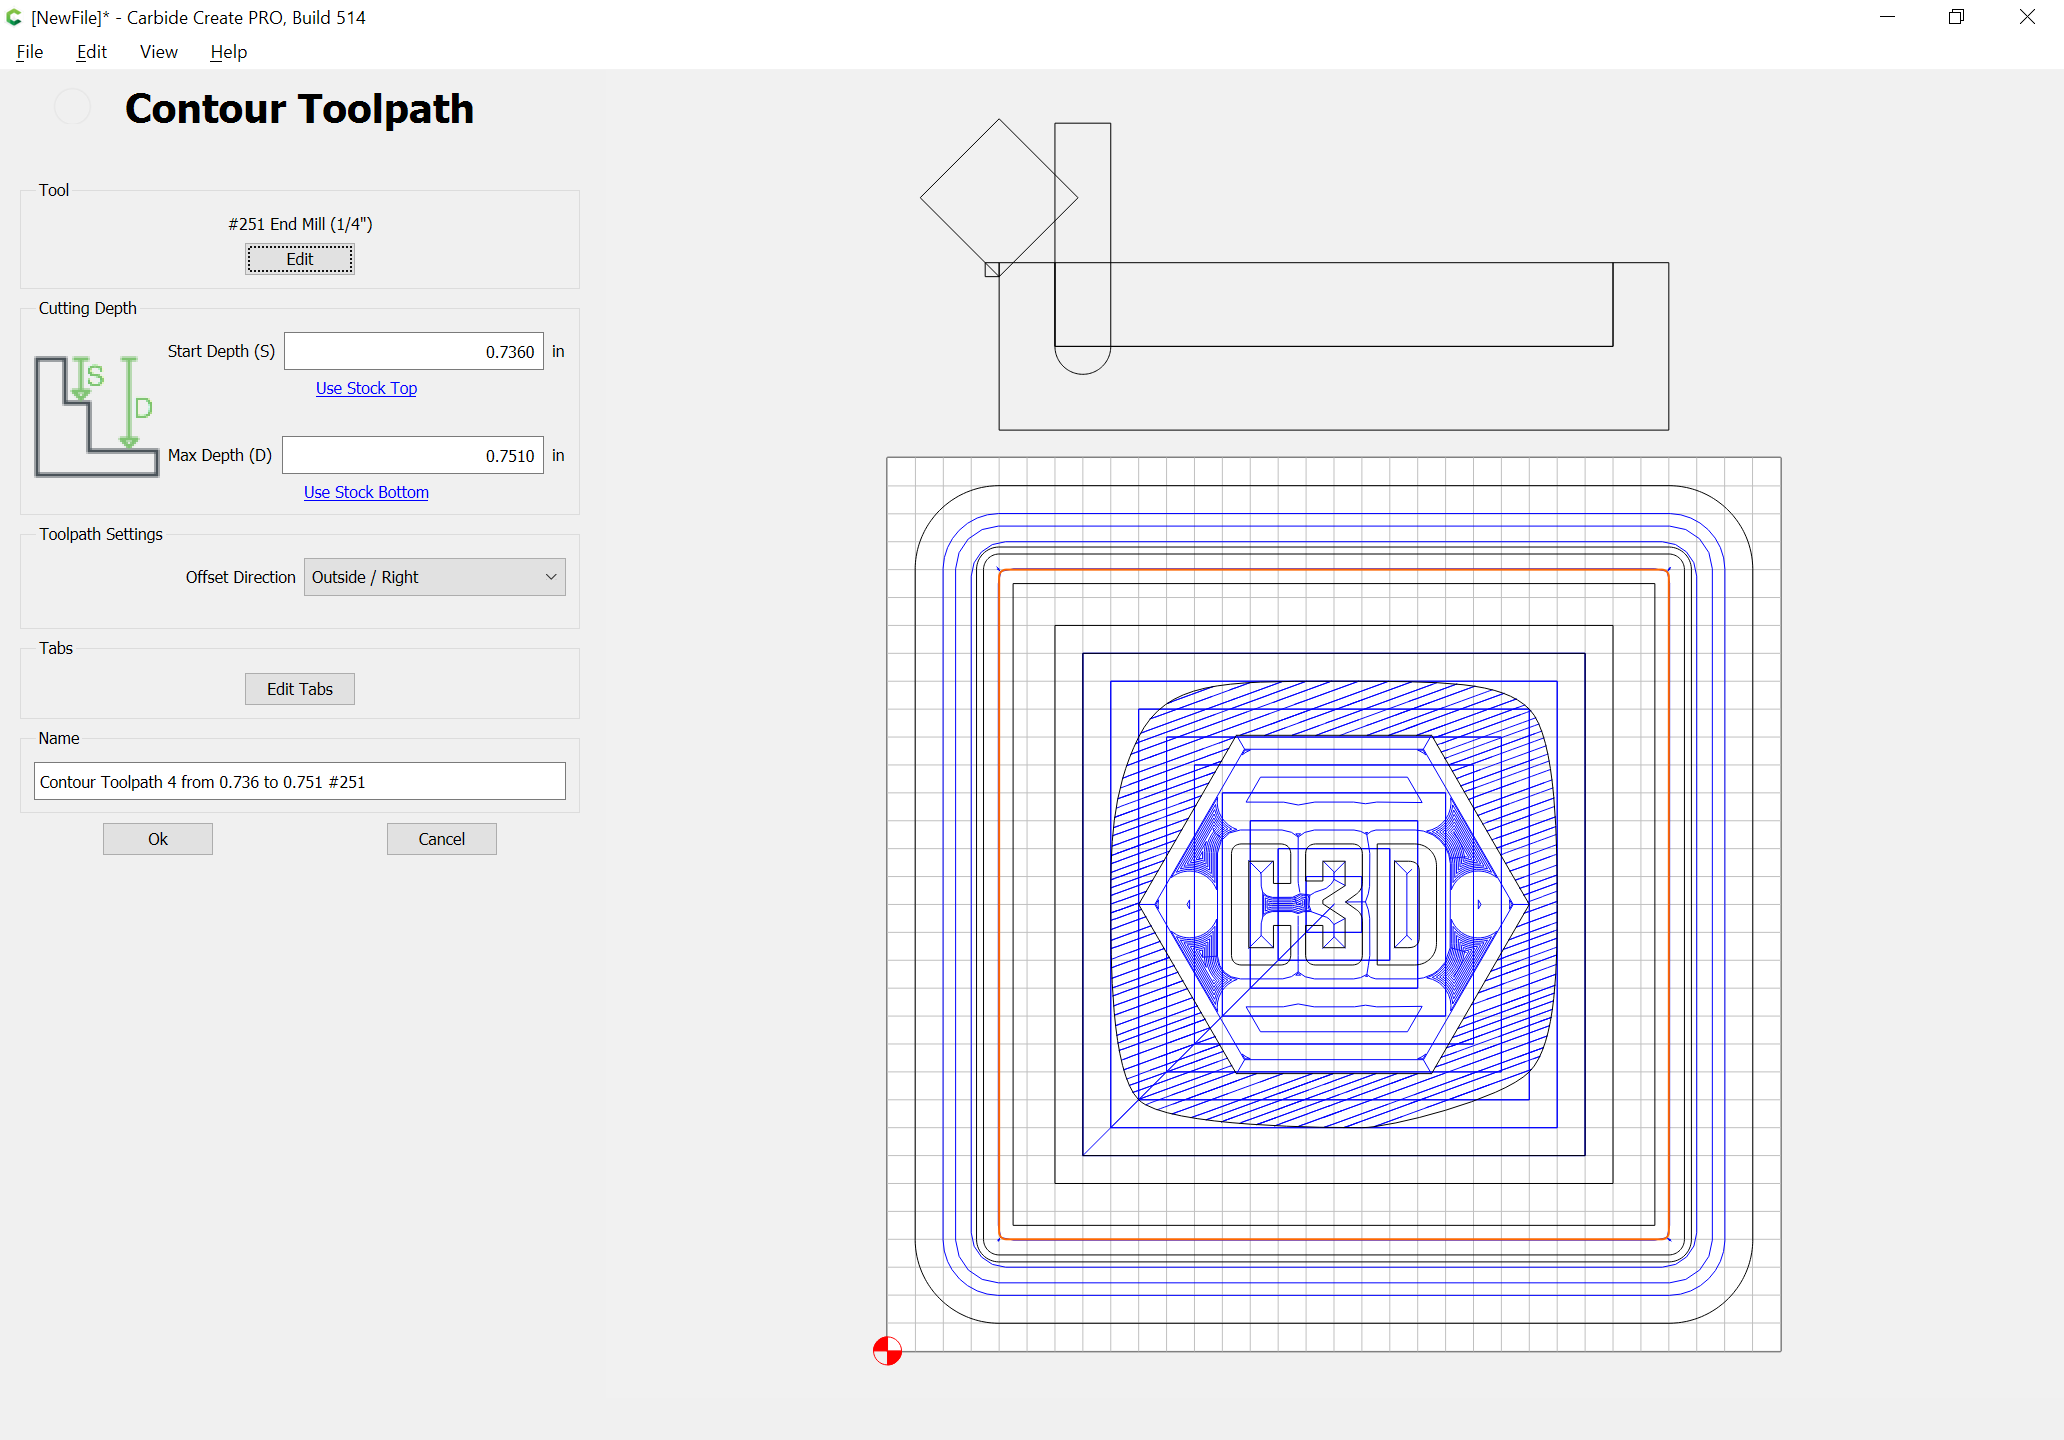
Lastly we cut out the outer profile — while this could be done as a slotting Contour | Outside / Right Toolpath, it is best to add geometry and cut as a pocket down to at least tab depth — another consideration is leaving a roughing clearance and making a full-depth pass for the best possible finish.
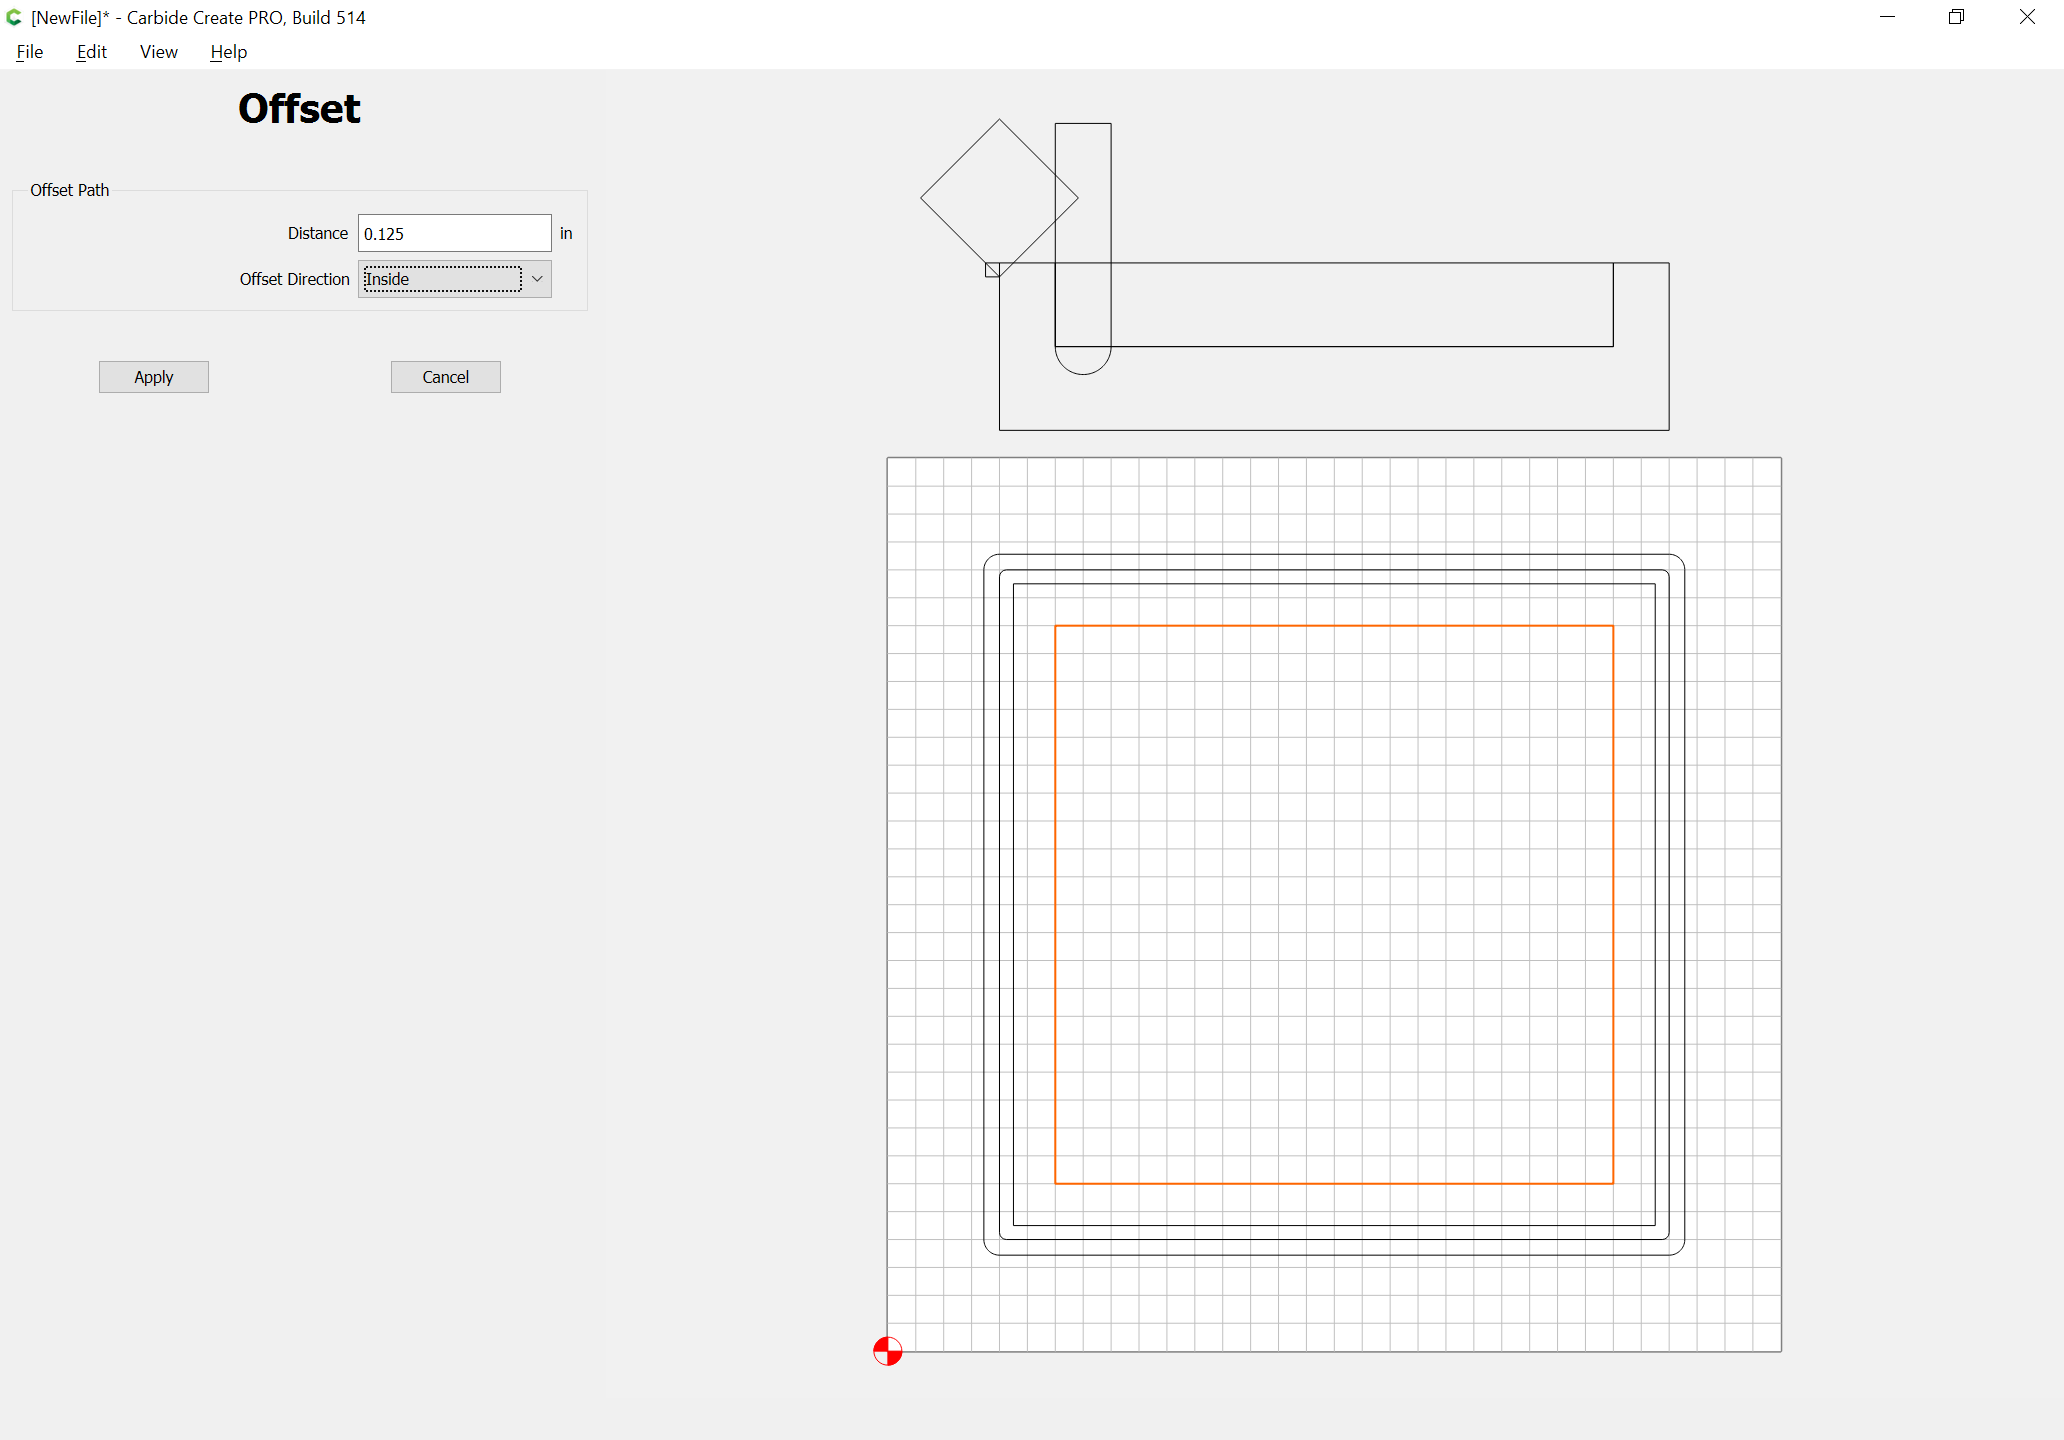
First, offset to the outside by the desired roughing clearance: