Design into 3D: Boxes: Coopered boxes

It may be necessary to revisit this and work out different options depending on the proportions:

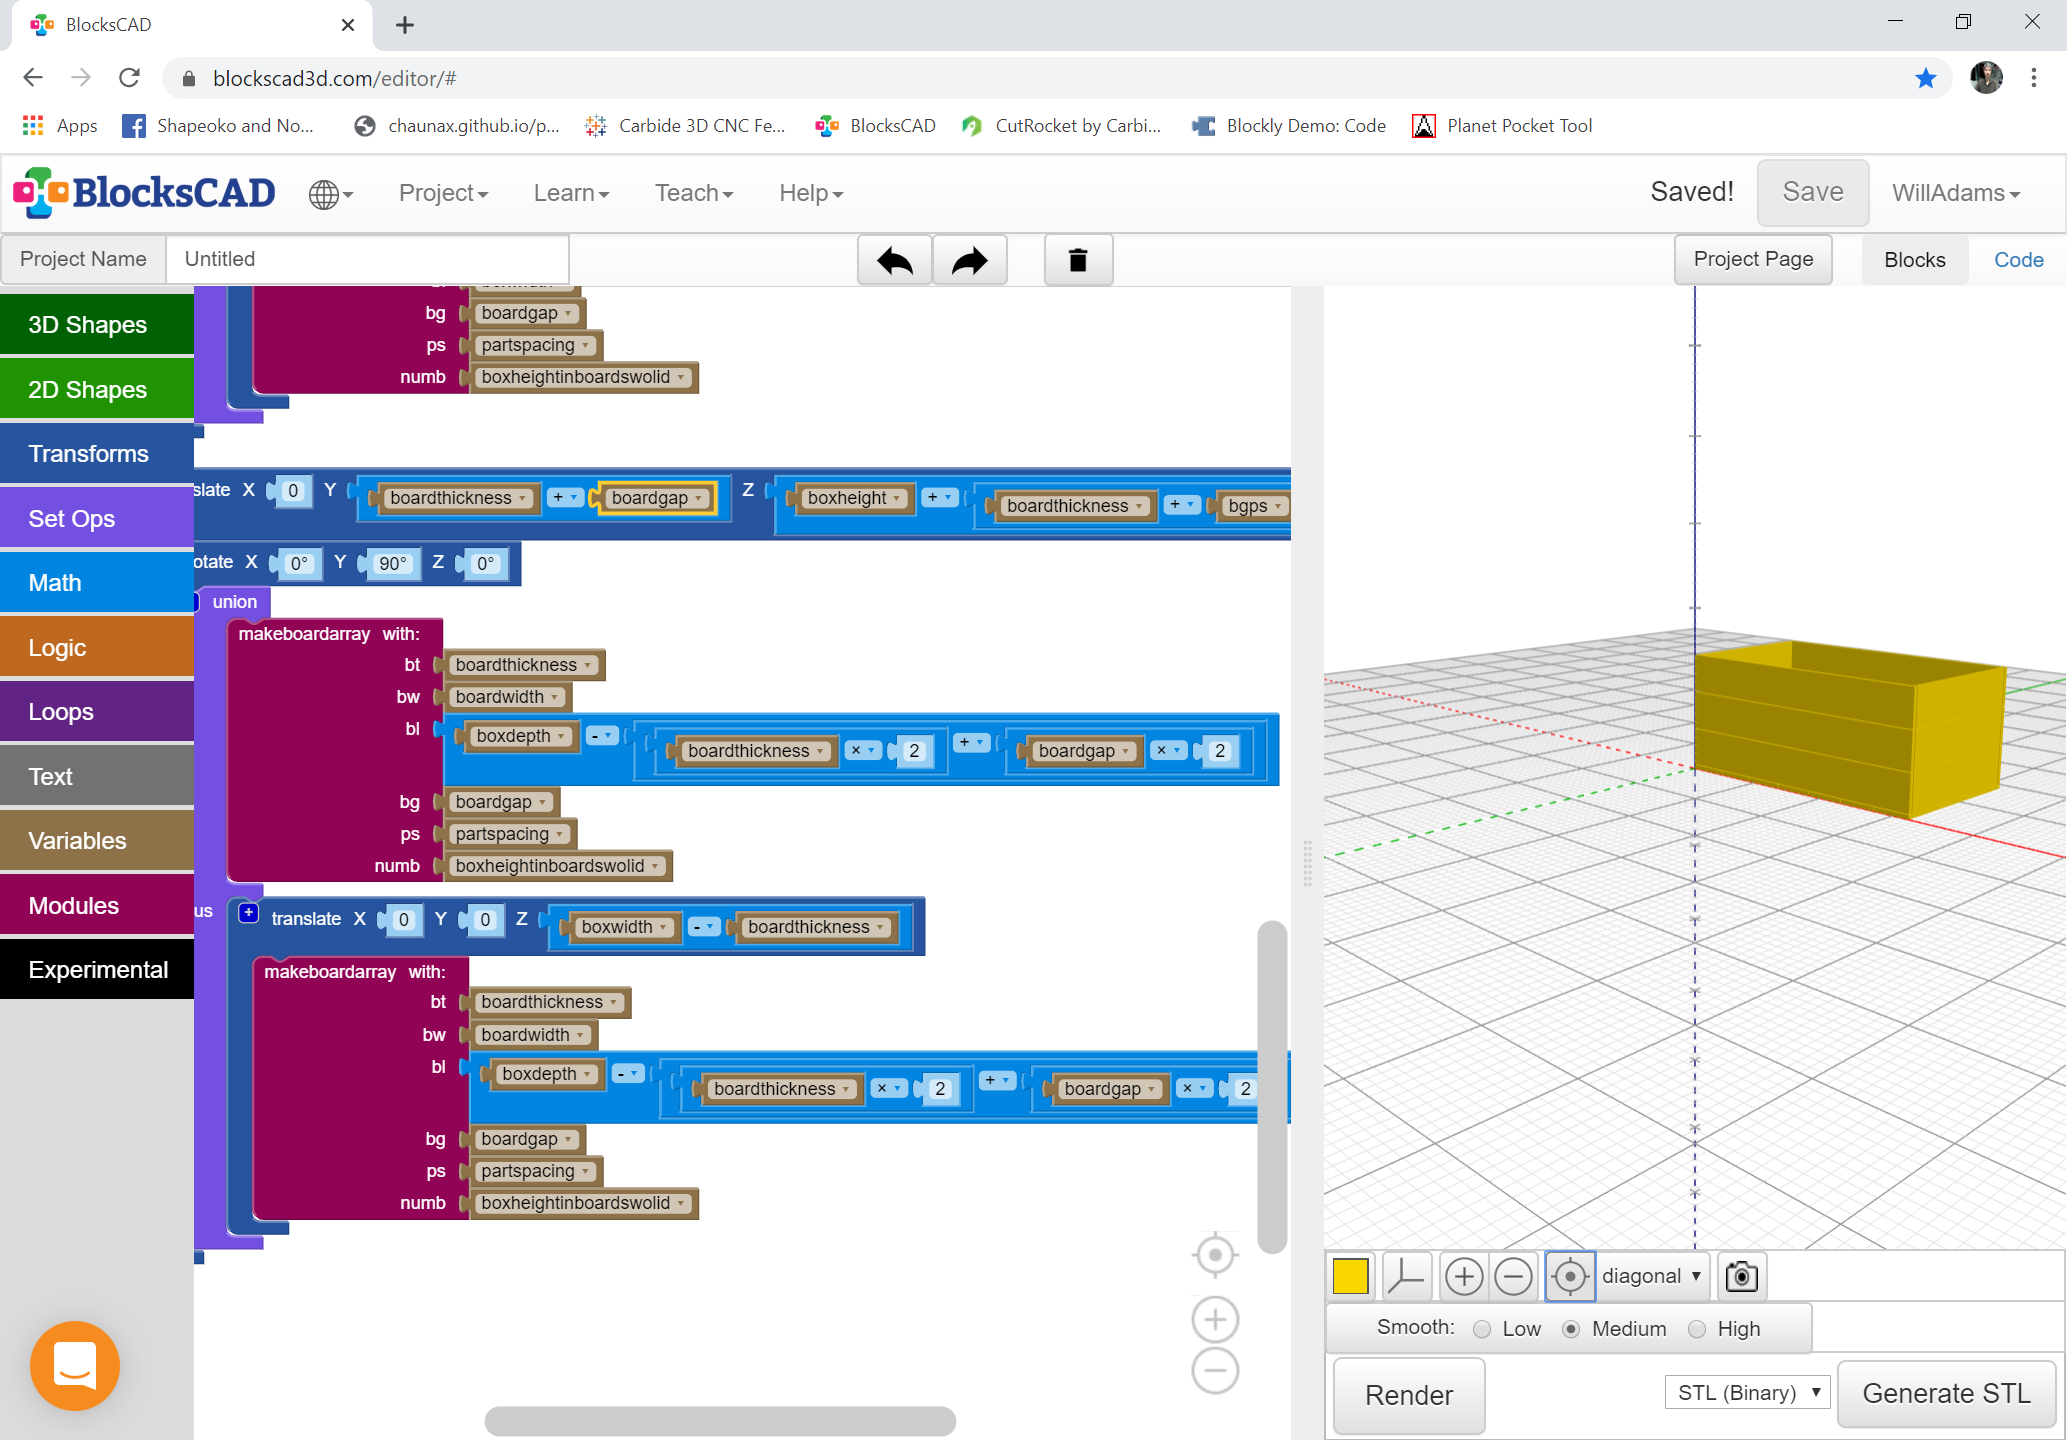
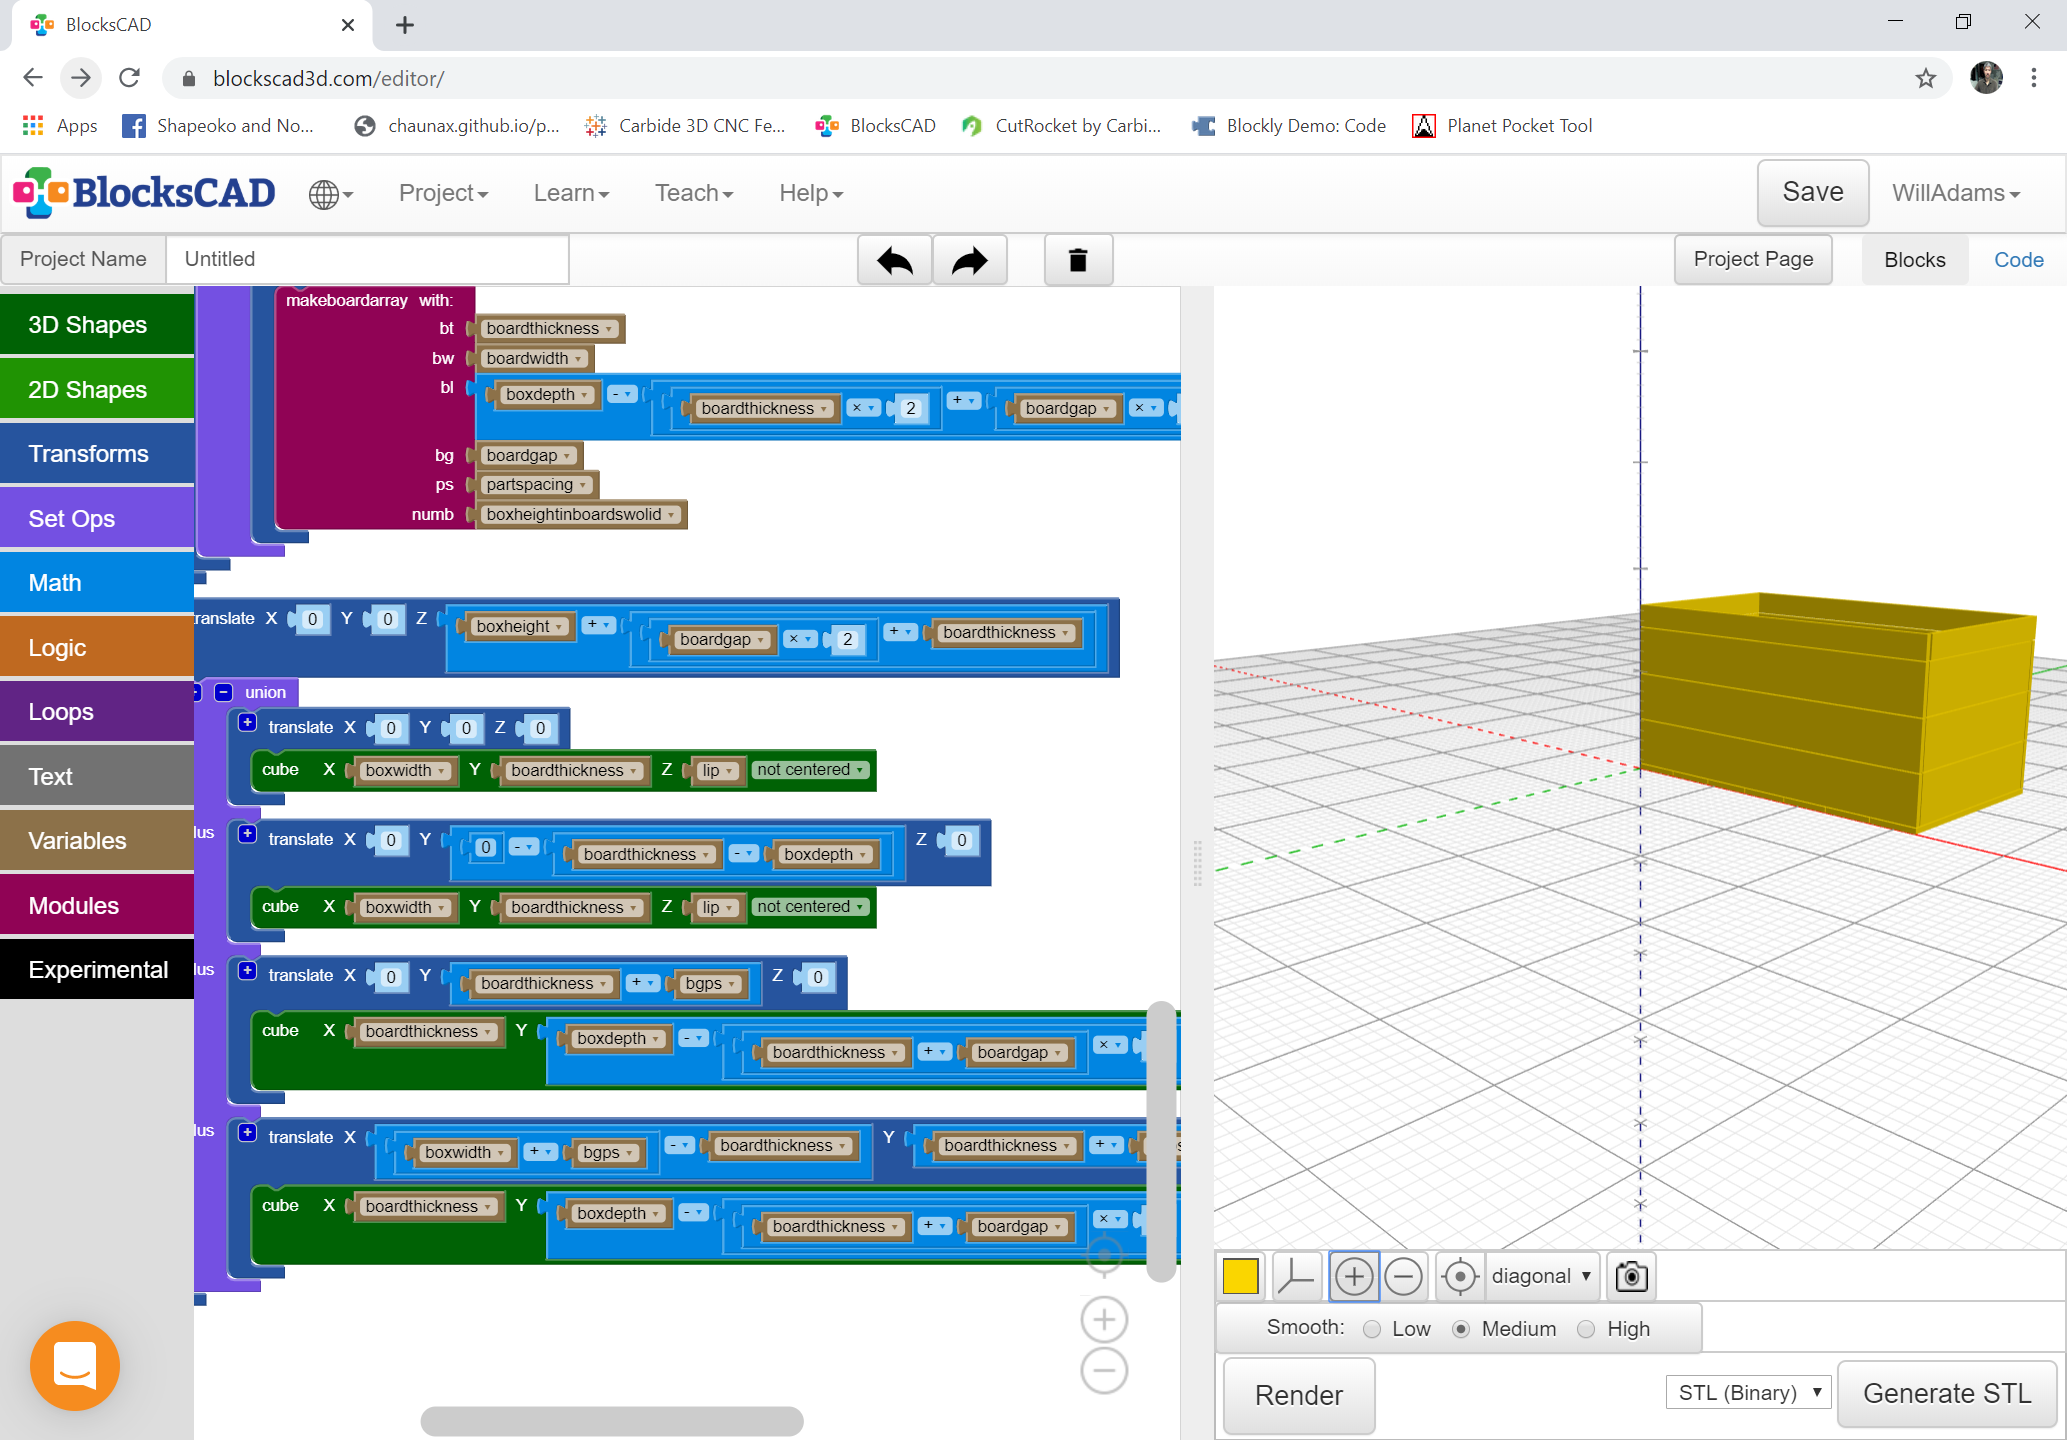
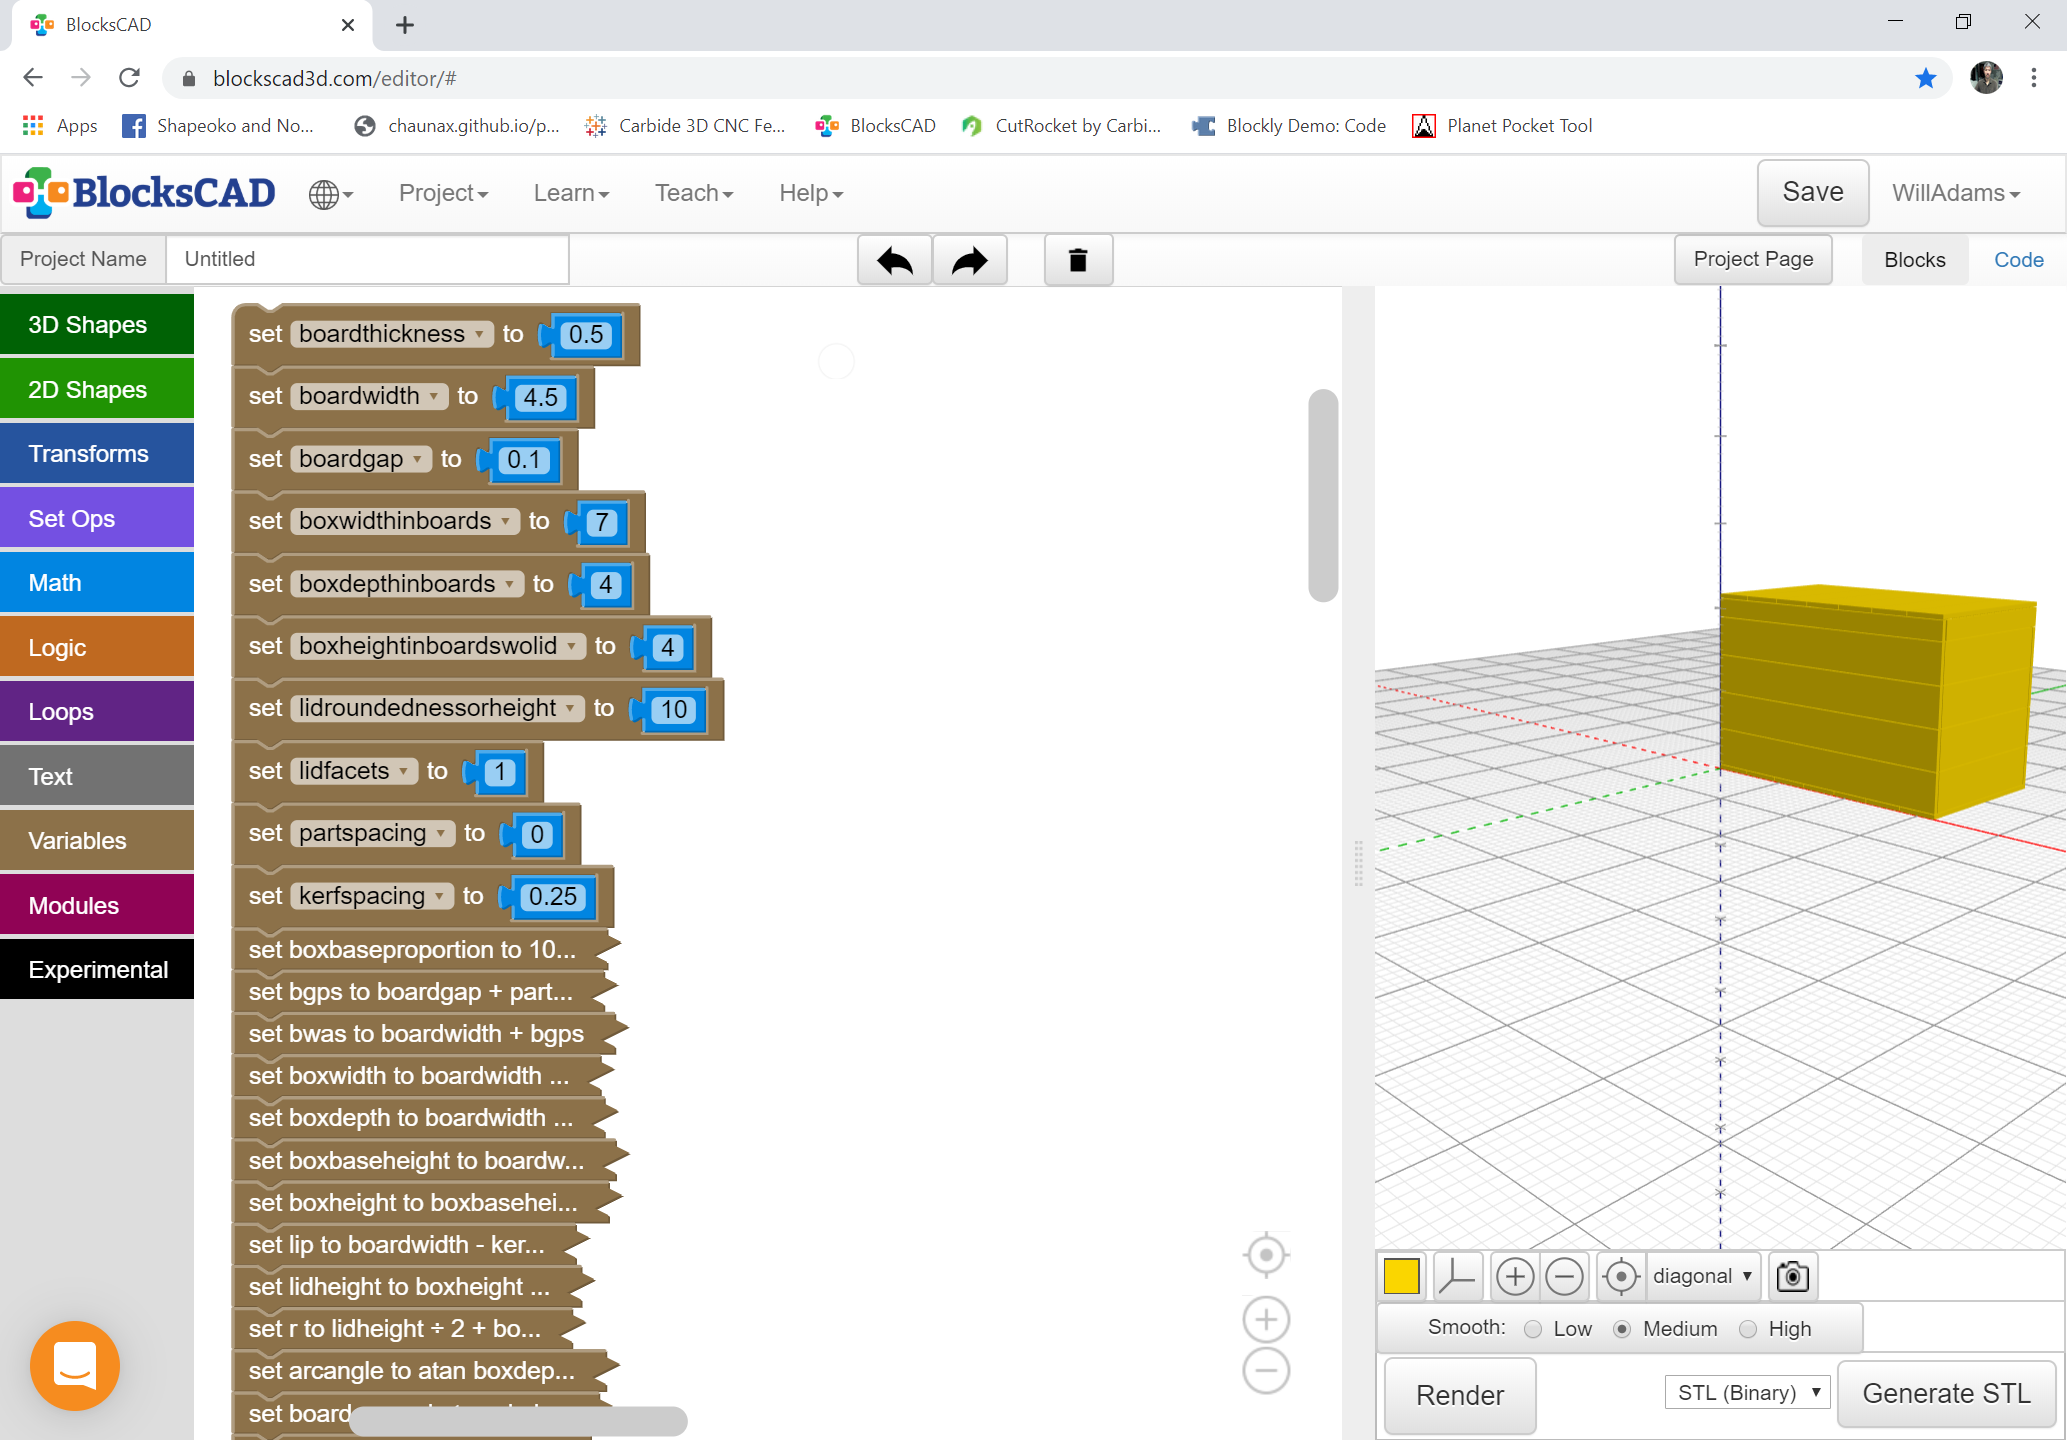
Next, we do something similar for the sides — here though we want to try to use stock efficiently since there are four sides — we assign half the board maxwidth to be added to the lid (one would rip a board each for the sides and front/back) — since the sides will be visible, we calculate how many boards there should be and then evenly distribute the height for a more regular appearance.

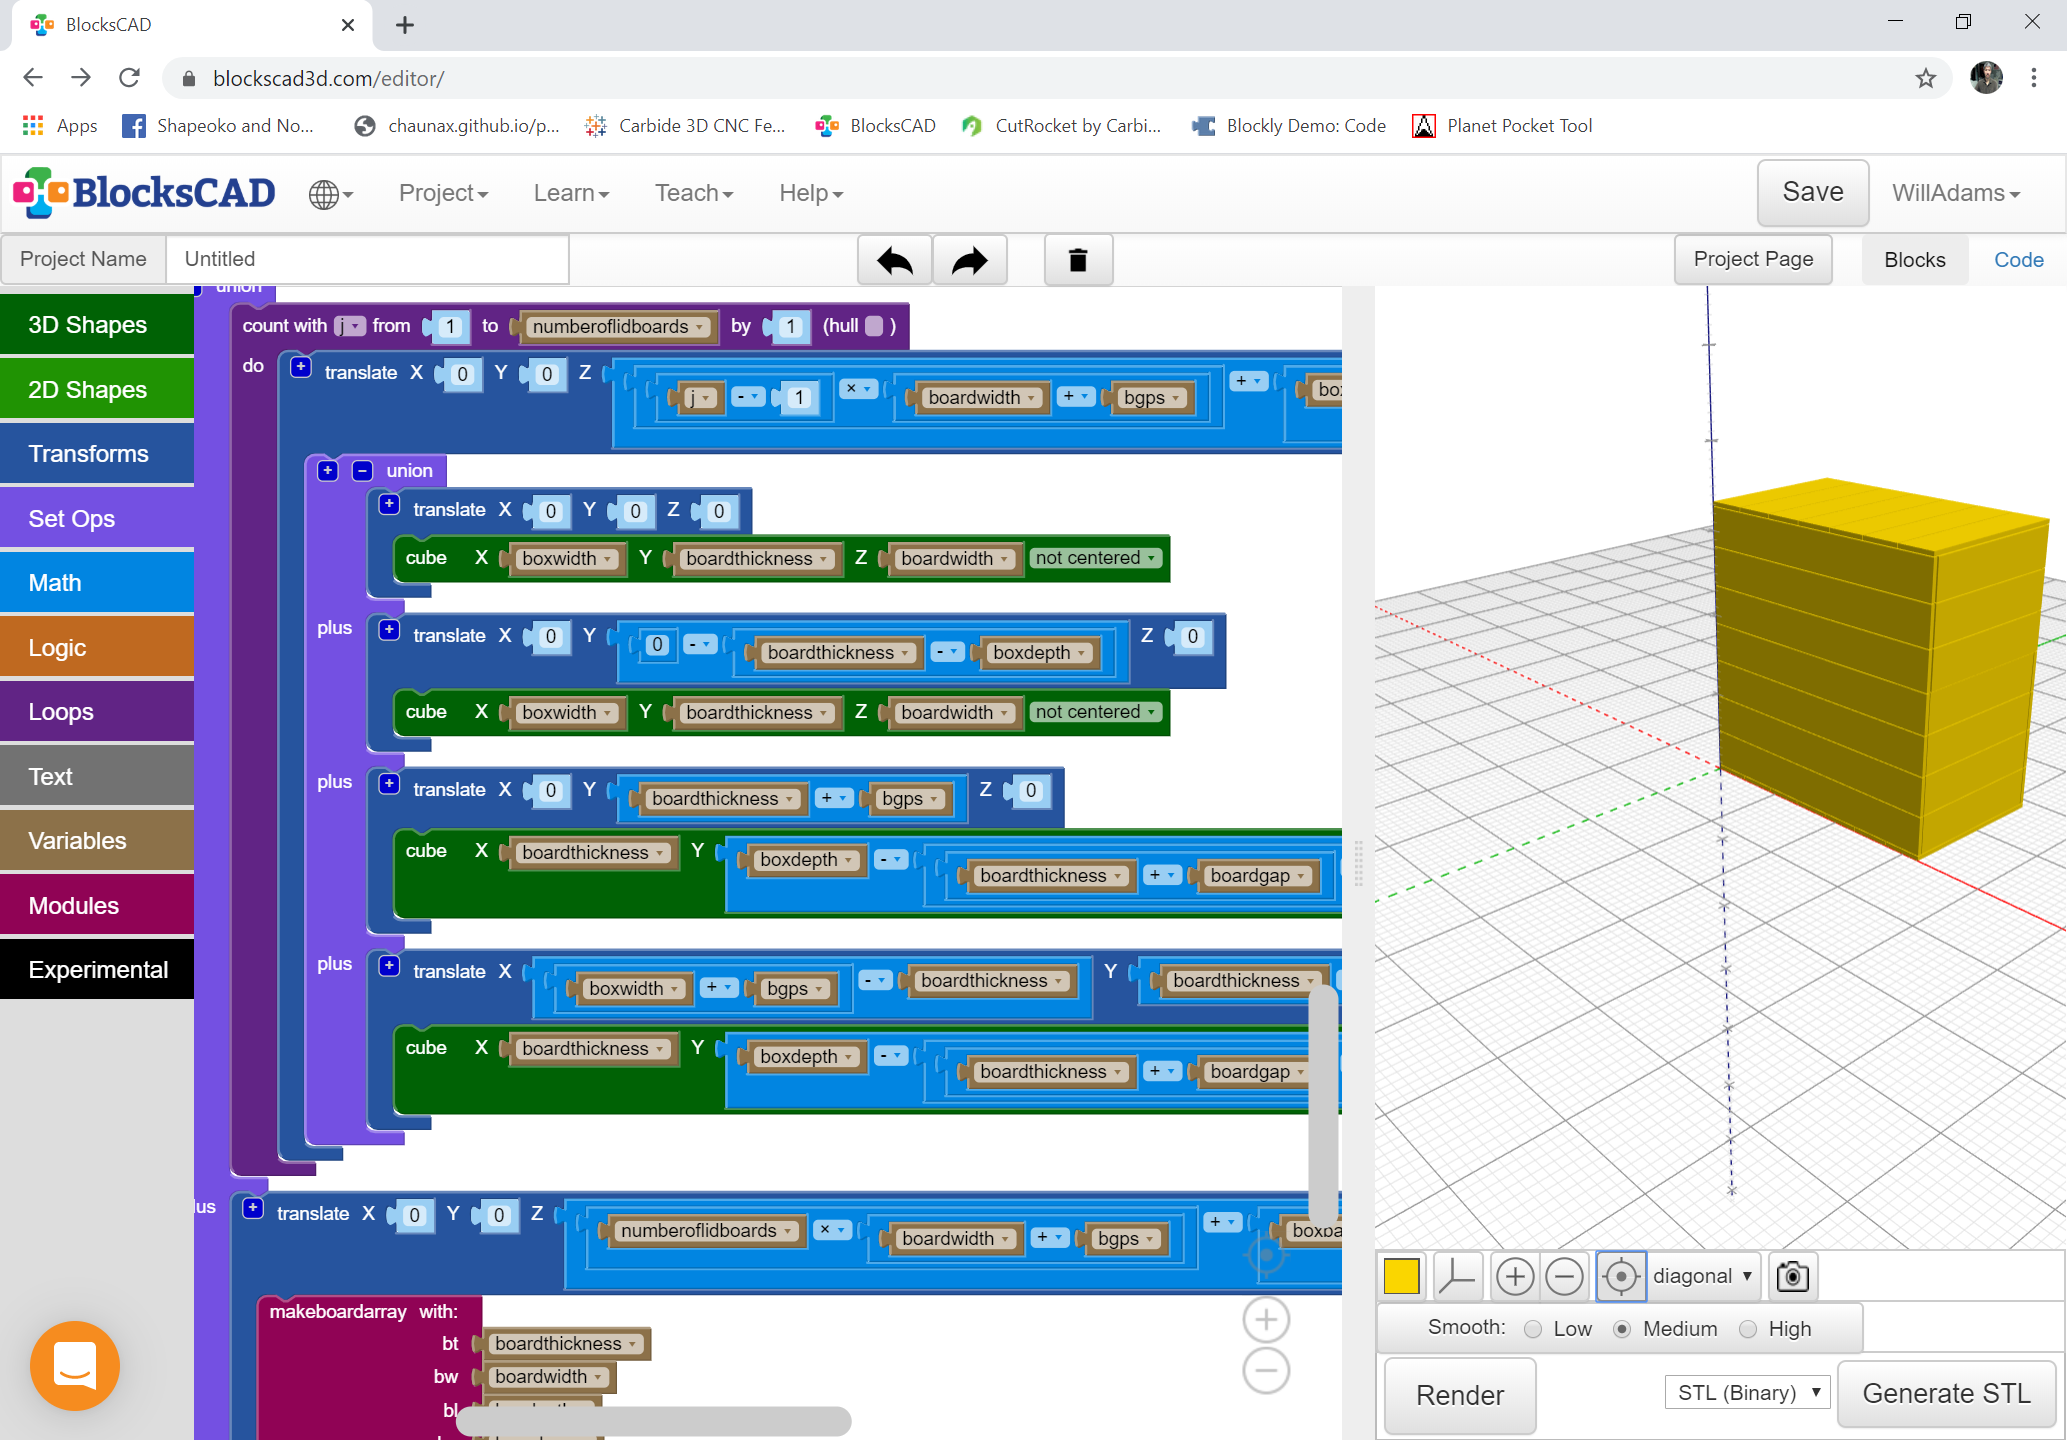
Note that we will also need to go back and revisit there being an odd number of boards for the base — probably the code could be re-used, just skip dividing at the last step — for sense it will probably be necessary to rename some variables.

1 Like

On third thought, a discrete number of boards makes more sense (and is certainly easier to program).

Trying again, (briefly considered openjscad, but it didn’t work out).

As before, we make variables:

This time, we use a module:

and we assume that the box will be wider than it is deep, and in keeping with that, we have the boards in the bottom run from front–back.

1 Like

and we have the bottom portion of the box pretty much done:

1 Like

and adding a sawkerf dimension allows us to have a lid base which efficiently uses two boards cut in half:

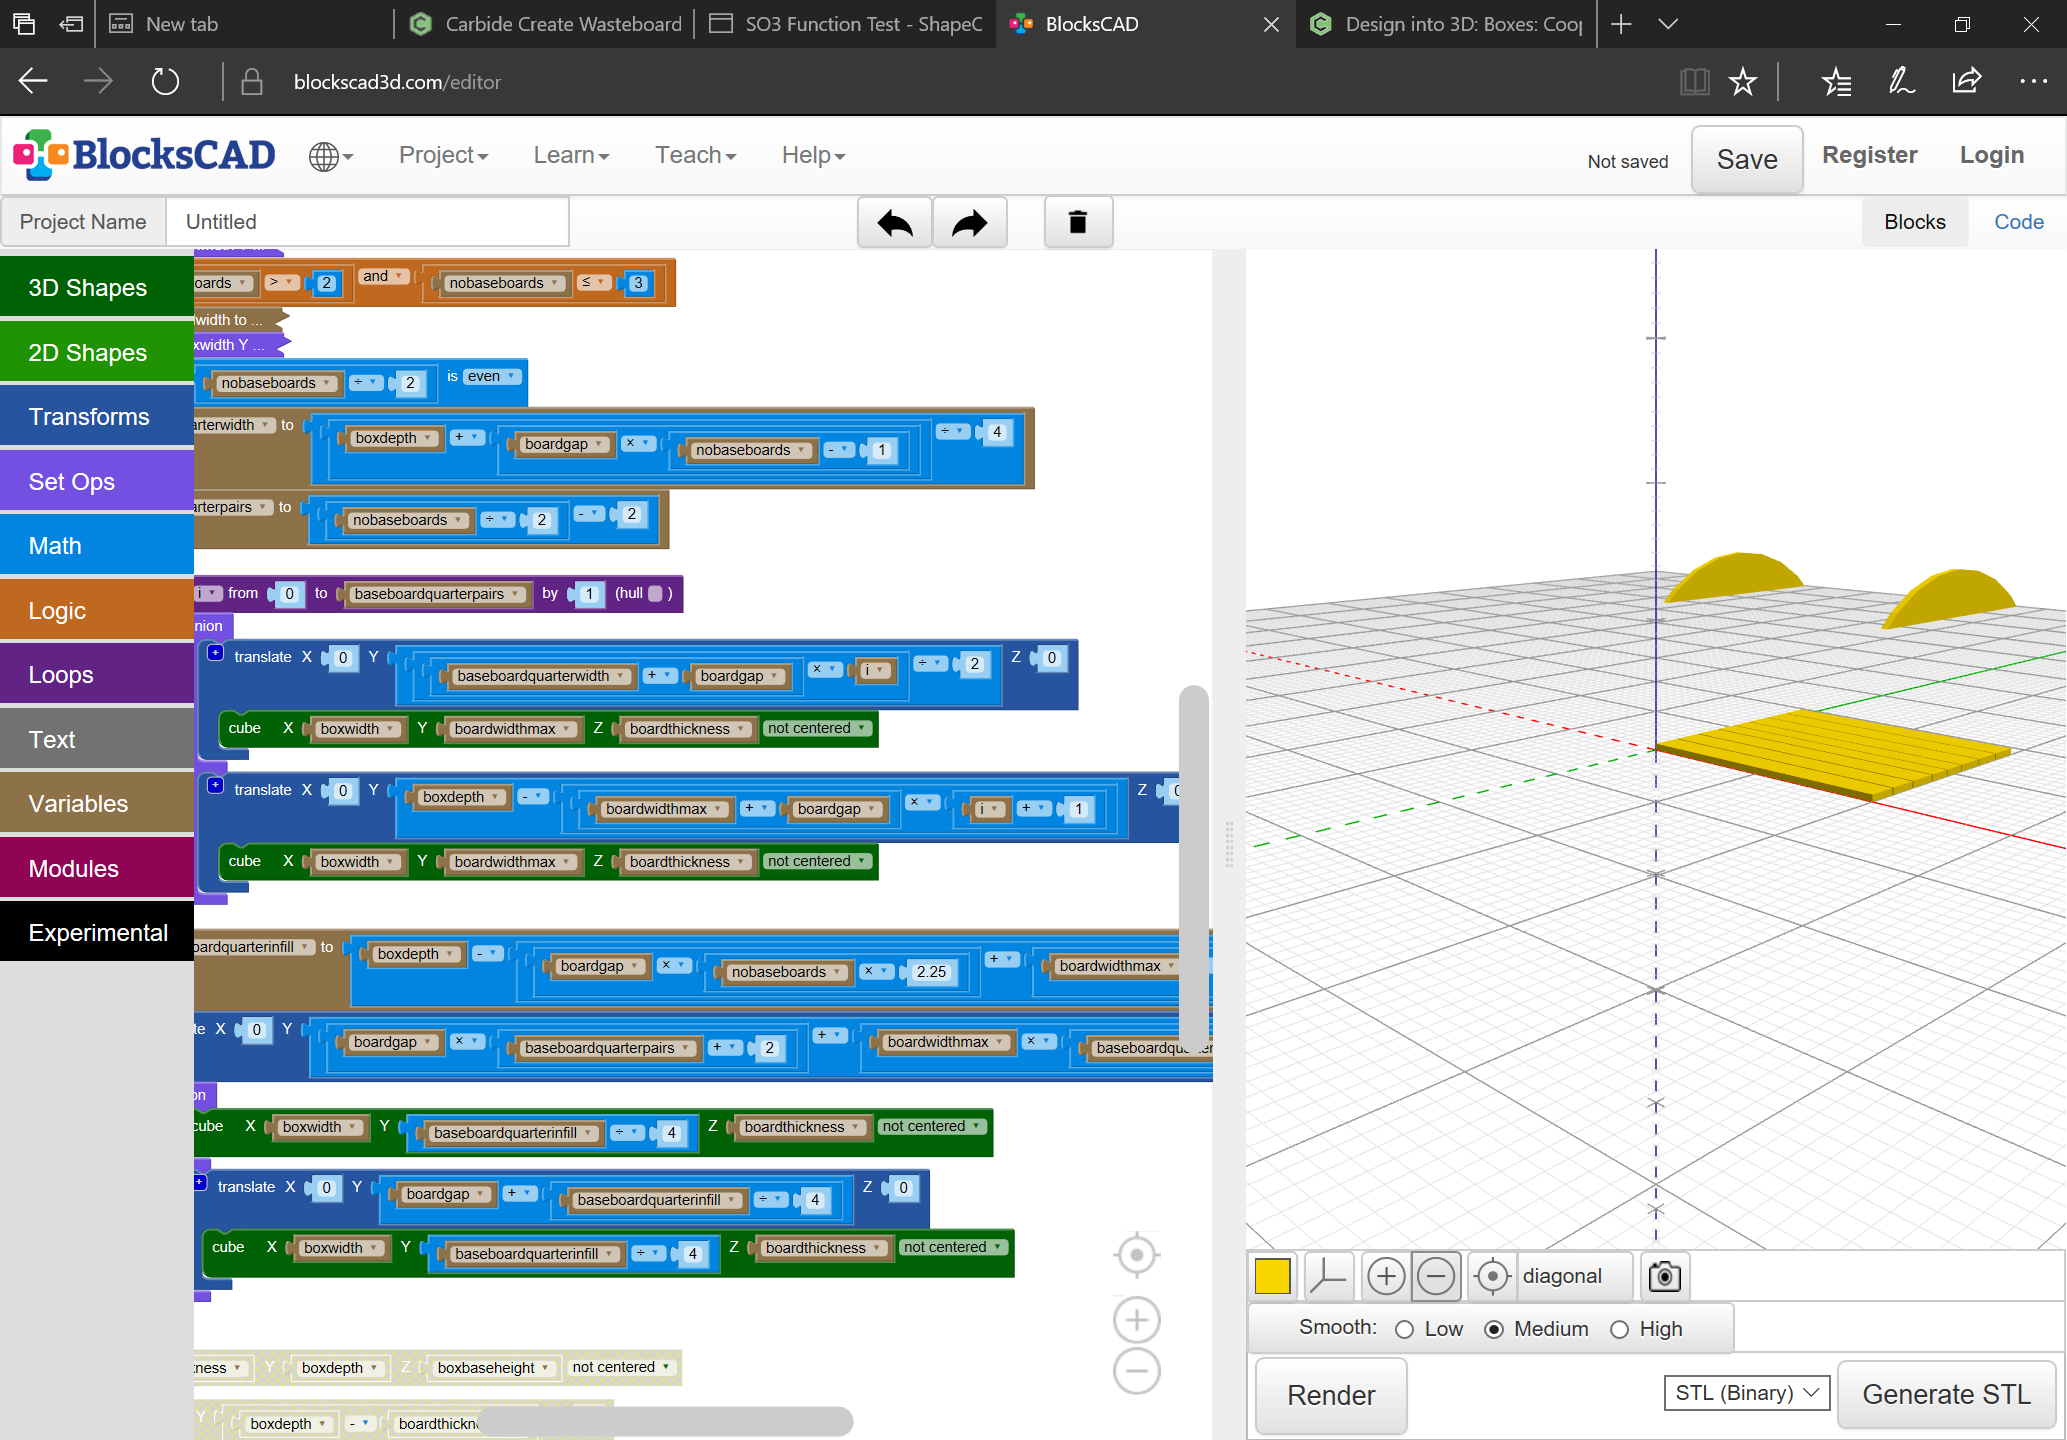
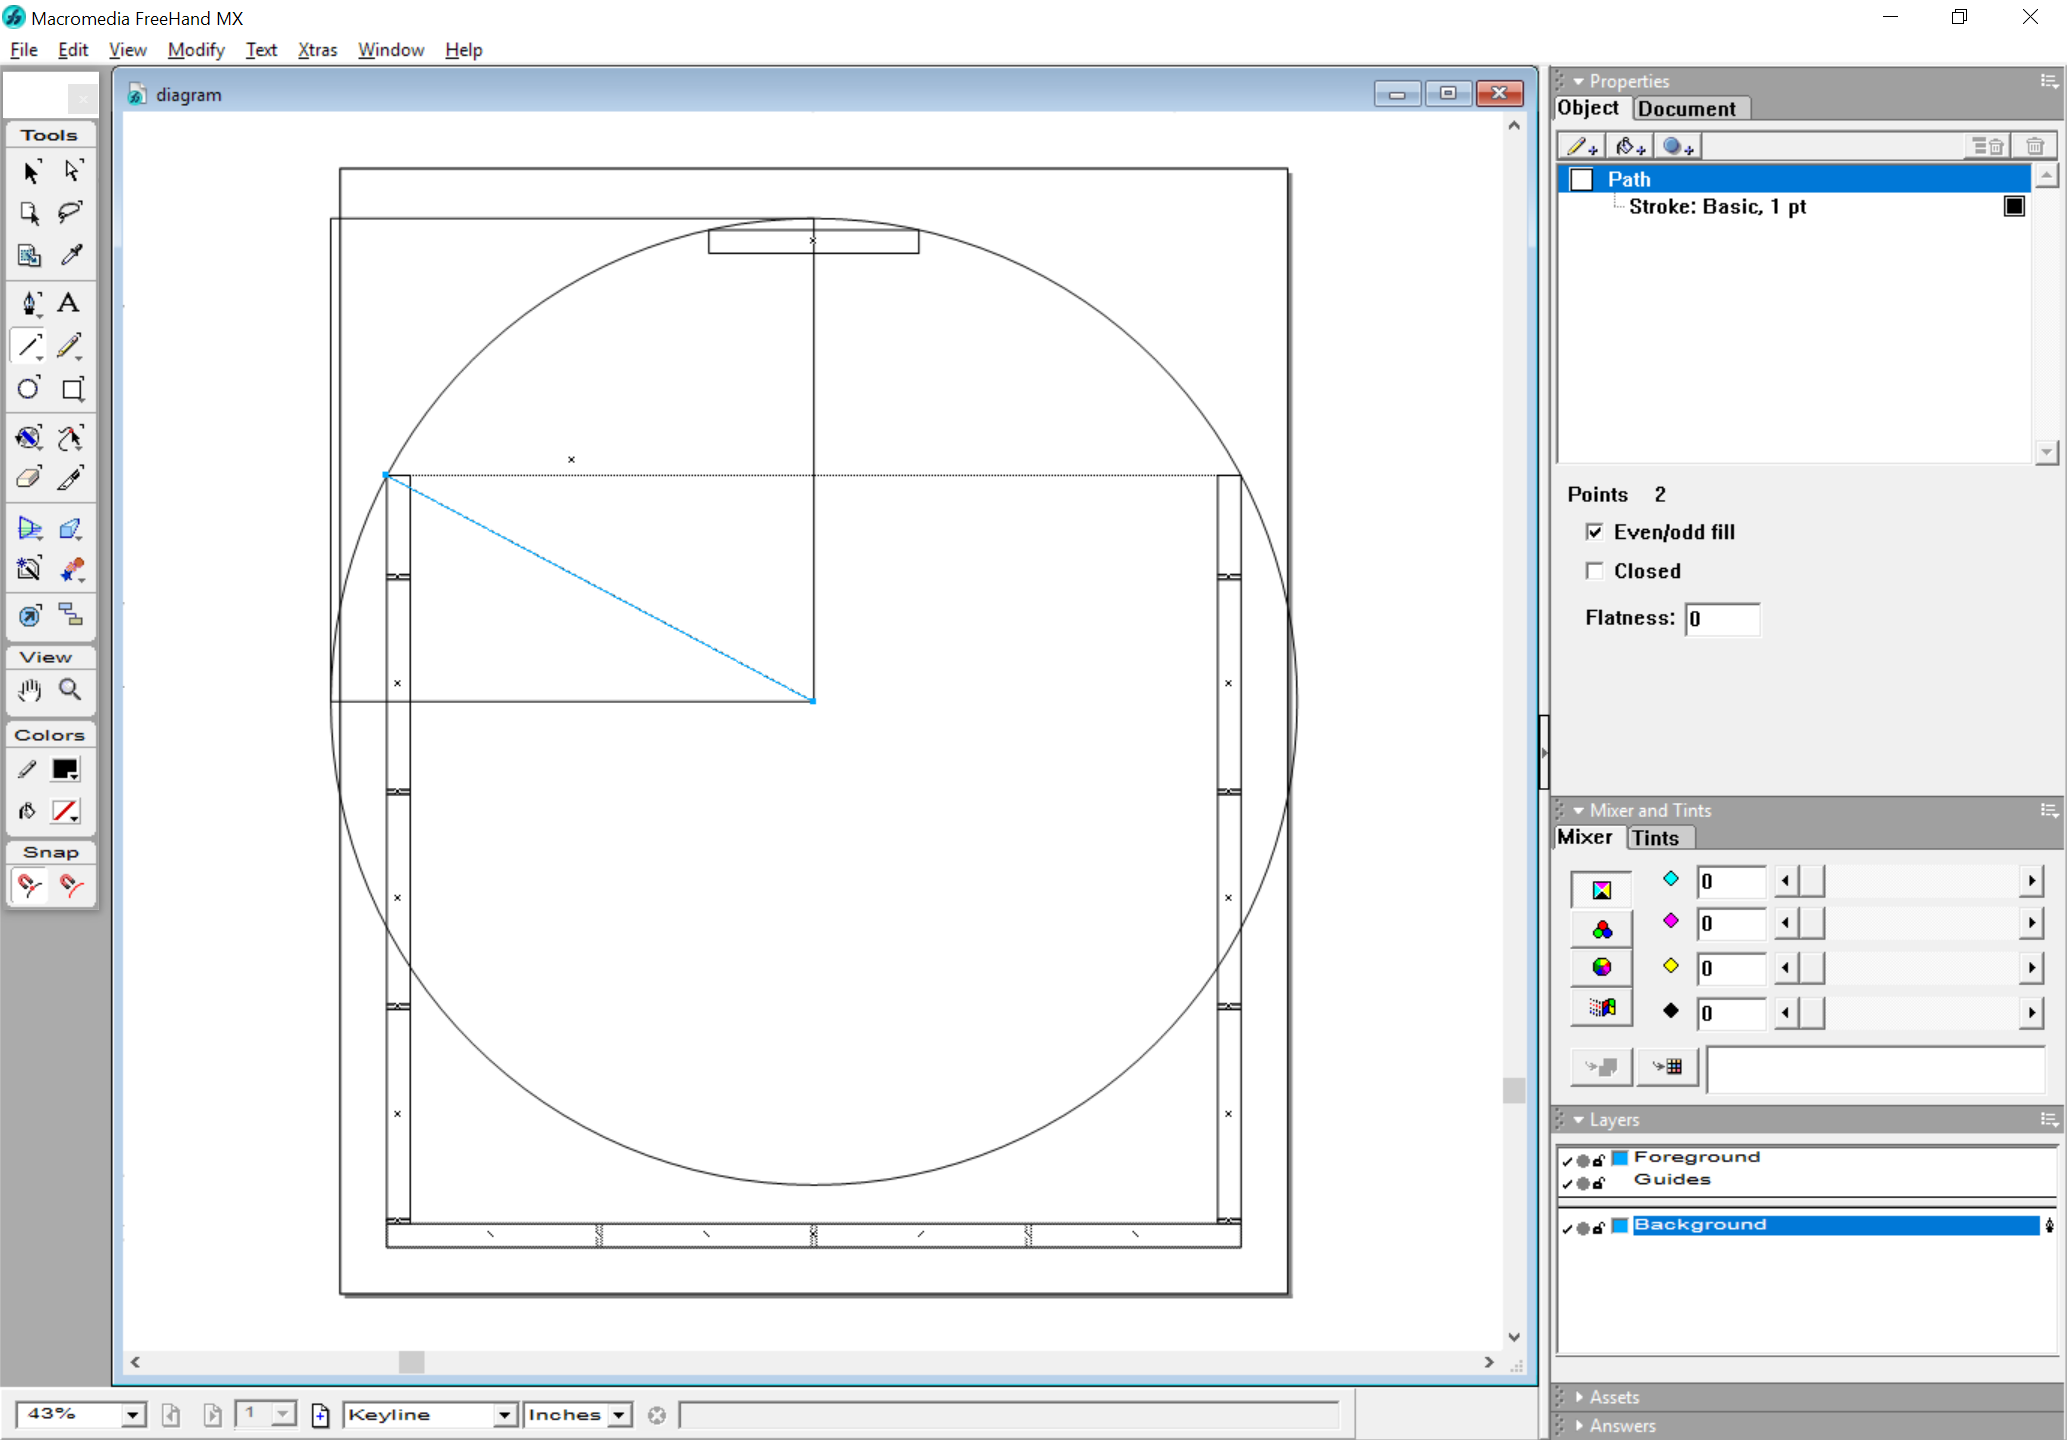
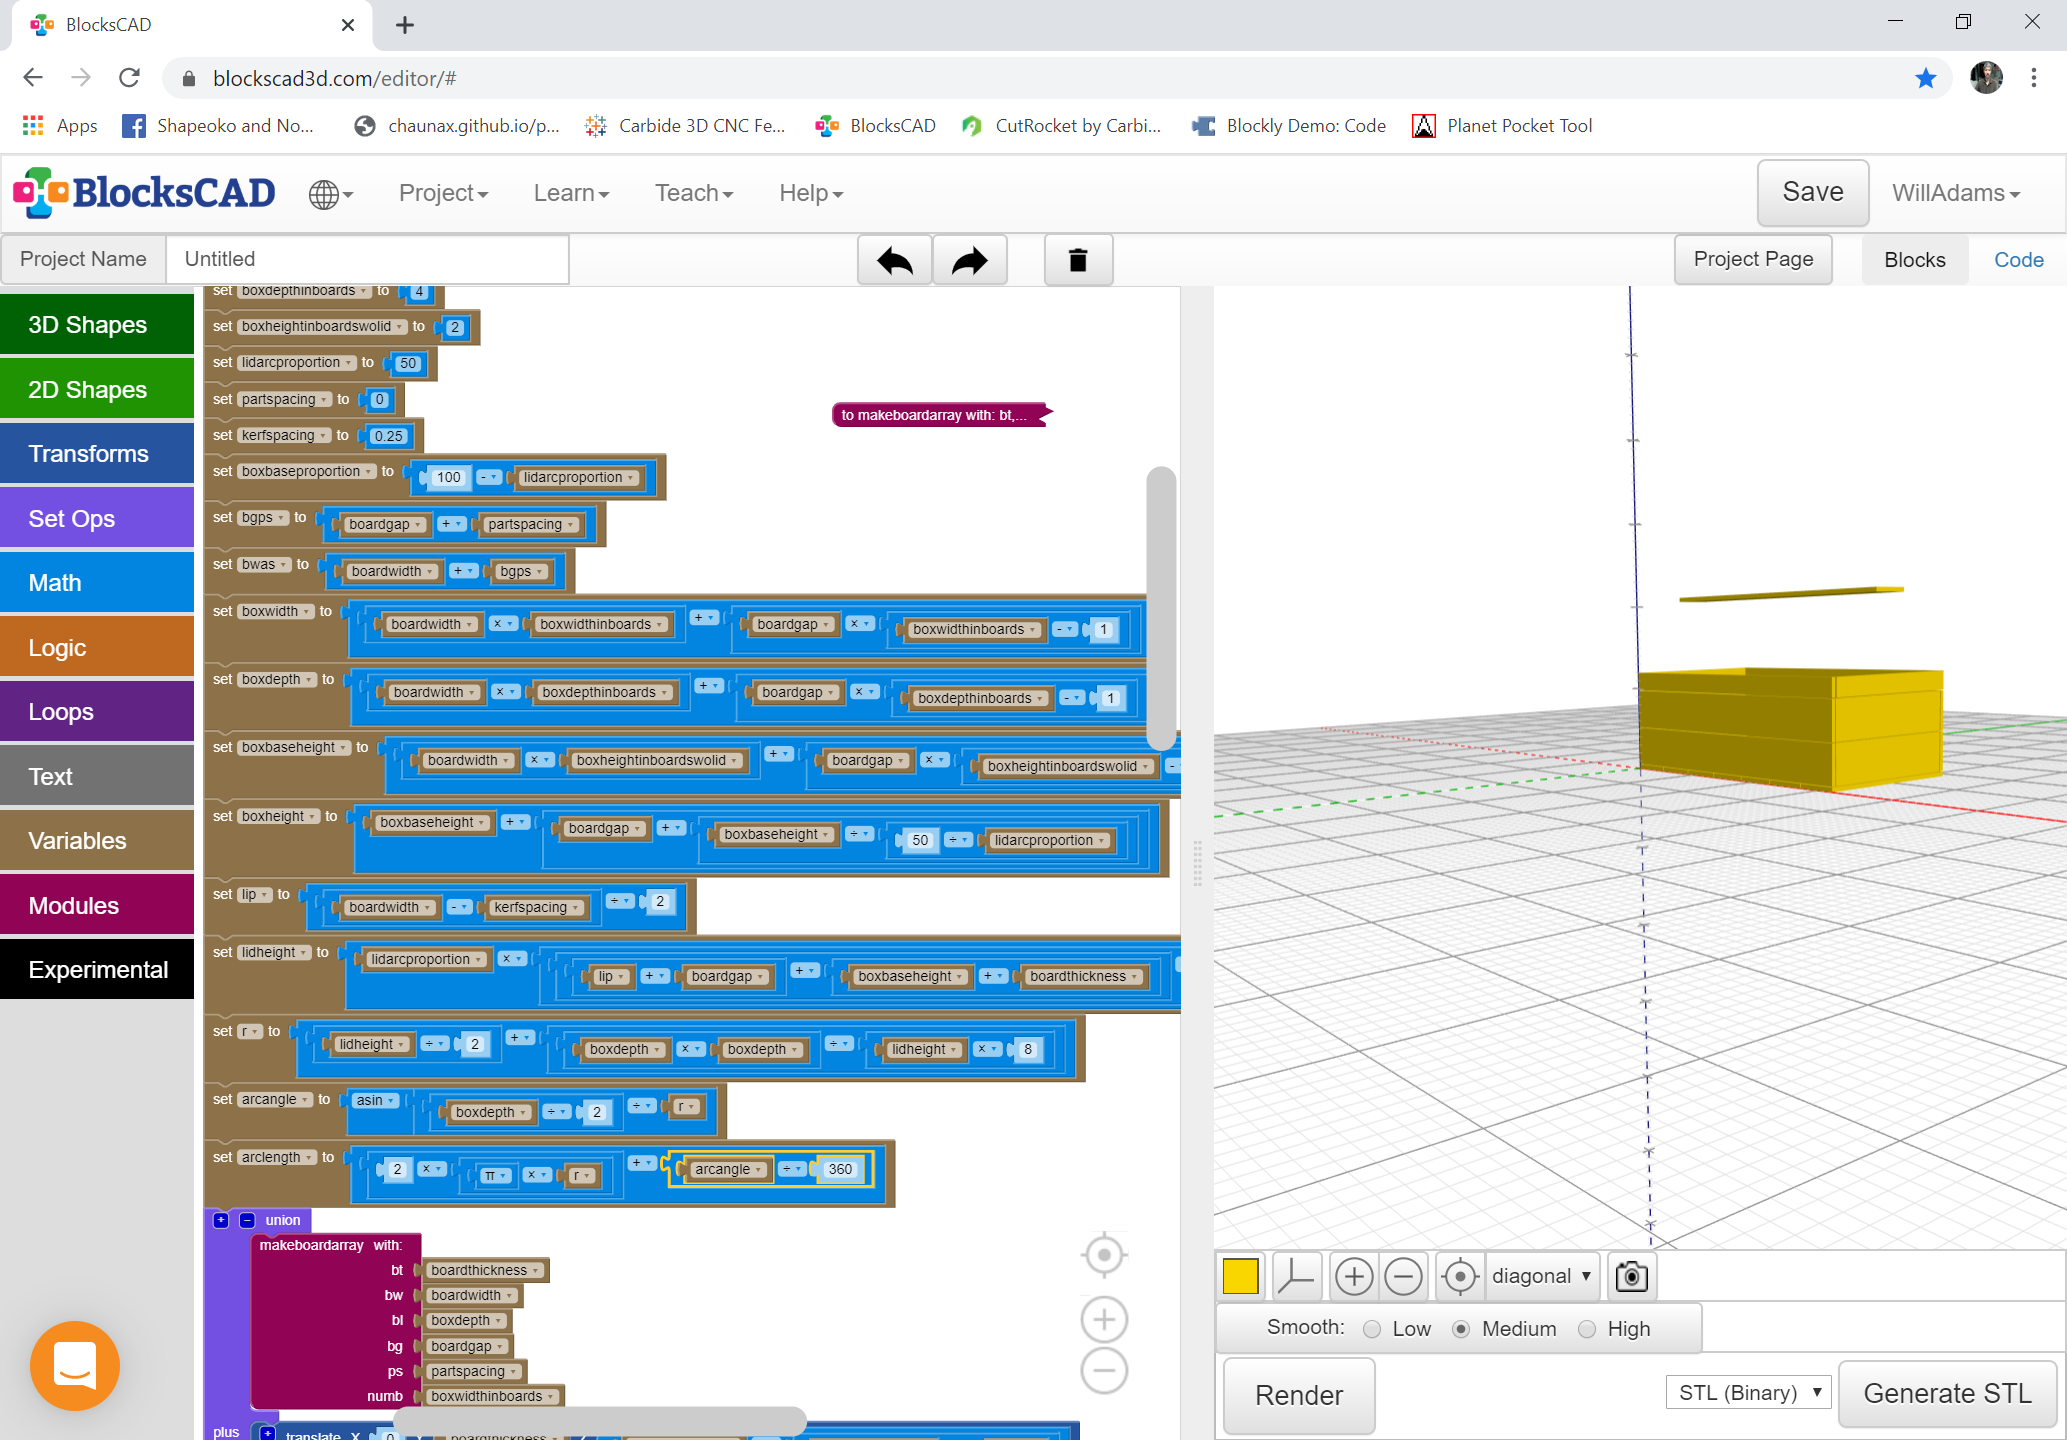
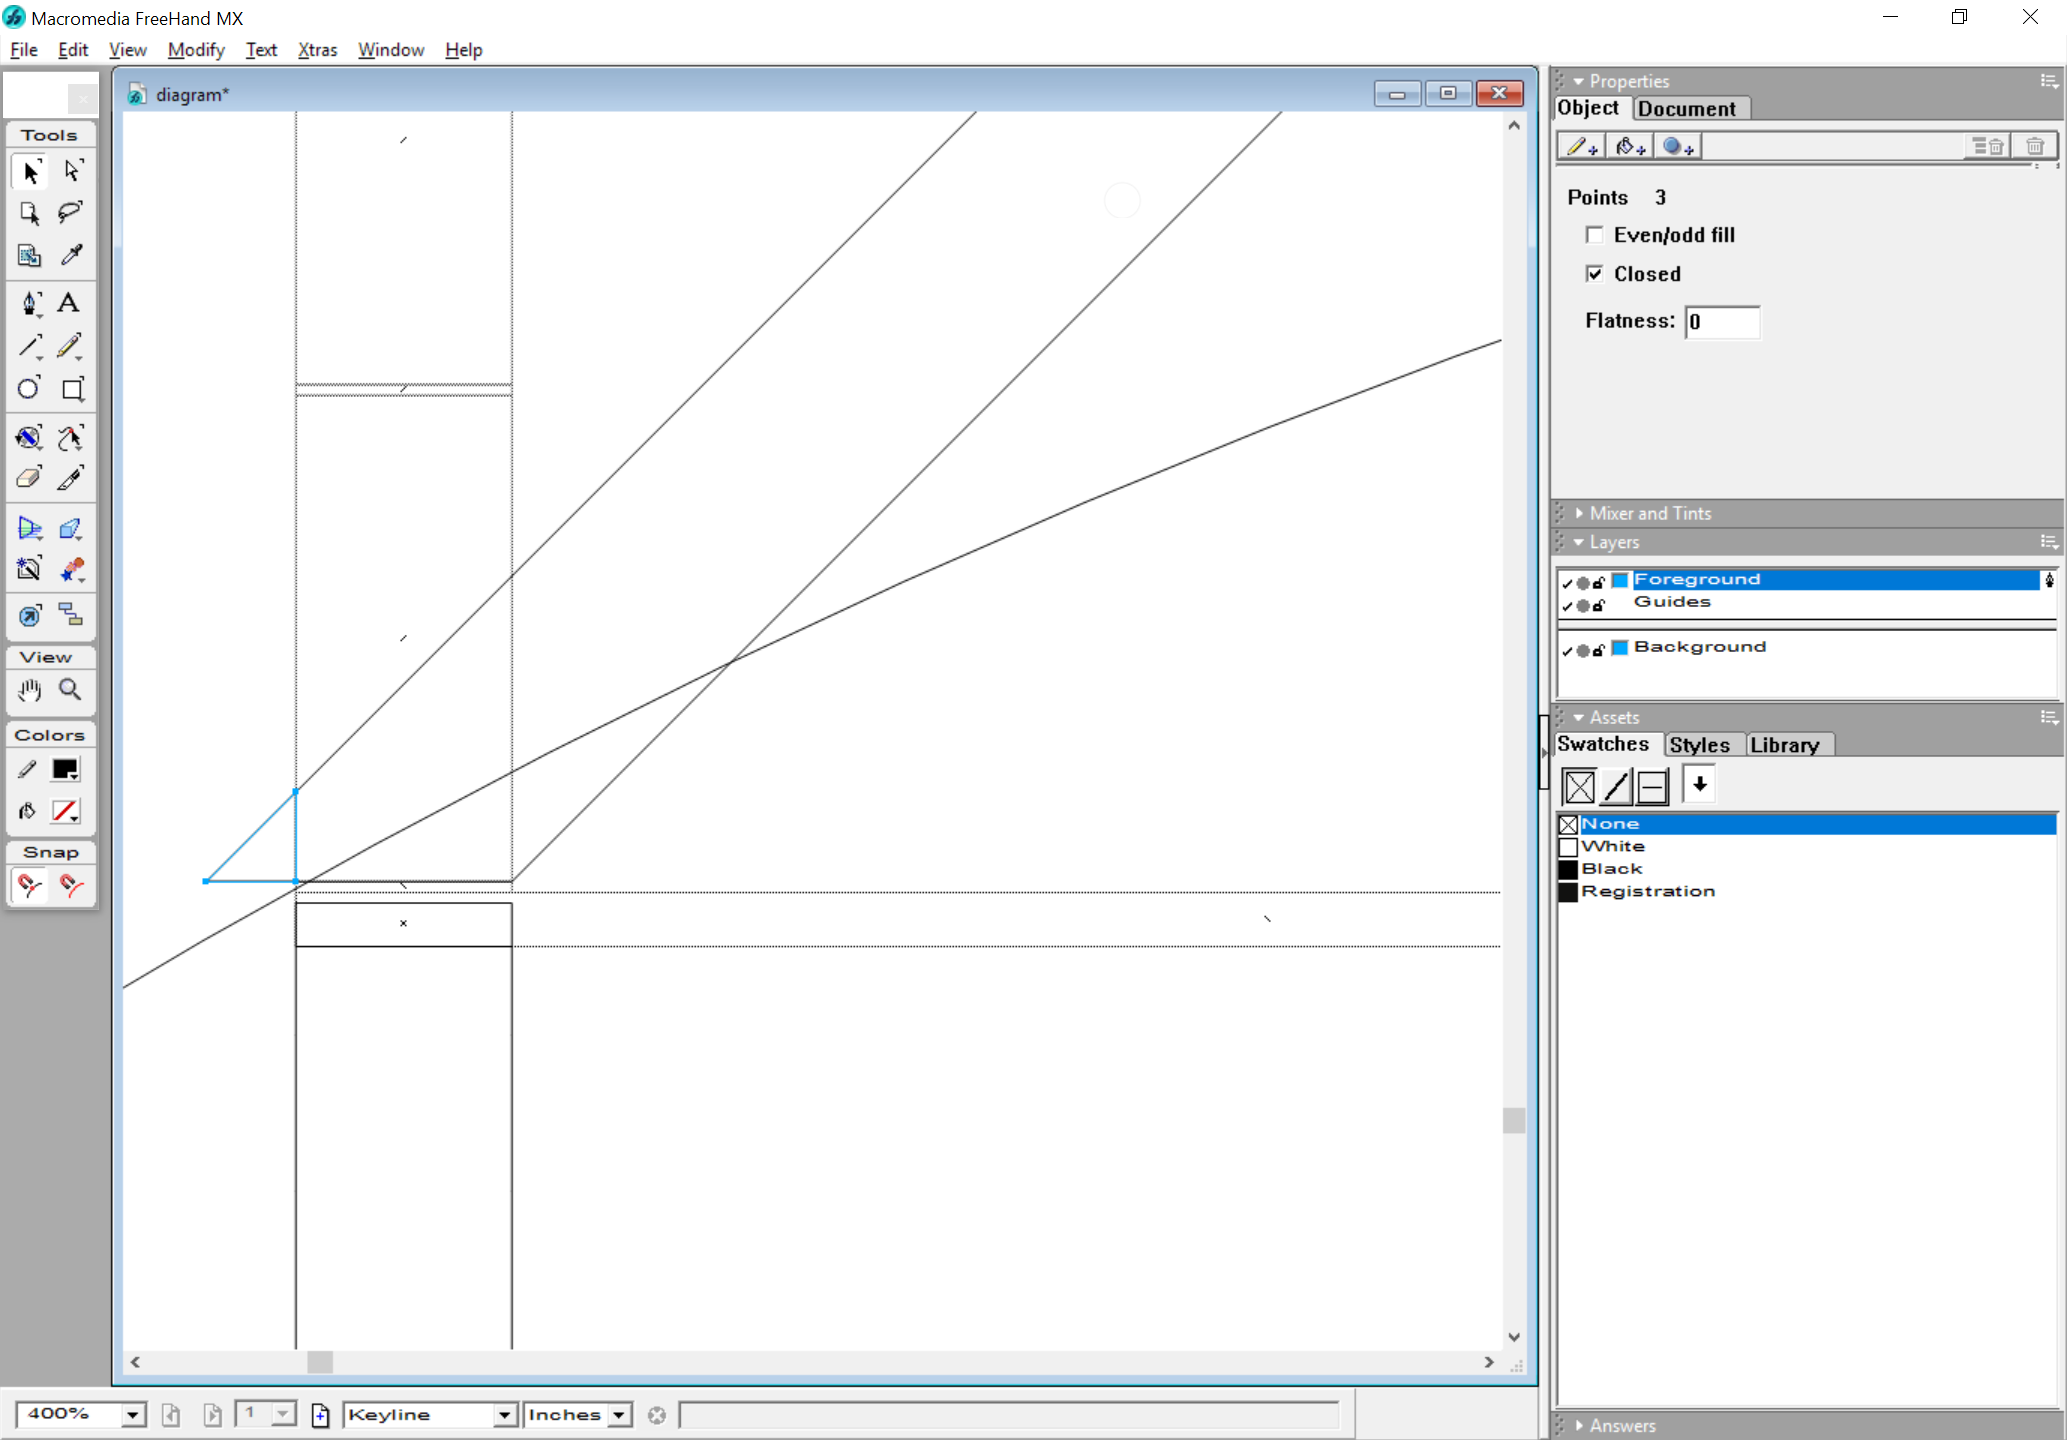
Next up is working out the math to place a board at the top of the arc for the box lid (adjusted by the board’s final width) and to determine how many boards will be necessary and at what angle(s) they will need to be cut along their edges.

1 Like

Dimensions which we have:

  • the length of the chord of the arc (this is the box depth)
  • the radius of the circle

Drawing things up we have:

1 Like

2 posts were split to a new topic: Design into 3D Kickstarter Book Status

We need a couple of variables:

(hopefully those notes will be sufficient to let me pick up where I left off)

1 Like

Next step is making a board with the correct (and rather slight) angles:

To fill out the lid we need to ensure that the number of segments will be odd, and then rotate them into place.

1 Like

Rather than try to calculate everything about the lid we change to having multiple variables:

which are still parametric, adjusting in terms of a percentage of the box bottom height minus one:

We will iterate on numbers until we reach the point at which it can become a loop.

1 Like

This topic was automatically closed after 30 days. New replies are no longer allowed.

Yeah, one has to model the parts in design orientation, then rotate them into place:

1 Like

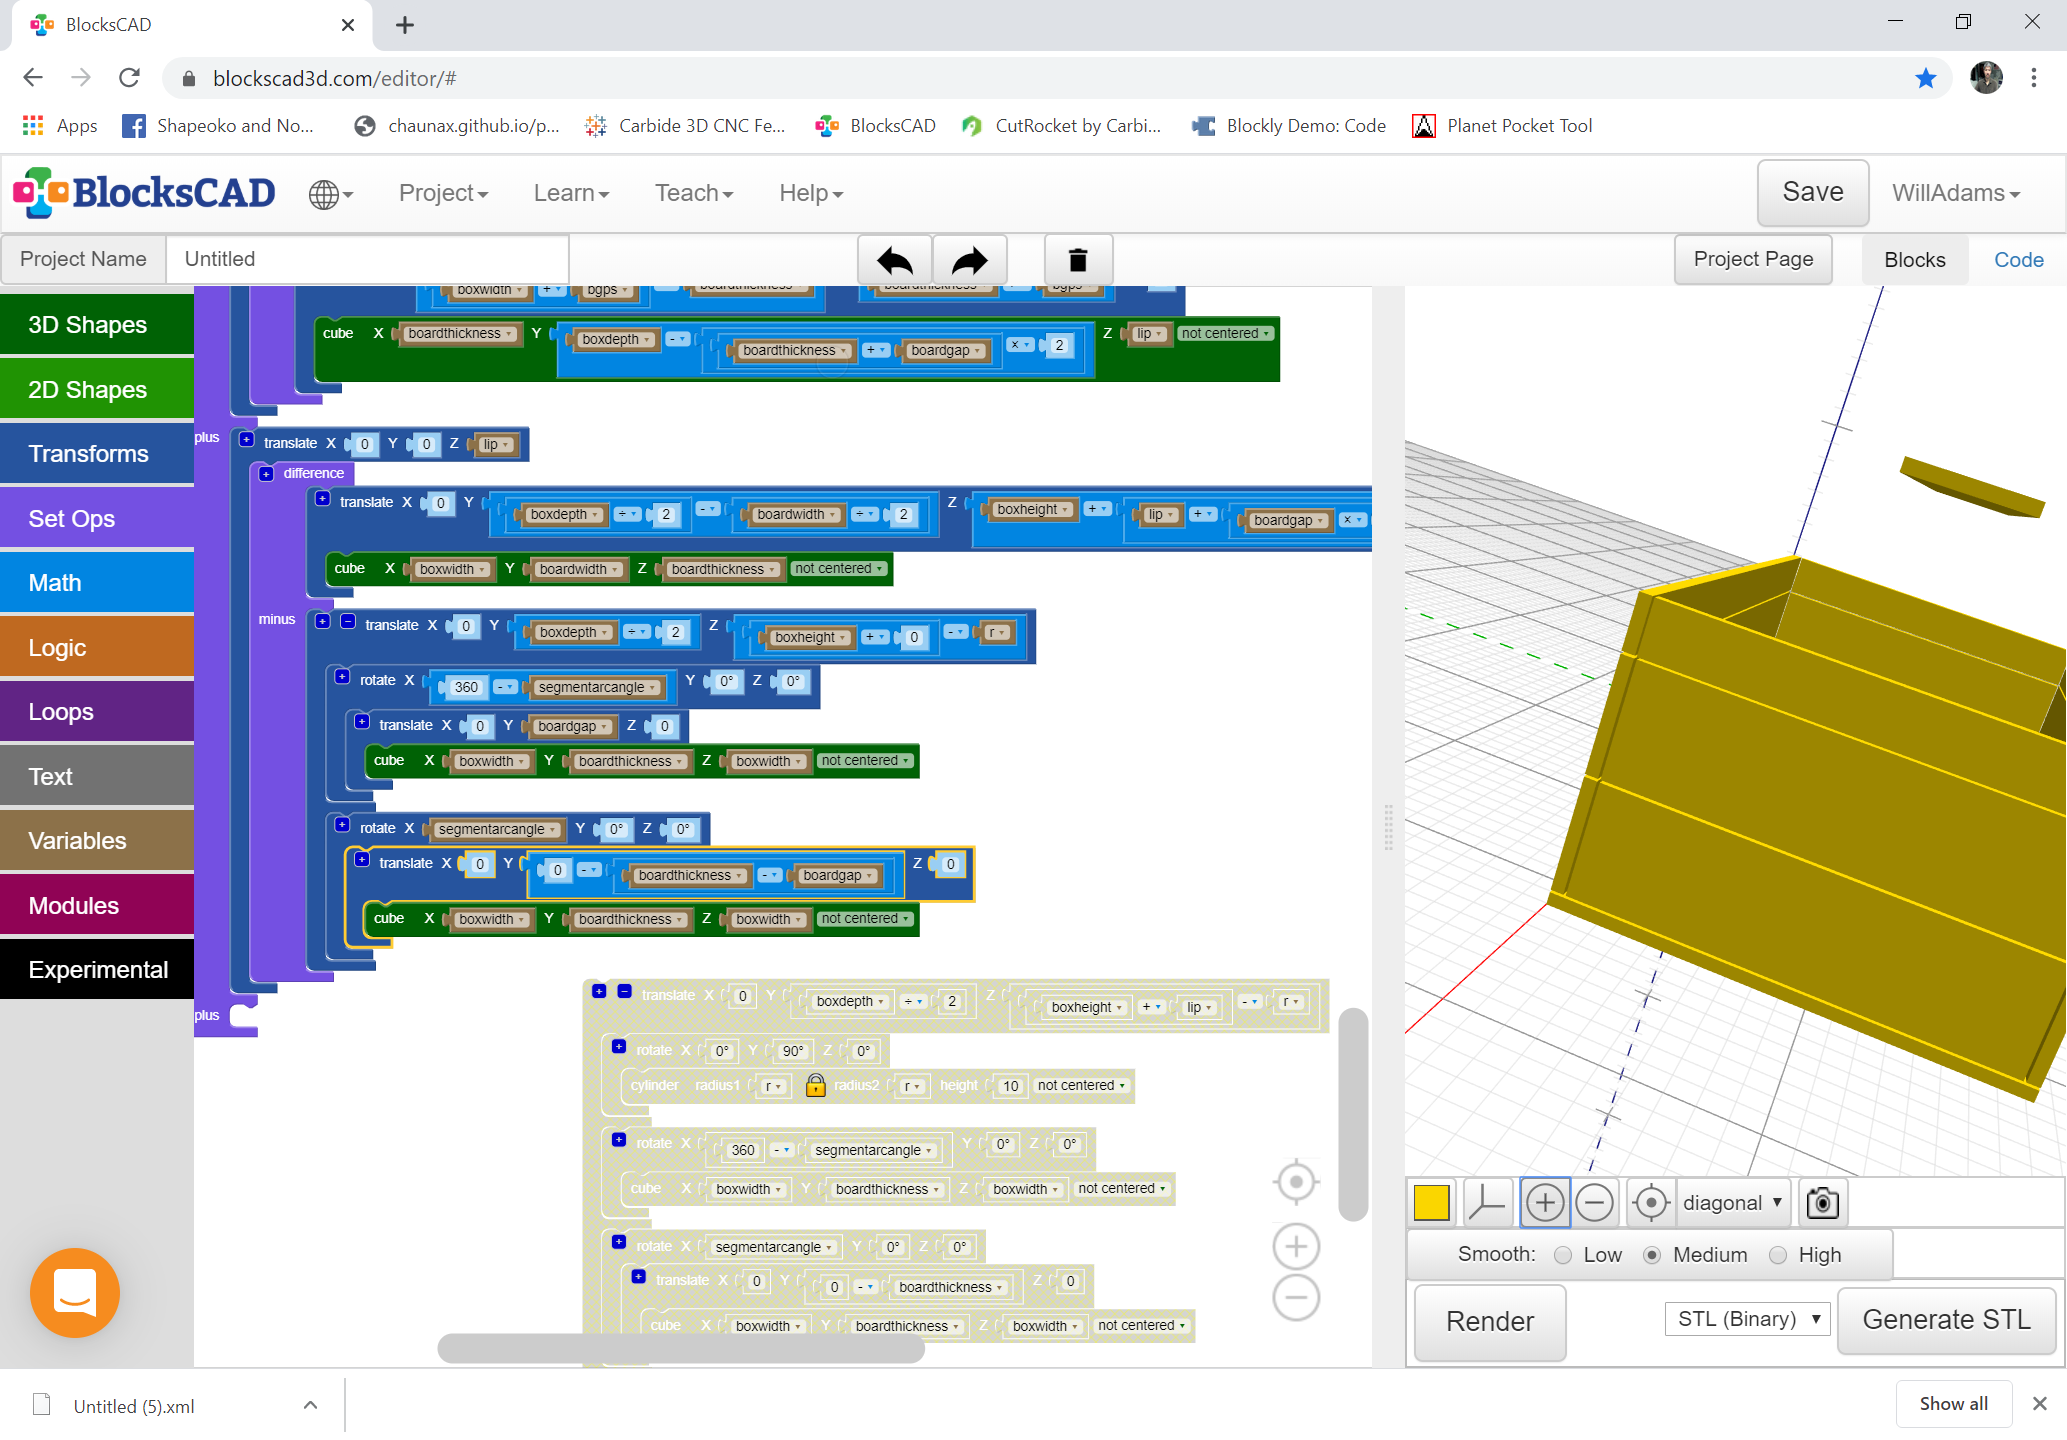
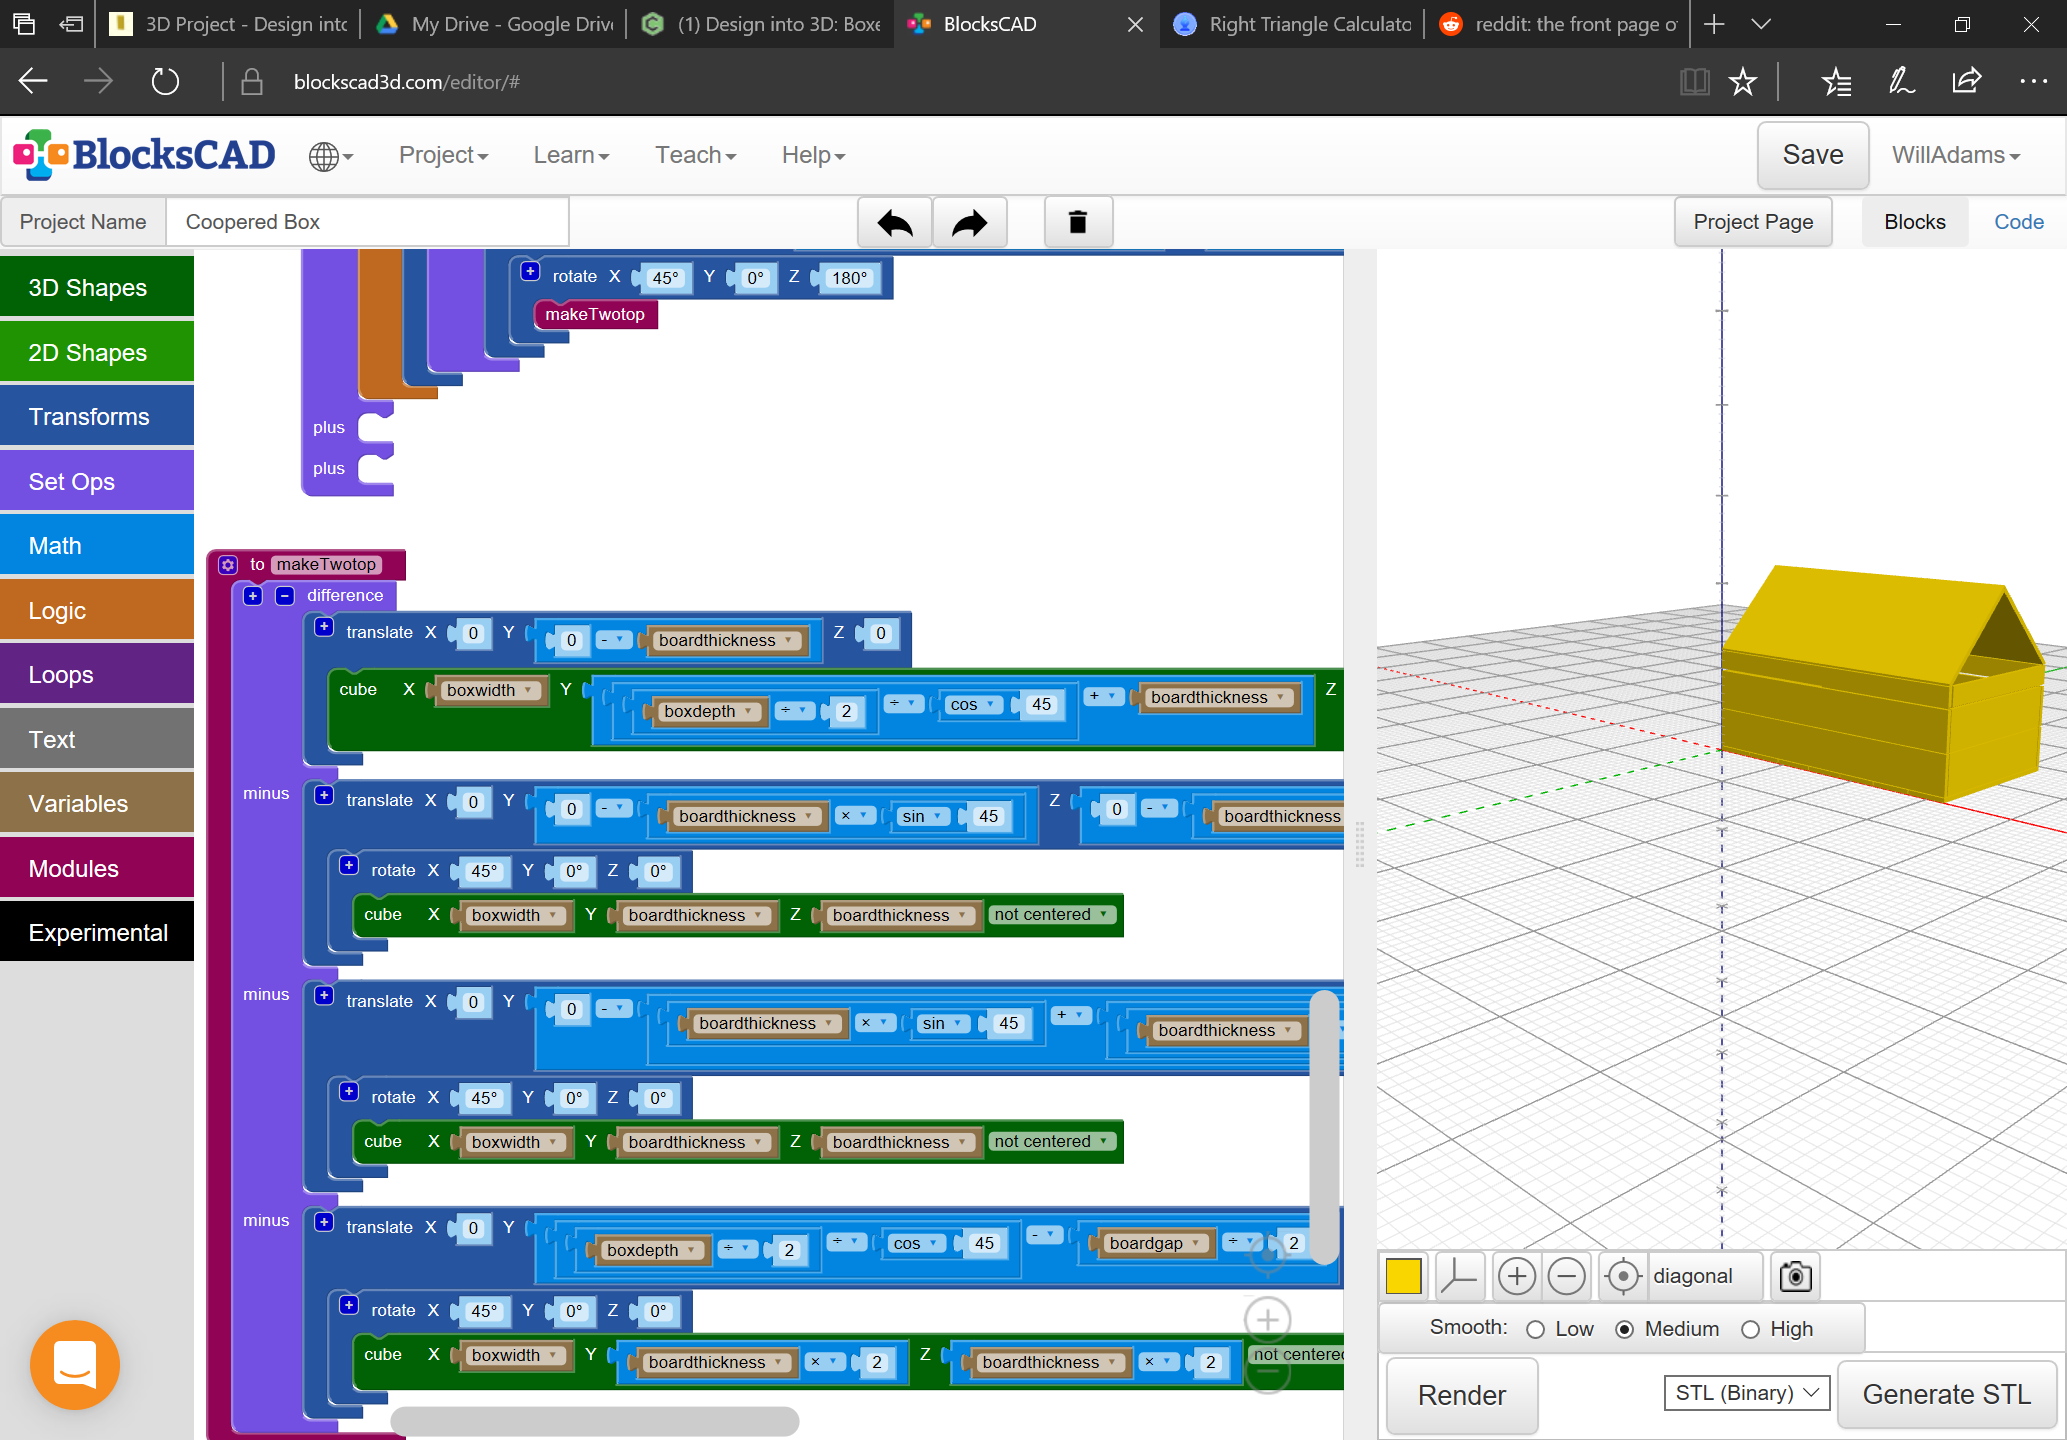
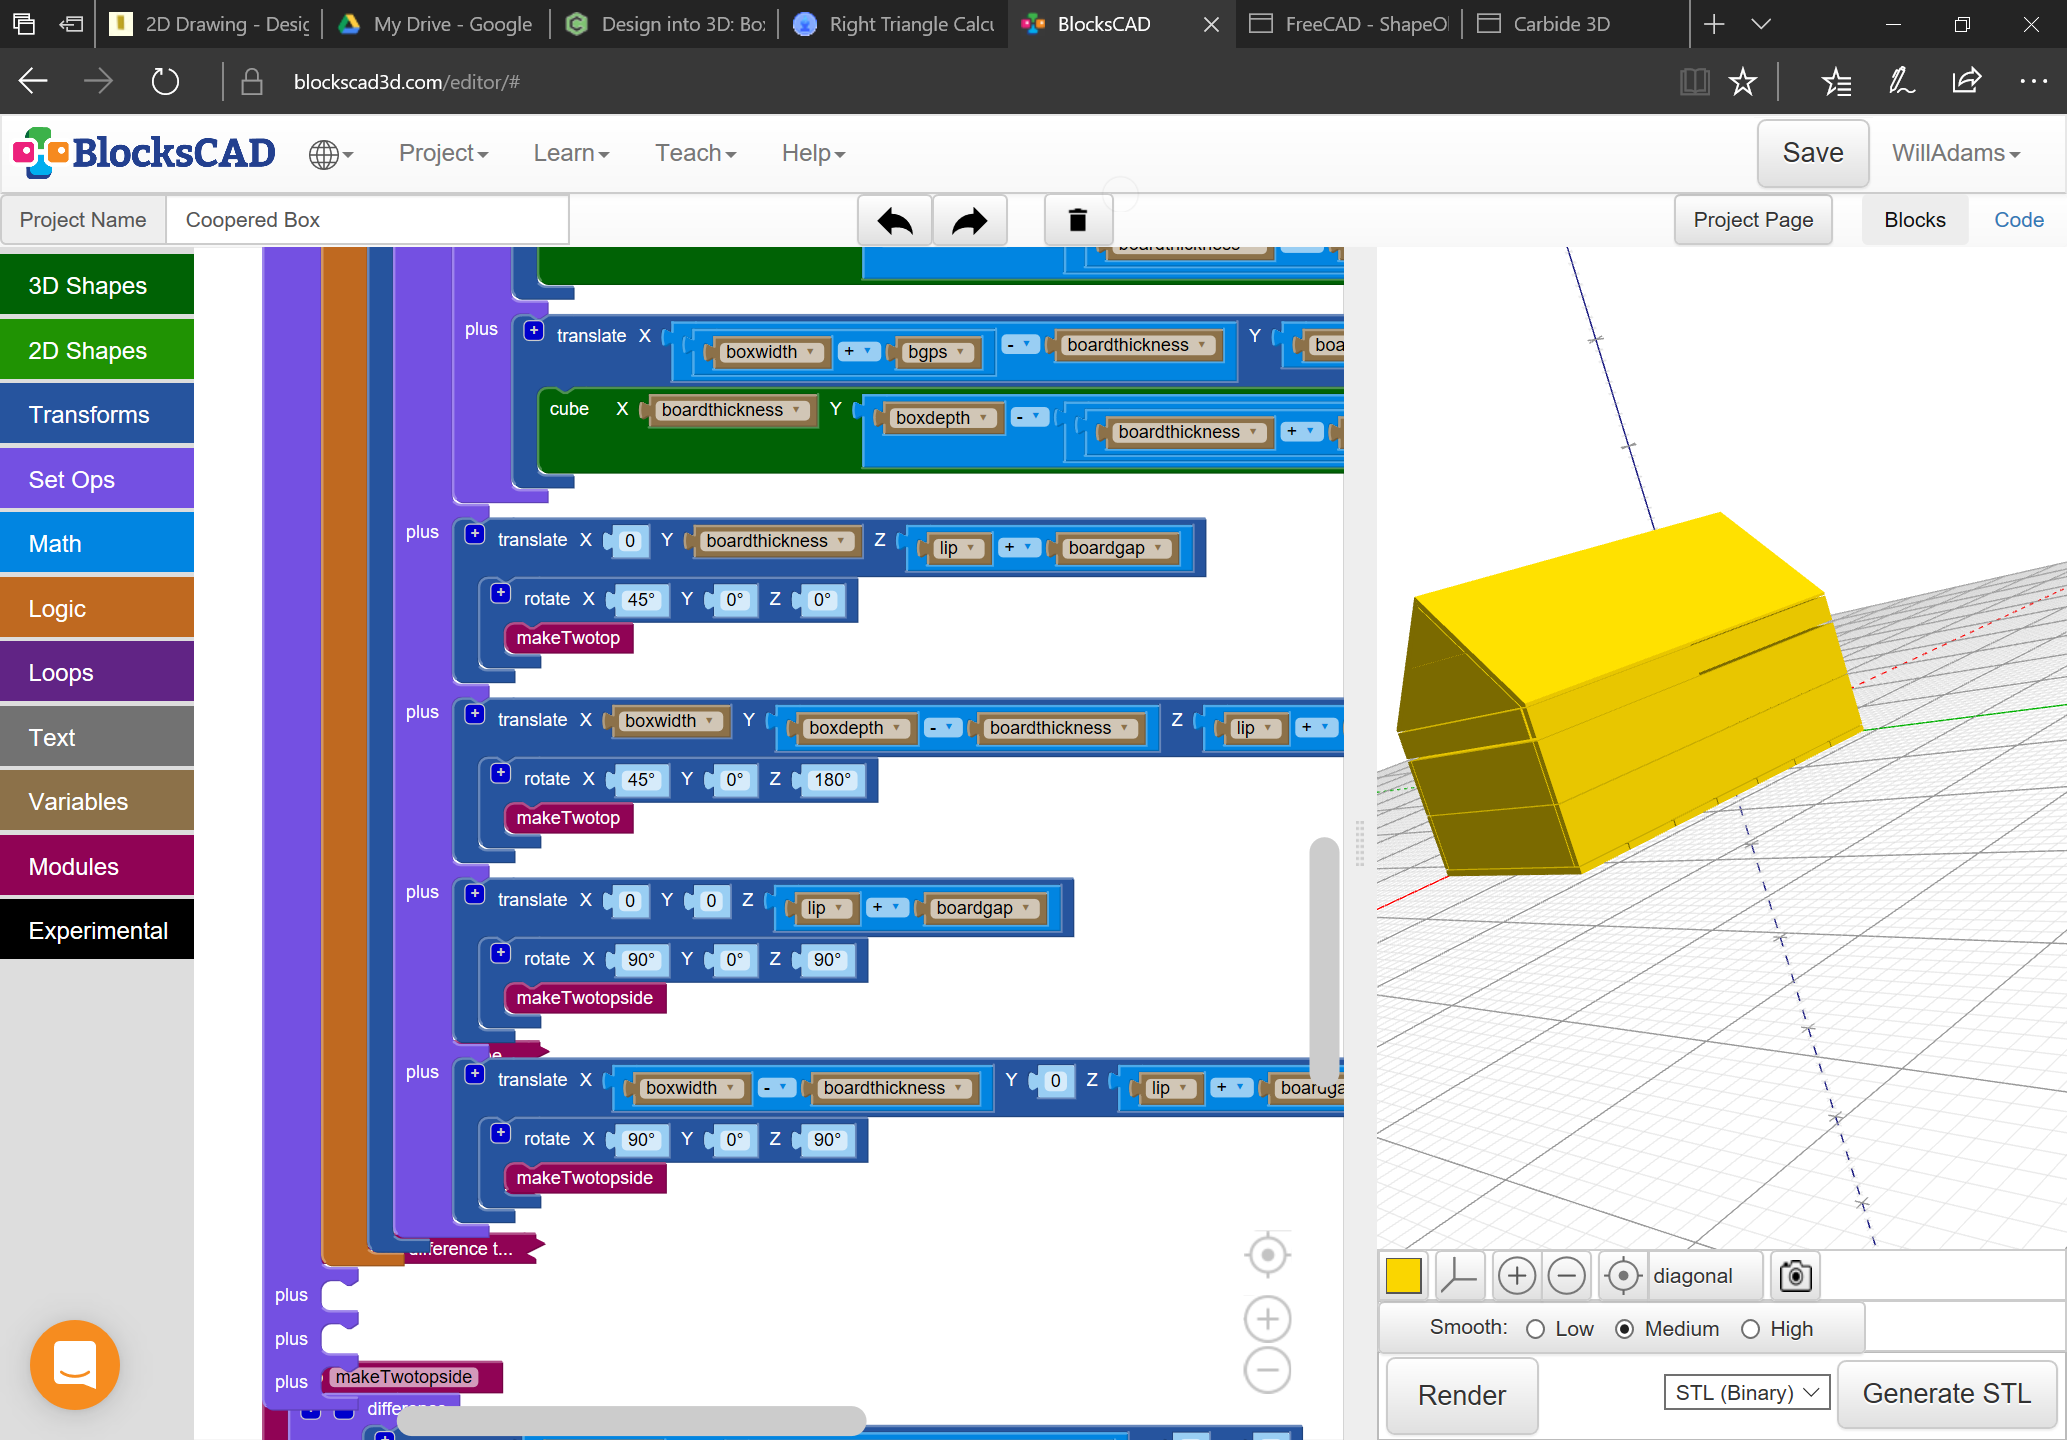
A further consideration, for maximum interior volume we want the board edges to meet at the internal edges, which makes the boards which meet the lid skirt want a two-sided operation:

1 Like

And it’s a house:

Next up filling in the ends: #done

then we do a 3 sided top.

1 Like

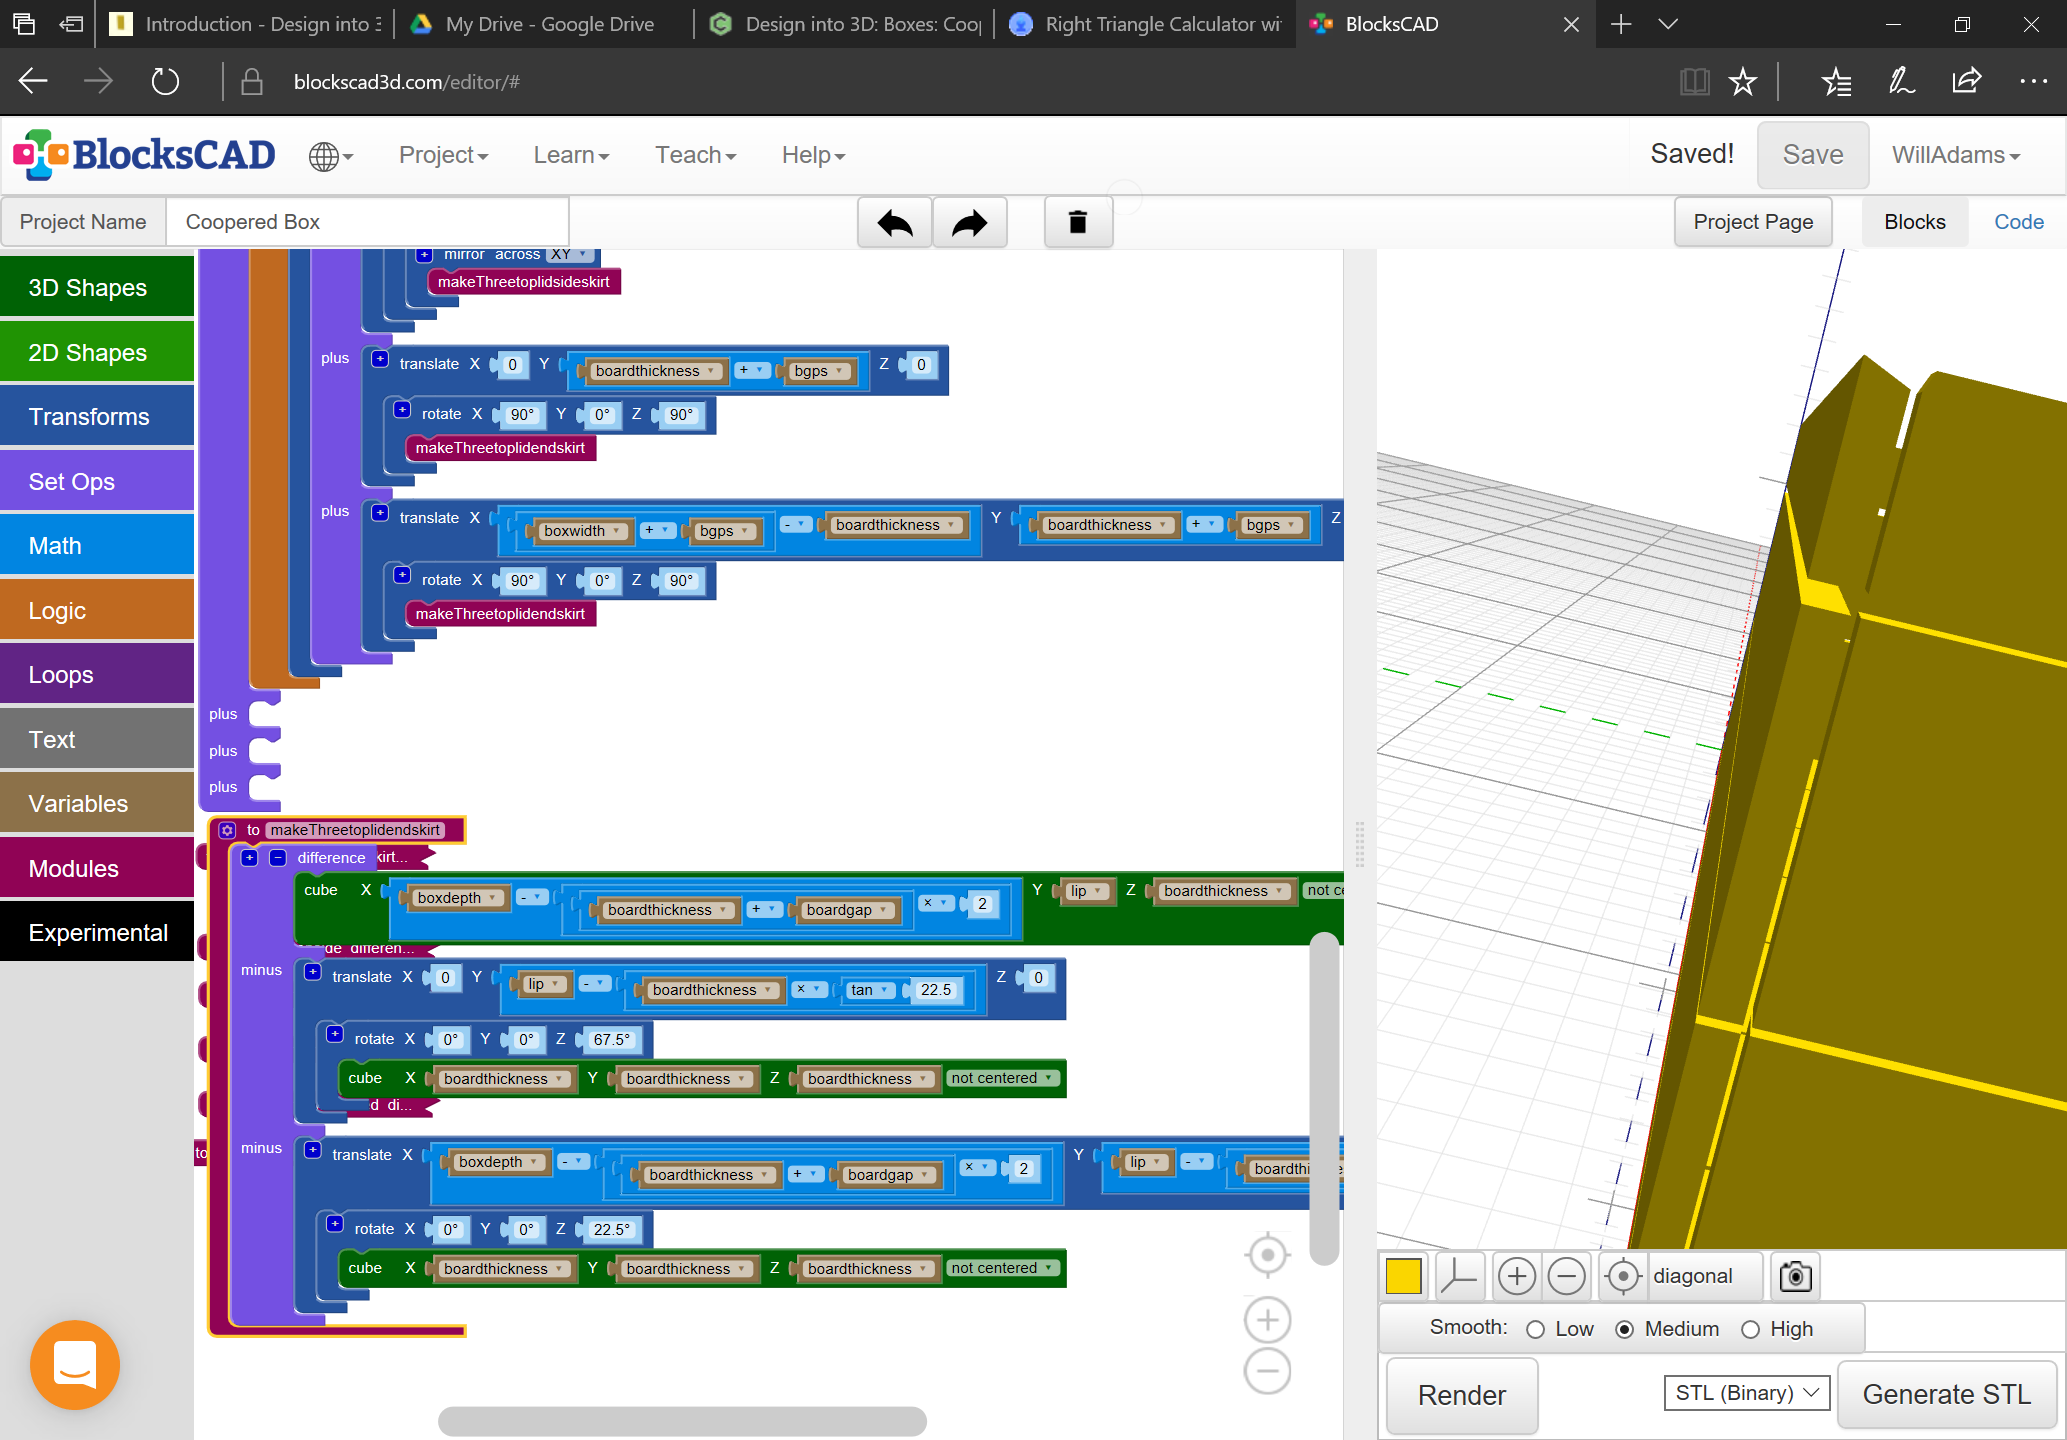
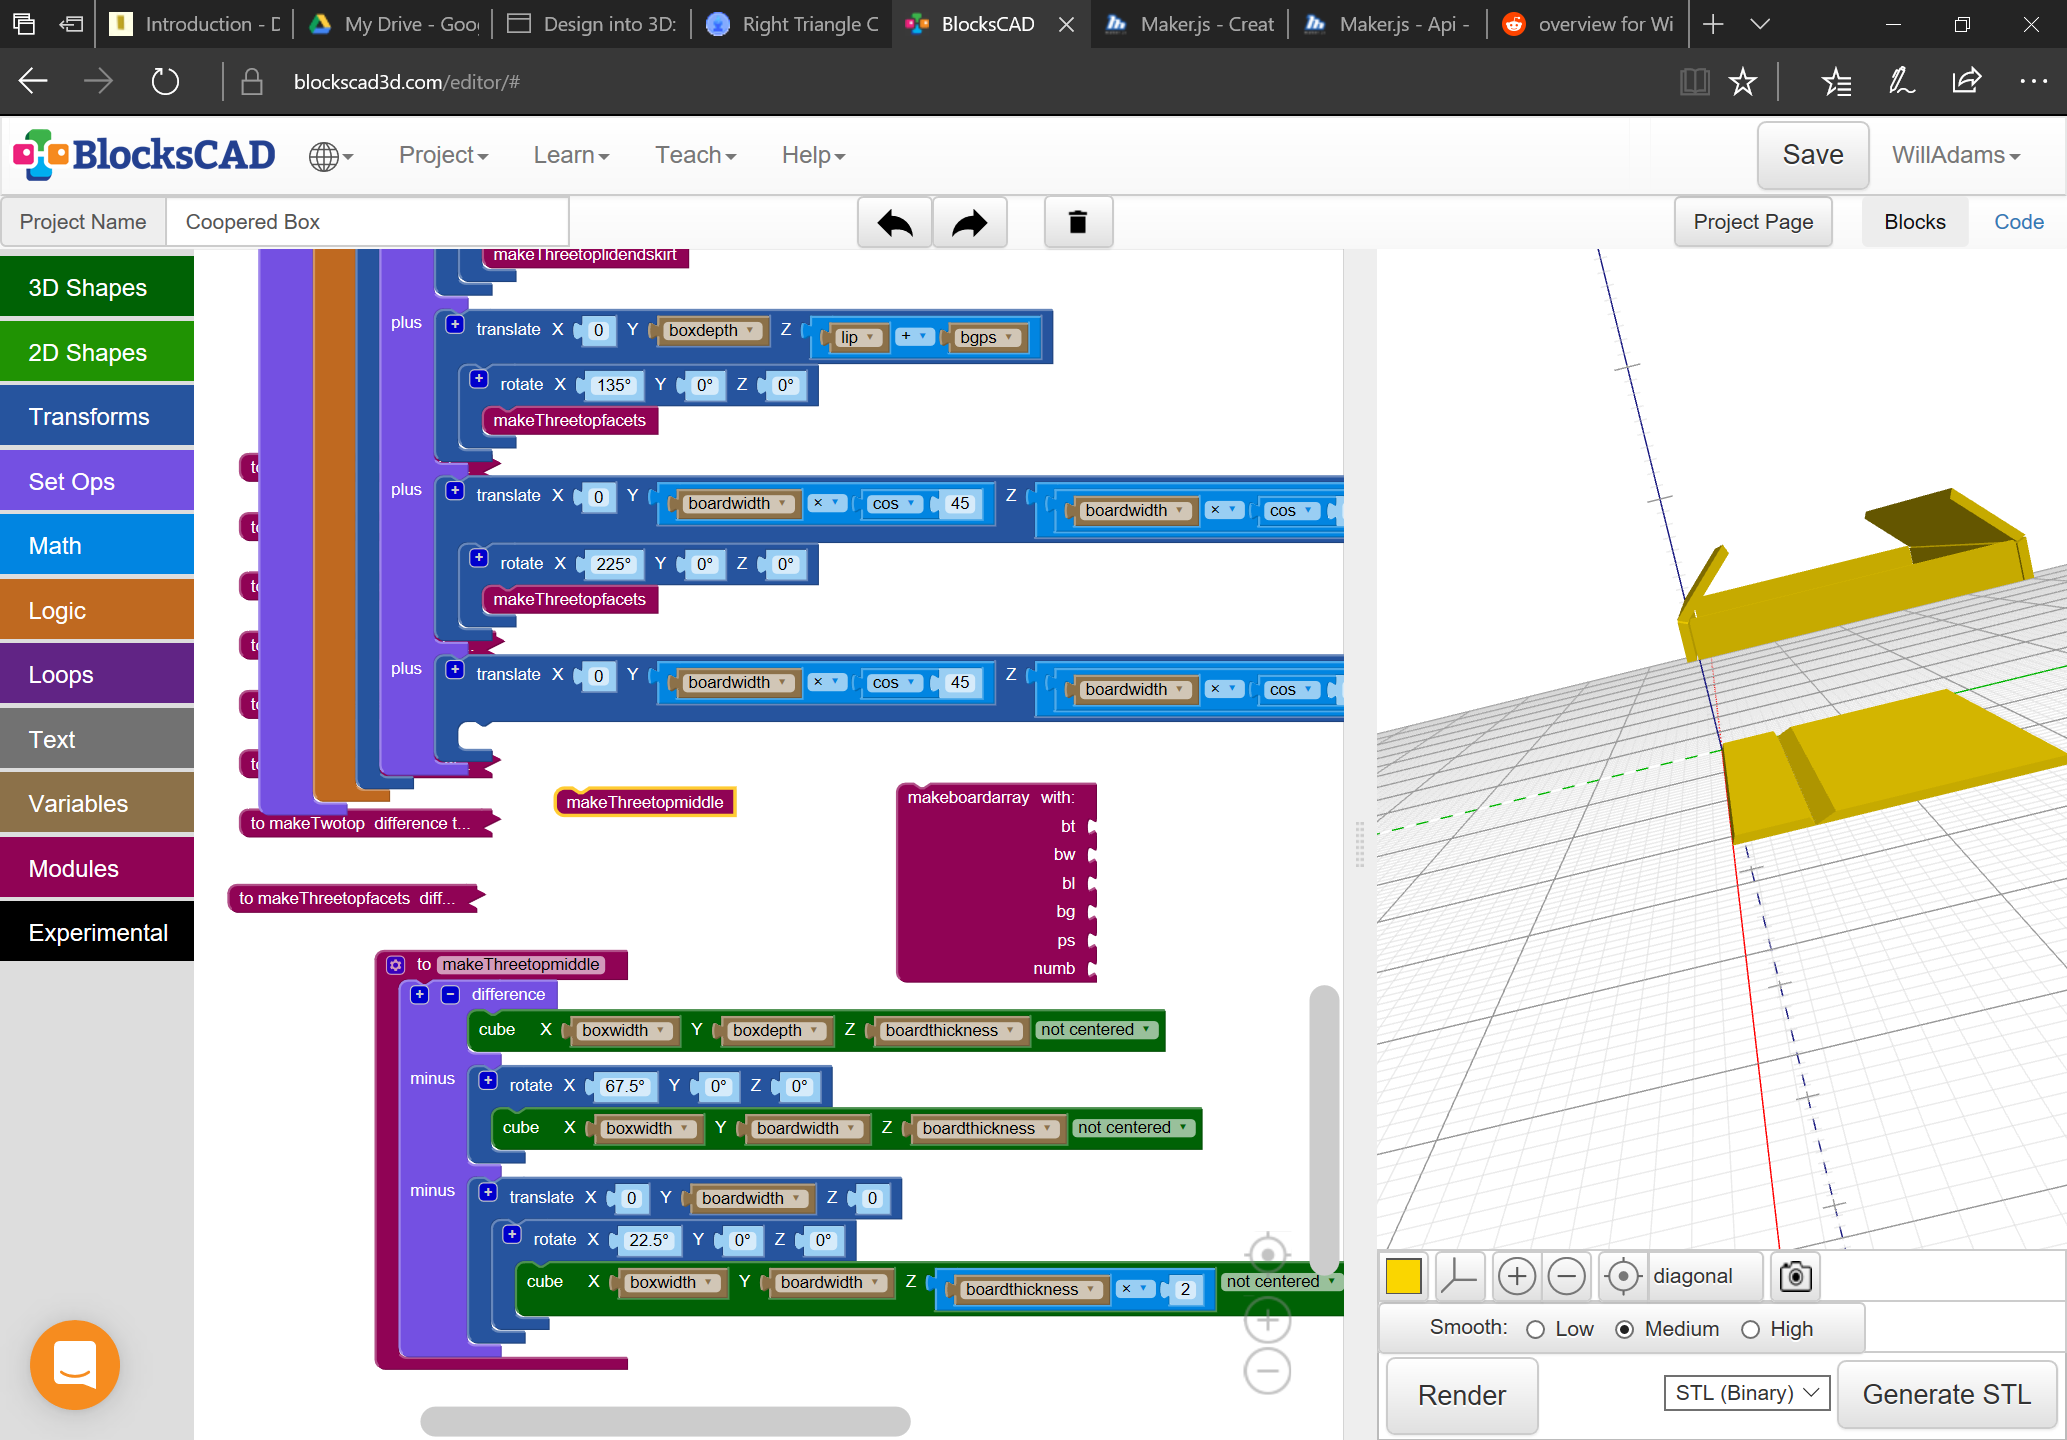
Okay, the 2 sided top is pretty much just a placeholder. For the 3 faceted top, we actually want good engineering and connections, so we need to angle the parts thus:

Next up is modifying the lid skirt to have that bevel along the top edge, then fitting in the other parts.

1 Like

Two choices here, we could reduce the board width of the ends, or, it’s better aesthetically and in terms of material usage to just notch them:

Next we have to add the 45 degree boards for the two side facets.

1 Like

A useful technique — hide the lower portion of the project and use that area for developing the part geometry:

Then, once the geometry is worked up you can shift it into place.

1 Like

Finally we have the 3rd option done:

The balance should be achievable with a loop.

1 Like