Erm I can't reach the waste board!

Thanks, @WillAdams.

Actually, the instructions refer to it as a baseplate board, but it didn’t say I needed a spoil/waste board too!

Never mind, my learning curve is currently quite steep, so this is a minor thing. I’ll get over it :slight_smile:

2 Likes

Yes,

There is a lot to learn in short order as you start off with the machine.

For your spoil board, I used T Tracks in my initial spoil board design, it seems to be quite expensive for Carbide to ship the MDF in the T-Track kit so I just bought them from Amazon and then this kit of clampy parts from Axminster;

who supply T Track too

But I quickly found that the T Track was rarely in the place I wanted to lock down a clamp for the small or oddly shaped jobs I was doing and ended up doing what many others have done and bought a bunch of threaded inserts;

https://www.amazon.co.uk/sourcing-map-Furniture-Threaded-Interface/dp/B07GZS3GMN/

and had my machine drill a square pattern into the spoilboard to insert these in the board below.

I just use 18mm MDF for my spoil board and jig boards, I bought a 1220x2440 and chop bits off with a track saw as I need them.

Have a search of the forum for phrases like
https://community.carbide3d.com/search?q=t%20track%20%23shapeoko
or
https://community.carbide3d.com/search?q=wasteboard%20insert
to see more examples of what other people have done

I found the most useful thing was, once I had squared the machine properly, have it drill a grid of 10.1mm holes for me to put short 10mm lengths of Aluminium rod in as alignment pins so I could get parts square on the machine easily.

HTH

5 Likes

Thanks, @LiamN.

I’ve shopped at Axminster before and they do have some really good stuff - although I find they can be a little expensive! I bought a router table, stand, riser and extraction ducting, etc. from them for my Trend router. That was an expensive day!

The jury is still out on holes vs tracks, although I think I’m leaning towards holes!

2 Likes

Install something and use it, that way you’ll find out what works for you and the things you want to make.

4 Likes

Fair enough, @LiamN :slight_smile:

So, I don’t know if my sums are all to pot or completely irrelevant, but I’ve done some measuring:

The maximum and minimum distances between the bottom of the collet nut and the baseboard are 5.5"/140mm and 1.9"/48mm respectively, so the maximum available cut depth is 3.6"/92mm.

The ‘useful’ length (1/3 of the shank length + end mill cutting length) of my selection of end mills (assuming 2/3 of the shank is in the collet and I don’t cut any deeper than the cutting length!) ranges from 0.58"/14.7mm to 1.35"/34.4mm.

Given the above, it looks like I’ll have to install a waste board that’s a little under 1.3"/33.3mm thick.

Does that actually make sense, or am I being a complete dunderhead?

Also, doesn’t this mean the depth of cut is artificially ‘improved’? Raising the spindle by ‘x’ inches and then having to raise the waste board(s) by ‘x’ inches to compensate seems pointless :frowning:

Thanks

Seems about right, although I’ve not used the Z+.

Because I have a large 80mm spindle I have a bit more flexibility in where I mount it and what the reach is. Even so, I still have to move it a little if I want max clearance under a large cutter vs. full reach with a very small cutter.

The total travel sounds about right, the usable travel on the HDZ is about 130mm and that’s meant to be a bit more than the Z+

Sometimes the problem is being able to retract a large cutter high enough to clear the top of a workpiece, sometimes it’s being able to reach down with a small cutter. There’s no goldilocks setting I’ve found yet.

You can get some longer reach 1/4" and 8mm cutters, there are 6 & 8mm collets available for the Makita I believe;

You’re right that, all other things being equal, you should choke the cutter up into the collet but depending on the cut and the cutter I have run 1.5" stick out on a good 1/4" cutter where necessary, taking the cutting speed and maybe RPM down a little to compensate. On an 8mm cutter I can run more stick out before it starts to vibrate. Of course, this is only done with a collet grip length of cutter still in the collet. I have a couple of really long reach 6mm & 8mm cutters, one has 65mm flutes, but it’s scary to run because of the wobble, I only really use that for boring deep holes in wood and run it slowly.

It’s not always just the flute length that controls your depth of cut though, sometimes you’re reaching into a pocket and machining in there so you can end up machining well below the surface of the wood, check out this guy’s stuff (it’s a good watch anyway);

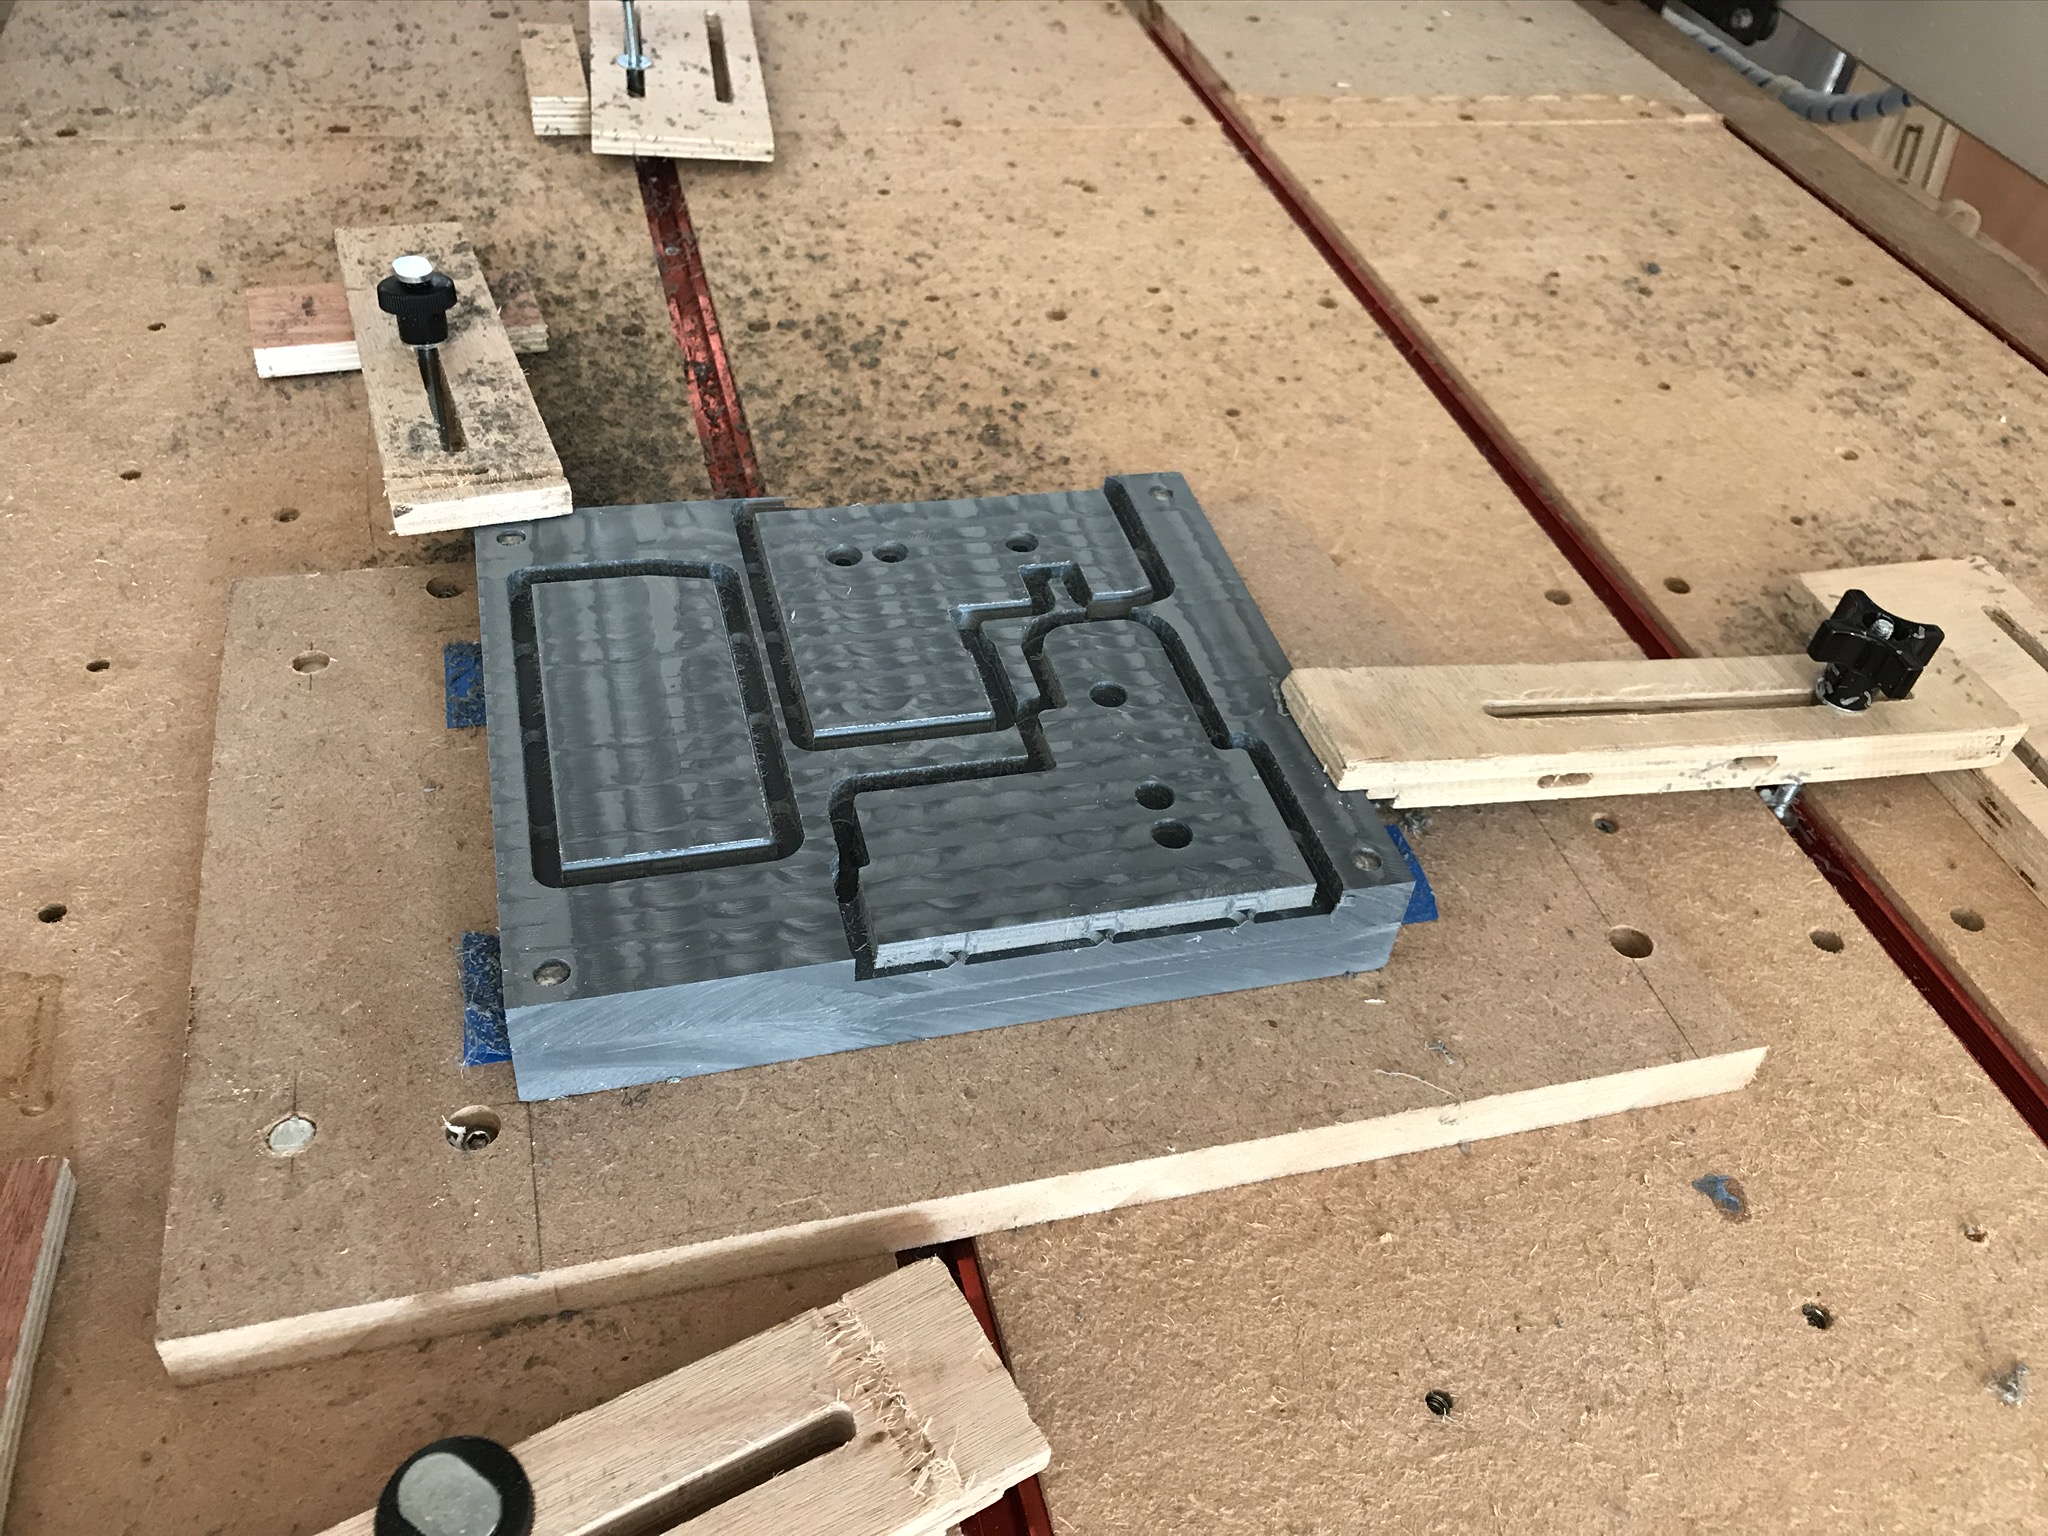
I wouldn’t think of just one height for workholding though. I have a spoilboard with the T-Tracks and threaded inserts as my ‘base layer’ but I frequently attach an additional board for workholding, here’s one I’ve been using for metal and plastics, it’s still smooth MDF so the tape & superglue trick works well, it also has holes for horizontal and vertical alignment pins for quick work setup;

I find it’s not uncommon to put an additional board on top of the spoilboard for some jobs, with my old AMB Kress spindle I had the same issue of not being able to get the 1/8" cutters to reach the spoilboard so I kept a piece of 18mm handy as an additional raised spoilboard layer, I drilled some holes in it to match up with the threaded insert locations.

For small workpieces moving them up towards the Z axis has a few advantages, the first is to make them easy to reach with small cutters but the second is that one of the largest sources of deflection in the Shapeoko is the ‘nod’ of the Z axis around the X rail which couples Z and Y deflection (up & down with front & back). The further away from the X rail you are, the larger this deflection becomes. So all in, getting up closer to the X rail is no bad thing.

If I had the Z+ I think what I’d probably do is set up my spoilboard on top of the supplied baseboards in 18mm or 24mm (3/4 or 1") MDF, put the T tracks or threaded inserts in it, level it properly with the cutter and then keep an additional “top board” to throw on top and lift the workpiece when I needed to use small cutters. I’d might also make this “small work” board smaller than the bed of the machine to start with, unless you want to do v-carve or engraving on large pieces.

Does that help at all?

5 Likes

Thanks (again!) @LiamN, of course it does!

I thought I would need to defer to having two boards above the base board, but it didn’t occur to me to have a smaller one on top for (potentially) smaller workpieces or to use smaller end mills. I also like the idea of tracks and threads in the first layer. This will at least make more use of a 4’ x 8’ board, as I don’t intend to use it to build - and I don’t really have anywhere dry to store it, just my garage.

It’s only really the spoil board that’s holding up production at the moment - oh, and a USB male to male lead. I need to get the board ordered and delivered, as I can’t get it in my car!

I might even pop into Axminster on my way to Brighton for the t-tracks…

Thank you, and you have been a great help!

2 Likes

If that is to extend the USB cable past 6’ — please don’t — we recommend no more than 6’ of length.

Great,

Being flexible about how you mount stuff is what I’ve found to be key, I recently made my Shapeoko pretend to be a little milling machine :wink:

I’m in the process of putting M4 threaded inserts in the baseboard for the T Tracks to replace the self tapping screws I optimisically used to hold them in the first time round…

2 Likes

Hi @WillAdams,

Nope, it’s not. I’ve connected the supplied cable from within the cabinet to an external socket, and I’ll use a short lead to connect it to my laptop.

Thanks for the pointer, though :slight_smile:

2 Likes

Awesome! Aren’t the self-tapping screws very good for securing the t-track, then?

I looked at the link to the 3d koi you provided.

The guy’s a genius!

Nope, they kinda suck :frowning:

I bought a bag of M4 inserts from Amazon (the usual SourcingMap cheap ones) and drilled out all the self tapping holes for the inserts and then put M4 x 12 countersunk small bolts though and they’re holding much better. Also, I can take the tracks out and refit them without weakening the screw fixings.

The Koi maker is on here too, he’s posted some great tutorials on how he does his stuff;

1 Like

@LiamN, I’m confused.

Did you mean you bought the inserts then drilled out the threads out of them to use the countersunk screws, or did you just use screws into the threaded insert?

Sorry if I’m being a bit slow here :frowning:

1 Like

Ah, sorry,

I meant that I initially used no 4 x 3/4 self tapping wood screws to screw the T tracks down to the baseboard but those tended to let go when I tightened up clamps.

So I removed the self tapping screws and drilled the holes in the baseboard out sufficiently to fit the M4 threaded inserts into it and then use M4 countersunk machine screws to bolt the T tracks down into the inserts and that’s been much better.

You still have to be a bit careful about gorrila tightening the clamps as MDF is just not very strong but it’s much better.

Ah, now that makes sense :slight_smile:

I was wondering if you wouldn’t mind having a look at my proposal for my ‘waste’ board (attached), although I don’t want to cut down to it too often!

The thing I’m concerned about is the end mill I’m using, which has a cut depth of 0.05", but as the flutes are the same diameter as the shank, I changed the cut depth to 0.2" per pass. Would this be OK, do you think?

I haven’t added the holes for the tracks, because I don’t know the centres, yet :slight_smile:

Thank you.

Petes Version Actual.c2d (519.0 KB)

Just downloading CC so I can look at.

Not sure I understand on the end mill, got a link to it?

Right, looking at the design, do you have a table or track saw or is the Shapeoko your best tool for making a straight cut?

Actually, I’ve realised that not suitable for wood, as it’s an upcut. I’m thinking of using this: https://www.inventables.com/technologies/solid-carbide-2-flute-straight-end-mill instaed.

No, I don’t have either. The best I have is a router table or a circular saw, so the Shapeoko is probably the better option.

Wait, I have a table saw (sorry, I was thinking of something else). It’s a Bosch GTS10XC