Yes if you connect the F pin to Gnd it will act as a Feed hold button
9 Likes
Luke,
Thanks! I appreciate your quick response!
Great things continue to happen at C3D and I’m sure we are all C3D fans because of your high quality products and spectacular company-customer relationship. 
4 Likes
The left front end plate would be a idea place to implement a E/Stop or E/Pause whichever is the correct term. Carbide 3D could use a lighted button identical to the power button on the right except maybe with a red light instead of blue. Since most people use the bottom left as the zero for projects it would be ideal.
1 Like
It would be nice!
I might be in the minority here, but I much prefer the support for hardware buttons over more software/having to rig touch screens.
I got some 24V switches that are 19mm like the power one… but I accidentally got latching instead of momentary and the actual button is much smaller. Time to try again. Might have to go Digikey or an electronics specific retailer, as a 24V, 19mm momentary, with a red LED ring, that matches the factory one is proving hard to find
1 Like
@SLCJedi I don’t know if that is what your after but it is just like the power button on the right except momentary.
1 Like
I had to go down the rabbit hole on Dupont 2.54mm pin assembly and crimping. I had always just ordered pre-made single pin wires and soldered. Needing to add the two wires to the z-limit 8 pin plug took some research but it’s always great to learn a new skill.
Thanks everyone for the information.
3 Likes
After some cutting yesterday that ended up going haywire (completely my fault) I now understand why this is so important.
So from a parts list perspective, it looks like I need to buy
- F pin connector (that has two holes) https://www.digikey.com/en/products/detail/molex/0022012027/171991
- Momentary Switch https://www.amazon.com/dp/B075Q9QSX4/ref=cm_sw_r_cp_apa_fabc_WZKGPCMN4489BK1JK4FC
- Longer strands of wire
Questions (I realise these seem ridiculously naive, but I am completely new to the world of electronics and wiring):
a) The momentary switch has 5 wires, my assumption is that I just need to use the black and red.
b) Does it matter with this switch which wire goes in which pin? I wouldn’t think so, but asking anyway.
c) The switch would be “press once for pause” and then “press again to restart”. Can you confirm that I wouldn’t need to hold my finger down on it?
e) any special tools needed to connect the F pin to the wire? If there is already a premade pin with wires hanging out that would be easier for a dummy like me? If so, can you send the link?
g) what gauge wire do you use?
@SLCJedi I’m not in favour of adding this to the actual frame as it wouldn’t be easily accessible if you had an enclosure.
2 Likes
a) The momentary switch has 5 wires, my assumption is that I just need to use the black and red.
b) Does it matter with this switch which wire goes in which pin? I wouldn’t think so, but asking anyway.
Black and red are used to power the light in the pushbutton… using DC with black=- and red=+… so I would suggest an independent 12V power source (wall wart) if you want to light it up
To wire the pause function, you use the white and blue wire to the controller. Probably doesn’t matter but I would connect the white on the PB to the ground on the controller, and blue to the FH pin.
c) The switch would be “press once for pause” and then “press again to restart”. Can you confirm that I wouldn’t need to hold my finger down on it?
press once to pause, wait for the z to complete it’s upward movement, press again to enable the resume button on the screen and use the mouse and screen button to resume
the PB will not function as a resume button if it’s the same as all previous controller designs
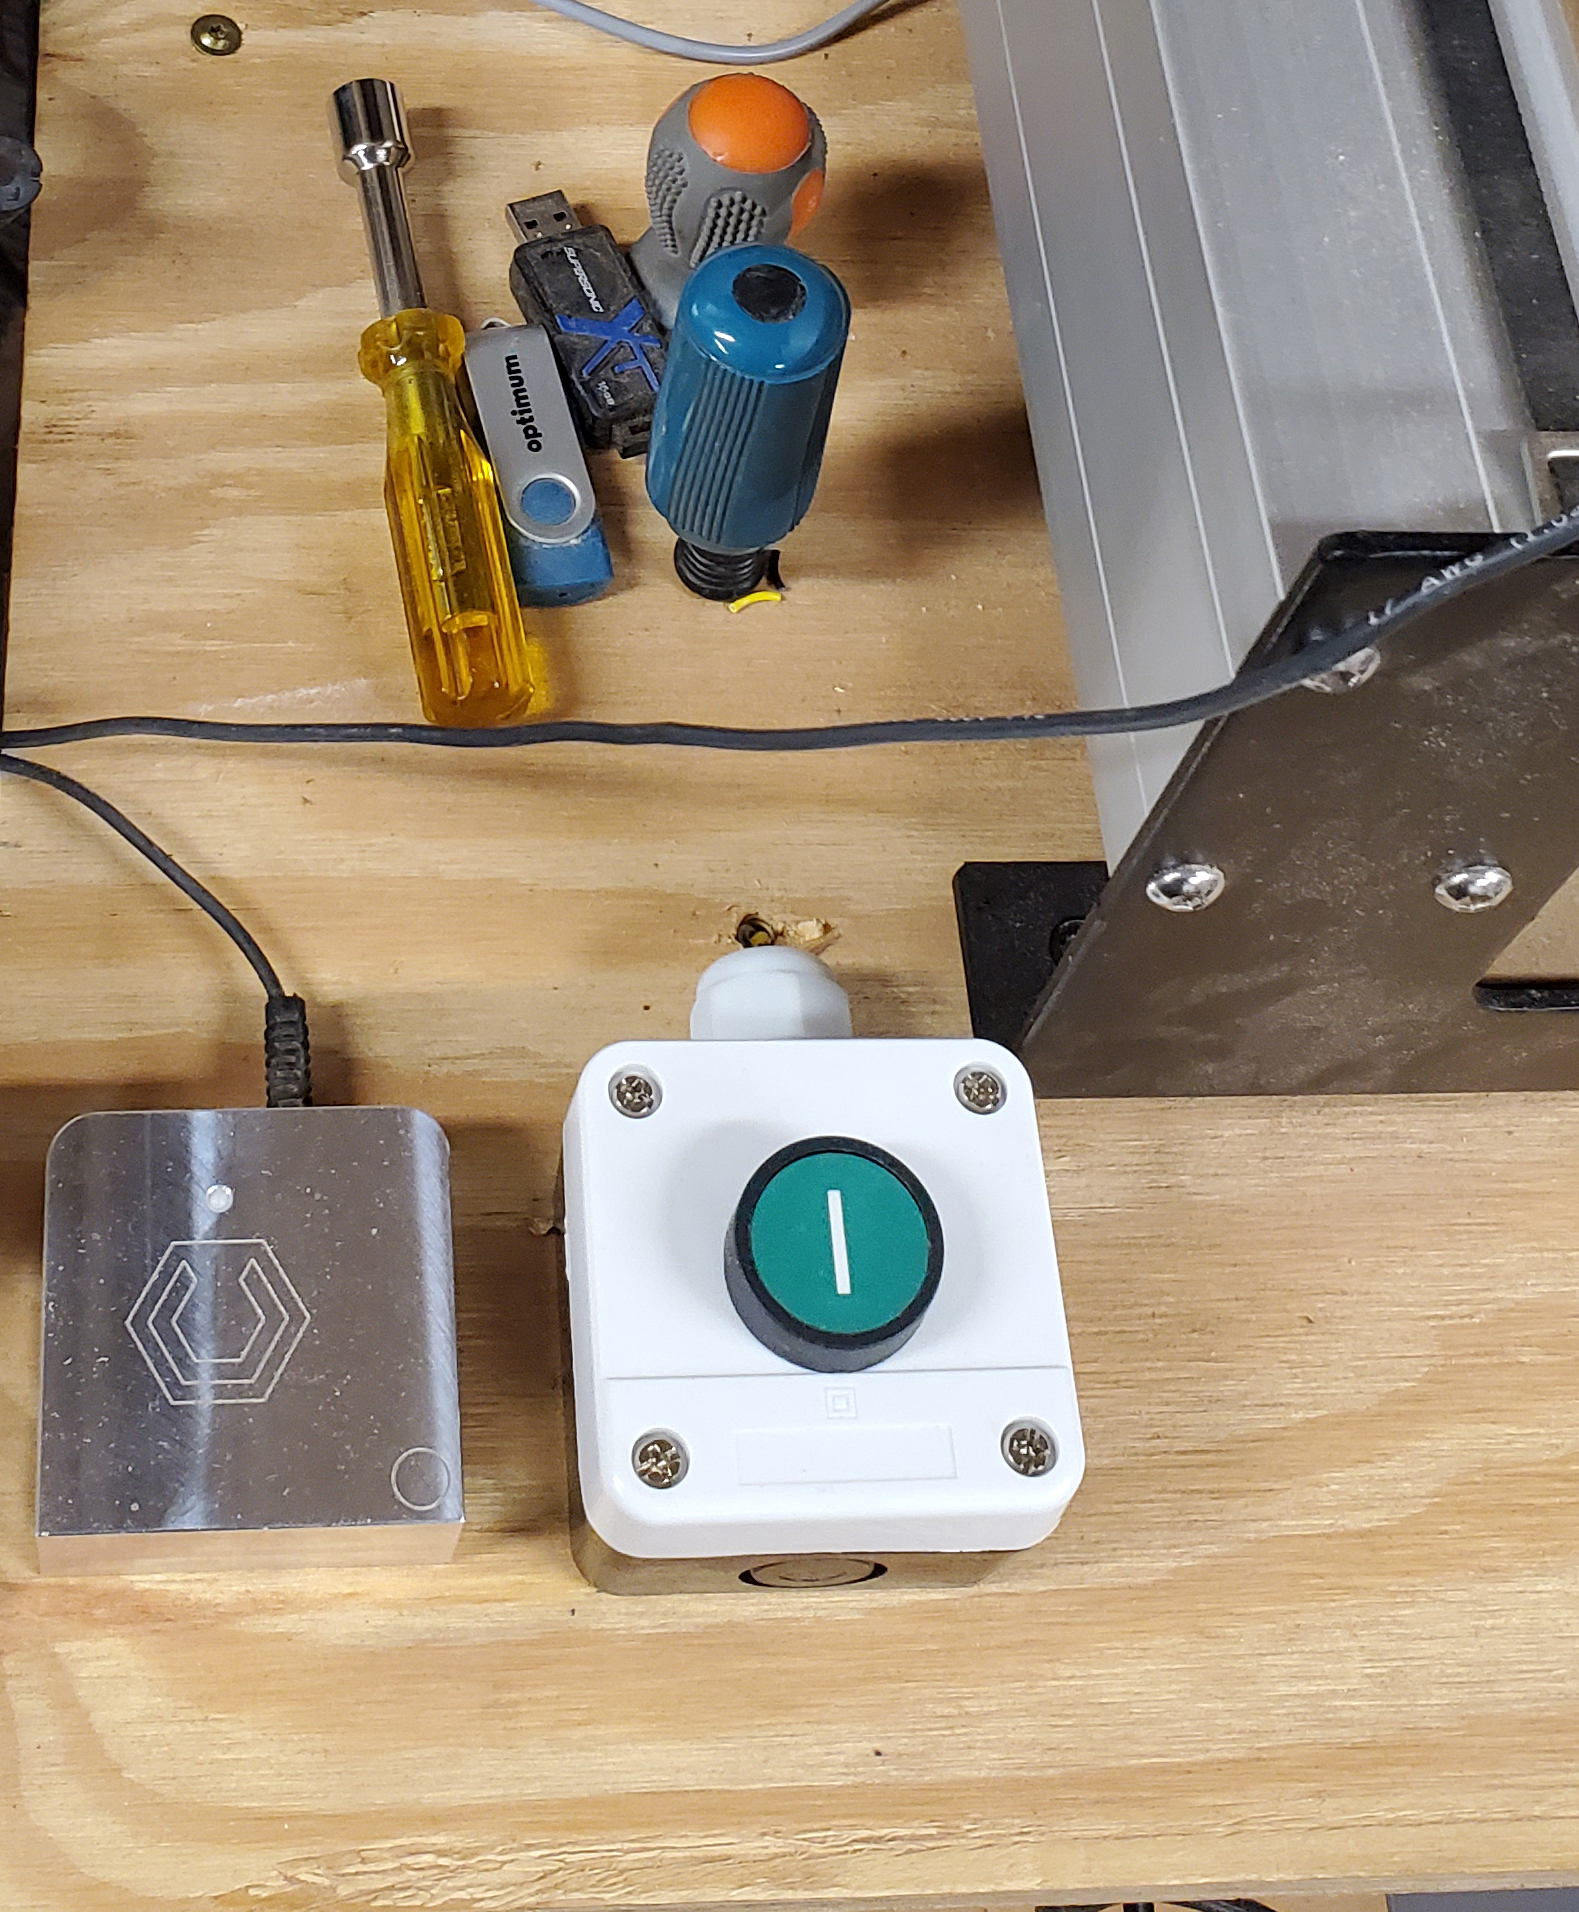
If you link here, you can see the button, enclosure and location I used… location works perfectly for me
https://www.facebook.com/groups/unofficialshapeoko/permalink/865079260566701
Note: the separate connector on previous controllers makes it easier to create a “plug and play” kit. I’m going to see if I can create a kit for the Pro eventually, but I don’t have a Pro (yet) to experiment with.
2 Likes
Just a little more info - at least the way mine works (non-pro) - This behavior depends on what’s going on when you press the pause button:
If it’s cutting, then yes, press the momentary (no need to hold) and it immediately pauses - the screen does not change … when you press the button a second time, the RESUME button will light up on your screen and you have to click that in order to restart.
However: If you press the Feed Hold during a Bitsetter or Initialization sequence, the shapeoko will immediately hold. When you press again, it will RESUME the sequence where it left off - there is no button on the screen to click.
4 Likes
Can confirm this is the behavior on my non-pro as well. I only had experience feed holding during those initial movements at first, so my first feed hold during a cut scared me because the head starts moving down into the part before it turns on the router. Now that I’m used to it it doesn’t phase me, but it is a pretty big difference in operation.
From what I can tell, moving to a rapid position shortcut also stays permanently stopped, so you can feed hold if something is in the way but then you will have to tell it to move again in CM.
2 Likes
Which machine do you have?
The momentary switch doesn’t need an LED. These would be easier to wire.
1 Like
I have the Shapeoko Pro.
Just an opinion…but not unlike a panic paddle, you want this thing to be easy to find and hit. These little buttons might look sweet in the front of the Shapeoko Pro, but in a semi-panic situation - will you hit them?
Mine is a big button…can’t miss it…even with gloves on
3 Likes
This small red button has served its purpose well since I made it a while back. Others I have made these for have nothing but positive comments.
Much of the time, the button isn’t hit to prevent total thermonuclear destruction… often it’s just to stop for a thinking moment, or to check collet tightness, a move in the wrong direction, etc.

Brandon, the connector you describe is not what you need, it’s the pins that go in it!
6 Likes
Based on the size of the panel, this looks to be almost the same sized diameter as mine - but since there is no shroud around it, it’s effectively a bigger press area than mine. I like it! Whatever you choose needs to stand out and be easy easy to press.
My last press was to stop a spinning bit from plunging into my BitSetter button (my brain seized)…it wasn’t thermonuclear destruction, but I saw the life of my bitsetter (and $120) flying by my eyes! I also have a panic paddle, but I’m glad I was able to hit the pause, let the bit spin down and then complete the job…Feed Hold rules.
3 Likes
I have done that in casino slot machines…
but, one of these days…
Different pins on the pro. They are different connectors.
2 Likes
Thanks!
Understand that C3D don’t want to publish wiring diagrams unless there are products sold by C3D due to responsibility…
That said, a simple standalone switch in a plastic box would have been a VERY valuable extra feature to be included in all future Pro shipments. With a breakout extension connector to enable future BitZero connection though.
1 Like