Hi Everyone. I am now 3 days into owning a Nomad 3, and I’ve just joined the forum. I have searched the existing threads but haven’t found anything that addresses this question, but apologies in advance if my search should have found something.
I’m trying to engrave text that is about 4mm high onto pre-anodised aluminium plate (from Hammond 1455 enclosures). I’m not after anything fancy, but really the finer the better. It’s not clear to me what the work flow is supposed to be. So I entered some sample text in CarbideCreate using fonts like Open Sans, Dotum and Gulim. I made tool paths from this text using the Vcarve tool and the #502 engraver bit at 0.1mm to 0.2mm max depth. I used the speeds and feeds settings built into CarbideCreate for Aluminium and the #502. (The features did not appear in the CarbideCreate simulation). I loaded the tool paths into Carbide Motion and let the Nomad do its thing .
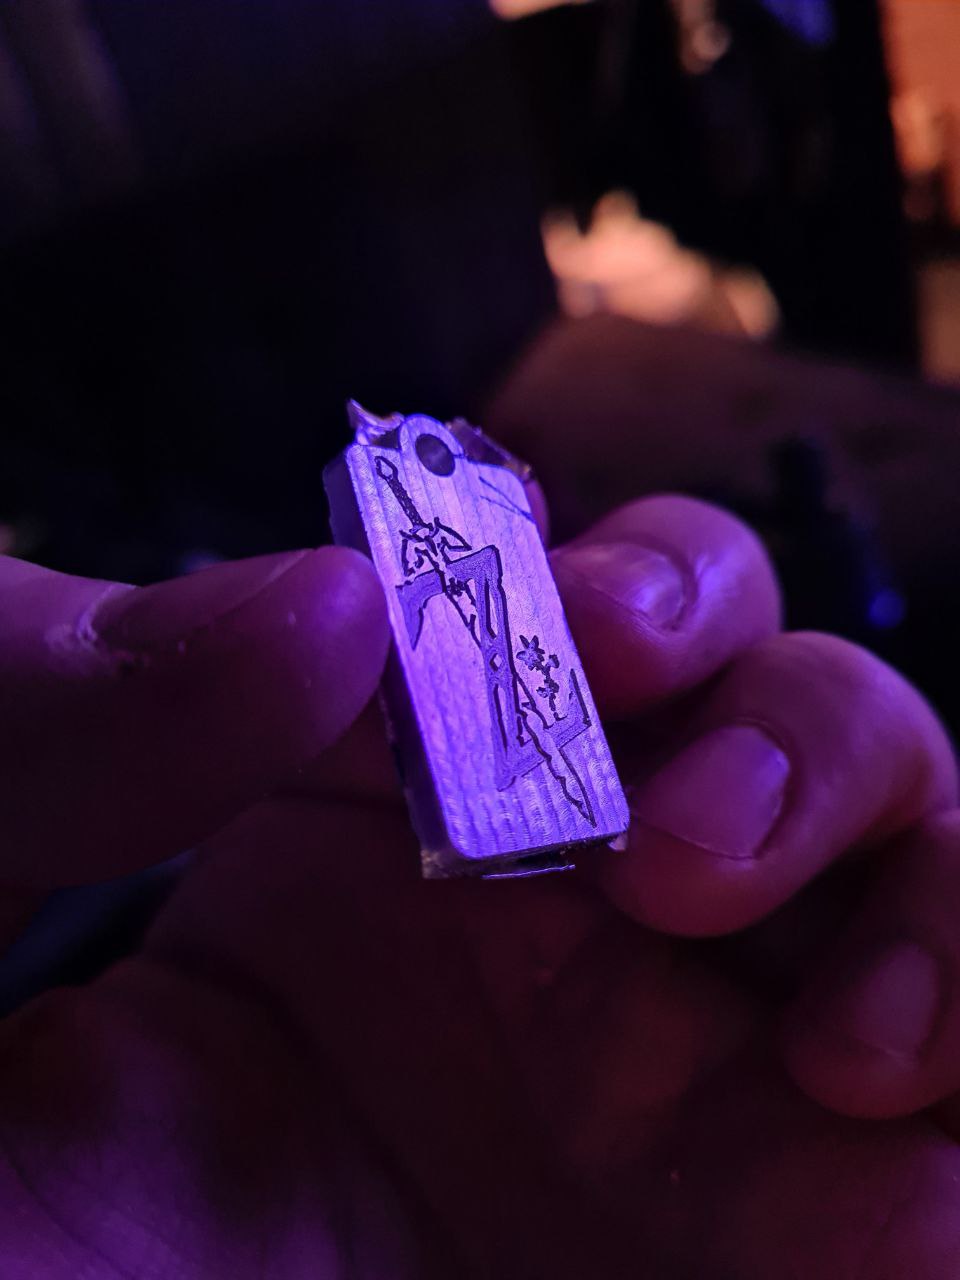
It kind of started out well, but by the 20th letter it looks like the cutter had completely lost its mojo. The top edge whether the anodised surface transitions to bulk metal is a blurred mess and there is aluminium swath stuck down in the channel.
My spoil board is mounted directly to the base plate, and the aluminium panel is sitting in a pocket that was machined into that spoil board in the same installation only about an hour before I tried the text experiments. Their is no residual dust in that pocket and it should be level within the spec of the machine.
The panel is screwed down on four corners and there is no perceivable movement there either.
I have good success creating text on alu (have not tried anodized) with just a super sharp engraver with a tiny point. I just added a tool with 0.1mm diameter in CC and use pockets with the same or half the diameter as stepover.
Looks similar to the drag engraver.
It might be 0.2 or 0.3 mm deep, 0.1mm stepdown.
I have experimented with anodised Aluminium and regular Aluminium. I have also milled silver.
For engraving patterns, characters etc: MC Etcher every time. Fine tip engraver bits perish and quality (resolution) drops. Biggest problem though is engraving a surface that ever so slightly undulates. Using a drag bit mitigates all this bar excessive surface height variation.
Downside to drag bit etching is depth. Dont expect to get deep engraving. Upside: super fine detail can be achieved.
Hi Mark, I have done a fair amount of engraving on my Nomad Pro and to me it looks like you did your engraving dry. The resulting heat causes the super fine chips that result from engraving to immediately weld themselves back to the stock (which is the cause for the rough edges). The heat also contributes to the tool tip breaking/dulling much quicker than necessary.
My first attempts looked exactly like your results and applying cooling liquid made a world of a difference. Under the best circumstances (fresh tool, good cooling/lubrication) the results are super sharp, as if printed.
I tried a number of lubricants/cooling liquids, and while they all gave great results I settled on a simple solution of a bit of dish soap in water and I am very happy with that. I apply this using a minimal lubrication system (Fog Buster). But spraying it on manually or even putting a small puddle of cooling liquid where the engraving is about to happen works as well. It is really important that the cooling liquid is already there before the cutter hits the stock for the first time, otherwise it is very likely that the tool tip breaks when it has to go through the extra hard anodized surface (check the tip of the cutter you used with a magnifying glass and compare it to a new one).
Other cooling options I tried are:
• WD40 (the odor gives me a headache after a while)
• Ballistol (doesn’t give me a headache, but leaves a scent of cold frying oil in the room, which is not great when that room is also your office, as in my case).
• Methylated Spirit (sharp smell, flammable!)
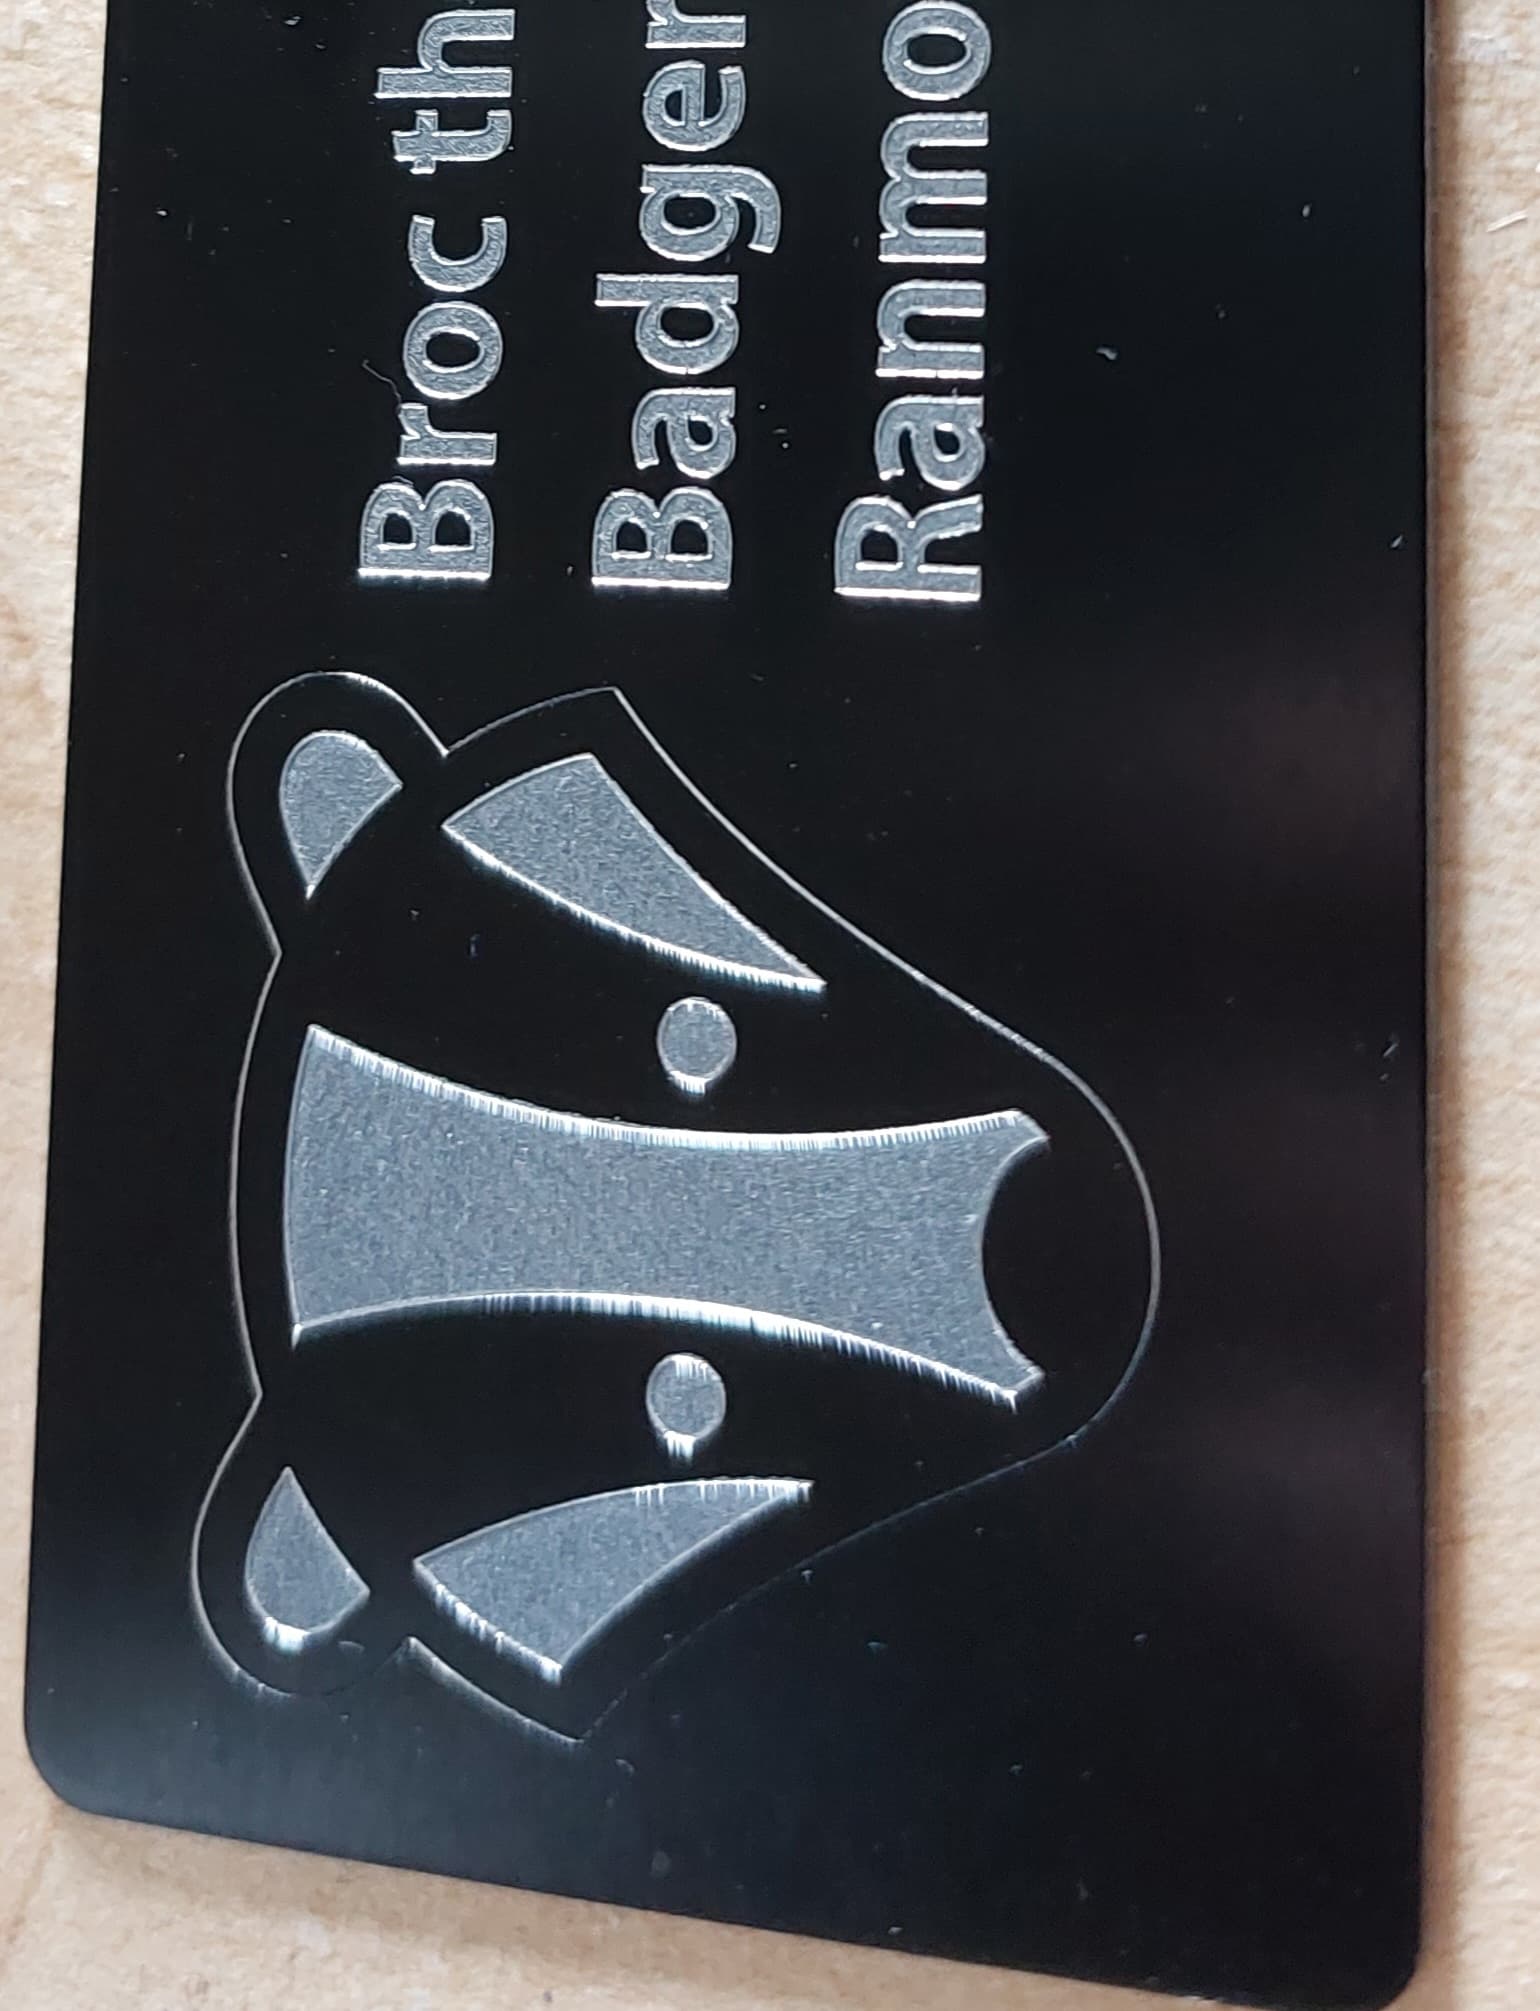
These panels were engraved on my Nomad, the left one with a new tool, the right one with a tool where the tip was already damaged. The smallest letters are 2mm high. The colour was applied by rubbing it into the engraving, wiping the excess colour away with a soft cloth.
The CC settings also call for a depth of cut of 0.06mm per stepdown. That’s probably the reason for your degrading cut quality, the tip was broken off.
The majority of the time, 501 is the way to go. The slightly wider engraving is a small price to pay for vastly better overall reliability and slightly faster speed you can push it at.
You are (all) absolutely right. I looked at the tip under a loupe and it’s broken off.
And, I did cut dry because I thought that the coolant was only required for steel and titanium, but I guess the anodising is hard enough to be a special case too. In order to have the tip wear out rather than break off on the hard anodising layer, can you suggest some cutting parameters?
Or could I scrape away the anodising layer using an MC Etcher drag bit and then use a #501 to create a deeper groove (to capillary paint) in the softer un-anodised aluminium?
Mark, as far as I can tell, the cooling/lubrication is not only needed for anodized aluminium it is also important for plain aluminium.
The reason for this is that you have to use a comparatively low chip load for engraving and very little material is removed. That in turn means that much less heat is taken away from the cutting zone. This welds the resulting aluminium dust (engraving hardly produces proper chips) to the stock and degrades the tool. The cooling improves this situation considerably.
I use a chip load of 0.01mm/tooth, a spindle speed of 10000 rpm (cutting feed rate 100mm/min).
I also use these helical engraving tools (the 30° and 45° degrees variants) Sorotec Online-Shop - Werkzeuge which evacuate the cutting area better than the typical engraving tools with a flat side.