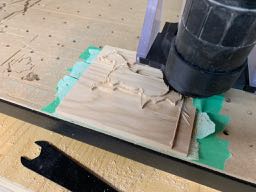
Today, I finally took the time to design and cut a 3D project in VCarve Pro. It was only an experiment but I learned a lot and I’m happy with the results. Here is the info on the project:
Design using VCarve Pro
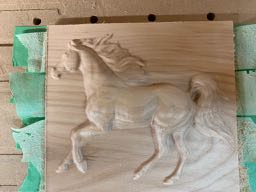
3D Model: Horse from Design and Make in VCarve library
Material: Yellow Birch 6" X 5.5" X 0.75"
Roughing: 0.250- 3 flute endmill (201), Raster X along grain DOC 0.15, WOC 0.0125, RPM 17K FR 175 PR 53 Ramp .75
Finish: 0.125 -2 flute ball endmill (101) Cut along Y (cross grain), WOC 0.01", RPM 30K, FR 55, PR 17
Hold down: Masking Tape and Glue
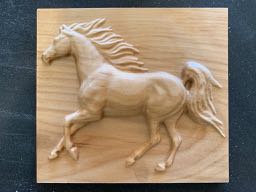
Total milling time was about 3hrs.
Issue: Some shatter on roughing when plunging and made a few marks on the project but these were removed in the detail pass. This may be due in part to the excessive stickout, I had used the same endmill to reach deep for another project and did not reset the bit in the collar.
In the end, the project needed very little sanding and I put 2 coats of clear lacker mat finish.
Nice looking horse. I have found that even people that have never ridden a horse love them. Maybe it is the free flowing mane or the idea of freedom that a horse represents but horses are winners when making projects for sale or as gifts.
Very nice ! Quick question, why did you go for a small stepover for roughing ? At this 60% DOC I would have used something like 40% WOC (but then again I have zero experience with 3D carving)
Thanks for the detailed info, a good reminder to also take grain direction into account.
I tried to aim at a 0.0015 chipload right between the 0.001 and 0.002 recommended and used a deeper and narrower strategy. Your calculator gave me a 176ipm FR which is close to the max of 200ipm of the Shapeoko. I wanted a bit of room for increasing the FR and did not want to be over ambitious on my first project. I also thought that the small stepover would yield better results. It worked relatively well but I want to try a smaller DOC and larger WOC in my next try because it may reduce the shatter I encountered when plunging into the material. I’m playing with your calculator and so far it works great.
As you know, VCarve does not support adaptive clearing that would have helped this. One can hope that VCarve 10 due for release in the next few months will offer adaptive clearing too.
If you want to try your had at 3D Carving with V Carve, I recommend YT videos from Mark Lindsay that provide a step by step instruction on VCarve and his instructions while a bit long at times are better IMO to the official Vectric videos. He provides good tips for design decisions.
I guess the shatter is not so much from the plunging than from the slotting / 180° tool engagement occurring either after a straight plunge or during a linear ramp? Still I am surprised because 0.15" DOC is conservative even for slotting, I will be interested to hear if a slightly lower DOC gets rid of this ramping shatter. Alternatively, you could try spiral ramping (I think Vectric has this option) ? (less cutter engagement). If this solved your shatter issue, it could also enable the use of a much deeper DOC if you want to keep the narrow WOC.
You are right, it was the slotting that was really the issue, after the slot was created, the shatter went away. I will try the spiral next time to see if this will make a difference but it will eventually slot the material but the first thing to address is to reduce the stickout that was excessive in that case, this will reduce deflection. I could have done it at the time but I did not want to reset and restart the job.
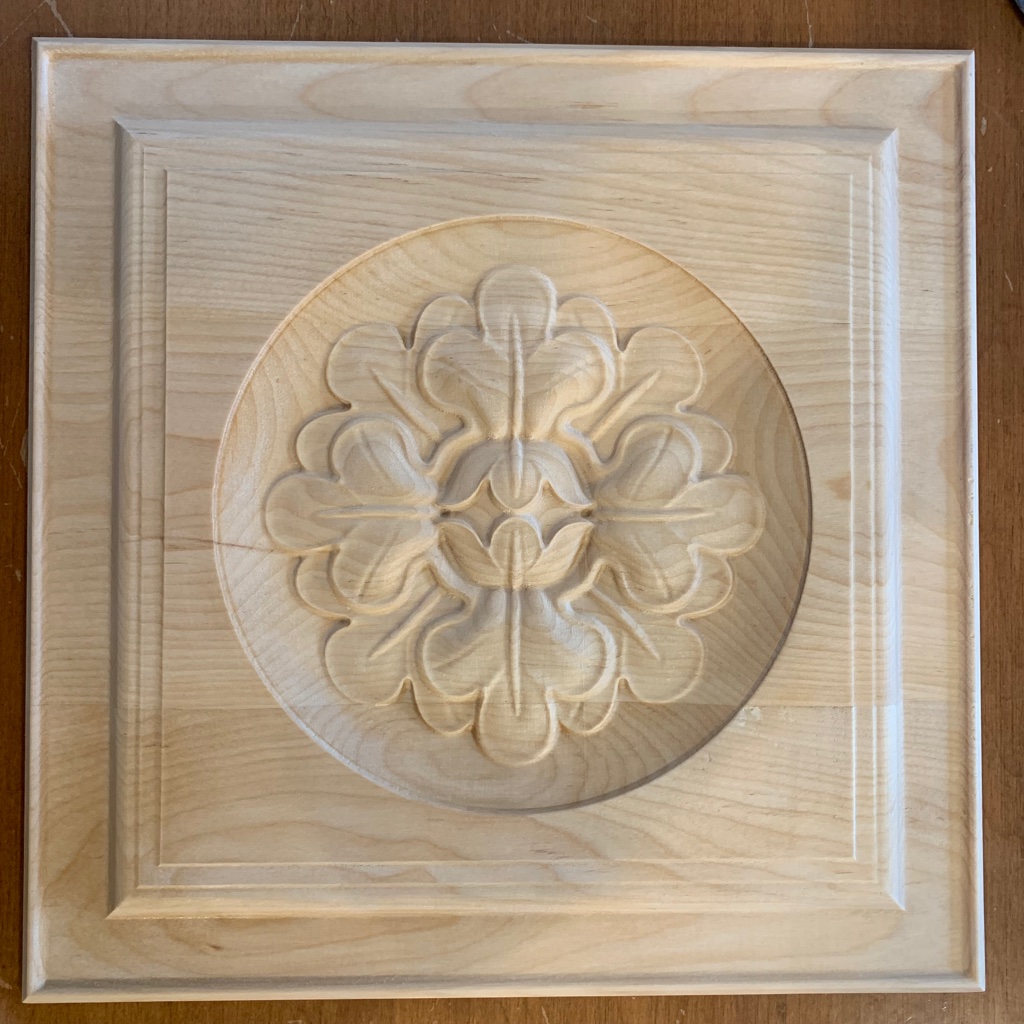
Ok this is my second attempt and for my next trick, I tried a combination of molding toolpath and 3D carving to come up with this 14inX14in decorative panel made of 3 planks of solid yellow birch glued together. I can say that yellow birch is very nice to carve and provides good definition and virtually no chipping with the finishing toolpaths. I adjusted the endmill stickout, F&S and had very little shatter.
Thanks, it was a 5hr total milling, 5 toolpaths and 3 endmills.
Molding is fairly easy but you need to find or design molding cutout. I was able to find DXF files from a molding manufacturer and that helped a lot as I only had to pick the one I liked and adapt it to the task.
A friend saw it and gave it to her, it will be a wall hanging.
Maybe I don’t look in the right places but it took a while googling and looking at all non relevant results to find usable files for this. If you know any, I’ve been looking for gingerbreading patterns too.
Griff
(Well crap, my hypometric precursor device is blown…)
17
Luc, thanks for posting. Giving me some ideas for a bathroom vanity I’m designing. Haven’t used the VCarve moulding paths yet.
Now I just need to find some vids on YT on cutting granite and I’ll be all set.
Granite is normally cut with a wet diamond saw but small details are cut with a diamond saw on a grinder. They are then polished with polishing stones on a grinder. A counter would be difficult to cut with a home wet saw as it is too large and you would probably have to use the grinder method or get yourself a 7in diamond blade that you would put in a circular saw where you would follow an edge guide but cutting the sink with a grinder will be a long messy process.
1 Like
Griff
(Well crap, my hypometric precursor device is blown…)
19
Yeah. I have the diamond circular saw blade. I’m thinking surface mount sink to get around the sink-hole challenge. Just need a diamond hole saw for the drain hole.
Sorry to hijack your thread!