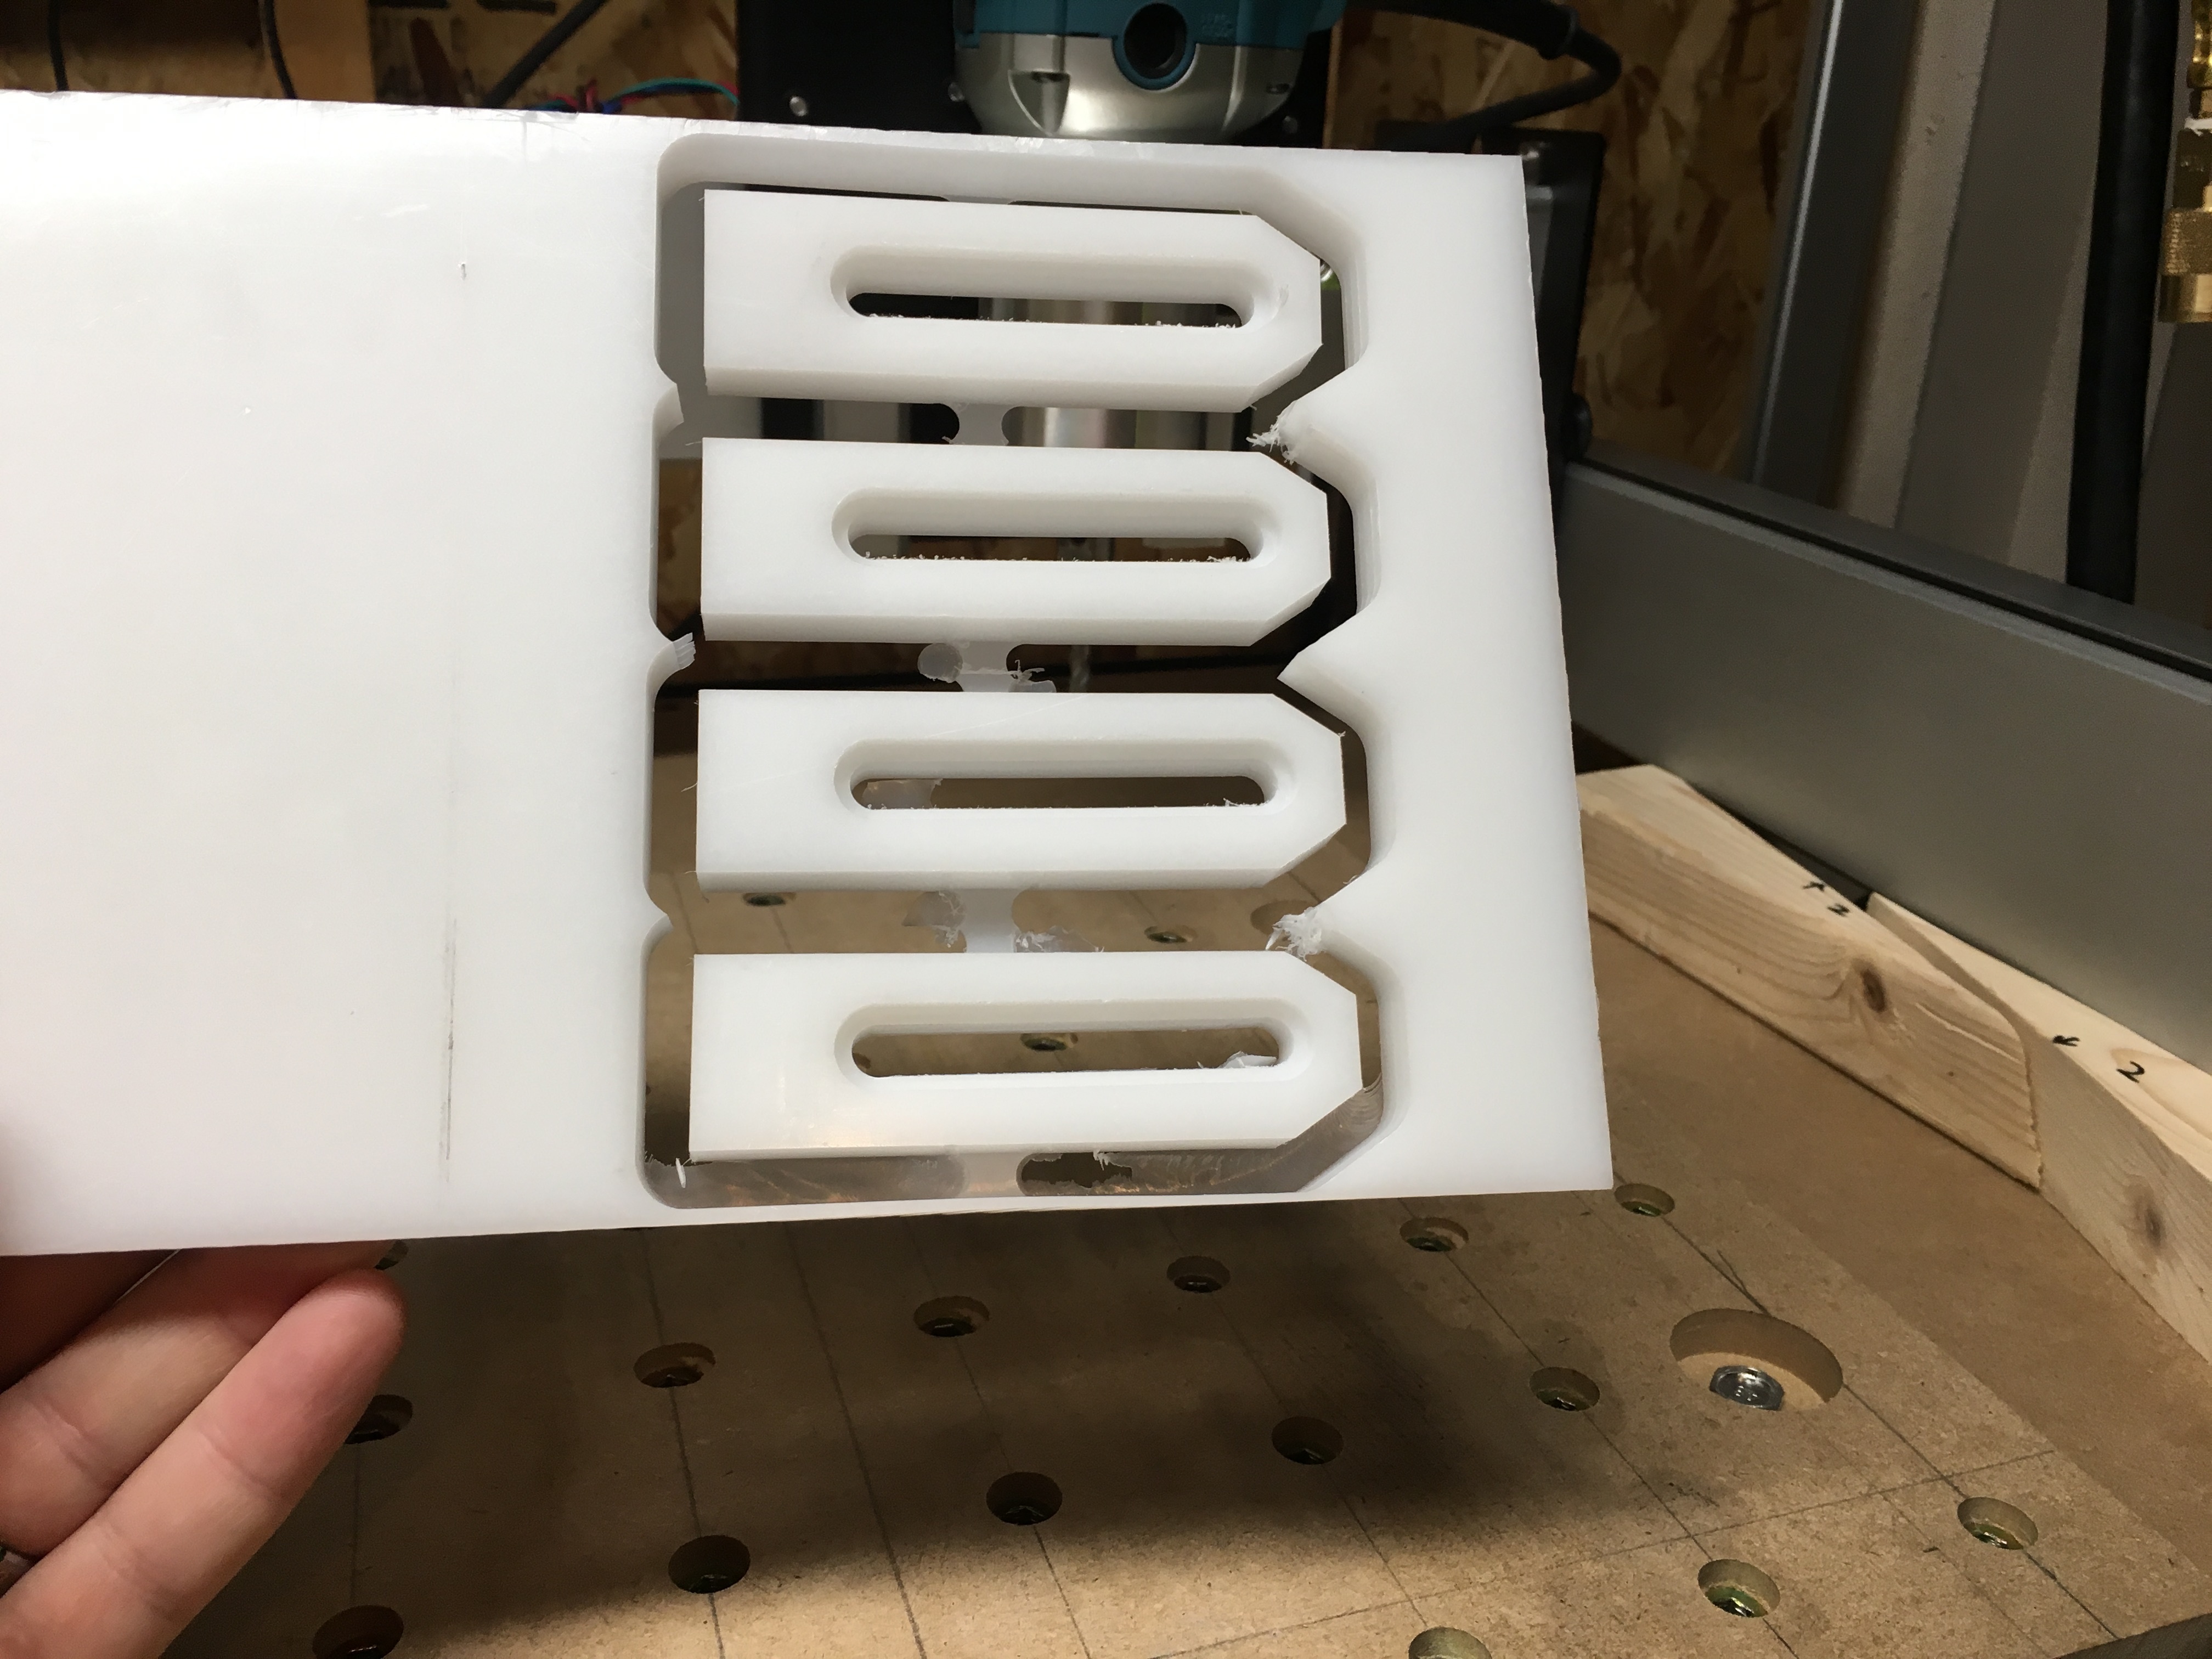
So I’m absolutely thrilled right now. I made some HDPE clamps for my threaded wasteboard. Nothing fancy or earth shattering that other folks haven’t done, but I’m ecstatic as this was only project #2 and my first Fusion 360 project.
Thanks to the advice of all the great members here, I was able to pull it off first try without any major mistakes. I started off by measuring my 1/4"-20 bolts that I would use and consulting some online clearance tables. Designed the clamps, figured out how to do the toolpaths, learned about how to post-process, and I was ready to go. I was unsure still, so I zero’ed the machine and then removed the bit to do a “dry” run of the tool paths. Adjusted my hold downs a bit, and then made a little sacrifice to the heathen gods, and went for it. I could not be happier.
They could get hot and soften, as well.
Maybe you could use wood shims, for the heat problem, Or make some good hardwood clamps until you get some metal ones. You already have the files
Relax all, I’m not really going to use them for the aluminum. I have some other hold downs in mind. This project was mainly a proof of concept that I could actually pull something off, from design to final product. And you’re right, I can use the same design in other materials, simply need to adjust feeds and speeds along with some other fine tuning.
I know how you feel. It’s great when I make something useful.
Excellent job designing your own, and not cheating and just copying some one else files.
Perfect practice.
Nice and good job. I’m embarrassed to show my clamps. Pieces of maple of no specific sizes with holes for bolts in no specific place. They get the job done but don’t look very professiona!
So from that for HDPE, I set the following conditions for my Toolpaths in Fusion 360:
RPM: 21500
Feed: 80 in/min
Plunge: 40 in/min
While the chart says DOC is .125", I went less than that. I was concerned that it might be a bit aggressive, and I didn’t mind for this project if extra passes were required since I wouldn’t have that many passes or a long milling time anyway. I did half that value when I planned my stepdown increments in my toolpaths. Oddly enough, I missed changing it for the 2D contour cut on the outside of the shapes (I input the .125 value before having second thoughts) so when that toolpath ran, I had a bit of a heart stopping moment when the tool plunged in much further than I though it would. However, it did not cause any problems, so maybe that .125" value is really verified. It did however remind me that I need to order a dust boot soon, as it created a pretty impressive shower of plastic chips that flew about 6 ft or more in any direction.
I will say that I have been reading here how some folks go conservative with their feeds and speeds in certain materials, but I think these were good settings for HDPE. I immediately checked the bit after milling was done and I shut it off, and there was barely any heat in the bit. There were a few chips that had spiraled themselves onto the upper part of the mill, but they were not melted.
I let Fusion 360 set the tabs, and while they held, I would change the distance between tabs to be 1.5" vice 2" which would have given me two tabs on each side of the clamps instead of one. I would also increase the height of those tabs to .1". I think they were set at the default of .06" or so, and they held together but barely.
The material was 1/2" HDPE measuring 6" x 12" (although I modeled only in a 6 x 6 box). Ordered it from McMaster Carr:
Technically its the Makita RT0701C, which is not much different than the older RT0700. The only reason I point this out is for newer users like me who might choose to buy their router separately from their machine. I went this route because I could get the router with some additional accessories for cheaper off Amazon than through Carbide 3d. I don’t think the RT0700 is made anymore or at least not offered in the US.
Thank you very much Evan, sharing this info is very important to us new users, I share my successful feeds and speeds on the topic “tutorial feeds and speeds”. These are way faster than mine. I have the same router and thought I had too much chatter or not enough smooth arcs so I reduced to 12 mm/sec less than half of yours but I also ran bit diam for doc and got good chips (measurable if I need to) for the 1/4" cutter. I use Estlcam and it allows me to change the running speed on the fly if the cut isn’t as you’d want. See that topic for the exact speed as I don’t remember that accurately. My bit was hardly warm and the strings tangled on the bit weren’t stuck to it. Pocketing was good as Estlcam has a “peeling” pocket cut which spirals the bit down to depth and maintains set stepover though the whole pocketing rather then a full width cut at first. My tabs were 1mm wide and 0.5 and held fine and cut out with a razor knife. As I progress I want to try to use 0.3 mm tab thickness, next time. I know my speed was slow but I’m learning and want to progress not be diverted with problems caused by too fast speed, I can always increase as I narrow into a perfect setup. My dust boot was the first hdpe project and it is amazing, I also have a camera (endoscope or bore scope) in the boot and I saw the whirl wind blasting the debris and staying clear of the camera. I use hdpe cutting boards from Sam’s club $8.00 for 15x20 no shipping. Thanks Jude
No worries Jude. Its interesting to see that you used essentially the same setup but at half the feed speed but at a greater DOC. From what I’ve been reading (and learning), it seems like that holds true most of the time, more DOC = less Feed and vice versa.
You can see from my picture, I got a pretty good finish considering I didn’t do any “finishing passes” for tooling. I had some leftover stock in the bottom of the outside contours compared to the opposing side, but that is due to the fact that I have not yet surfaced my wasteboard to be true level. I also had a minor amount of tearing out around the slots, but I assume that is just another symptom of no finishing pass, and using a standard “up” cutting bit. For HDPE, as you pointed out, it is easy to clean up edges with a utility knife or quick sanding if desired / required.
I appreciate the heads up on a source for HDPE. I only went with McMaster Carr because I had to order some other parts and supplies anyway, so it and a 6 x 6 x .50" bar of 6061 aluminum were a no brainer to add on.
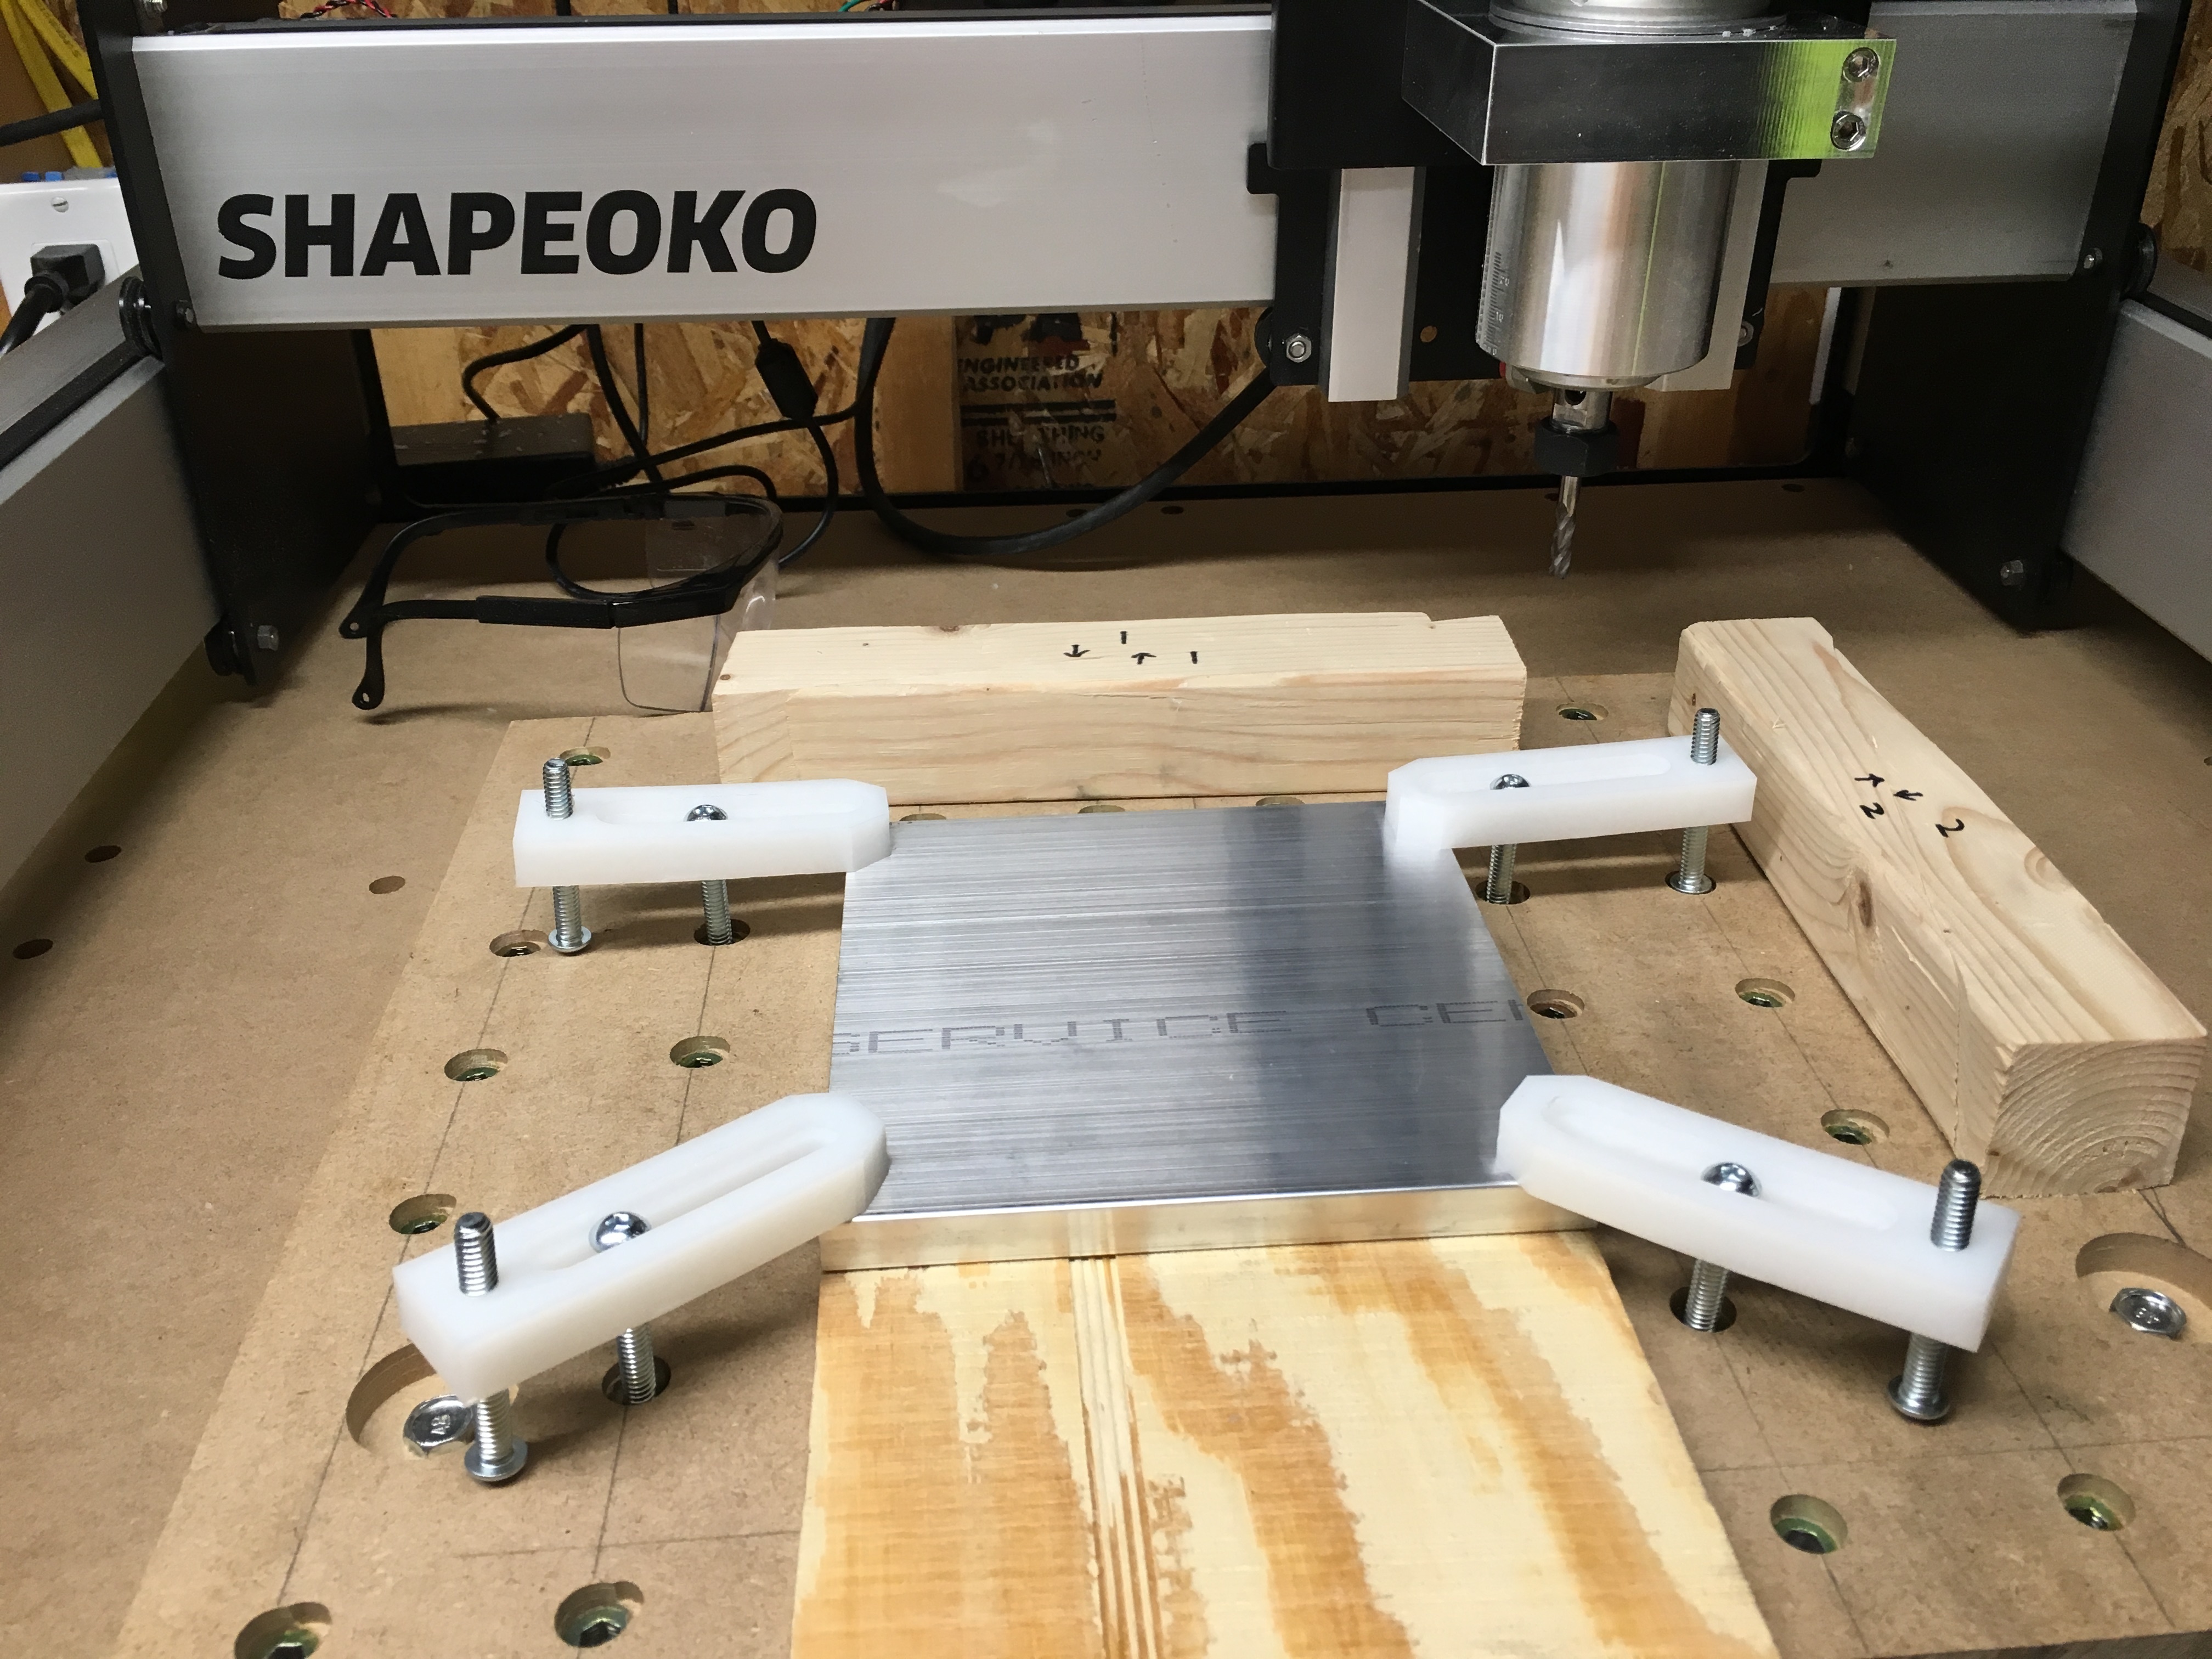
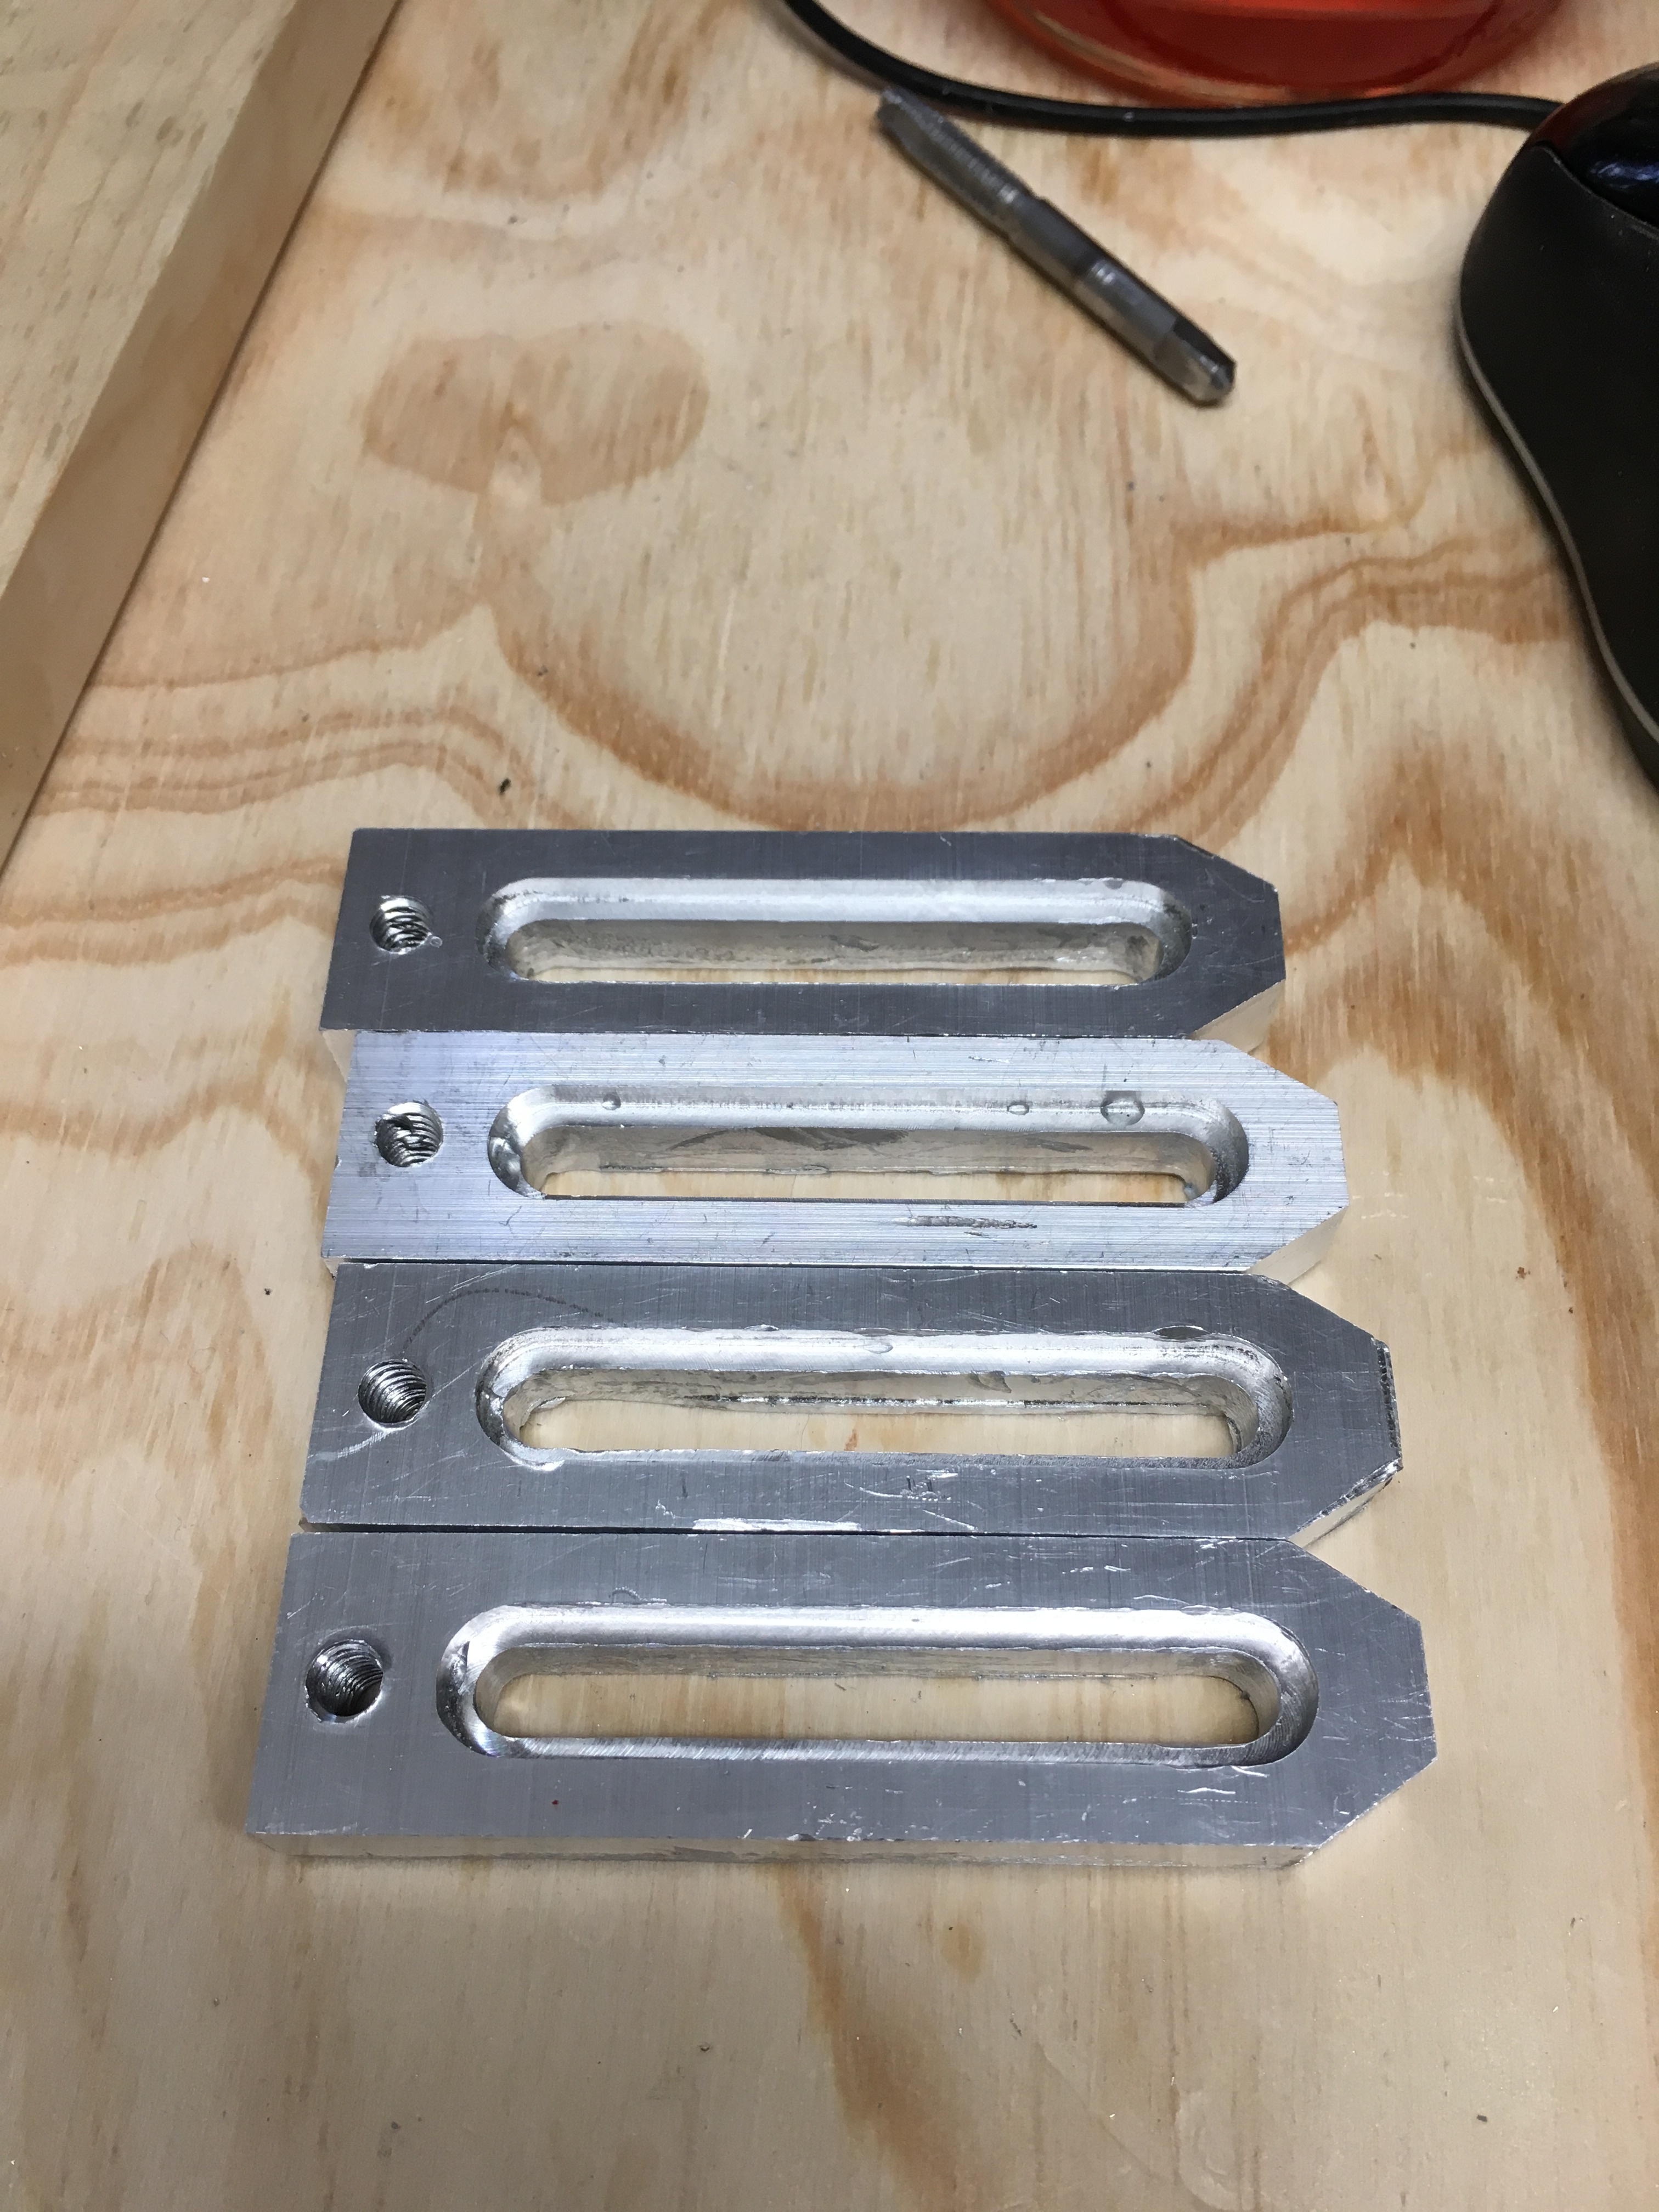
So I didn’t want to create a new thread, but I made some new clamps (courtesy of the HDPE ones I originally made), this time out of 6061 Aluminum. This was my first attempt at milling Al on the SO3, and thanks to helpful videos like those of @RichCournoyer, I was easily successful on my first try.
Endmill: .25" 2-flute coated mill from Mcmaster-Carr: https://www.mcmaster.com/#8923a53/=18eunbe
Feeds and Speeds: 30 Feed / 10 Plunge IPM @ 17500 RPM (per the SO3 feeds and speeds chart)
DOC: .04" (Maybe a little aggressive, but no issues)
For the small holes, I used an uncoated 1/8" mill, but only bored in 0.2" and drilled them out by hand. Feeds: 17 / 4.
I ran out of WD-40 (silly me for not checking quantity ahead of time) so I used a light coating of clean motor oil applied with a small paint brush as a lubricant. Not the best choice, but it works. Only downside is that it is of course less viscous which makes the chips clump up and stick to surfaces. Ultimately though, I had zero problems with the Al getting too hot or melting.
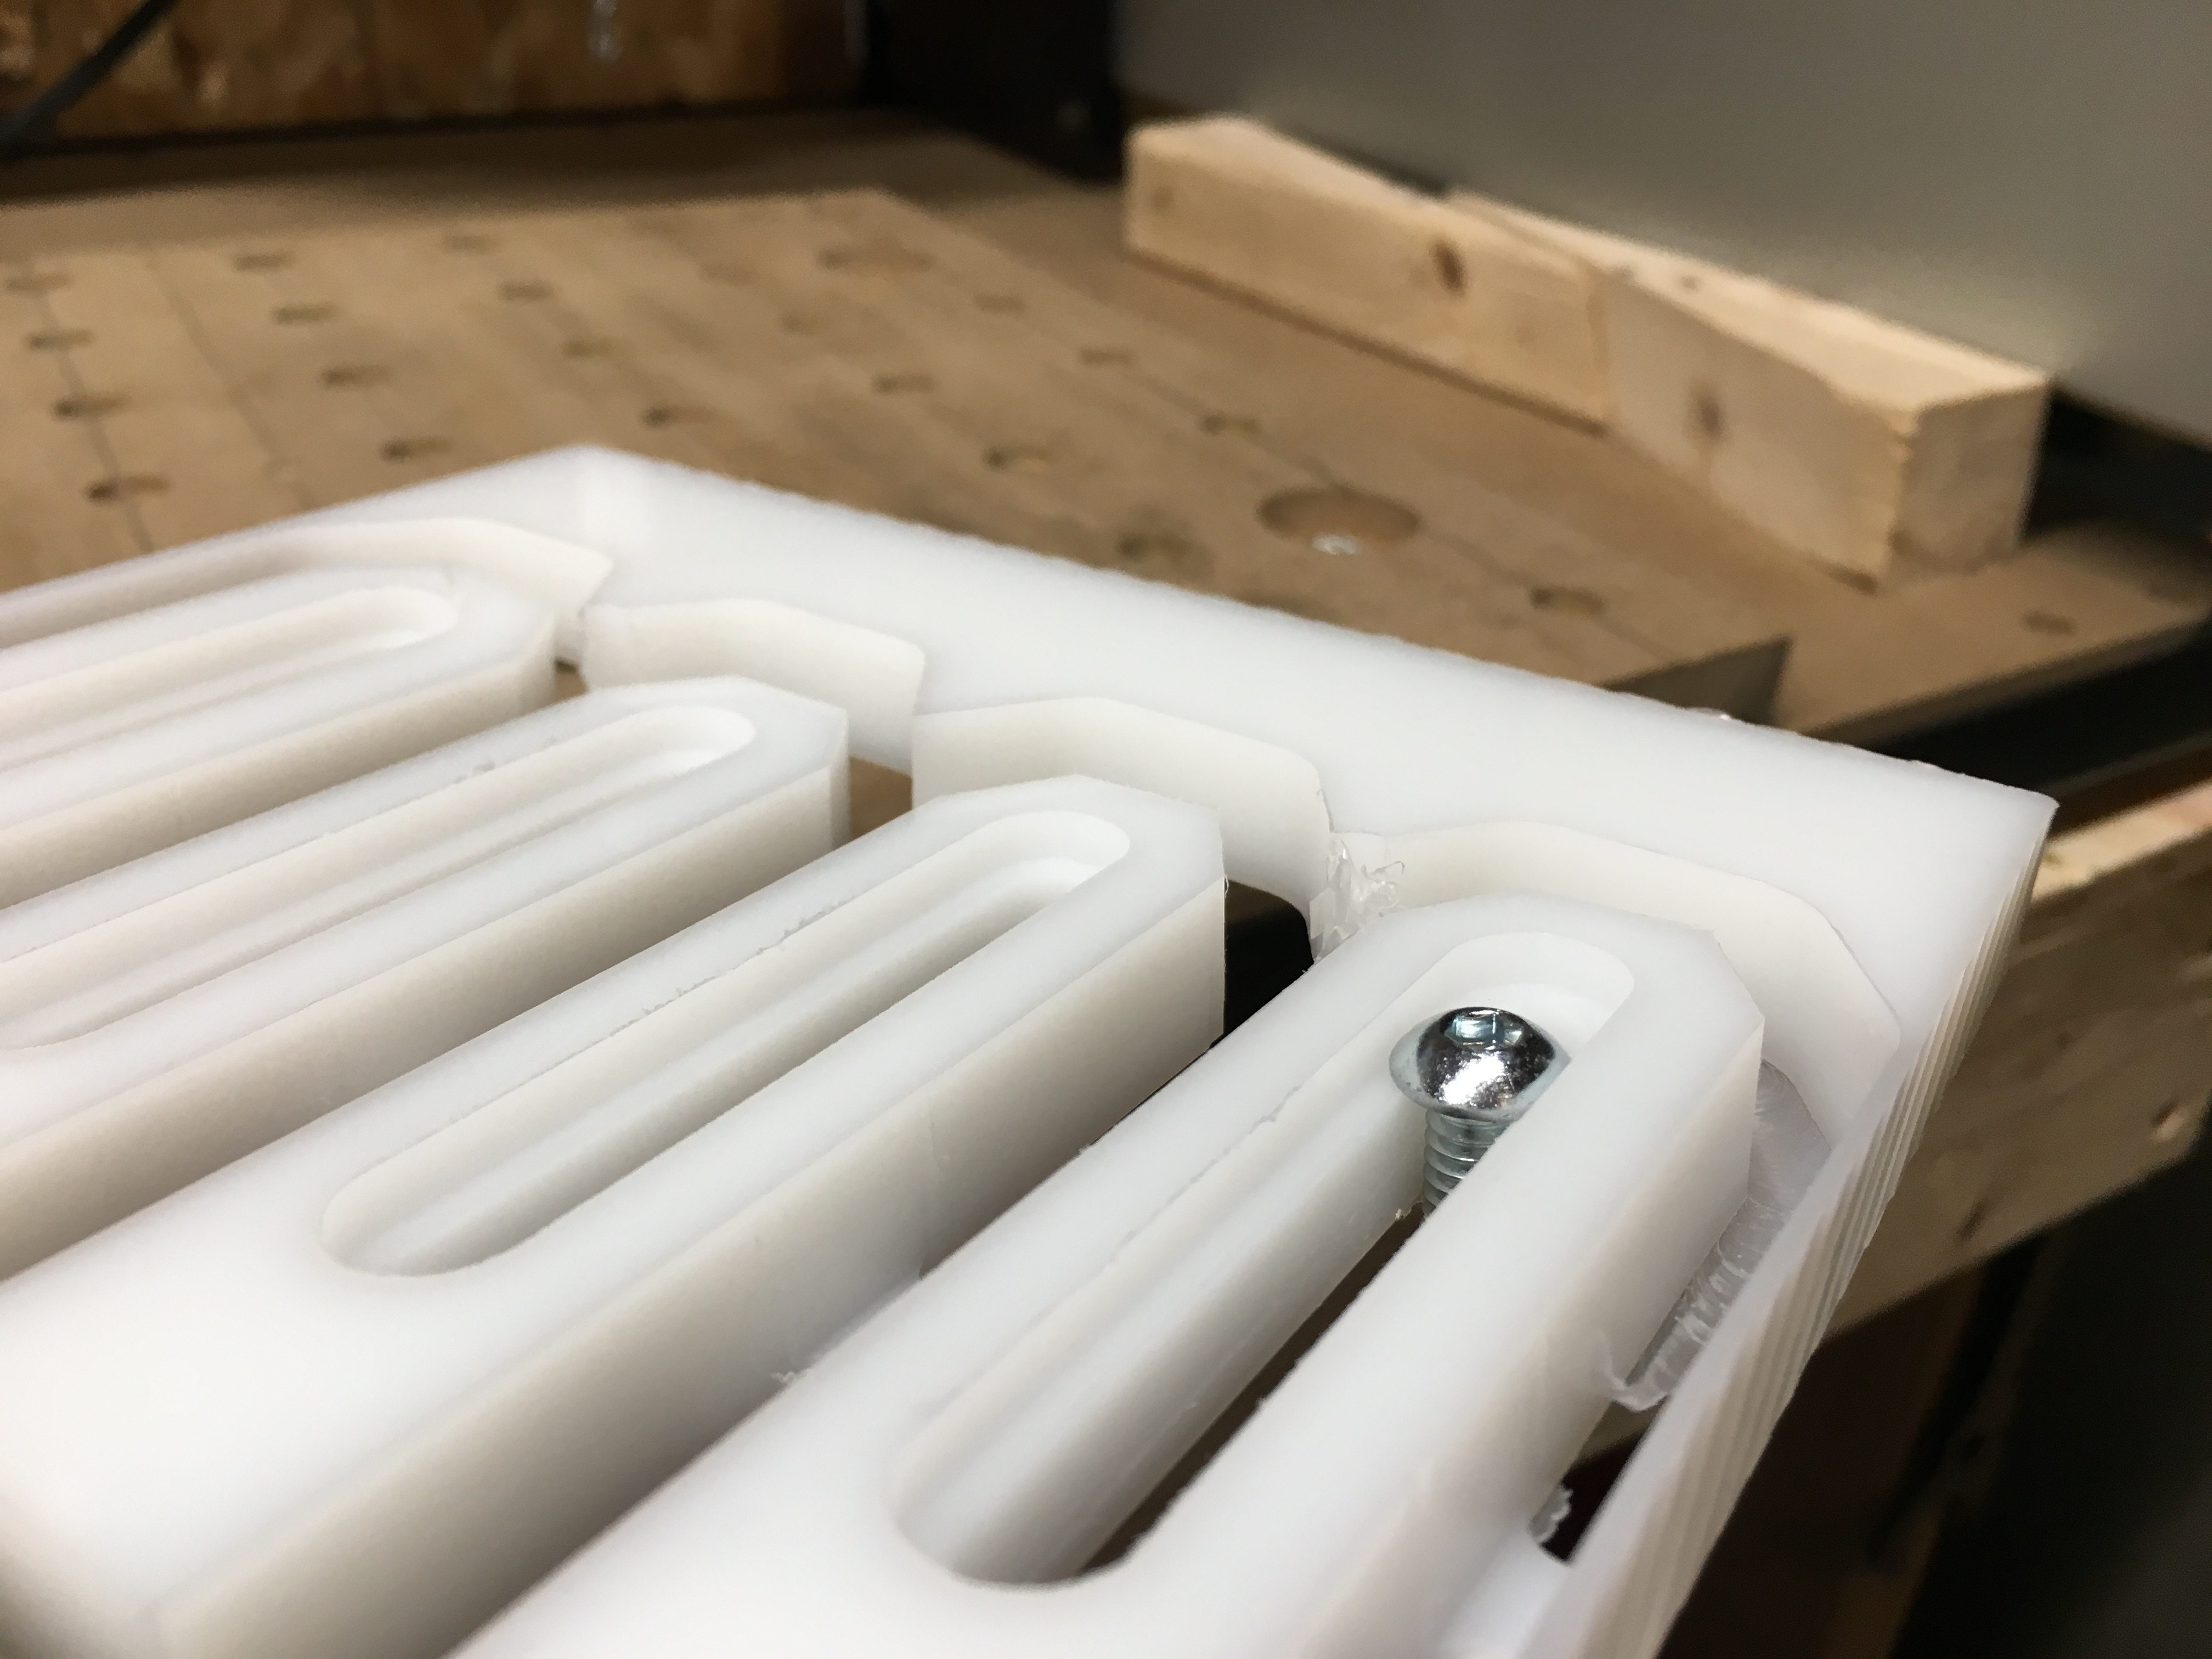
Threads are tapped for 1/4-20 and the slot fits that size bolt and the recess keeps the bolt flush with the surface of the clamp.