Email sent.
Thank you.
Email sent.
Thank you.
Hi @isoworks,
In the meantime you may be interested in the great tips that @RichCournoyer shared a few days ago regarding how to mitigate the risk of losing Z steps with the standard axis:
While you are here, do you want to share more info on the material+endmill+feeds and speeds combination you are using that is causing you to lose Z steps ? People may have helpful tricks to share with you.
Email sent ! Thanks !
We hope the next batch to be ready in a couple of weeks.
Hello Luke, it would be fantastic to have a date that is a bit more precise than a couple of weeks.
Thank you.
Julien,
I am using a electroplated diamond grit 1/4" ball “end mill” to engraving hard (freeway spec) concrete to a depth of 0.3" or greater than 1/4" on an uneven surface.
I have stepped down to a feed rate of 4 and a plunge rate of 0.3. And still I am ramping that down to a 10-20% rate when it gets into the aggregate. Depth of pass at 0.03.
The Z skips most often on traverse when the tool encounters a harder piece of aggregate. The ball, the hard material, the shallow pass, and system deflect make for the perfect ramp and “pop” the Z skips.
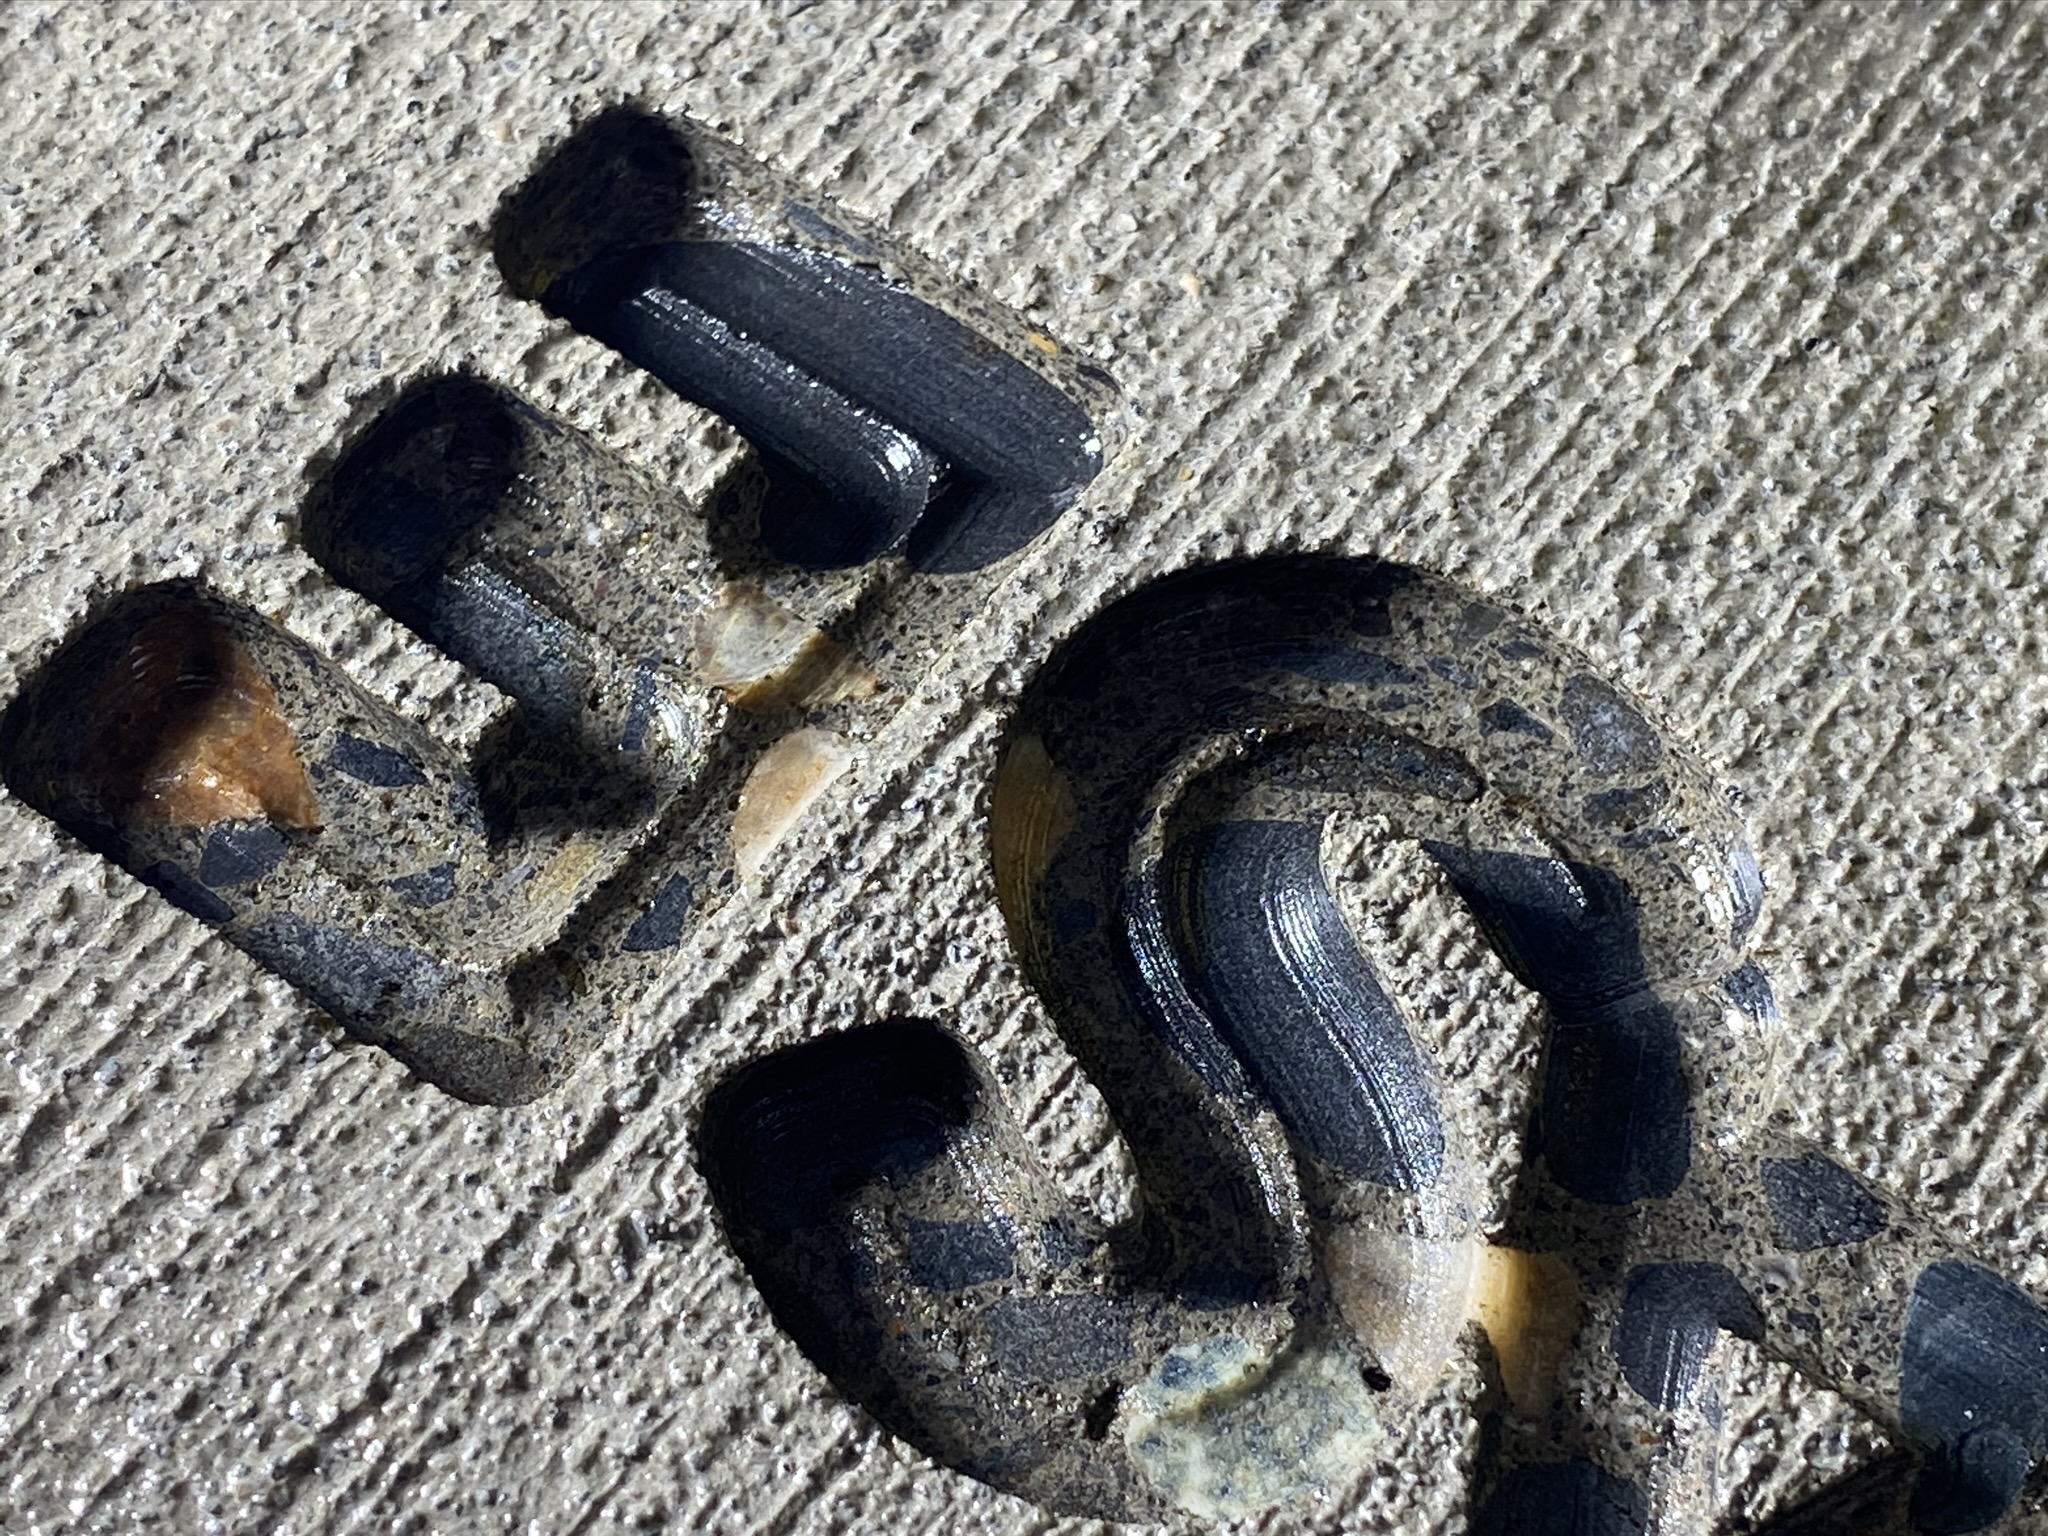
I spent time making sure that the Z axis belt was tensioned properly. After it skipped again, I took the belt out to examine that there was no damage. Reinstalled, retensioned, and dropped the feed rates to where they are now. The ES letters are the first two letters I have been able to create in a row without skipping.
But this is too slow, I need to create too many letters for a client, on-site, to run this slow. I have a limitied time window each day.
I really need that HDZ upgrade.
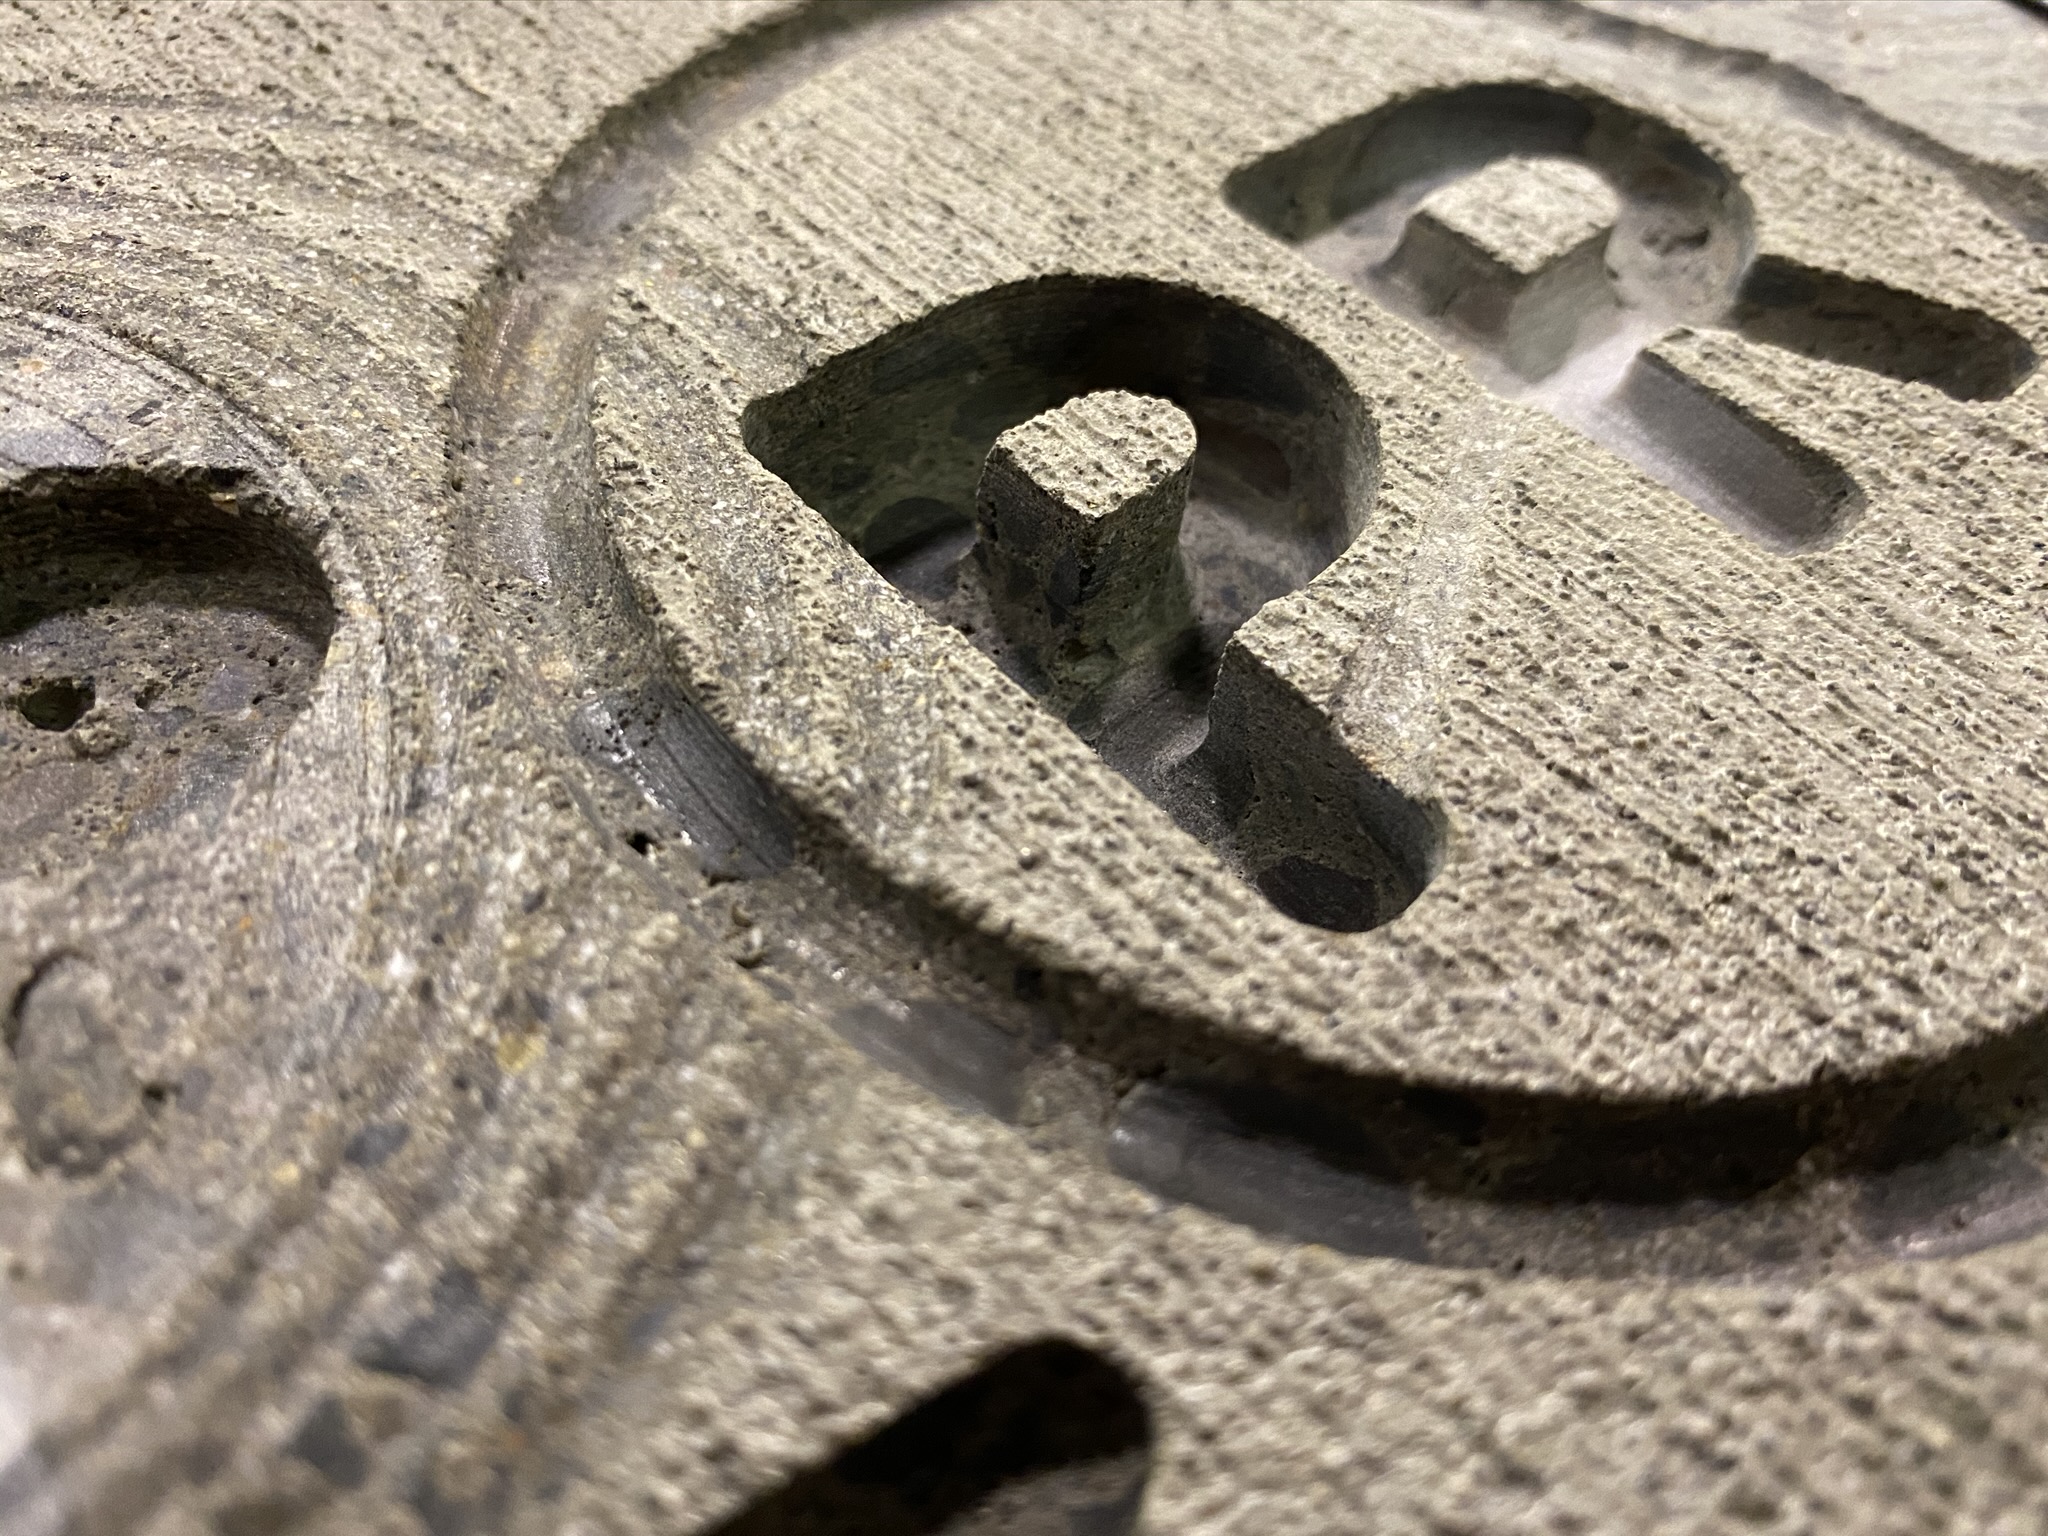
Here are some picture and a link to a video of what I am doing.
Video
Engraving Concrete
Picture that caused me to post.
Other Pics
A potential solution to your short I term problem, and this type of job in general. Use the Shapeoko to create offset templates for a brass guide bushing. Depending on the margins, I’d likely prefer HDPE for its resistance to water and texture. Then use a plunge base and a conventional router. Or if this is your primary venture, a machine developed for wet work. I used to run a stone fabrication shop with full CNC implementation. But still had 20 or so guys running hand directed tools.
@Lowbrowroyalty. Thank you for the input.
We will also be using the HDPE template and standard plunge router, as well as concrete core drills and hand saws.
The reason we aren’t using a large wet CNC is that this is on-site work so the machine has to be portable.
Wow. I definitely did not picture concrete when you mentioned a “hard material”…so I have no tip to provide whatsover…
I wonder if a trochoidal milling/adaptive cut approach would make any sense in such a material, to enable larger feedrates, or at least deeper depth per pass.
@Julien - interesting thought. I have not played with other CAM software. Will MeshCAM allow for this? Or do you have any recommendations?
I don’t think MeshCam supports adaptive toolpaths, you would have to look at Fusion360 (it has a steep learning curve though) or EstlCam.
But that may just be a crazy thought…I just thought about how adaptive toolpaths are easier on the cutters in metals than regular toolpaths, and maybe the same approach of taking many small circular bites rather than a continuous grind along a linear path would help in your case. If you feel really adventurous and would like to start experimenting, I’ll be happy to generate a few example adaptive toolpaths in Fusion360 for you to (check and) try.
I would really appreciate the assistance and would be happy to experiment with this. What file would you like from me to move forward?
Are you using CC for the examples you showed above? One associated c2d file would be perfect, else just a vector of a letter/text and its associated target size, as well as all cutting parameters you are currently using (some of which you have mentioned above already): I would try and “just” adapt them to an adaptive approach.
Here’s a first set of questions for you:
can you confirm which toolpath in the file corresponds to that video ? I’m a bit confused because the only enabled toolpath uses a 1/8" square endmill at 4ipm / 0.3ipm plunge (which is what you mentioned in your post above), while there are other toolpaths using a #202 ball endmill, which is closest to your 1/4" diamond grit ball cutter, but feeds and speeds are different for those?
can you also confirm which RPM you had your router set to during the cut?
do you have a link to that diamong grit cutter that I could check to know more about this tool?
Reading a bit about machining concrete, it sounds like doing it with a Shapeoko (and a stock one at that) is going to be very challenging anyway (because people apparently normally use very rigid machines to do it), so don’t expect too much (this is a fun experiment, but the answer may well be that one has to reduce load/depth of cut so much that the resulting cutting time is not acceptable…we’ll see!)
In response to you questions:
I did a lot of investigation regarding the engraving of stone and concrete. While I do not know a lot about engraving of concrete I run a concrete sawing and drilling construction company. So in the investigation I looked at other machines, visited tradeshows before deciding on the Shapeoko. In my opinion, it is the best option for the portablity factor.
The only other machine that I thought about is from this company https://redarttechnologies.com/, but I was thoroughly unimpressed with the machine and the owner.
Thanks for clarifying that, this was for me to establish a baseline (your current cutting parameters) and compare it to an adaptive-based alternative.
So your baseline is:
If I use that in CC on your sample vector, I get 3.5h cutting time for those three letters:
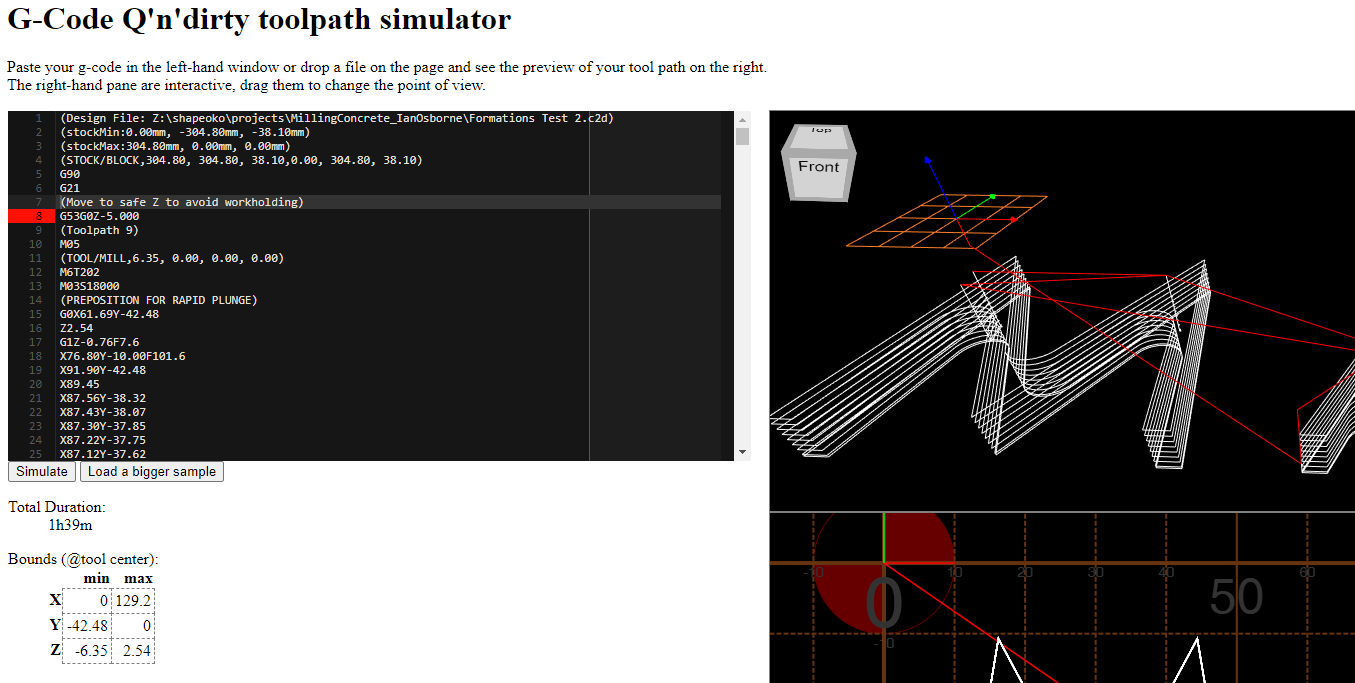
but then again the generated G-code previewed in a different tool tells me it’s going to be 1.5h:
Which one seems to best match the cutting time you are seeing ?
In the meantime, I stumbled upon this cool page:
And that is telling me that my “deep adaptive toolpath” approach could actually make sense, because that guy is doing exactly what I was about to do in Fusion360: ramping down at a very low angle, and once reaching the full cut depth, start moving in circles at a very small stepover (basically adaptive clearing). He also uses feeds and speeds that I would have aimed for (60ipm ballpark), so there’s hope.
Soooo, give me some more time to do sam CAM in Fusion360 tonight, and check cutting time, and then we can get down to milling tests!
![]()
Let’s prove that there’s nothing a Shapeoko can’t do !
EDIT: did you get some of those on that Amazon special ?
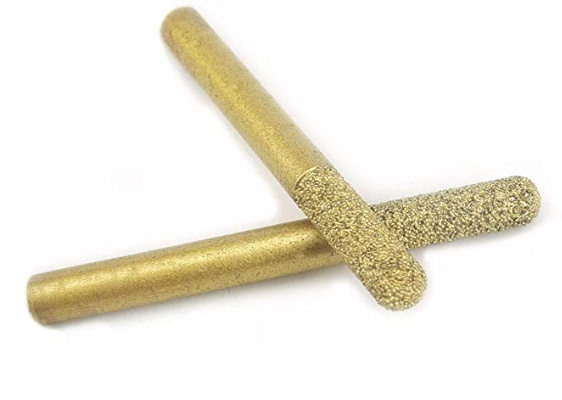
It should allow to cut deeper that the ball one
btw Carbide Create makes toolpaths that have different forces during it’s path…
but you can “smooth this out” using a tool:
https://fenrus75.github.io/FenrusCNCtools/javascript/gcode2gcode.html
that adjusts speeds to have a more equal forces across the paths
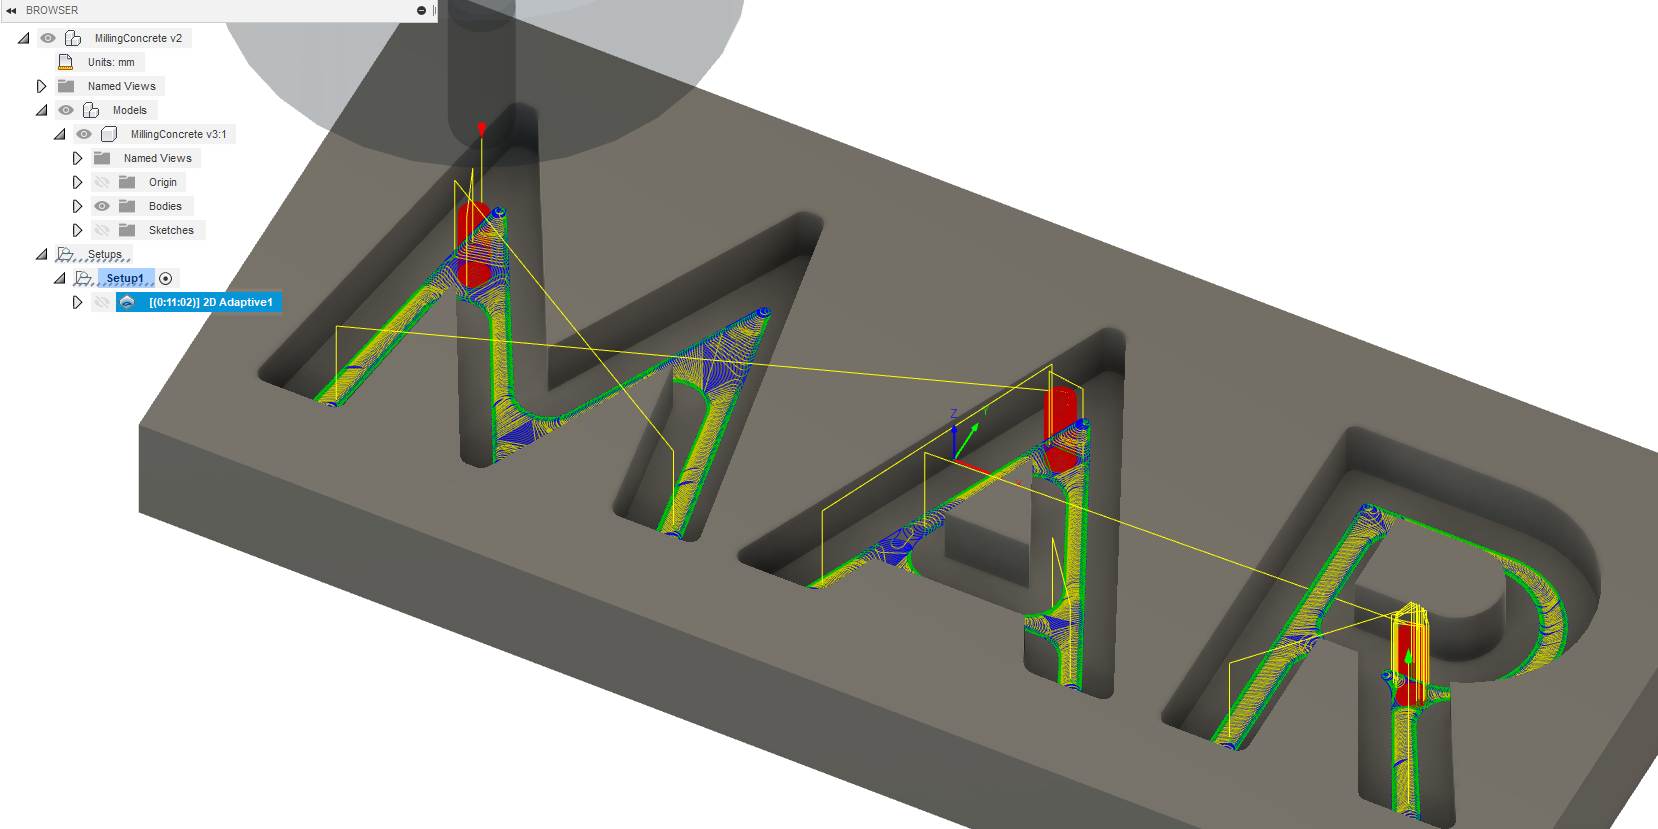
@isoworks: so an adaptive toolpath will look like this:
zooming in :
However this assumes the use of that other tool in the picture, that is only rounded at the tip, to be able to cut 0.25" deep in one pass. The ball tool is 1/4" in diameter, so it cannot take more than 1/8" in depth and you woud need two passes:
=> let me know which one you have and want to use, I’ll adjust the toolpath and post a first G-code test file !
Julien,
That is fantastic. Let’s use the ball end mill with the straight sides, not the in-cut.
I agree with the smaller stepover on the first attempt.