Has anyone run their Pi headless and use a tablet via wifi to access CNCjs?
This would be the ideal setup for me if it works. That way I don’t need a keyboard or mouse attached to the Pi
Has anyone run their Pi headless and use a tablet via wifi to access CNCjs?
This would be the ideal setup for me if it works. That way I don’t need a keyboard or mouse attached to the Pi
Yes. I don’t use a tablet, I use Chrome browser from a laptop, but same difference.
Yes! There is also a tablet-specific UI you can add to the pi, which makes it so that you don’t have to scroll around the webpage when opening it on the tablet: https://github.com/cncjs/cncjs-shopfloor-tablet
For myself, there was a little lag on the tablet input vs on the laptop but it may have just been my mind…
Has anyone run their Pi headless and use a tablet via wifi to access CNCjs?
@wb9tpg - yes I have always done it this way - no problems whatsoever
Sounds like I need to learn how to load and configure a Raspberry pi. I picked up a 3B+ from MircoCenter today.
Awesome, that’s the model I have. No issues at all with it 
FWIW here’s my setup routine:
Done!
You can then unplug the keyboard and display, reboot, and do everything from there by doing a remote ssh connection into the Pi, using its IP address (most of the time I just use Putty to do that)
Then follow the CNCjs install instructions and you should be good to go.
I used PiBakery to create the image and initial load then connected the keyboard, mouse and display to set it up.
Configured static IP, NVM, Node V8 and then CNCJS. Got it all installed and working.
Ran into lots of trouble with VNC while trying to connect from my Kindle Fire. I looked myself out from the Fire and the pi says connection refused and too many attempts to log in; the pi even refuses the connection from the browser to CNCJS on the Fire. I’m not sure how to fix that one and any tips would be appreciated.
Anyway, I was able to connect to the pi from my Mac & iPhone and actually home the CNC. That was the first time I’d actually tried to do any motions on the machine since I rewired it and installed the spindle.
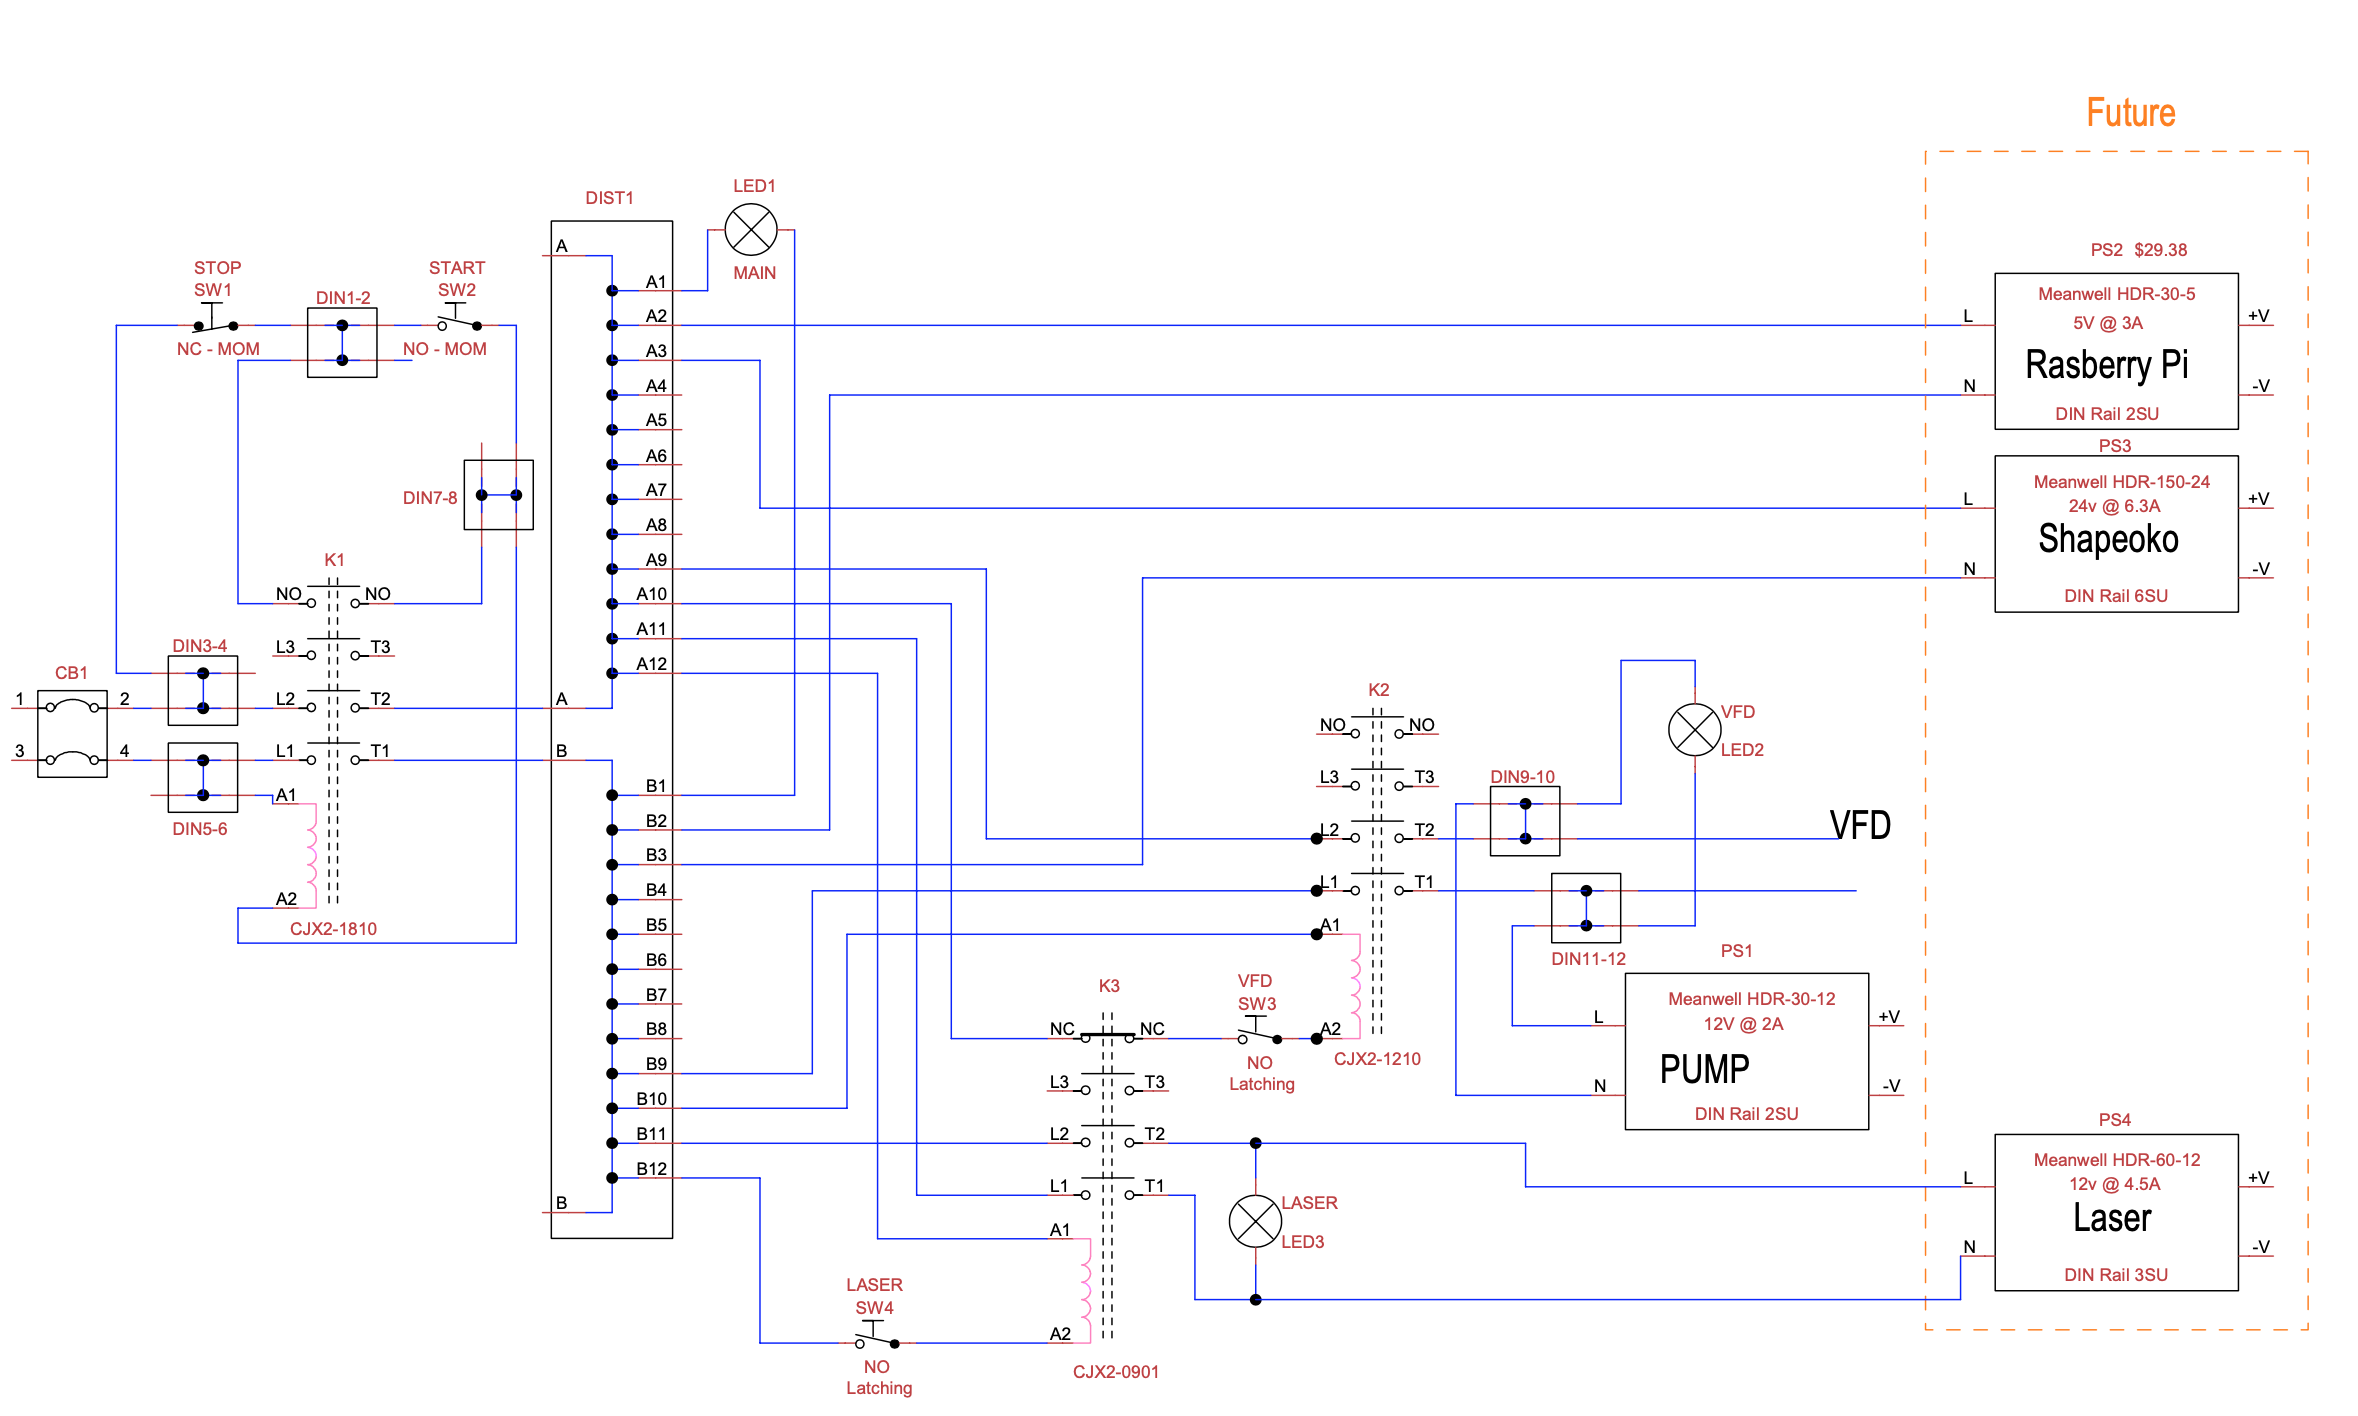
Here is the diagram of my control box design. It’s over designed but I wanted to never worry about it again even if I upgraded in the future. Only bad thing is some of the parts are coming from China and I’m leery of a virus hitching a ride with the shipment.  I’ve changed the design so I’m using the existing power bricks for the Shapeoko & Laser as they’ll run on 220V just fine.
The input side of the circuit is a “magnetic contactor” design so that if power drops the unit will not power up when power comes back up.
This topic was automatically closed after 30 days. New replies are no longer allowed.