This is a two-sided milling job in maple. I used a 1/8 inch end mill, and clearly my settings are wrong, as those sides are meant to be smooth. What would be a good approach for future steep sided projects?
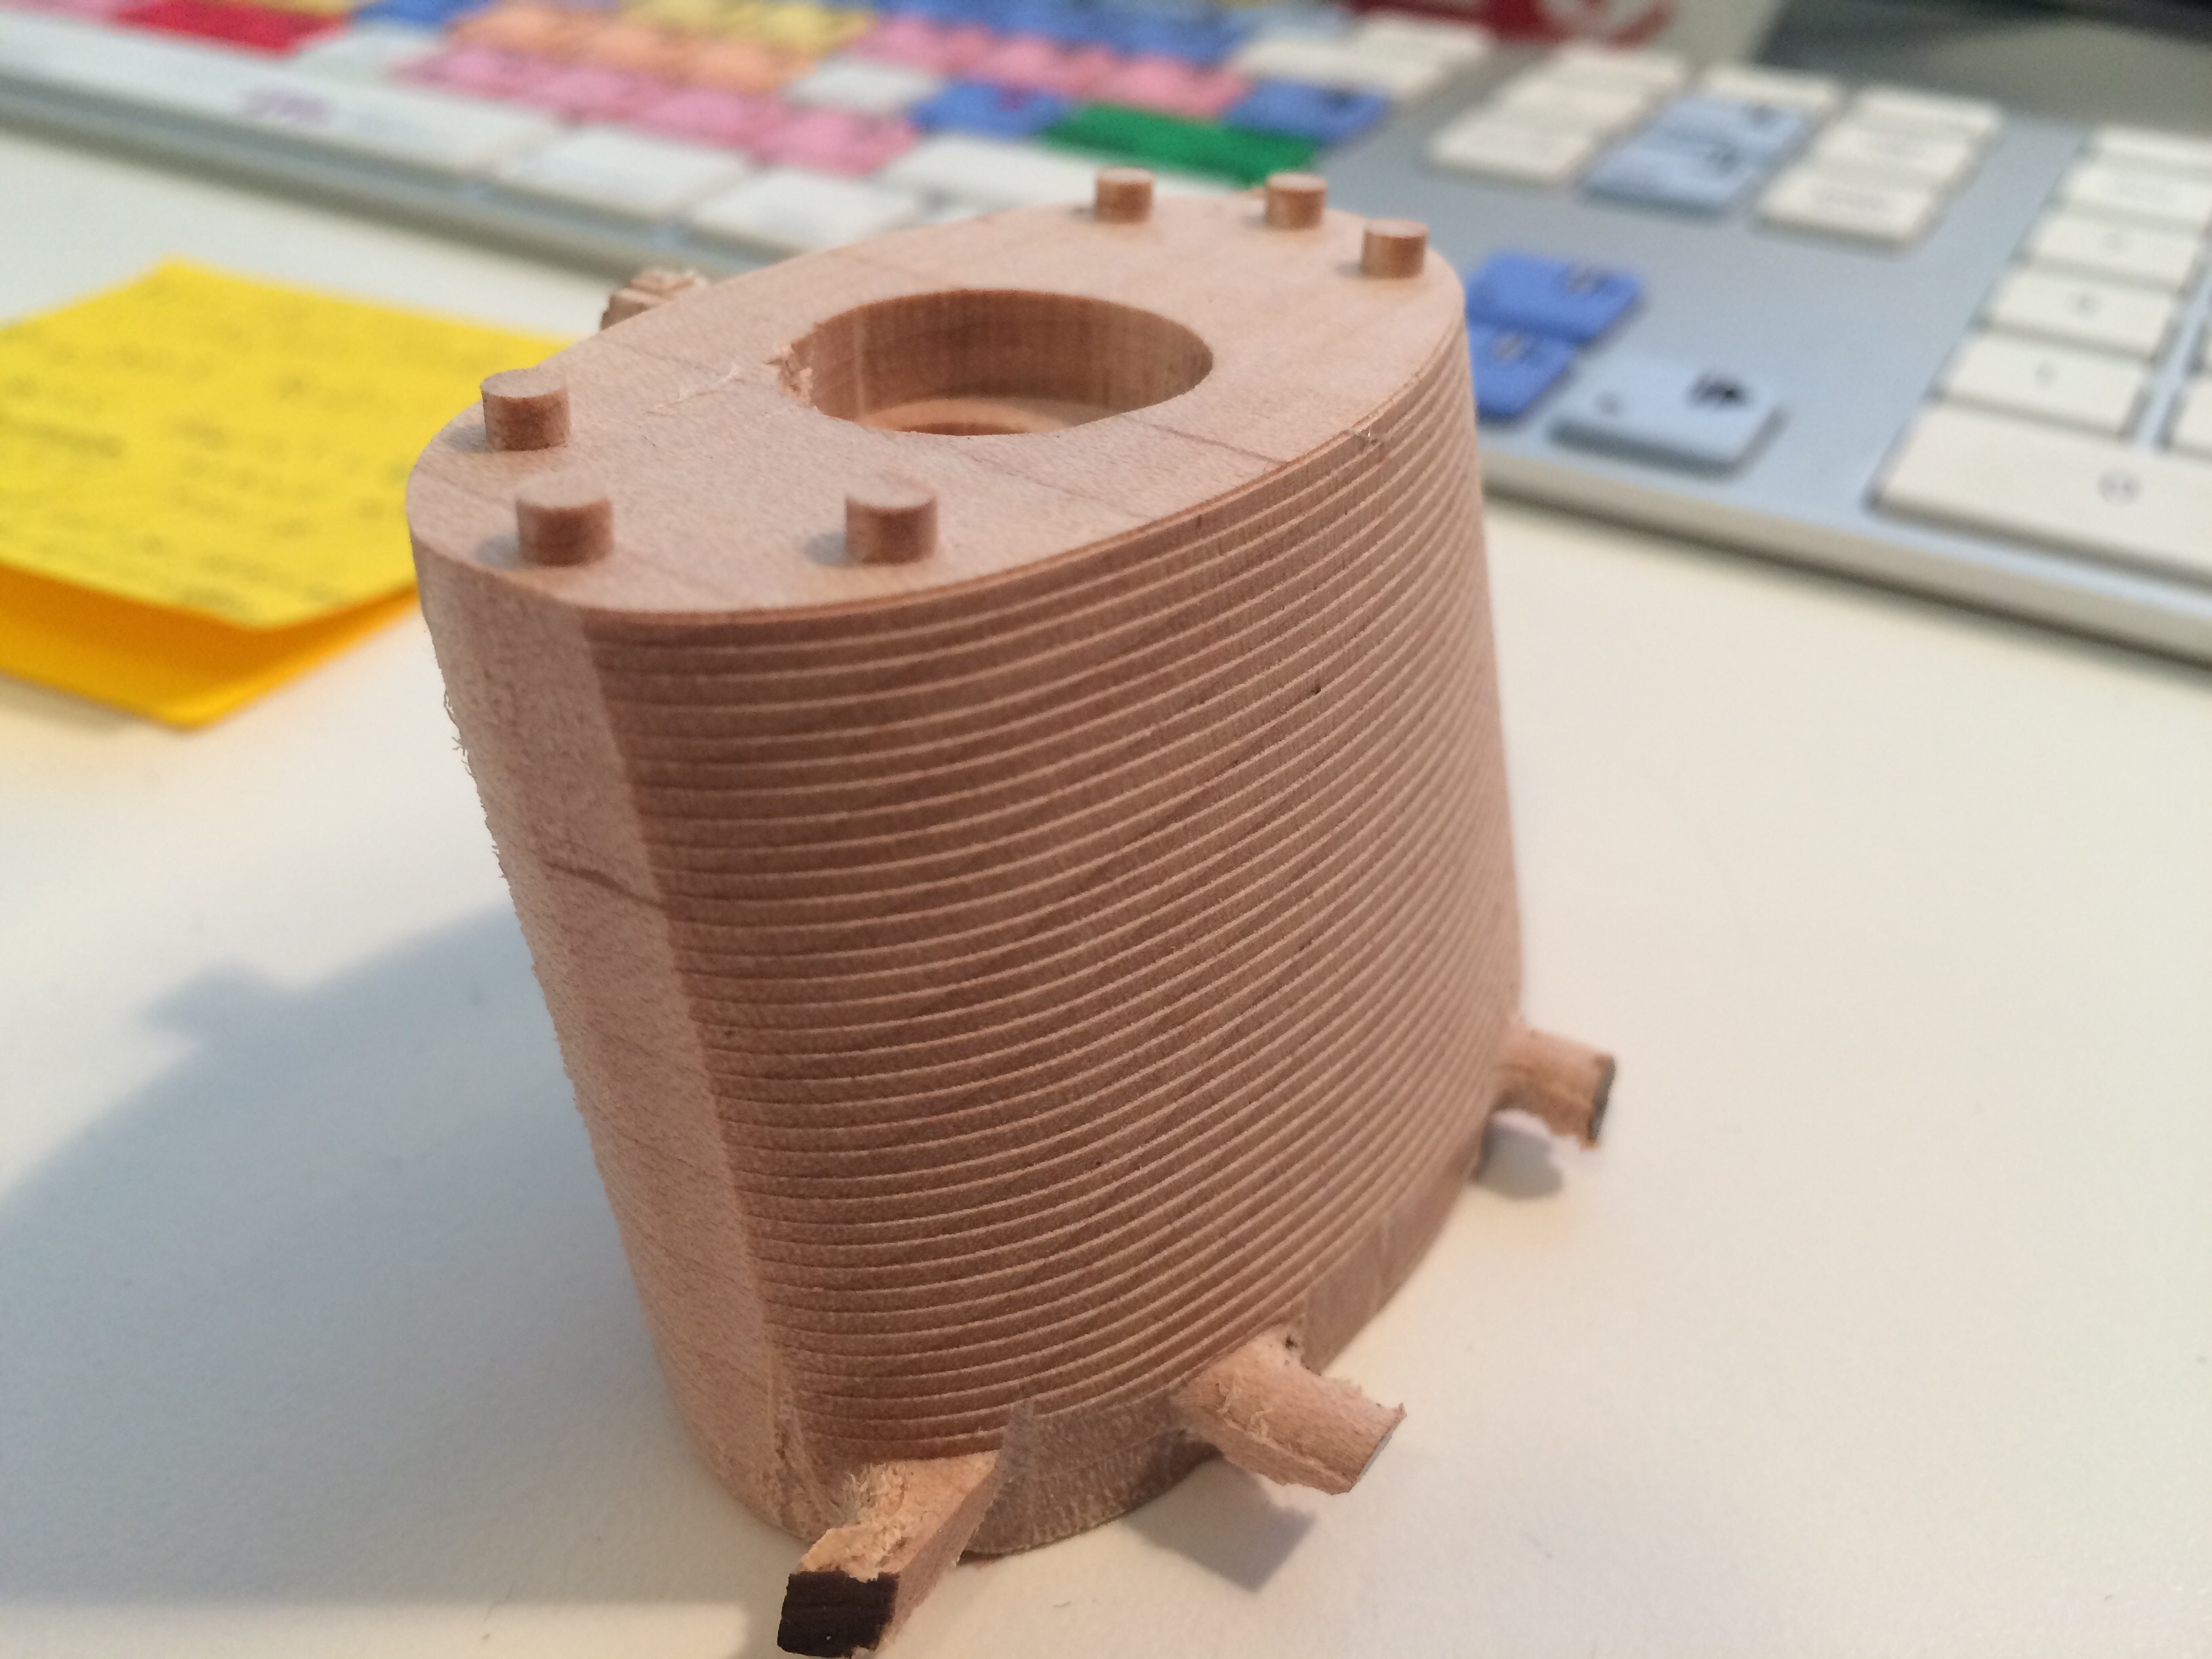
It looks like the broad surface is not quite vertical. In that case, and using a square-ended mill, there will be the terraces, but they are “material safe” and sanding them down (i.e. bridging them with a sanding block and blending them) will leave you with the true contour. You can reduce the steps by going to a finer stepdown, and/or using a ball-ended mill, which will follow the steep slope better even at your current stepdown.
If that is actually a vertical wall, please refer to the Slight stepping artifacts; any ideas? thread. 
1 Like
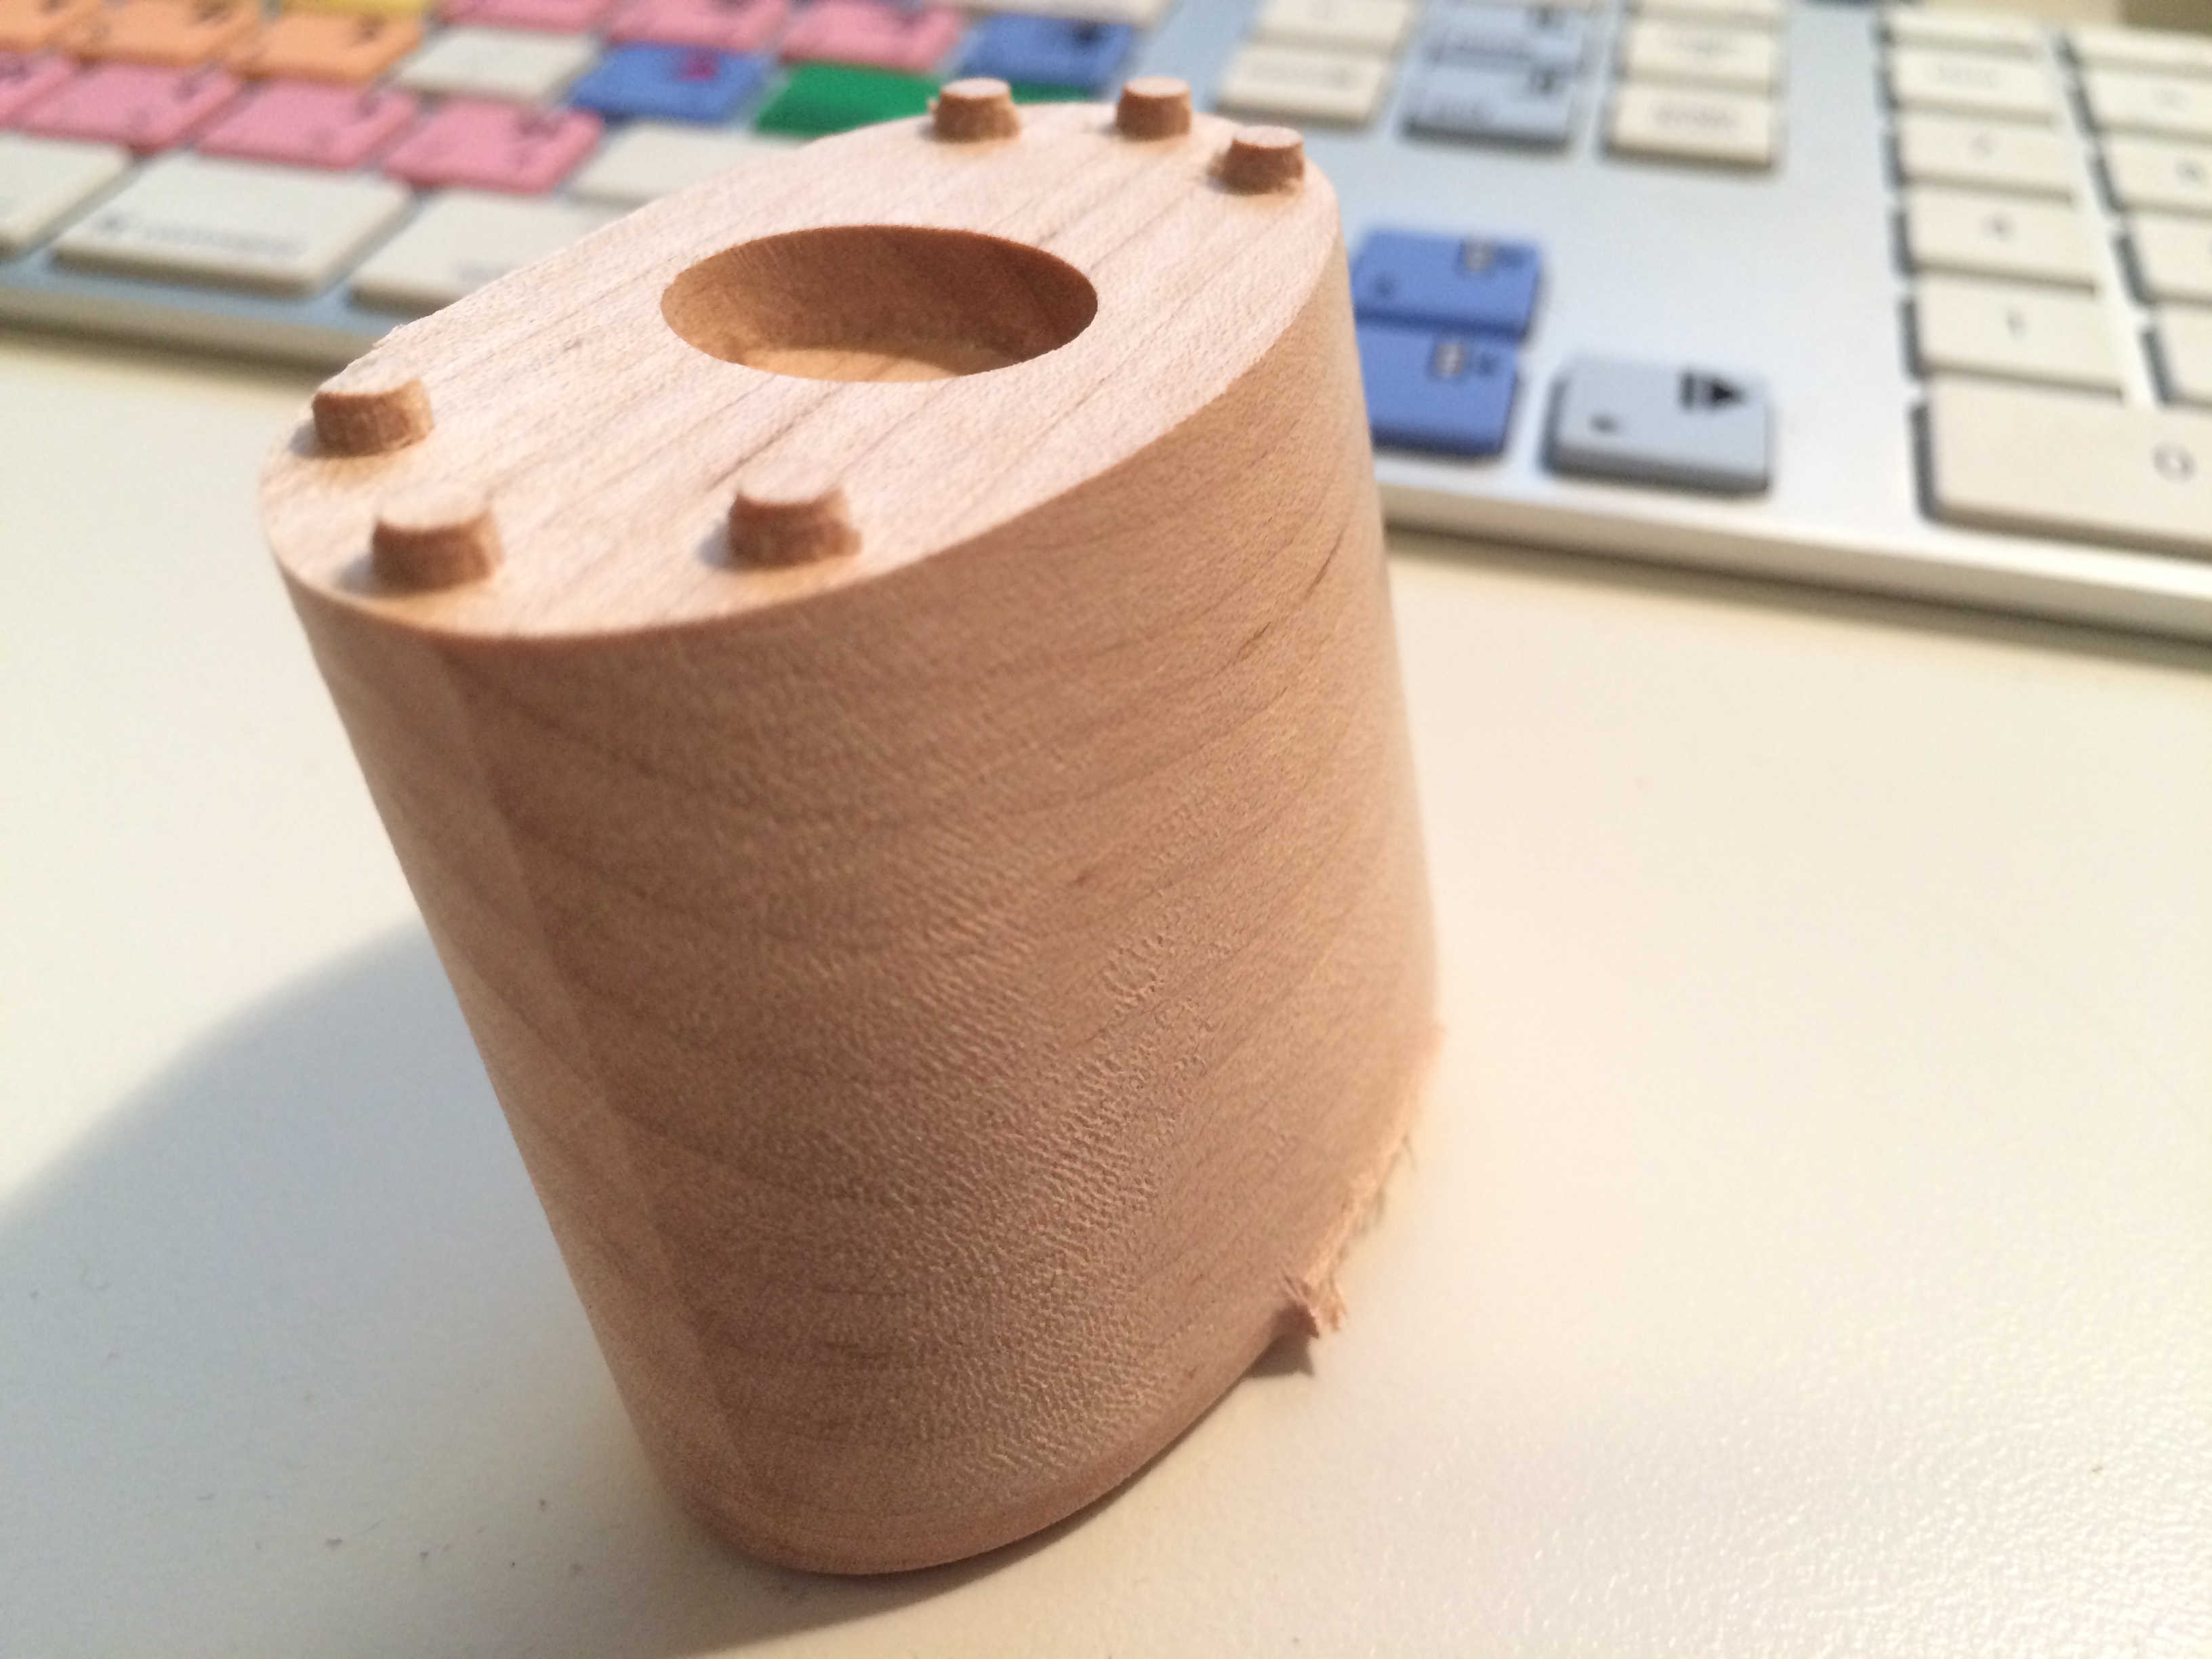
@Randy I just wanted to thank you for your advice, which I followed, to MUCH better effect. Here’s the result of re-doing the job using a ball-ended cutter, as well as reducing the stepdown, as you had suggested. As you can see, a great improvement!
Thanks again!
EDIT: just FYI, this piece has not yet been sanded or finished in any way, it’s straight out of the Nomad. I’ll post a write up of this whole project soon, which will include finished photos. It’s been a gigantic pain in the a** learning experience.
@MrHume, you’re welcome. Very nice work, whatever it is.  And your last sentence is so true. The two go together like hand and glove.
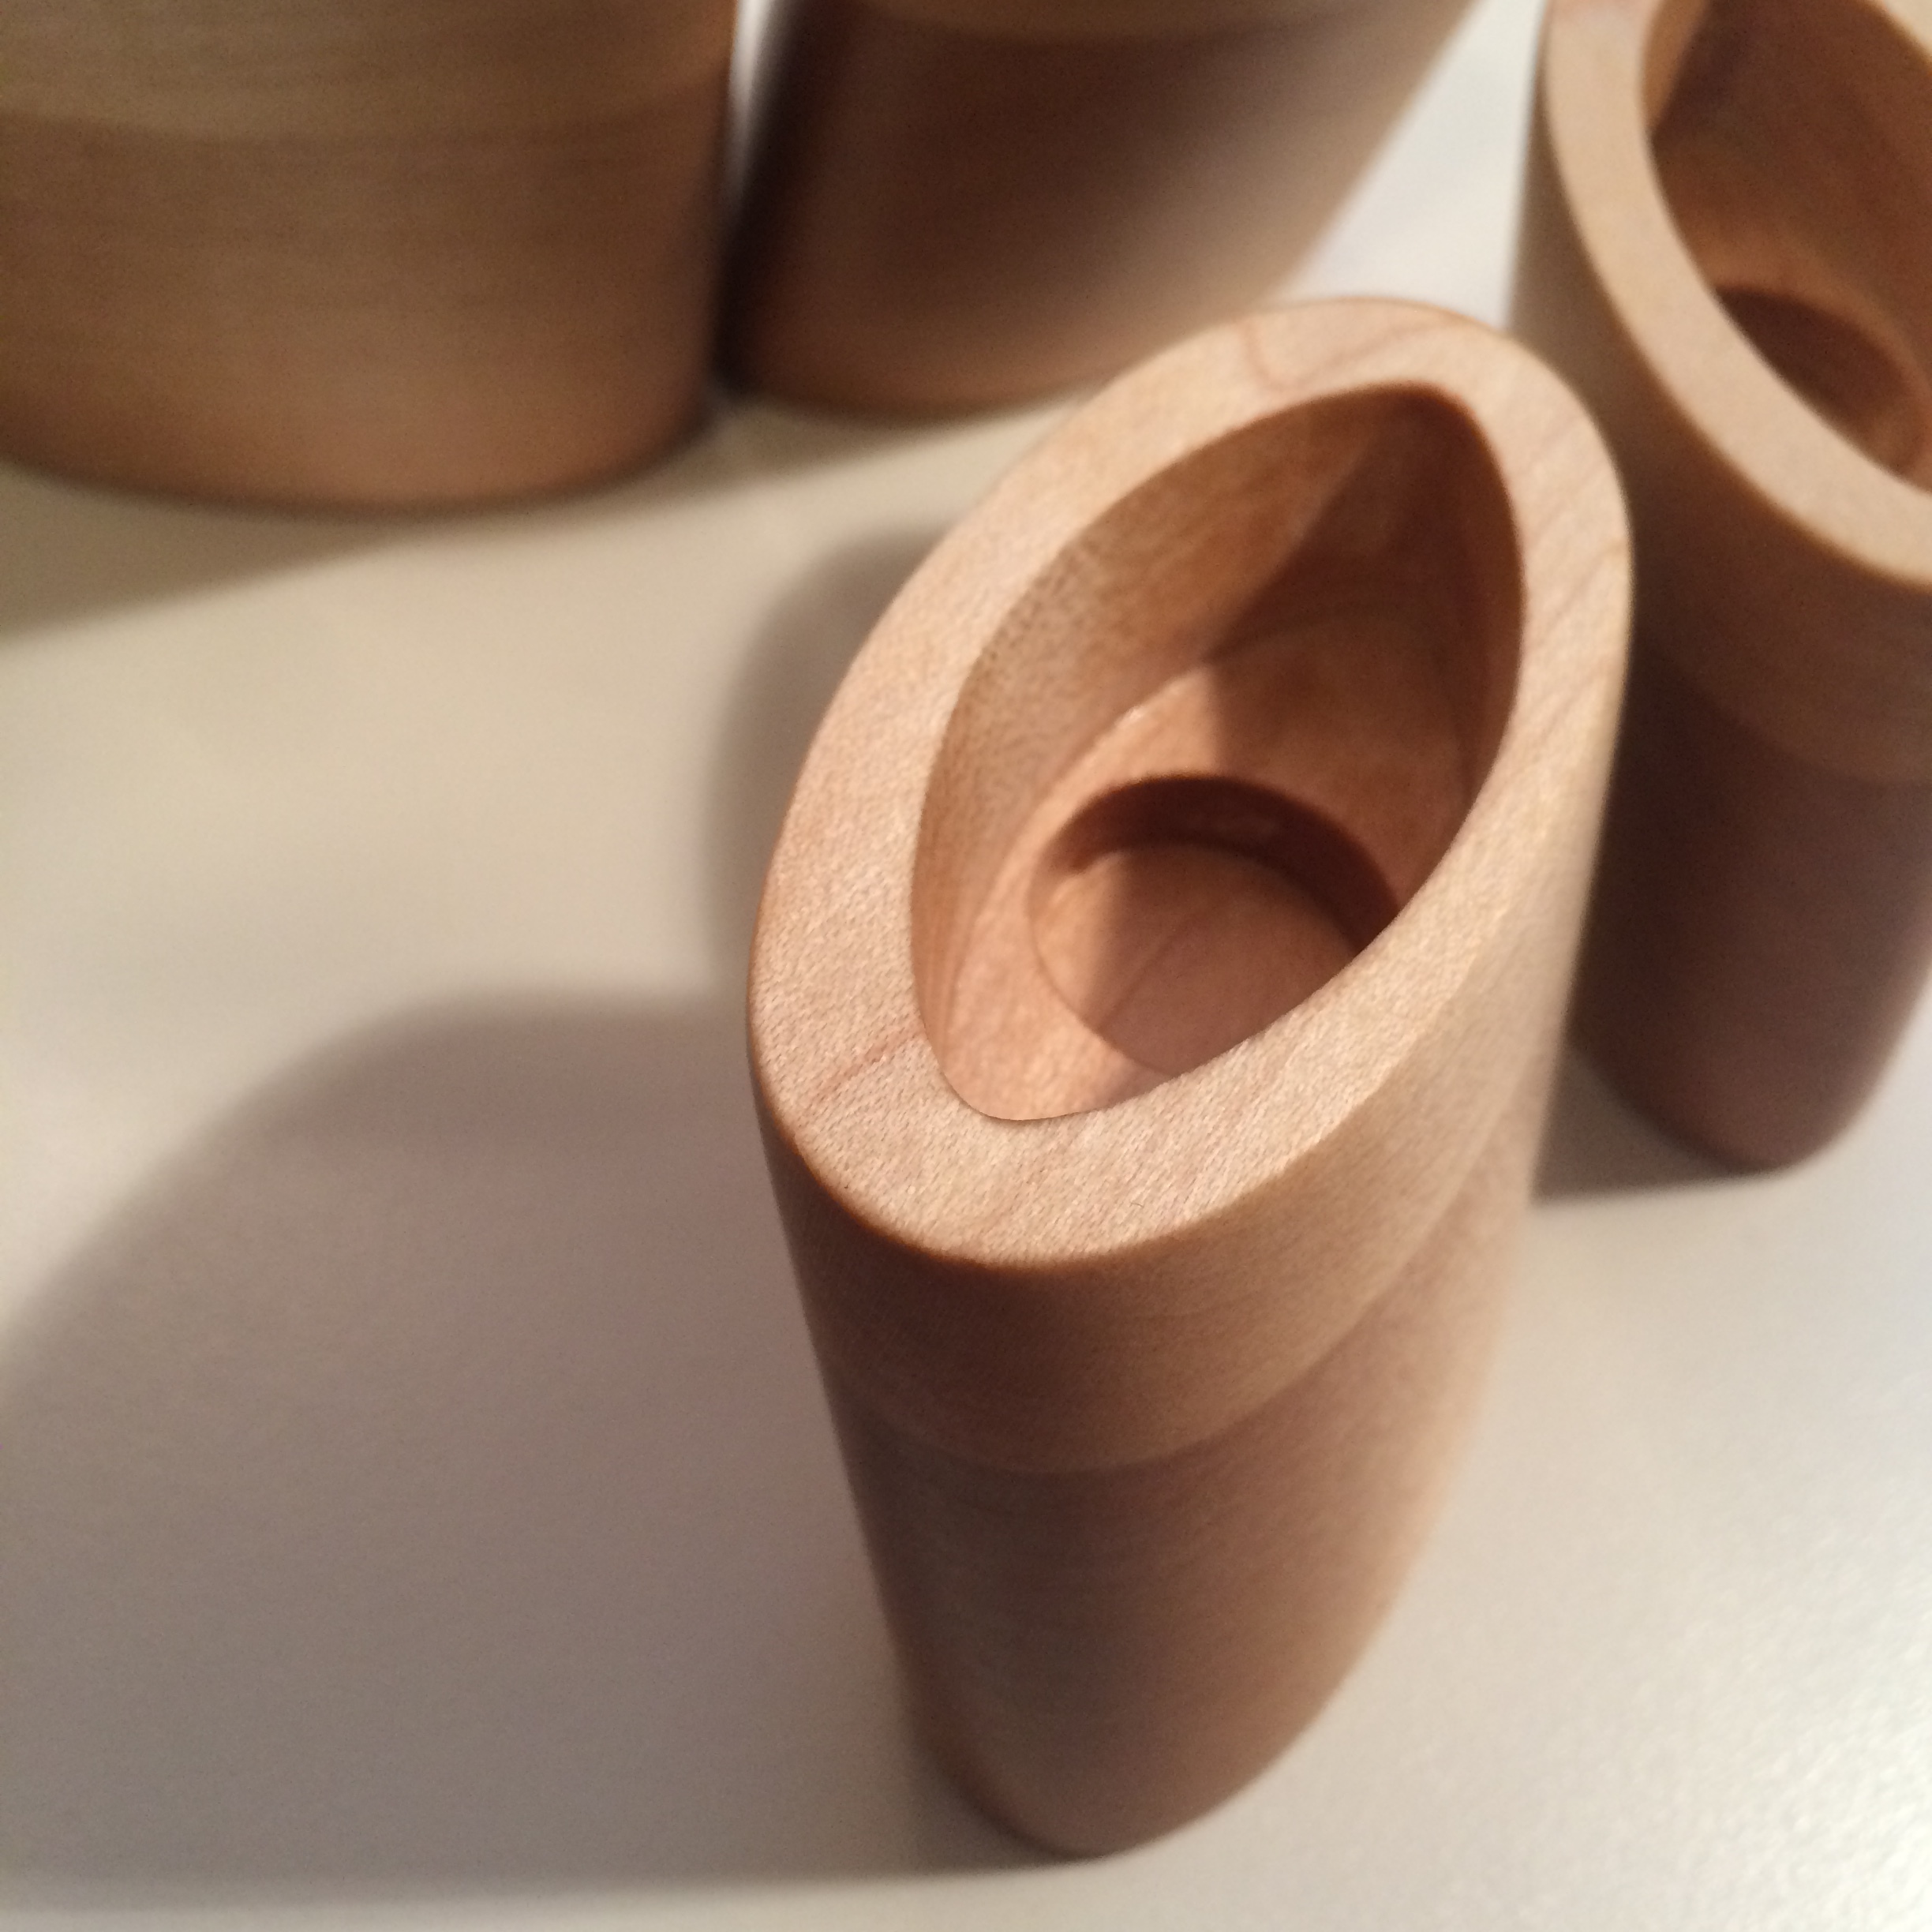
Just thought I’d update this very old topic with some photos of the final products.
It’s a riser for my desk, as you can see I made 4 of them.

It was one of the first things I ever tried to make in any CAD program. I modeled it to match the angle of the desk leg, and to have a recessed area inside that would hold the little plastic disc on the bottom of the leg, as well as a collar to keep the leg and foot together. As you can see here:
Here it is in action:

These are a nice hard maple, dry sanded down to a 320 grit, and wet sanded with 400 and 600, using Bush Oil as a finish and sanding lubricant. I’m having a hard time doing them justice with the photographs - but they are beautiful objects in real life. Frankly I went way overboard on the finishing - but I’ve never made anything out of maple before and wanted to see what I could do with it.
I have to say as a starter project for a beginner to CNC and CAD and manufacturing in general, this has a lot to recommend it. If you’re a newb like me, I suggest you try it! Getting the angles right, figuring out how to make the things using two sided machining, learning about feeds and speeds, and seeing what happens when you try to go too fast on a 2" thick piece of solid maple, learning how much support is necessary to keep things from breaking free and ruining everything, FINALLY getting one out only to realize it’s covered in ridges and isn’t right anyway, then getting the Nomad to finish them nicely (thanks @Randy! ), then realizing you’ve made the damn tolerances too tight and your clever little pegs are not going to fit in your clever little holes properly, brute force solving that problem, and then discovering how much work it is to finish something by hand after all that… OY!
Knowing what I know now, I would absolutely NEVER do this project the same way again, but that’s the point of stuff like this, not just learning how to do things, but also finding out what NOT to do.
For any absolutely beginner newbies like me, here’s the most important lesson I learned:
Patience is the most important tool in a machinist’s arsenal, followed by obstinance and a set of decent calipers.
*note that you can swap “perseverance” for “obstinance” if that makes you feel more inspired.
4 Likes