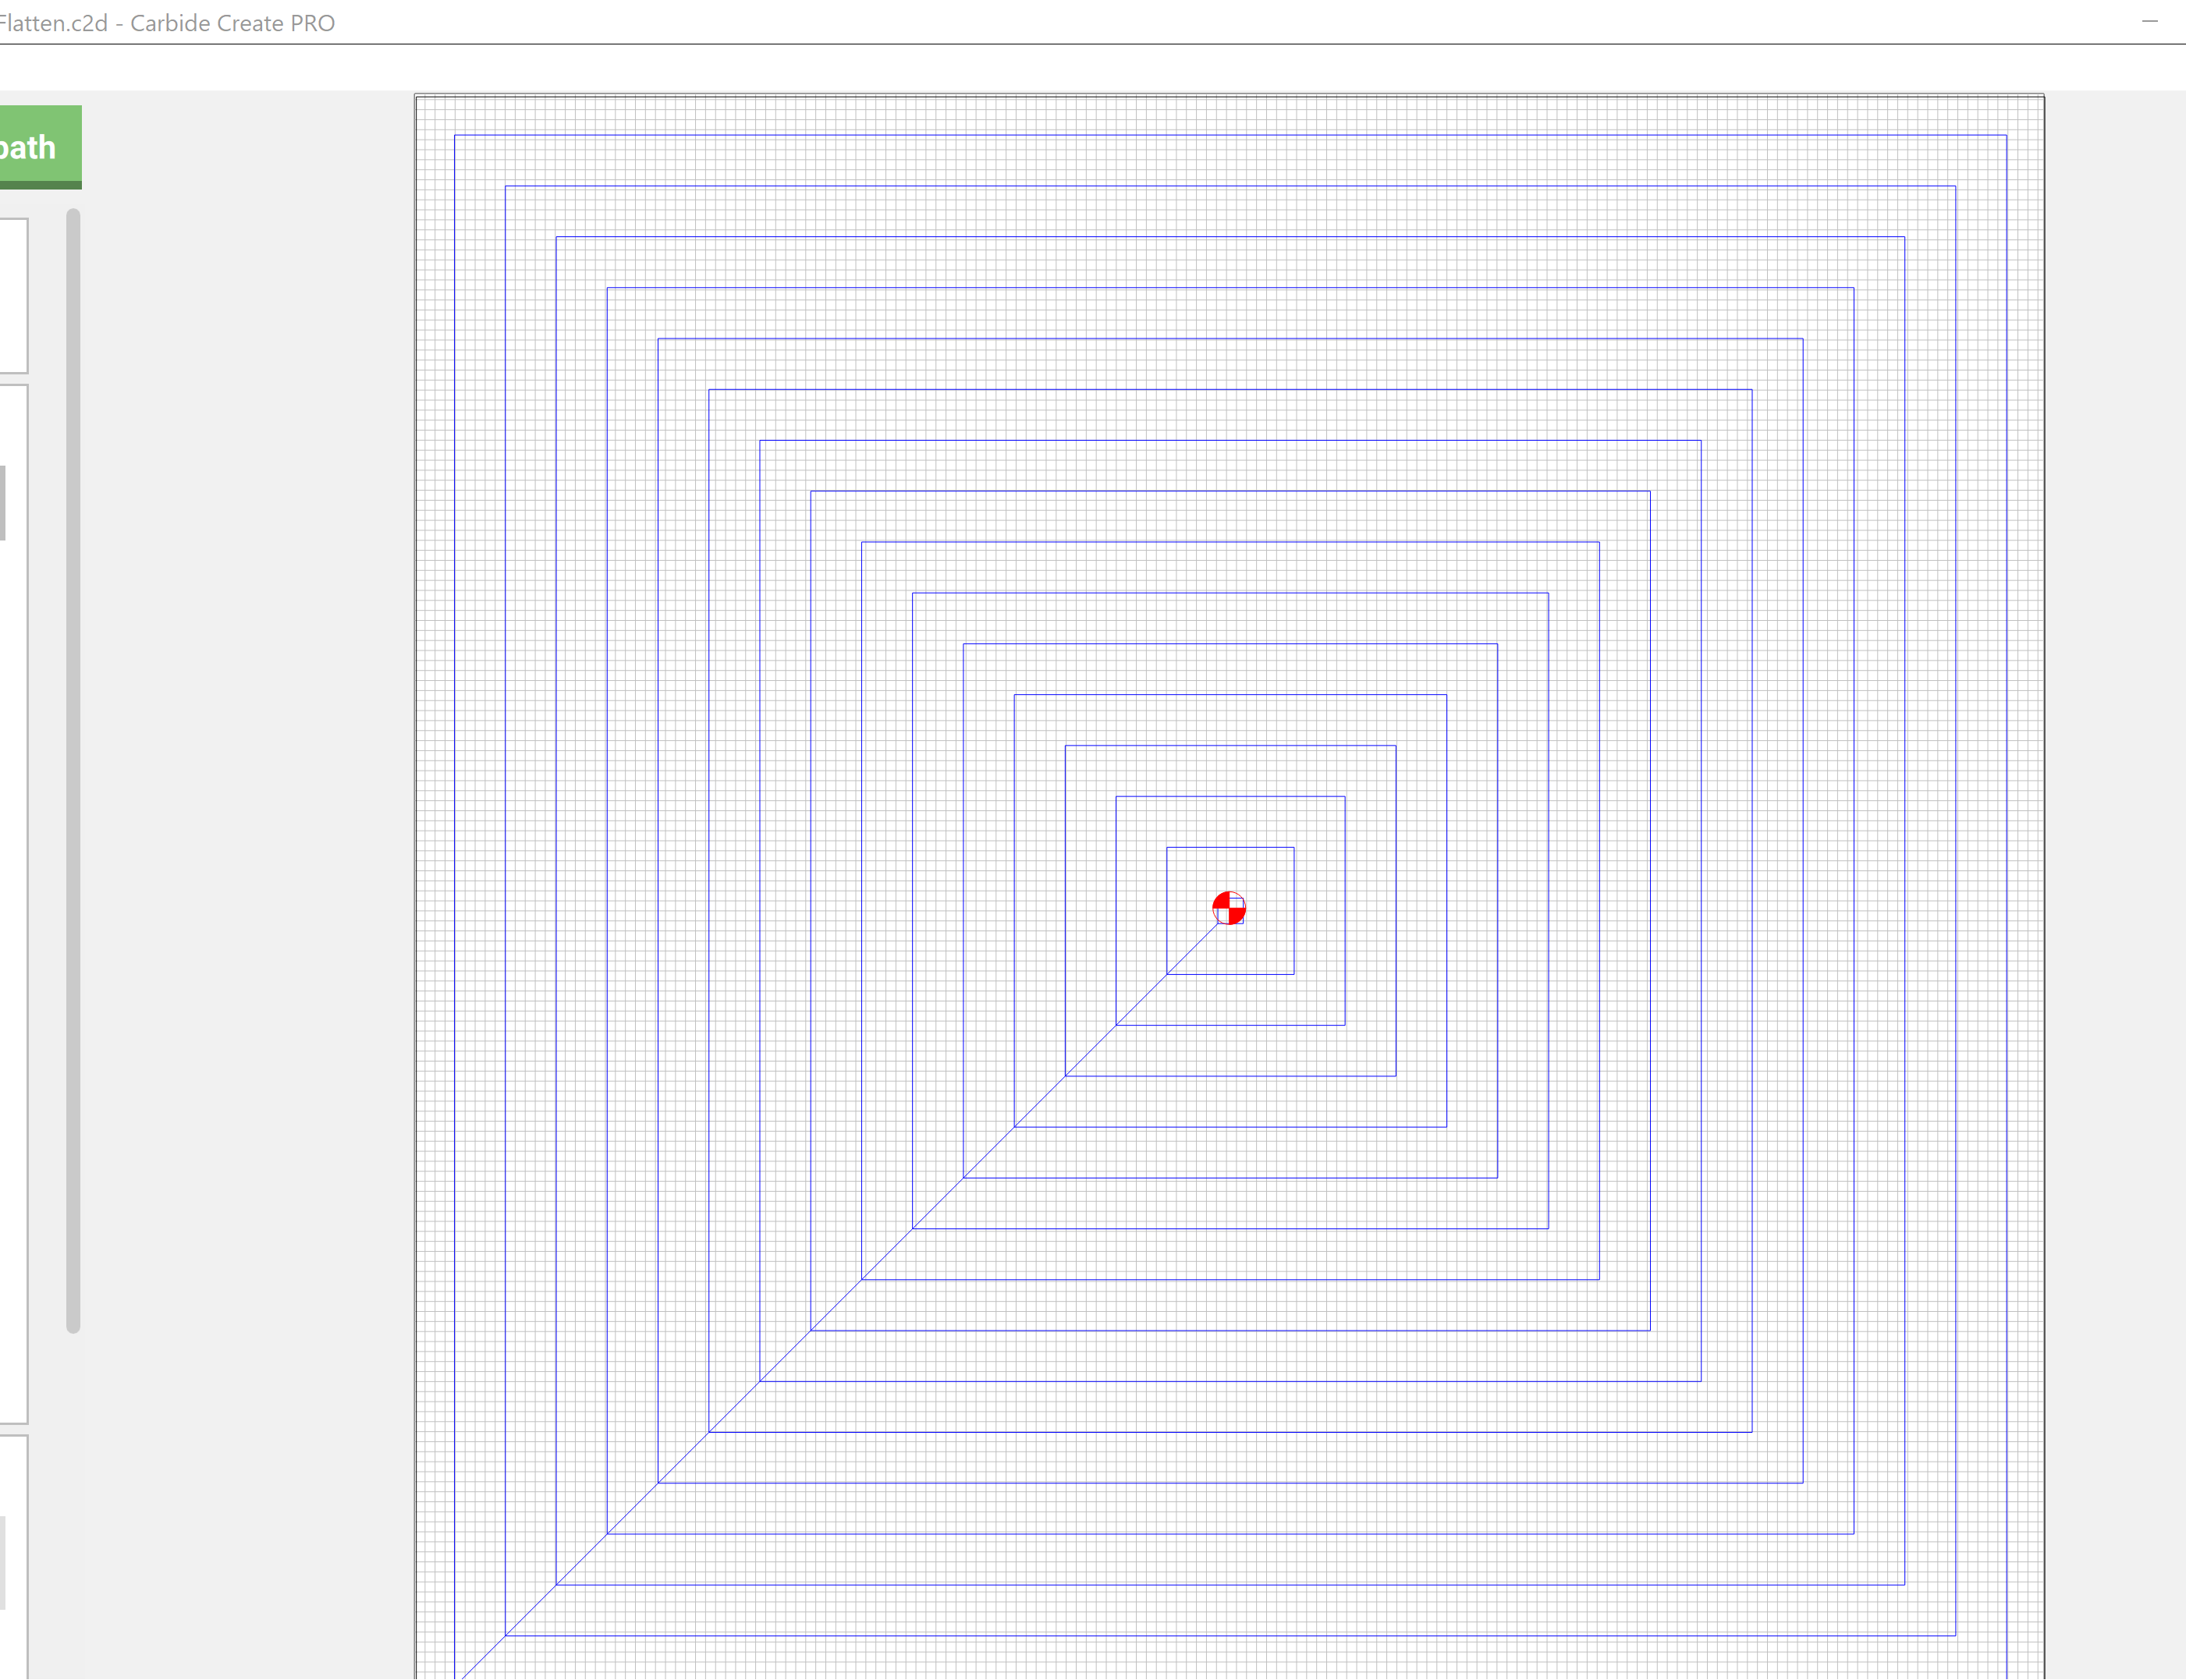
Yeah, it’s a smaller bit, it’s just a 19mm which I run with a 14mm stepover, takes about 15 to 20 minutes to run on the XXL wasteboard.
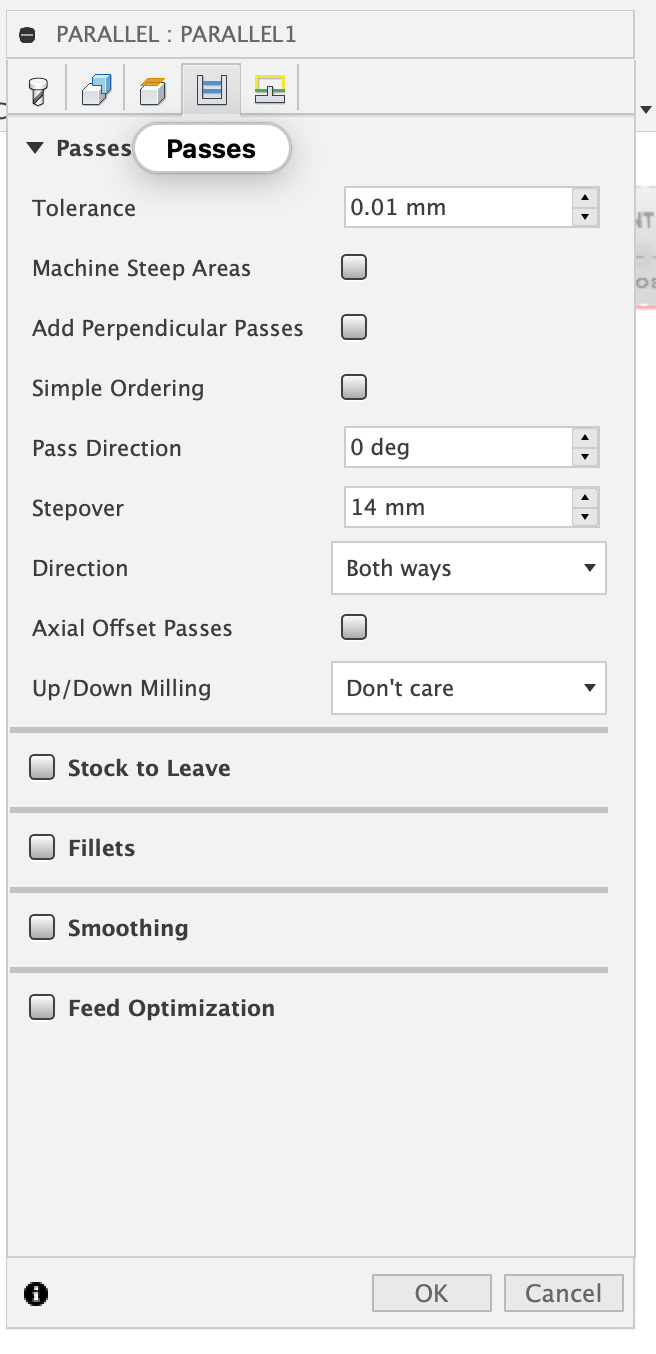
edit - If you’re running the XL not the XXL you already halved that time 
Yeah, it’s a smaller bit, it’s just a 19mm which I run with a 14mm stepover, takes about 15 to 20 minutes to run on the XXL wasteboard.
edit - If you’re running the XL not the XXL you already halved that time
So, you’ve been playing Tron light cycles then?
Oh that’s interesting! Is the Tron cutting pattern more effective?
I’m having a hard time finding the right threaded inserts on Amazon. I found the perfect ones, but they won’t ship to CA?! Bc they’re European? M6, 15mm deep. And are EZ style inserts better for MDF? Can’t use the regular threaded ones?
I ended up going SAE - 1/4x20 T Nuts. Had to adapt the Myers Spoilboard design because the T-Nuts I got had a larger diameter than his (for the recess)…but 1/4 x 20 means that cheap Home Depot bolts are my friend. Easy.
I have used these so far and they’re OK for inserting into the underside of the top spoilboard so they stop well clear of the surface and you don’t machine into them as you run levelling passes.
I have found huge variability in quality between the different threaded inserts and there’s only a couple of vendors on Amazon I’m prepared to buy from now having had a lot of the cheap ones fracture or shear off as I tried to insert them into birch ply.
You probably want some longer inserts to go into the baseboard to hold the spoilboard down with and then some shorter ones for the spoilboard to leave levelling room.
If your experience is anything like mine you’ll spend ages trying to figure out what layout is best for your spoilboard and workholding, build it, use it and then discover all the things you don’t like about it and start your “next spoilboard I make will be like this” list…
I have no idea if it’s more effective, but as long as your spindle is trammed properly, it works just fine.
One more thing: Make your square in the design LARGER THAN the size of your board, or the Pocket you create will have rounded corners and you will not have a smooth surface. Or, I suppose, you could set up a final no offset cut at the end of the job.
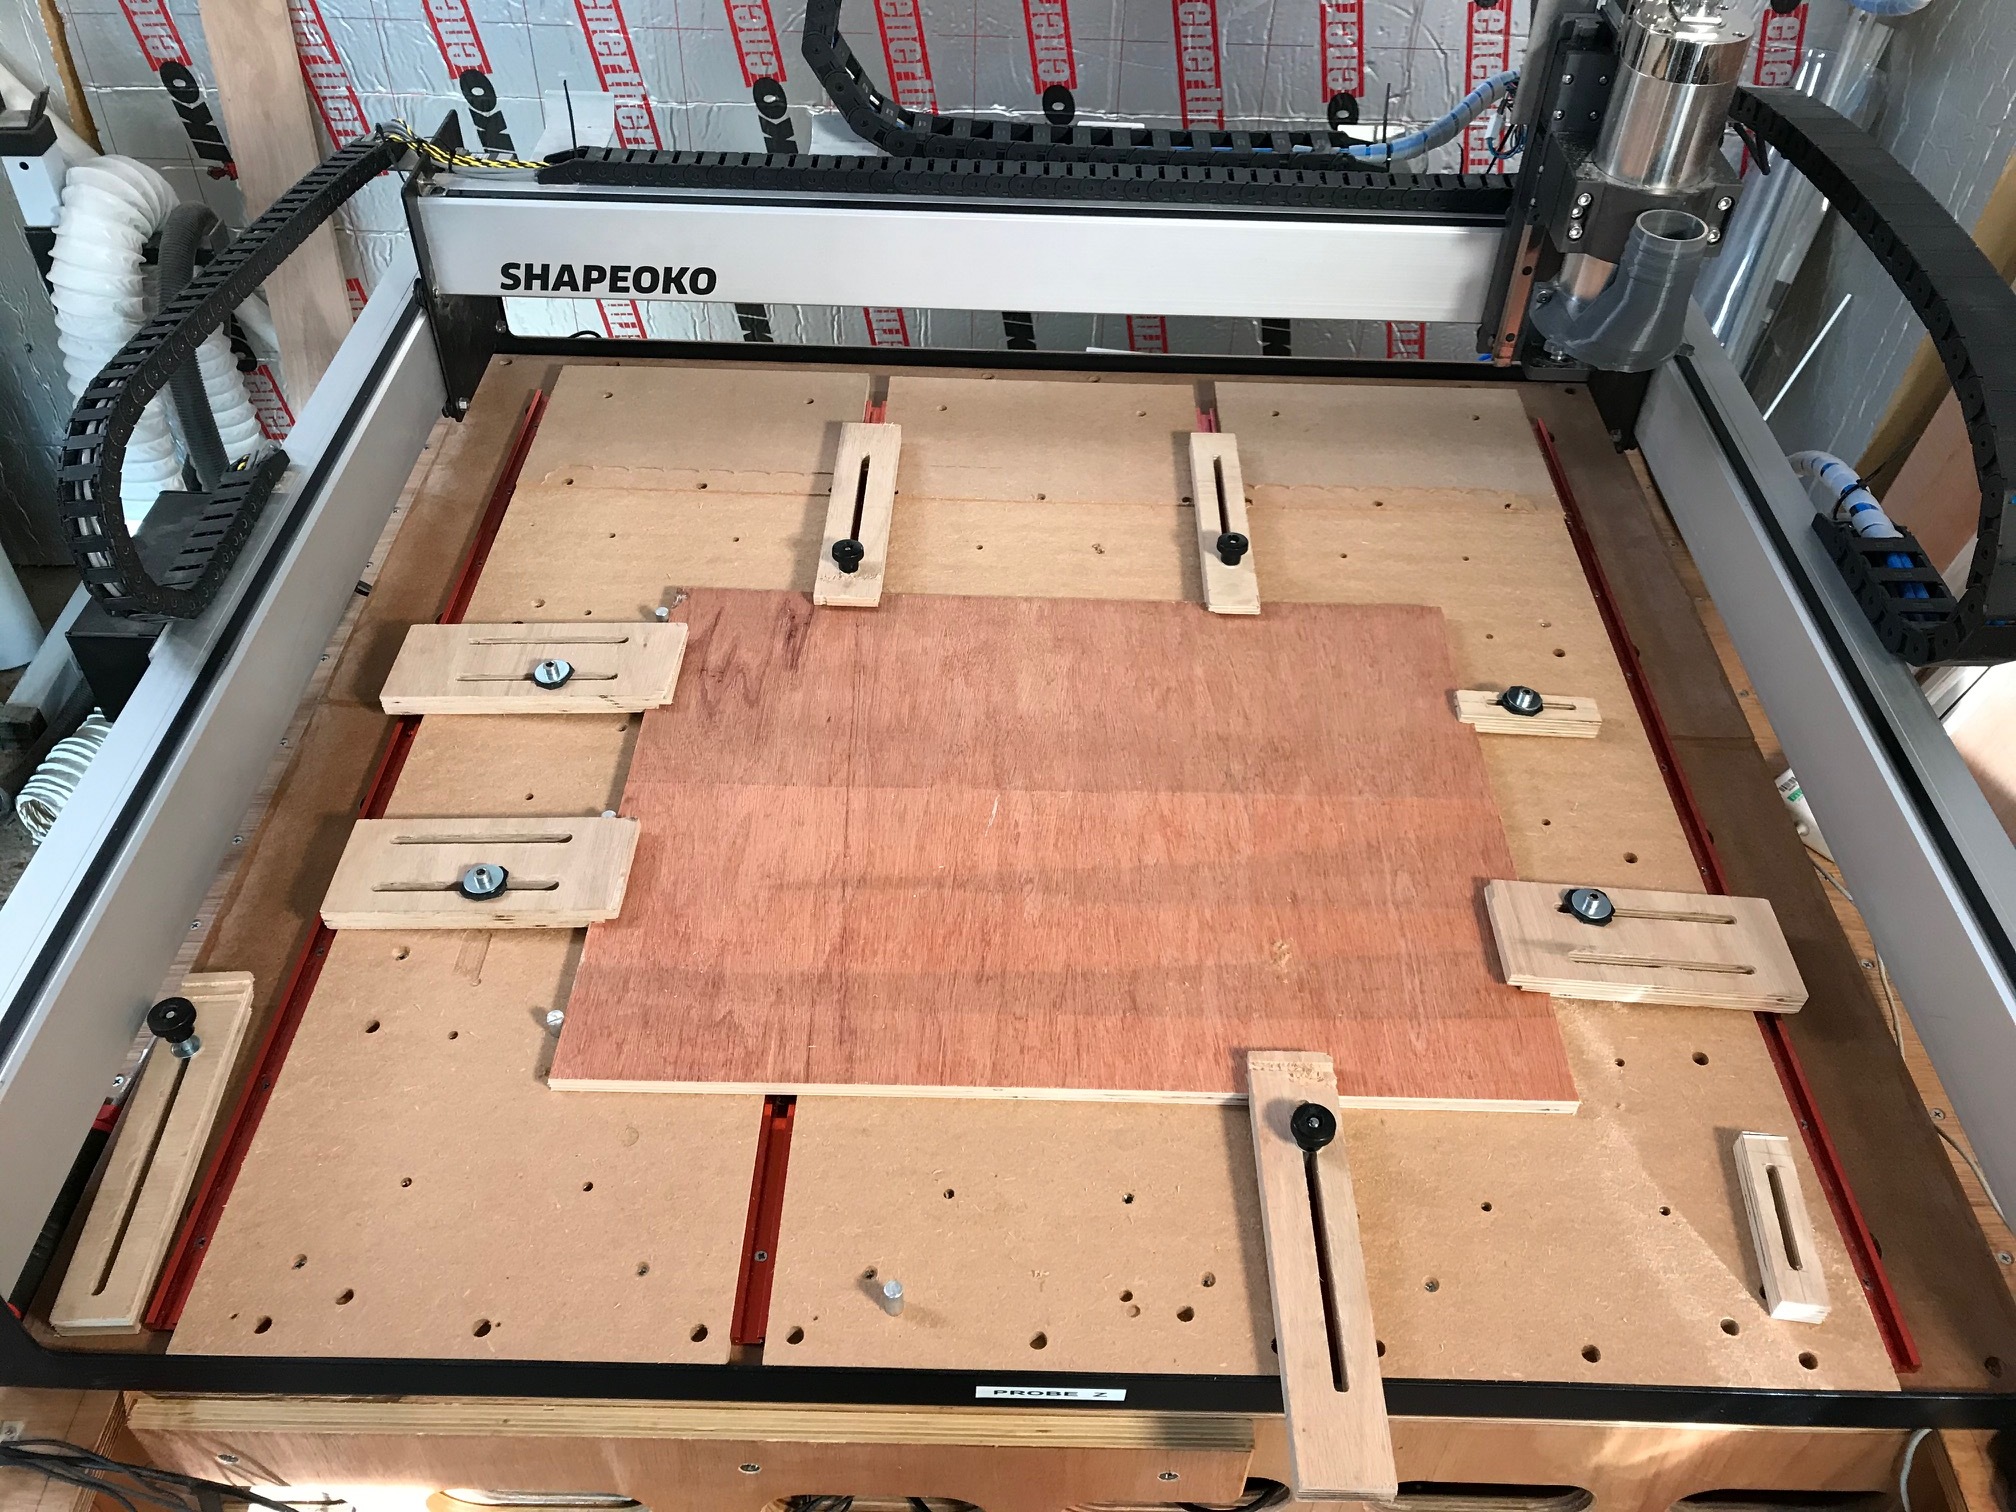
Here’s my carefully chosen design of T-Tracks with spoilboard strips inbetween which I spent too long thinking about before actually building and trying to use it.
Since then I’ve realised that;
It is only effective if your light-cycle is properly tuned (porting helps)
I removed the supplied MDF and supports, fastened the shapeoko to the work table and built up a work surface on top on the table.
Works Great. No bounce, no deflection and I seem to have a better max “z” travel than most.
Thx Liam,
I guess the rule of thumb is, the top waste board should be no wider than you’re able to mill level.
To be within the scope of the cutting bit. Otherwise, a larger project would sit on top the outer lip and not be level.
Am I understanding it yet?
Yep,
That’s a key “DOH” moment when you realise you can’t mill the edges of your spoilboard.
I think the main thing is to get a spoil board with some workholding installed and levelled, then actually use it and find out how you plan to use the machine and which of the many workholding, zero finding etc. methods are going to work for you, then when you’ve worn away your first spoilboard by levelling it you’ll have a much better idea of what V2 should look like.
Yes Liam, my thoughts exactly. I know it won’t be perfect coming out the gate, therefore V2, V5…etc.
We learn from our mistakes, life goes on. The journey is the best part. If everything is handed to us is perfect, then life would be boring.
Hi Sherpa,
I’m concerned that my bit won’t be able to go low enough to drill out the holes in the stock wasteboard.
Are you saying I would have to remove and raise the stock MDF, drill it and lower back?
Thanks, G
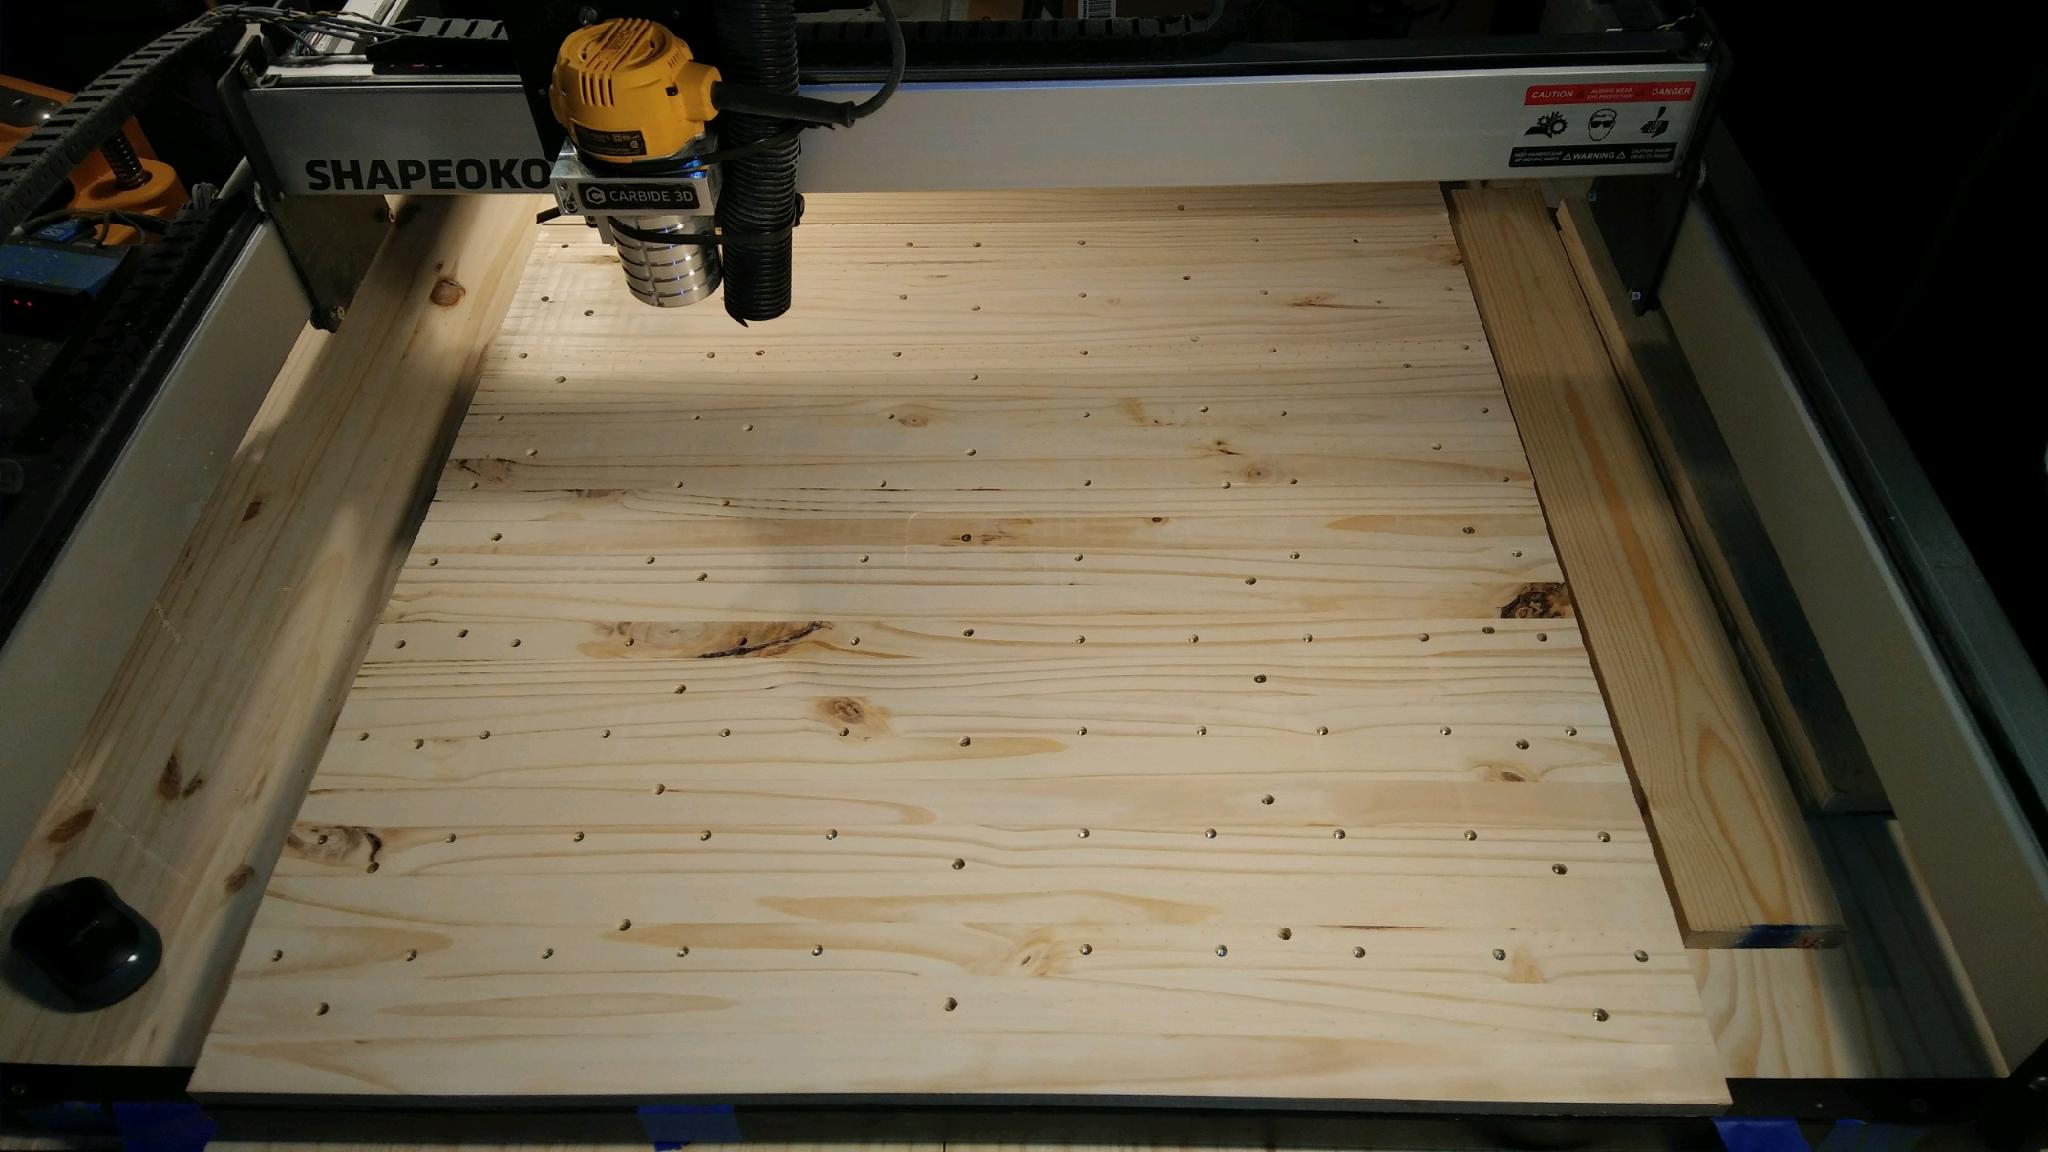
No worries, so what I did was simply put the new supplementary wastebord on top and run the job to do all the holes, then once they are all done and you are happy, find the centre on the supplementary waste board and on the black front rail of the So3, then line the centre’s up, and mark with a pencil etc the hole locations that go down into the original board and then drill manually with hand drill.
Do not worry to much about CNC accuracy here as the inserts have a little slop, allowing the bolts to move around a smidge for fitting, obviously you want to be as accurate as you can manually though as this will save time with alignment. Then tighten up, step back, admire your awesomeness, take picture, smile and post here #fistpump lol
If that does not make sense let me know and I will take pics on my machine
This topic was automatically closed 30 days after the last reply. New replies are no longer allowed.