Inlay Work (Woodworking)

I’m new at CNC and I construct end grain cutting boards
I just purchased the SHAPEOKO 3.
Anyone know how to get started with inlay work pertaining to woodworking.
I would like to get the Canadian Leaf image and inlay it in a board I’m building
Thanks

Thank you for the purchase! We hope your machine will work out well.

The machine can do inlays, but it’s a bit challenging getting the files ready for the machine to do this. Let’s take a look at some of the options in broad strokes:

  • software (specialized or general done manually) — there are a number of commercial apps for this, some quite sophisticated, or amazingly capable (esp. the one which is a plug-in for Adobe Illustrator). Some of the free/opensource software also has this feature

  • nature of the inlay — there are a couple of options here: square endmill and vertical sides and solid materials, V-bit and angled sides and solid materials, square or V-bit carved pocket which is then filled with something — one can do an offset cut using a V-bit which will fit and that avoids many of the complexities of using a round bit as described below.

We’ll work through how to handle this with the default software and a round endmill — let us know if you have any questions!

First, draw or find a suitable vector file, e.g., File:Flag of Canada.svg - Wikipedia

Then, open it in some suitable tool — we will first try to directly open it in Carbide Create.

Although unplanned, for didactic purposes, this would have been hard to beat. The image is incompleat, so we will need to examine it in some other tool and fix it — we’ll use Inkscape.

If necessary, download and install Inkscape from http://www.inkscape.org then open the file in it.

To see how the file is truly structured, switch view modes: View | Display Mode | Outline:

Select everything to determine how the file is composed — a layering of:

  • path (the maple leaf)
  • rectangle (the white square
  • rectangle (the flag itself which is masked out in the center to yield the two rectangles to either side)

Ideally, we would instead want: path (the maple leaf), as part of a composite path with the white square (each having suitable path directions), two separate rectangles for the red panels to either side, and an overall rectangle to define the overall dimensions.

To arrive at this, we will need to:

  • zoom in
  • select the “Edit Paths by Nodes” tool
  • click on the Maple leaf to select it
  • click on one of the two nodes which defines the gap by not being connected to the other
  • Click on the “Draw Bezier Curves and Straight Lines” tool
  • click on the selected node
  • click on the other node to fix and close the path

Zoom out, select the Maple leaf and the square and select Path | Difference to get the desired composite path:

We note that the square is positioned at 250 units in from the left edge of the page, and that the square itself is 500 units wide. This then makes it straight-forward to:

  • select the rectangle
  • Edit | Duplicate
  • change the width to 250

  • Edit | Duplicate
  • change the X position to 750

The graphic should now be ready to save to a file and import into Carbide Create.

The SVG import filter for Carbide Create seems to delete redundant geometry — but since we know the proportions of the flag, this is simple enough to fix within Carbide Create:

  • click on the outer rectangle to select it, note the dimensions
  • gear icon
  • set the stock size to match the dimensions of the rectangle
  • click to deselect, then click again to select to load the Design pane for this object
  • select the bottom left corner as the origin
  • set X and Y to 0 and click “Apply”

The balance of this should be obvious w/ Apollo’s notes below — let us know if you have any questions.

4 Likes

Hi @Angelo
As @WillAdams has described, the radius of the tool must be considered when preparing art for the CNC inlay workflow.
By considering the size of the tool you will use you can make sure your parts will fit perfectly together.

Take a look at this test file; I have added a radius to the sharpe corners to allow for a .125" cutter to define both the inside and outside of the shape.
maple leaf adjusted for inlay.c2d (270.9 KB)
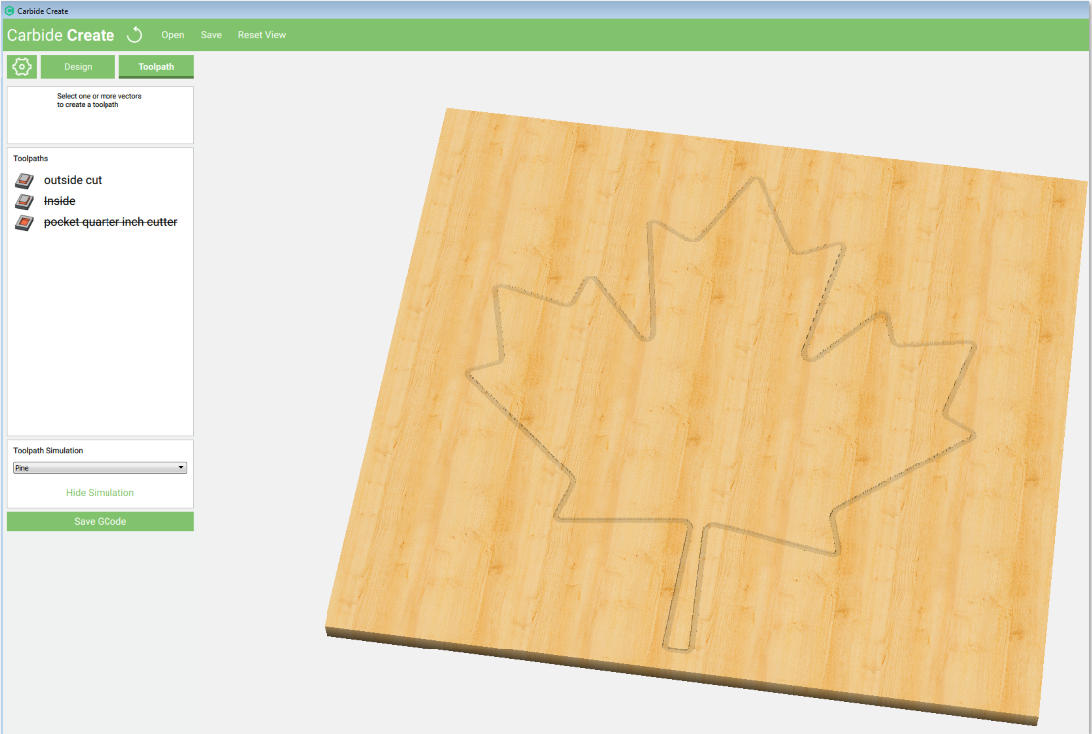
For this Maple leaf example it will take 3 toolpaths and 2 tools (#201 .25" endmill and #102 .125 endmill).

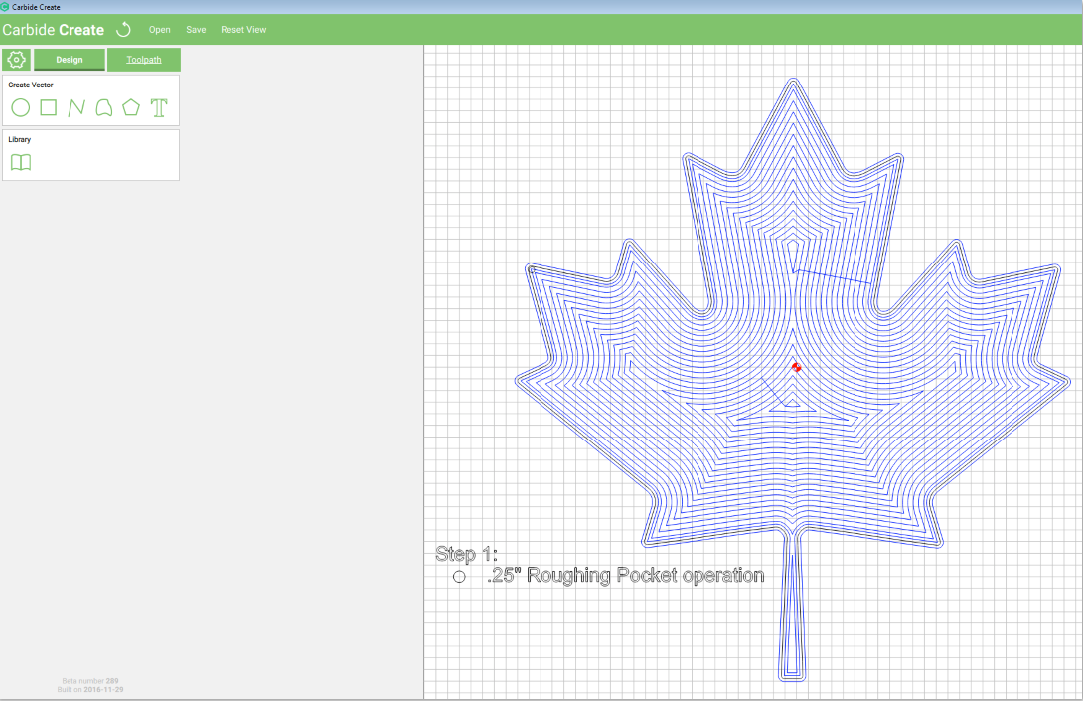
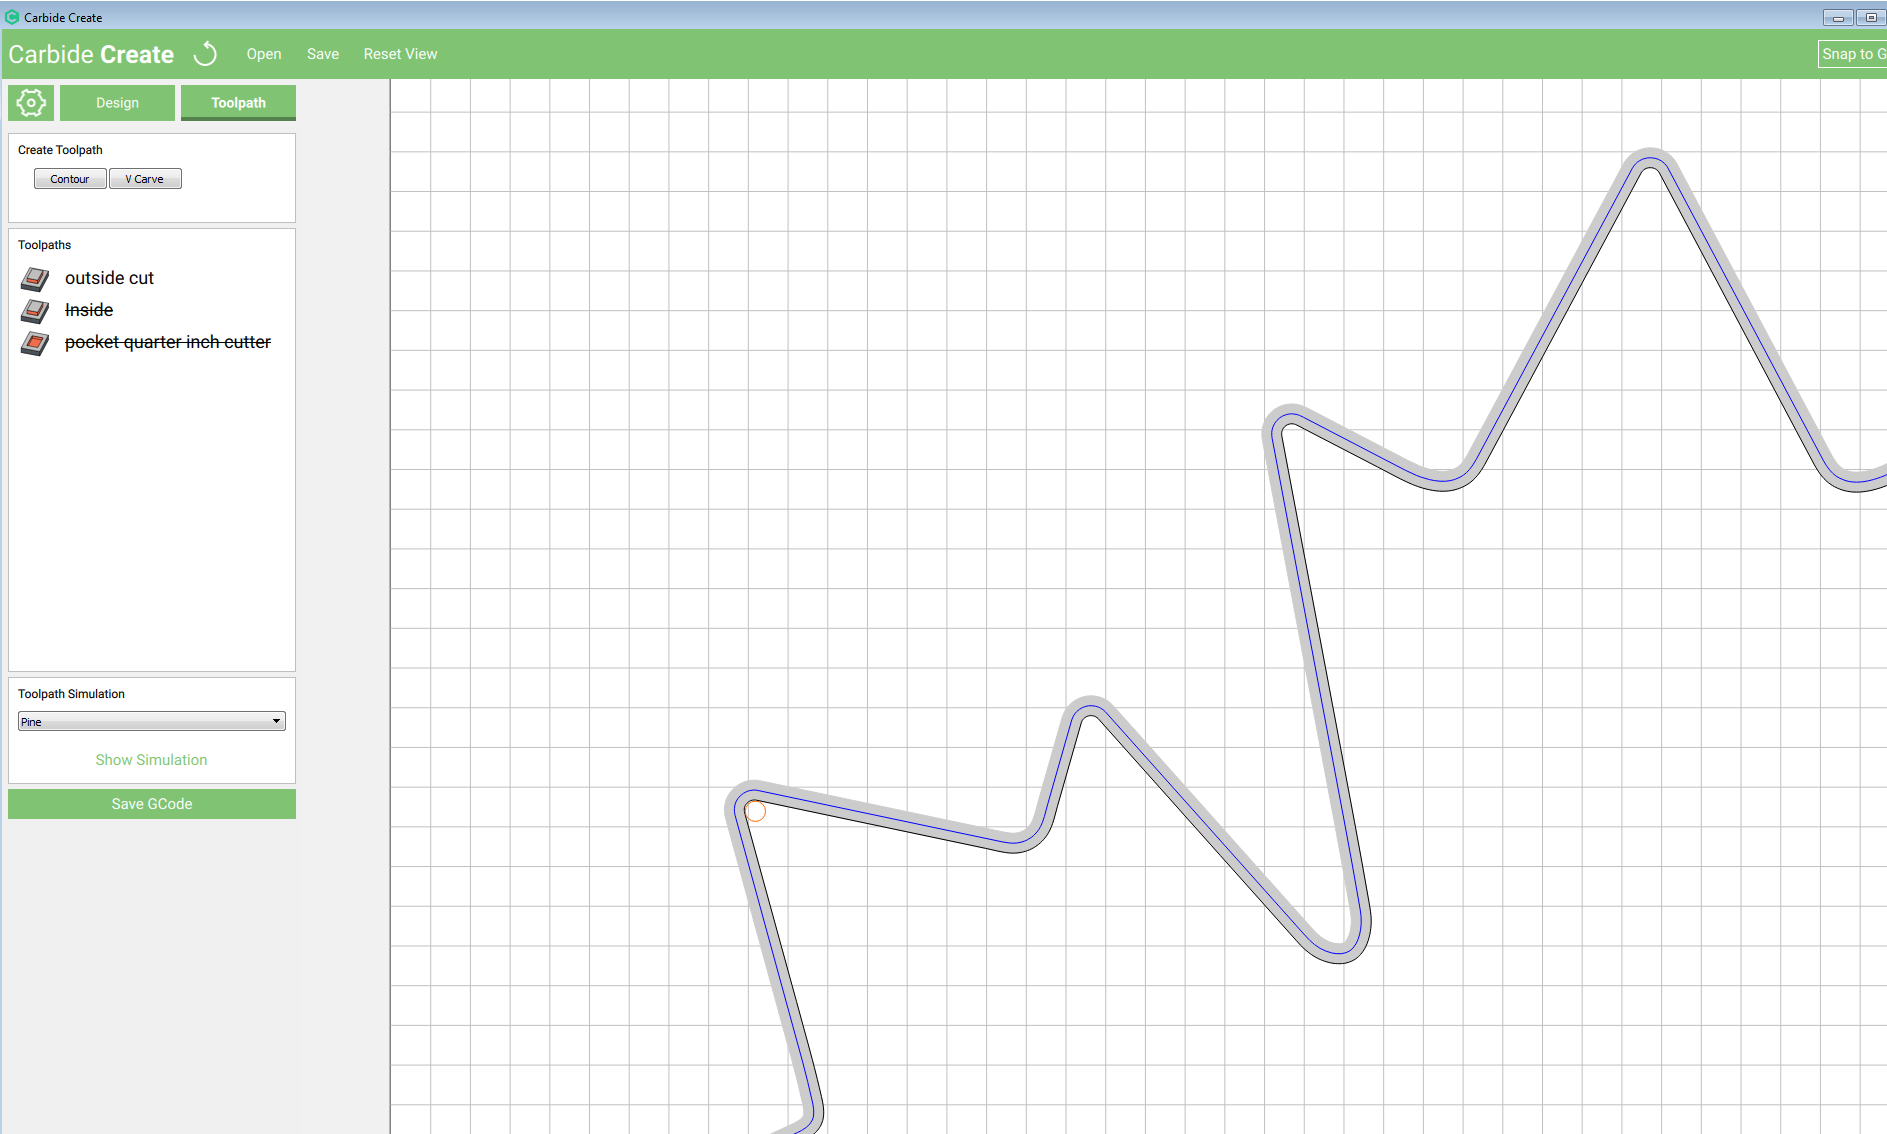
Step :1 “Pocket” cut with a large tool, like the .25" endmil.

Heres a look at the result of the Pocket cut with the .25" - you can see that the tool cant reach all the areas, and a smaller cutter will be needed.

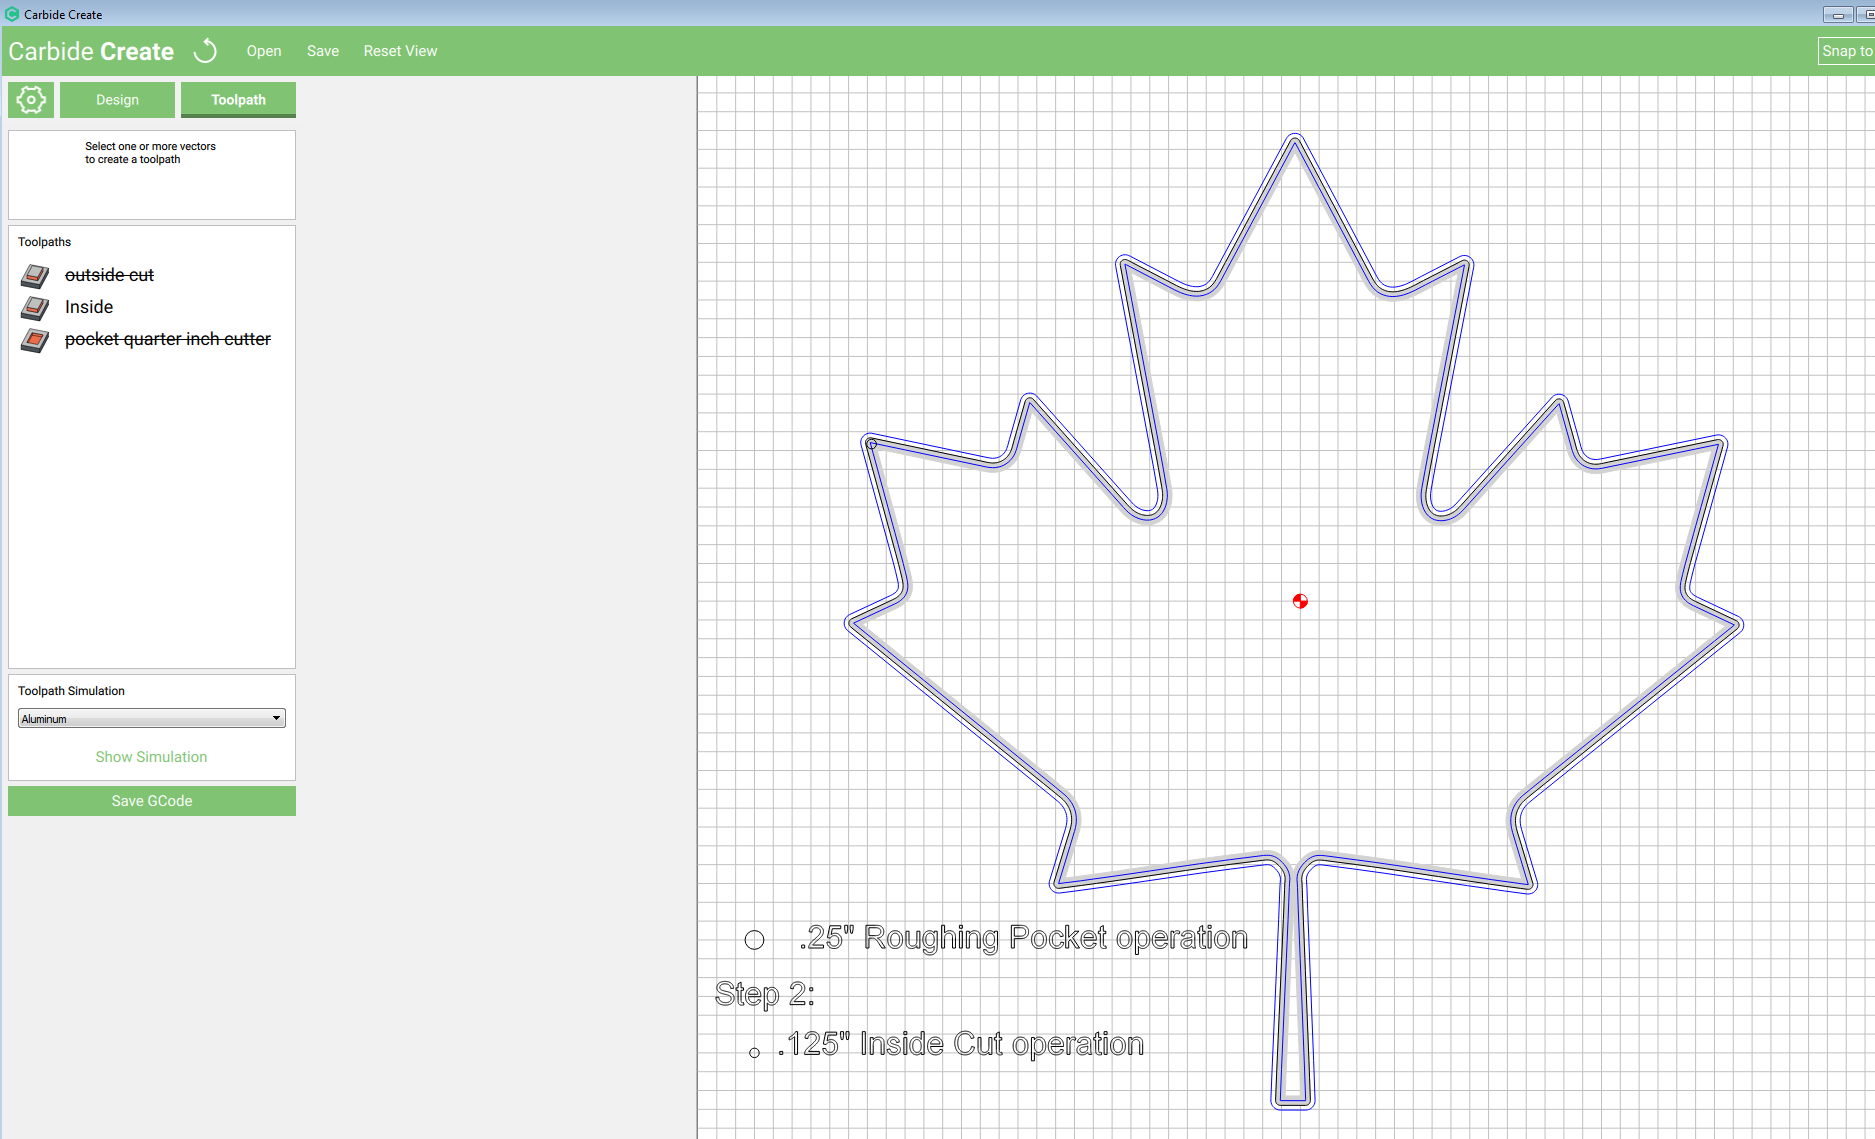
Step 2: Use a “Inside” the line style toolpath with the .125" endmill to reach the perimeter details.

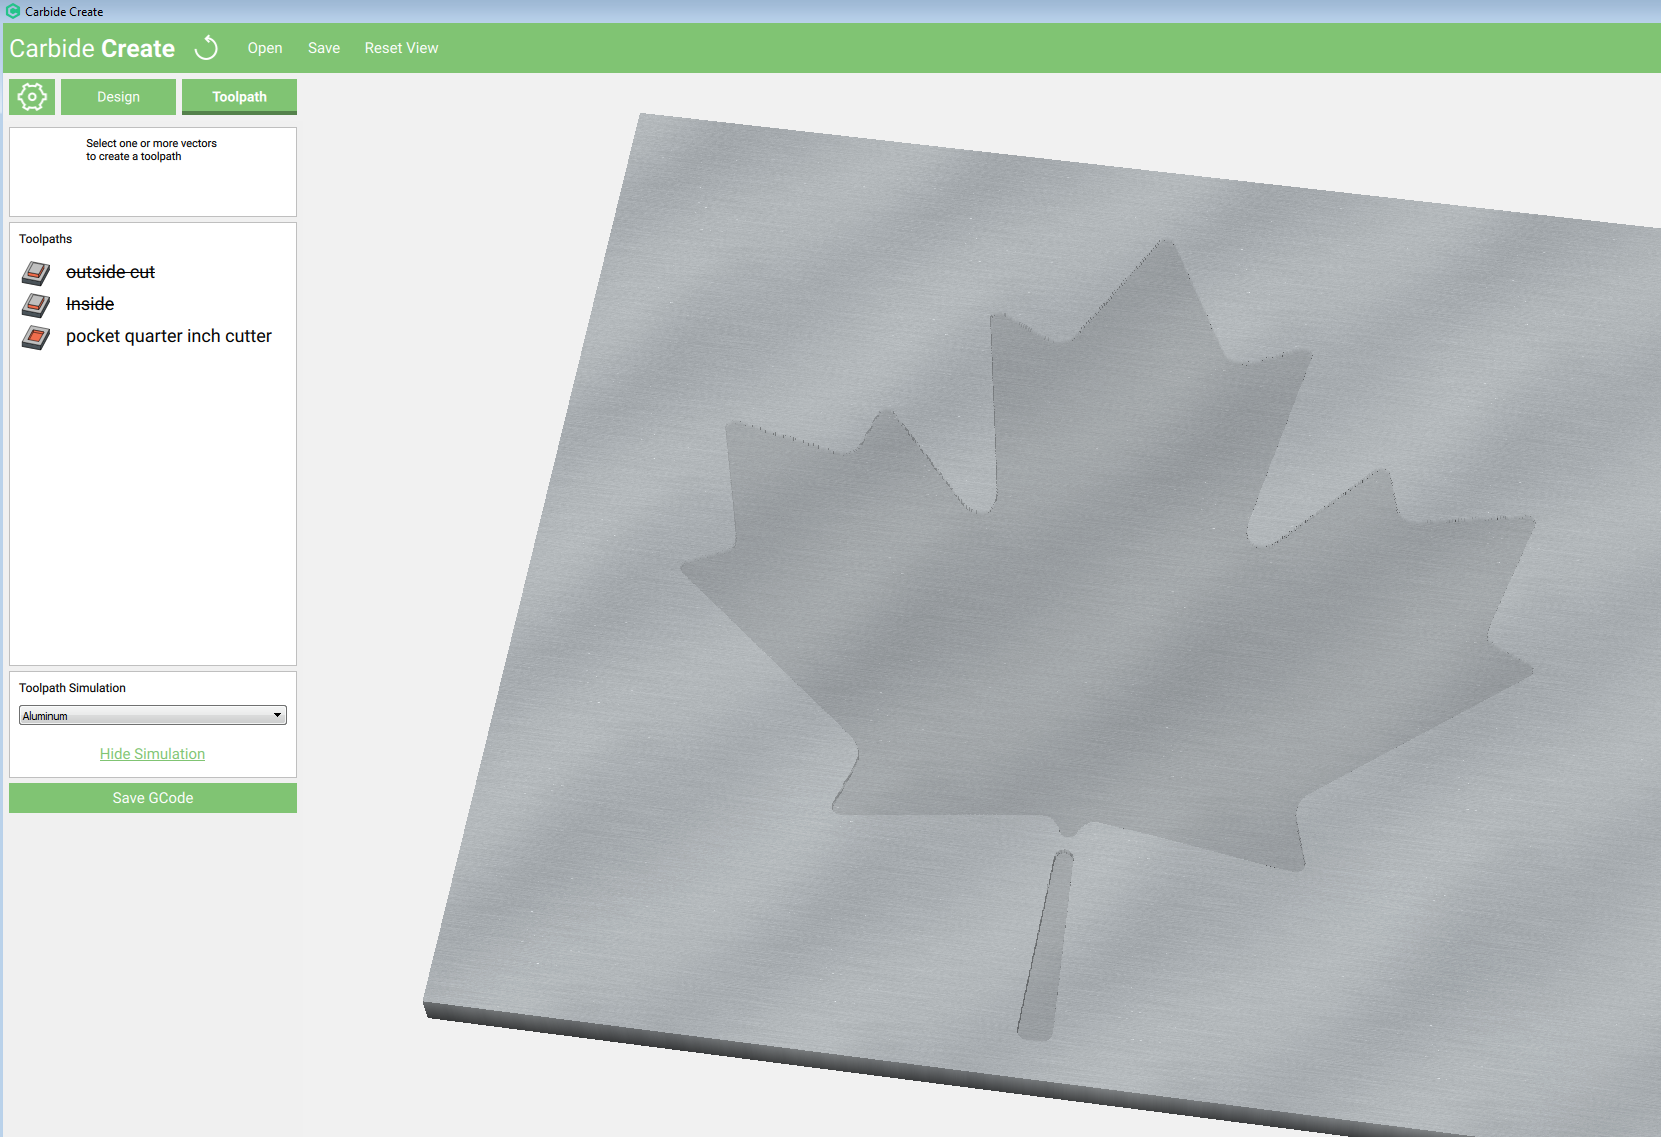
Step 3: Use a “Outside” toolpath to cut the inlay material.

If you have to scale the Maple leaf down, you will need to use a third tool, smaller than .125" and a third “inside” cut toolpath.

-Apollo

1 Like

This is perfect and thank you.
However, how do I get the Leaf or another design for inlay work onto Carbide Create?
Also, will every design I download will be there if I ever need to go back to it?

Eventually I will figure this out with your support

Sorry Apollo disregard the first question
I just viewed your explanation
Thanks again

You could also try the v-inlays, albeit much more complicated I think. mtmwood on youtube does some really great V-inlays. I myself would like to learn this process too. you can get some great sharp corners and detail.

Yes thanks for that.
I’ve seen MTM videos. He is pretty amazing. I actually do that sort of work I just haven’t done any inlay work like he does and I’ve been getting requests to do some inlay work on cutting boards.

This V-inlay…What’s that all about? As you say it’s complicated.
Is it a free download?

You may need Vcarve software to do it, maybe there is other software that can do it too, I’m not sure. Vcarve is expensive. Check this link out http://forum.vectric.com/viewtopic.php?f=39&t=7241 There is an attached PDF at the bottom of that post that is very detailed as well. I have never tried it, but would like too someday.

F-engrave is a (the?) free option with an inlay option — not sure if it does V-inly or no.

Easel has a inlay generator in the apps tab and is also free http://easel.inventables.com

OK no I’m not interested in buying any of the software I know they are expensive.
For the amount of inlay work that I’m going to do I can’t justify the cost. I think what you have carbide create will be enough for what I got to do

OK good to know I will try that however I still need some help on how to get designs placed onto your carbide create Then communicate it with the CNC machine thanks again this is very helpful

Is easel compatible with carbide create

No, Easel is a cloud-based design / CAM program which Inventables runs for their machines. It is able to export G-code which Carbide Motion will then be able to send to a machine, but in some instances the setup of Easel has caused configuration issues.

sorry guys i wasnt aware there was configuration issues with easel,has worked perfectly exporting projects for me,thanks for the heads up will

I guess I don’t need Easel
I just need something that will do my inlay work

Just follow the guide apollo and will made above for you,taking it one step at a time,im sure it will come out great!

Apollo I’m getting all kinds of different information which is great but what do you recommend that I use for the inlay work?
Should I just carry-on with carbine create or carbide motion and download an image from inkscape ?

I would recommend trying the straight inlay method Apollo has outlined above with scraps.

I use straight and V-Carve inlay methods in V-Carve Desktop, I am not familiar with Carbide Create. It wasn’t available early on and haven’t had the opportunity to learn how to use it.

If your inlay fits too tight you may need to make it slightly smaller to allow for variances in bit diameter and allow for glue.

In regards to square corners, a 1/16" diameter endmill will give you a 1/32" radius which may be small enough for your work.

Once you start doing the inlays and working with the programs everything will make more sense.

OK thanks everyone.
For all the information I’m getting is fantastic. However, I don’t know which one to use as I am not familiar with this sort of thing.
What’s the best free download that somebody can recommend .