I am trying to find time to play with the tool you made — it would help if you’d provide a compleat sample file of each sort of path — if that doesn’t work, I guess I’m hand-coding in either G-Code or using TPL, or trying FreeCAD again.
fair enough; I was going to add a CI environment this weekend to the tool; examples are probably step 1 in that …
Just got mine Dan and had a question about assembling the z plus. I didn’t understand the “opening the v wheels” part. Did you do anything to yours? They are located on the back right? Mine seem really tight, like it would be a struggle to tighten them more. Any advice? Thanks in advance.
For the V-wheels please see: https://docs.carbide3d.com/support/tensioning-eccentrics/
Thanks, Will! Is that the zplus in the video? It looks a little different but it was very helpful in understanding how they work and I think I can continue assembly and tighten later if necessary.
No, that’s the original Z-axis — but the eccentric wheels are the same in concept for all of them.
Here is what a flat bottomed V-carve looks like. I don’t think it looks bad.
Anything is better than the stock Z Axis. I have the HDZ and it was a game changer. If i would have had the Z-Plus im sure I would have stuck with it… congrats and happy tramming!!!
Glad to hear you got the HDZ. It’s quite impressive. I’m just lucky that I ordered a couple days that they made the Z-Plus an option! I wasn’t even aware of it until I went to place the order. And as far as tramming, those bolts on the front plate are sure convenient!
Where did find the assembly instructions for the Z plus?
Please e-mail us at support@carbide3d.com if you haven’t already.
I sent the email and somebody emailed me the instructions.
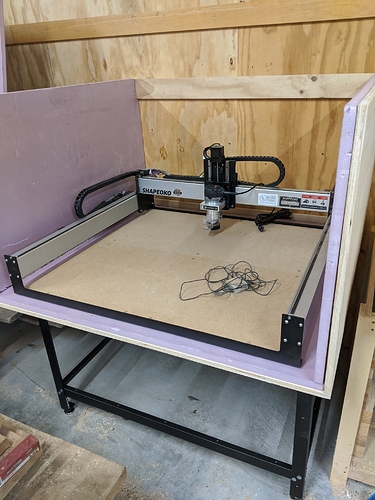
My new zplus xxl will be here tuesday! Trying to get the enclosure done this weekend!
So exciting right?! Hope you make some awesome stuff with it! Be sure to post some pics!
Well its together, much easier to put together. Great improvement on the wire harness. time to work on the wasteboard, finish the enclosure and tram it up(not in that order).
Martin,
Would you mind sharing the outside dimensions of your enclosure. It looks like a comfortable (if not spacious) fit. I’m trying to convince myself to get an XXL instead of an XL but not sure of the space I have to work with.
Looks like 3/4 ply and 1" foam?
Thanks!
(Ordering any day now! I’d like to get it right the first time!)
3/4 ply with 1" foam.
Outside dimensions are 53 x 48. I need to measure the height.
Biggest mistake I made with my first enclosure was not leaving access around the machine and control box for maintenance or upgrades. I was feeling super dumb the first time I had to crawl across my machine to reach the belt clips at the back. Or having to remove the side panel to get access to my controller box. Now my machine has its own “room” (forever in progress) and the whole thing is on casters so I can pull it out into the middle of my shop for maintenance.
I created trap doors on the side to access the control box and the Y plates and mechanical of the gantry plus another at the back to enable tiling. The whole module is on caster wheels so I can move it away from the wall in order pass the material through.
This topic was automatically closed 30 days after the last reply. New replies are no longer allowed.
