Hello fellow CM users
How would be easiest way to find center of stock with machine?
I do right now this way:
Jog in x left edge with paper touch till grips, zero x… then jog right edge, touch till with paper. look the number. Then i divide it 3 by 2 and then i manually jog till i get to that number.
Rinse and repeat with Y
In carbite motion when you start to zero in every axis next to “zero X” or “zero Y” there it shows coordinate number. Weird is that i can write there what ever number but doesnt seems it does any effect.
Question:
How to use coordinate window what you can manually type what ever number?
Is there even possible to jog/zero manually? aka i know center is located lets say in 50mm and then i type some where 50 and machine eater zeroes there or jogs there and then i zero it?
Would be cool if next to button “zero x” is also button “jog x” and machine jogs what ever cordinate i typed in
You can type in the number into the box and press enter.
For example, you hit the left edge with a 0.25" bit, then press “Zero X”. Now you can type in -0.125" and press enter. It’ll recognize the current X as -0.125" and therefore the X = 0 will be on the workpiece edge.
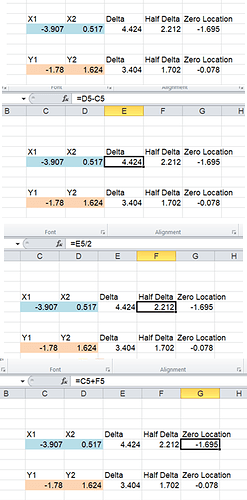
I made an excel sheet to help me zero stock by probing both extents of each axis. Going to the zero and then pressing zero helps as a rough check that your are at the center.
If he’s looking to find the center of something, he doesn’t need to bother subtracting the radius of the tool/probe.
Run a probe into the left side of something. Run the same probe into the right side. The center is right between them. The radius of the probe on each end cancel each other out.
Okay, I never said you had to subtract tool size to find the center. It is just an example where setting a zero without actually going there has an application. Notice it was finding an edge, not the center.
Another example is where I don’t know how much I need to surface/skim to have a flat piece. I’ll make a g-code to skim 0.02" for instance. I can keep running the code until I get a fresh flat surface, and just type in new values for the Z. For instance, if I’m currently at Z = 2.20", I can type in 2.22", and then it’ll cut 0.02" deeper the next pass. If I’m happy with that number, I can force a shallower pass by typing in 2.225" on the next round, for instance.
Interesting… Im kinda struggeling allso facing desired depth when i dont know how much i need to cut till its all flat.
I have tried to type in number and press enter but i have not notice any change…
So as “carved out and painted Red”
If Y is set 0 and machine is there. if i go to zeroing page and type in Y is 1 and press enter… Then next machining cycle will be -1mm below or 1mm from original 0?
But then every machining cycle machine homes then Y is not in 0 position anymore… lets say its 28 higher than my set 0… should i actually type in new value 27?
If i get logic out of what happens when i write number in axis window and what will happen then… Guess i can figure out how to zero in every angle
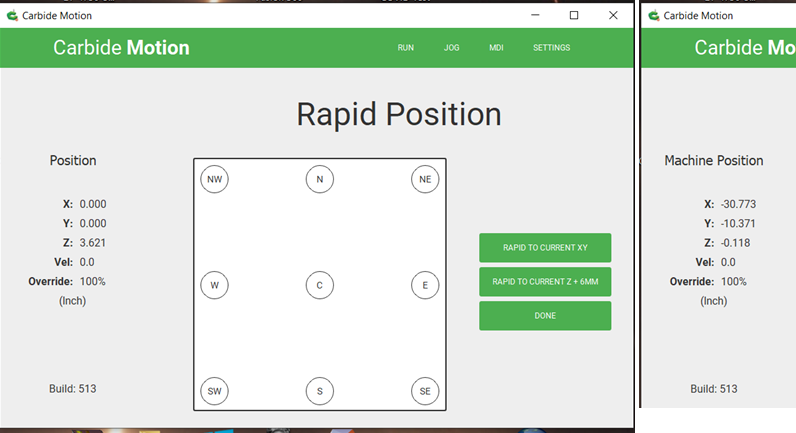
So it is currently at X = 0", Y = 0" relative to CAM zero, and at X = -30.773" and Y = -10.371" relative to machine home position .
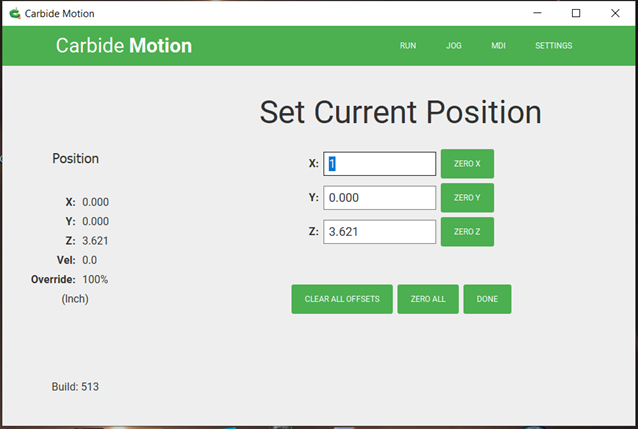
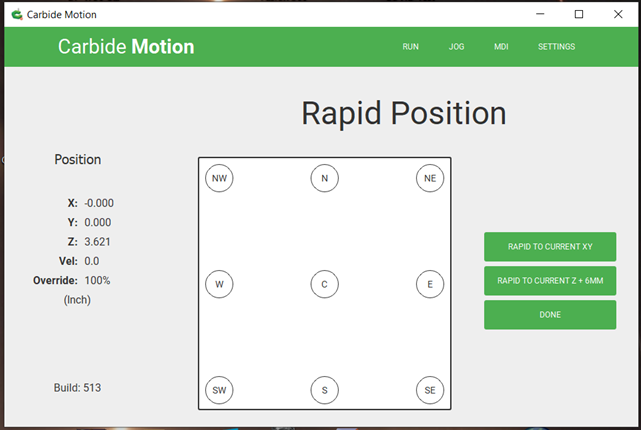
Now when you are at the set current position screen, you can click on “ZERO X” or enter a value of your choice. For instance, I’m typing in 1":
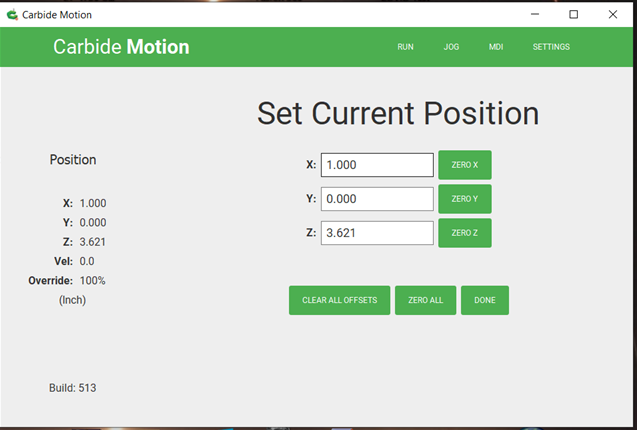
After I press enter, notice how that value is populated into the Position value on the left side:
So now we have adjusted the CAM zero location without actually traveling to that physical location. Whether that is useful or not for you depends. I gave two examples of how I use that in my previous posts. If you just want to use that as a way of forcing the machine to move some arbitrary distance or coordinate, you can of course go press RAPID TO CURRENT XY and it will move 1" to the left so we are at 0,0 relative to the CAM zero again: