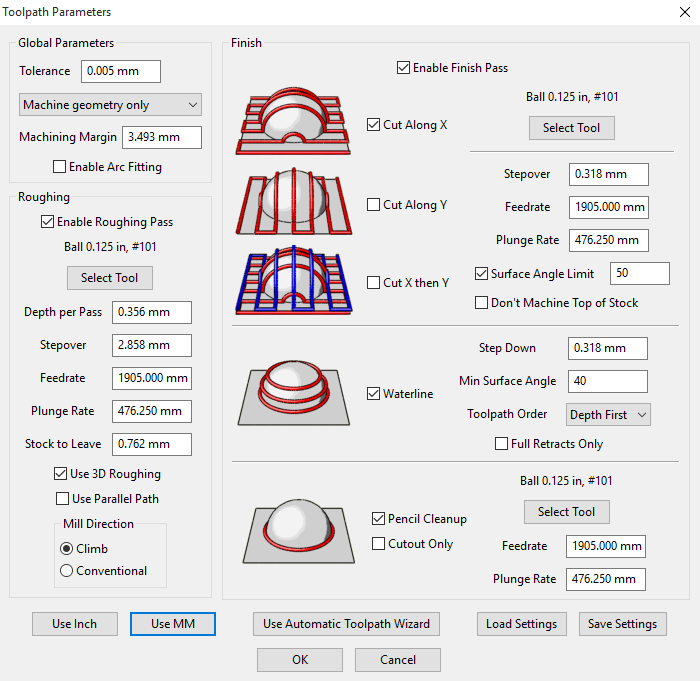
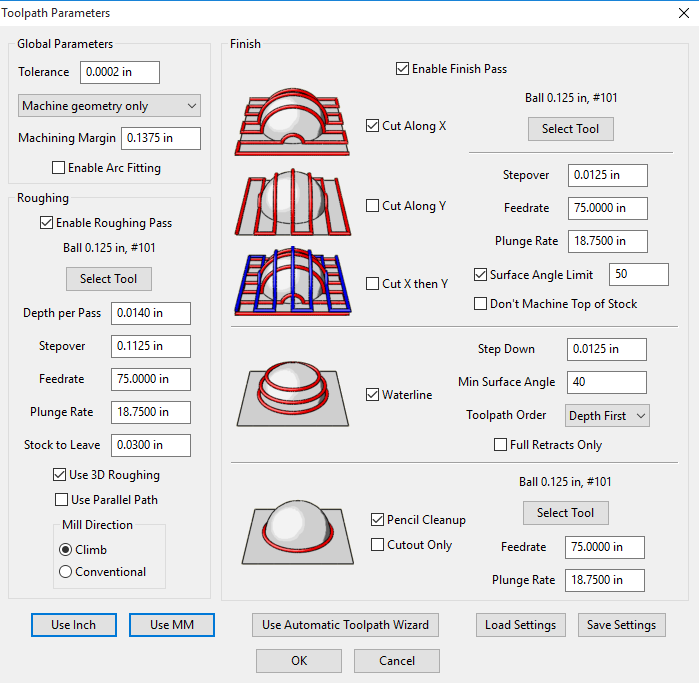
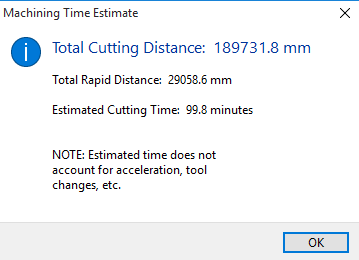
Can either of you share your toolpath settings and the machining time needed to create these reliefs? I’m programming a similar job now and getting estimates over 1000 minutes =( .
Yes this helps quite a bit actually. My I was doing my finishing passes with the 1/16th in ball end mill and running on both x and y axes. The stock is also a bit bigger at 7.5"x7.5"x1.5". Did you have to do much sanding after your piece came off the machine?
I’ve finished my carving of Mt St Helens and decided to go a step further to make it into a cribbage board! The size of the piece is about 7.5" square milled out of 1.5" thick Walnut. The entire project took a while to complete because it’s double sided with keyholes on the back so that it can be hung from the wall. The Nomad Pro didn’t have any trouble with the roughing parameters that I set, so I think I’ll be a little more aggressive for the Mt Hood and Rainier versions.
I got the data from google maps by using sketchup to extract it. It was a very slow process and I’m sure there is a better way but I was able to grab all of the data that I needed. If I go through this exercise again for a larger area, I’ll definitely search for a more efficient way to get the topographical data.
The trick with extracting the topo data is that you need to make sure that it’s in a form that you can manipulate afterward if you want to add thickness or features to your model. Stl files are point clouds and can’t be edited so you need a nurbs surface or solid model to begin with. My process was convoluted but I have access to the tools to make it work.
Sketchup- Topo Extraction
Rhino- Nurbs surface draping and extrusion into solid model
ProE- Import model and add features (because I’m not very proficient with Rhino)
Meshcam- For the majority of toolpath generation
Fusion 360- For the keyhole cutting and hole drilling (each hole is .3" below the surface at that point which I couldn’t convince Meshcam to handle.)


 I am from Germany and that was one of the first things i did too (of the area in California i live in now though)