I am having some trouble applying my understanding of 3D carving with Carbide Create Pro.
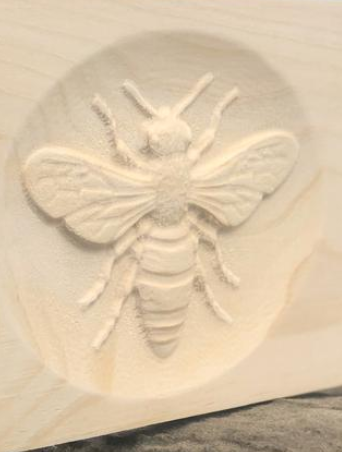
I am trying to create a carving in a 0.75" board that is has a cove, but a embossed like image in the cove, like this:
Here are my steps:
Setup project with 0.75" stock thickness
create a rectangle for the base
create a circle for the cove
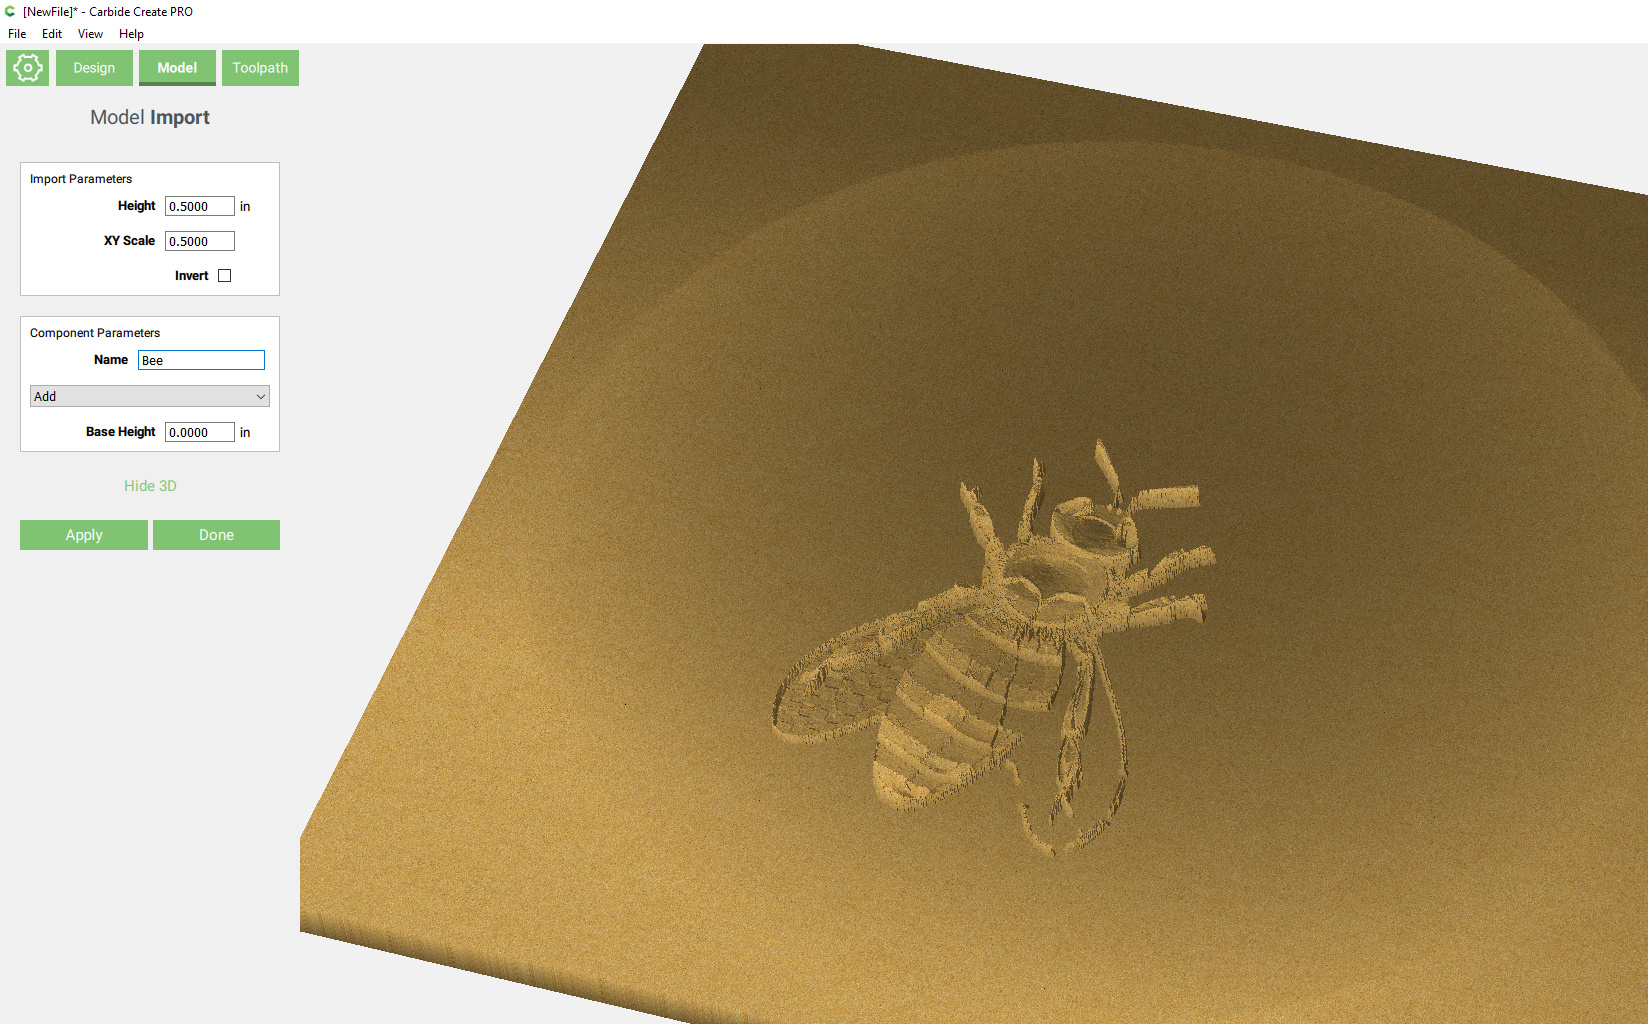
On the model screen, create 1st model with “Add 0.75” for the base
create 2nd model with a 4 degree angle for the cove and “subtract”
create 3rd model from PNG and “Add” it back in with a height of 0.2
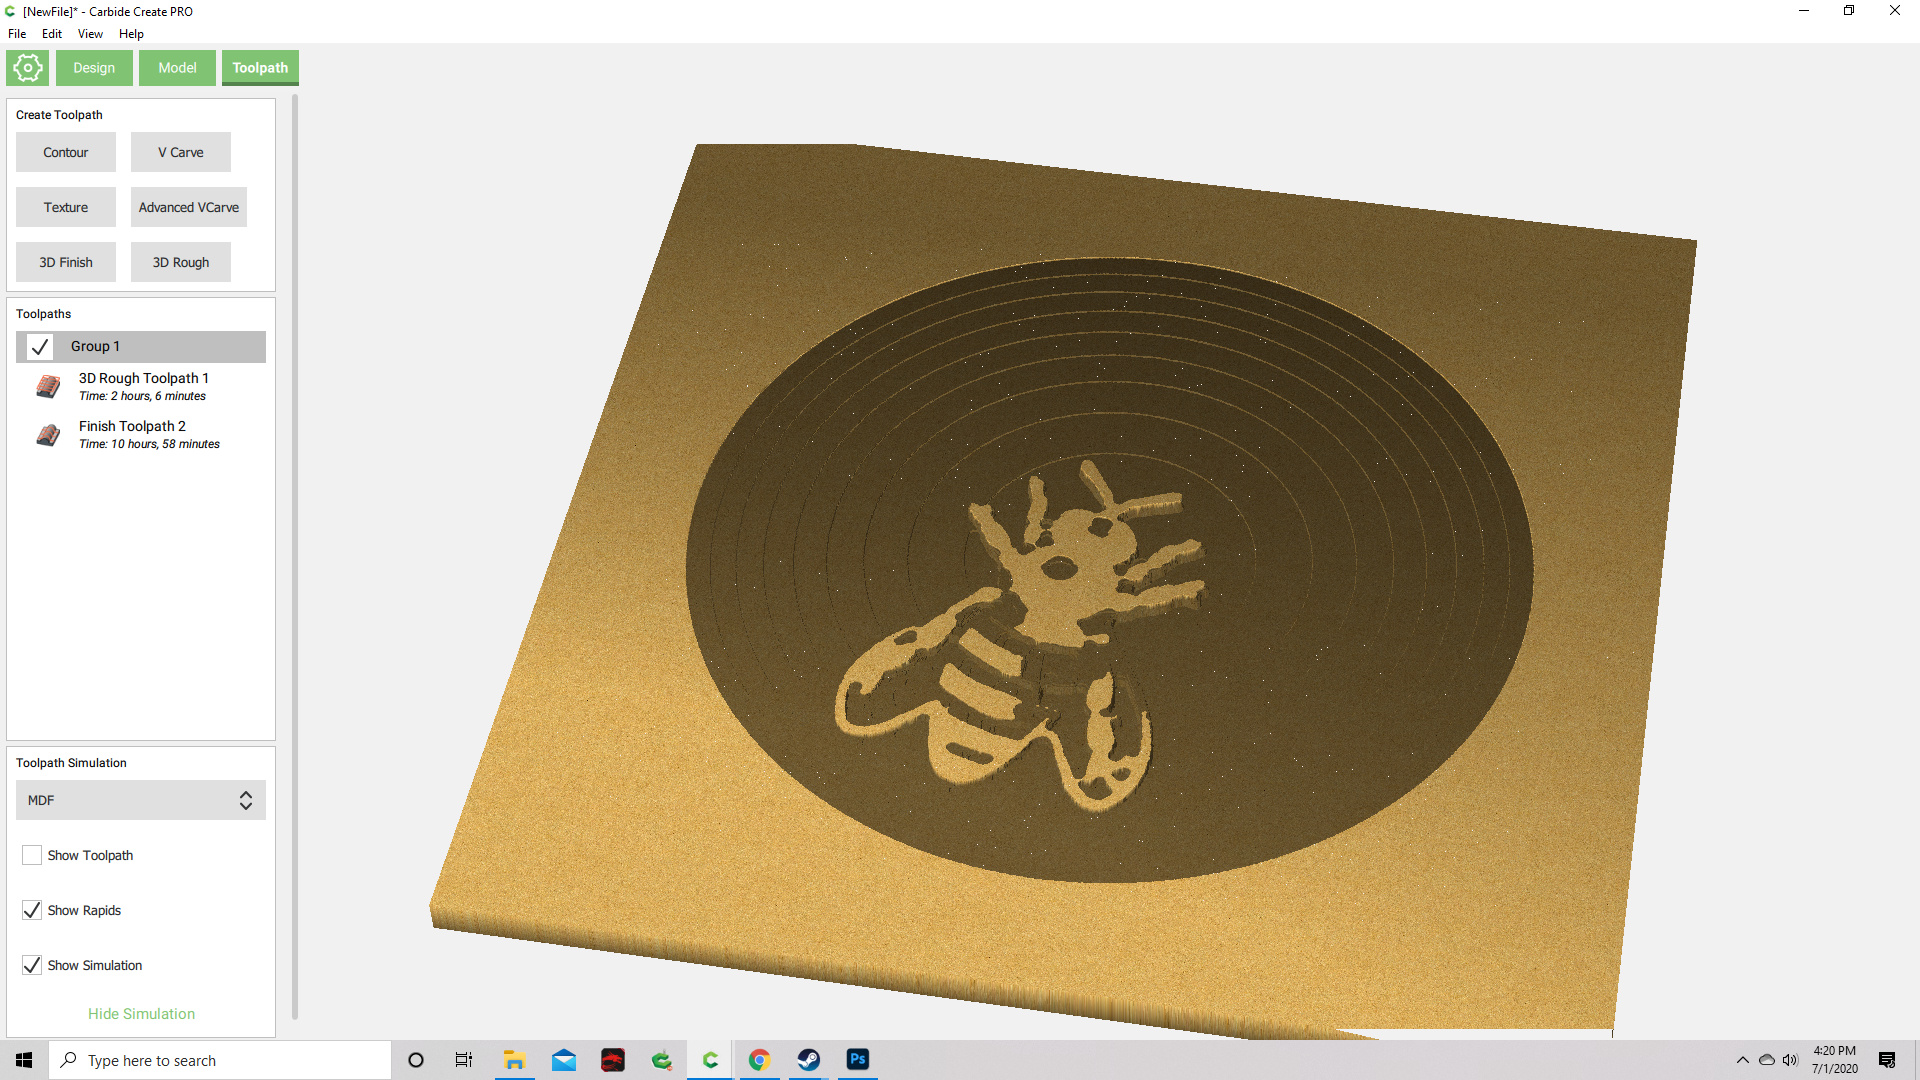
This is the model view I get which is pretty good but not centered:
one key thing to decide is if you want the bug to “follow” the hollow area, or if it should just come out of it “flat”… how you approach this depends on the answer to that question
Thank you for this example. I was going for the bee coming out of the hollow area, but it ended up looking like it was following it because I couldn’t precisely align the bee image.
ok so the whole range from black to white is the height you set in CC
in gimp, in the colors menu there is a “Levels” submenu that allows you to scale the range of your active layer to exact values… with that you can control the Z range of each of your layers