I had a thought, is it acceptable to place a few pieces of printer paper under your stock, so when you are cutting things out you can avoid splintering of thin bottom layers by plunging through and still not gouge your spoil board?
Thanks!
2 Likes
Many people use the masking/painters tape and superglue method for holding their work pieces effectively having a thin paper under their workpiece. If you wanted to use say wrapping paper under and attach your workpiece with clamps, it should not be a problem. I must say however, that somehow stuff will happen and eventually, you will mess-up your wasteboard. This is why we have a supplementary wasteboard. Recently, I had an issue with an endmill that can loose in the collet and while I saw this happen, it managed to go through before I could pause the job.
3 Likes
Well I happen to have a few reams of printer paper handy and it would work great for me to place a few sheets under my work piece, and clamp on top of it. Just checking that it wont catch fire or damage my end mill haha. I googled it and got nothing.
Thank you
1 Like
and then the next step will be to get profile cuts that cut though the stock yet barely scratch the paper. That’s when you know your machine is perfectly square, surfaced, trammed, and calibrated 
3 Likes
Yeah that would be nice indeed. I have about .2" to work with surfacing on my spoilboard. I can shave the whole thing lower and do it again but what a job! I am currently in the process of building a bench and enclosure so I did not surface yet, I was putting it off. 2 sheets of paper will be perfect to avoid slight scoring for now.
The problem with using paper is it can be abrasive and will dull endmills — coroplast or a suitable thin plastic sheeting seems a better option.
2 Likes
Thanks Will, was wondering cause it seemed too easy! I bought spray mask but its adhesive backed. Maybe something similar with no peel backing? The Coroplast I saw on Amazon seemed too thick.
Personally, I don’t think that the paper would be any worse than masking tape that many of us use regularly and it would become such a small portion of any cut. Coroplast is corrugated and would be first, thick and second because it is corrugated, it would compress under the pressure of the clamps and mess the accuracy of the Z.
2 Likes
It is called spoil board for a reason. You can make all kinds of work around but the spoil board is made to be used and abused and then resurfaced and ultimately replaced. Of all the things you could worry about for saving money the spoil board would be your least bang for your buck. Invest your time and money in software, bits, carving material. Let the spoil board do its job and be spoiled.
4 Likes
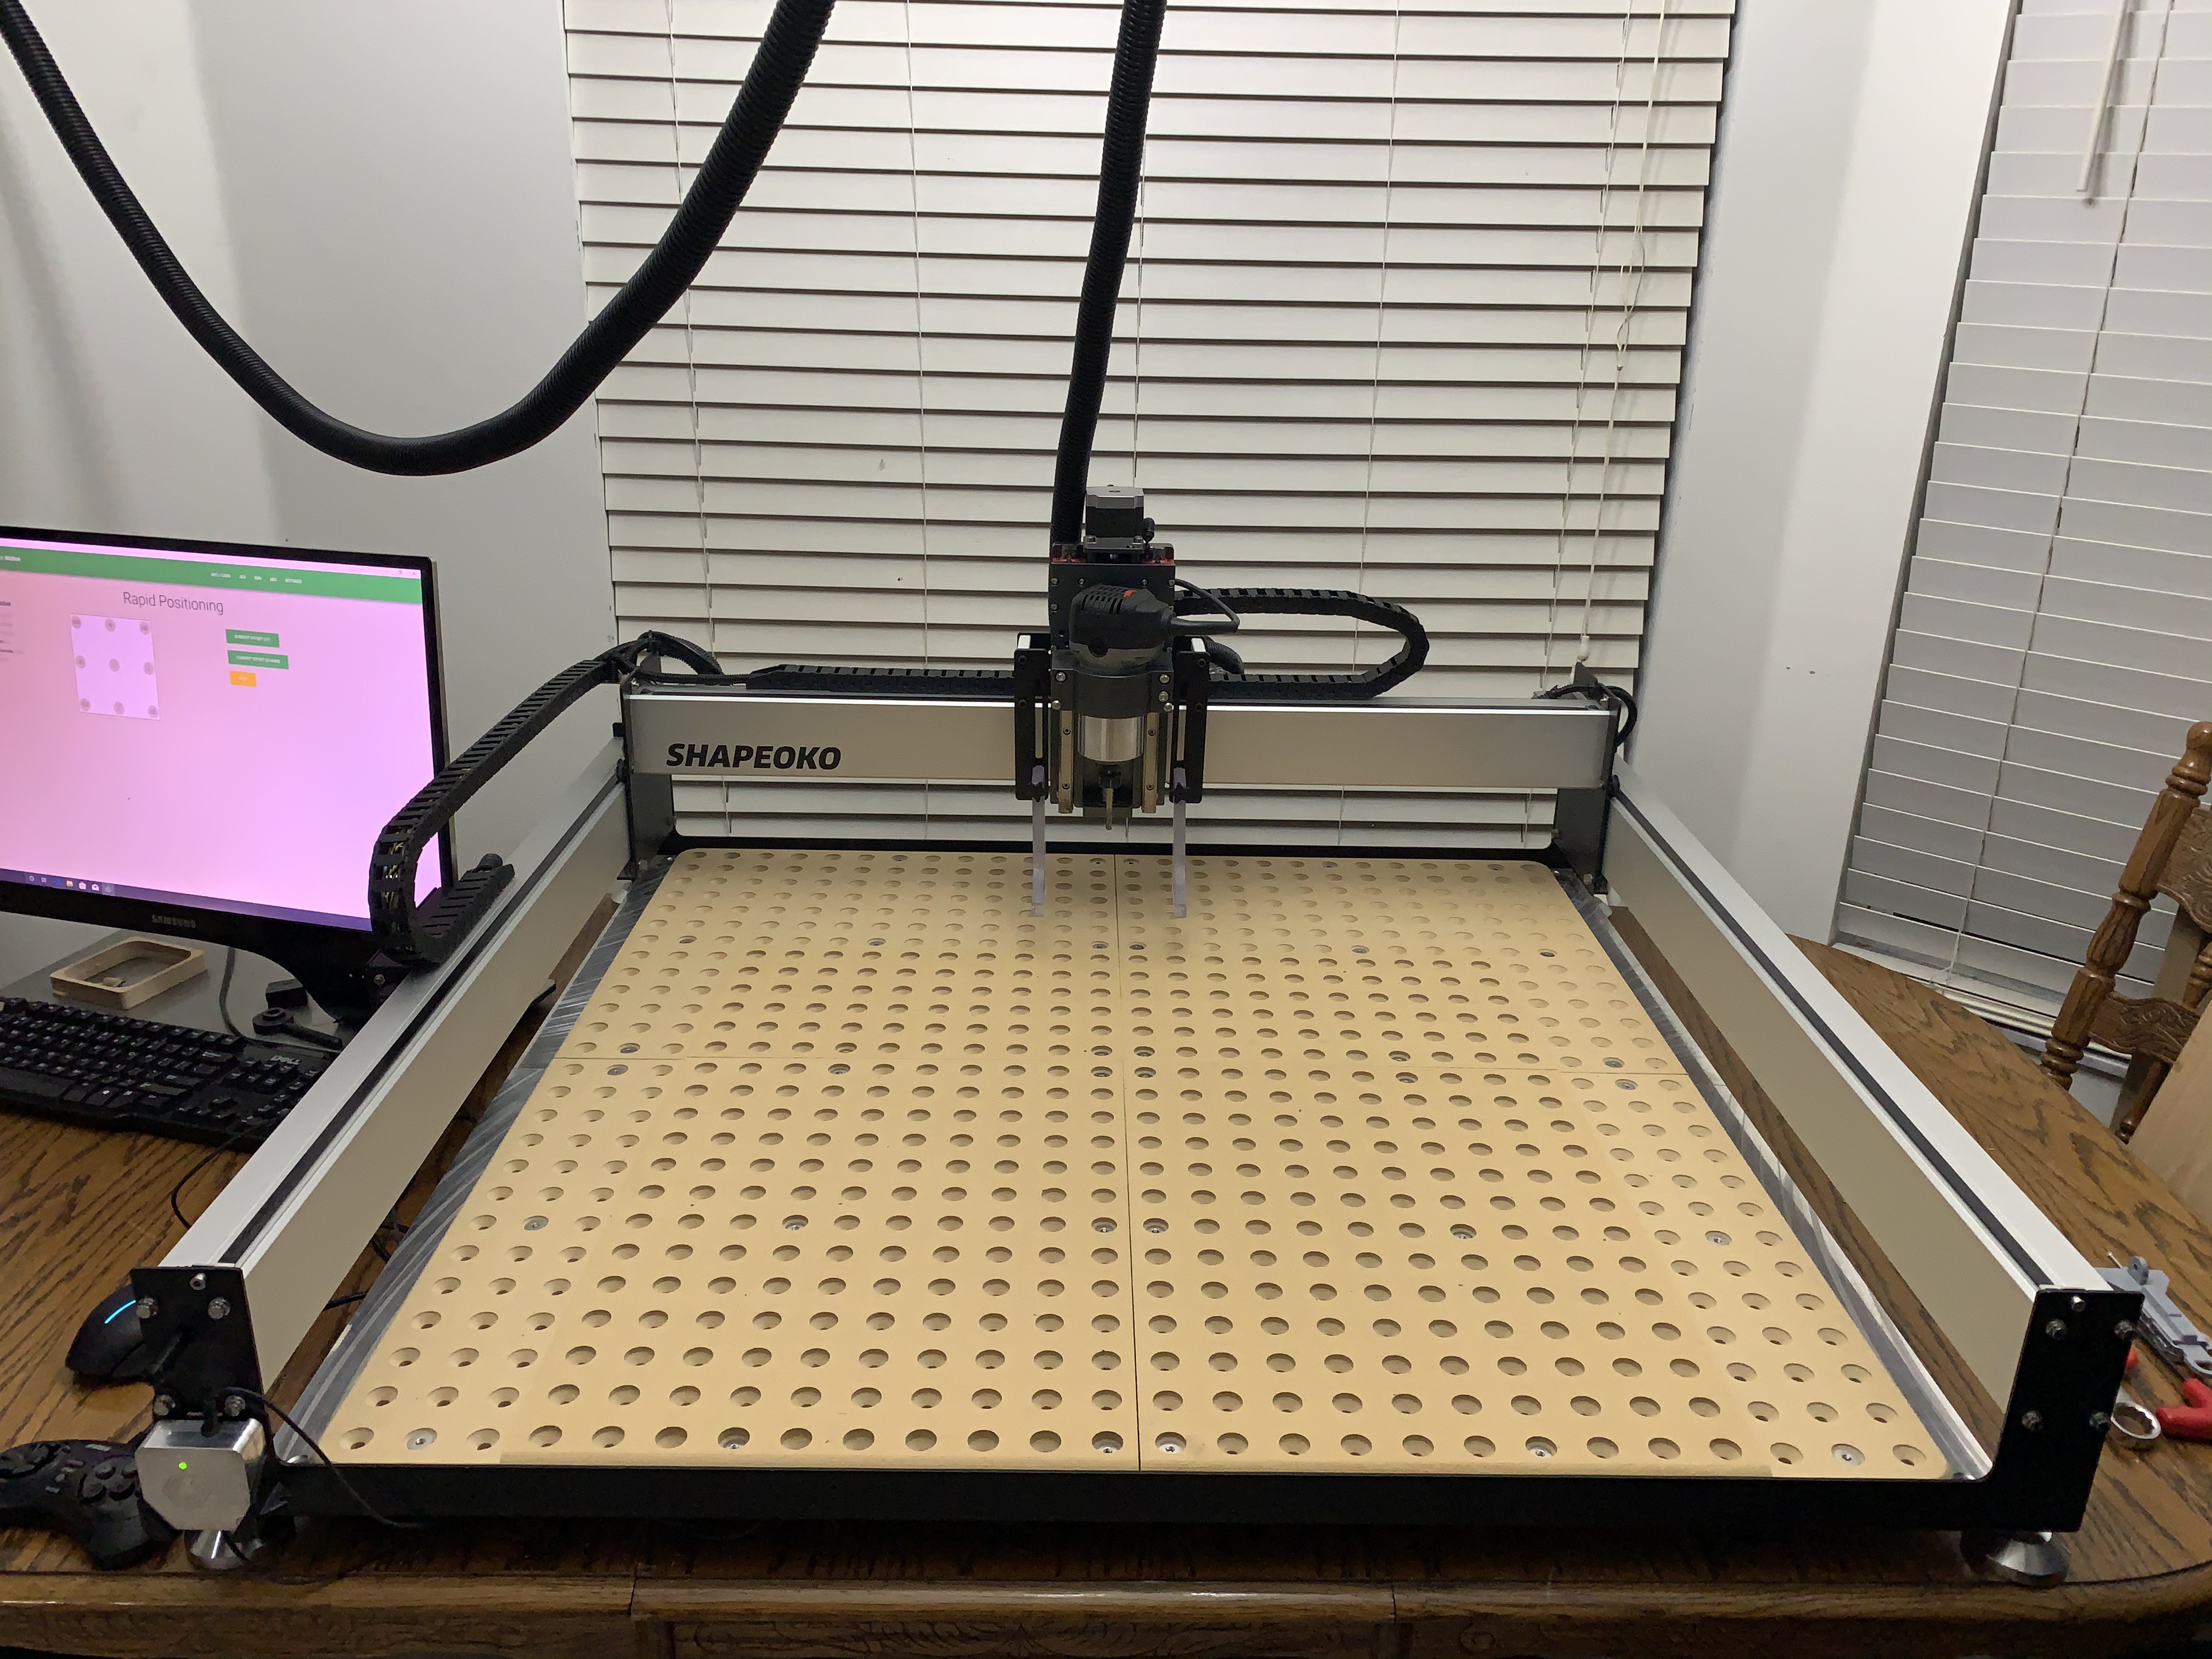
Thank you Gdon, mine is a XXL spoil board that I designed with 670 countersunk holes and takes a considerable amount of work and cost to replace. Just looking for simple ways not to damage it for no reason and I get a cleaner cut carving out material on the bottom when I plunge through as my table has slight variation. I agree there are better things to be worrying about for sure. I have been very happy with the free version of Fusion 360, but I have been working with Black Walnut and Red Oak so far and I am about to start on Aluminum. My tool collection has been growing for 45+ years with no end in sight!
My final thoughts if I were so inclined to put in the effort, would be to print out a trace the cut out area and cut out the paper and use a hole punch for locating it with the work piece bolts, giving myself a .006 or slightly higher area to use with 2 sheets (before compression which I have not tested yet), before gouging my spoil board surface and avoiding touching the end mill with the paper.
Thoughts?
I guess there is no definitive answer, there seems to be two kinds of people on this matter: those who see their wasteboard as a consumable item and happily overcut into it, and those who try to make it last forever. There is no right or wrong but let me just make one suggestion: since making a sea of holes wasteboard is so tedious indeed, and since clamps tend to get in the way, why not give tape&glue workholding a try? No more holes, no more clamps and bolts, just a flat square piece of MDF or HDPE that you can resurface in 10 minutes. I must say I’m a convert and it baffles me that the clamps method is still so widely used, but to each their own!
4 Likes
I kind of went all in with the Ohio Diesel board and invested in a lot of hardware to use it. My goal was the ability to bolt my frame to metal as opposed to MDF and hopefully achieve a more stable environment for tight tolerance machining.
For future machines I will definitely try that method but I really do like my current setup. I have a method to countersinking and bolting all my projects down that works very well for me. No mess to clean up and multiple countersunk 5/16 bolts holding down your work piece just can’t be competed with for centering and stability. I am trying for exact tolerances and many of my pieces so far are designed to fit together using friction only.
1 Like
Sure, I was only commenting on the supplemental wasteboard part, it’s great to have a metal bed underneath that. So do you have three layers on that pic ? Aluminium bed, MDF base with holes over the whole surface, then smaller work-area-sized MDF spoilboard on top?
I designed the spoil board with a workspace ledge. the ledge sits .2 inches above the floor surface.
It is 1/2 aluminum plate surfaced to .005 on 1.5x1.5 grid 5/16-18 threads with 1/2 MDF cut down .2 around the cutting radius of the spindle. So it is 3 levels yes but 1 piece of MDF.
Here is the Fusion file shared haha so cool!
To see the ledges you will have to go into bodies and select a different model, the flat top model is for initial boring and countersinking,
1 Like
I think that with the sea of countersunk holes on your MDF, you would have a tough time using the glue and tape method. My supplementary wasteboard is on a 2X2in grid and the holes are countersunk underneath to accommodate the neck of T-nuts so the top has 5/16 in holes that are flat. This makes it a relatively large flat area where the tape can stick the dimples in your design reduce the flat area significantly.
I commend you for dedication to make it a perfect surface but mishaps occur even with the best intentions. You will need a box of tissue when then something goes wrong and the spindle wants to dig to center of the earth.
1 Like
so one thing that I should have learned earlier but was still a great thing: For the cutout, use “zero at stock bottom” both when you zero at the wasteboard and in the CAM tool… and the amount of cutting into the board goes WAY down. I use double sided tape to work hold and that is enough margin to make that work great
(but with the new bitsetter this somehow becomes less attractive since suddenly I no longer zero as much in the middle of cutting  )
)
This is turning into a hot topic.
I typically cut right to my tape, setting my zero based on the wasteboard for most cut through operations. That said, I get what @CNCInspiration is saying about cutting past the bottom surface to minimize tearout. I was cutting a piece of wide plank flooring (making an integrated intake for a neighbor that removed a wall) and found that the cut went best when I went 1 or 2mm past the surface. I used tape and glue, so I jacked up my wasteboard pretty good. I have used construction paper for this exact reason, but it limits you to using clamps. On a smaller machine I have at work, I settled on using 1/8" hardboard that I laser cut to match the hole pattern in its wasteboard.
Workholding is the part I like the least. Double sided tape is easiest, but it does not work for some things. Super glue and tape is great, but I find that it fails when my garage is too cold and on some smaller cuts. Clamps are ok, but they don’t cooperate with my dust boot and you’re always fussing with tabs.
Anyway, back to the original topic, I liked using construction paper trimmed the for the work piece.
2 Likes
I was using a technique for a while where I would put my work piece under a piece of 1/8th in hardboard as a supplementary wasteboard. Now that I have marked up my wasteboard a bit, I have embraced it and leveraged clamps and tabs more than tape.
1 Like
This topic was automatically closed 30 days after the last reply. New replies are no longer allowed.