In a word, WOW. This is one of the nicest machine kits I’ve put together (from CNC plasma, router, laser cutters, and 3D printers). The packaging is really good, and I appreciate how it guides you through the process. Parts are nicely deburred, and there is no mystery oil anywhere. Some feedback listed in no particular order:
A few pieces were clearly kitted from the XXL. I had some extra fasteners on the frame stage, but expected it so wasn’t confused. The extra long belts were a little annoying since I had to pull extra through the tensioners and trim them to avoid movement issues.
I managed to install the router X and the signal Y drag chains backwards, which was an easy fix but a little annoying. Might just be me, but zooming out in the assembly video to show the full machine would help with orientation during those steps [@wmoy]. Right now it’s a lot of close shots.
Is there a reason the electronics box needs to go on last? In my case I needed to slide the machine around a bit, so this was much easier to do before installing all the hybrid table pieces. Realized that part way in, so it was still a little beastly to slide
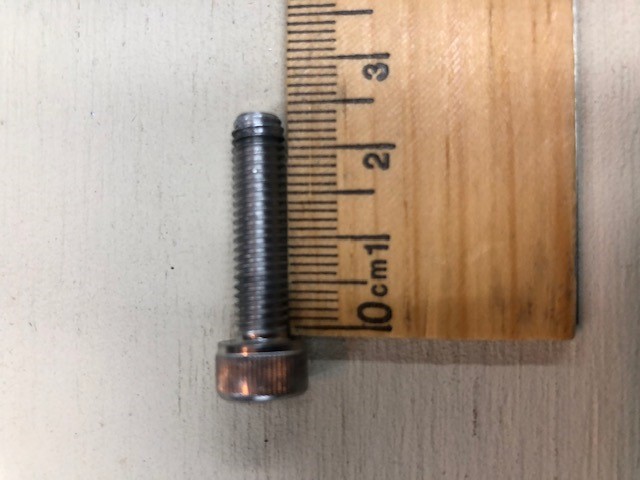
The X motor pulley was still on backwards and grub screws were not oriented over the flats anyway. This is sort of motion components 101, so I expected better. It’s difficult to pull off without damaging anything (cosmetically at least).
Unless I missed it there was never a prompt to remove the shipping bolt holding the X axis in place, but I figured it should come out before attaching the Z-Stage so it was no issue.
Drag chain wing orientation can be a little confusing - any way to put stickers on here to help? The directions are ambiguous as they tell you to “put the single hole” toward the back. That actually means the single tiny drag chain hole, not the actual only end with a single large hole as that goes to the front.
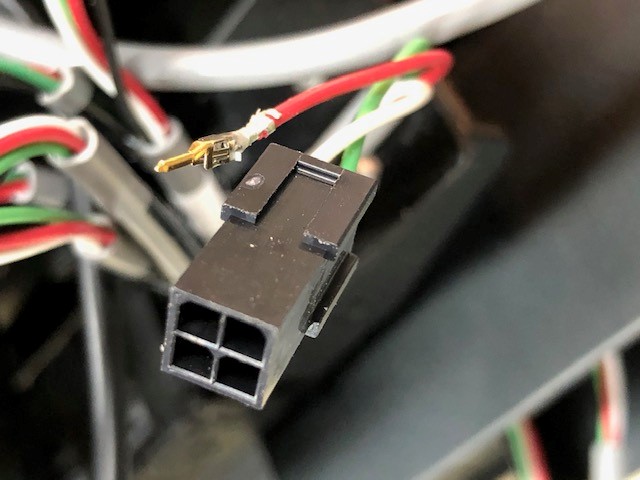
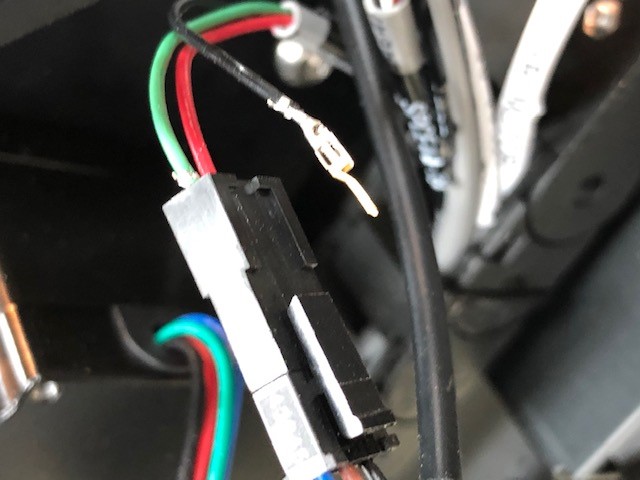
I did a pull test on the wires going into every connector, and didn’t see any issues but haven’t powered on yet. Going to wait until I sleep so I don’t blow anything up.
I was missing the plastic strips for the hybrid table, but it looks like I will be able to slide them in from the front and screw them down later . Will have to contact sales about that.
Dan, did you ever get the filler strips. They sent mine but for the XXL instead of the XL so im still waiting so i can finish putting the table together
Looks like you had much better luck than I’m having. In addition to the router spindle mount which their still working on I found 2 cables in the Y axis drag chain with bad connections. The YR Stepper motor cable and the X Axis Sensor cable. I am not having fun right now
Looks like Carbide3D has just released a new version of Carbide Motion that now includes the settings for the Shapeoko Pro XL. Was wondering why i couldn’t see anything for the XL only the XXL in the setup screen. Question answered.
If you ordered a Shapeoko Pro XL you will want to download and install this version of Motion
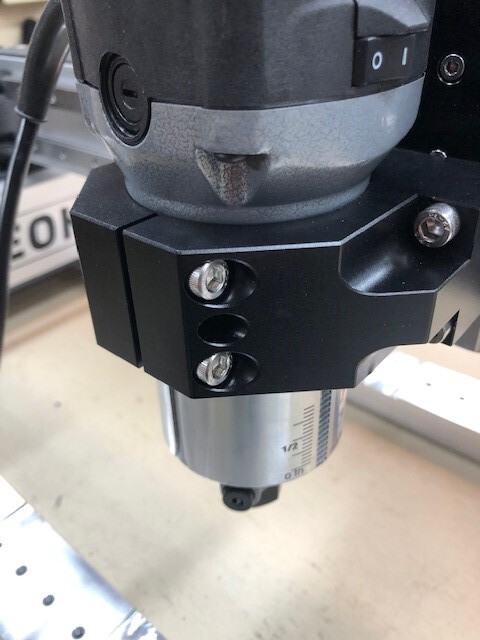
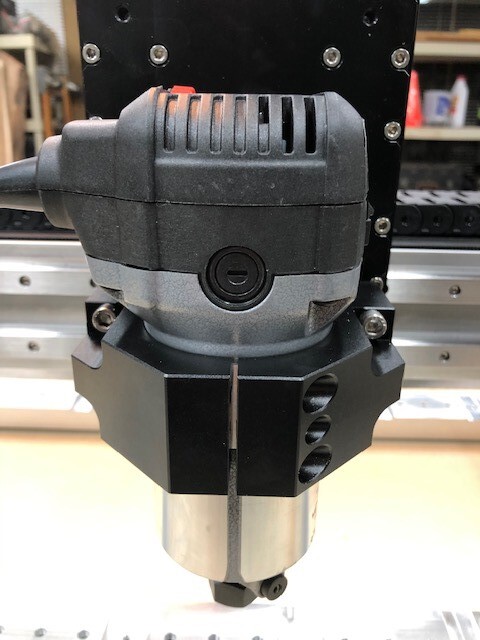
Seems the problem is with the router mounting plate. When i insert the router there is quite a bit of play on the router and cant tighten the M6 x 25 mm screws enough to clamp the router. I got a makita router to try and had the same issue. So if the router is correctly machined to 65 mm has to be the mounting plate. The assembly instructions said to use the grub screw if you couldn’t slide the router into the mount. but mine was very loose. That should have been my first clue. They are sending me a new mounting plate.

 . Will have to contact sales about that.