Not sure if this a problem with Carbide Motion or operator error. I added bit setter to my Shapeoko XXL3.
When I want to run a project I typical follow the following steps.
Turn on and initialize the machine.
I install the bit I’m going to use.
Using the probe I zero out X, Y and Z.
I load the project I want to run and click on start.
Once I do that the machine wants to move the router over to the bit setter. After it does that the router starts and move over to the wood to start cutting but it just cuts air because “Z” is no longer at the top of the material. At that point I stop the project and set “Z” at zero again. I eventually get it to work. It has always worked fine once I get past the first operation. Meaning once it finishes a operation it moves to the front center of the machine and prompts me to change the bit. Then moves over to the Bit Setter before starting the next operation. Am I doing something wrong?
This is likely the issue. If you had a different tool in the router at the time you performed machine initialization, and then “just” proceeded to swap the tool in the router before zeroing, what happens is, the machine is not aware of that and still thinks you have the initial tool (the one you had during initialization and for which it probed the length with the bitsetter) and that you are using that to do the zeroing. Later when you start the job, it will go and probe the tool length with the bitsetter again, at this point it will do some math to automatically adjust Z zero you probed for. But for this computation it will use what it thinks is the length reference, the one it measured during initialization, so it will end up not adjusting properly and Z will be off.
The cure is simple: you MUST use the “Change tool” button in CM whenever you need to swap the tool in the router at a time when you are not prompted to do so. CM will bring the router to the front for you, you will install your tool (as you did, but the big difference is that now the machine KNOWS you are doing this, since you clicked on “Change Tool”), and it will probe for its length and update its internal tool length reference. And then later on when the job starts and it uses the BitSetter again, the tool length reference is up to date and you shouldn’t have any Z issues then.
So that I follow you let me put it in steps. Steps work better for me.
I want to start a project. I turn on the machine that does not have a cutter installed.
I initialize the machine.
the cutter moves to the front on the machine and prompts me to change the the bit.
I install the bit I want to use and click on resume
The machine moves over to the Bit Setter and probes.
Help me get the steps correct because I know I’m missing steps.
after initialization, at what step do I load the new job and when do I probe for X, Y, and Z using the probe, since the Bit Setter only zero’s the “Z” axis. When I probe should I be using the probing rods that came with the probe?
jog to origin and set zero (or at least verify that the current zero is where one wishes relative to the stock)
load the file
run the file
The first two steps may be done in either order When one runs the file, it will note what the currently loaded tool is — if that is not the correct tool, one may load it then when prompted for a tool change.
Alternately, at any time before loading the file, one may use the Change/Load new tool button to load a new tool.
Yes,
I’ve done several of the tutorials. I didn’t use the machine much over the summer so I’m getting back into now.
I typical, after initialization, zero X, Y, and Z. then I load the file. When I hit start that’s when it prompts for a tool change. I usually already have the bit I want in their but if I didn’t I would put it in and click on resume. That’s when it goes to the bit setter and probes again then starts the spindle and moves towards the wood to cut.
After the machine probes with the bit setter that’s when I think it changes my Z axis so that its no longer at zero.
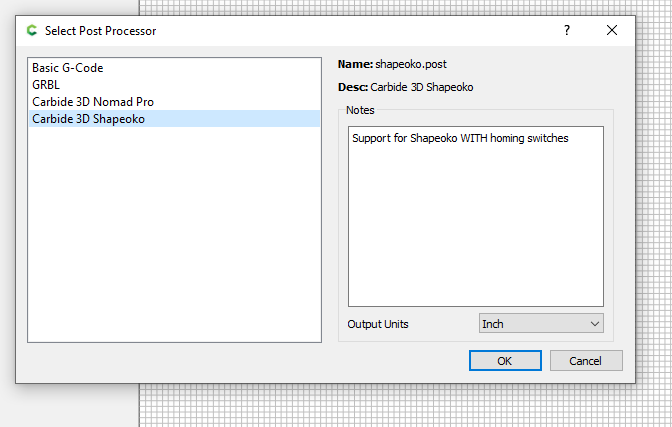
I’ll try what you recommend. If I want to turn of Bit Setter just to avoid all this I think that is done in Carbide Create select post processor. What are the two settings I should be using in their to either turn it on or off? I think when I want to use the Bit setter I make sure the file is set to Carbide 3D Shapeoko and when I don’t want to use the Bit Setter I set it to Basic G-Code. Is that correct?
This is fine, as long as you don’t swap the tool without using the Change Tool button in CM between the Initialization and the moment you set your zeroes. If you stick to this rule, you should not have the incorrect Z adjustment issue.
No, you should keep the post-processor set to Carbide3D Shapeoko at all times.
when you want/need to use the BitSetter for a multi-tool job, make sure the BitSetter is enabled in Carbide Motion’s Settings page, export all your toolpaths in a single file, and run that.
when you don’t want to use the BitSetter, disable it in Carbide Motion Settings, and then make sure you that all toolpaths you export into any single file use the same tool (or CM would not know what to do with the tool change command, when bitsetter is not enabled)
I don’t remember seeing a place in Carbide motions, setting, to disable the Bit setter. Where is it in settings? I usually like to turn it of when I’m just running the waste board cutter to smooth out and level a surface.