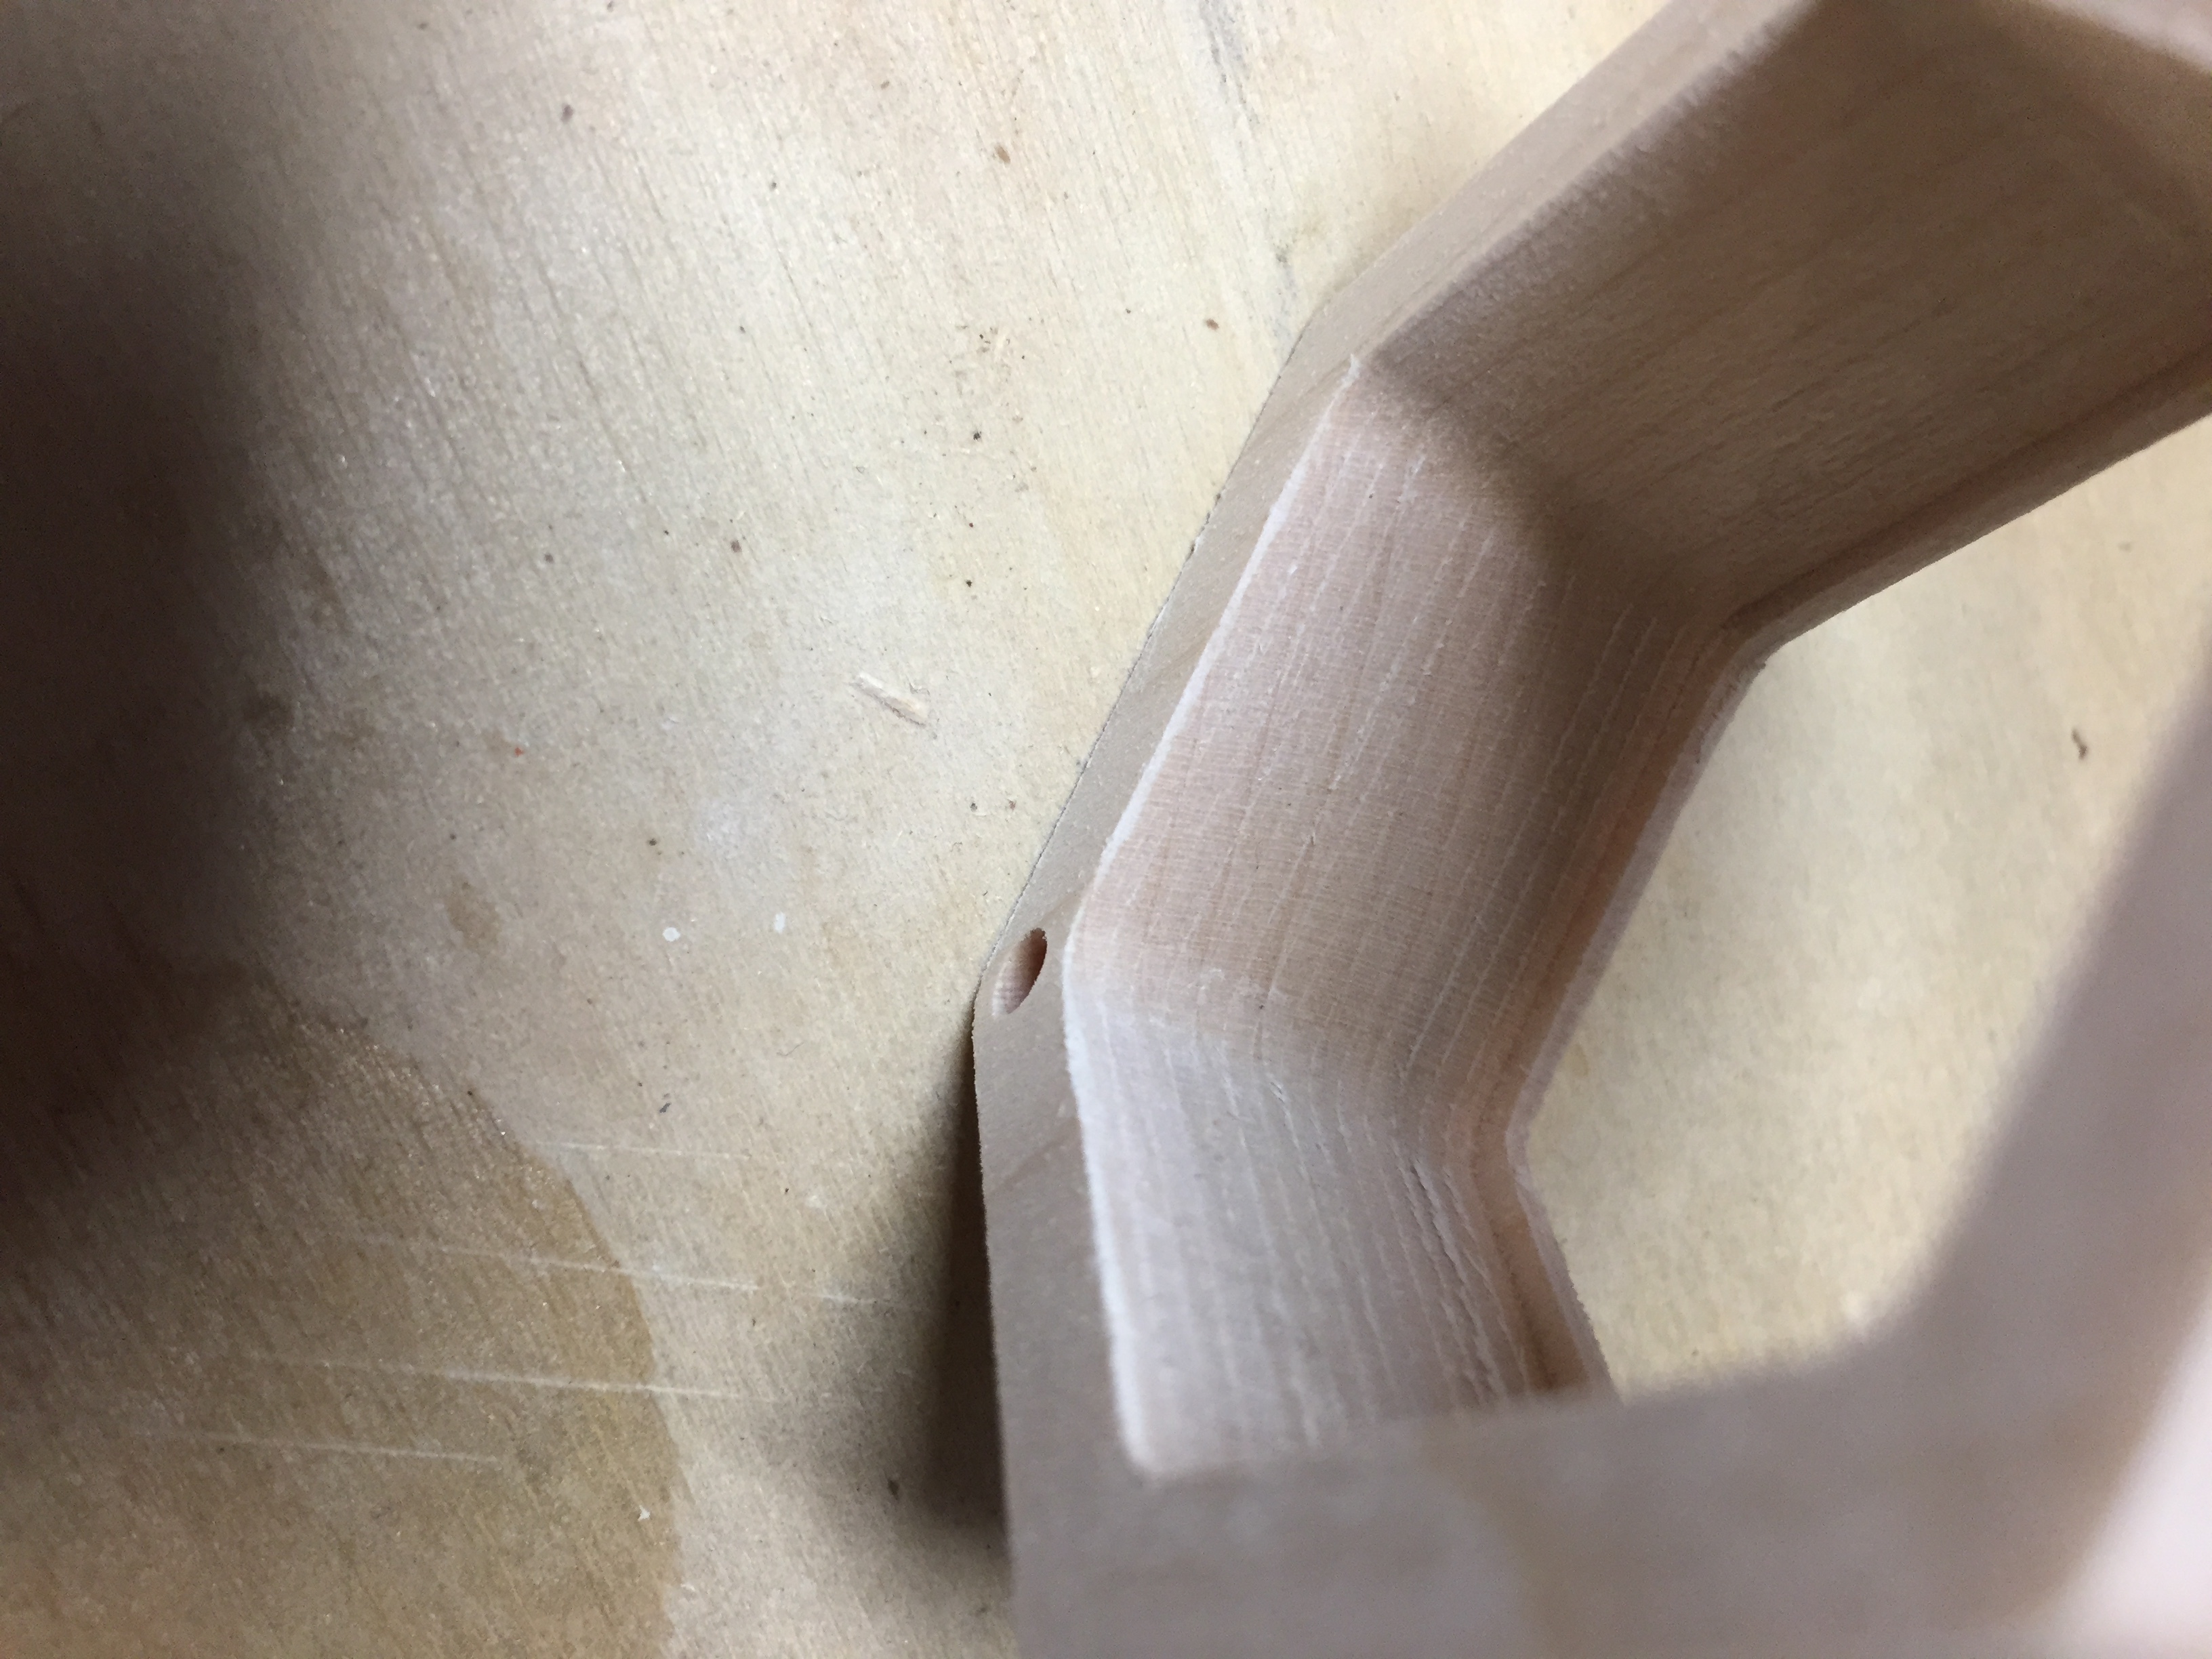
Is there a way to prevent or reduce this effect? I seem to notice it more on my 1/8" bits, which I thought was due to cheap bits but I just tried a Kodiak bit, which wasn’t pricey but also not cheap, and got the same effect. This is a mating piece so when I try to sand them off it of course doesn’t line up as nicely as it should. The one other difference right now is my 1/8" bits use a 1/8" collet where all my others are 1/4" shank, but I’m not sure how that would leave ridges. Am I cutting too deep per pass and deflecting the bit? It appears this way all the way around the piece so I don’t think the gantry is skewed.
I assume a finishing pass would help remove this, perhaps I should just bite the bullet and use Fusion360 for this.
Just what I was going to say With a deeper step down on the finish, maybe.
Maybe an offset would work for a finish pass tool path?
Like, do the first pocket a little smaller, than the final sized pocket, for a finish on the bigger pocket that feeds a little slower, and deeper.
You could maybe do the whole depth on the final pass.
Jdg yeah would need to add geometry to do that in CC I think. The thing is with the step down as-is it’s basically cutting most of the depth on the final pass anyways (.75" stock and .5" cutting length) but the lines are present across the whole surface. So I do think it would only help if it actually cut a small amount off on the final pass, so yeah a finishing pass but in CC that’s not the easiest since you can’t define a manual offset for the toolpath that I know of. I haven’t used Fusion360 but it may be time as I recall seeing a lot more options like that.
it’s stepping down .05" but that means it’s ‘recutting’ the previous .45" with a half inch cutting length on the bit. We’re on the same page I was just saying cutting around the same geometry would be the simplest way but in effective. Really wishing CC had a feature to set a manual offset since a few thousandths of an inch in the right direction and it would do a finishing pass.
Rather than add geometry, make a new tool for the bulk of the machining, (EDIT increasing (NOT reducing)) the diameter by twice the desired finishing pass.
I haven’t used CC, but I think you could make your smaller pocket about .02"-.03" smaller, then erase those step down lines with a full depth pass on the .02" bigger pocket.
Yeah that should work, I was trying to come up with a way to do it without adding a bunch of extra geometry and I think between your advice and WillAdams’ there’s a way, which is nice because this had me frustrated and would add a lot of time to my project to sand them all off
No worries, it clicked as soon as you said it that the diameter on the tool would create the offset.
Side note, in CC tool library the #102 cutter claims to have a .75" flute length but the shop says 0.5" (which seems standard). Doesn’t affect much but I’m glad I checked before I setup a .75" step down (I have c3d bits coming before I’ll have a chance to try this job again).
Is there a rule of thumb for higher flute count bits? I’m debating picking up one of these:
My understanding was that 4flute designs were more common for metal milling, but that they’d usually work for wood just by slowing down the router or speeding up the feed rate a bit so the chip load would be similar to their 2 flute versions? This one has a 3/4" cutting length so my finishing pass could be done in a single step down. Most 1/8" bits I have are 1/2" cutting length so I’d still be left with a ridge I’m guessing.
Thanks Will, I’d seen the tooling guide but always forget to check the wiki. Sounds like the 4 flute would be fine for the finishing pass but not ideal for the roughing. I think I’ll get off Amazon and dig up a 2-3 flute mill with a 3/4" cutting length, but for now I can use my carbide3d bits and hopefully end up with a single ridge if that.
I’ll have my Carbide3d bits this afternoon and can try this again tomorrow. I’ll try with the ones I have first and see if dropping the feedrate down for the finishing pass helps eliminate the issue. I want to ideally make a few of these so the less post-cnc work I need to do the better.
Appreciate both of you taking the time to give suggestions/links/advice/etc. Was definitely frustrated when I sanded off those lines and ended up with a box that didn’t fit together well any more. Working on modifying my CC file to do roughing and final passes and will see what kind of ridge gets left with the bits I have with a nice slow feedrate on the final pass. If I still get ridges since it’s only 3/4" material I’ll likely invest in a bit that can do a finishing pass in a single run based on the suggestions here. Thanks again.
Decent improvement. Interestingly helped on one side more than the other. The first picture shows it after the roughing and the second shows after the finishing pass. Unfortunately once extricated from the waste the other sides not visible were just as bad. I programmed in a .135" bit for the .125" real dimension, thinking I should double the size of the finishing cut by trying .145". Any thoughts?
I agree, and by the looks of it the lines should be gone after that.
.01", ( or is it only cutting .005", I get confused )is pretty fine for soft wood, and probably just isn’t quite enough.
Glad it’s getting better for you.