Edward,
How about an update on the XXL upgrade kits! Are you still looking to ship on Monday the 16th?
Limit switches for XXL update? Just wondering if we have a solid date yet.
Hey All, sorry for the radio silence. We’ve been busy trying to get a solid date on everything that’s in motion right now. I should have taken a little time to post an update sooner.
We still dont have the limit switches delivered. They should be in ‘any day’, but I dont have a firm date yet.
We are still planning to ship XXL upgrade kits next week. We wont get through all of them, but we should definitely get us within our 2-3 week lead time.
In related news, we have managed to get a MUCH more complete version of the assembly instructions compiled. I have that posted under the other thread:
-Edward
Ed,
Please see my question above re: drag chain brackets. I haven’t receive mine yet it sounds like they were all suppose to have shipped. Sent an email too but no response. If they haven’t shipped and the limit switches are soon to go out please put them in with those.
Thanks, John
Tony, I’ve assembled my machine up until the limit switches, as it looks like I’ll need to mount the drag chain to the gantry via the limit switch mount. Could you explain how you got around this? (I’m a COMPLETE newbie, so explain it like I’m five if possible  ) Any precautions I should know about using the machine for the first time without the limit switches? Thanks!
Here’s how to home w/o them: http://docs.carbide3d.com/article/39-how-to-home-the-machine-in-the-absence-of-limit-home-switches
Just keep an extra careful watch, and be ready to kill the power if need be.
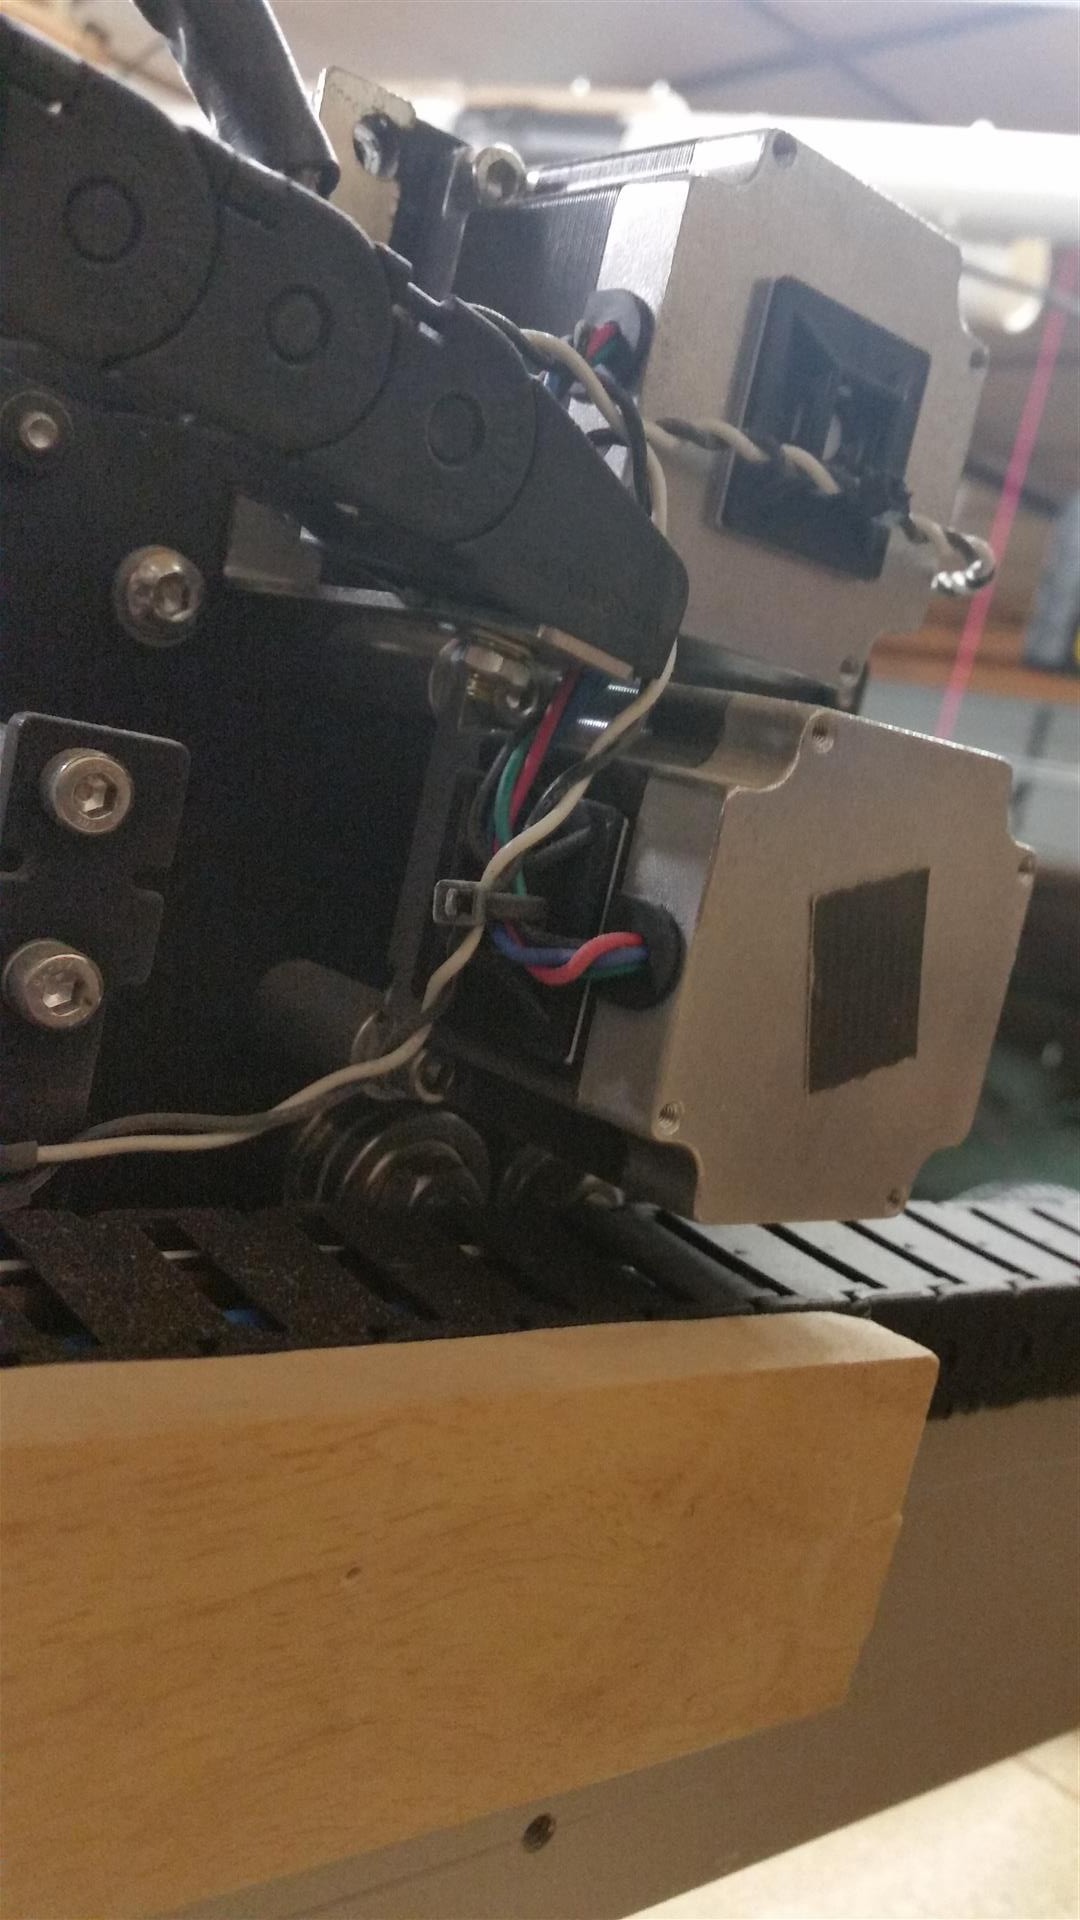
Note that I used different mounting holes for the Y axis cable chain mount. It is supposed to mount using the top motor screws with nuts added. I had to shift mine so that the cable chain never moves past the extents of the Y axis of the machine so it would all fit in a snug enclosure. I also added some guides to make sure the cable chains don’t fall off the edge of the rails. You should use the VHB tape to secure the other end of each chain (not shown). However, I just drilled and tapped a hole in the rail to attach mine.
I noticed that I’m missing a couple screws… one for each chain bracket. I’ve been doing other mods and haven’t put those back in yet.
Also, I may have my X axis cable chain mount upside down compared to what C3D recommends. It works fine this way though.
Let me know if that does not answer your questions.
Thanks so much for this info, Tony!
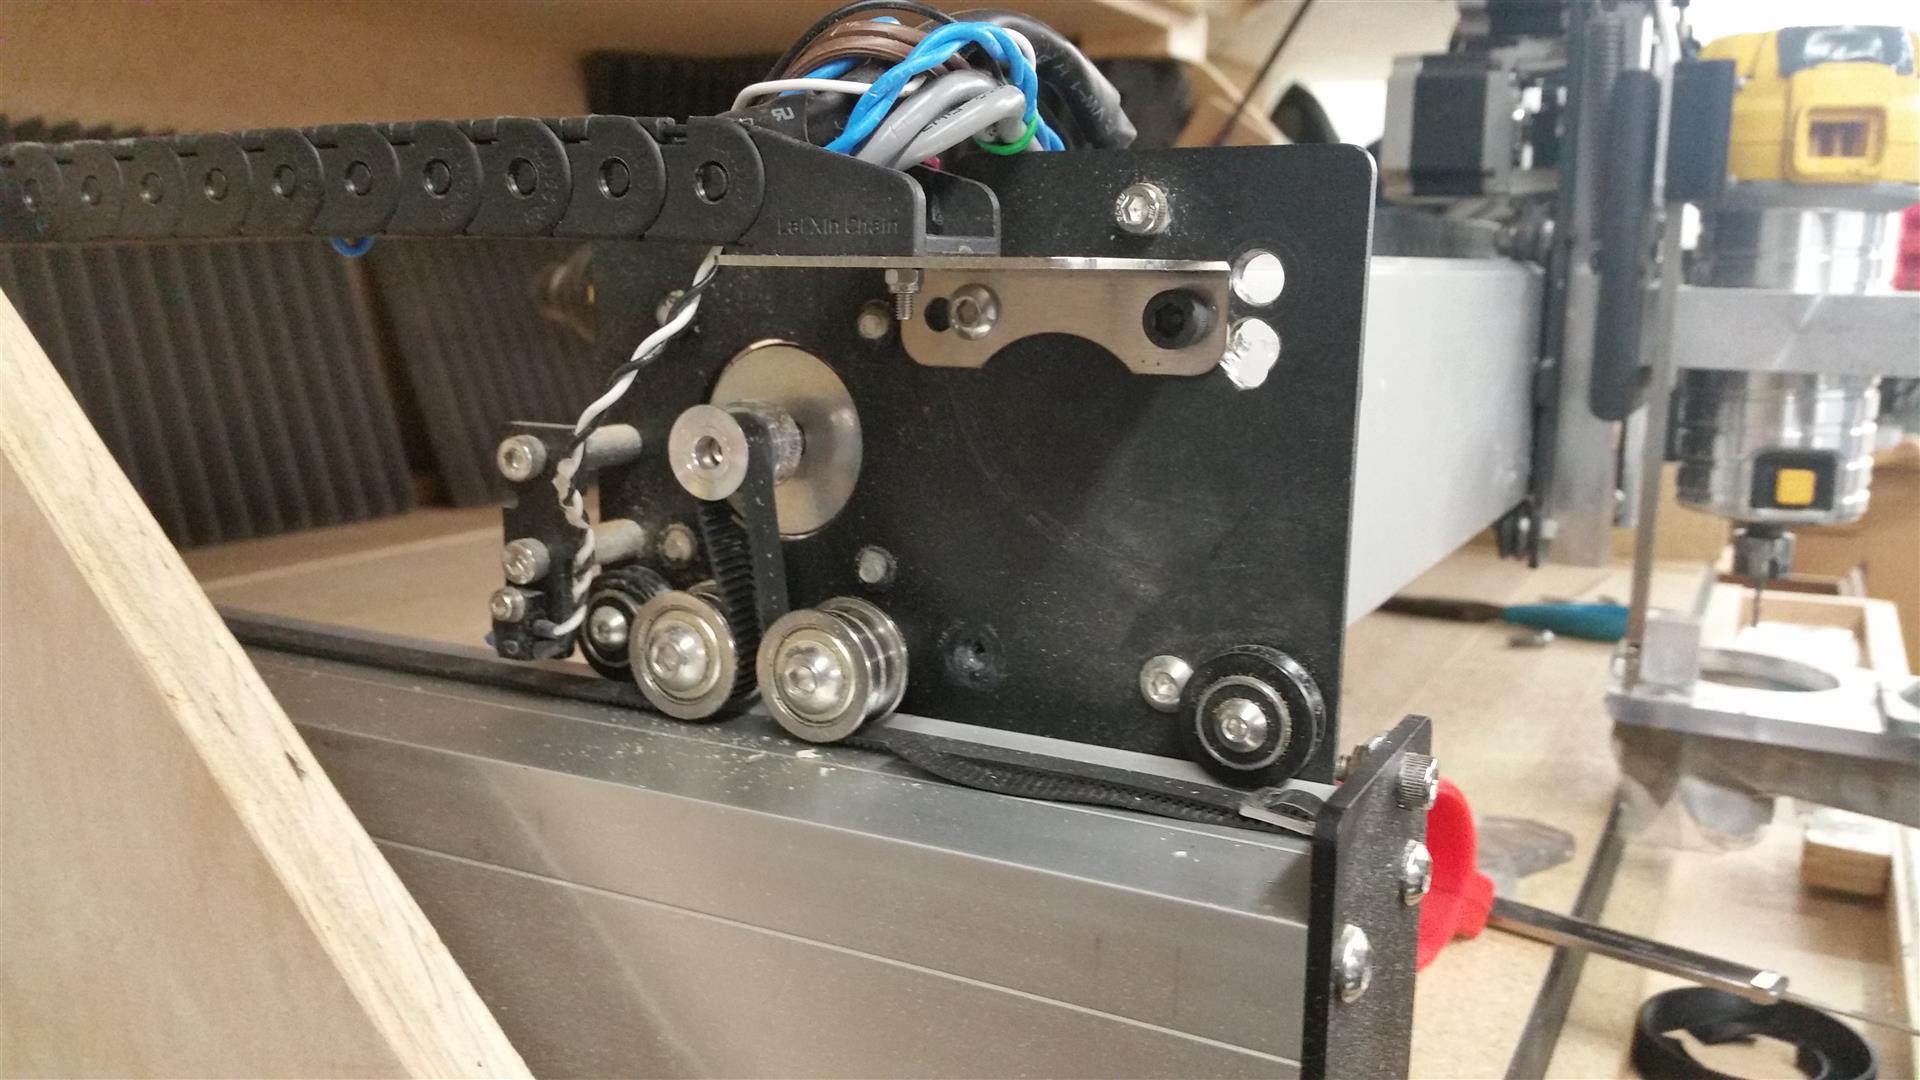
It may be that I’m just not understanding the assembly step for attaching the drag chain. I’m seeing where the L bracket is supposed to go on the z plate, but it looks like I’d need that top bolt that (I thought) was supposed to come with the z limit switch.
That top bolt here:
And from the front, this is what yours looks like as well? The pics I’m seeing in the assembly manual all have a fixture on the top, front of the z plate.

Is your guide that wooden plank I’m seeing? Was that just to be extra sure the chain won’t fall off? (I was a little unsettled about attaching it with just mounting tape, myself.)
And thanks for replying on that other thread about the limit switches! How long does it take to home on the XXL? As long as making sure my projects don’t near the border of the work area, I shouldn’t run into any problems with losing steps, should I?
Thanks so much for your help!
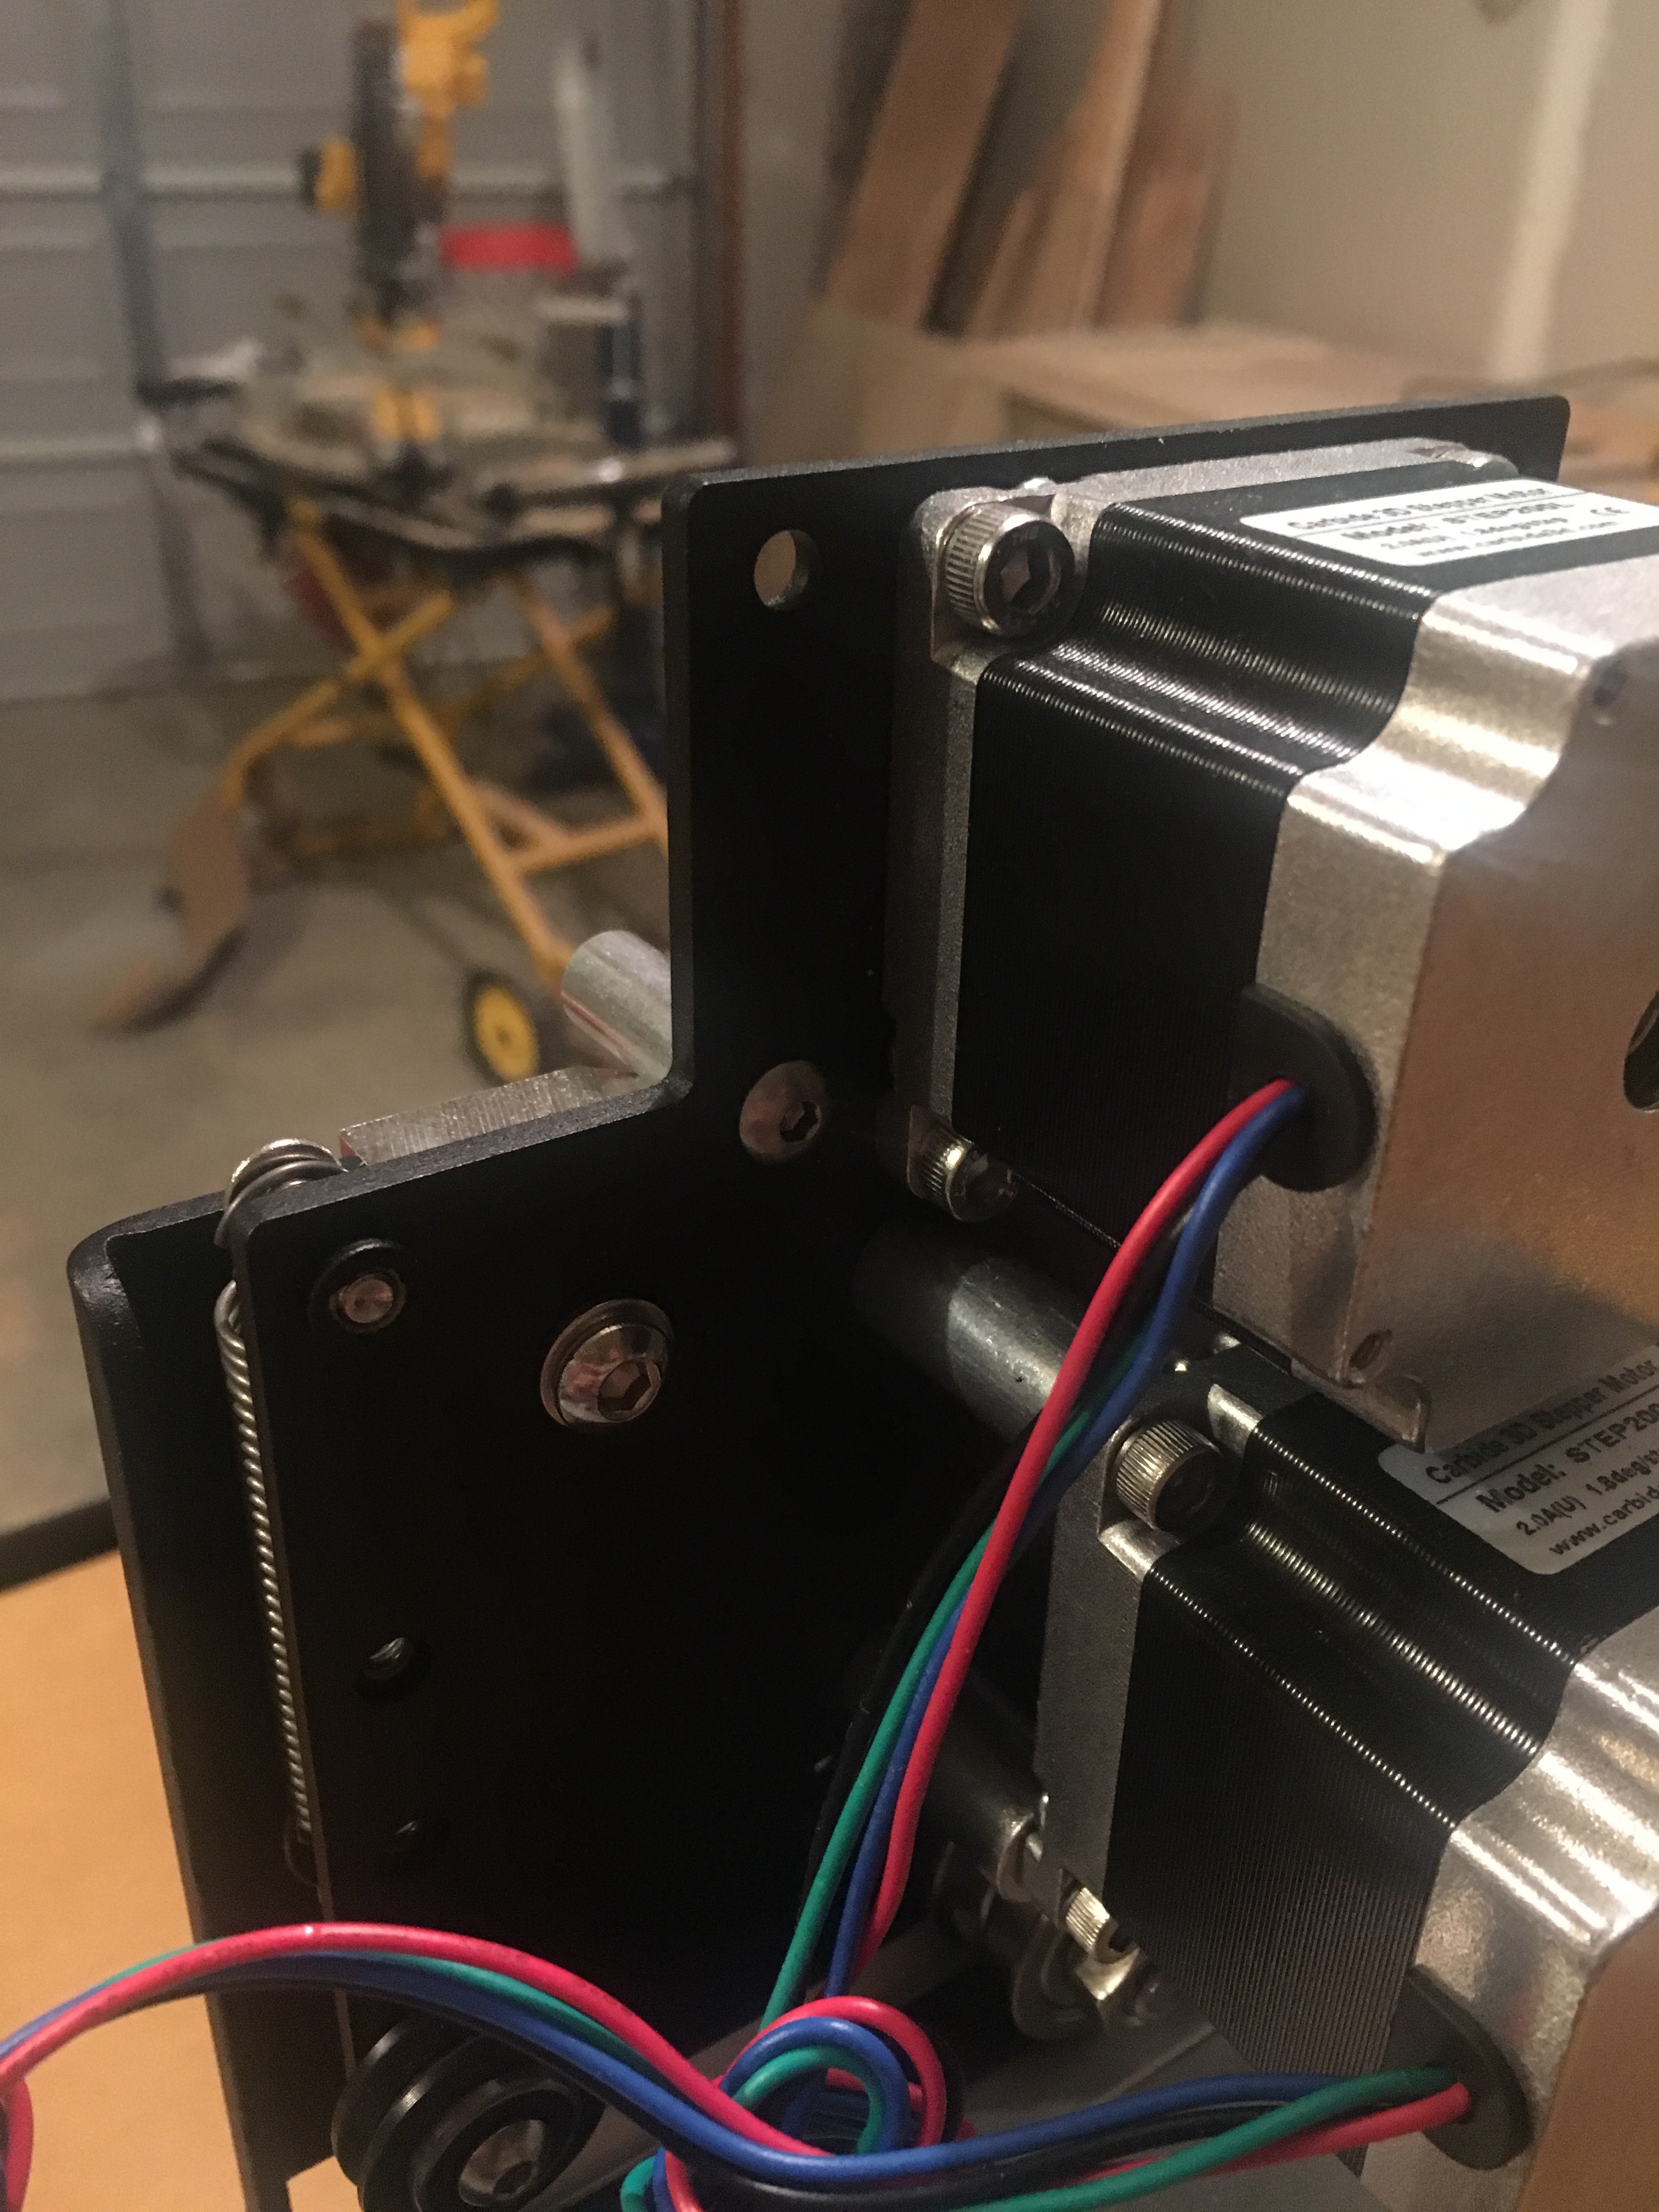
it looks like you only have one of the 4 aluminum standoffs installed that support the z axis limit switch mounting plate. The x chain bracket mounts under the screw that secures the standoff that you have mounted and the screw that connects to the standoff that goes above that one which you don’t have installed. I’d attach a picture of mine but I replaced that plate with a custom one that allows me to mount my dust shoe. I think Edward has another thread started with his latest assembly instructions. That thread has some pictures of this area.
Yes, the wooden plank is my chain guide.
You shouldn’t worry about crashing this machine. The motors aren’t powerful enough to tear anything up. Just be aware of the size of your part and where your zeros are and you shouldn’t have to worry about running into the stops anyway. I haven’t had any issues so far.
I hope that helps.
Having belts on all axes makes the machine wonderfully forgiving — all that happens in a crash is the pulley starts skipping on the belt, and the worst that can happen is the pulley will damage it at that point, limiting the max. travel until it’s replaced most likely.
Yeah, that’s what I was thinking, too, but this is just how it came to me. (I didn’t do any of the z plate assembly.) I’ll actually be ordering the mini dust shoe soon from Kent CNC, but wasn’t sure if anything would have to be modified. Did you mill your custom plate yourself or just get a different one at the hardware store that would accommodate the shoe?
And thanks very much for all the info! Thanks puts my mind more at ease about using it sans limit switches 
@WillAdams, do you know if my machine was supposed to come with all four standoffs on the z plate, or if those were coming with the limit switches?
No idea I’m afraid — just kibbitz on the forums, not privy to details @ Carbide 3D.
Contact support@carbide3d.com for accurate information.
Ok thanks, will do!
.
I milled my own. I made my shoe stationary so it doesn’t move up and down with the z axis. It is adjustable for height though. I’m still working on the design. Its set up so that I can have it move with the z axis or stay at a fixed z height. So far I’ve only needed to use it at a fixed z height. I’m still trying some unique ways to make it better.
Sounds cool! Thanks again for the help
Are the XXL Upgrade kits still on schedule to ship this week?
1 Like
Got my XXL limit switch tracking info today.
Same here…they must have received a batch of these finally.
I received shipping notification for my XXL upgrade today! Is there a BOM available for the XXL upgrade so we know what were are supposed to receive?
Just got my tracking number!!! Ordered XXL Kit on 2/24/16!!!