G53 is not modal and has to be entered for every block you want to move in machine coordinates. It looks like your second line will be moving in work coordinates.
1 Like
Correct.
…
Correct.
I appreciate that, @Gerry , thank you ![]()
So, this is what I’m going to do…
I’ve already got the ‘after’ measurements from the project, so I’m going to run it again. But this time, I’m going to measure everything before the first cut, but after BitZero has done it’s thing and the bit is above the start point (spindle off!) and then let it run it’s course to see how it goes. If it’s successful or gets cocked up again, I’ll repeat the tool protrusion measurement (the rest should be constant) to see if there’s any change.
Sounds like a reasonable plan!
If we consider the reasons the Z might change, we’ll need to cross off things like:
- The bit slipped and is protruding further out and cutting deeper
- The Z-Axis tried to go to high, and couldn’t physically move even though it is being told to move. So instead of going 10cm upwards it only managed 5cm, so when it comes back down 10cm it will be 5cm too deep.
- A variation of 2 where the Z-Axis slips when moving so its physical position doesn’t match the position the software is tracking.
- The CM setting for the Z-Axis is wrong, so it sends the wrong number of motor pulses to go a certain distance.
- Pixies
This happened the first time I ran the project, so I can’t say.
So, just to be clear, I just need to move the tip of the bit 0.5" above the waste board, then type this in the MDI:
G21 G53 G0 Z-5 and press Send
G0 Z0 and press Send
…and repeat it several times.
It’s funny you should say that. I prefer to work in inches, but CM shows everything in millimetres. Is that why and does it really matter if CM is in metric and CC is in imperial? Which is better for accuracy?
When I setup CM on my laptop and tried to change the settings to imperial, I ended up with stupid numbers in the boxes - because the number of millimetres change to inches, i.e. $130=845.000 inches.
Make sure your Z0 is set before you enter the commands. You just need to set Z0 once. Then repeat the commands.
And how would I do that, please?
(I beginning to feel a little stupid!)
How do you normally set Z0? BitZero? By eye?
D’oh! Either method, but I misunderstood. I should set the bit 0.5" above the waste board, then set Z zero from the set zero screen in CM.
(Told you I was feeling stupid ![]() )
)
That’s correct.
…
Thank you.
OK, so I did that (about 20 times!) without any issues. Z returned from the top down to the same position every time.
So, I guess I’ll try to run the project again.
It might be relevant, but during the cut of the pocket, which would normally cut flat-bottomed, I noticed this and took a photo (the fluff in the middle is chippings):
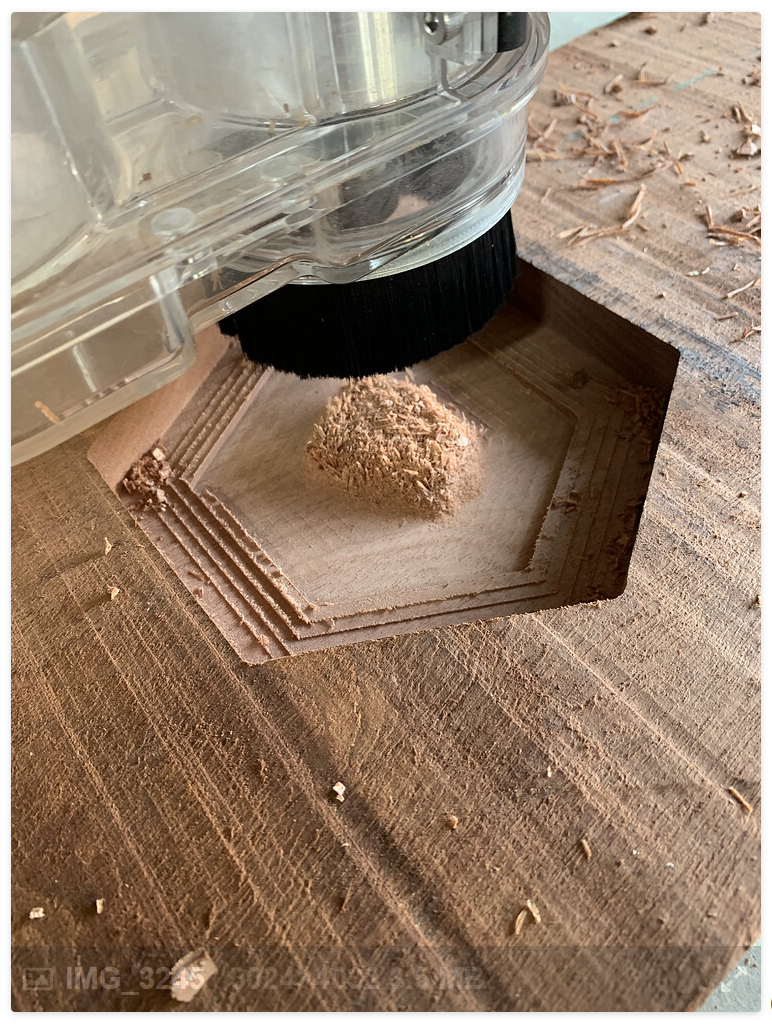
Why did the cut start ‘stepping’?
It looks like your dust collector will get in the way there. The brush fibres themselves might be enough to cause a failed move, or the plastic edge. Can you lift it up so there’s lots of clearance before trying this?
It does look like it, but I was keeping a very close eye on it with my hand poised over the feed-hold button, just in case, but the cut went on to flatten this out without any problems.
So, I tried to run the project again, and the issue is persistent. This is what I did:
Starting from scratch, I connected and initialised the machine, which went home, moved South and prompted for a bit, did it’s BitZero thing, then returned South.
I jogged the spindle and manually set zero, using the probe from the BitZero v2. And then did it again.
Loaded the file and clicked Start, and the machine moved to South and prompted for a bit. I installed the bit, clicked Resume, and the BitSetter did it’s thing before returning to South, prompting for me to set the spindle speed (the spindle was already running by this time).
I clicked Resume and the bit went off to start work, BUT plunged 11mm into the stock to start the cut, so I pressed the feed-hold button, which stopped the spindle and retracted the Z height.
At this time Z was showing 46.545mm but was only 31mm above the stock - which means the Z zero changed at some point to 15mm below the original Z zero. Here’s a photo of where Z zero actually was when I jogged it alongside the stock:
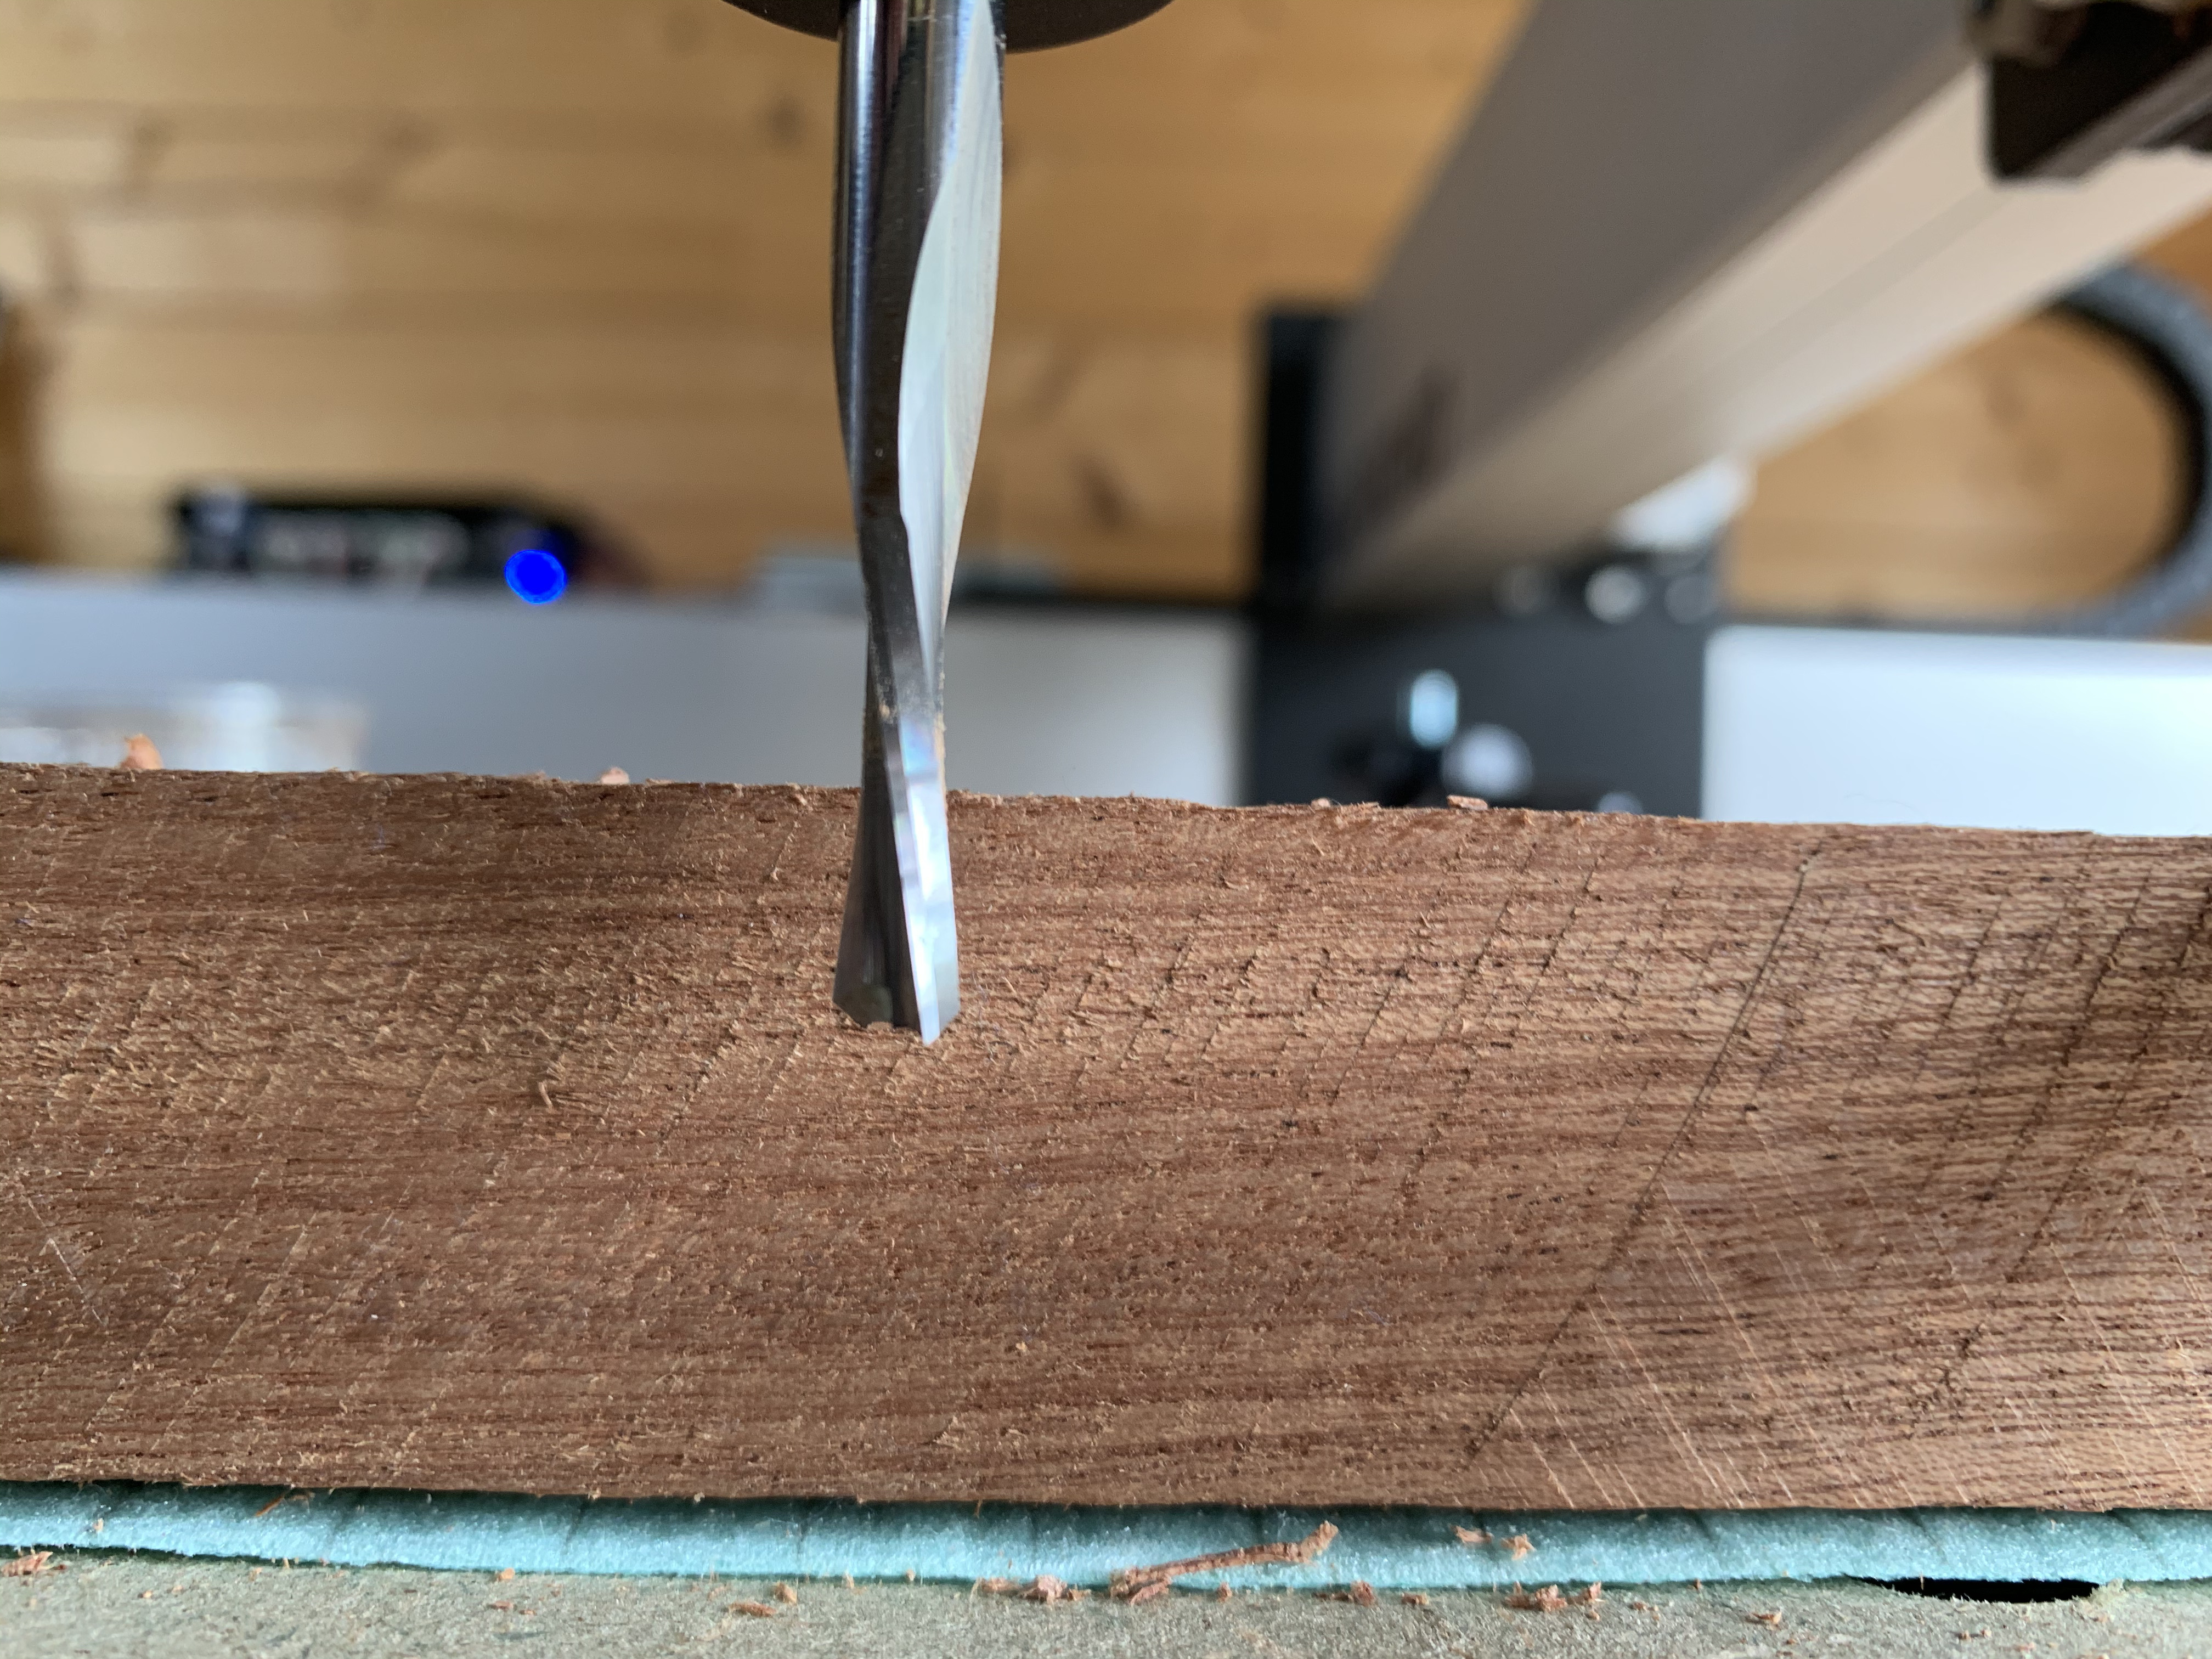
The protrusion of the bit hasn’t changed.
1 Like
If this is now repeatable, that’s a great thing (for the investigation). If you can reproduce one more time and collect logs, and maybe even capture the whole thing on video, that could provide hints as to what is happening. It would not be the first time we have a collective “hey wait a minute…” moment while watching the recording of the events.
3 Likes
I’m collecting an awful amount of dust and scrap wood, but no logs! ![]()
OK, I’ll run it again using the same process, this time with the CM log window open.
I’ll try to video it, but can’t guarantee my film-making skills…
4 Likes
Can you try setting Z0 without the probe? Just jog until it is touching the surface and set Z0 there.
Eliminating variables…
3 Likes
Hi Neil,
Yep, I did that on the second cut (with the 11mm plunge cut) and this one, but this time everything worked without a hitch - apart from a slight design error.
I’ve got the log and some video, but I don’t think there’s no point uploading it for the successful cut, unless it’s worth showing the hole?
For this cut to have been successful is annoying, particularly after the first two failed, because I can’t prove anything. Grr.
Not sure if this link will work: iCloud
IT DID IT AGAIN!
This time, rerunning the .nc file to cut just the bottom of the box, the bit plunged too far (6mm) into the stock! I used the feed-hold button to stop the process, and a second time to revert control to CM. The Log looks like this, after I clicked Resume to continue the project and get some of the Log report:
GRBL_RESUME
[MSG:Check Door]
[MSG:Check Door]
[MSG:Check Door]
[MSG:Check Door]
[MSG:Check Door]
[MSG:Check Door]
GRBL_FEEDHOLD
GRBL_RESET
ok
Grbl 1.1f [’$’ for help]
N0 G4P0.005
ok
M56P0
ok
N0 M5
ok
N0 G4P0.005
ok
N0 G4P0.005
ok
N0 G4P0.005
ok
$h
ok
N0 G4P0.005
ok
N0 G4P0.005
ok
M56P0
ok
N0 M5
ok
G92.1
ok
G54
ok
G10L2P1X0Y0Z0
ok
G21
ok
G49
ok
G90
ok
$G
[GC:G0 G54 G17 G21 G90 G94 M5 M9 T0 F0 S0]
ok
$#
[G54:0.000,0.000,0.000]
[G55:0.000,0.000,0.000]
[G56:0.000,0.000,0.000]
[G57:0.000,0.000,0.000]
[G58:0.000,0.000,0.000]
[G59:0.000,0.000,0.000]
[G28:0.000,0.000,0.000]
[G30:0.000,0.000,0.000]
[G92:0.000,0.000,0.000]
[TLO:0.000]
[PRB:0.000,0.000,0.000:0]
ok
N0 G4P0.005
ok
$$
$0=10
$1=255
$2=0
$3=2
$4=0
$5=0
$6=0
$10=255
$11=0.020
$12=0.010
$13=0
$20=0
$21=0
$22=1
$23=0
$24=100.000
$25=2000.000
$26=25
$27=3.000
$30=1000
$31=0
$32=0
$100=40.000
$101=40.000
$102=200.000
$110=10000.000
$111=10000.000
$112=1000.000
$120=500.000
$121=500.000
$122=270.000
$130=845.000
$131=850.000
$132=95.000
ok
The difference this time being I used the BitZero to set the X, Y and Z zeroes.
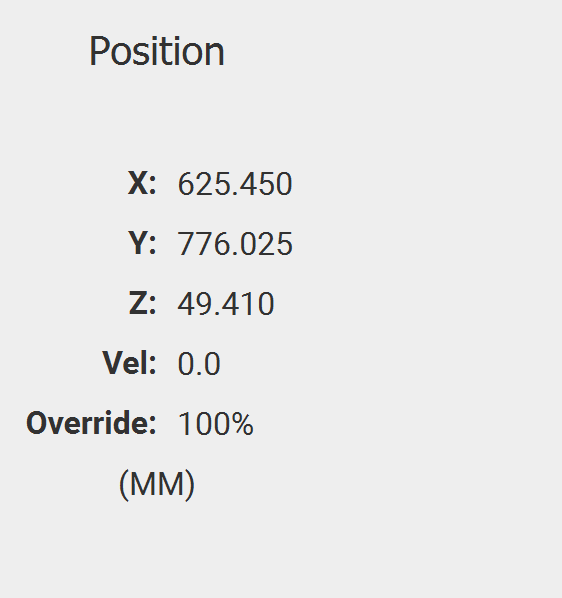
When I pressed ‘Stop’, the machine went ‘Home’ and I got the grumbling as the machine completed that workflow. These are the X, Y and Z settings with the spindle at Home:
I’m going to Z-Zero by eye and run the project again, to see if that makes any difference.
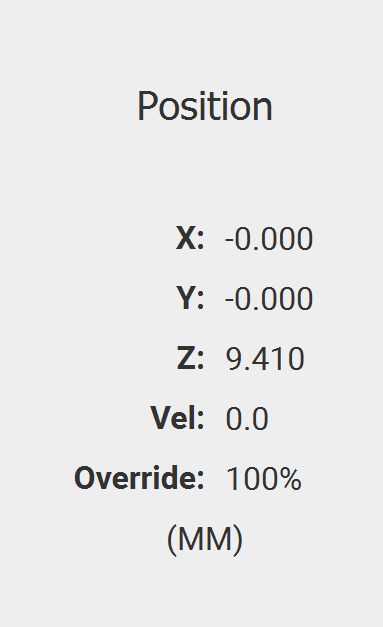
These are the settings with the spindle at stock zero, before I reset it. Looks like something reset the Z-zero too low:
Stay tuned…
UPDATE: After manually setting the Z-zero, it seems to be doing what it’s supposed to do, raising the obvious questions about the BitZero?
I think next would be to see when the z resets… confirm coordinates after BitZero and after starting job (stopping it before it plunges).
Alas, the interesting logs would have been those before that moment ![]()
That’s slightly suspicious, I don’t see/recall why GRBL/the controller would reset after a FH/resume, and I’m not sure how CM will handle that situation. Anyway, the problem we are looking at is before all that (but it may affect the readouts after the FH/resume)
As @RoughDraft40 mentions, I suppose the next step is to break down the process and double-check zeroes at various moments. You may want to leave the BitSetter out of the equation for now if this is a single tool job, by disabling it. And right after you use the BitZero, manually jog to 0,0,0 to check that it operated correctly.
1 Like