I just replaced my spoilboard on my Shapeoko 3 XXL. Here is the procedure I used to flatten the spoilboard.
Please send any feedback you might have.
spoilboard_flattening.pdf (570.4 KB)
I just replaced my spoilboard on my Shapeoko 3 XXL. Here is the procedure I used to flatten the spoilboard.
Please send any feedback you might have.
spoilboard_flattening.pdf (570.4 KB)
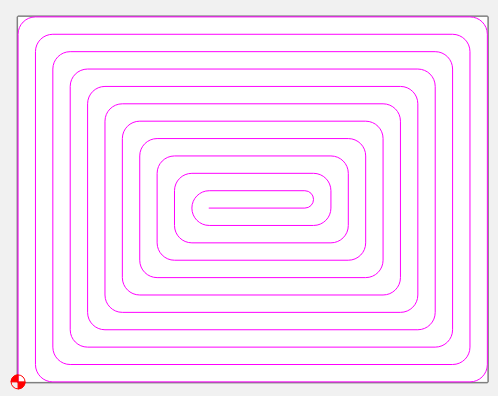
Pretty much the same process I use. I create my own pattern for toolpath. Outside → In, climbcut
And instead of touching off to reset the Z, I just pull up the Zero menu and add 0.010 to whatever it says. So if my Z is at 3.129, I change it to 3.139 & rerun the program.
When I have to replace this one, I’ll cut it down to the work envelope. I’ve had no need for the spoilboard outside the envelope so far, and moving and swapping slats is tedious. I’ll just keep sections of the old spoilboard cut down 1/4" to fill in the spaces.
I have tried just lowering the Z 0.010" and resetting to zero but on a new spoilboard I have found that sometimes that lowering is not enough to completely flatten the spoilboard. Then I would have to lower again and run the flattening again. Just going to the low spot and zeroing there I can usually get the flattening done in 2 passes.
I also do the pencil marks on pieces that I need to flatten on the Shapeoko and do the same thing. I run the flattening and if there are any pencil marks left I move the z to there and rezero.
This topic was automatically closed after 30 days. New replies are no longer allowed.