Shapeoko Pro Cutting 6061 T6 Aluminum

I just received my Shapeoko Pro and cut about a dozen things (in two days lol), I have yet to run in to an issue, all has gone very well. Surpassed my wildest dreams being such a newb. I thought I would have snapped a bit by now or ruined the projects but so far so good. I’ve even completed a few more complex designs (so exciting!)

I guess I am really interested in snapping a bit because I want to “try” aluminum. :grin:

I have read and watched a lot of videos. Lots of not necessarily conflicting information, but more overwhelming information. It’s to the point where I feel even less prepared for aluminum than before I knew I could cut it. Too much information syndrome.

I have a few .125 and .25 thick 6"x6" of 6061 T6 Aluminum.

I was wondering (hoping) someone could just give me a straight shot “do this” to cut out a simple 4"x4" square with a .5 hole in the center?

I am not looking to make an actual part, just want to test it out so I can go from there onto bigger and better things. I figure a square with a hole is a good way to go for edges and “drilling” into aluminum and from there I can branch out with a good starting point.

So, If you were doing this, how would you do it? What bit, speed/feed etc? I only have the Shapeoko Endmill Starter Pack on hand, but more than willing to buy specific bits.

I noticed this forum seems to be unlike all the rest where someone just says “use the search” or “google it”, so I figured it was safe to ask for help on this and in this way. (although I am totally open to being linked to a video for this exact kind of thing)

I would just draw up the geometry and assign the toolpath using the feeds and speeds in Carbide Create:

One consideration is that it’s better to cut as a pocket, than a narrow slot for a contour, so backup to the Design tab:

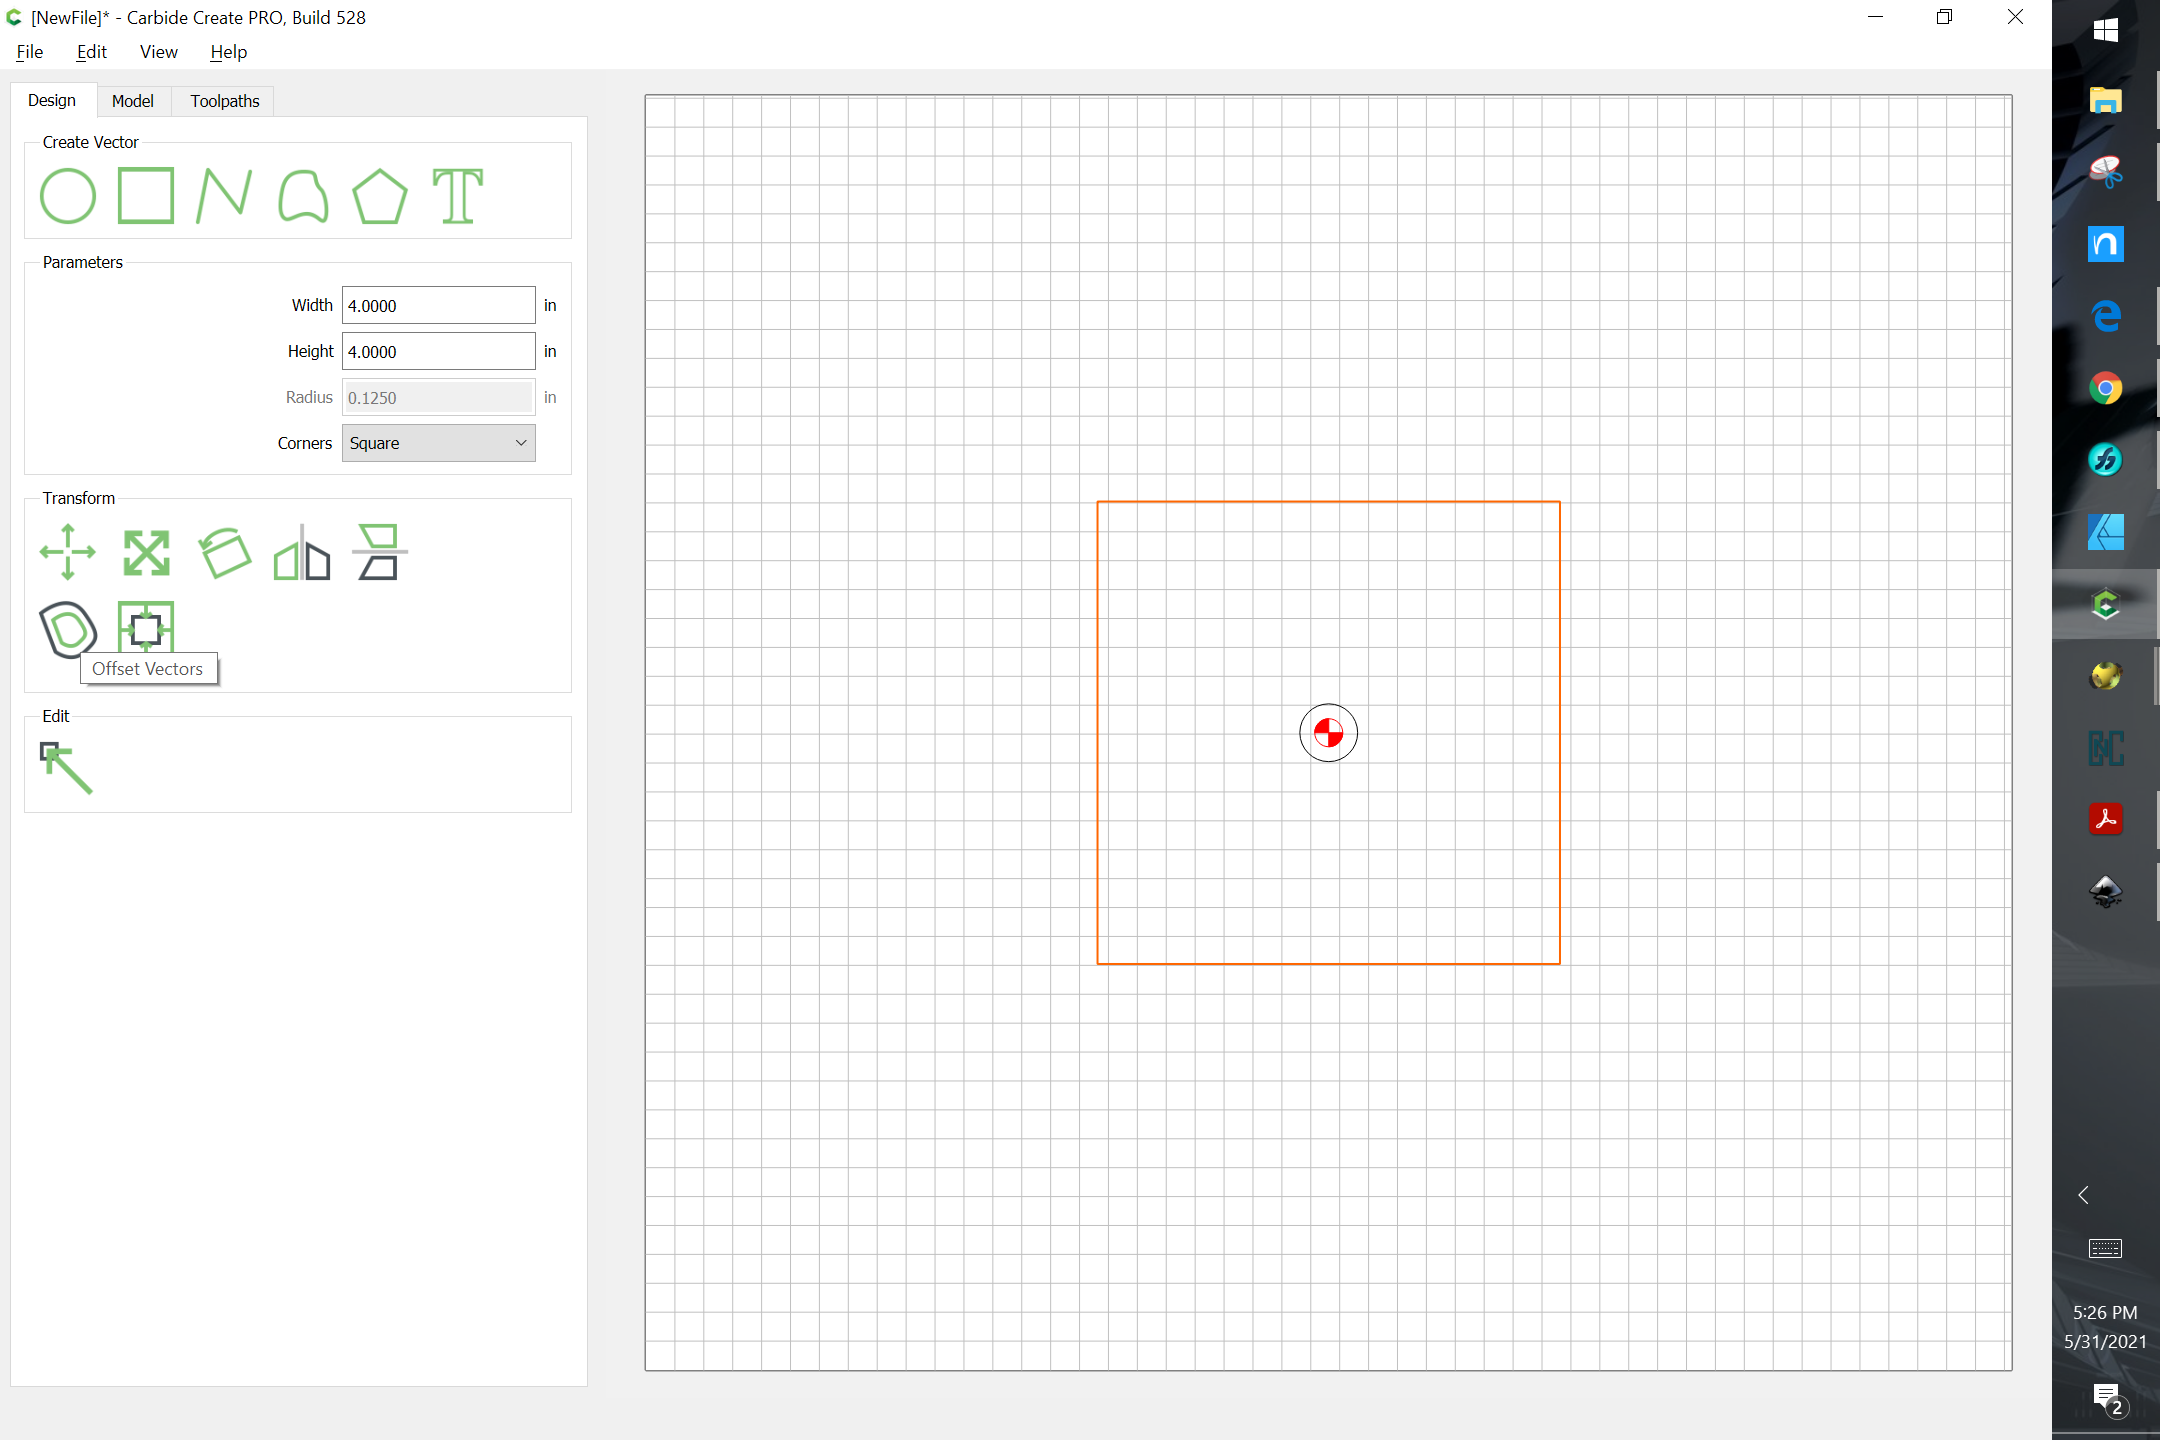
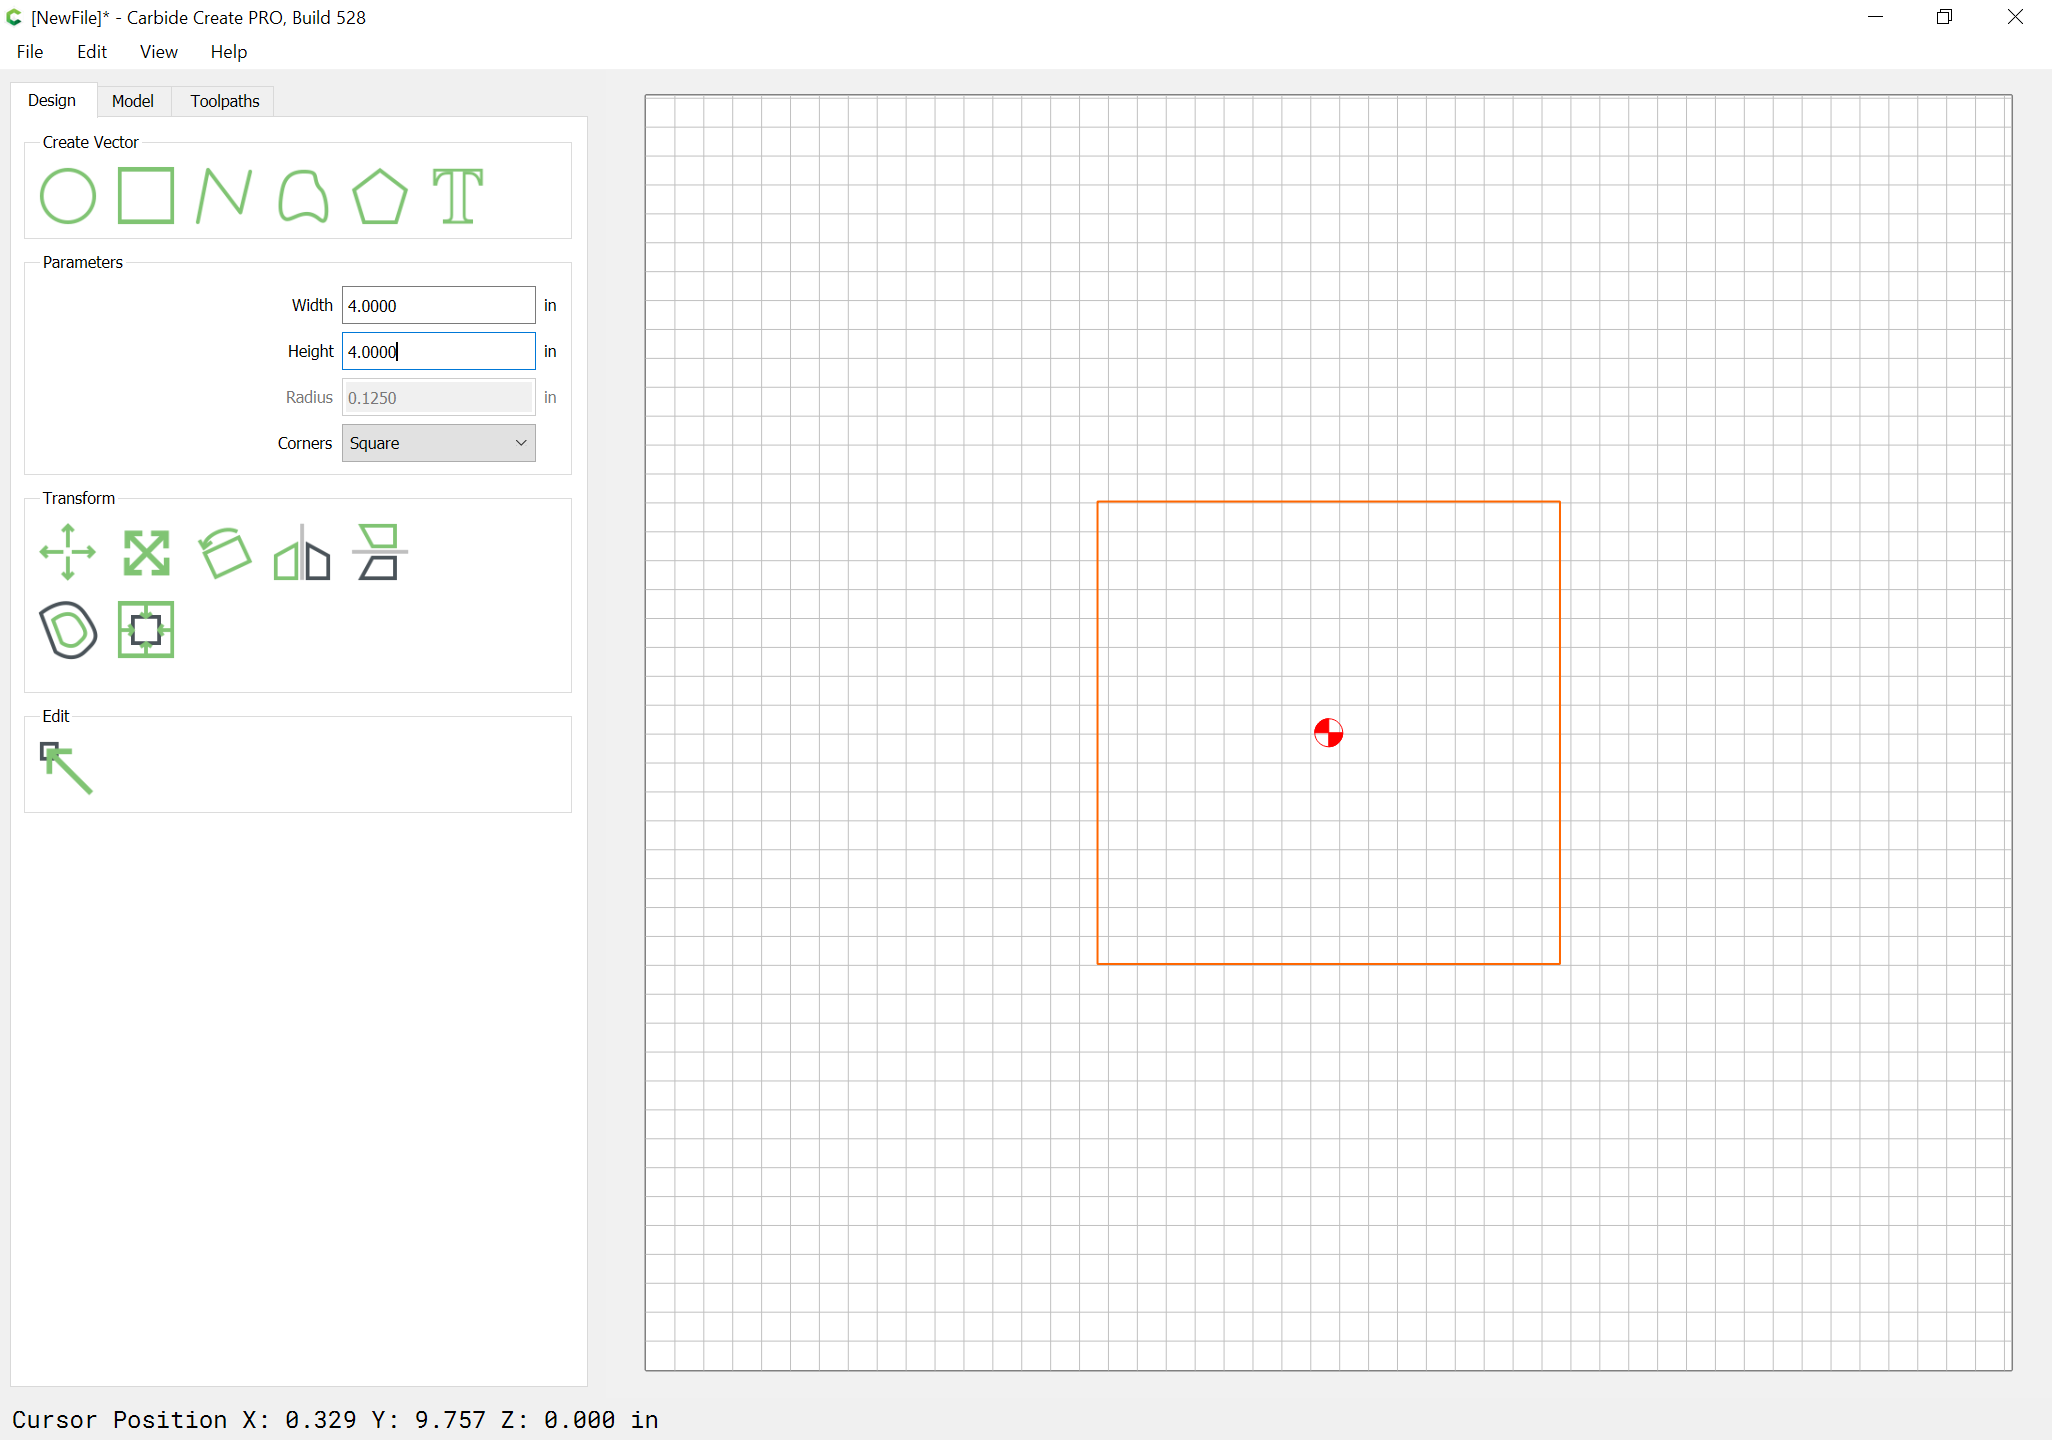
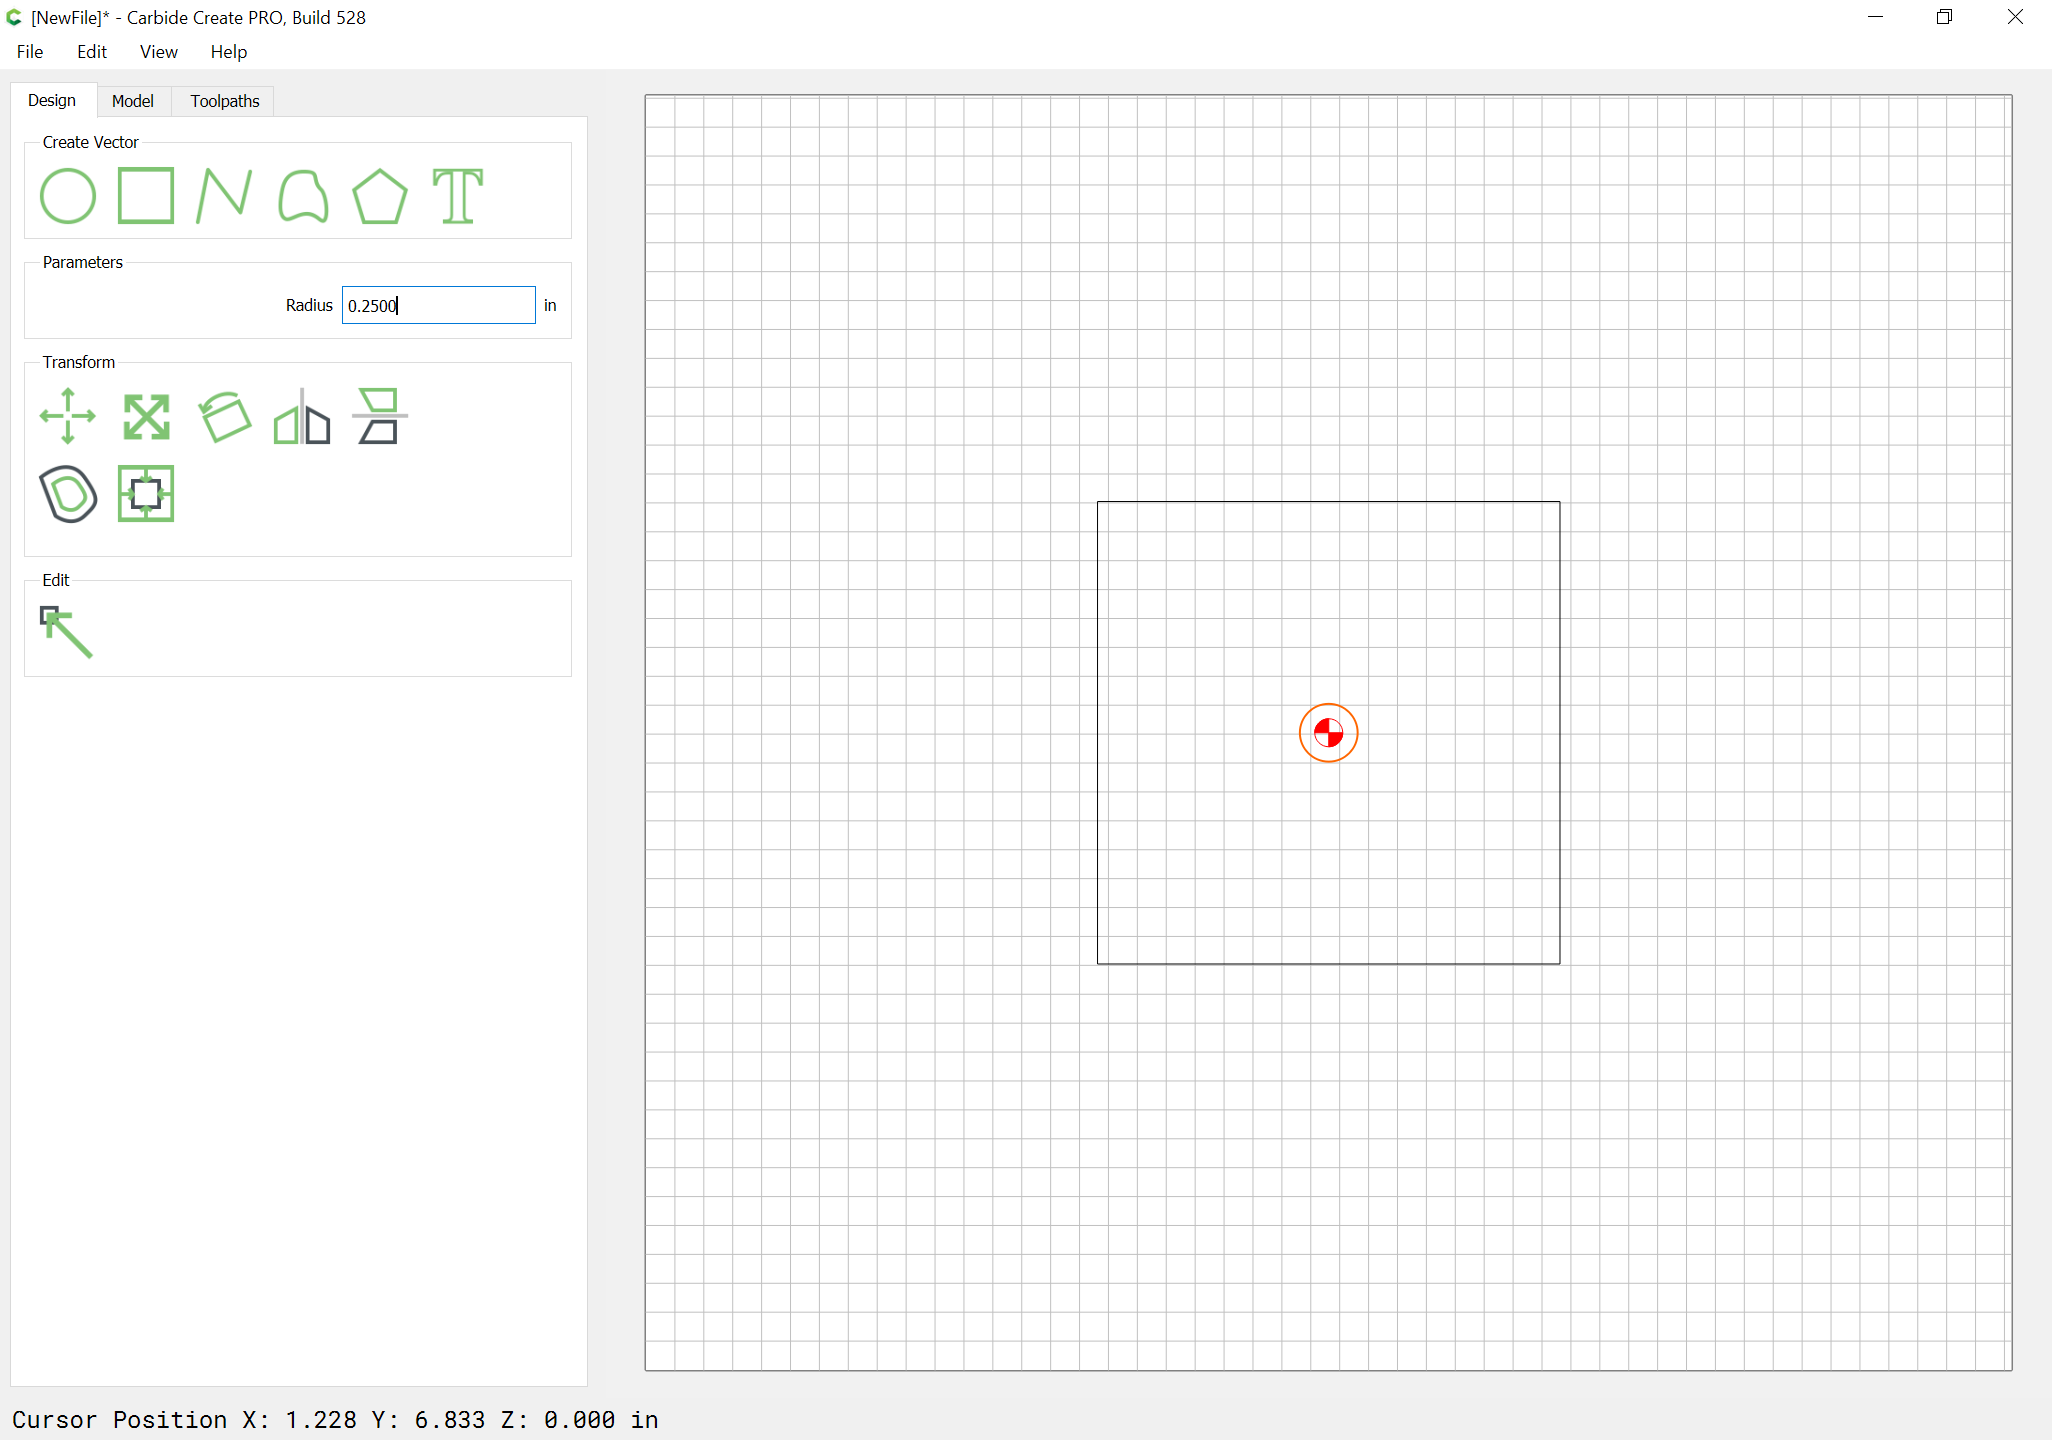
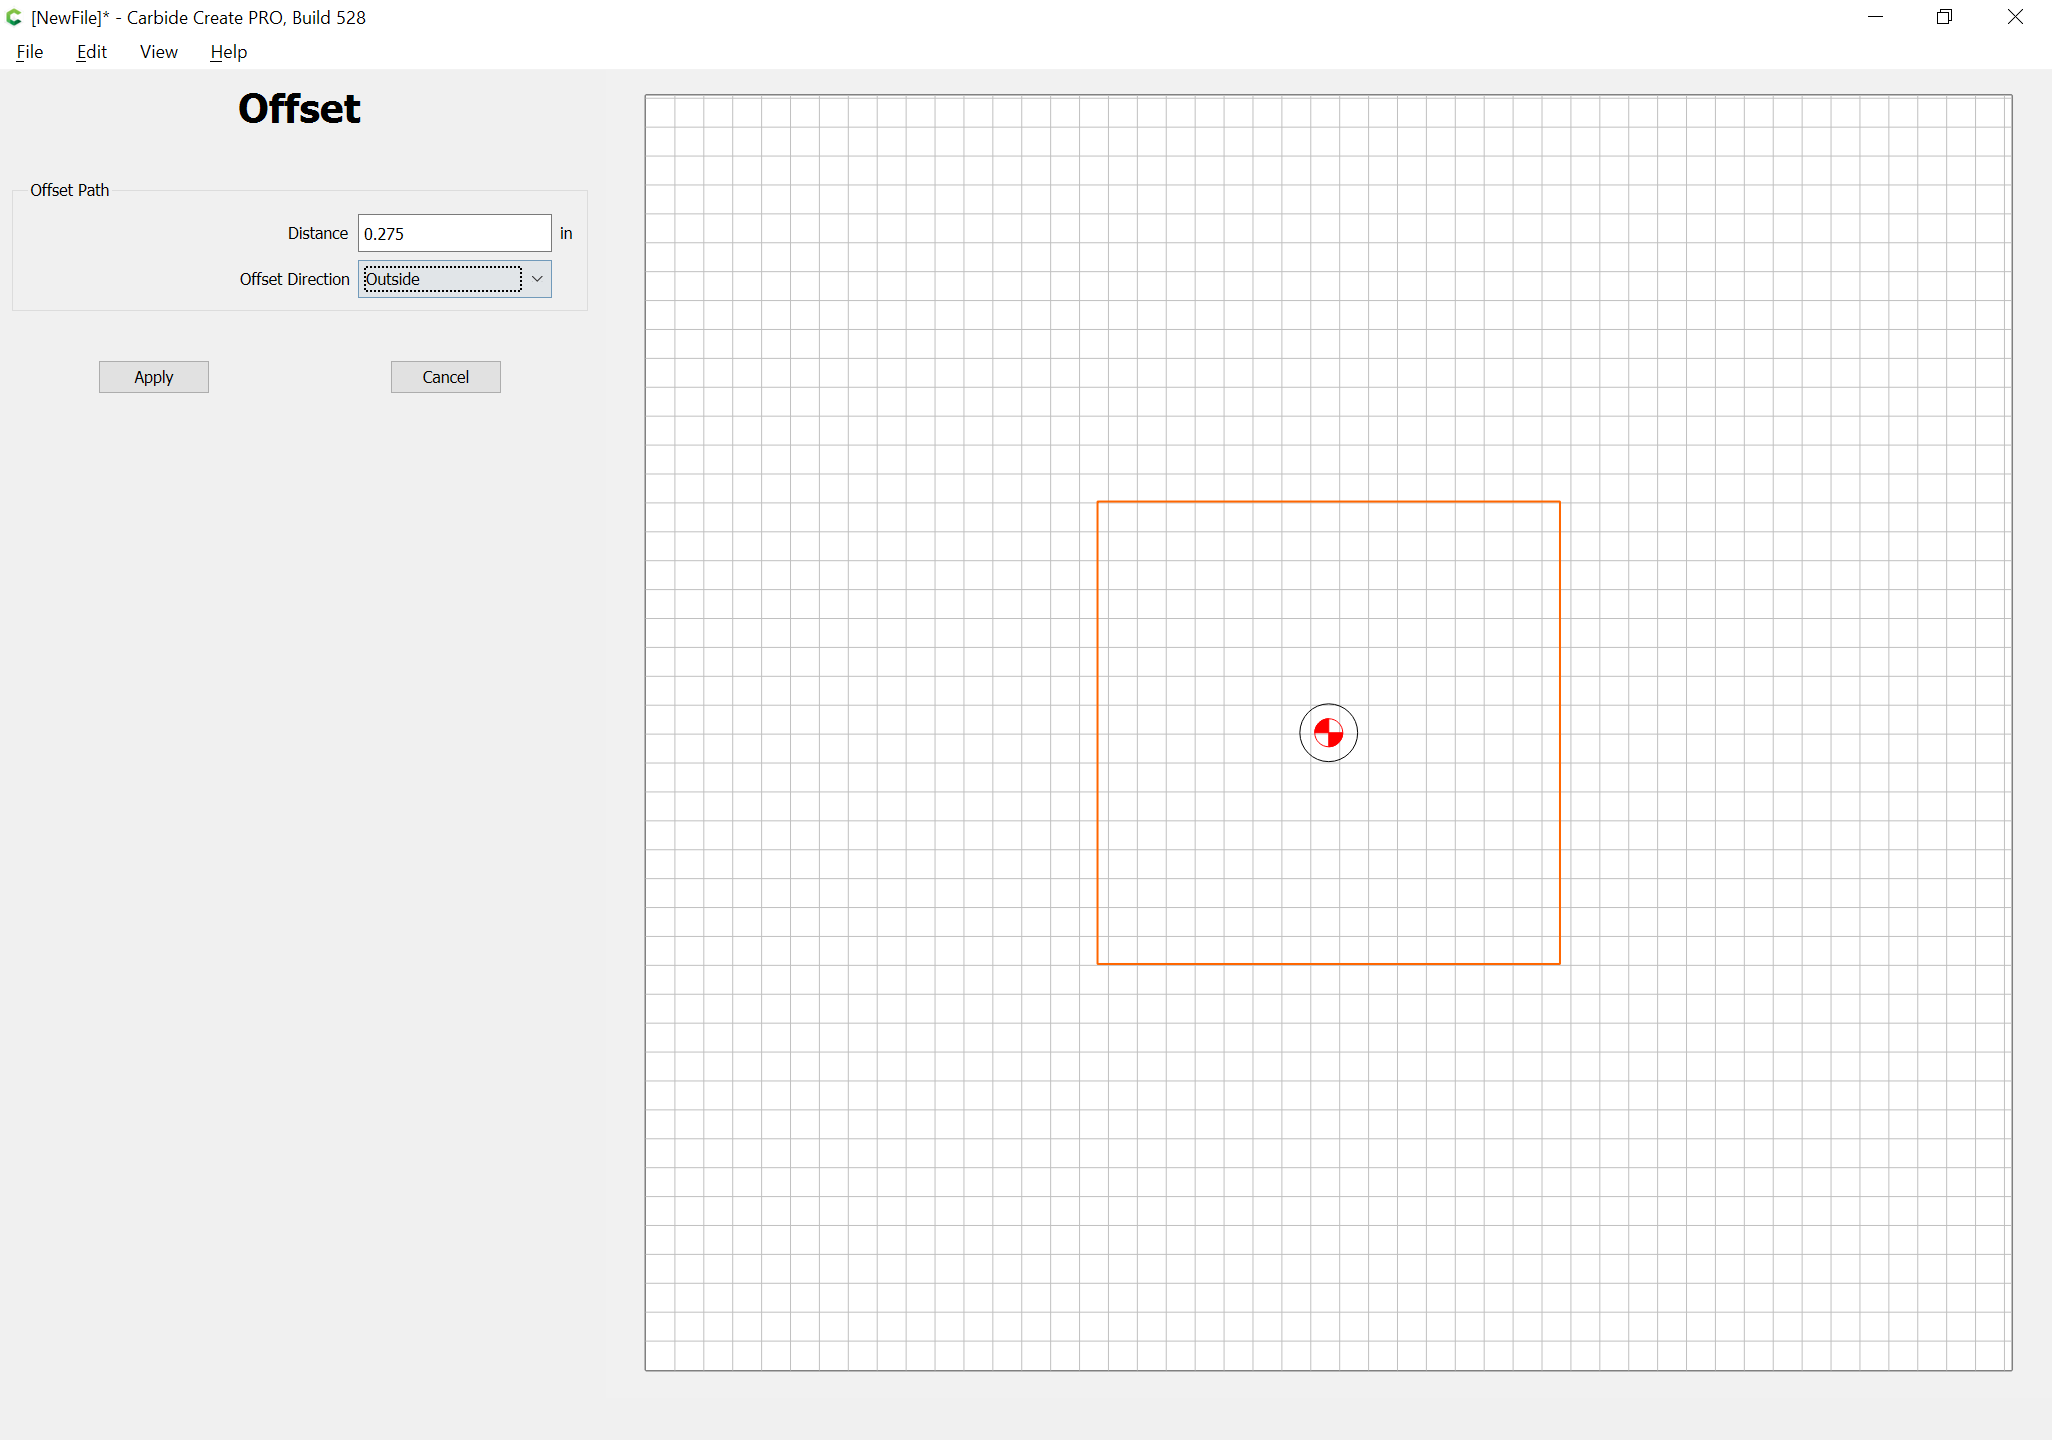
and offset the geometry to the outside by the endmill diameter plus 10%:

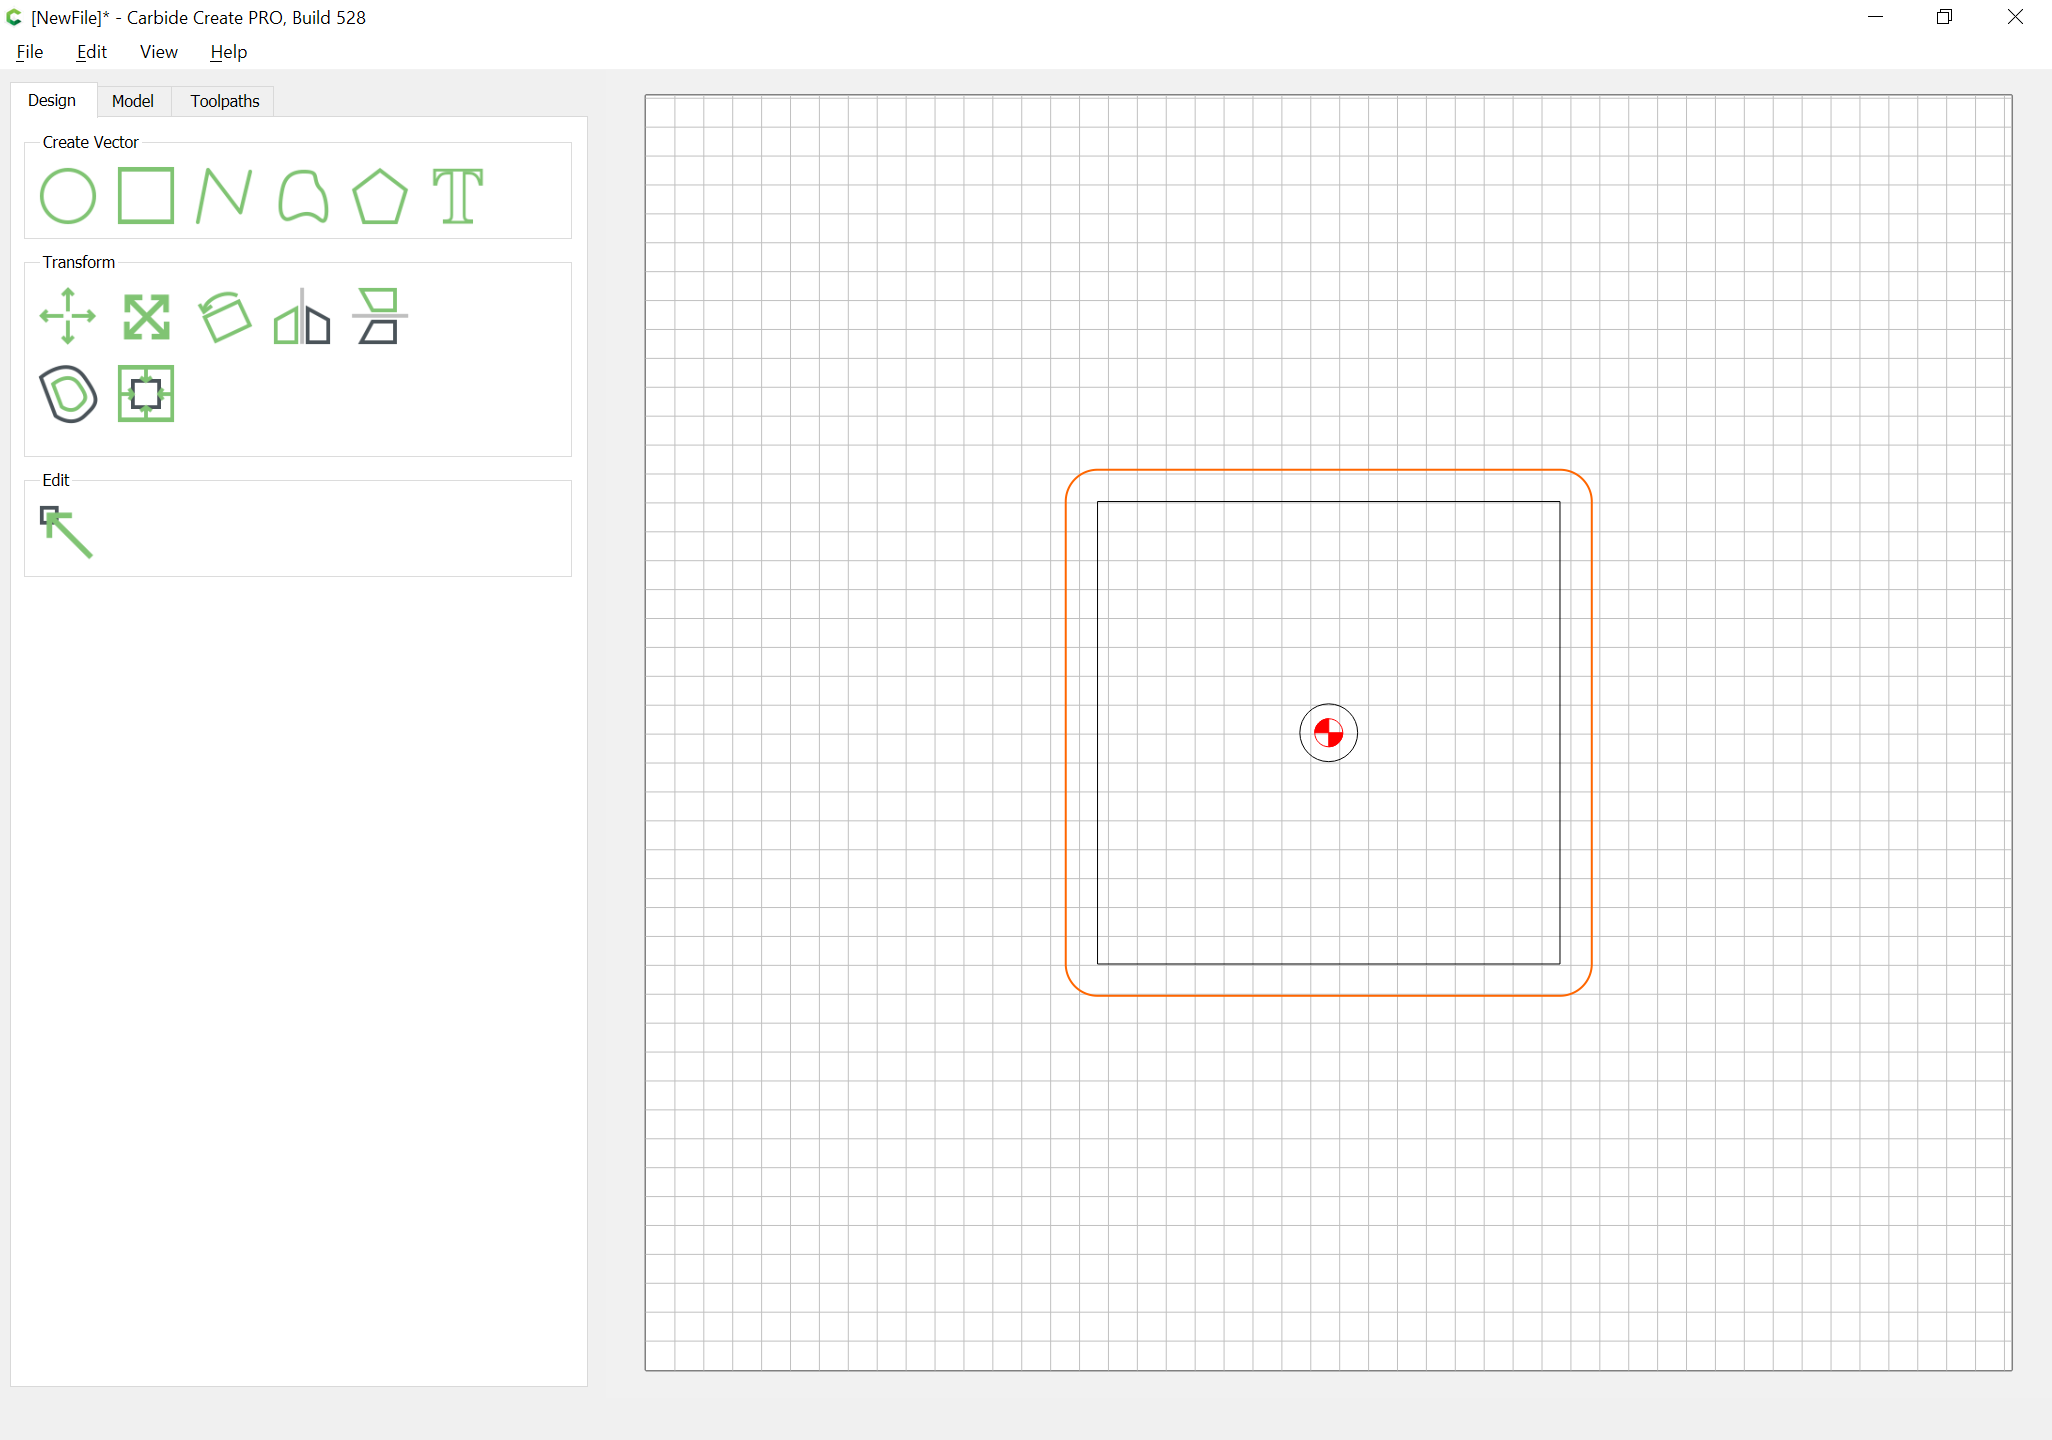
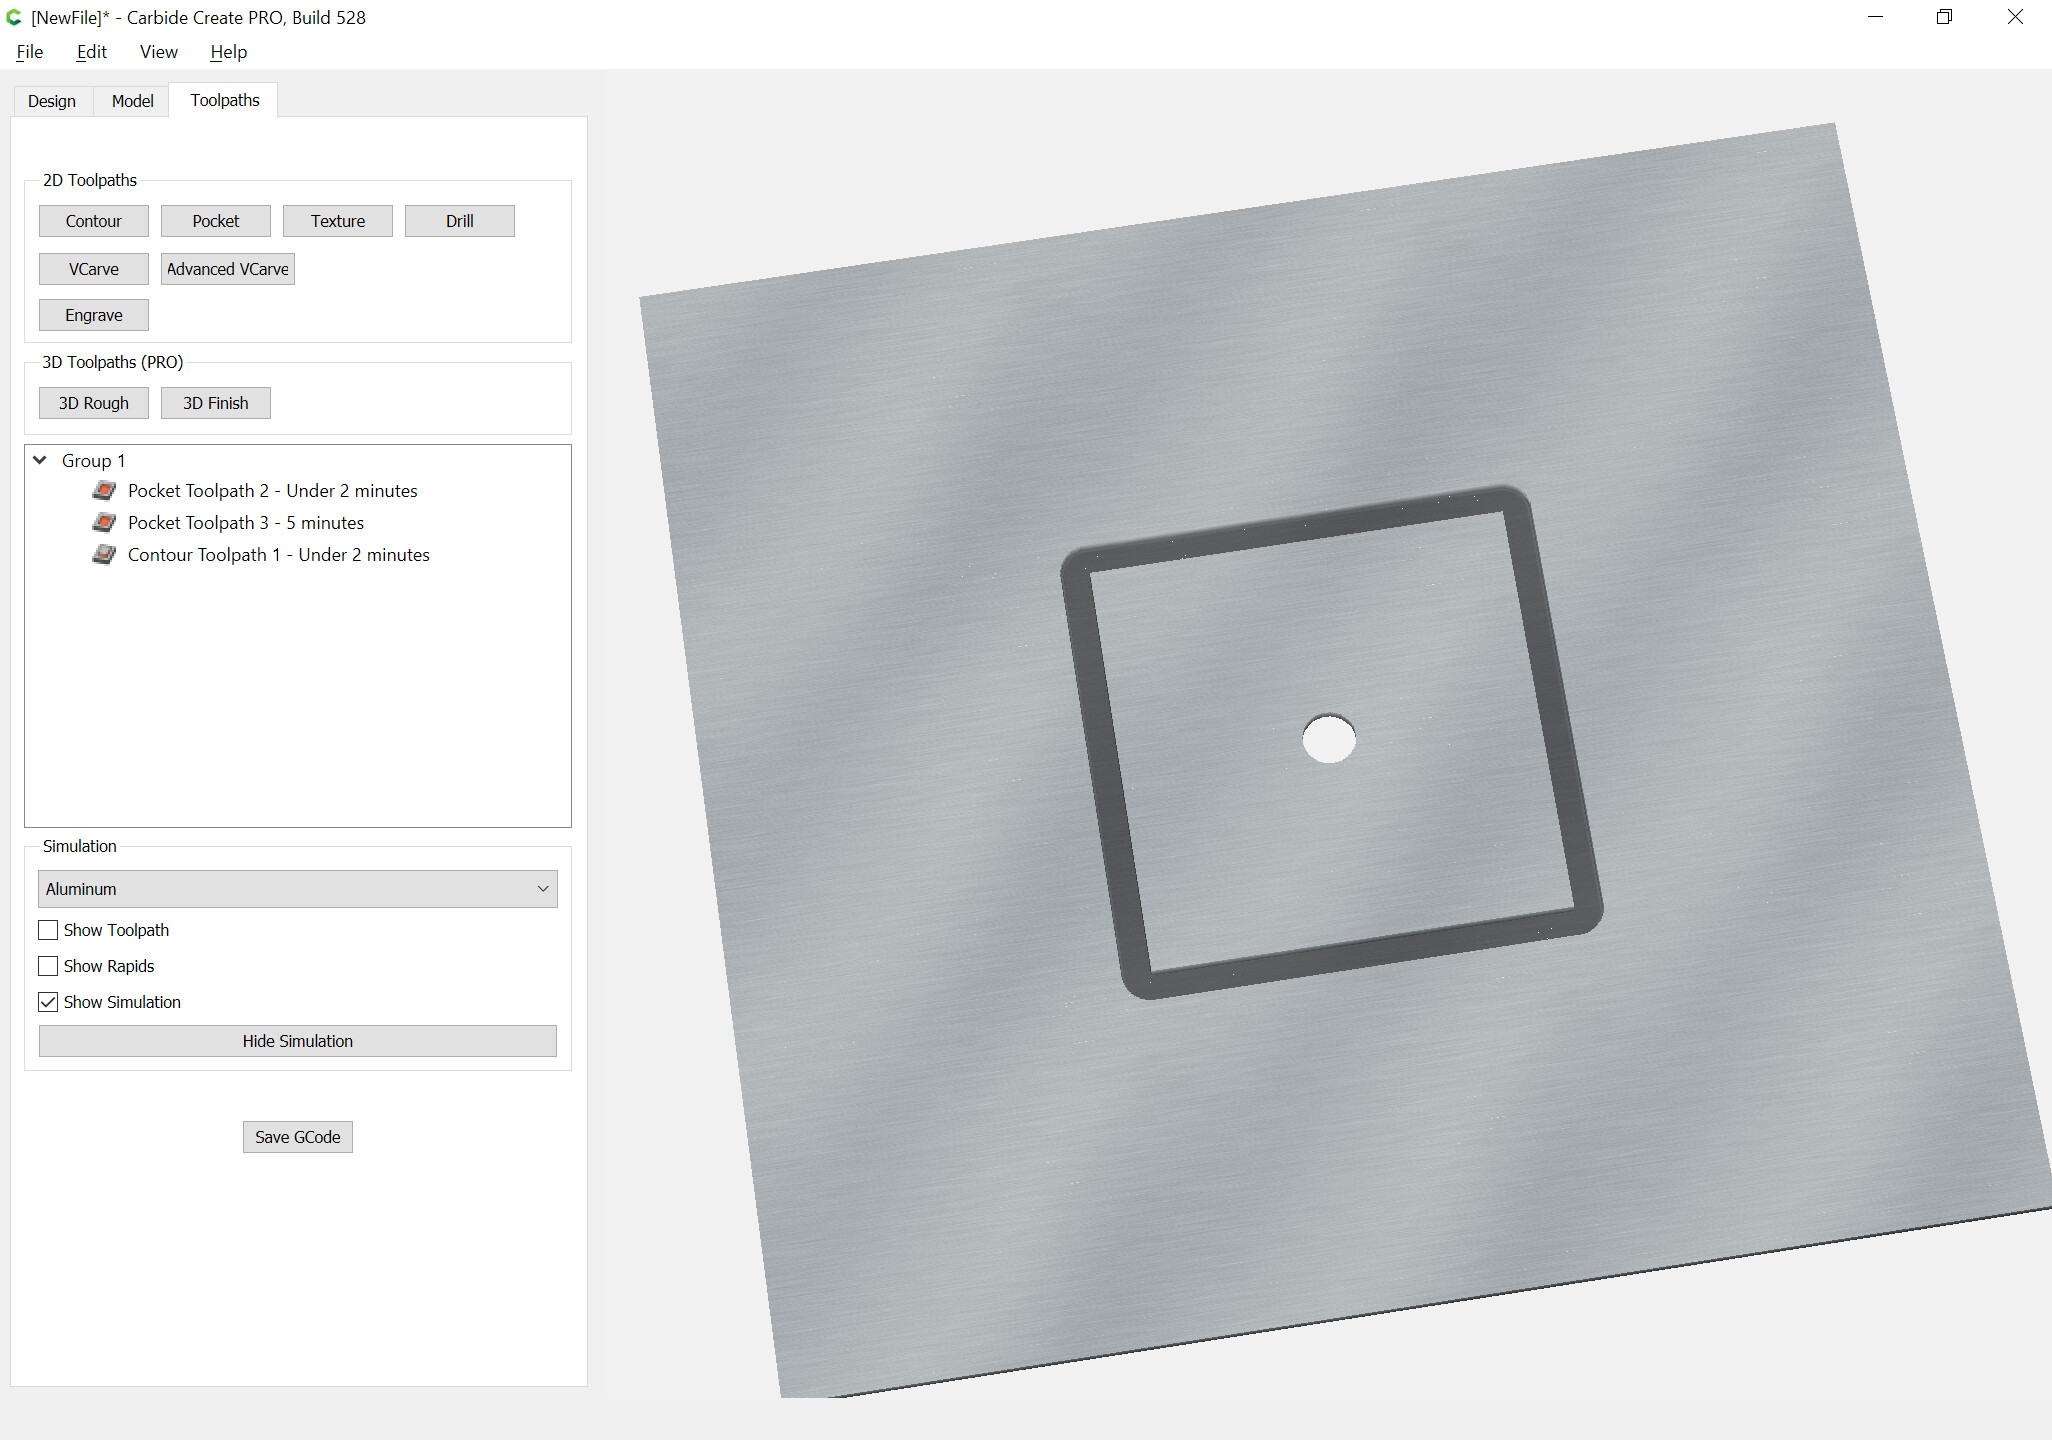
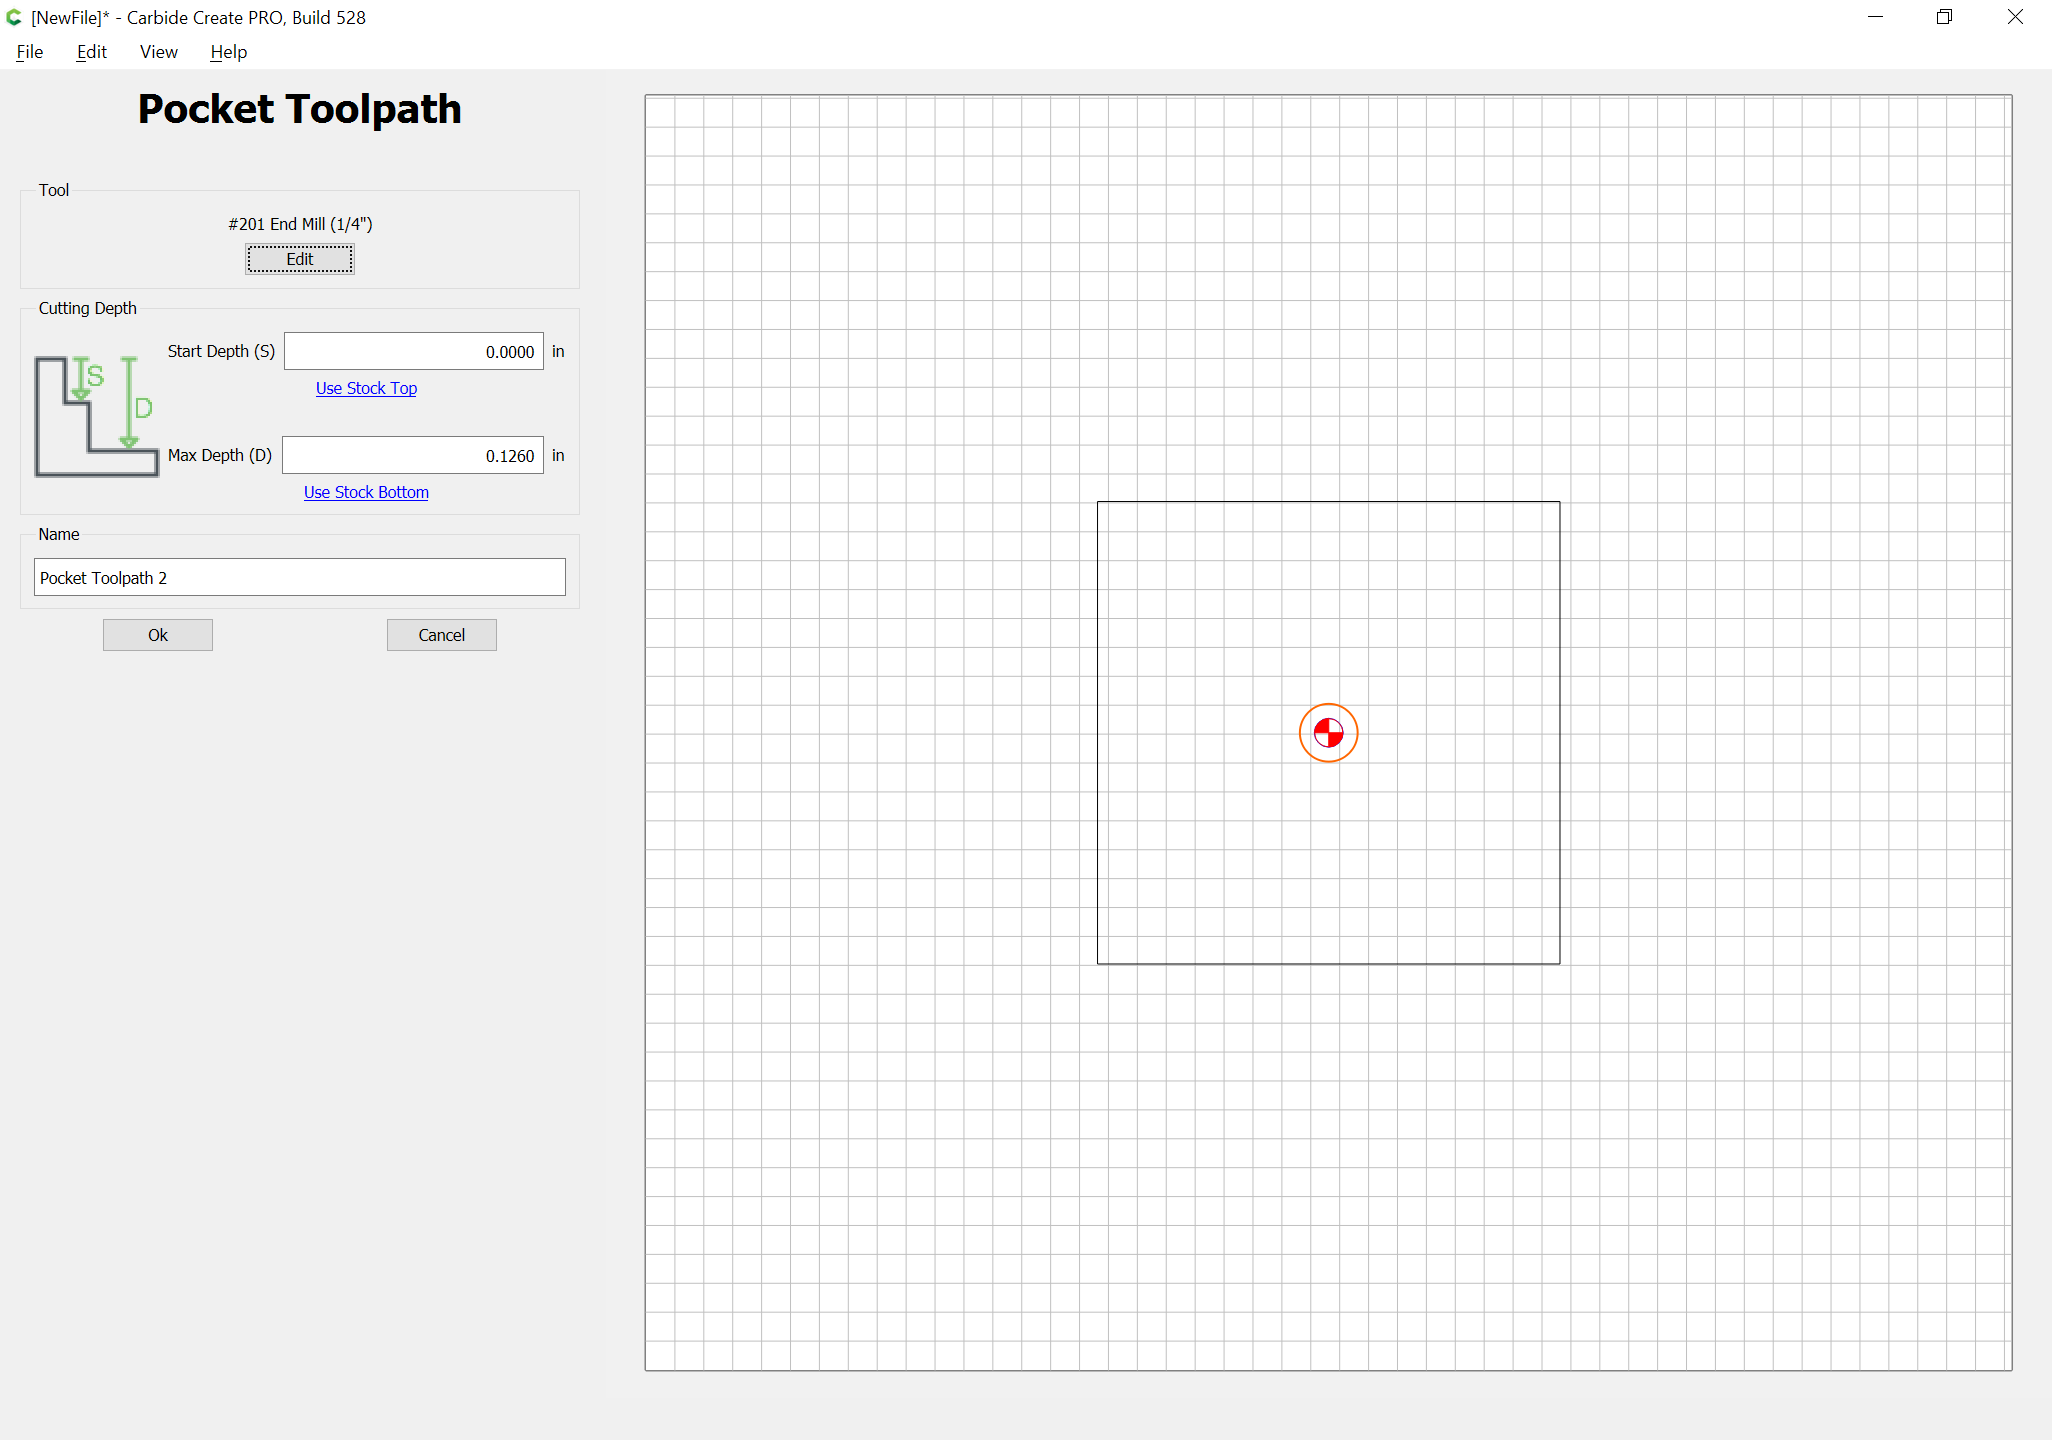
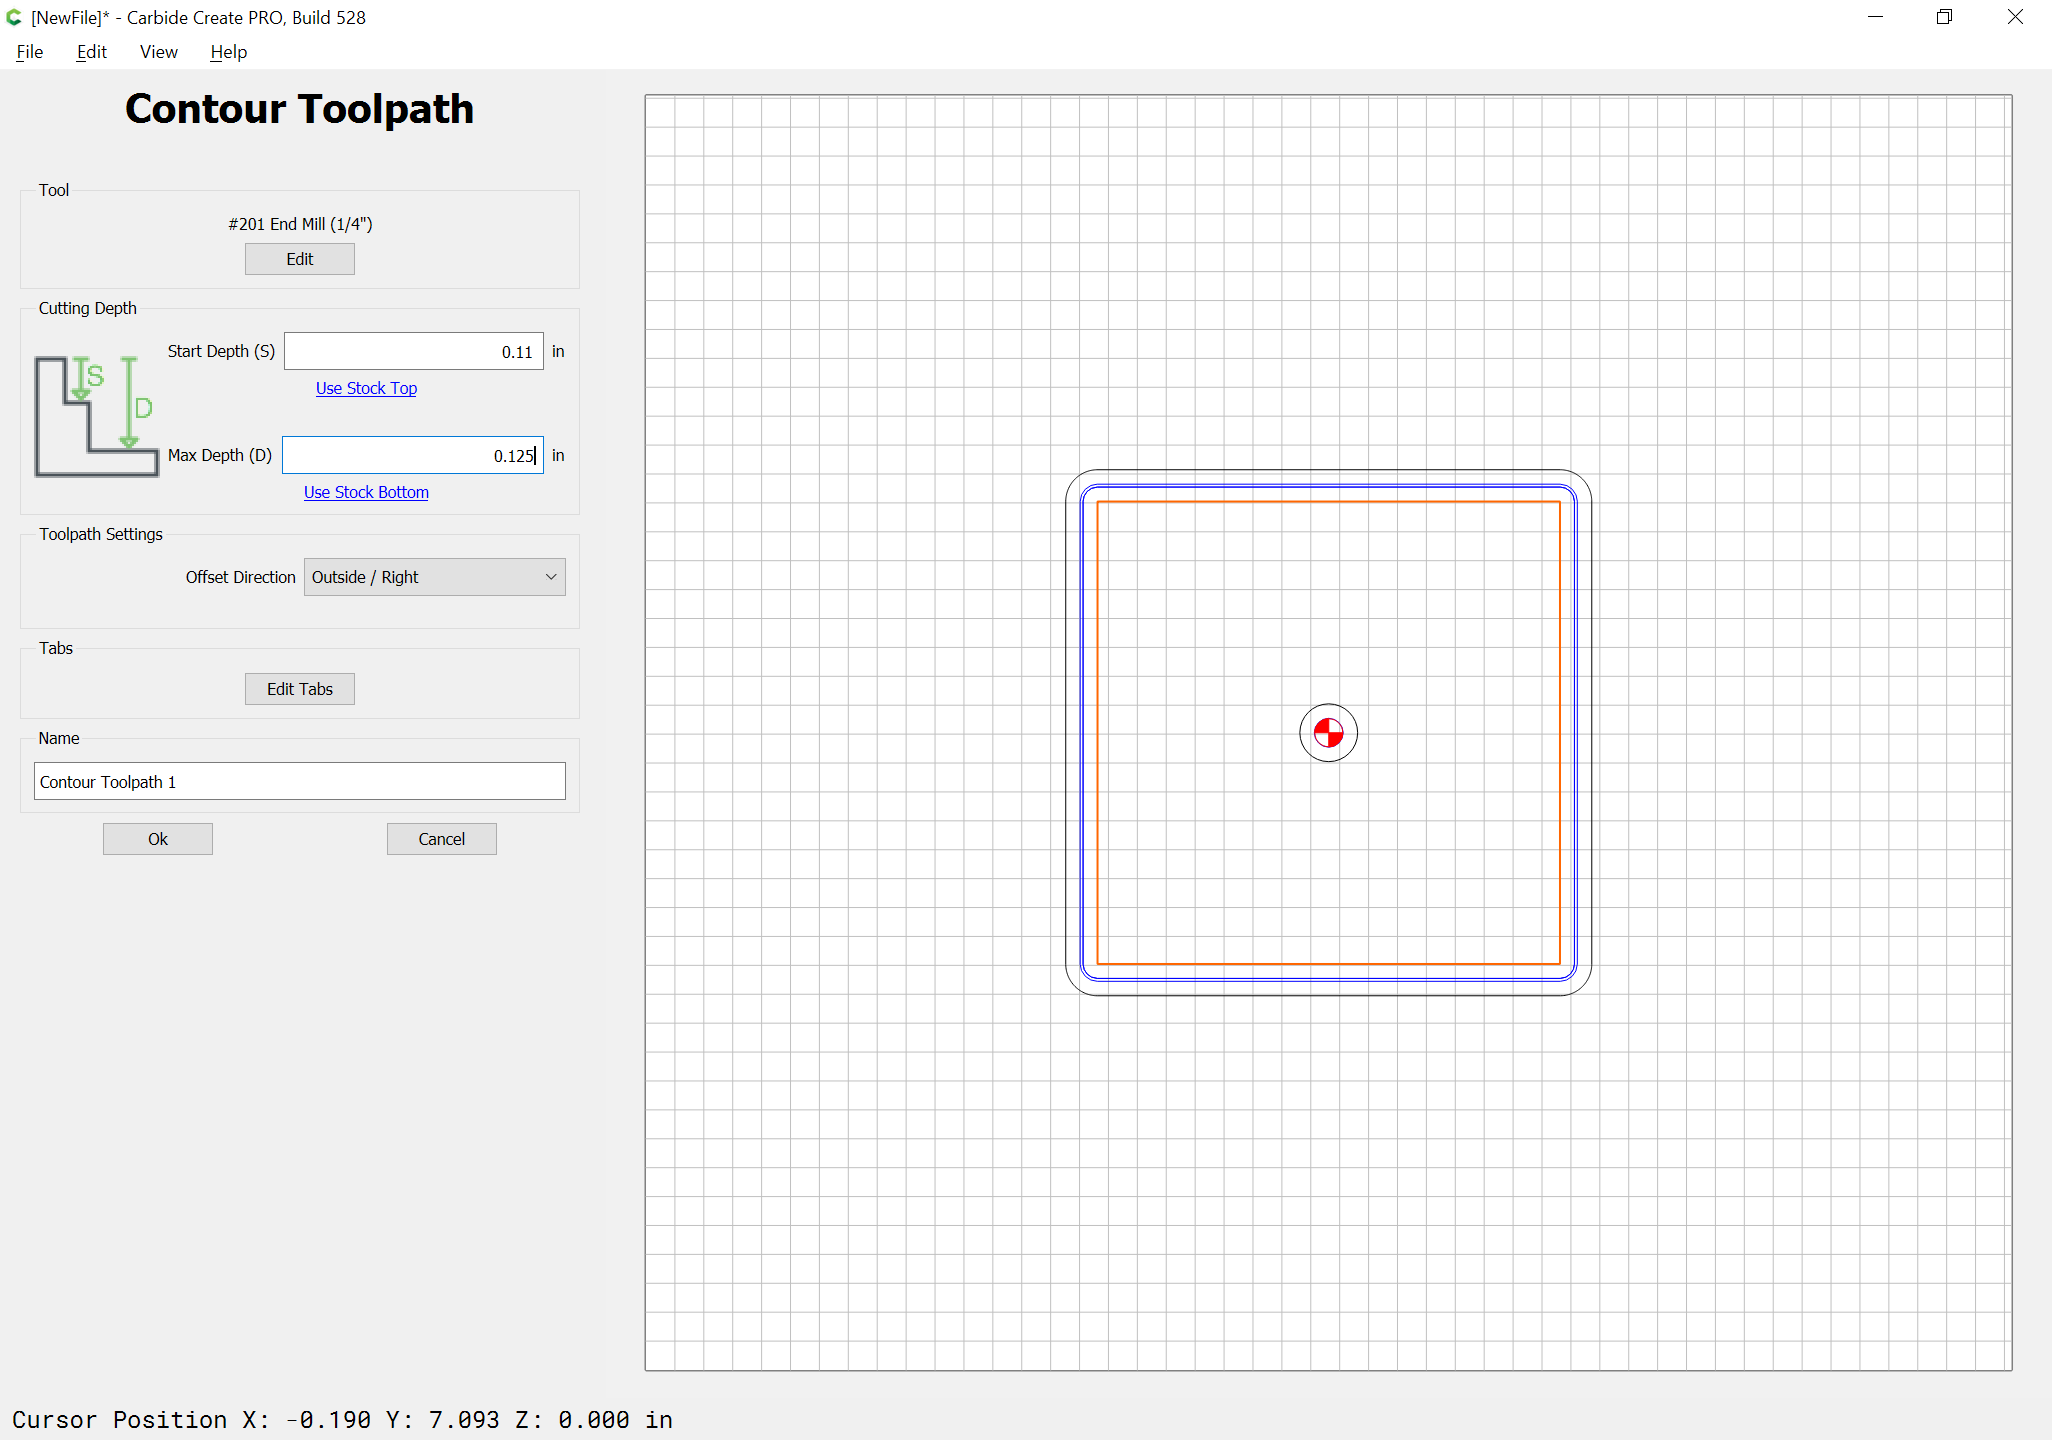
Then cut as a pocket down to tab depth or the penultimate pass:

Then for the last pass select only the desired geometry:

(if not using a suitable workholding, assign tabs)

4 Likes

That’s fantastic, thank you Will.

I thought I needed different specific bits , so this is nice. :grinning:

If you can a coated, and/or a single-flute endmill will help a lot, see:

I’ve found the recipe for success includes:

Slower plunge rates, and ramp in if you’re using a program that has the option.

Shallow depth of cut with higher feed rates.

Single flute endmills.

3 Likes

So I just ran this simple job and OH MY I am so excited. Perfect cut, no issues whatsoever.

As I was watching I got a little nervous because it seemed like the endmill wasn’t touching the stock about 1/2 way through, then I remembered I did the pocket first half as suggested by Will (lol) I just didn’t set the start depth for the contour.

Looks amazing.

But here’s the BIG LOL… and the NEWB. I ordered both the 278Z and the 274Z with the Shapeoko Pro because I wanted to also try Acrylics! So I already had the better bits just forgot about them.

Josh, I don’t have anything with ramp capabilities (I understand what it is), is there software you recommend that would work “out of the box” so to speak with the Shapeoko Pro with bitsetter and Bitzero?

One last question, can I use the smaller end mills on Aluminum? (just curious, not a requirement)

7 Likes

It’s fun isn’t it? :wink:

I’ve had surprisingly good results recently using 2mm single flute cutters in Aluminium. Carbide bits are pretty strong so long as you don’t let them clog up with chips.

4 Likes

Be careful you may develop a severe case of aliminium chips addiction, and then you do silly things like little aluminium chips mountains :upside_down_face:

image

The next step in the addiction is when you try adaptive clearing toolpaths and their sweet BrrrBrrrBrrr cutting sound.

5 Likes

Fusion 360 has the best capability in aluminum, but it comes at the cost of complexity. I’ve used both CC and Vectric VCarve with good success for simpler aluminum projects.

Julien, I am pretty sure I will have a mountain soon enough! And Yeah Liam it is ALREADY addicting. I am incredibly juiced up right now over potential aluminum projects.

Josh, I have some experience in Fusion, just not the actual machining part, so it’s a start. Won’t se so alien to me if I give it a go, thanks.

I do have a question though (for anyone) I watched the videos Will suggested, the feeds, speeds, settings Winston uses/suggests are VERY different than what I get when I select an end mill (like the 278Z) for aluminum in Carbide Create “Aluminum” tool set. Is carbides suggested feeds and speeds basic and Winston just tested to the limit or best?

I hesitate changing anything in the tool data even though Winston has much higher settings. I’d love to push it faster but I don’t technically “need” to.

4 Likes

The speeds thing is something I just constantly fiddle with. Learn how a ‘happy’ machine and cut sounds and then slowly go faster, wider and finally deeper. CC gives you a ‘safe’ set of feeds and speeds, Winston gives you something closer to what the machine can do, Vince gives you a target to aim for.

I continuously fiddle with the feed override in Carbide Motion, much of the time I stop and re-export the toolpath from Fusion with ‘better’ settings a few seconds into a job.

Vince has some very good videos on how fast you can push a Shapeoko, you can probably go faster, wide cuts but not very deep are the learned wisdom on these machines.

Keeping the chips away from the cut with either air blast or extraction is important to not clogging up the bit, I use my dust hood and suction with single flute cutters and get reasonable cuts and finish.

When you really get hooked, grab gmack’s feed and speed spreadsheet or spargeltarzan’s Millalyzer program to help you understand what’s going on with the cutting forces.

5 Likes

Why is it the first thing I make when I get something are parts and pieces for it or something else I own…and not the cool stuff :rofl:

These are some of the parts I cut out last night and this morning to make my laser build stronger. I am loving this. These parts are absolutely perfect. I have all kinds of fix it now projects to do. Aluminum is such a fantastic thing to be able to cut.

I’m going to have to get a sandblaster cabinet to glass bead blast this stuff

11 Likes

This topic was automatically closed 30 days after the last reply. New replies are no longer allowed.