Sharing Carbide Create Dovetail Files

In Camotics it’s possible to enter a dovetail bit as a stub endmill:

image

which then allows one to preview how the file will cut:

I believe it’d be helpful to have a jig to ensure that the parts are lined up accurately:

dovetail_fixture.c2d (132.1 KB)

Though I’ve been using it only to line things up to clamp for the cut:

1 Like

Workholding gave way for the next to the last cut, and didn’t quite get things lined up on the last, but at least this proves the concept:

6 Likes

Will I downloaded the dovetail file and when I click on to it opens the connect to cutter .
So what am I doing wrong
Jeff

You would want to open:

http://community.carbide3d.com/uploads/default/original/2X/9/9361326a9e42c5318b00fb18a75ccfe8c7165743.c2d

in Carbide Create and make toolpaths suited to your machine — hang on though, I’ve got a generalized fixture which I’ll be posting (along w/ a hardware list and photos showing it in use) which should work better.

1 Like

This topic was automatically closed 30 days after the last reply. New replies are no longer allowed.

See:

@WillAdams http://www.tailmaker.net/ is no longer available.

Yeah, there’s a rumour that the program will be made freely available since the developer EDIT: retired, but I haven’t heard anything beyond that.

EDIT: See:

1 Like

Did you really just clamp the board directly to the frame? I think I may have been way overthinking my need to mount a clamping system to my table.

Yes. The fixture I made is for fine/consistent positioning, then I have a pair of clamps which are ground down to fit in-between the front frame and spoilboard and use them with a suitable board — eventually I’ll make one which has a slot to hold things together so it’s not quite as fiddly.

1 Like

I don’t understand why a dovetail box cannot be cut in CC Pro without needing any vertical jig. Vcarve does it by making the dovetails go all the way through, so the bottom of the box is cut upside down. That should be possible in CC Pro using a 3d shape. What am I missing @WillAdams?

Using a vertical fixture allows cutting dovetails which have a traditional slope (not limited to the angles possible from a V tool) and creates crisp sharp joins not limited by the rounding imposed by an endmill on a piece of stock held flat.

The picture is not using a V tool though, it’s using a 1/8 flat end mill and the joints are through joints. I am assuming you are talking about the “armpits” of the dovetails that have to be 1/8 rounded. But this is largely offset by making the last millimetre of the pin slopes vertical.
The thing is that the advantage of milling the whole thing flat - and in one session - may outweigh the vertical jig.
To create the little slopes on the pins could be pretty hellish in CC though.

I’ve been looking into ways to do joinery which allows cutting parts out in a single setup, see:

https://willadams.gitbook.io/design-into-3d/radiused-fingerjoints

and

https://willadams.gitbook.io/design-into-3d/blind-miter-and-hidden-spline

Moreover, I don’t see how the dovetail joints could work without post processing unless one is introducing a tool which will do the undercut or post-processing the parts by rounding off the bottom of them so that they will fit.

1 Like

5 posts were merged into an existing topic: Applications from Tailmaker developer available

Nice ebook.

When will you be changing your name to Dorian Bracht? :wink:

An interesting development here is keyhole toolpaths:

which could be used for a dovetail tool.

1 Like

I started using the key hole function I have a Frued bit and created a custom tool in CC.

Here is my custom tool database .csv file. This would only work for the Frued

Here is the Frued 70-104 Key Hole 1/4" shank key hole bit.

number vendor model URL name type diameter cornerradius flutelength shaftdiameter angle numflutes stickout coating metric notes machine material plungerate feedrate rpm depth cutpower finishallowance 3dstepover 3dfeedrate 3drpm
701 Freud 70-104 Keyhole end 0.39 0 0.25 0.25 0 2 0 Shapeoko Hardwood 10 60 16000 0.4375 0 60 16000

Here is a file that I used to create some key holes.

cigar_store_keyhole.c2d (44 KB)

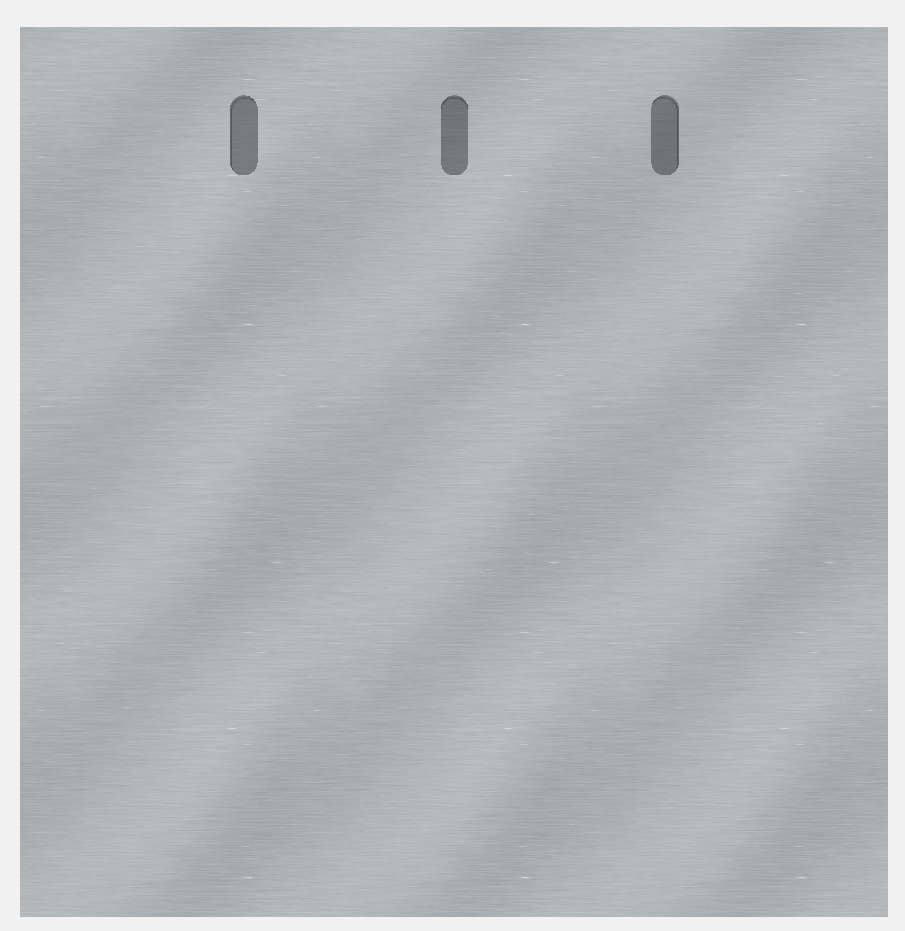
In the file you will see three circles and that is where the key hole bit plunges in. then it goes forward then retreats and comes out the entry plunge.

If you look at the simulation it looks like the bit plunges and goes forward and does not show the smaller diameter of the router bit making the key hole shape. Not sure which version of v7 I created the file in. The simulation is limited by the largest diameter of the bit to show in the simulation,

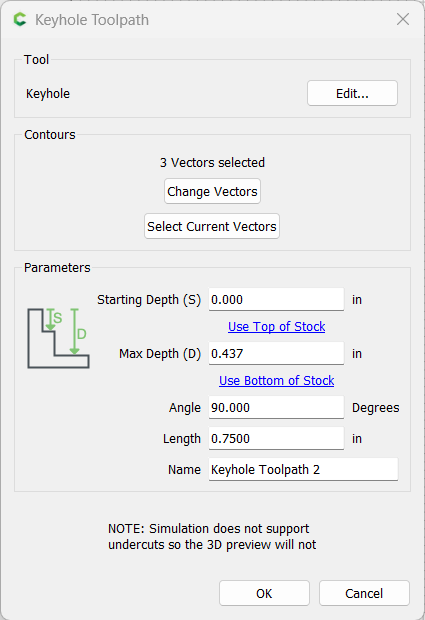
Here is the key hole tool path. The calculation is how big your big diameter is and the tool was created to have a depth of cut so the big diameter plunges down and then goes forward, reverses and comes back out the original plunge hole.