Is it possible to make tiny letters lets say font size 14 with SO3 by using a .0312" flat cutter or a ballnose cutter? I need to create some wooden invitations and the letters have to be so small. Do I need smaller cutters?
I just bought these cutters from carbide3d store. When I’m trying to create the toolpaths in vectric aspire I can’t get it right. When I preview a toolpath, the letters are connected to each other. It seems that even such small cutter is too big for such letters. Am I right? Do I need smaller cutters or do I have to change something in my toolpaths?
At the moment I have a v bit 70°. This one is not suitable for very small letters. I’m waiting for another v bit 45° though and I think it will do the job. I will test it when arrives.
Thanks for your help!
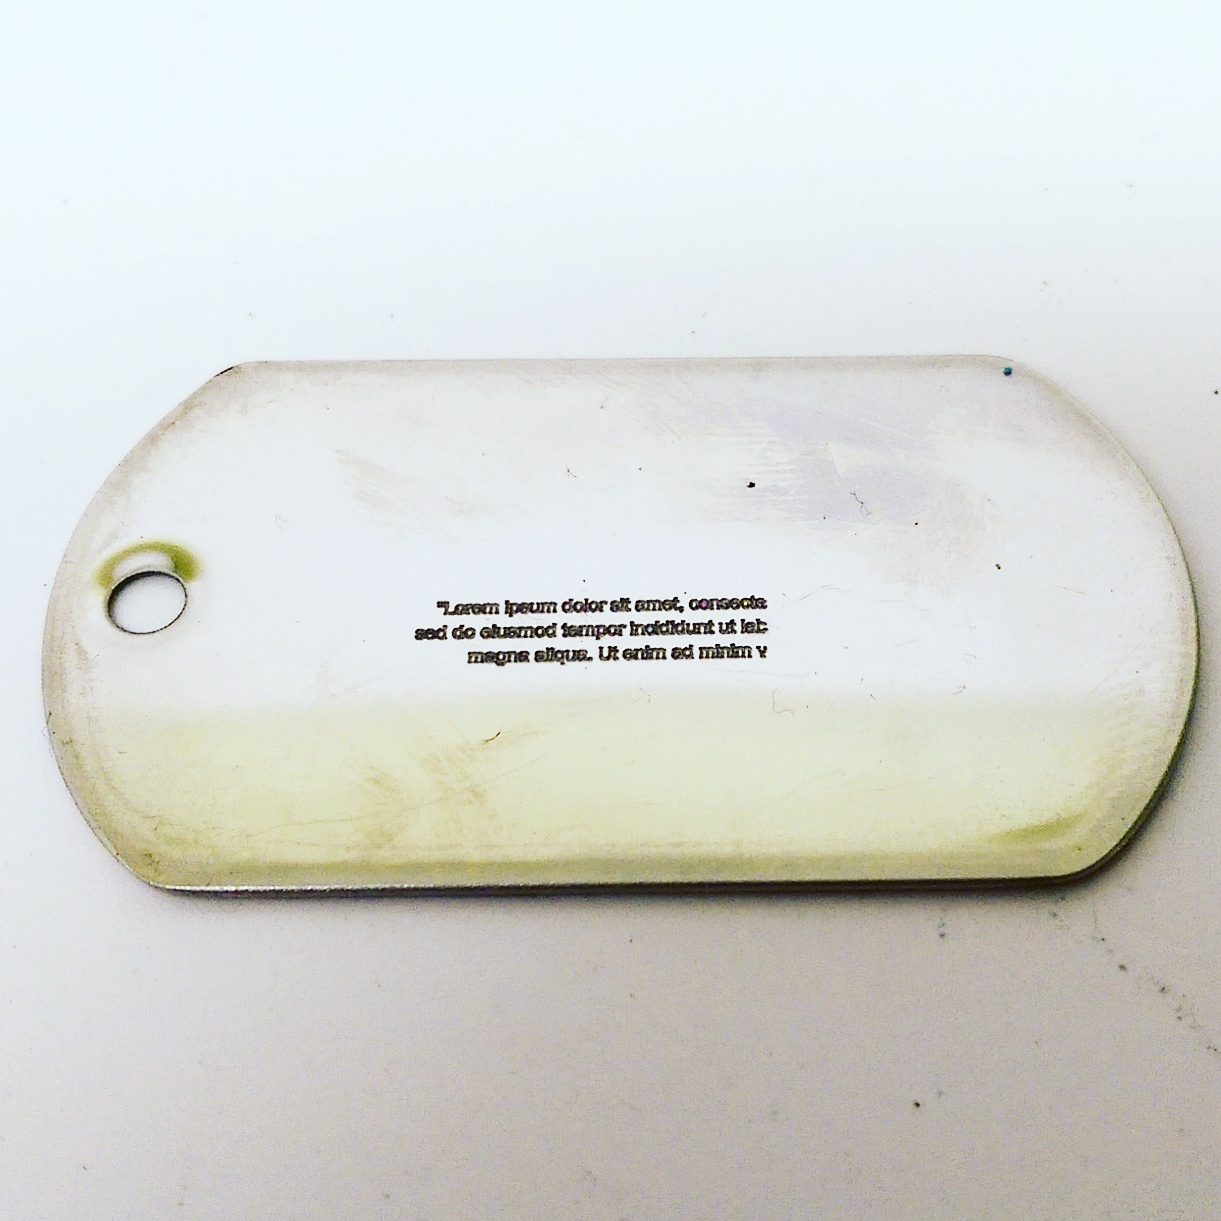
Here’s the smallest letters I have engraved to date; 1/32 of an inch tall. I used a generic v bit and a v-carving tool path out of carbide create. Purely as a test; to lubricate the bit while cutting the stainless steel dog tag I used peanut oil.
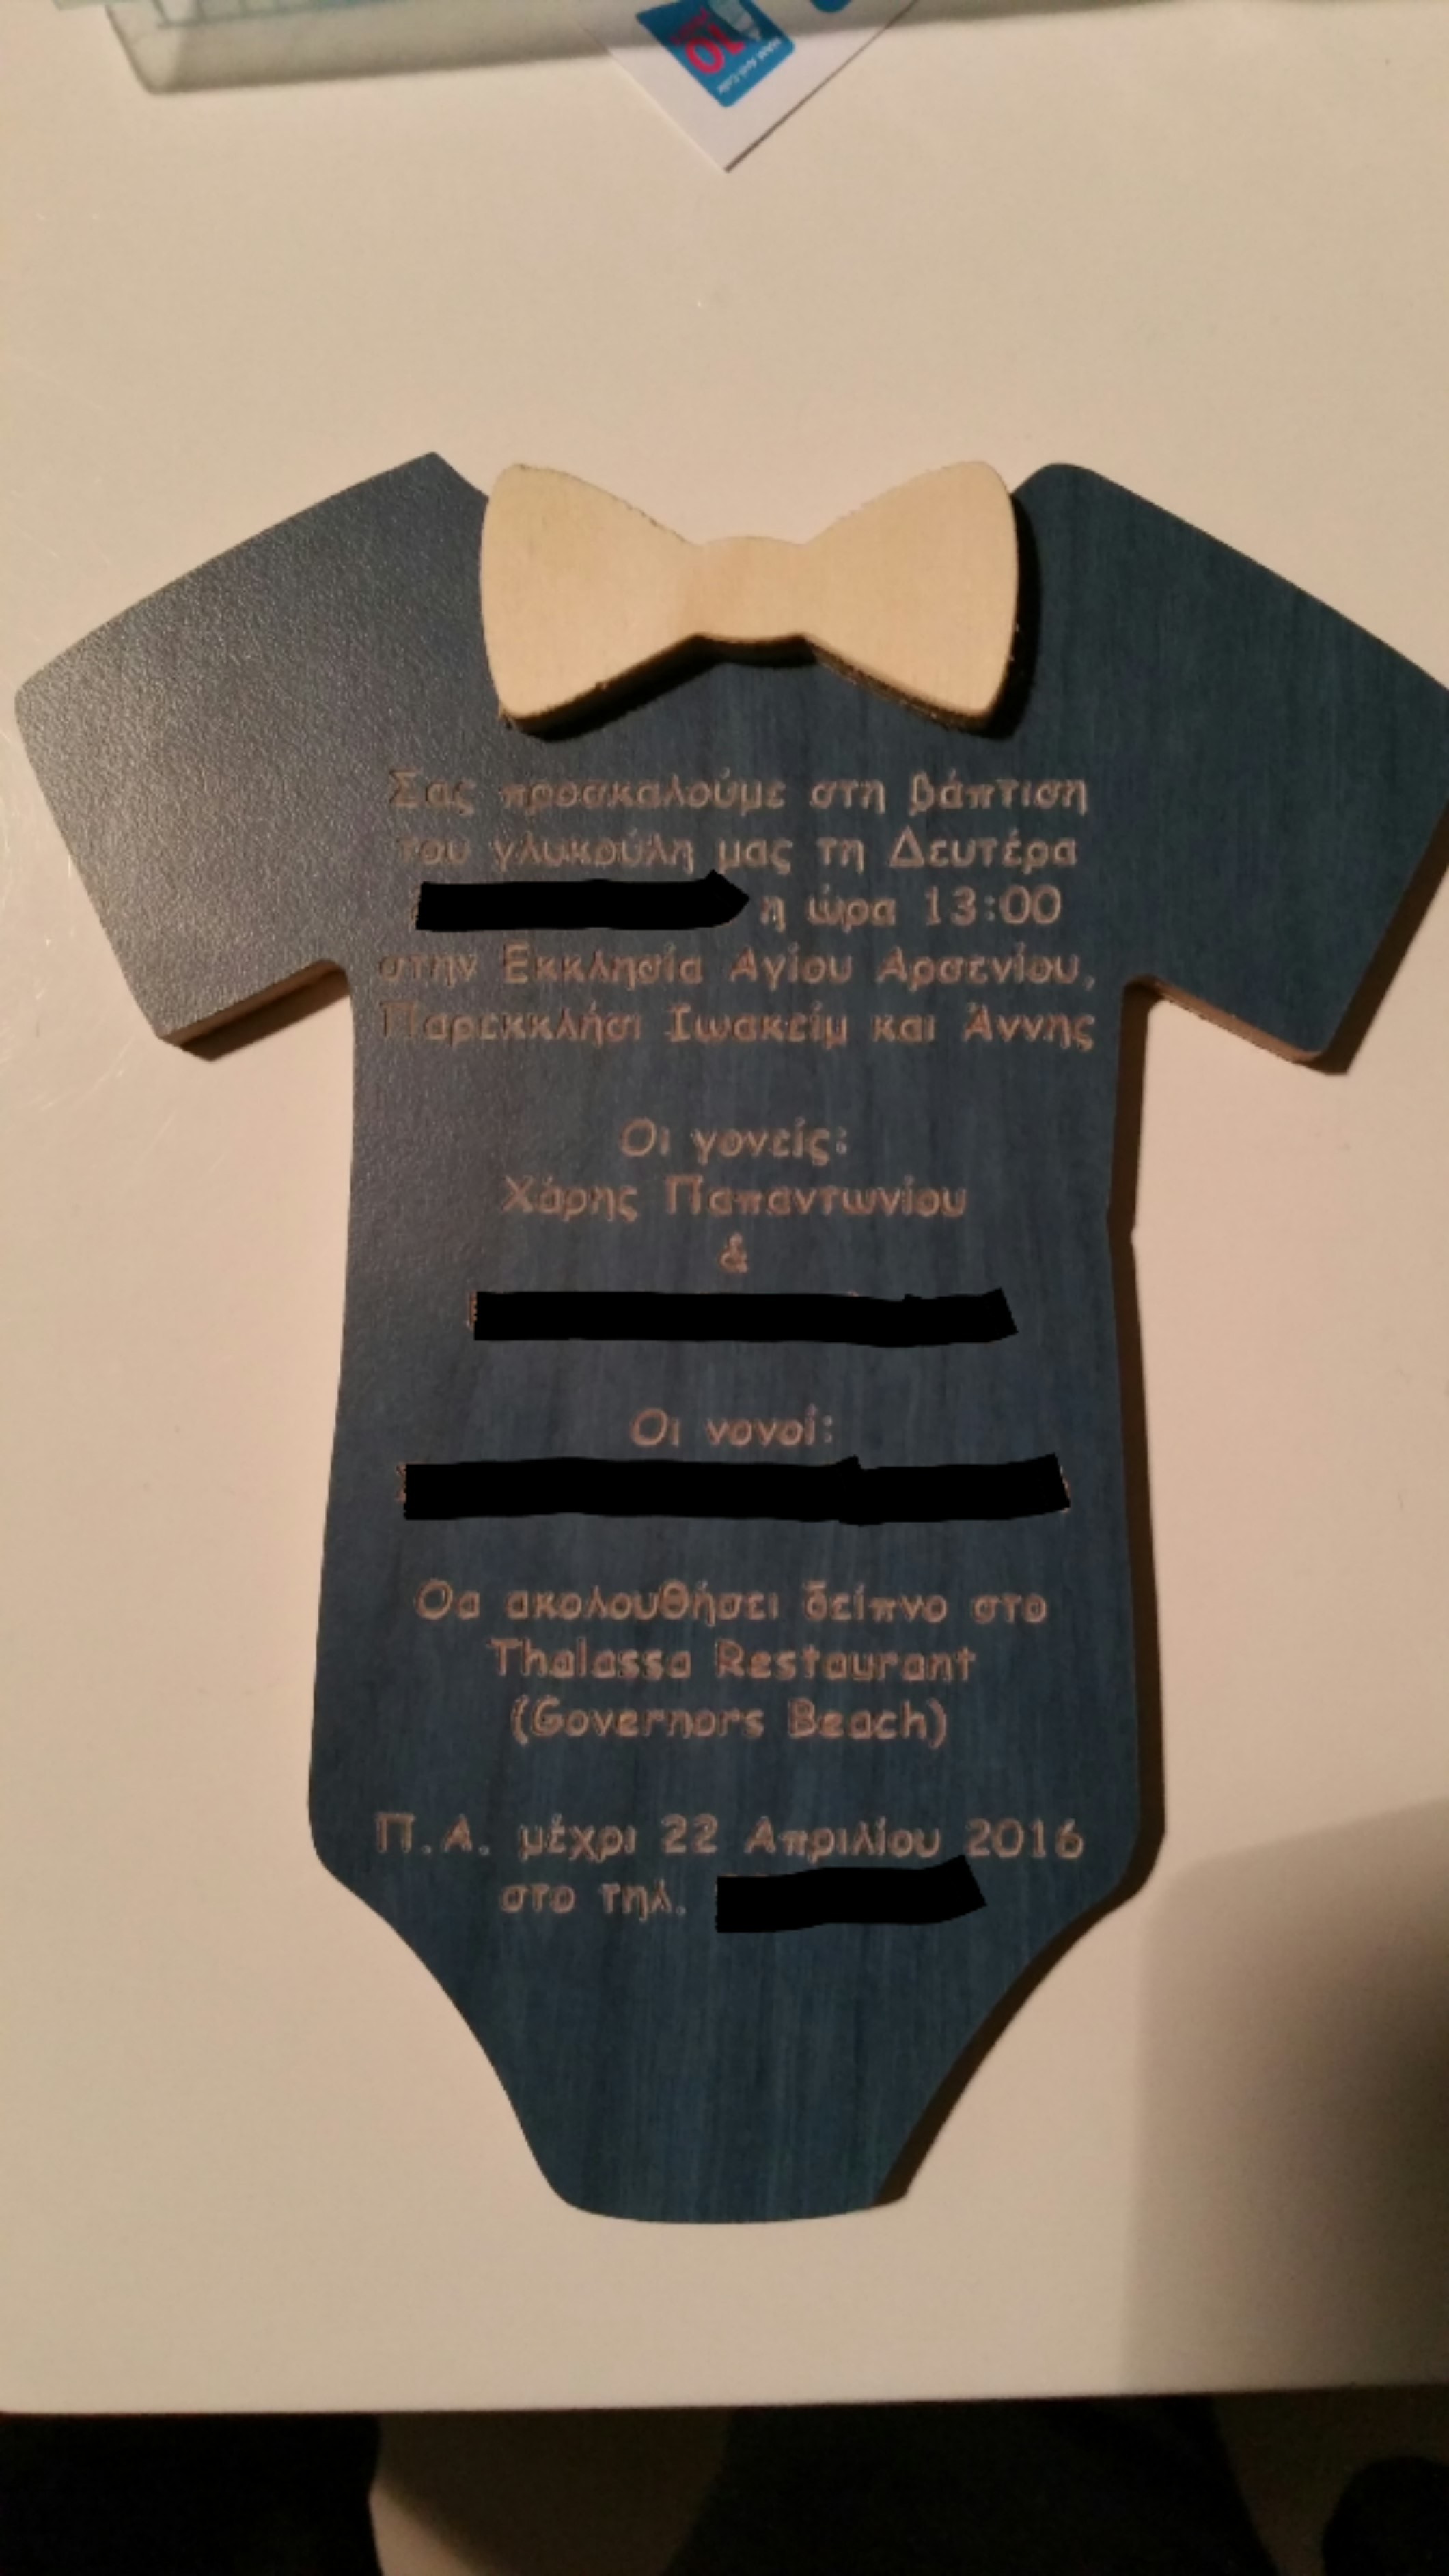
After spending some hours I managed to do a sample of the invitation. I used vectric aspire and did a pocket cut for the letters with a 0.312" ball nose cutter, depth 0.3mm. I used this cutter for the sample until the v bit 45° arrives. It’s quite good I think but with the v bit is going to be much better.
The invitation is in Greek language. Sorry for hiding some words but these are private informations of other people (telephones, names etc).
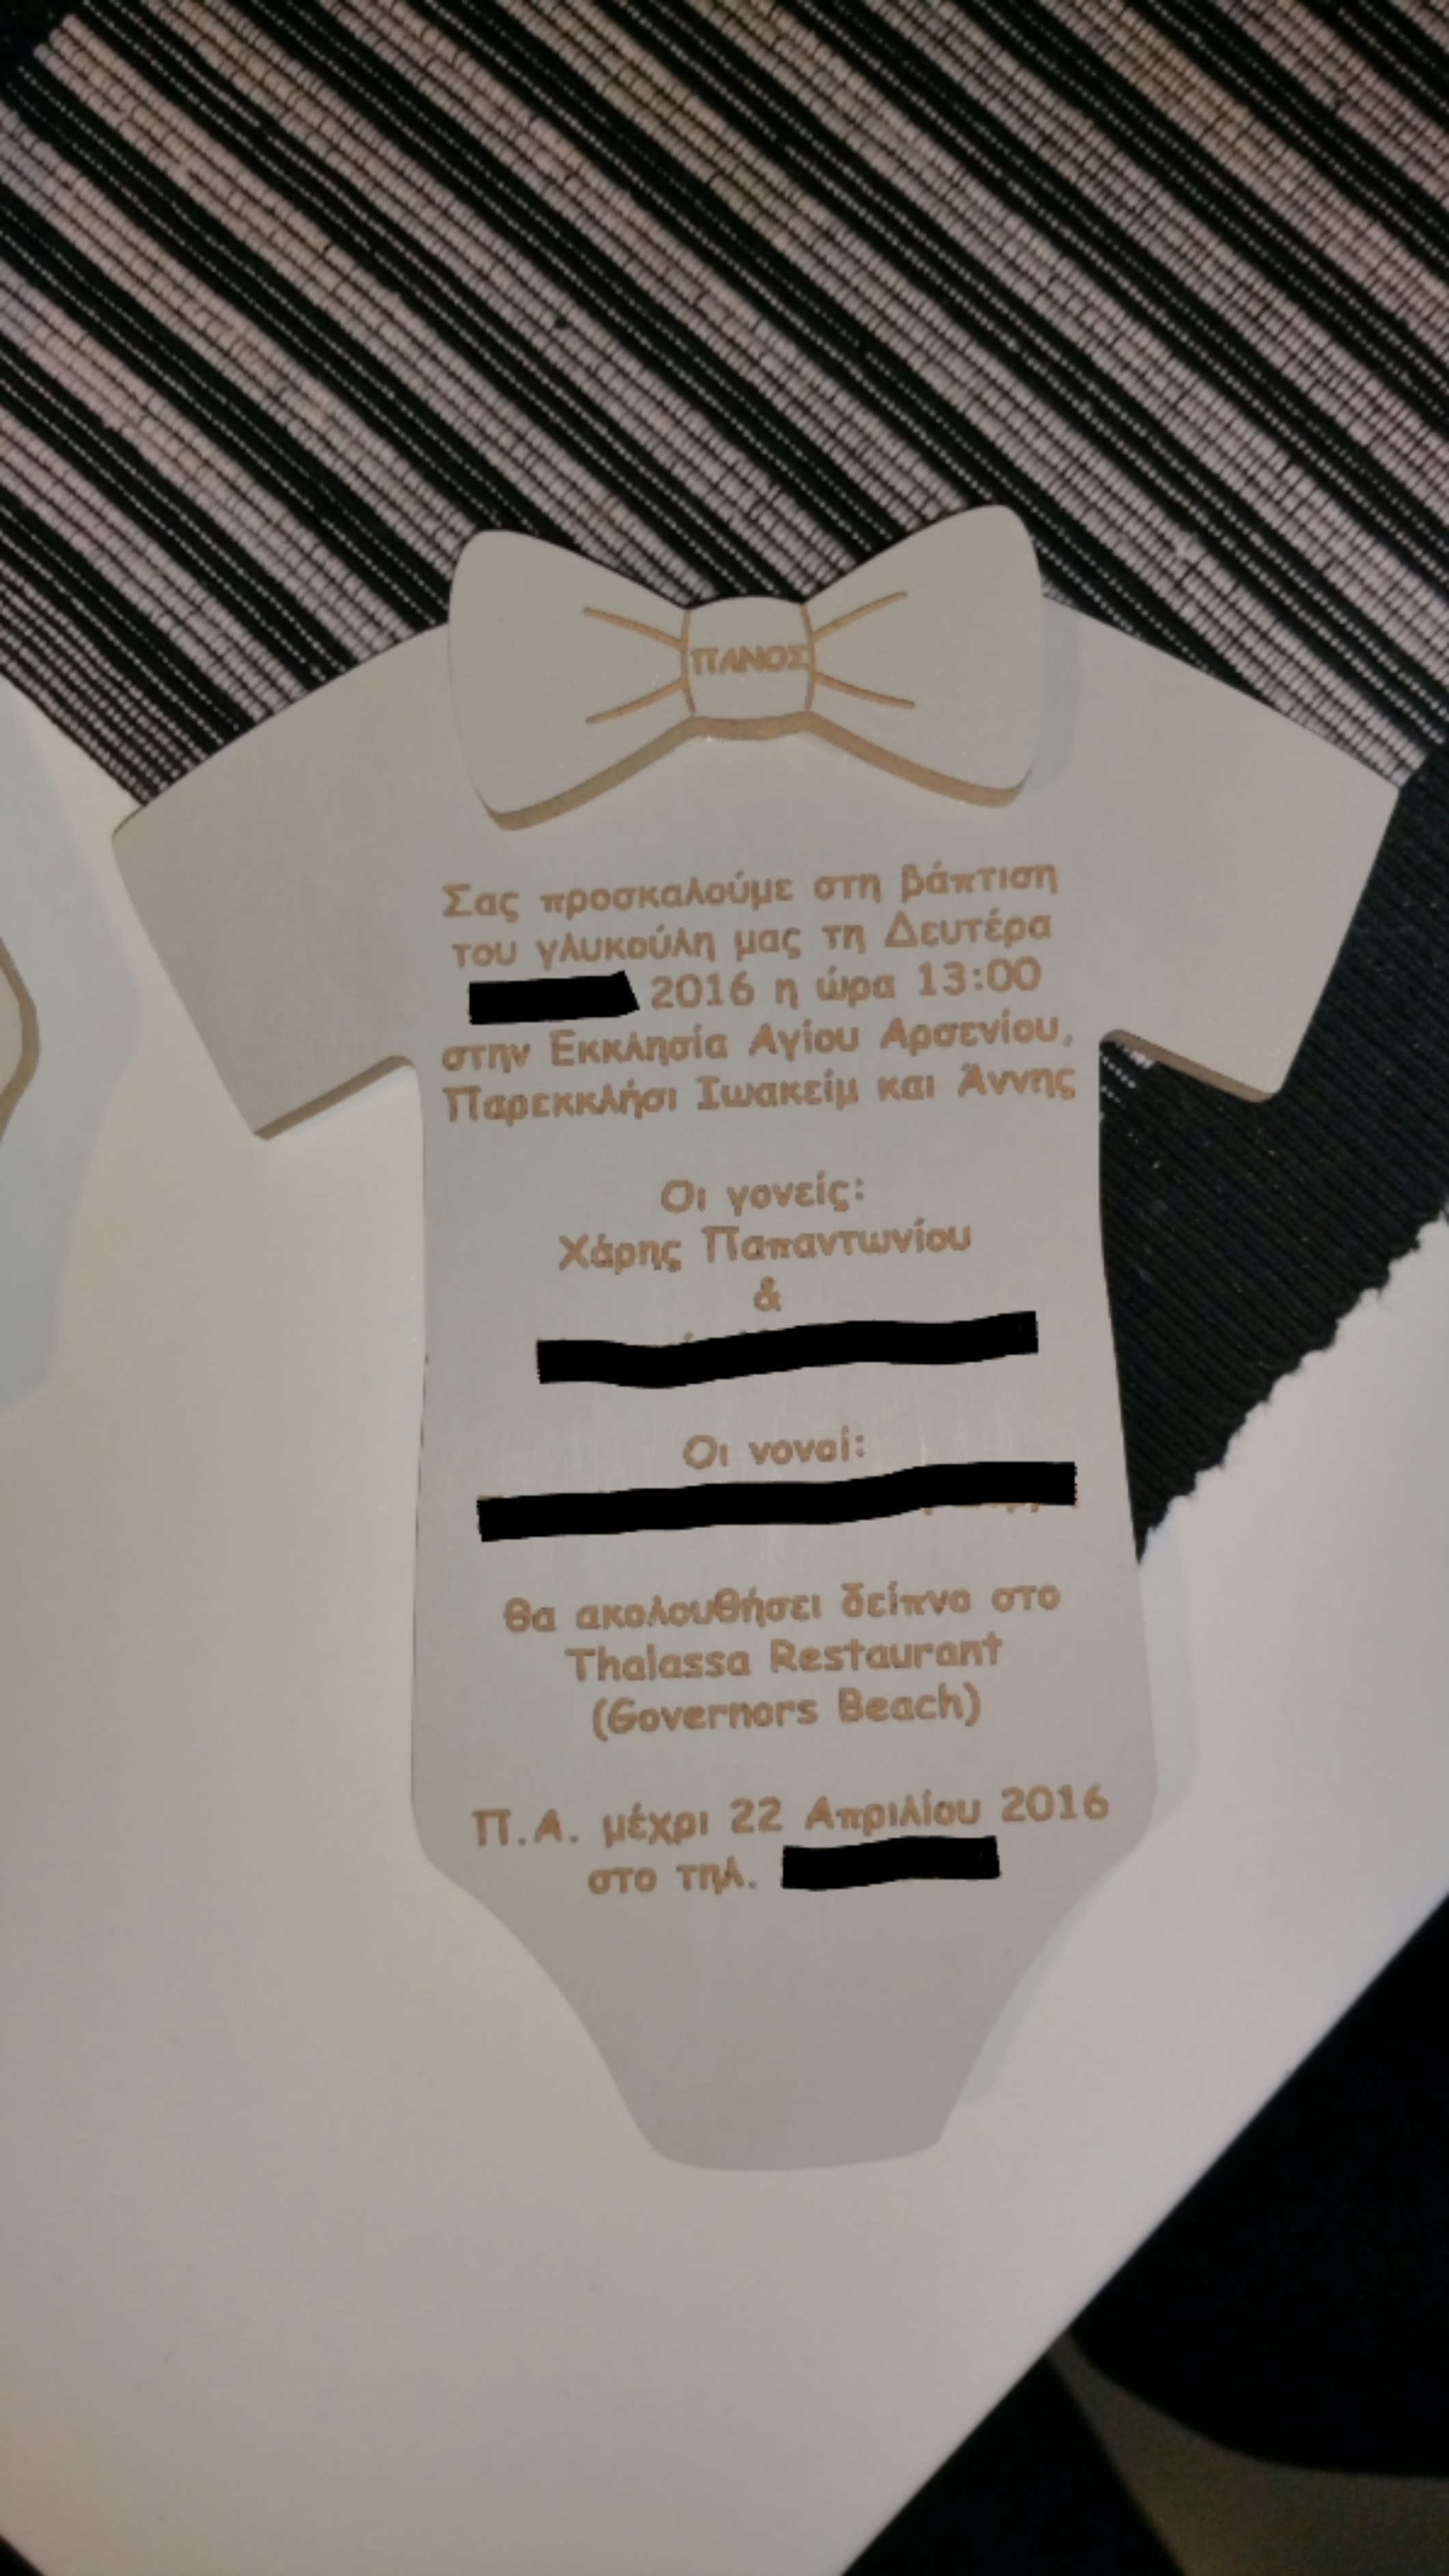
It still needs some improvements though, this was just the sample. I will cut a different bow tie on different material to put on the invitation and also fix the outside cut of onesie(some corners etc).
Btw if you notice the right side of the outside cut, the line has a small corner where it had to be straight there. This corner point is where the machine was starting to cut the outside. Anyone knows why the starting point has this corner? Any tip to fix it?
Thanks.