I just got the threaded table, decided to pick it up since it was on sale. Until now I’ve only used the wasteboard with Nitto tape. I’ve had pretty good results with that but wanted to see if the threaded table would save me some time applying the strips of tape every time.
I was wondering about two things:
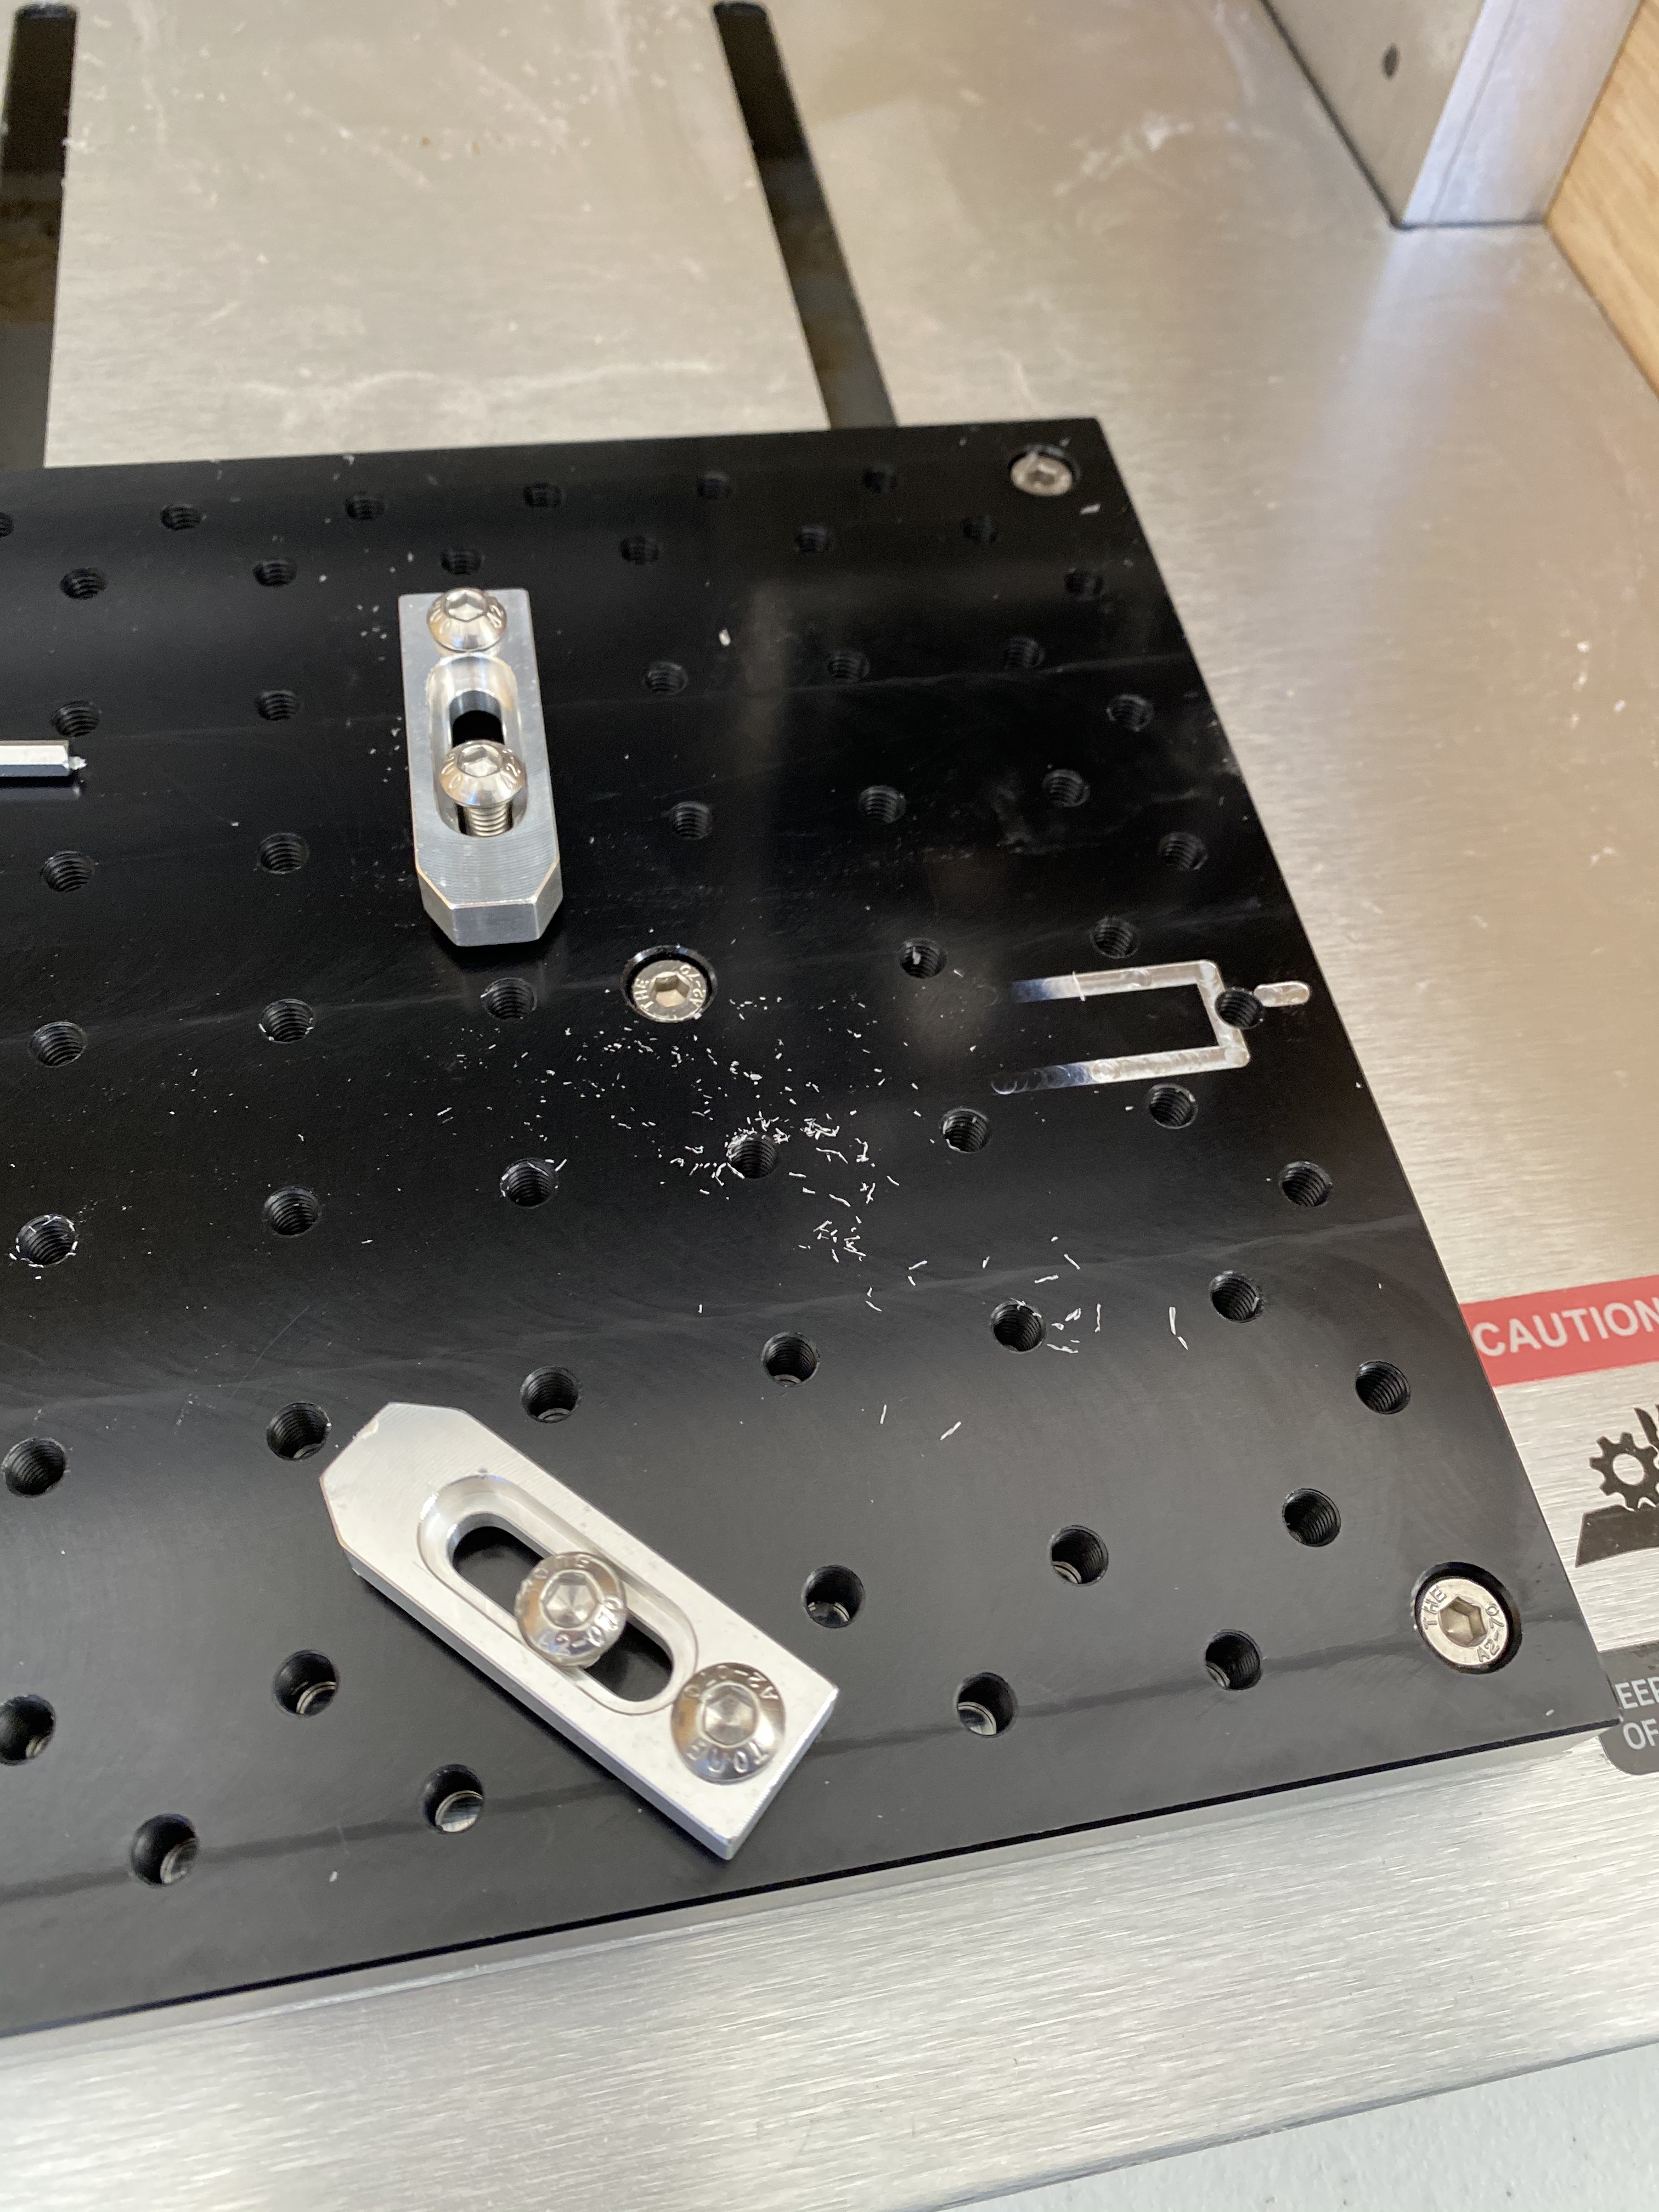
How exactly am I supposed to use the provided clamps? I don’t see a photo of them mounted anywhere. There’s a threaded hole that fits the screws, and then there’s the recessed slot. Do I use the threaded hole to set the clamp’s height (matching the stock height) and then use a second screw in the slot to produce the clamping force? Is there a way to clamp sideways instead of from the top?
The second question is what people recommend to avoid the cutter touching the table during the bottom passes. With the wasteboard the stock was always 0.2mm above the wasteboard surface so I zeroed there and that gave very clean results (not that it would matter much if it cut into the wasteboard). The bottom pass was precisely aligned with the stock bottom and also above the tape, avoiding gunking up the cutter.
When I tried the table now for the first time, I clamped the stock directly to it and zeroed exactly at the table surface. I noticed that the table must be not perfectly level, because the cutter did end up cutting into the metal on one side (see photo, I zeroed near the left edge of the table and it hit the table near the right edge). With the wasteboard I was easily able to fix that by milling it down by half a millimeter or so, resulting in a perfectly square plane in relation to the cutter path. I can’t do that with the table, so is there a way to calibrate/adjust the plane of the machine’s bottom carriage on which the table is mounted?
Also I’d like to have a bit of safety margin like I had with the 0.2mm for the tape in the past. Do people just use some sacrificial material between the table and the stock bottom? I guess a few sheets of paper would do it.
For the clamps, install the BHCS at the far end of the clamp from the bottom and adjust it so that end is slightly higher than the clamping end for leverage.
I use a piece of acrylic beneath parts on my Nomad when using the threaded table or vise,
Thanks for the tips Will! What does “BHCS” mean? Does the way my photo shows it match what you recommend? What I forgot to mention in my original description is that what I have there works, but it seems to restrict me a lot because I always have to find two holes that are in line.
BHCS == Button Head Cap Screw — I install them from the other side, but that’s not strictly necessary — only the screw in the slot goes in a hole — the other (which I like to install upside down) is just used to adjust the height.
I like to use nylon ones (they’re available from auto-parts stores for license plates) to reduce the likelihood of damaging something.
Ah, welcome to the wild world of workholding! In subtractive manufacturing, workholding is everything.
The clamps are a great generic solution for holding down a part; the downside is you can run into them so you need to either program around or over them or use keep out zones or just plan to replace your clamps every part.
In general, I aim to keep the cutter .010-.015" off the table. I trust the z-axis of the machine more than that, it’s just the amount of leftover material is pretty trivial to remove by hand when the part is ‘done’.
I’ve iterated a bunch of my own generic workholding, using the clamps you are using and now use these all the time:
These allow you to access the entire top of the part, all along the top edge and down to the last .190" of the part, if you are feeling particularly daring. One side has tightly sized and positioned holes to repeatably fixture it to the Nomad table, if the threaded table is good to the Nomad axes, then so is this rigid side clamp. The other side is slotted. Butt the slotted side up against the part, tighten slotted side down and then turn the Mitee-Bite clamp against the part and you’re in business. Even with that single Mitee-Bite engaged, you can pick up the machine with the part. This design is similar to the NYC CNC Mod Vise except that design is way more robust to react Tormach or Haas level cutting loads; this design is more compact because I need to react out Nomad level cutting loads. This design let’s you quickly fixture parts almost as big as the table or the 1" wide piece of aluminum shown above.
There’s a time and place for top clamps and side compression clamps, the best time and place is having some of both.
P.S. Worth pondering, if it weren’t true with workholding and ingenuity, humans could make better workholding and in turn make more precise parts at lower cost, we’d still be living in caves. I’m pretty convinced that aliens thousands of years ago dropped off like 3 pyramids and a ballscrew and now I have a personal desktop CNC mill in my garage…
Ah right I see, the rear screw doesn’t have to go into a hole on the table, no idea why that didn’t occur to me before.
And very clever idea to insert it upside down, I see now that that’s what you meant by “from the bottom”. That way the screw cap doesn’t add any extra height above the clamp, very cool.
Yeah I realized I need to pay closer attention to the retract height now. I was lucky today when I tried it for the first time, there was a rapid move to another location that came close to one of the clamps. I regenerated the Gcode with higher retract height afterwards.
Your .010 spacing to the table seems to be about the same as what I am used to with the Nitto tape. I did run a job exactly like you said earlier and it was indeed easy enough to clean up the leftover material by hand.