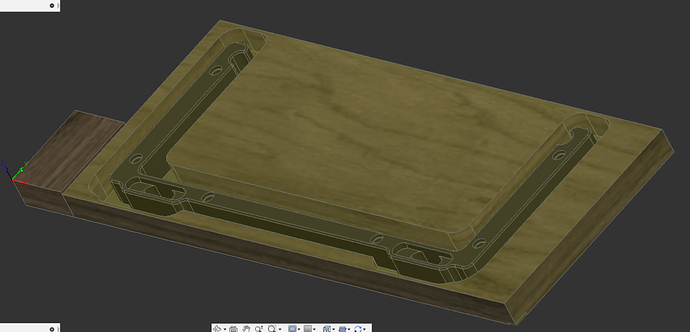
New user here, just got up and running a week ago. I have an SO3xxl with Z-plus. I created my wasteboard and used a whiteside bit to resurface it with no issues. Now when I use an end mill to go all the way thru material (MDF) it will leave a .04 gouge in the wasteboard. I’ve used calipers to ensure my material thickness is correct in CC and choose that same max depth in my toolpath. I’m using the touchprobe to probe for x,y,and z and can confirm it’s correctly placed in the corner of the piece. Am I doing something wrong or is this normal to get gouge this deep on the wasteboard?
Can you double-check with a tape measure that when you manually jog upwards by 1 inch on Z in CM, the endmill actually moves by 1 inch ?
EDIT: and, tell us the stock thickness.
that is what a waste board is for. Better deeper than too shallow. But if consistent, just reduce z cut
Thanks for the replies so far. I’m thinking this is more likely user error. I used my touch probe to zero the z against the wasteboard. Then I used the paper method to move the bit down to the wasteboard and then manually jogged it up by .75 and measured it against a scrap of mdf and it was nearly perfect. The calipers did show the mdf scrap at .75. I will have to be extra vigilant in my next project to ensure I have the right max depth and stock thickness.
if you really dislike cutting into the wasteboard, you can also go the other way around
zero on the wasteboard always,
and set in CC (or other tools) your zero at the bottom, not the top.
it’s a tradeoff; measurement inaccuracies either show as slight cuts into the wasteboard (zero on top) or as deeper or shallower first passes (zero on bottom)
if you’re carving designs mostly in the top of say wood, and your only deep cuts are cutouts around the work, you likely care more about accurate design feaures
if you 're mostly cutting parts out, you likely care a lot less about that, and more likely want the zero-at-bottom method
of course don’t mix; if you zero at the wasteboard but have the software told that zero is at the top, no good comes from that.
This is why I wish for the setup of “zero” to be in the toolpath. ![]()
I am not sure if this is good advice, but I was always getting some slight variation of my Z depth, trying to measure different materials and get a exactly accurate height.
I recently started using a 1-2-3 block to probe off of at the top corner, and estimate my stock height as best as possible.
I design my work always below the stock height, that way it always trims down to the top, and I always stay within .2 doc and who cares if it take off .1 or .122941 off the top? I don’t!
Could an expert please tell me if this is a bad idea for some reason I have not thought of yet.
Thanks!
It is fine when it works well — we don’t recommend it I believe because of the risk of setting zero at top, then running a file.
I feel it is better for me as the CNC machine always knows accurately where a inch height from the spoil board is. it has reduced my gouging my spoilboard or ending up having to adjust my depth and re-cut out the bottom which was happening to me a lot.
I am not clear on what the advantage is to setting zero at the bottom of the stock. For some reason since day one, I was always using the top of my stock to set my zero. Could you please explain it to me?
This zero at the bottom method relies on informing the machine an accurate measurement of the height of stock instead of relying the actual height from the probe? My stock is all over the place, I have to surface it and even then trying to get accuracy in measurements is difficult. 1 spot is a certain height, and a 1/2" over to the side is another height…
When using a 123 I am always confident I have accurate height measurement, I just create a 123 block in fusion and don’t add it to my models but use it for zero…
I believe one reason I was having a Z height issue is my plunger came un threaded from my bit setter. I believe it was in a state of chaos for a long time randomly untwisting during vibrations, that was making my z heights all inaccurate ever since it started coming loose…
If your first operation on every project is a surfacing cut to a specific height, then your method will end up being the same as measuring the actual thickness of the stock … except for the material and time loss.
This topic was automatically closed 30 days after the last reply. New replies are no longer allowed.
