So, having seemed to correct my issues with X and Y axis (see the “Diagnosing Hello World” thread), I have been doing some test projects, and the Z axis keeps losing depth. I’ll zero something before a project. The project needs does a roughing pass that goes down to about .6 inches, with a max depth cut of .15 inches at a time. However, as I watch, I can see that the Z starts to NOT go as deep as it needs to. I jogged the Z back to zero after cancelling the job, and it looks like it is now about .27 inches too high.
I have checked and gotten the z axis motor set screws tight on the flat, and the belt seems very tight. Once again, I am at a loss and am looking for suggestions. I have reviewed similar threads, but, having checked the belt and the set screws, I’m not sure what else could be the issue.
It has happened with two different cutters and two different collets. The project I have been trying is the “3D Import” test project in Vcarve. It has three toolpaths: the first does a roughing pass with a 0.25 endmill. The second toolpath is the detail one with 0.125 ballnose. The last toolpath uses the 0.25 endmill again to cut around the perimeter.
The cutters I’m using are from Carbide 3D. The 1/4 collet is the one that came with the Dewalt router. I purchased a 1/8" collet from Carbide3D.
The first time I tried the project, the roughing pass went great and didn’t seem to have any issues. I was able to switch the cutters and started the detail toolpath. It went great for about 1/3 of the way, and then I noticed that the cutter was no longer going deep enough to actually cut.
After resetting the z-axis set screws and checking the z-axis belt, I tried the project twice more today. Each time, the Z axis seems to lose depth part of the way through the roughing pass.
One thing I did not think to check was to see if the cutter itself had moved in the collet. I’m not sure if that is what you were wondering about, but I’ll do another test and check the cutter length outside the collet before I start the job and after it starts to fail (if it does).
(30 minutes later…)
OK. Just did another test. Same issue occurred. Measured the length of the cutter sticking out of the collet. Ran the job. Once I noticed it was no longer going deep enough to cut, I stopped the job, and then re-measured the length. It was the same. So, it doesn’t appear that the collet is slipping, but it is something with the z-axis itself.
SO if not the set screws, and not the belt, and not the collet…the ONLY time I have had a problem with the Z drifting has been because I was running the machine too hard and the Z Stepper motor was not able to hold it into position. So I ask are you running it too fast? (Feed, and depth of cut)
So, update… I took off the Z plate and checked the v-wheels. Two of them seemed a little loose, so I tightened them and put everything back together. Based on an e-mail from Ed Ford, I moved my router up about an inch in the holder, so the top wasn’t resting on the bracket. Ran the roughing pass again, but same issue occurred. Not sure where to go now…
Rich – In terms of the toolpaths, the roughing pass is using a 0.25 end mill. I am currently cutting poplar. The default tool path in the project had a pass depth of 0.2 inches, and a feed rate of 100 inches/min, and a plunge rate of 30.0 inches/min. The first time I ran it (using pine), that seemed like it was going too fast and the machine shook a bit. I adjusted the tool path to use a pass depth of 1.5 inches and a feed rate of 60 inches/min. The Dewalt router is currently set on speed of 2.
Will - some of the links (in the belt section) on the page you sent are bad. I don’t understand what you are referring to when you say “had to use a pry bar to get D 4 (left) and B flat 3 (right)”. (I’m a stupid newbie, remember…)
Can you do a test run with 1/2 feed rates for us? (Plunge 15"/min and Feed 30"/min), Speed 4-5.
I think the pry bar comment = Z Belt tightening idea. Loosen the Z motor (4-screws). Place two shims (or large screw drives or small pry bar with tape over them to protect the surfaces) between the X and Z motor to push the Z motor upwards. When the belt is tight. Re-tighten the 4 Z-motor screws
Just to keep everyone up to date on the comedy of errors…
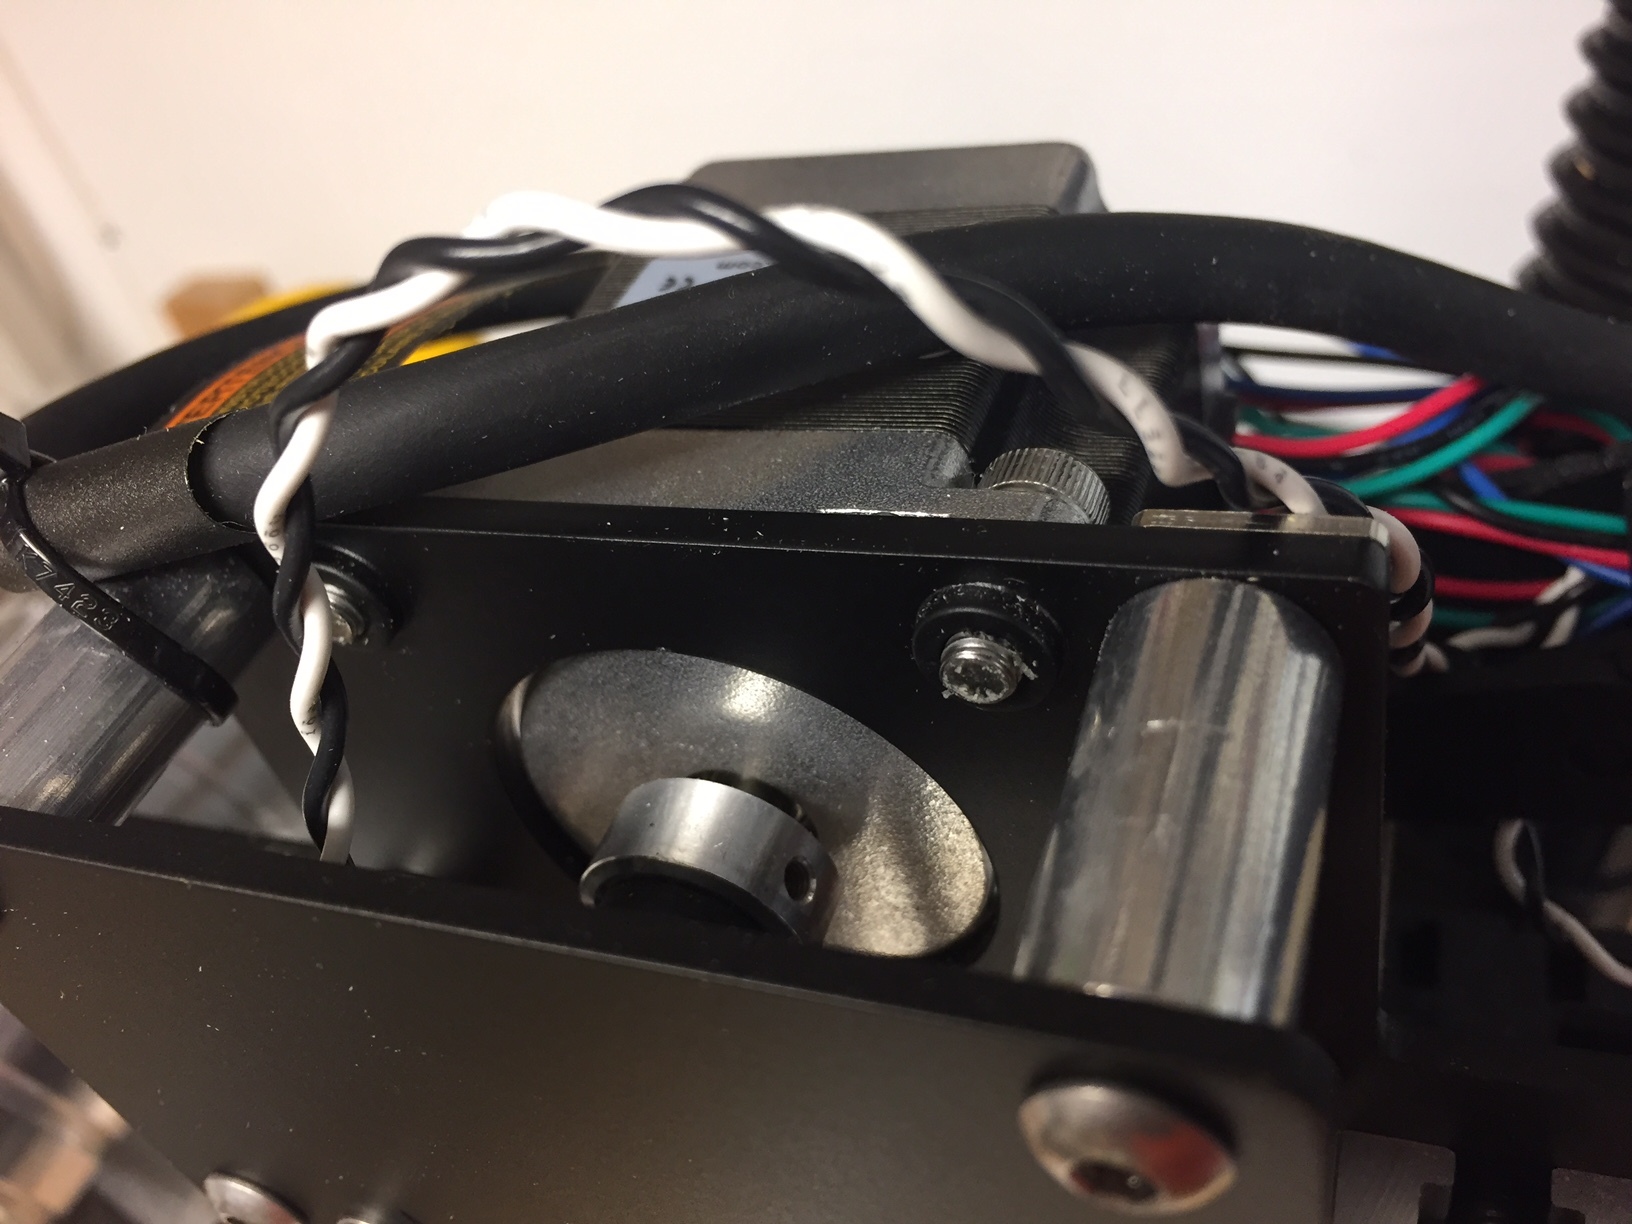
I could not use the shim method that Will referenced. In the photo in that link, the Z plate had slots where the motor connected. On my Shapekoko 3 XL, the plate is different – there are just threaded holes where the motor connects.
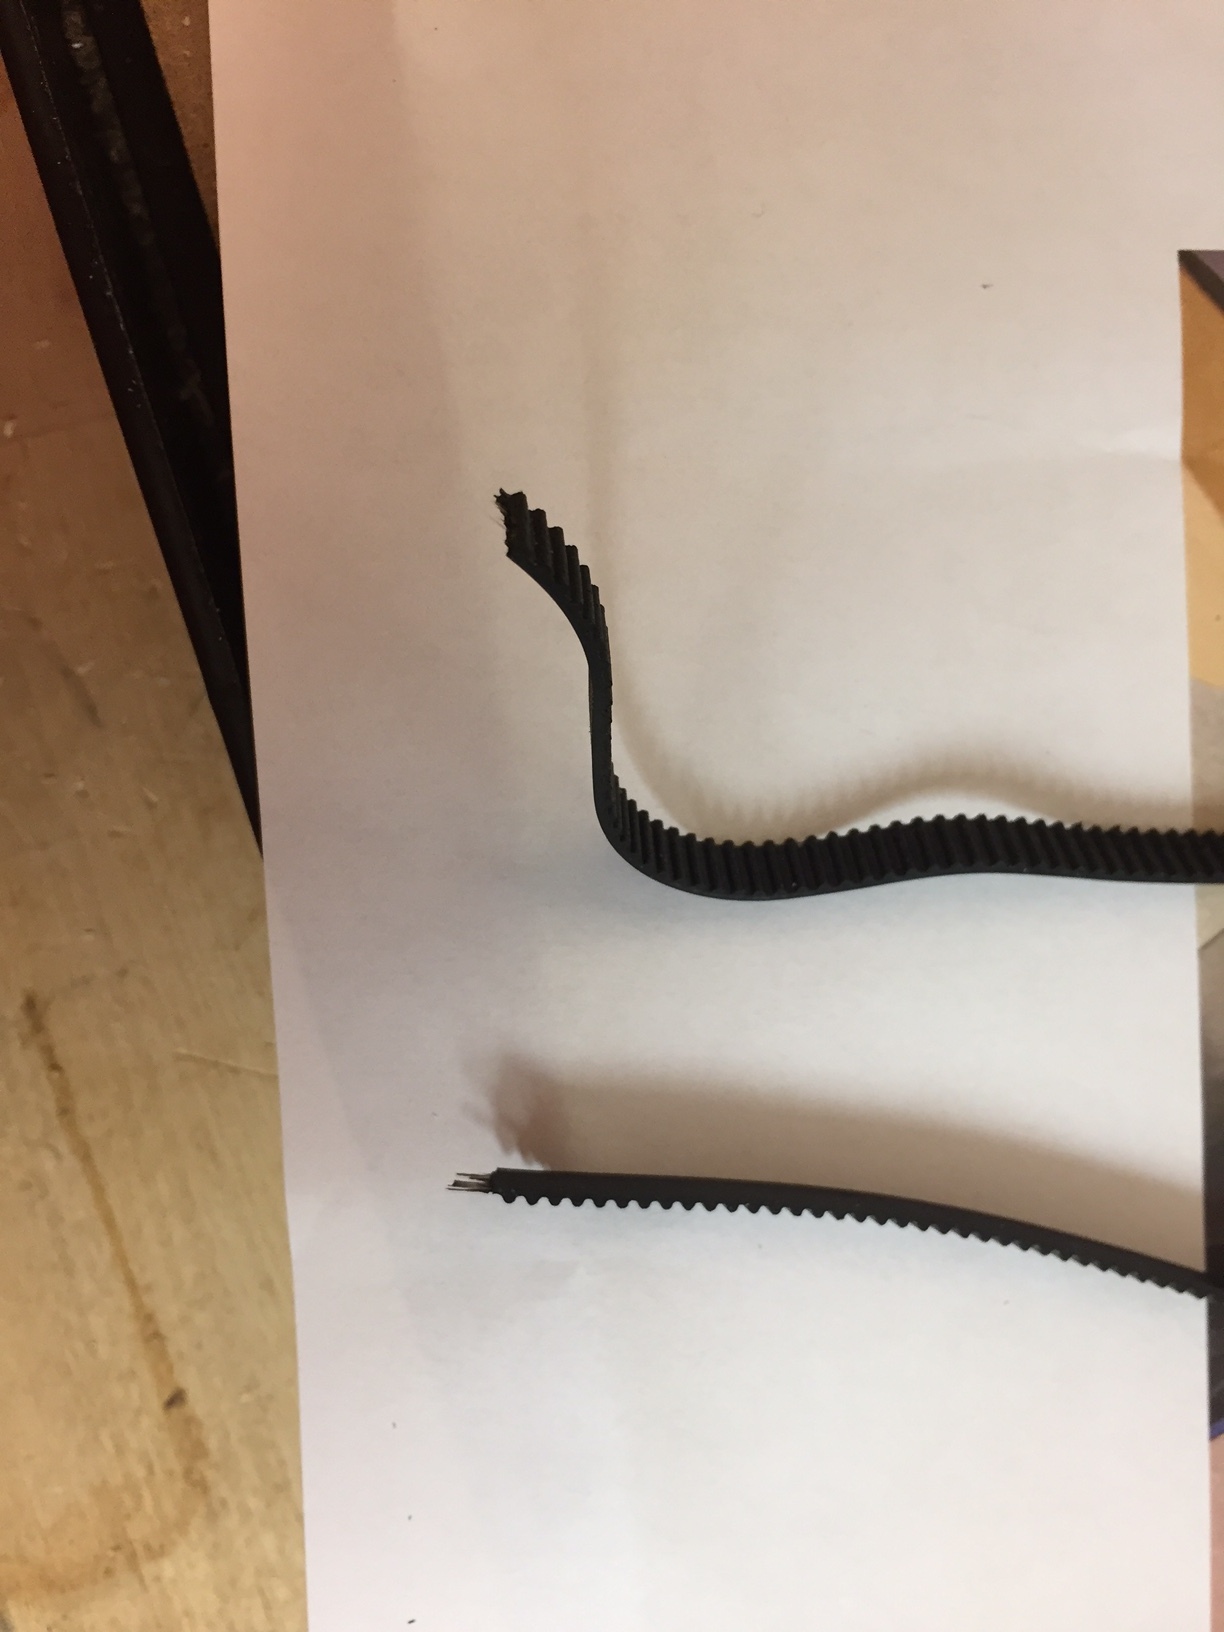
So, I decided to try to increase tension with the tensioning screw at the bottom. I loosened the bottom pulley, tightened the tension screw some more, then went to tighten up the bottom pulley. Suddenly, the belt was very loose. As I investigated, I found that the belt was broken!
I had a similar issue with my Z axis, a seemingly shifting on the Z azis. All of the tiny set screws felt tight, but the one set screw that bears on the flat side of the motor shaft was not at exactly 90 degrees to the flat surface. Sometimes it would slip under heavy load from a plunge or retraction from a deep cavity. If yours is doing this there will be radial scratches on the shaft.
My solution was to
Remove the tiny set screw on the flat side of the shaft
Loosen the other set screws
Slide the gear until i could see the flat on the motor shaft
Align the empty hole with exact center of the shaft
Push the gear back onto the shaft until it is aligned with the belt
Put in a new 3m x 10mm socket head screw , which has a much larger bearing surface and kind be tightened much more than those tiny set screws.