Hey all- I’ve had this happen to me several times, when homing my machine on startup, this limit switch doesnt seem to strike the extrusion & activate, and my carriage grinds into the side (forcing me to shut off power). The Metal piece on the bottom makes contact with the extrusion, but not the limit switch. The switch does appear to be working fine, but i just dont think its making enough contact. All bolts are tight. It happened to me 5x in a row yesterday, then seemed to resolve itself. Any ideas?

Can you post a pic of where it’s making contact?
If the little blue thing is hitting it should trigger?
Usually this sort of problem is caused by some sort of looseness or misalignment.
Loosen the hardware, pull things into the right alignment to make contact first reliably, then tighten.
See: http://docs.carbide3d.com/software-faq/home-switch-troubleshooting/
1 Like
Thank you, I will try adjusting. Wish I could have found this without taking your time but the amount of good info. on here can be overwhelming at times.
While I have you & instead of making another thread- I completed a 3d carve yesterday (.25 ball nose, 10% stepover), and it appears pretty good but It’s going need sanding to be smoothed out. A couple higher spots noted on the carve as well but some sandpaper would even it out. Is this the quality I should be expecting from my SO3? Or am I off in alignment and missing out on even cleaner stuff? Thanks again.
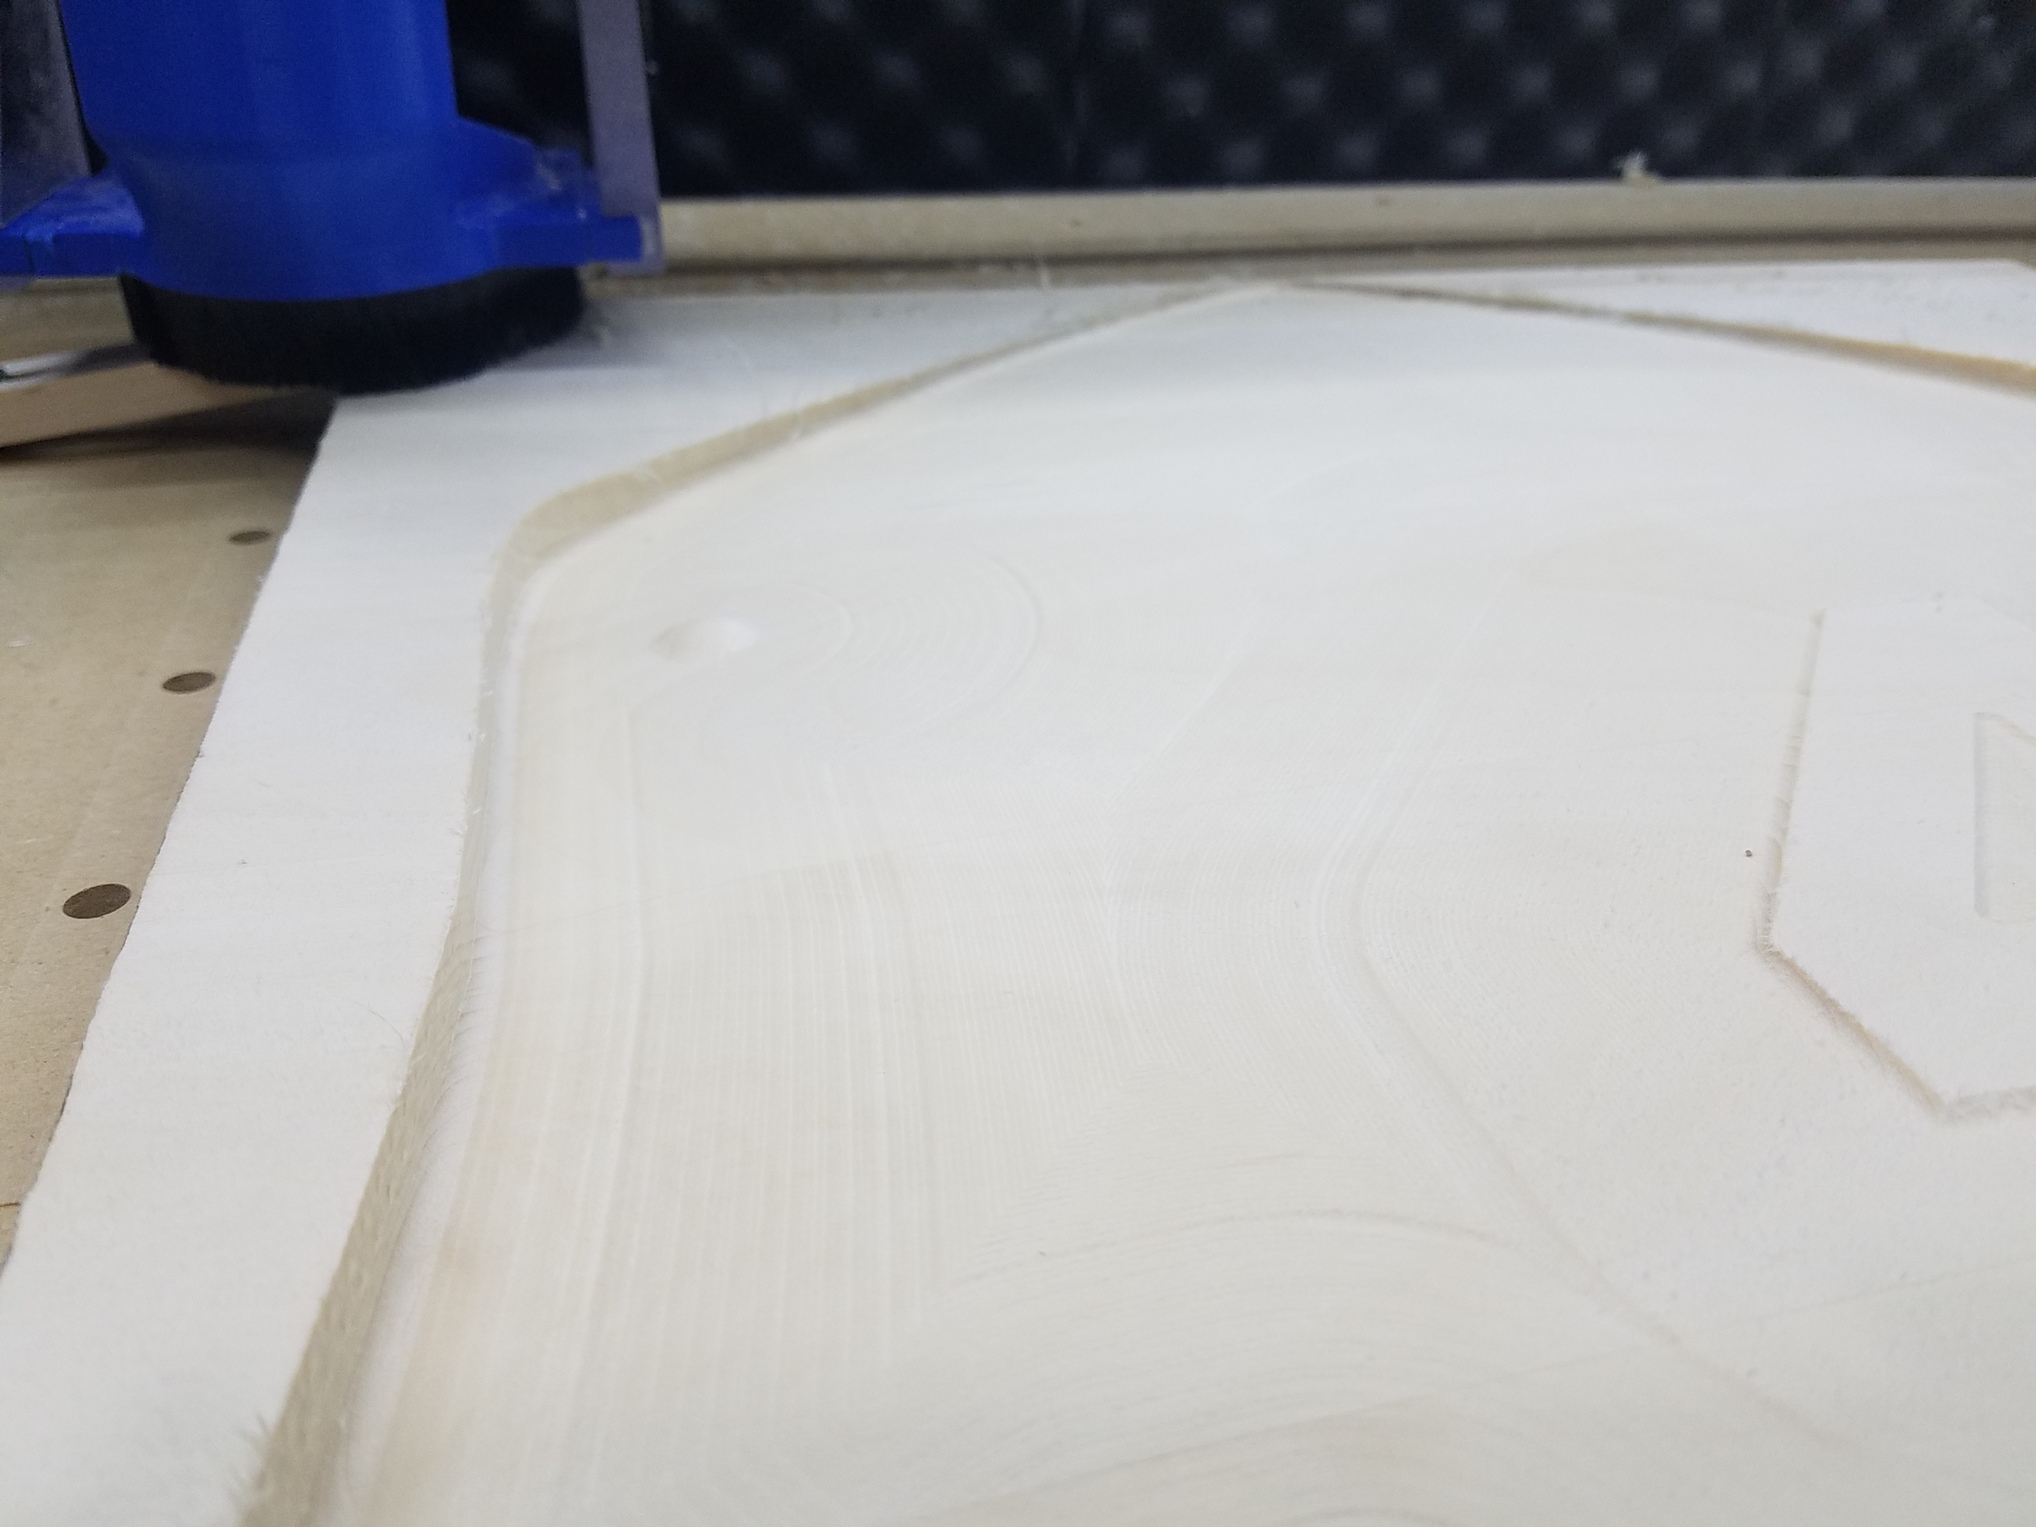
For a ball-nosed endmill, finish is determined by size and stepover:
https://www.shapeoko.com/wiki/index.php/Endmills#Stepover
usually this sort of thing is a series of trade-offs w/ the axes:
- machining time – finish
- tool changes – feature size
- wood grain / quality – overall outcome
For an inexpensive piece of wood, and a reasonable cut time, and no tool change, that looks fine to me.
1 Like
I’ve had the problem on the Y axis switch where it was right on the edge of the belt bracket. After I adjusted belts, the clip was slightly differently placed and the switch wouldn’t hit it. I could have adjusted the bracket, but fixed it in my case by adding a 1/4" thick “target” of MDF to the frame so there was something there to hit.
1 Like
I’m not sure how stiff the material is cutting it, but is it possibly lifting a little? Also as Will mentioned, with a ball nose end mill the surface smoothness is going to directly relate to the amount of step over in your program. If you really need the rounded corners you could try finishing the inside of the pocket with a flat end mill, might give you better results. Have a look here for an explanation:
Dan
1 Like
Yeah, using a square endmill to clear a flat bottom and a ball-nosed endmill for a rounded perimeter is discussed at:
https://www.shapeoko.com/wiki/index.php/Carbide_Create_Photo_Tracing
I had this exact same issue. The switch doesn’t reach the plate. So I also added a small MDF target and that solved it. But it seems like the piece, perhaps on a certain batch of S3s, is incorrect.
Following the article from Will, I loosened the two screws holding the limit switch plate, tweaked the plate up, and re fastened. There was a decent amount of play where I could see the switch possibly not activating. Seems to have fixed my problem. Thank you
3 Likes
This topic was automatically closed 30 days after the last reply. New replies are no longer allowed.