Bamboo Work Clamps made with Carbide Create

I stress tested the clamp as a whole by running several jobs, the M6 thread was tapped in a 5mm hole and it is strong- if any part of this clamp has a weakness it would be the thin section surrounding the through slot.
I will probably modify the design to be wider, however a small clamp can be useful, so started with what can be considered a minimum in order to test the bamboo material to its limit.
I have not snapped one yet.
Here is my bamboo clamp test: I clamped down on some .25" thick 416 Stainless Steel over night.

The next day I tried to shift the steel plate, it did not shift.
I applied about a 1/12 of a turn to each clamp to see if any would make a sound to hint at a potential future failure, but there was no splitting.
I then proceeded to machine a keyhole feature through the steel with the #101 1/8th Carbide 2 flute endmill.

2 Likes

I’m going to need you to get a torque wrench and tell me how many newton it takes because it fails… and then I’ll need you to convert that into Fig Newtons. Please post results.

I really like bamboo as a material and I’m considering making a keyboard case out of some.

1 Like

Threads in materials you would think are very soft are surprisingly strong when cut properly. I’ve seen a steel aircraft (AN3) bolt shear off when threaded into a solid nylon nut and tightened to failure.

I agree with Apollo, the weak point here is the sides of the clamp at the slot. Bamboo is a great material, really wish is was more readily available. Should be dirt cheap, but it’s so much more expensive than pine it’s crazy. Bamboo flooring can be a little easier to get.

Here’s a favorite…

I sometimes find cheap bamboo cutting boards in my area (Monterey Bay Ca) at Marshall’s and Ross. This is also a good place for HDPE. I bought a complete coaster set at Goodwill for $1.50. Costco had flooring for $30 a box at one time.

I updated the Carbide Create file, heres a screenshot of the preview:


And here is the file:
4 bamboo clamps 125 m6.c2d (842.4 KB)

The Small Work Clamp design keeps evolving.
This latest CC Design File includes step blocks!


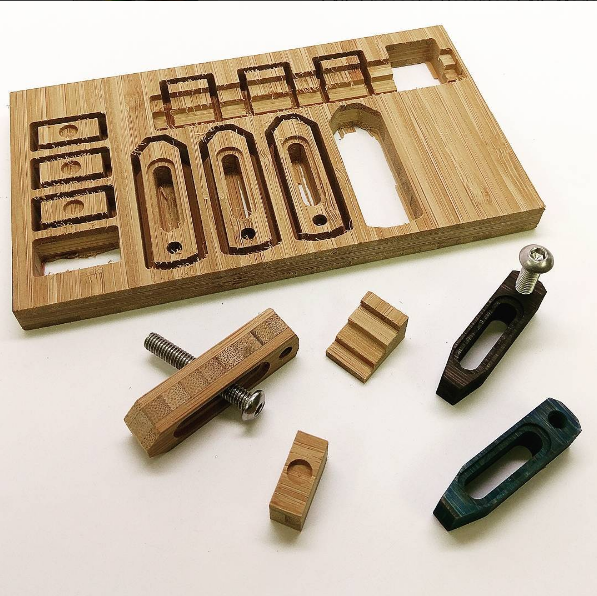
If you want to make a set, you will need 4" x 7" x .5" thick material.
Carbide Create File:
5 Small Clamps wiith step blocks.c2d (1.2 MB)

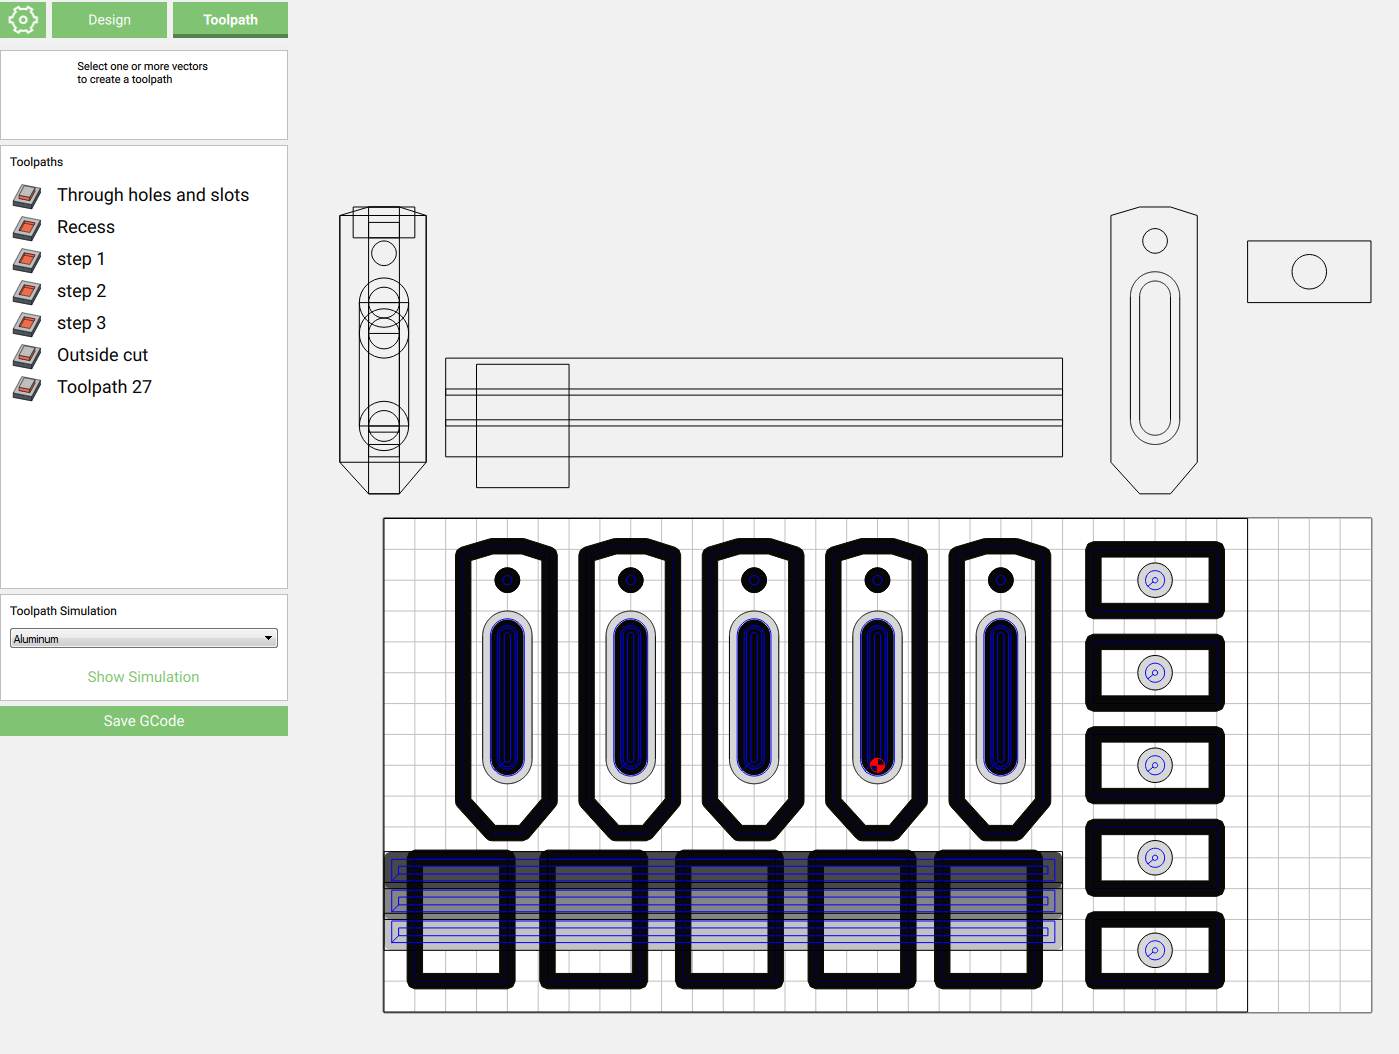
Heres a Simulation Screenshot after adding a 5th clamp:

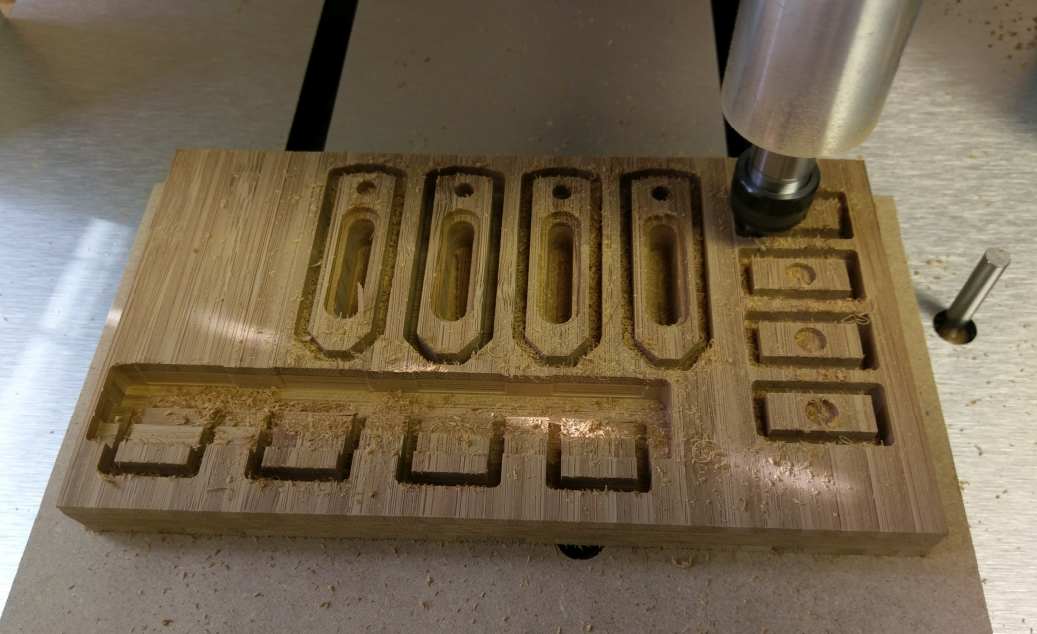
The Toolpathing View:

These are really useful and only require the double sided carpet tape and the .125" endmill.

4 Likes

I just cranked out two sets of these using Baltic birch ply instead of bamboo. Outside of a little shredding of the thin top layer, the pieces came out fine and cleaned right up with sandpaper. The birch ply threaded easily and seems to hold the screws securely. As a noob I am still trying to get a feel for getting stock measured correctly and optimally placed on the bed. Two-sided carpet tape worked well but since the workpiece was not completely flat I chewed into a little bit of the tape at the end of the job…cleaning endmills is not really fun so I know to pay attention to stock thickness settings. I know my spoil board is sacrificial (and I have extras) but for some reason I am loathe to scratch mine up…I should get over that!

Thanks @ApolloCrowe for posting these projects as they are building my confidence in using my Nomad as well as sparking my imagination as to what I can make with it!

Hi @vegasracer Glad to hear they worked for you, do you mind posting a picture when you get a chance?

Turpatine works best for removing the adhesive gunk from tools and acrylic.

@ApolloCrowe please excuse the image fuzziness… not a lot of depth-of-field on my phone cam. I gave them a coat of Thompson’s Water Seal after sanding.

2 Likes

@vegasracer
Have you had a chance to use your clamps yet?

Not yet…I’ve been busy with other life stuff but I have something in mind to test them out on. Stay tuned…will post my results here. :+1:

1 Like

thanks for sharing brother…very nice design

1 Like

Apollo,
Off subject but what is the small notebook your using in this photo?

Donnie

RCA Cambio, I have the same one and it works great for CNC.

1 Like

I’m pretty new at this and I’m struggling with what seems to be simple stuff. So excuse the noob question.
I downloaded the “5 small clamps with step blocks” file, but not having any success cutting out the parts.
The problem is in the Z axis. If I zero Z at the top of the 1/2" stock, it doesn’t cut at all. The spindle moves around in what appears to be the right pattern, but I never moves down far enough to actually cut. If I set the Z axis zero to the bottom of the stock it cuts too deep.
To zero the Z axis I go to the MDI window and send “/G10 L20 P1 Z0”. Then go to the Jog window and zero the Z axis.
Thanks in advance for any advice.
Ray

You don’t need to do any of this in mdi mode.

Just use the jog controls to move the spindle to the zero position you want. Then use the set zero button on the jog page, clear the offsets, and you’re set to go.

1 Like

@very_old_noob
Welcome to the Forum Ray.
I have attached a file below that you can load directly to Carbide Motion and should work.
What machine are you using? Nomad?
Center at the Top of your stock, should be good to go, let us know.


5 clamps Center top Zero 125endmill.egc (273.7 KB)

Something in the Clamp file you are working from may have lost the toolpaths possibly?
If you can upload some screenshots similar to what you see above maybe we can see what setting needs to be changed.

Heres the Carbide Create user guide for your reference:

http://carbide3d.com/carbidecreate/userguide/

3 Likes

Thanks for the quick response, Apollo,
The Carbide Motion file you send didn’t work. I suspect it’s a Nomad file because I got a “limit switch” message.
The good news is that I was able to get the original file to work after re-generating the GCode.
I’m not sure what the original problem was, but as I usually say “mistakes were made”.:blush:

1 Like

Ray,

A limit switch error message usually (99%) means that during the “look ahead” feature of the controller saw that you were going to hit a limit switch somewhere during the run.

Yes, it would be real nice it it also told you WHICH axis it was, but it doesn’t That means you need to do some research, (too close to the left, right back, front, of Z bottom.

It can happen if the program file you just uploaded’s home position, and your setup are not the same. Example (You picked the Top Left, but the program was written Bottom Left)

I hope this explains this error message to you and the many that will see it in the future.

Rich

2 Likes

Rich,

I believe in this case the limit switch error was due to the fact that the CM file that Apollo sent me was for a Nomad (he didn’t know at the time that I have an SO3)
When I ran new SO3 GCode version of the same CC design it works fine.

Ray