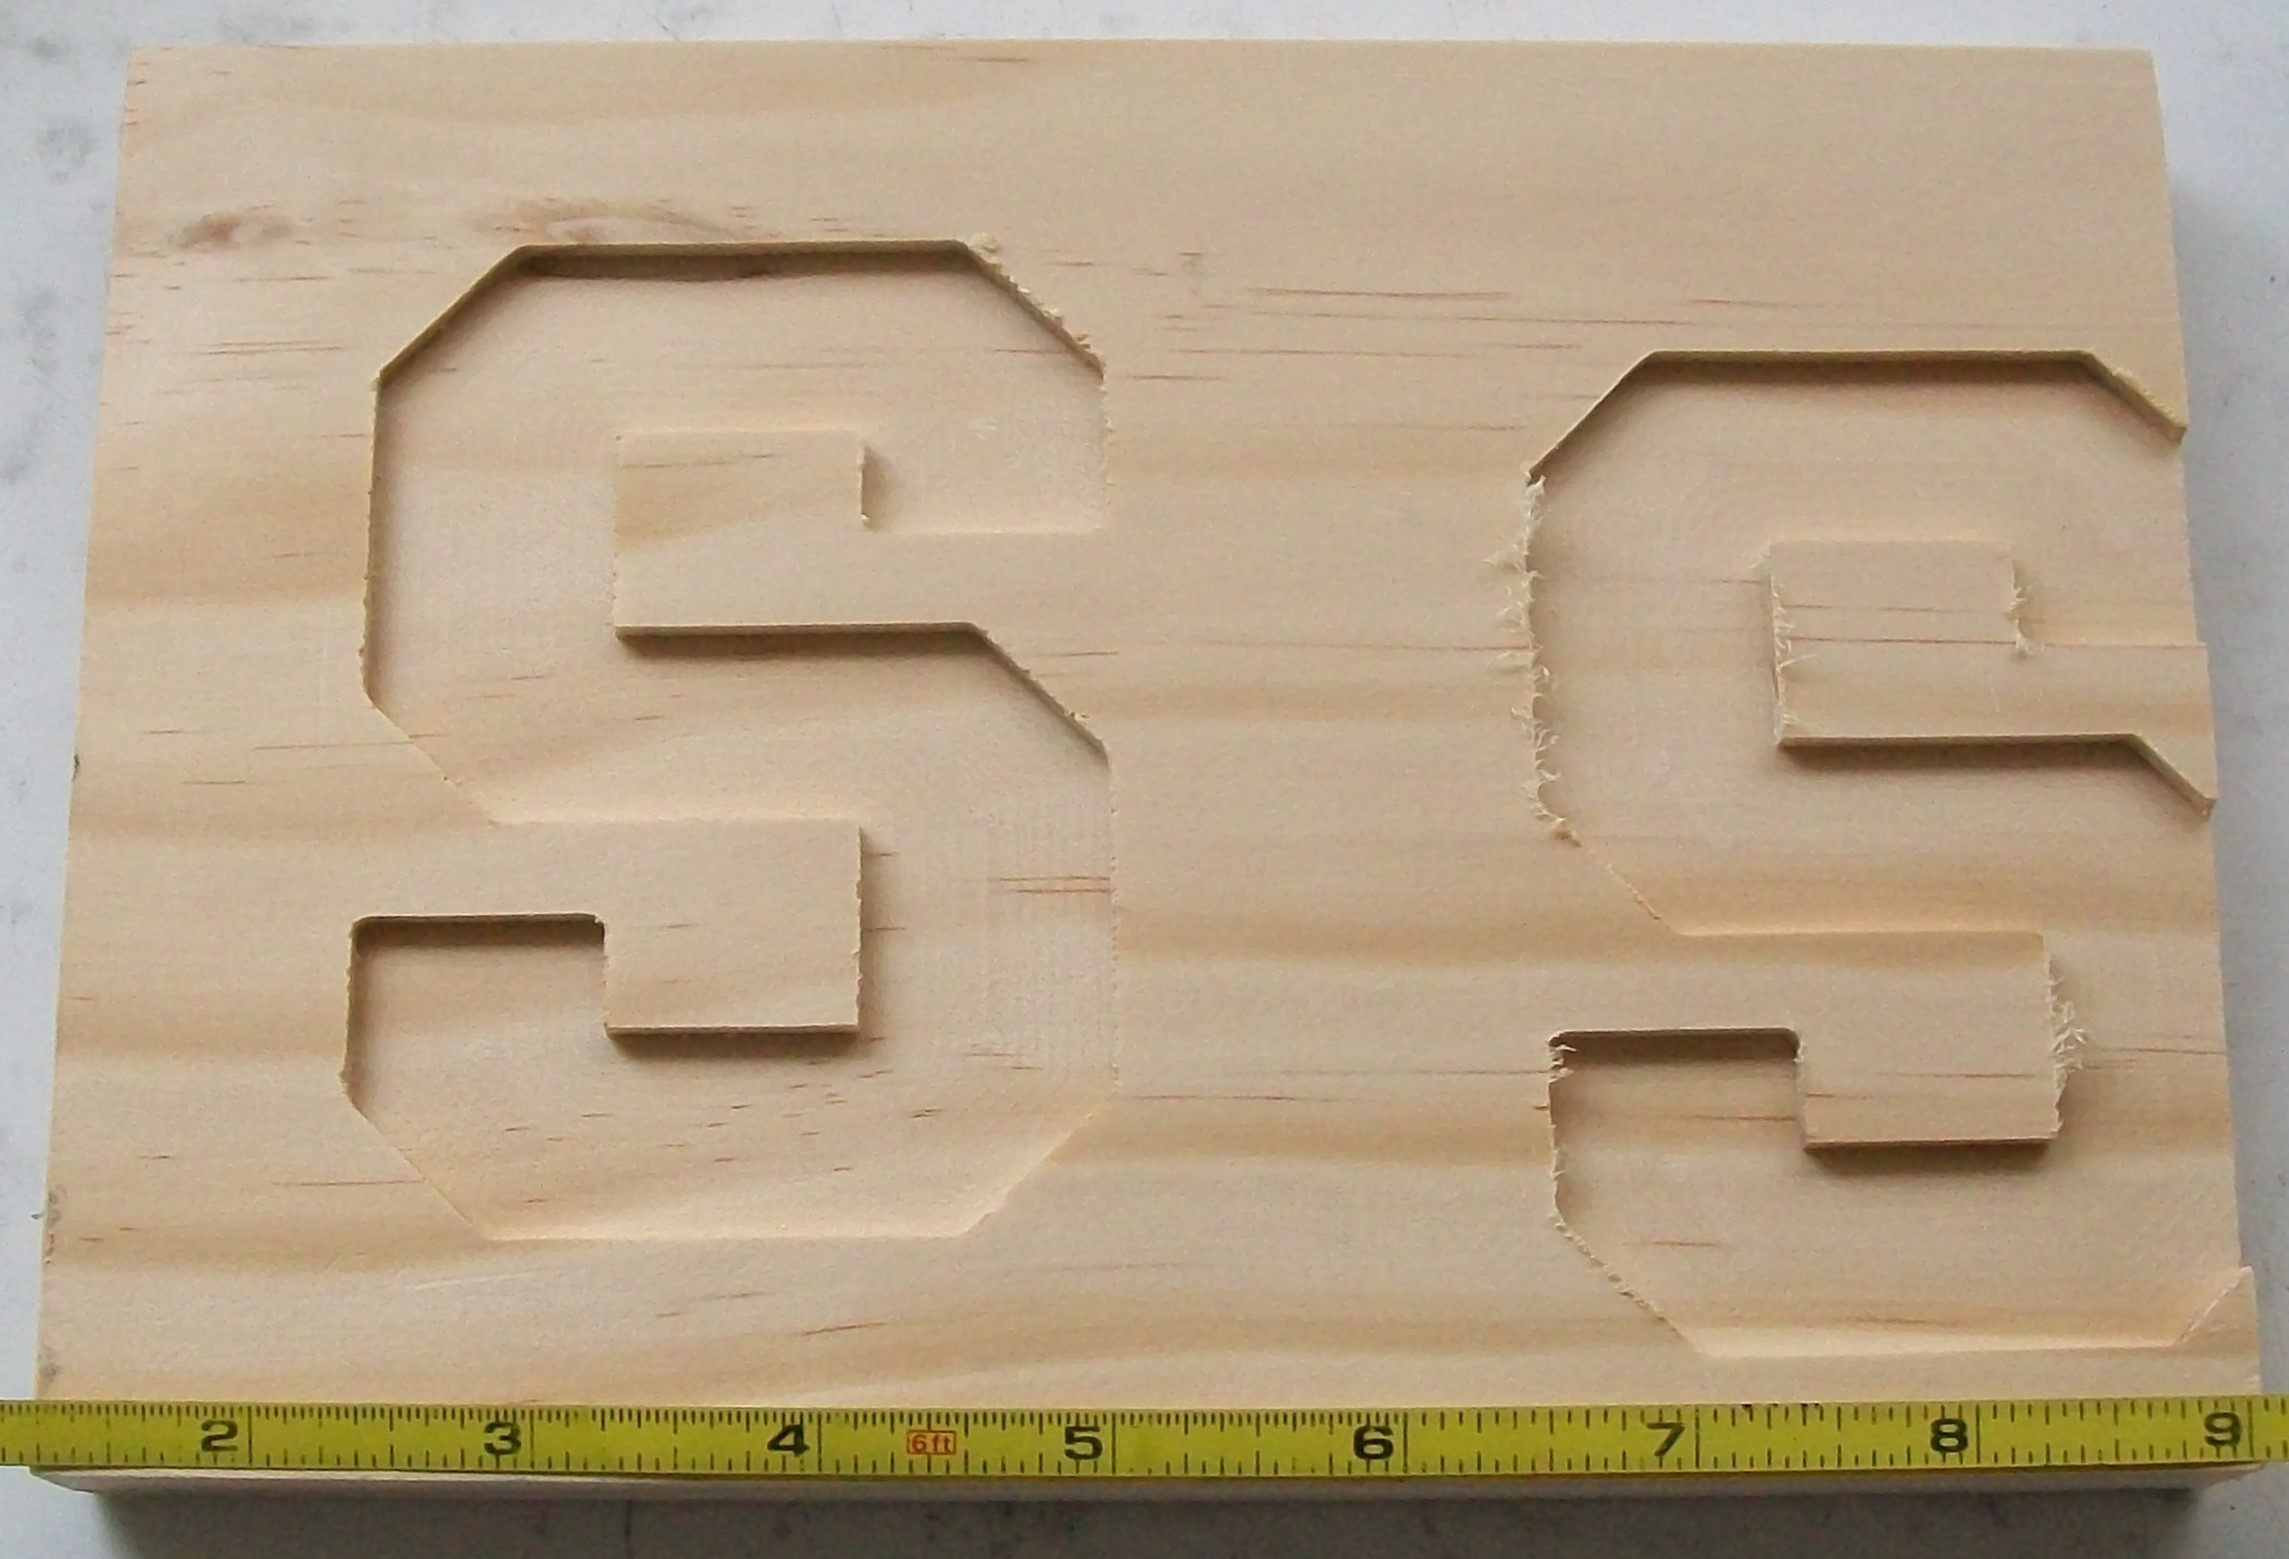
Attached is a picture of my first project after the wrench. Only took me a week to figure out how to do this because learning the Nomad/Carbide Create is like a blind man crawling through a room with the lights off. The first one I made was actually the one on the right…it missed the wood because I used my zero as the bottom left part of the wood. It took 20 minutes with the preloaded settings for soft wood. For the one on the left, I changed the zero to Center and used the Nomad settings for Pine (DOC 0.03/Step 0.056/Feed 72/Plunge 32/RPM 4500). It took 10 minutes and the finish was better.
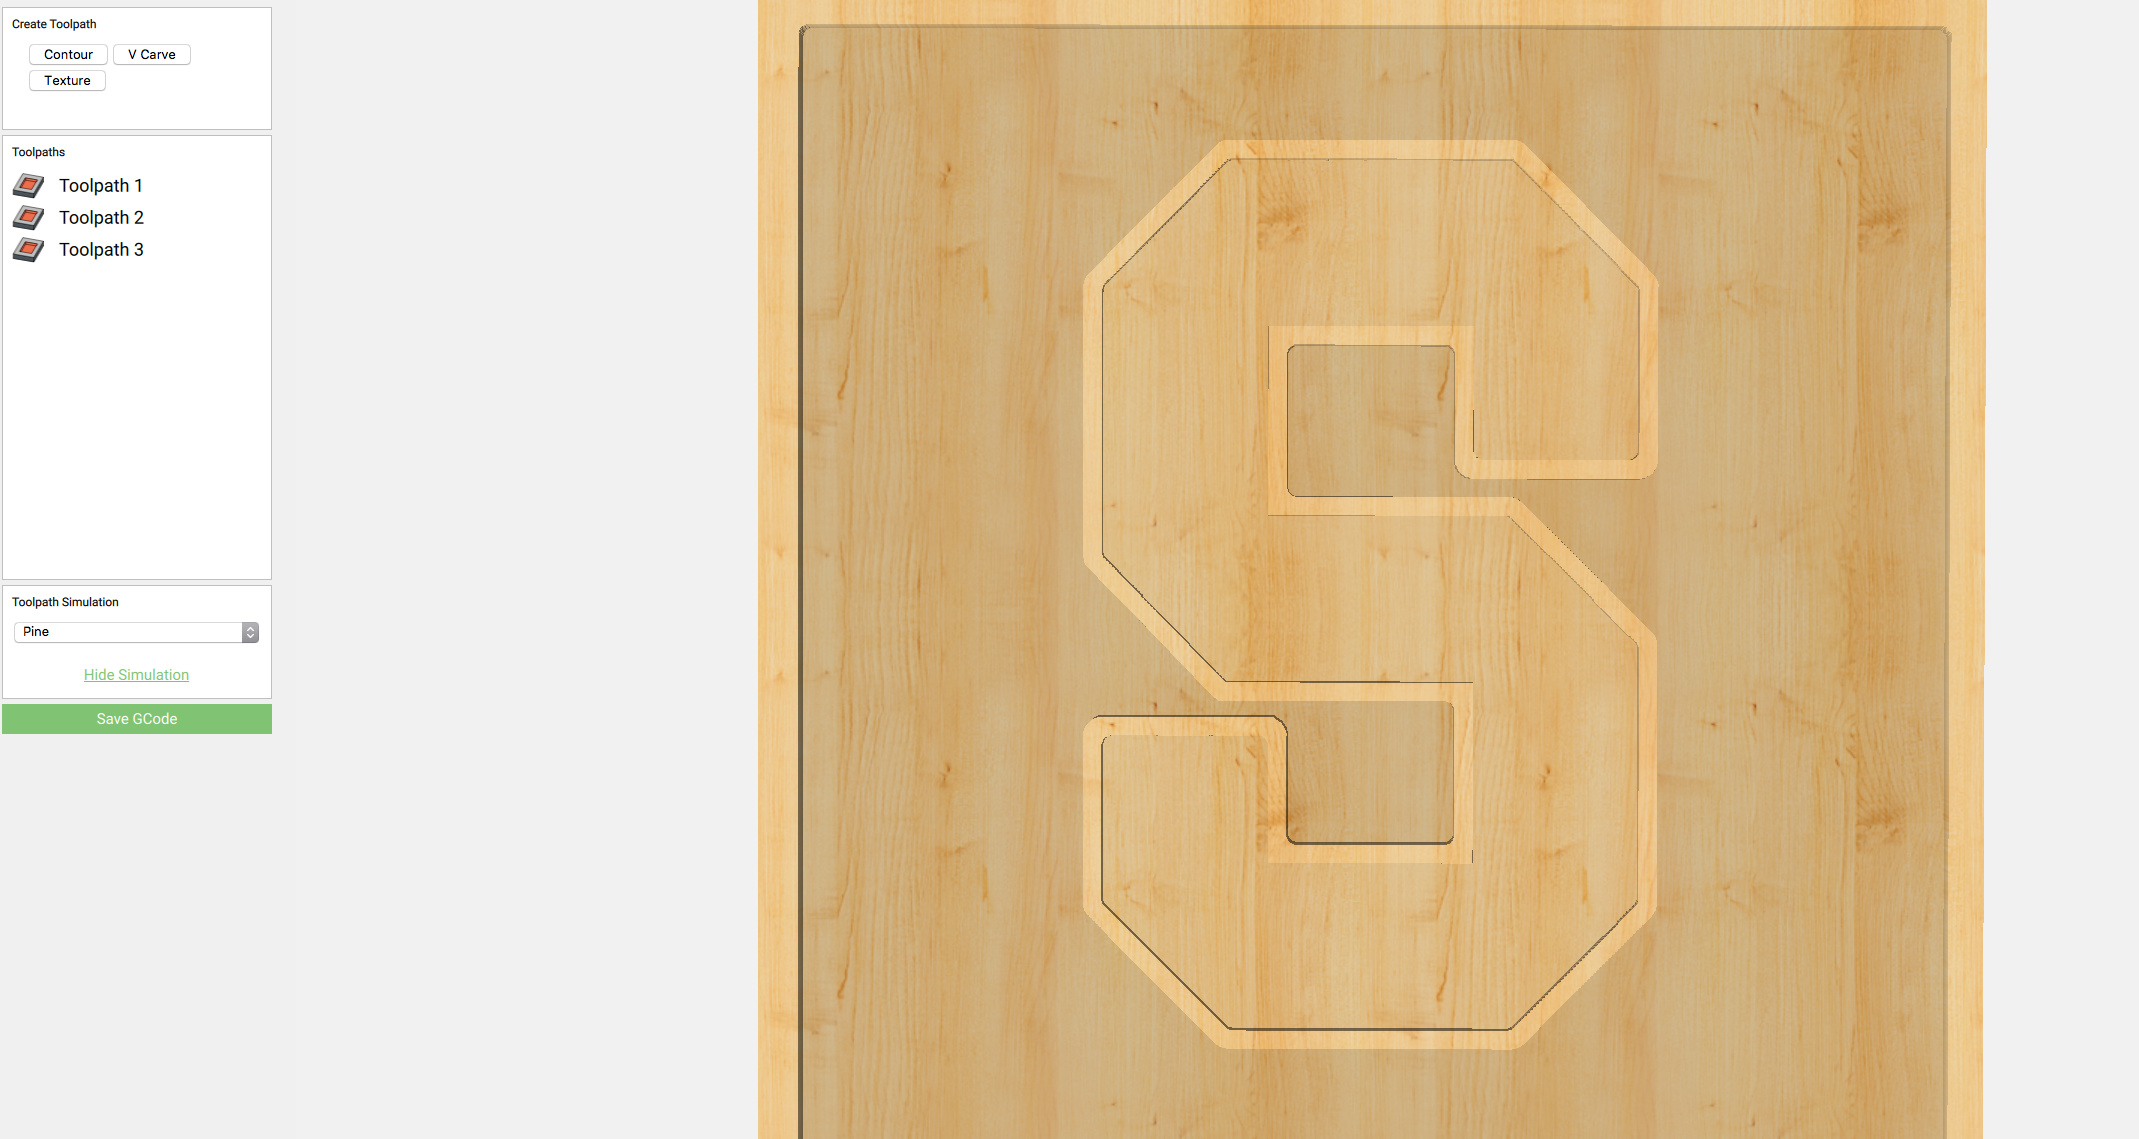
So now I want to do an outline and remove the wood inside and outside of it. The attached drawing shows the blue part that I want to look raised in the wood.
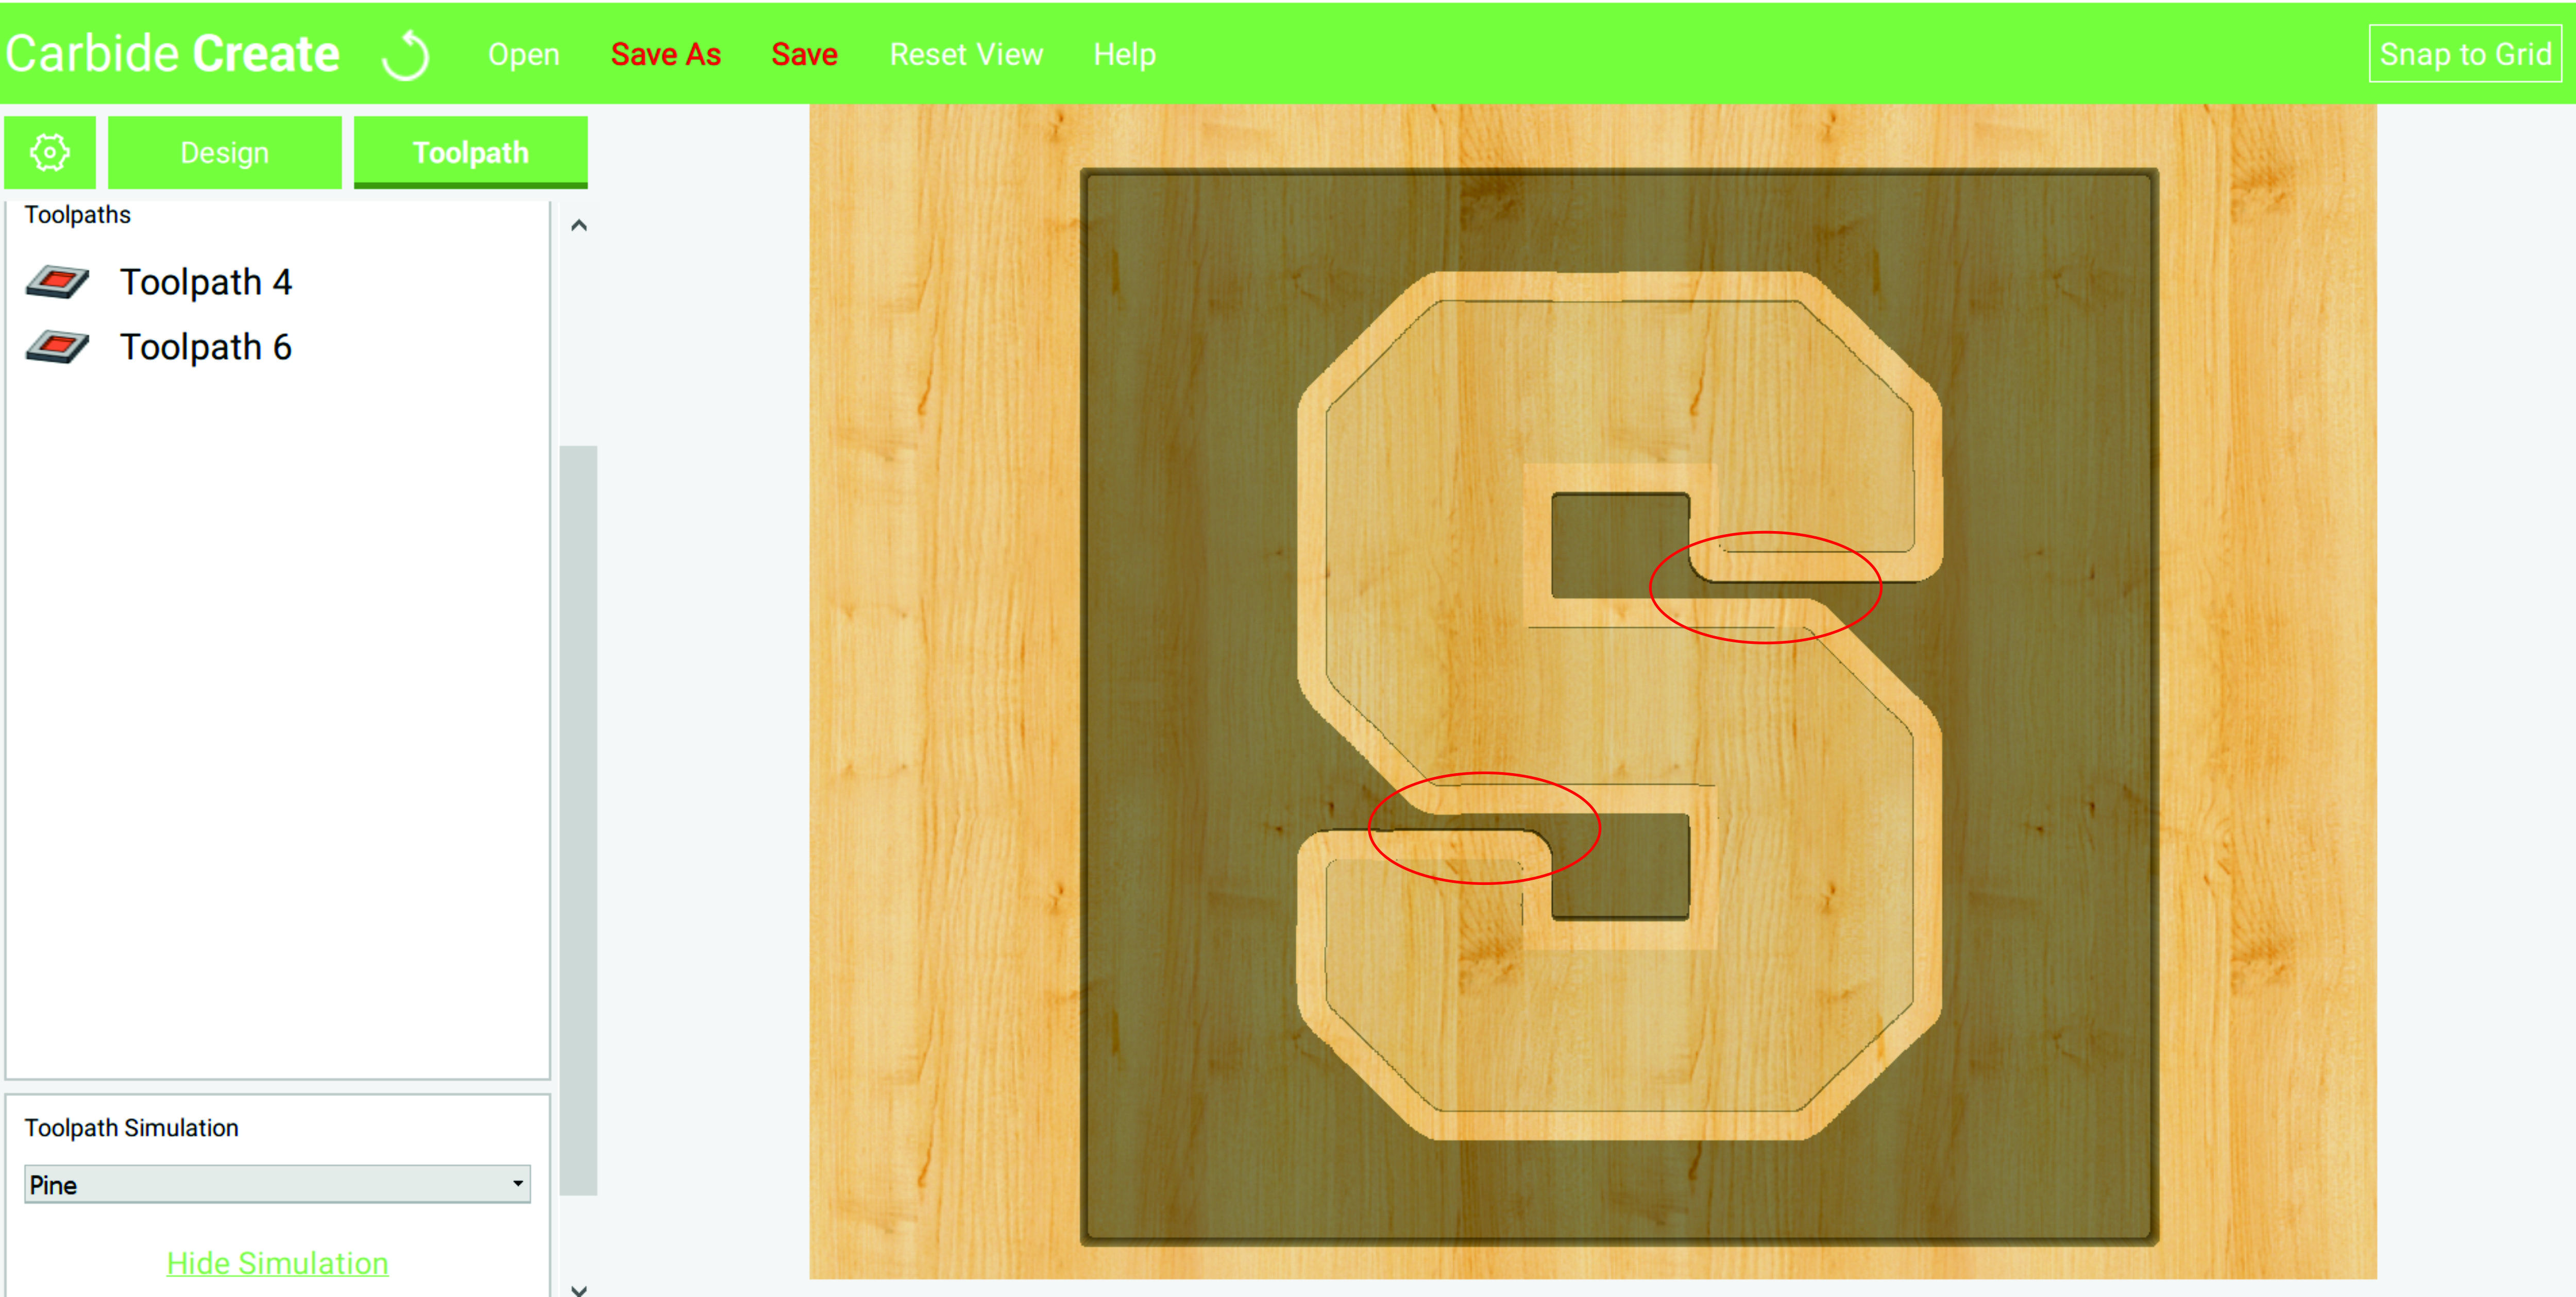
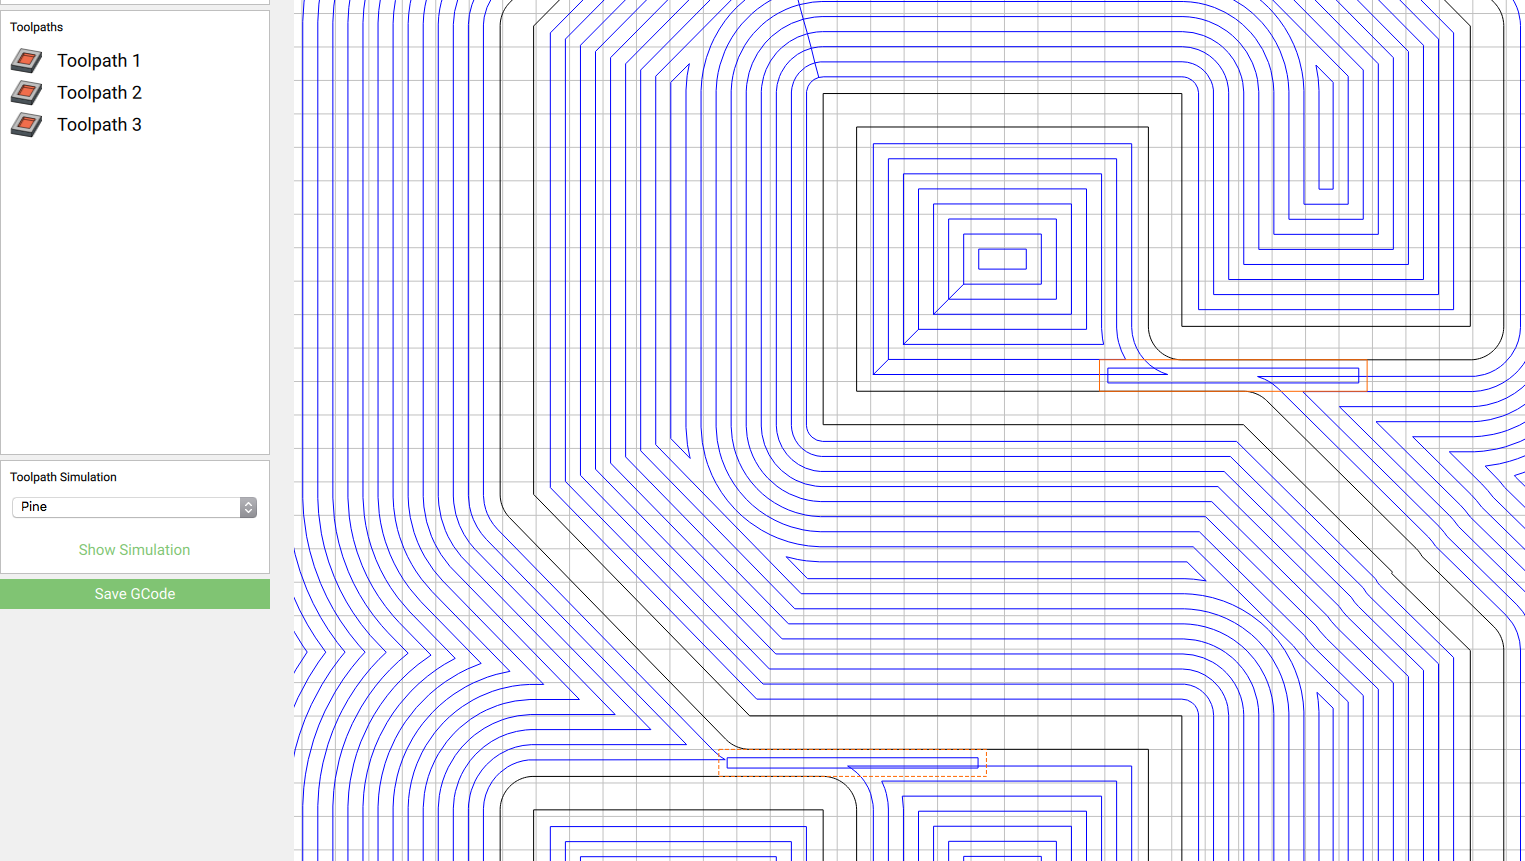
The problem is that it appears that there is a section that is too small/thin for the 1/8" flat endmill. The attached simulation shows that it works if I use a 1/16" flat endmill but I assume that would take forever. I circled the two areas that I think are too small to work with the 1/8" endmill. Is there a way to create a toolpath to just do these areas with the 1/16"? If so, how?
Yes, you can design to use a finer bit for only a portion of your project.
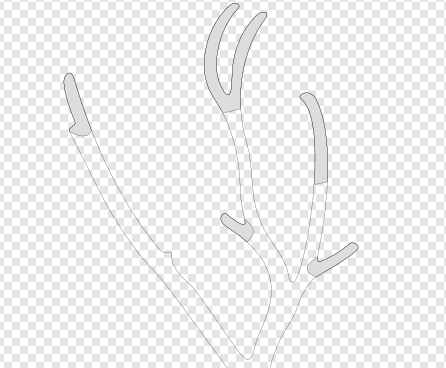
Here is a portion of a “snag” I inlayed, quite magnified. The unshaded portions inside the outline were finish cut with a 0.381 mm bit. The shaded areas are smaller than this; they were cut with a 0.254 mm bit. These bits are pricy, delicate and take a long time to do their job. The shaded areas were used to restrict the cut to only where needed, areas the other bit could not reach.
The shaded areas are also part of the overall outline, no need to modify that. The larger bit just won’t cut into that area. The shaded regions were constructed from a copy of the outline.
Hi Byrne…thank you for the reply…I guess my question is…how do I construct those shaded regions? Can it be done in CC or do I need to create them in a different program and import them into CC?
I created the pocketed areas in a drawing program, they have far more robust design tools than CC for generating art. However it might be possible in CC using its BOOL function. I haven’t used this myself but I suspect you could create a rectangle and intersect it, in the appropriate place, with a copy of your art.
Tex…I guess I didn’t explain it clearly…my goal was to only cut those small areas out with the 1/16th so I could use the 1/8th everywhere else, so I was asking “how” to do just those little areas with the 1/16th…I didn’t know how to create a toolpath for areas that were not well defined. There’s nothing in the manual that covers this.
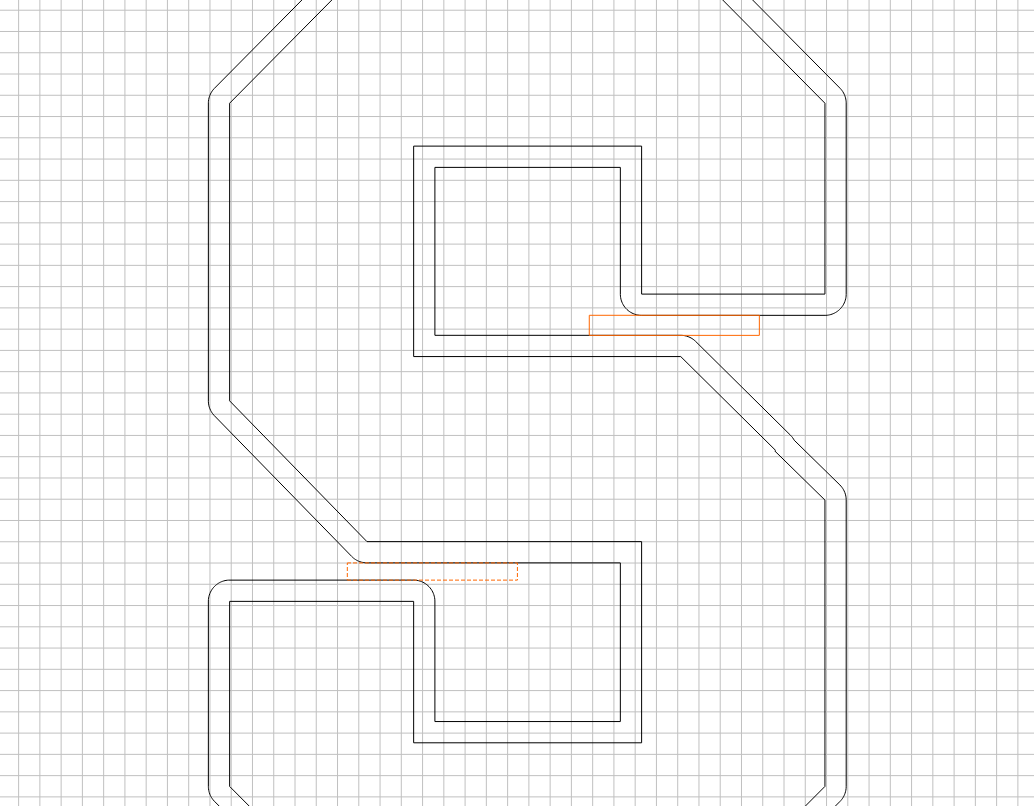
@Cicero, I don’t have a great solution, but this is what I would do:
Make two rectangles that fit just perfectly (kind of pain, but can be done). Make them as short as possible. The longer they are, the longer the job will take.