I am REALLY getting tired of having to buy so much tools and materials just to get the Shaepoko to make its first cut (In my opinion shipping out a cnc with no work holding is sending out an incomplete machine). Thinking of making this but then it requires a chamfer bit.
I don’t think I will need one ever again, so I don’t want to purchase one if possible. Any downsides if I skip this step?
You don’t really need to if you don’t want to. I ended up cutting the holes for my threaded inserts that I ordered from Amazon with the actual CNC machine.
Here’s how I did it:
I mean, granted, it’s being done on a spoil board but I did use the same technique on the original wasteboard.
IMO… it’s not an incomplete package since you can use screws or double sided tape to hold down your parts… screws provided you slightly oversize your blank. I actually prefer using screws as there is no worry at all of hitting a clamp and nothing will ever slip out is held down by screws. Plus, it is super easy to set up a waste board since you don’t spend several hours with all those silly inserts. Anytime you feel you needs a new waste board you can do it in about 30 minutes ( leveling to machine would be separate step if you do that )
I don’t know what others have done regarding running that job you are thinking of running ( the DIY board file ) but they recommend pulling the bit pretty far out of the collet… that is normally not a good practice so I would place a SECOND board on top of the factory supplied MDF so you DO NOT have to pull the bit so far out. It’s better to stick with a 2/3 in the collet approach - that is my rule of thumb. Plus… some of those bits you can buy from Carbide are ridiculously short and you will probably not be able to reach far enough down on some projects if you don’t lay down a second waste board… I realized when their bits arrived why they were so “affordable” compared to other bits I have purchased in the past… lol - there is a lot less carbide there.
3 Likes
Griff
(Well crap, my hypometric precursor device is blown…)
5
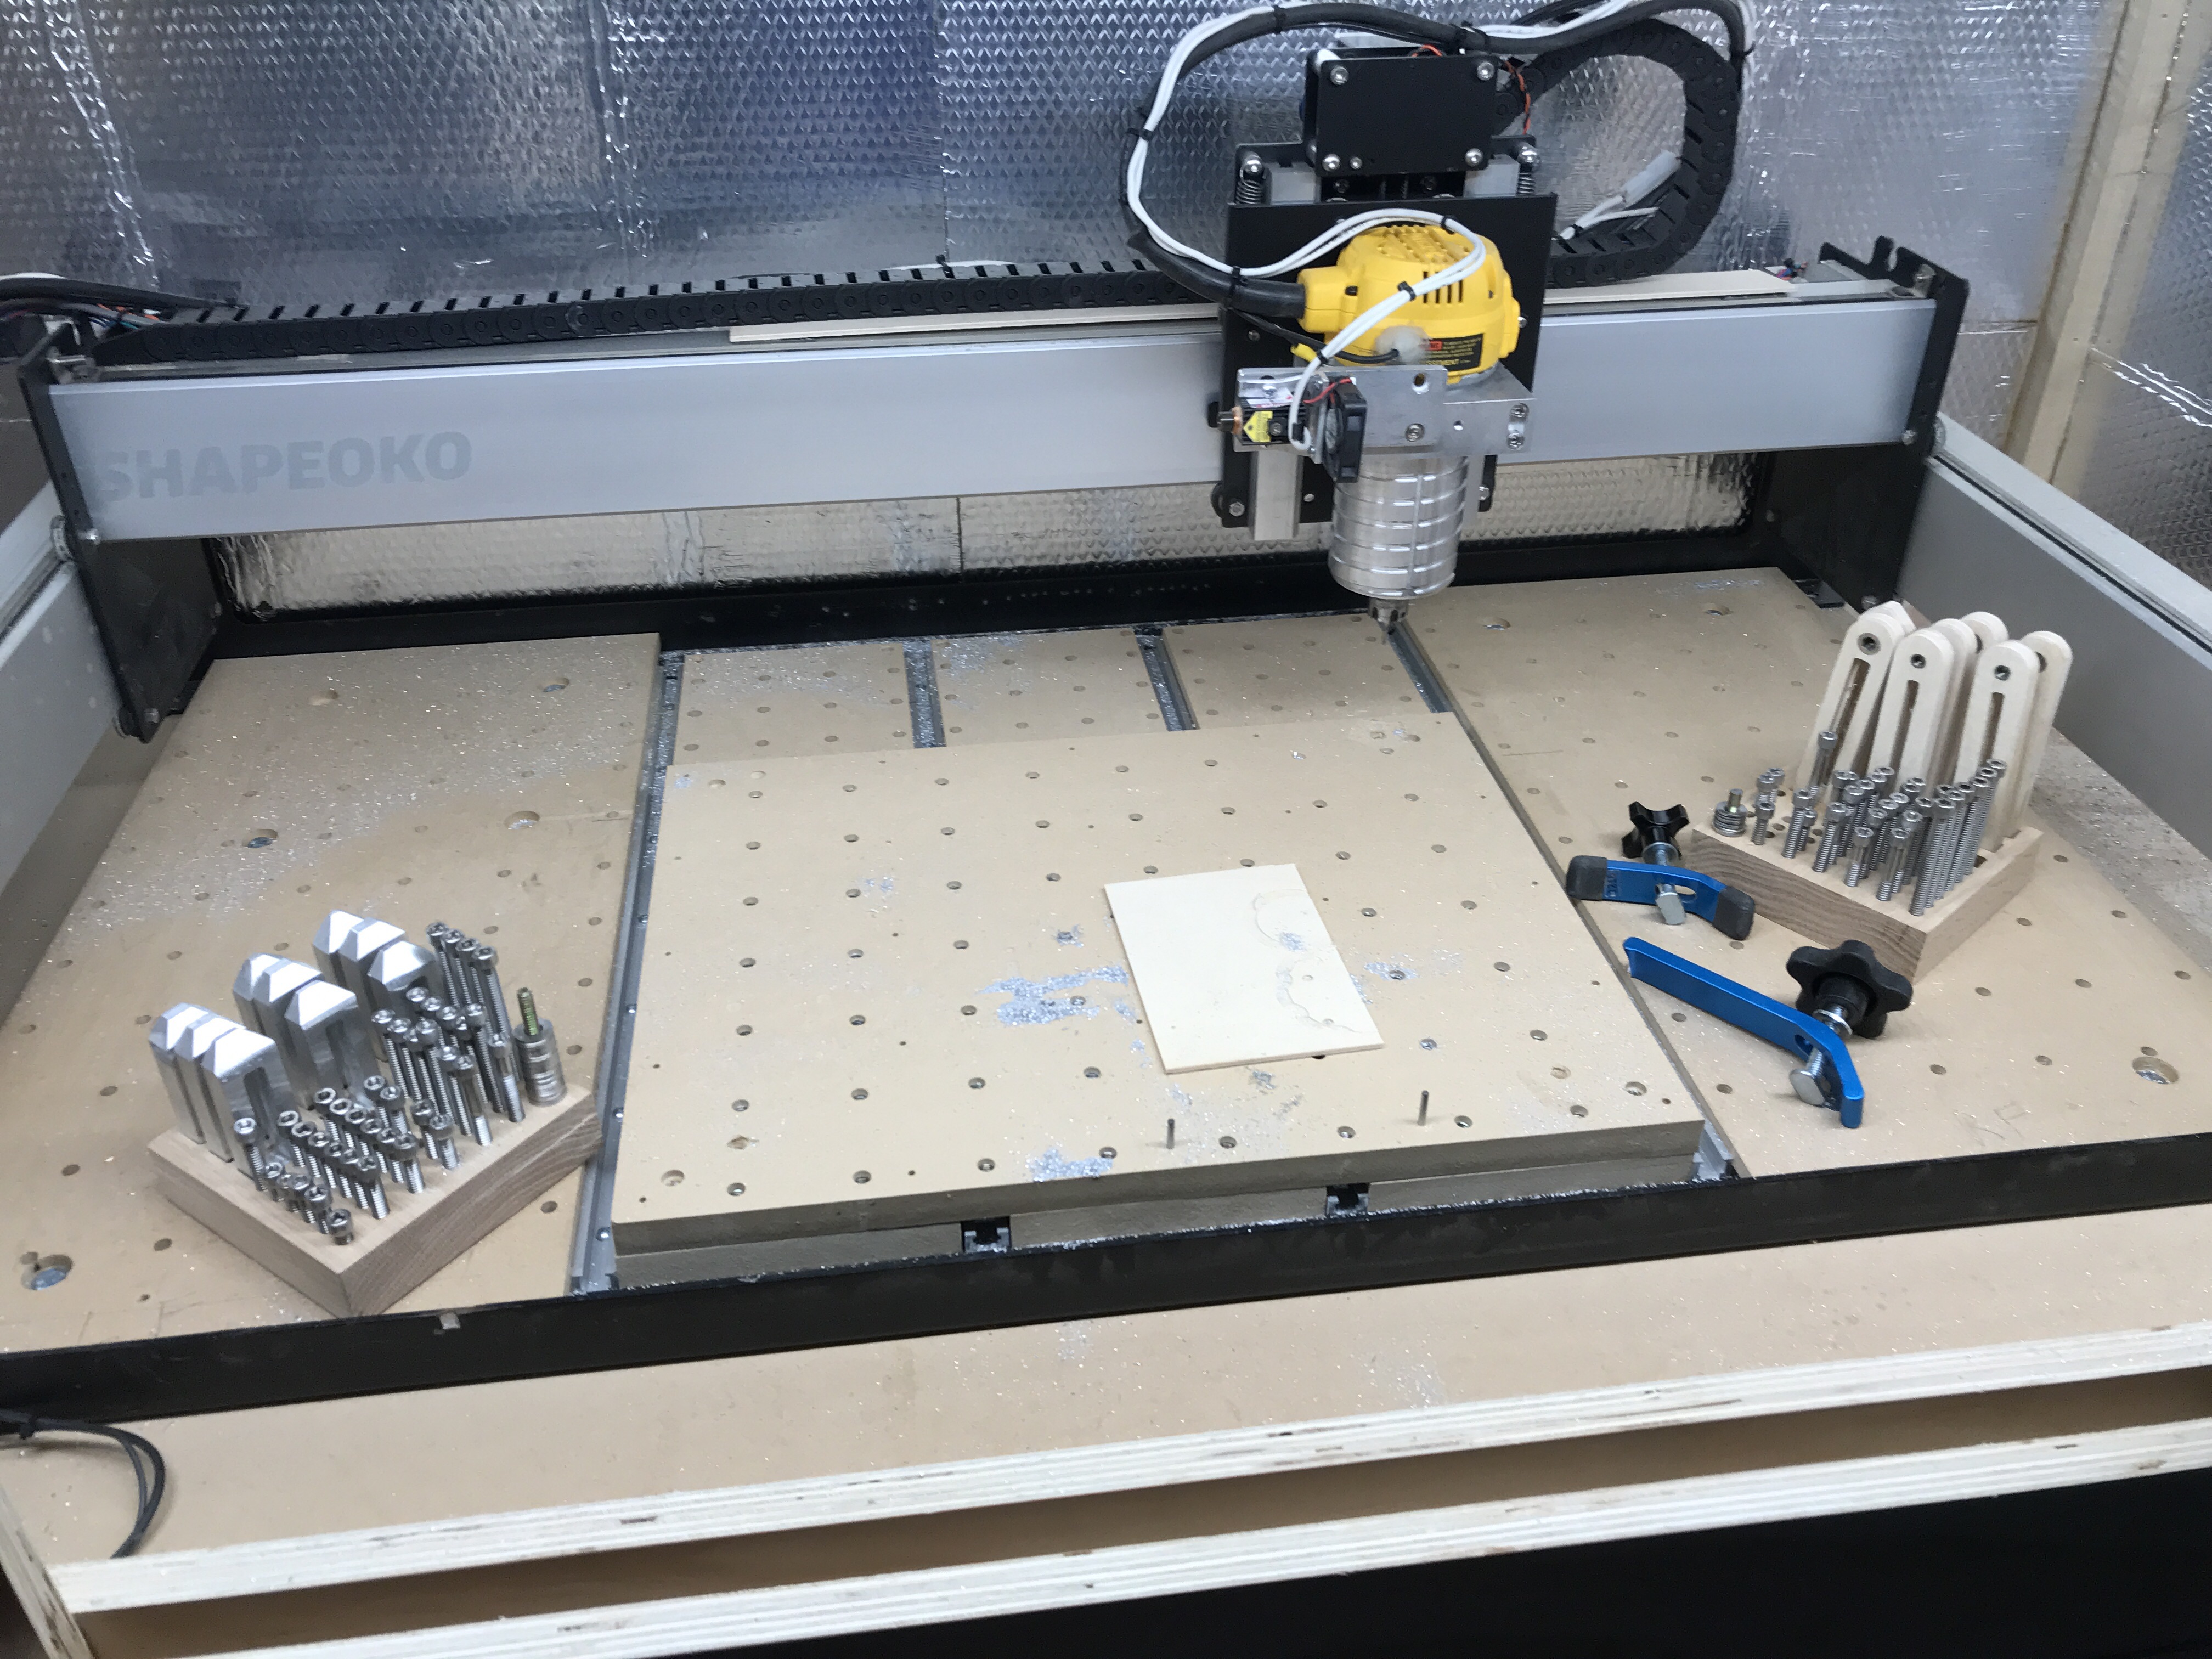
FWIW, I’ve gone through several iterations of waste boards, job holding techniques over the past couple of years. This is my current setup. Sorry it’s kinda messy but I actually use my machine, a lot
The machine itself sits on an oversized mdf base that is screwed to torsion box. It has a t-track outside the machine frame in front, parallel to X, to accommodate oversized pieces. The secondary wasteboard is currently comprised of five pieces separated by 4 t-channels. The “precision” wasteboard sits on top of the secondary wasteboard, it has been face milled and dowel holes cut to provide the ability to easily and accurately align jobs with the x and y axis’.
In future I will eventually replace the left and right sides of the secondary with four pieces separated by t-track. I may also cut another 30 inch wide “Precision” section if the need arises. Obviously the “precision” section can be easily removed to enable an increase in Z. Having the waste board in pieces like this makes cutting seas of holes less tedious and enables replacing only the damaged sections rather then the whole entire waste board.
This is all over kill for most users but it’s what I like, flexibility.
I posted this elsewhere, but I’ll post it again; I went 100 rounds on the right way to hold stuff: t-track, threaded inserts, etc. Never quite worked for me. Now I just screw things to the wasteboard. Easy, works every time. You could even use brass screws if you want to save your cutters accidental contact.
I have threaded inserts in my stock table and then I made a 14x14 mdf sheet that bolts on top with it’s own threaded inserts. I use some 3d printed clamps but usually just double sided tape. I do like the C3D table addon with the t tracks but then you can’t machine level that easily so I haven’t gotten it.
I probably went 100 rounds as well between threaded inserts, T track, tape, glue, the list goes on. What I found is there is no “perfect” clamp unless you cut the same materials all of the time. Sometimes I clamp, sometimes I tape, sometimes I screw it down. People that know I have a CNC router but have never used one tend to think you just turn it on and out comes a part. In reality the work that goes into design, tool paths and clamping strategies take way more time and mental horsepower. I think leaving clamping options out of the SO3 “kit” is a good thing, because most likely whatever was added to the kit would raise the price, yet may never get used depending on the projects you do. Just my $0.02
I am a woodworker so this might not apply to you, but I use my chamfer bits all the time. I picked up a cheap 2 bit (small and medium) from the big box store a long time ago and I think they cost like $5 for the set. You dont need a chamfer router bit, you just need something to ease the edge of the holes. A large drill bit works well also.
I’ve beeb milling in a shapeoko for almost a year and a half. Only recently did I start to use the tape and glue method. Changed my life! Works with plastic, aluminium, steel, wood and costs about 1p per job…
Yeah, masking tape and CA glue 100% recommended.
Only downside is going into the local hardware store and buying like 50 packets because it on special and getting weird looks from the sale staff thinking you are a glue sniffer.
Thanks guys, I went the CA glue with tape. I went as far as to use it to connect my wasteboard on the baseboard as well. I couldn’t find an accelerator though. Do you know the scientific name for this as I am not in the US and not sure what to google for it.
Alcohol, baking soda, pretty much anything that provides an accessible (OH) and doesn’t otherwise interfere with the cure or damage the parts being bonded. Baking soda is nice since it is non-toxic, cheap, and the residual doesn’t cause problems with the bond or most materials, and provides (OH-). Ditto plain water.
The alcohol isn’t ionic, but still provides an (OH) (I don’t know the chemistry off the top of my head for this case… it may be due to the water dissolved in the alcohol, rather than the alcohol itself, but IIRC, the alcohol is actually involved)