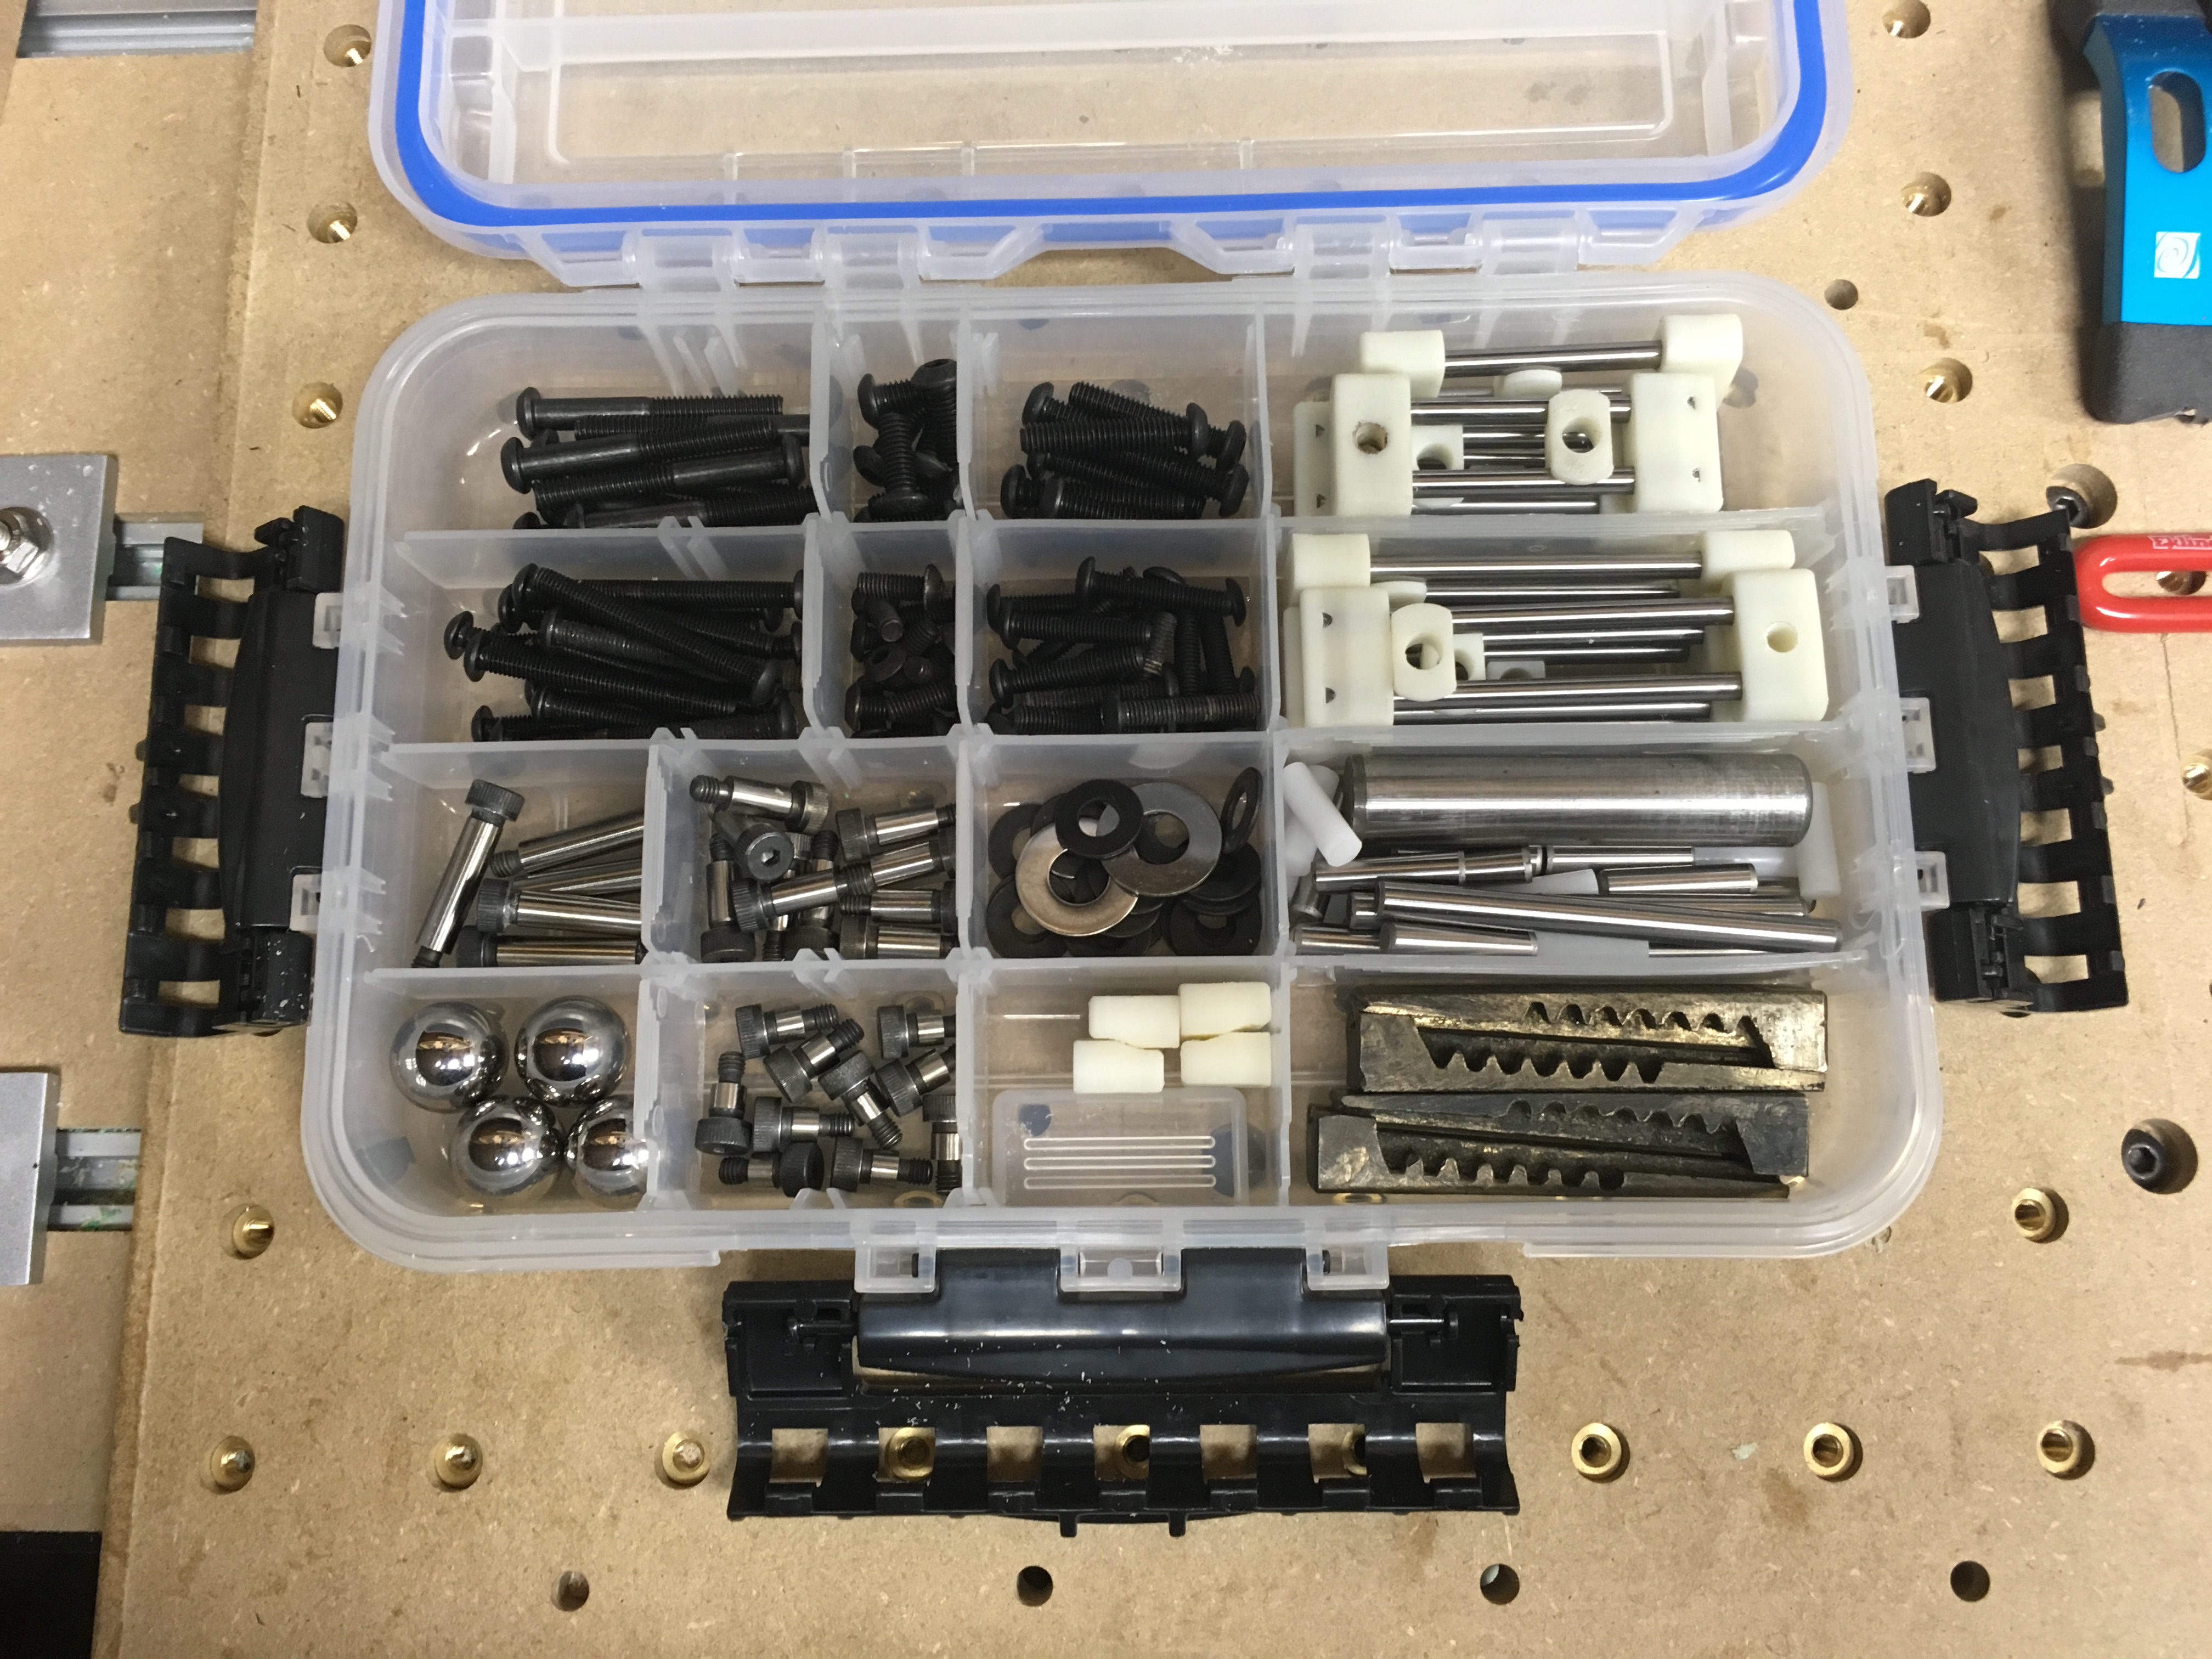
Here’s the majority of clamping kit of stuff I use all the time with my machine. The Suckit “oops” clamps just replaced some other rockler sourced camps. There are a few other clamps, but they’re more special purpose (some t-track stuff for side clamping, mostly)
Stuff that’s in there:
Shoulder bolts, several lengths
1/4-20 screws for the oops clamps
suckit “oops” clamps (I really like these, will see how they hold up)
Washers for the screws
Various dowels - some fit the table, some are for hold-down along the sides of material.
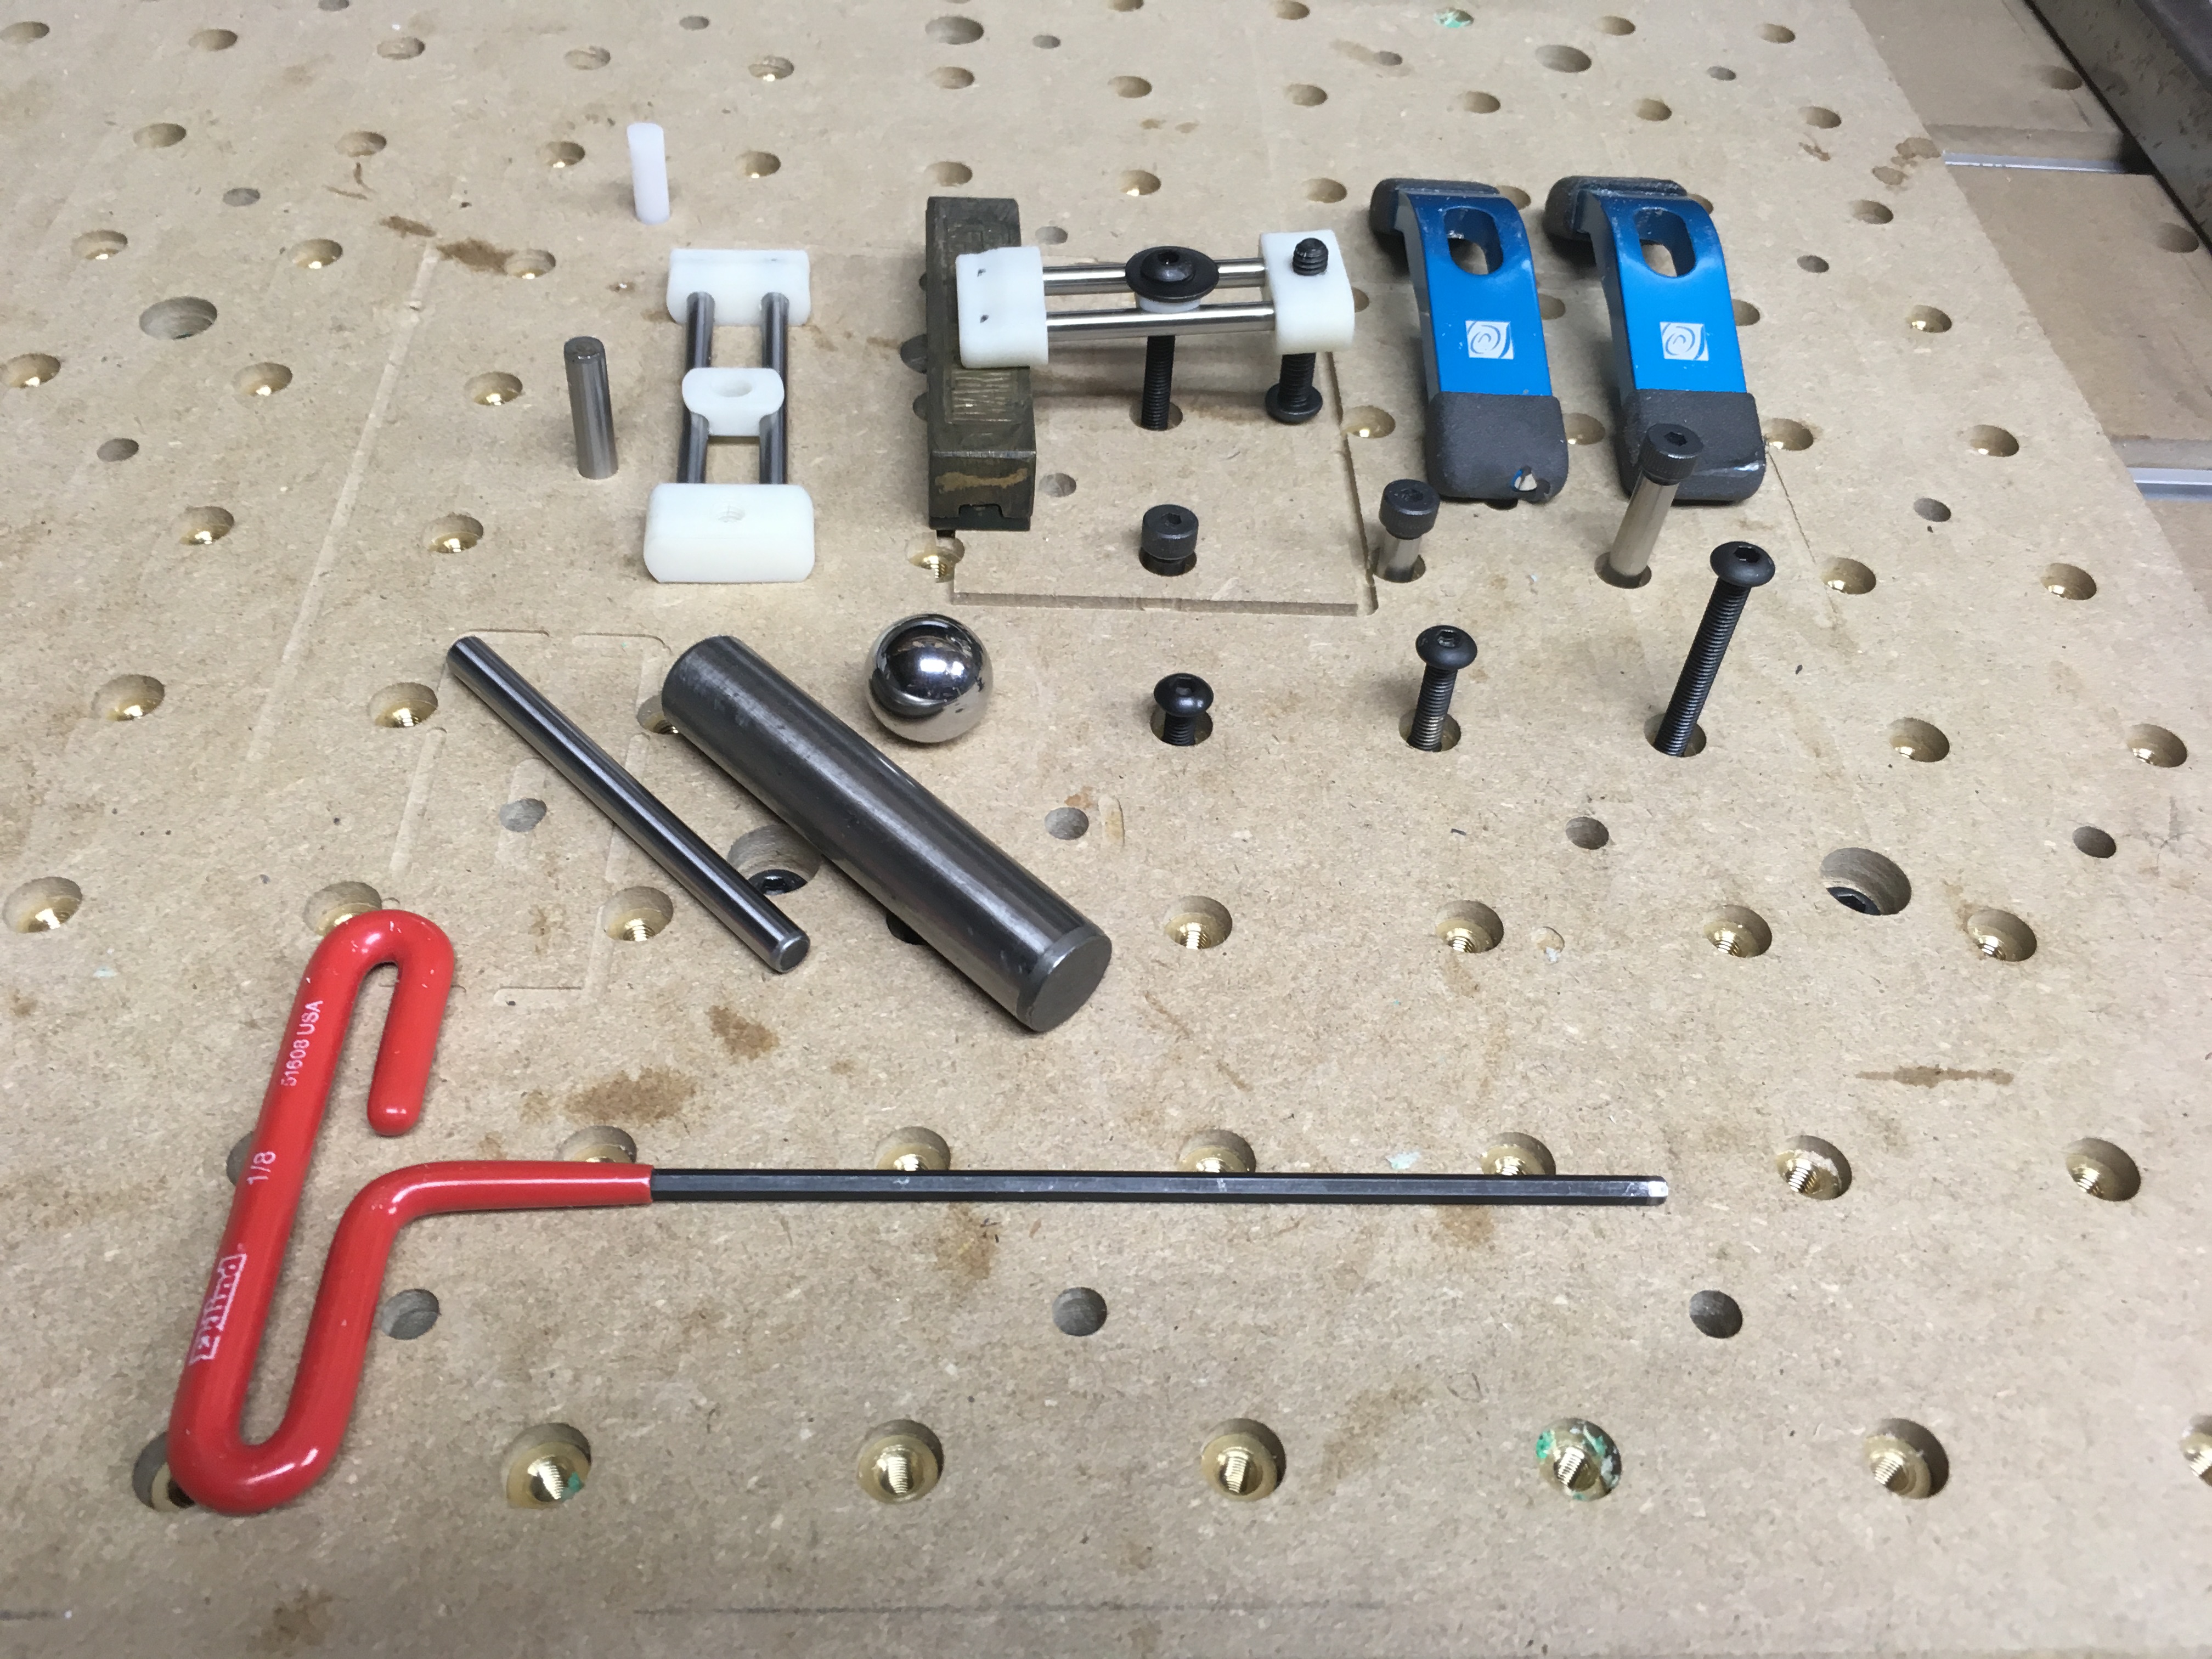
[two short dowels in the pin holes in the board, long dowel against that, then a cam clamp from the other side, part won’t lift off the table when clamped]
Big ball bearings - again, side hold-down without lift.
A few quoins (brass, jaggy looking ramps on the right)
Hm. Add some painters tape, CA, and activator and you’ve got a pretty sweet kit there. Maybe a few wood screws too to screw down stock sometimes. Nice!
I generally use the black screws with a washer around an edge, or can get things to work with a cam clamp somewhere. I do use CA/tape for some things, but it’s pretty rare.
Fair question, this is a great trick. When you use a cam type clamp from the side, the material being clamp tends to lift off the table. This is why there is discussion of “jaw lift” with respect to machining vices. Putting the ball bearing (or a dowel) between the moving jaw and the material prevents the upward force from moving the material, so it doesn’t lift (the ball rolls a bit). The balls are better when there are a couple directions of force involved (say, a triangular object and you’re applying force to one of the angled sides), or something taller. The long dowels work well for short material (thinks sheets of 1/4" plywood)
It’s a neat trick I picked up out of a machining “how to square material” youtube vid from This Old Tony. I’ve since seen it elsewhere, but the same technique applies.
Here are a couple pictures, I didn’t have something handy that was triangular.
Mike, what kind of cam clamps are those you’re picturing with the balls and rods? They sort of look like Rockler but I think the Rockler are plastic and the ones in your picture look like some sort of metal?
They’re rockler, and they’re metal. Better be, they’re kind of expensive for what they are. For what I’ve been doing recently, I haven’t been finding them too useful. They are well made, seem to work ok, just not working well with my projects. I’ve got a “sub” wasteboard on top of the t-track (you can see it in the original picture) that’s got threaded inserts in it, and I have been using that for almost everything recently.
I had to drill out the slot clamping hole so that it became a thru hole. They are hardened so I used a carbide end mill. Then used a t-nut in the table slot. Bought the 7/16 size.
Yeah these are made to fit into a bridgeport mill type T-track. These were the smallest I could find. Plenty sturdy for any sign project that I have done. A T-nut in the slot holds down well. These are a cheap version of a Mitee Bite clamp.
I decided to use side clamping because it’s too much hassle worrying if the bit or dust boot would hit a toe clamp.