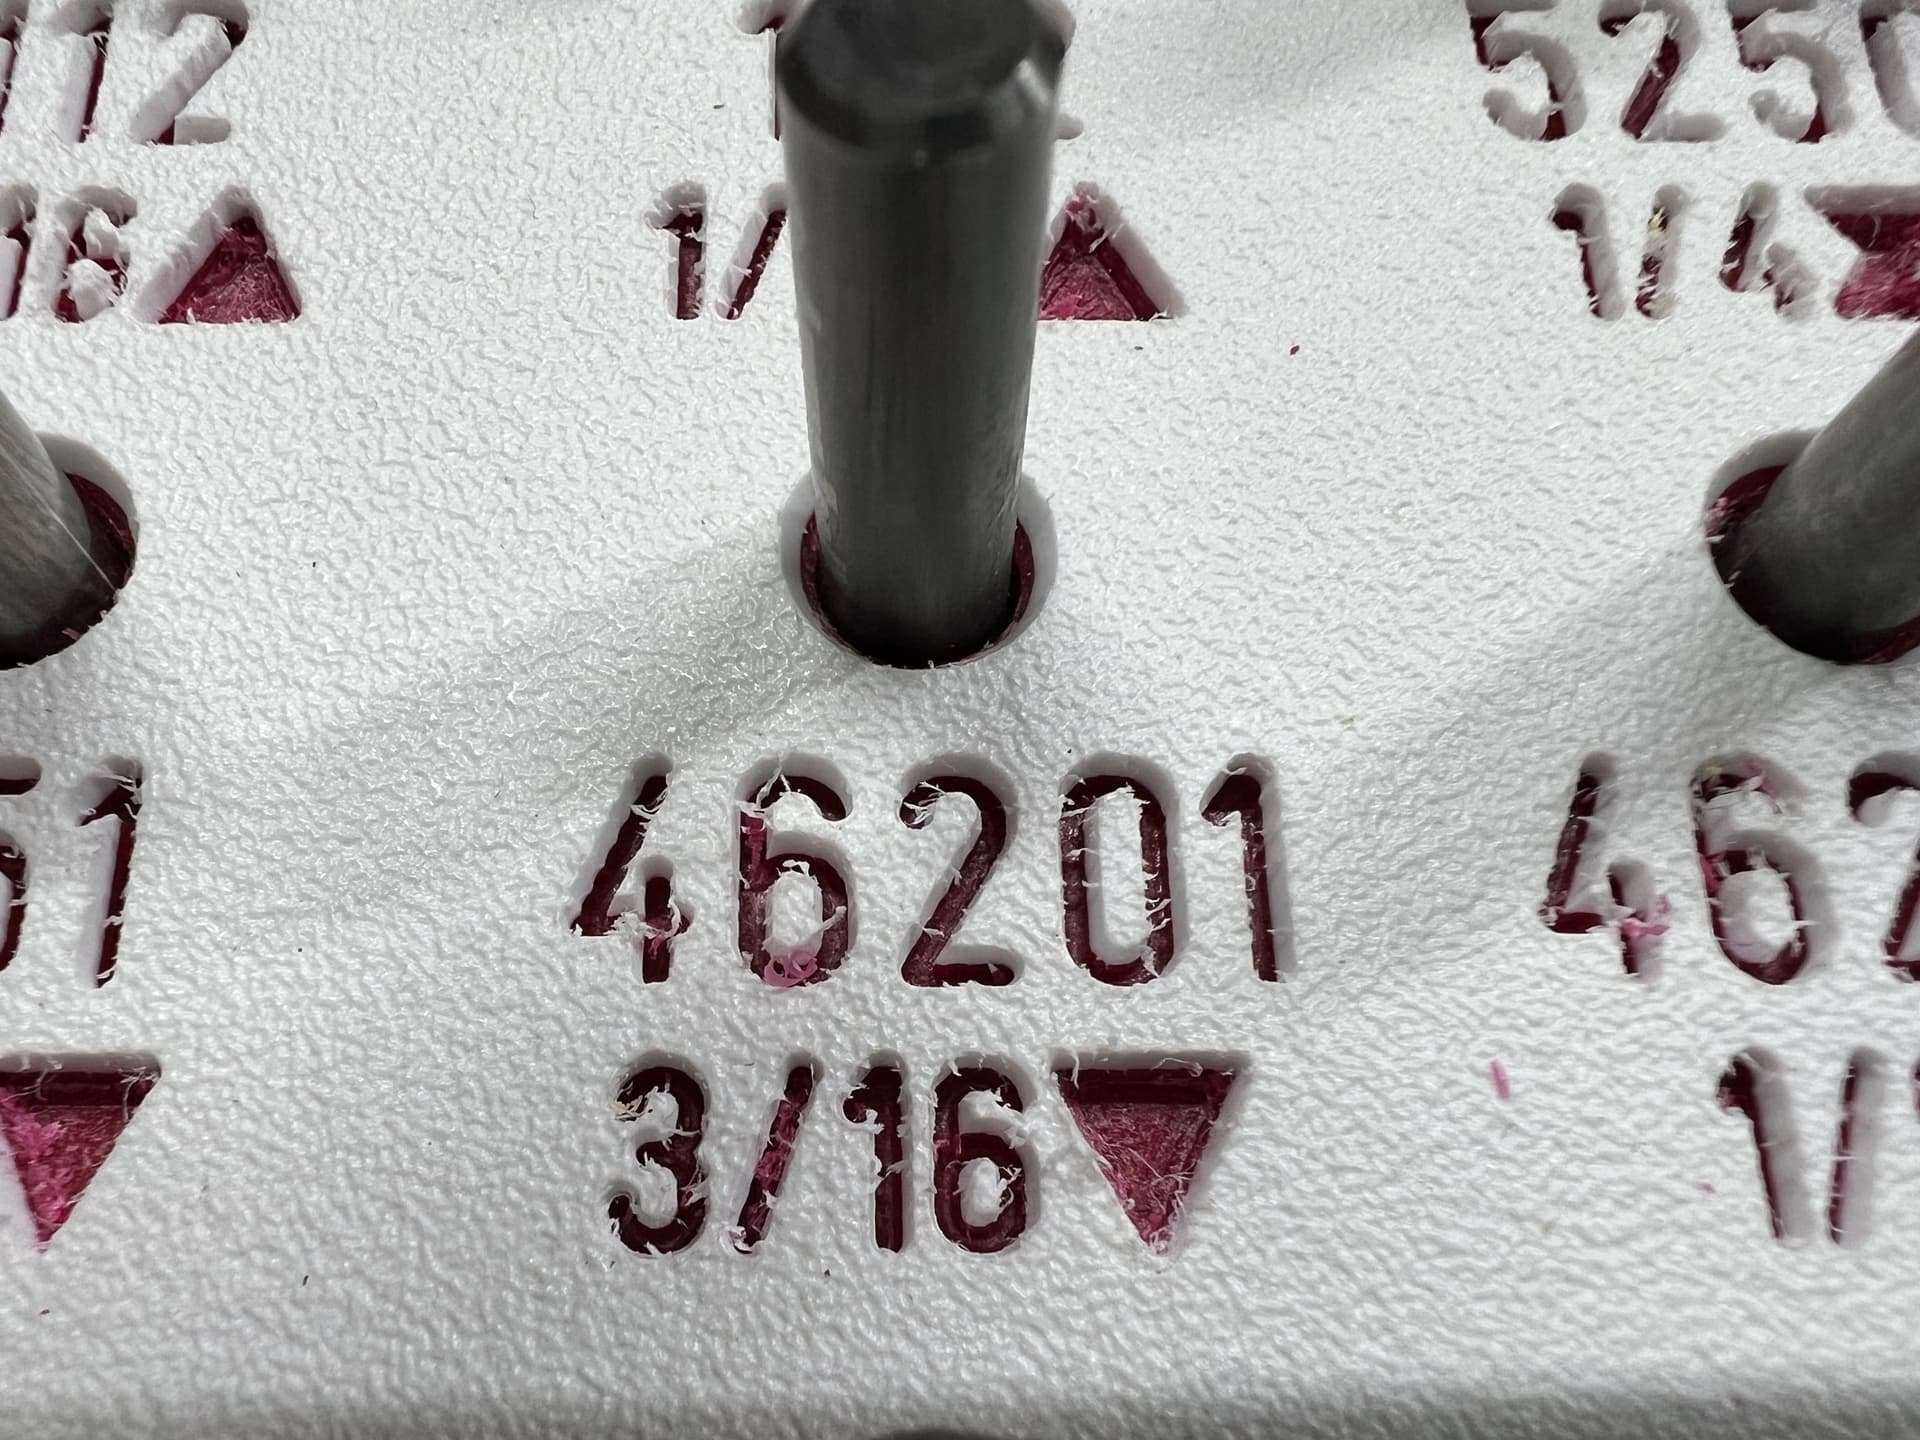
The material is the two layer PVC, so the cuts have to be at least 1/16 inch deep to get to the alternate color. Most of the material cuts cleanly, but it leaves tiny strings that are uncut. In the above photo I have already brushed the cut material away, what you see are still attached.
I like the material, just finished making the 3rd insert for my Bit Box.
The result is usable, but want to figure out how to get a cleaner cut because I like the material. I just don’t like cleaning it up by hand with an razor, it’s tedious and time consuming.
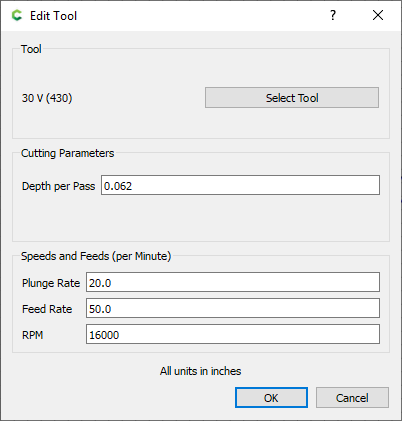
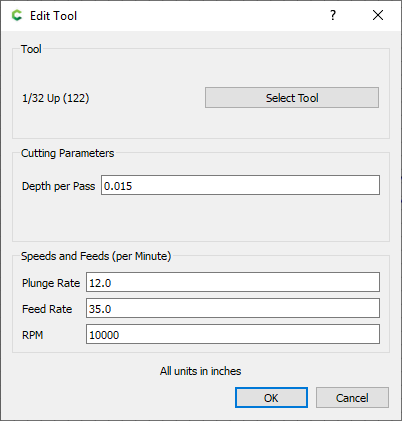
Here are the feeds and speeds I used
Push the V bit faster?
Adjust RPM?
Depth per Pass?
LOL: It still bugs me about the 201 and 202 tool naming. I think they did it on purpose!
What i normally do is when it is finished i go back and run a 1 shot full depth pass and that takes away all that was left behind. You can also speed it up if you want because it is just making a cleanup pass.
If it makes you feel better, it bugs me too. The person who did it had a reason, but it wasn’t a good one, and it was too late to fix it when we found out about it.
The plastic insert is replaceable, which is why I was making this 3rd version. I would agree with anyone that said this box is a bad way to organize and store bits. But the fancy box makes me smile.
Usual preface, I’m with PreciseBits so while I try to only post general information take everything I say with the understanding that I have a bias.
There’s 2 common issues here that I would look at, shear, and minimum chipload. Without enough shear force material can “escape” the cut. The easiest way without changing tooling to increase it would be to increase your RPM. However that gets into the other issue of minimum chipload. Every material and tool geometry combination as a minimum chipload needed to cut a chip. In general the softer and more flexible the material the bigger the chip required (the chip needs to be strong enough to support itself). If I calculate the chipload the 30° and those settings it’s 0.001". That’s less than half of the rule of thumb number for plastic.
Between the 2 I’d probably go after chipload first. The simple answer to that is to feed faster. However, there’s another issue here which is that the cuts are very short. I’m not sure what the acceleration is set to on the Shapeoko but for 20" (508mm)/s/s you will only be able to get to ~60IPM in a 0.10" line cut. This kind of puts you in a bad place where you have to pick between shear or chipload. As I said I would probably go after chipload first. So without changing tools the best answer there would be to lower the RPM and keep the feed up. Ideally I’d want to cut it at least in half but I’m not sure if your using a spindle/router that can go that low.
The other obvious thing that could help is to switch tooling. Less flutes and a higher helix (flute twist) would help give you a lot more options to make this cut. I’d also look for something that’s an up-cut to clear the chips and prevent re-cutting.
Hope that’s useful. Let me know if there’s something I can help with.
I’ve had poor performance from the GrooVee downcut V-bits in plastic. Wood with a mask is the best thing for those bits, but wood is definitely where they shine for me.
I’ve tried test cuts in acrylic, and I couldn’t find a path that didn’t build up and melt.
Haven’t seen the cutter other than pictures so I don’t know the rest of the geometry. But anything with 3 flutes in plastic is a hard spot to be in with quick direction changes or short lines. For plastic in general it could work but is going to need a LOT of feed and fast. Ramped plunge might help too to keep from getting the dwells. The down-cut doesn’t help in this application either. Although I can see how if you were cutting with a mask that could be very useful.
I agree that a faster feed may be the best way to clean up the cuts. You have a low depth per pass, so feeding faster shouldn’t cause any issues. I will also note that it may be worth it to do one additional, full-depth finishing pass after the actual cutting is done to clean up the insides of the cut.