Looked up Lasers in subjects I see some people got the lazer from Jtech. was wondering how its working out for you guys.I do live in a cold climate so i am a little apprehensive about buying one.Any information on this subject would be greatly appreciated.
2 Likes
‘Laser’
‘S’, not ‘Z’.
1 Like
I have used a JTech 4.2 Watt laser for several years and it has performed faultlessly. I have engraved wood, aluminium, glass, slate and ceramics without issue. It depends on what your intended use is because today, blue diode lasers have exceeded the older limitations (5~7 Watt output power). This apparent power increase is achieved by stacking several low power diodes (typically 8 x 5 Watt units stacked) and combining the laser output for up to 40 Watts of output power.
Jay at JTech is well known throughout the industry for providing outstandingly great customer service and in all of my dealings with him, I can confirm that to be an accurate assessment of his services. You have nothing to lose by making your enquiries with him and then you will benefit from his guidance. He does not charge the cheapest prices but you pay what is fair and get the fantastic customer support with it.
pictures:
Image 1: This is an engraving of birds feathers on cherry wood
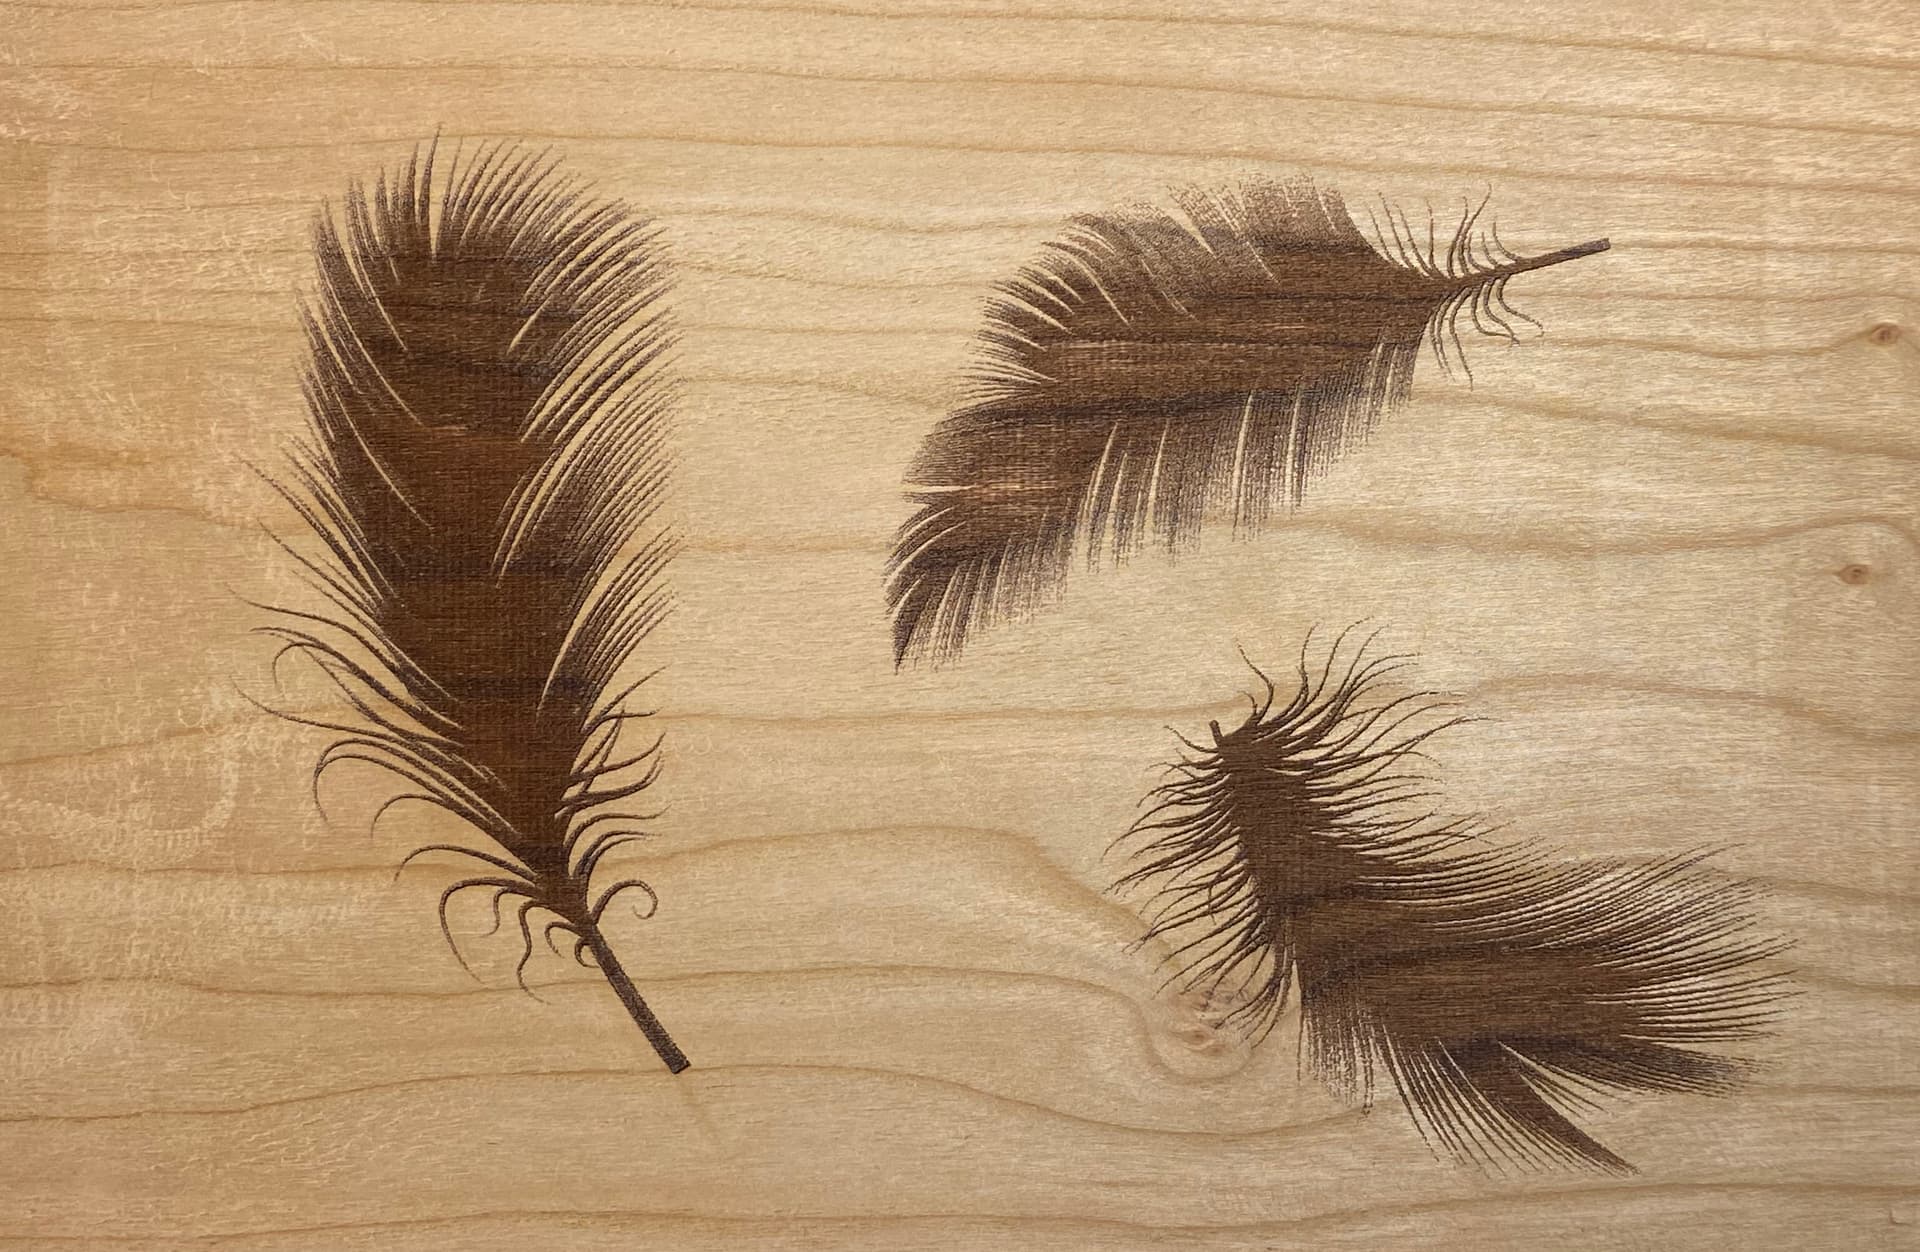
image 2: This is an engraving of a black bird on cherry wood
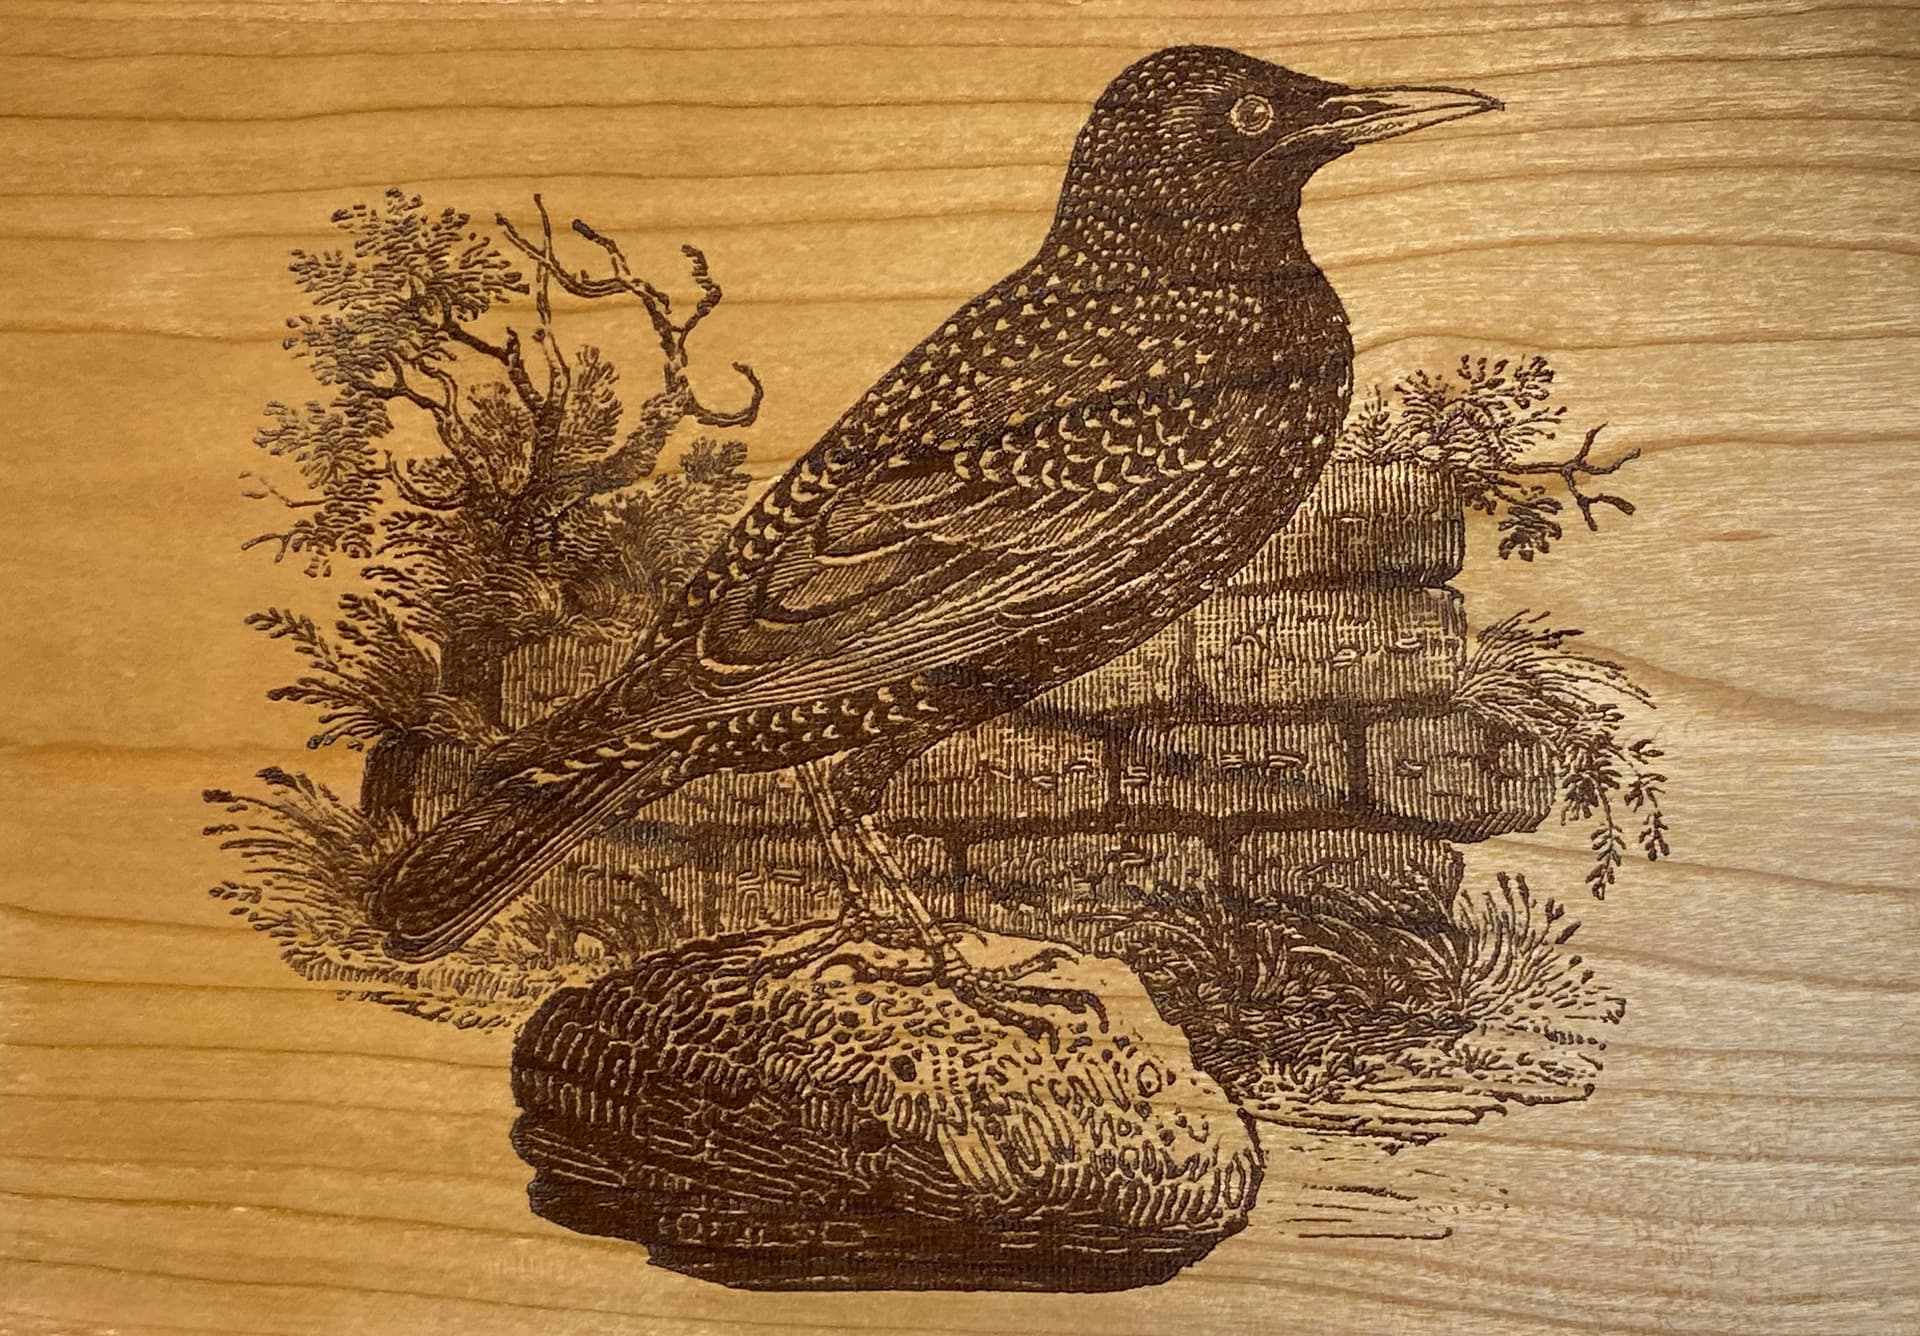
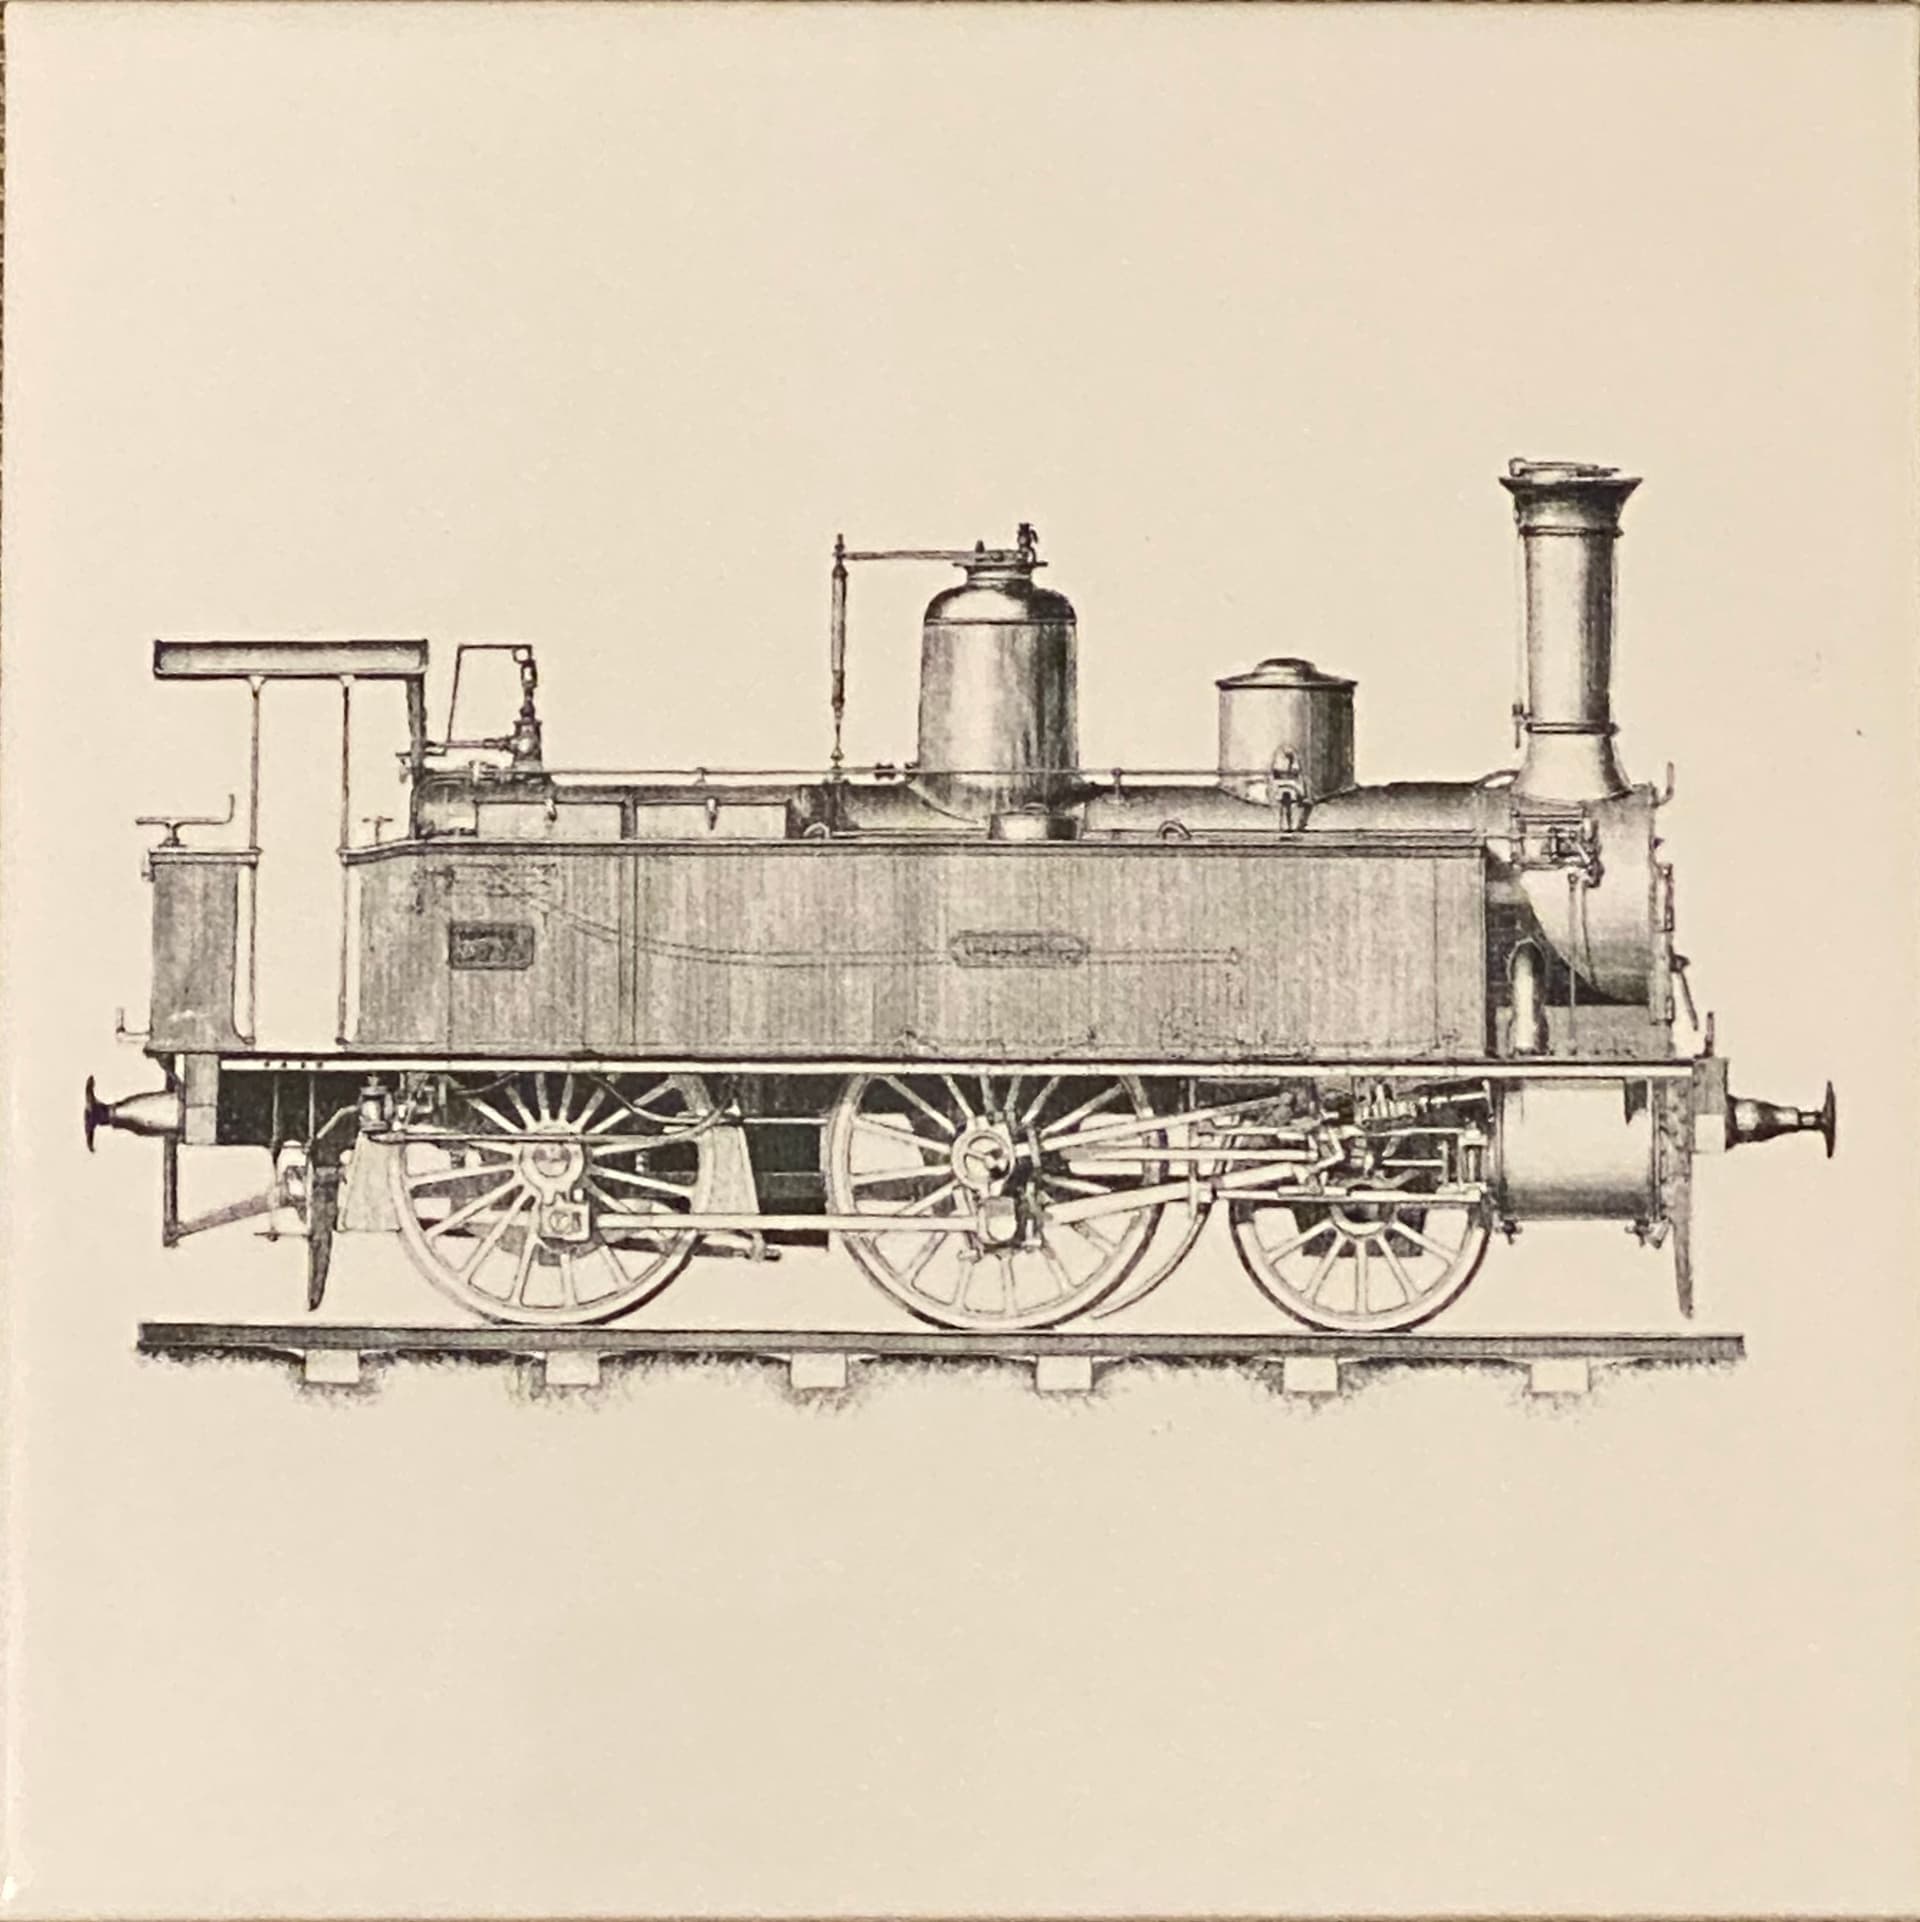
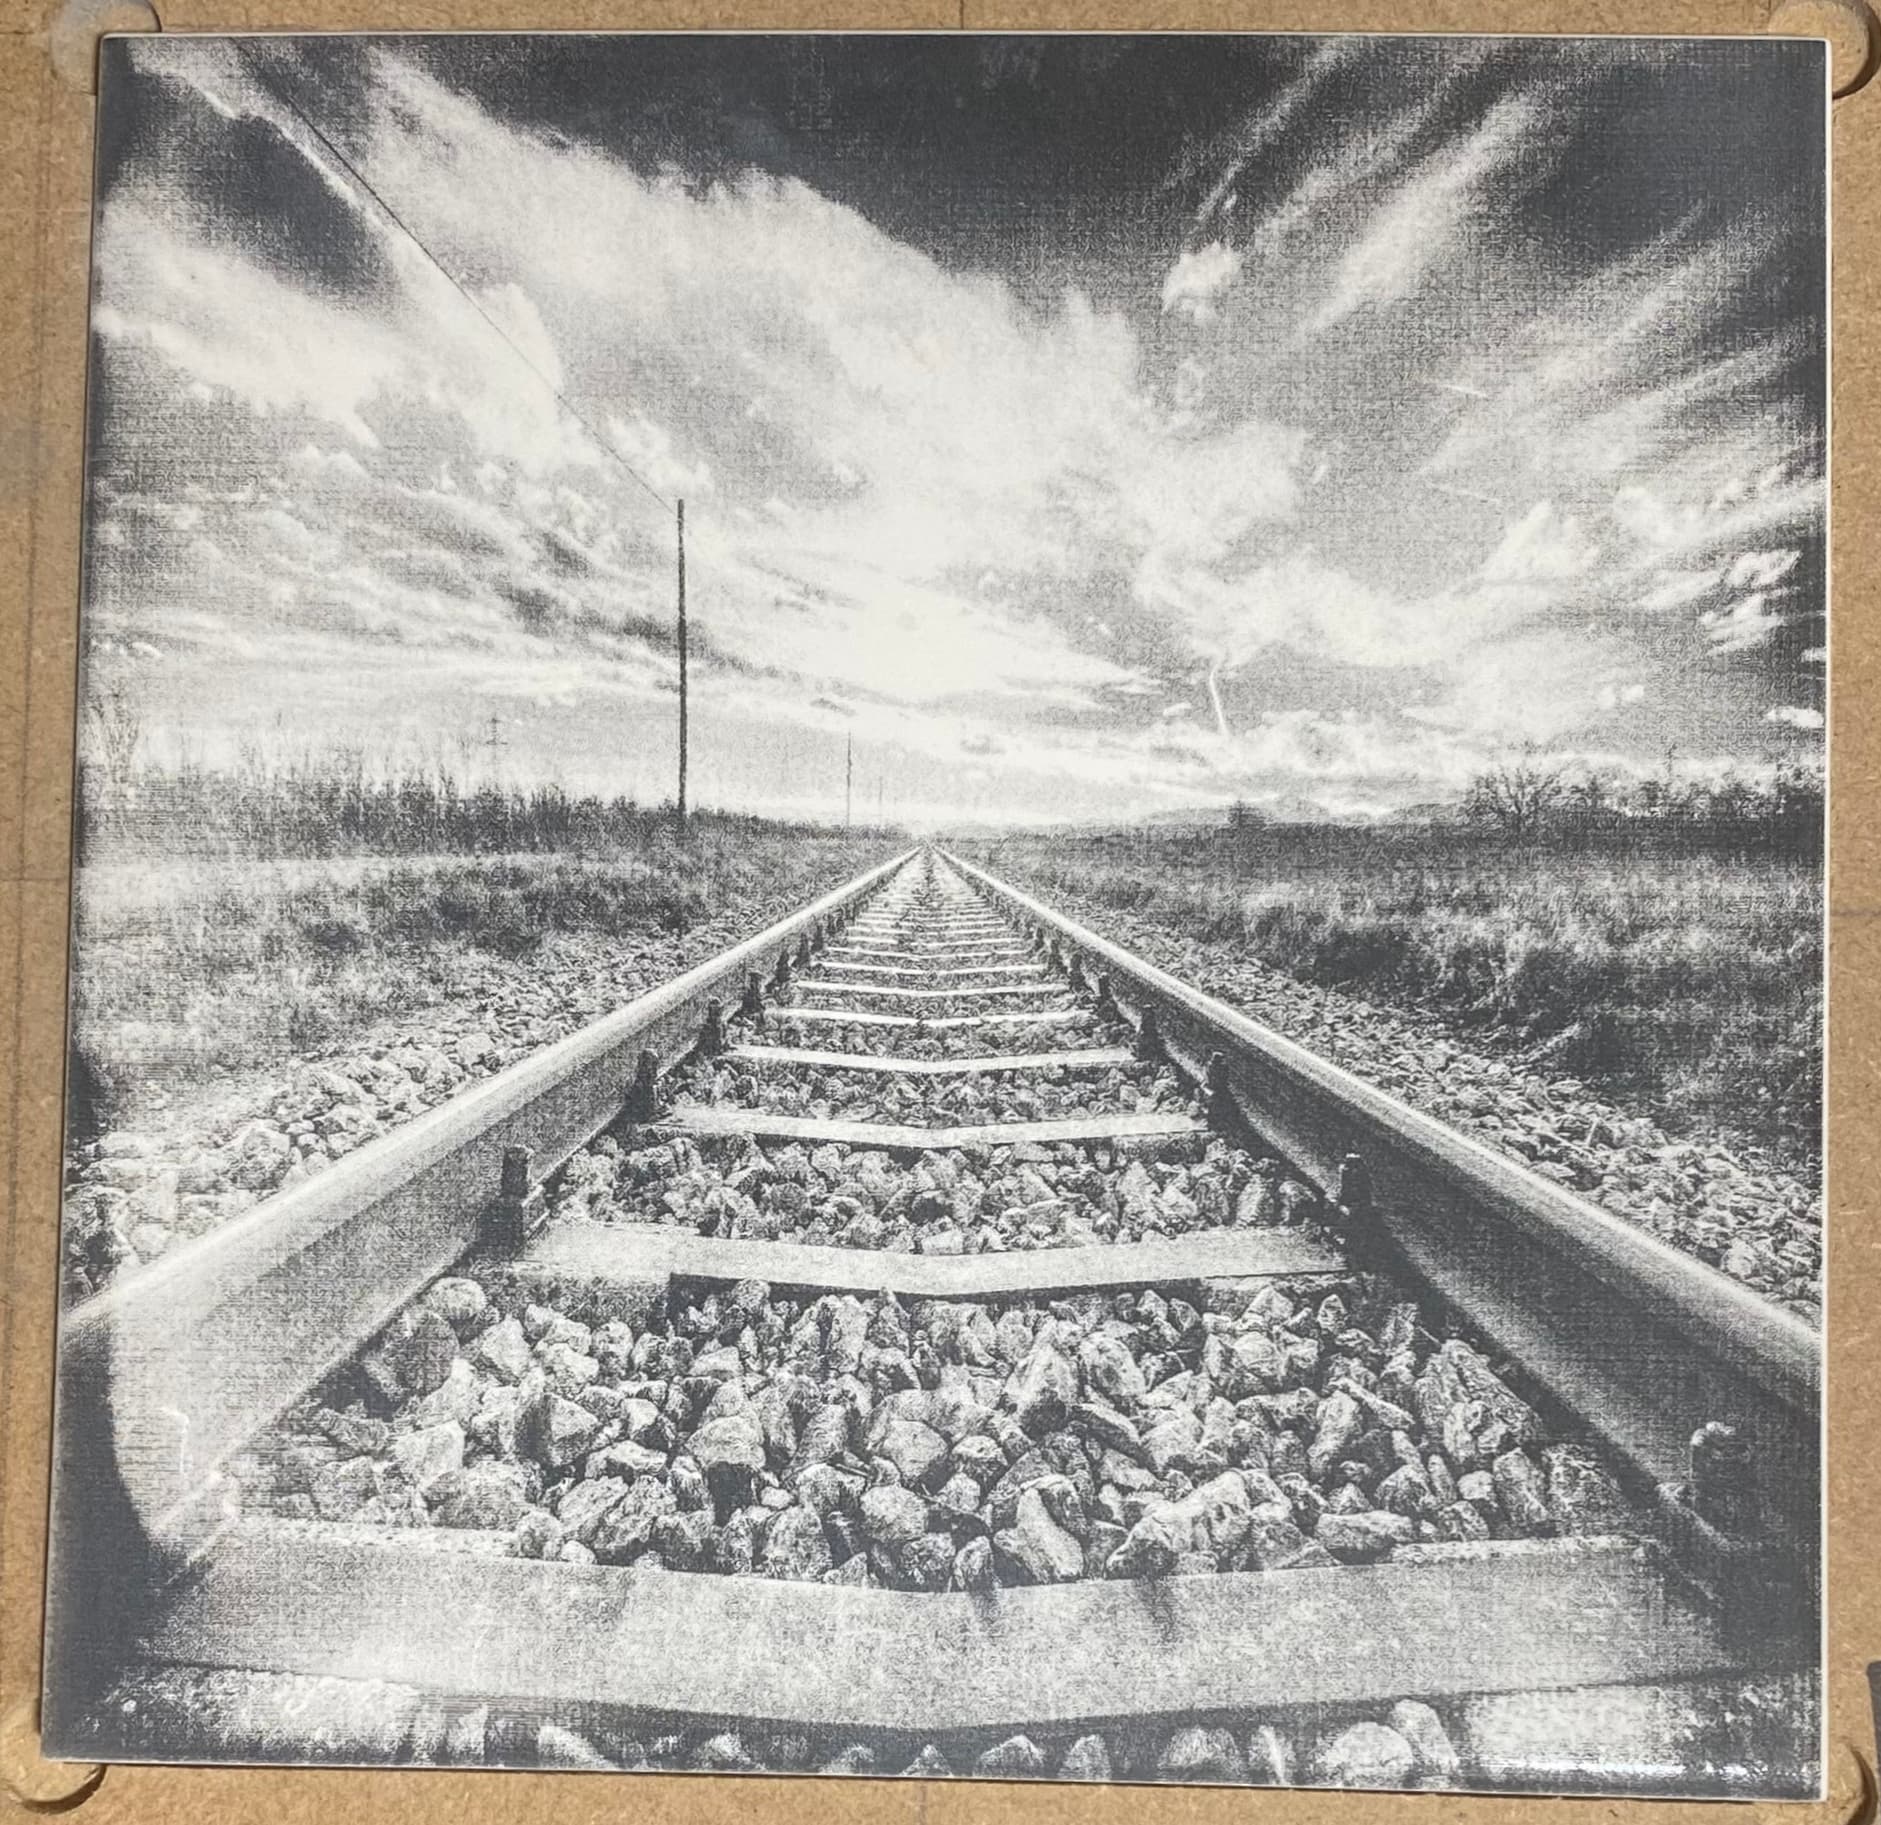
Image 3: This is an engraving of a narrow gauge train on ceramic, using Norton’s method.
Key to using any laser type (fibre, galvo, CO2 or diode) is the software. One of the most accessible laser software types is LightBurn, which will suit any laser you can obtain. They have a great community over here: https://forum.lightburnsoftware.com/ and the developers are really responsive to all questions and issues.
10 Likes
Hi I live in Quebec city which is indeed a cold climate. I am sharing my experience with you and may be with others that might be interested. I knew that with a laser, I would need outside ventilation. My SOP XXL is in my woodworking shop which is under my double garage with only one window which is about 20 feet from CNC. Also my CNC is not enclosed so I decided to go with a dedicated laser engraver which would share the corner of my shop where I do some spray printing occasionally which is next to the window.
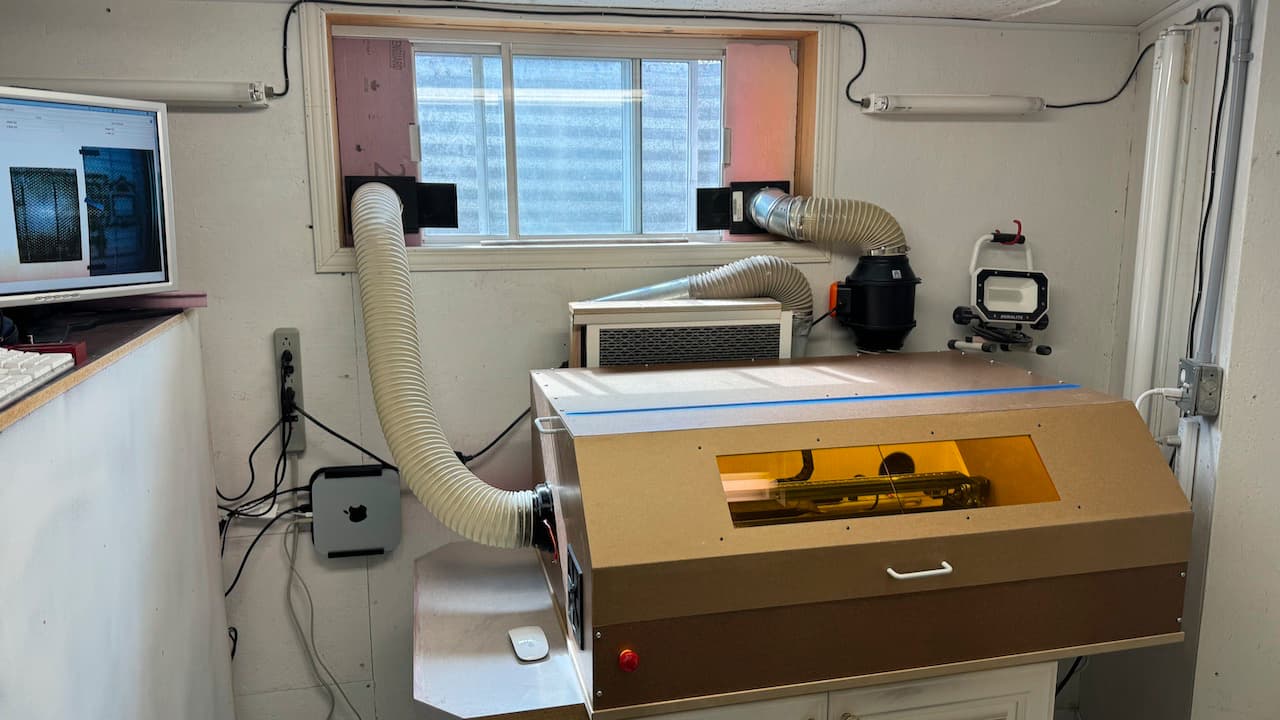
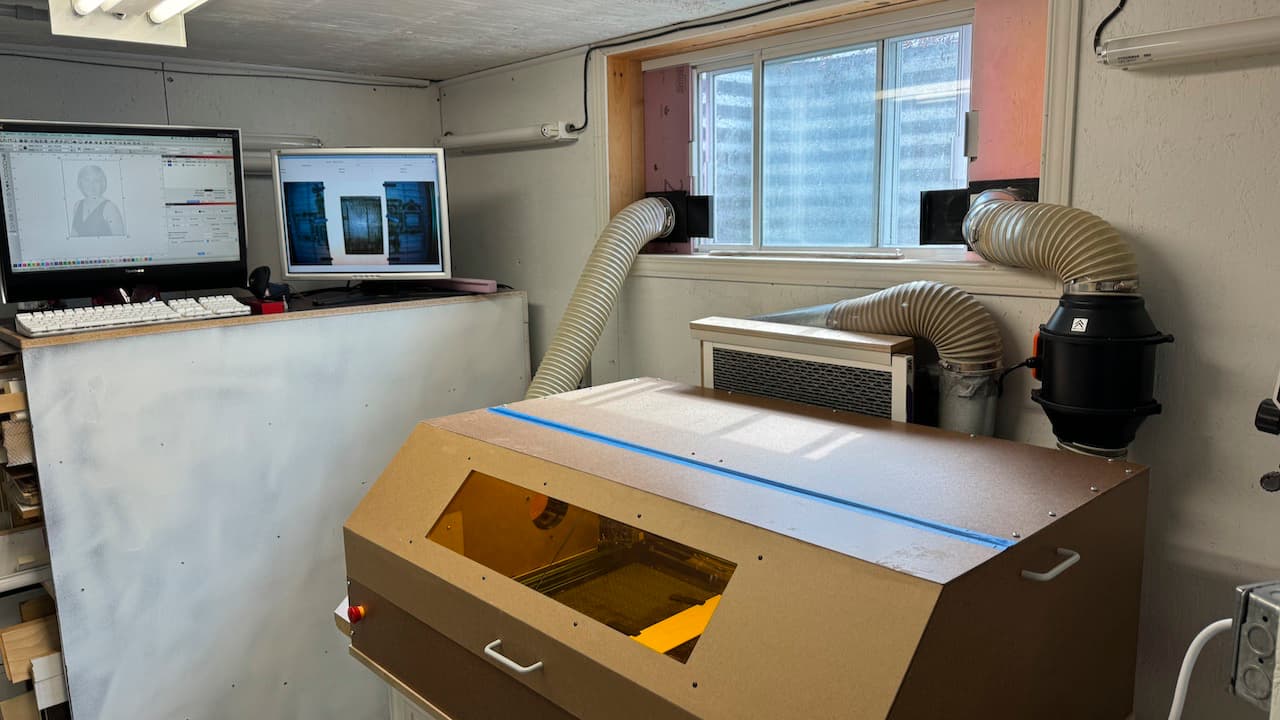
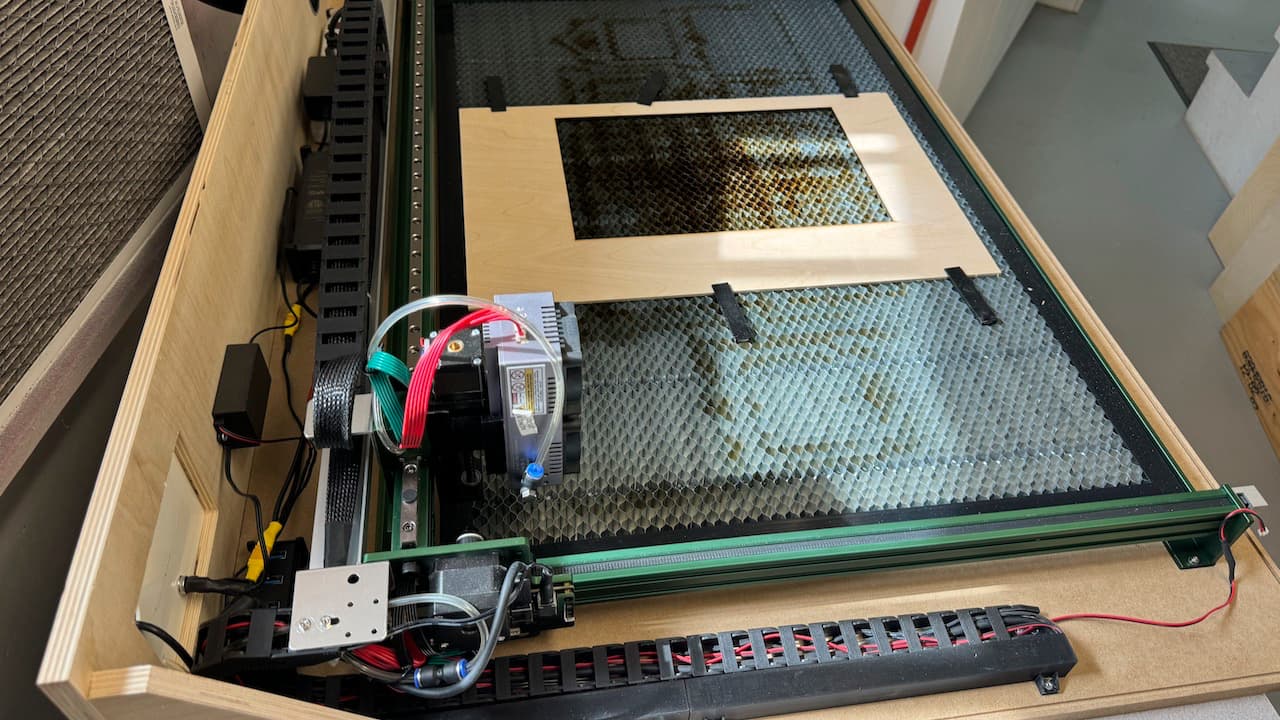
So a few months ago, I bought a NEJE Max 4 E80 20 Watts diodes laser engraver. It seems well built, have Z axis motorized like our CNC and a quite large area which can be optionally doubled. After finishing the assembly and smoking my shop with a few tests, the next thing was to build an enclosure.
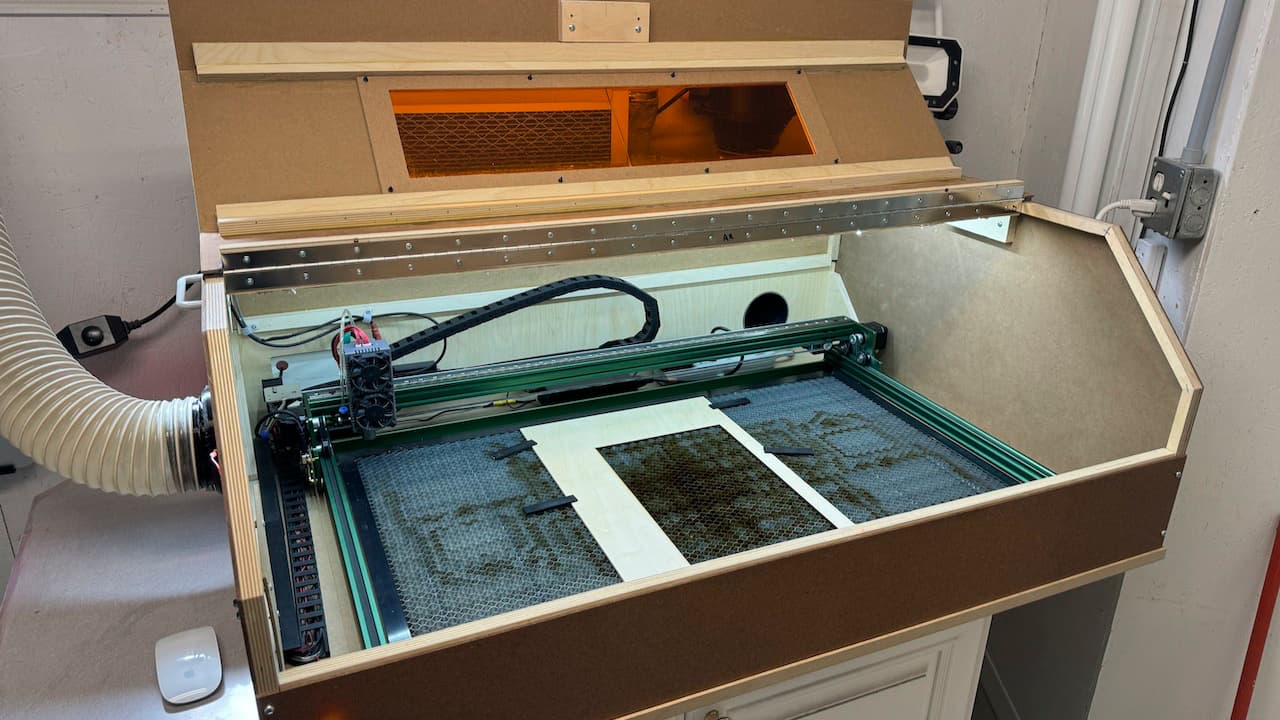
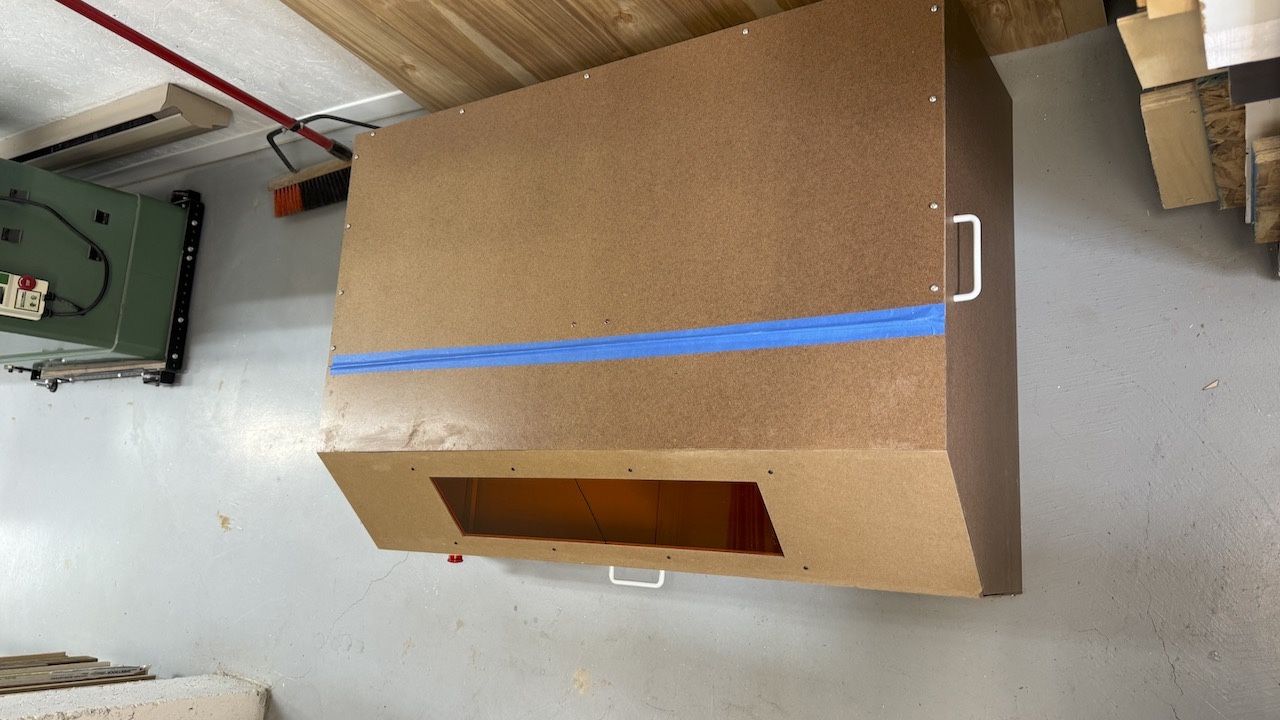
My requirements were to be able to move the laser an enclosure easily if I want to do some spray paint since it is sharing the same spot. So it required to be lightweight and easily hand transportable by one person. I made a MDF base and birch plywood back panel with some machining on the CNC. The removable top is made of 1/8" masonite reinforced with small parts of Baltic birch plywood. There is only 3 connectors to unplug before lifting the top. There are for the top camera, the power for the LEDs lightning and the front stop switch. All the others equipments are fixed to the base or the back panel.
The top enclosure is just sitting on the base in some groves, no screw. Also all the top parts are screwed in so it is easy to disassemble if some modifications are required.
The laser with the enclosure sit on old kitchen cabinet which I added some wheels which is used also for painting. Normally I paint my tool enclosures and tool cabinets like my CNC (previous post) but for this one I though it would be some kind of prototype which turn to be the final product…
Now for the ventilation I started with an inline duck fan going outside thru a window trap. For the input air, I 3D print a vent trap which is on the left side. But this approach was not efficient enough and had still smoke smells in the shop. Then I installed an intake duck to bring some outside air in the enclosure which made a closed air circuit with outside. Of course when it is -15C outside, it gets cold in the enclosure which seems not a problem for the laser.
Here are some advantages of a separate laser engraver. You can use the two equipments at the same times, the laser module can move faster than on the CNC specially when doing image engraving which required a lot of displacement, the laser is always ready to use. Some disadvantages are it is more costly, takes more room, and two equipments to maintain.
Lightburn is a very good software to use with lasers. They are developing an another software for working with CNC.
A laser engraver is a nice complement to a CNC router and a 3D printer…
2 Likes
Thanks for the response Im kinda leaning on the Jtech lazers as an add on to my cnc as im limited for room in my garage. Was wondering how everyone that uses jtec on there machine. The 44 watt lazer package is around 1600 bucks. I would hate to invest that much and not use it.
1 Like
Thanks for the response I considered a stand alone really don’t have room for it although it would be nice.
I have mine attached to my CNC machine. The 3D printed support framework worked well enough or a couple of years but eventually I made a support in acylic and then latterly, I duplicated that and made one in aluminium. I wanted to locate the laser to one side of the spindle mount. It was originally centrally placed and I gave myself an additional 50mm lateral movement of the router by reducing the amount of supporting framework for the laser.
A few explanatory images…
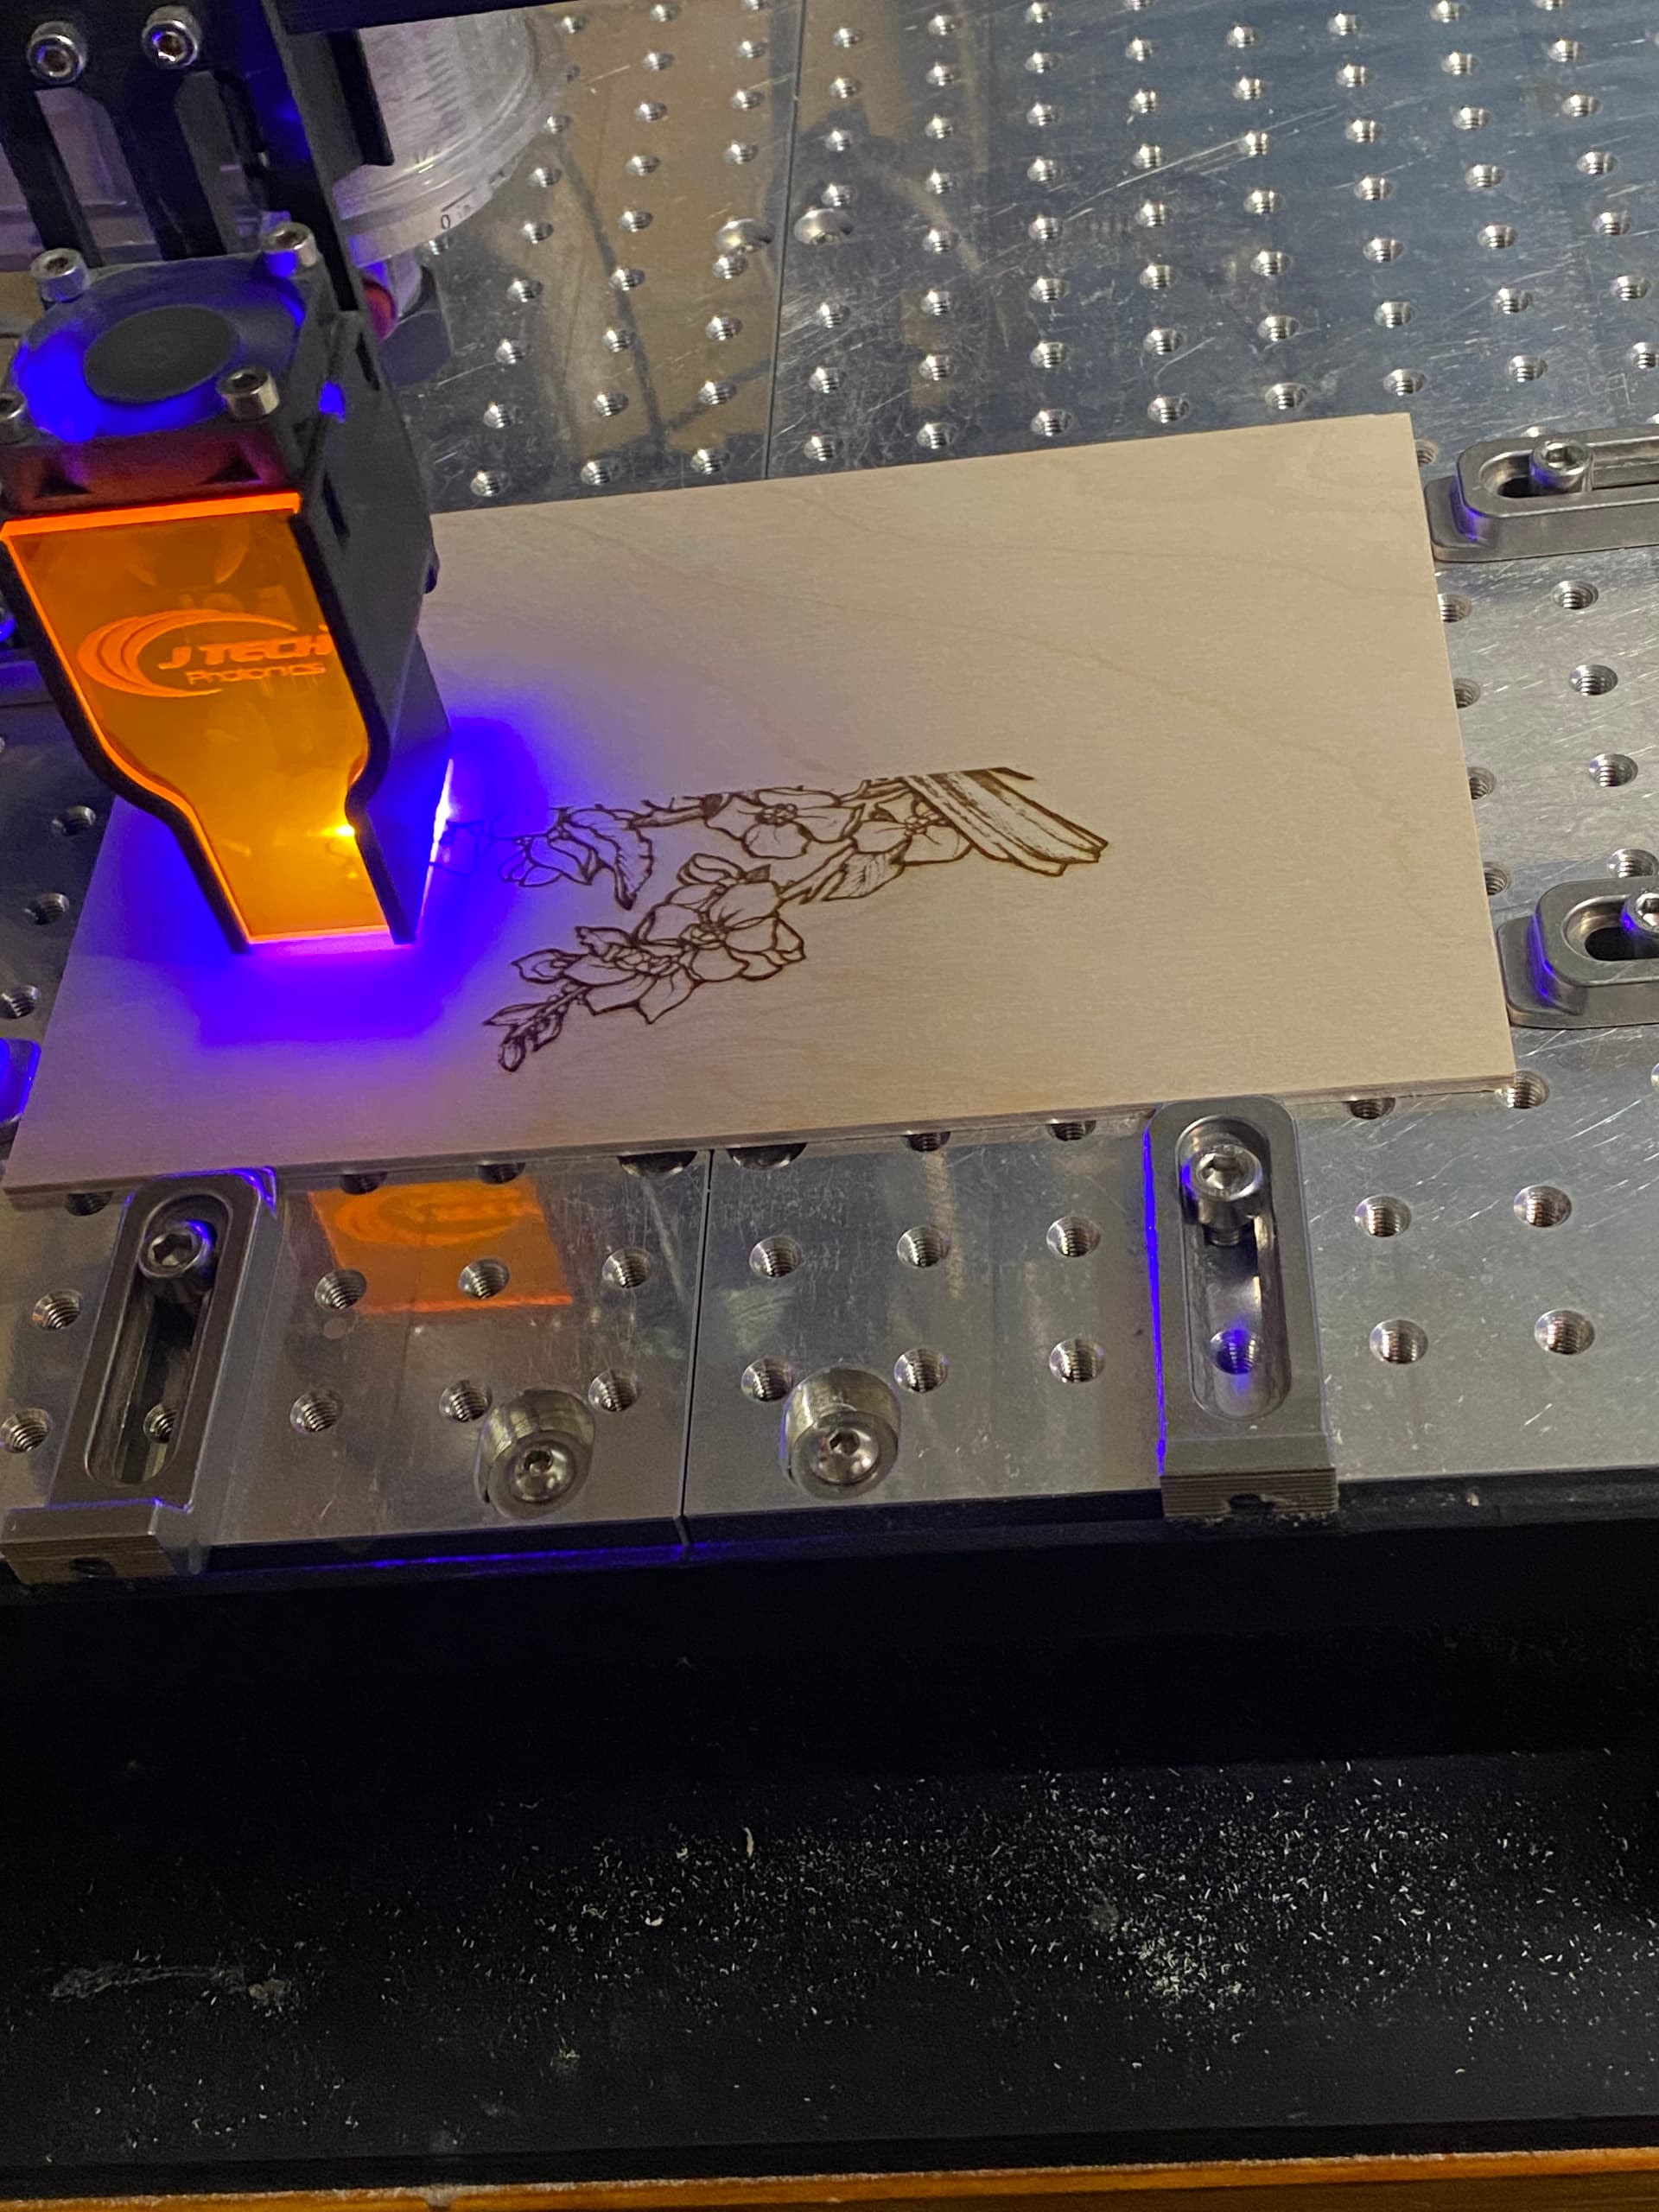
Laser attached to CNC machine
Looking from the left side of the spindle.
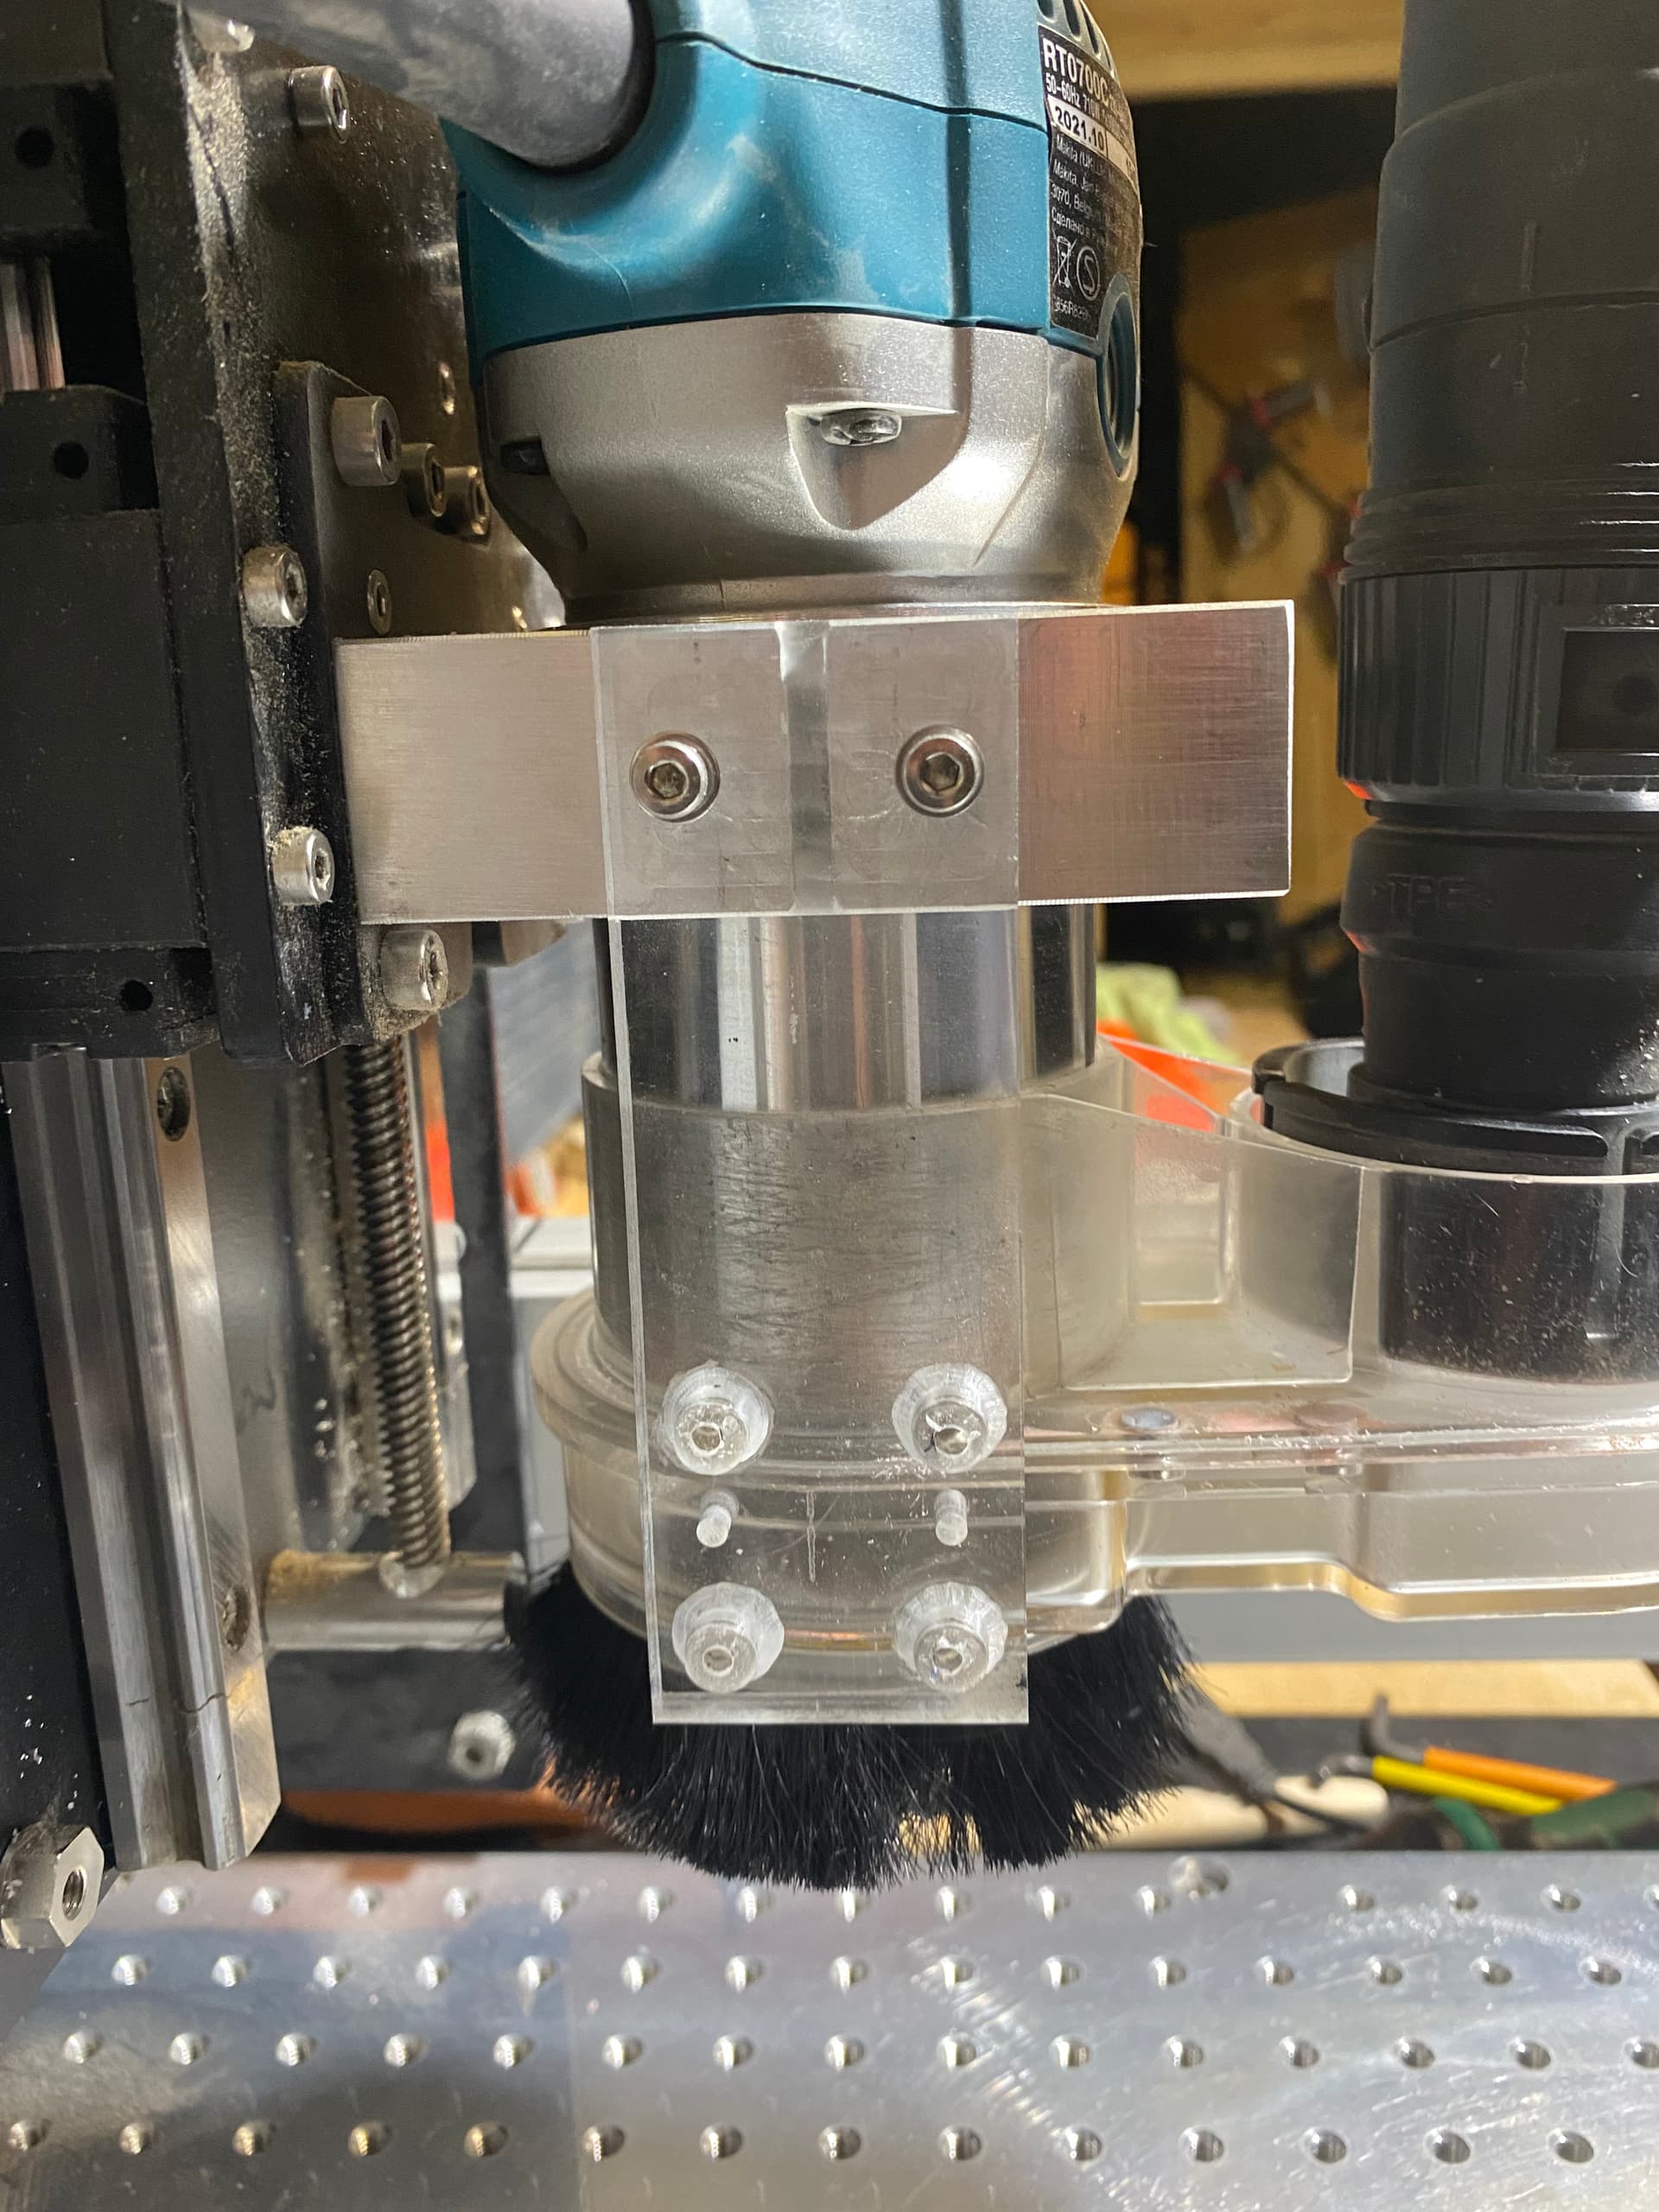
Looking obliquely from the left side of router mount
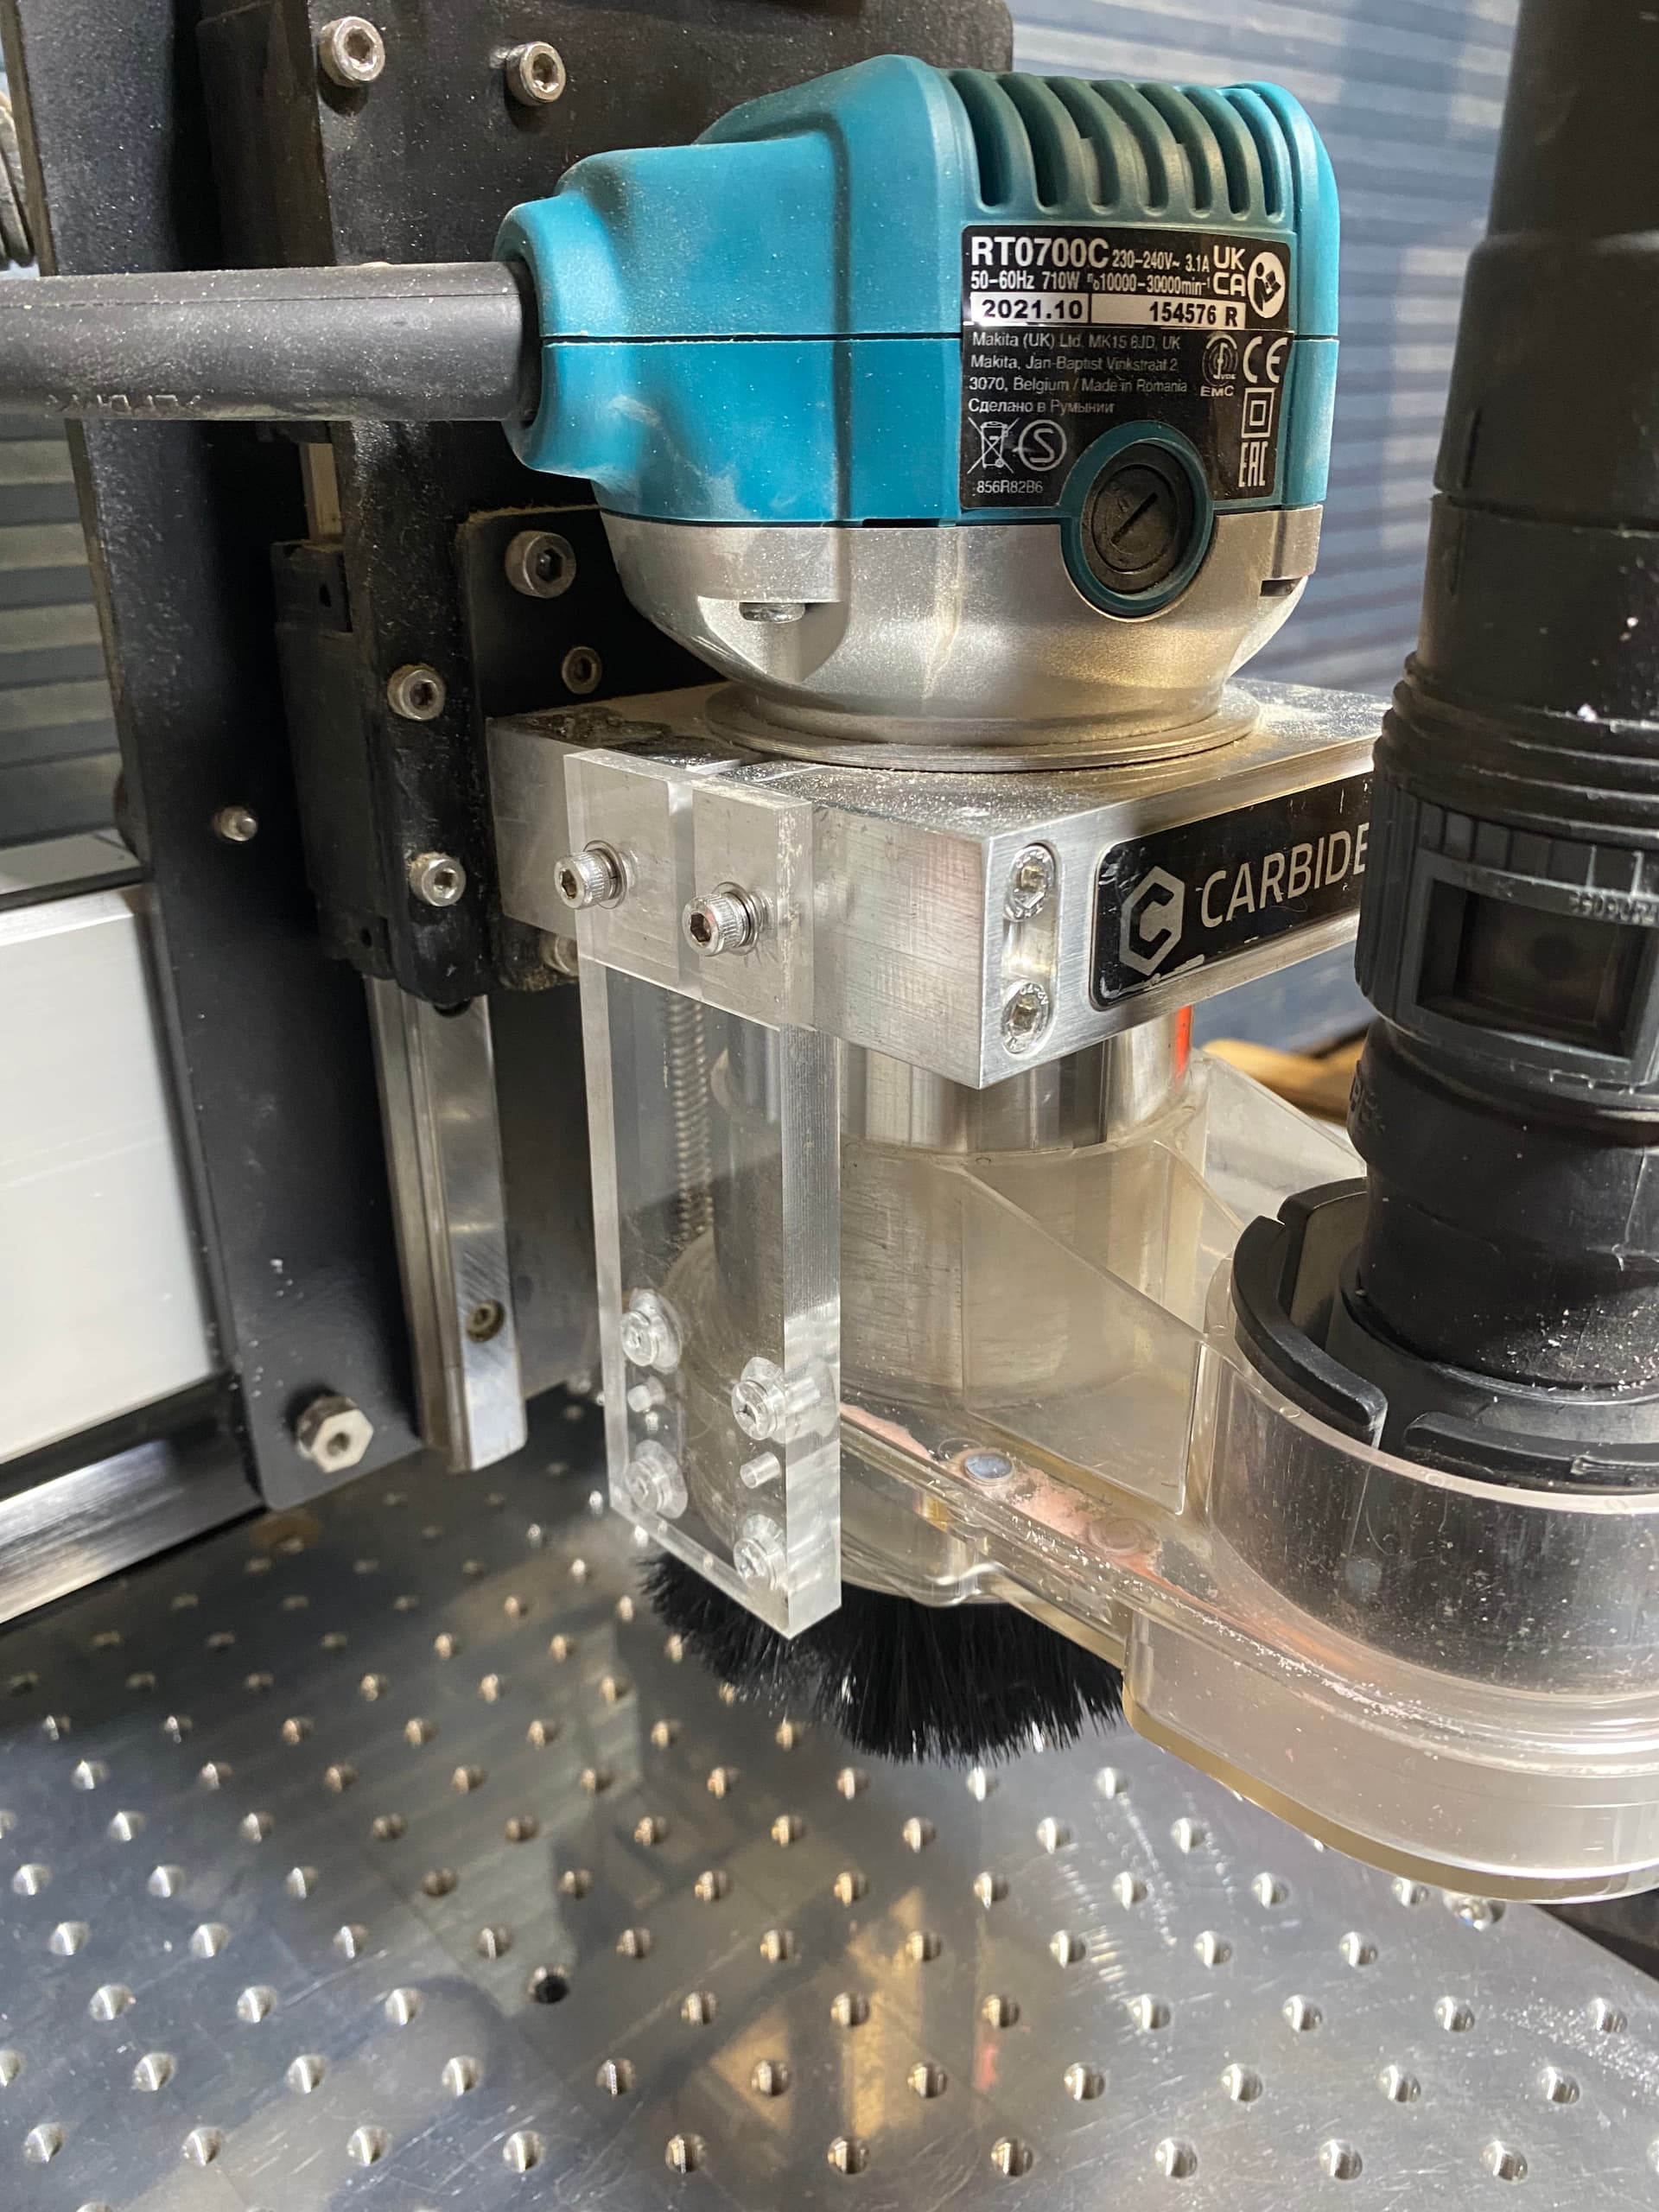
Looking from front of CNC machine

Looking from front of CNC machine with laser attached
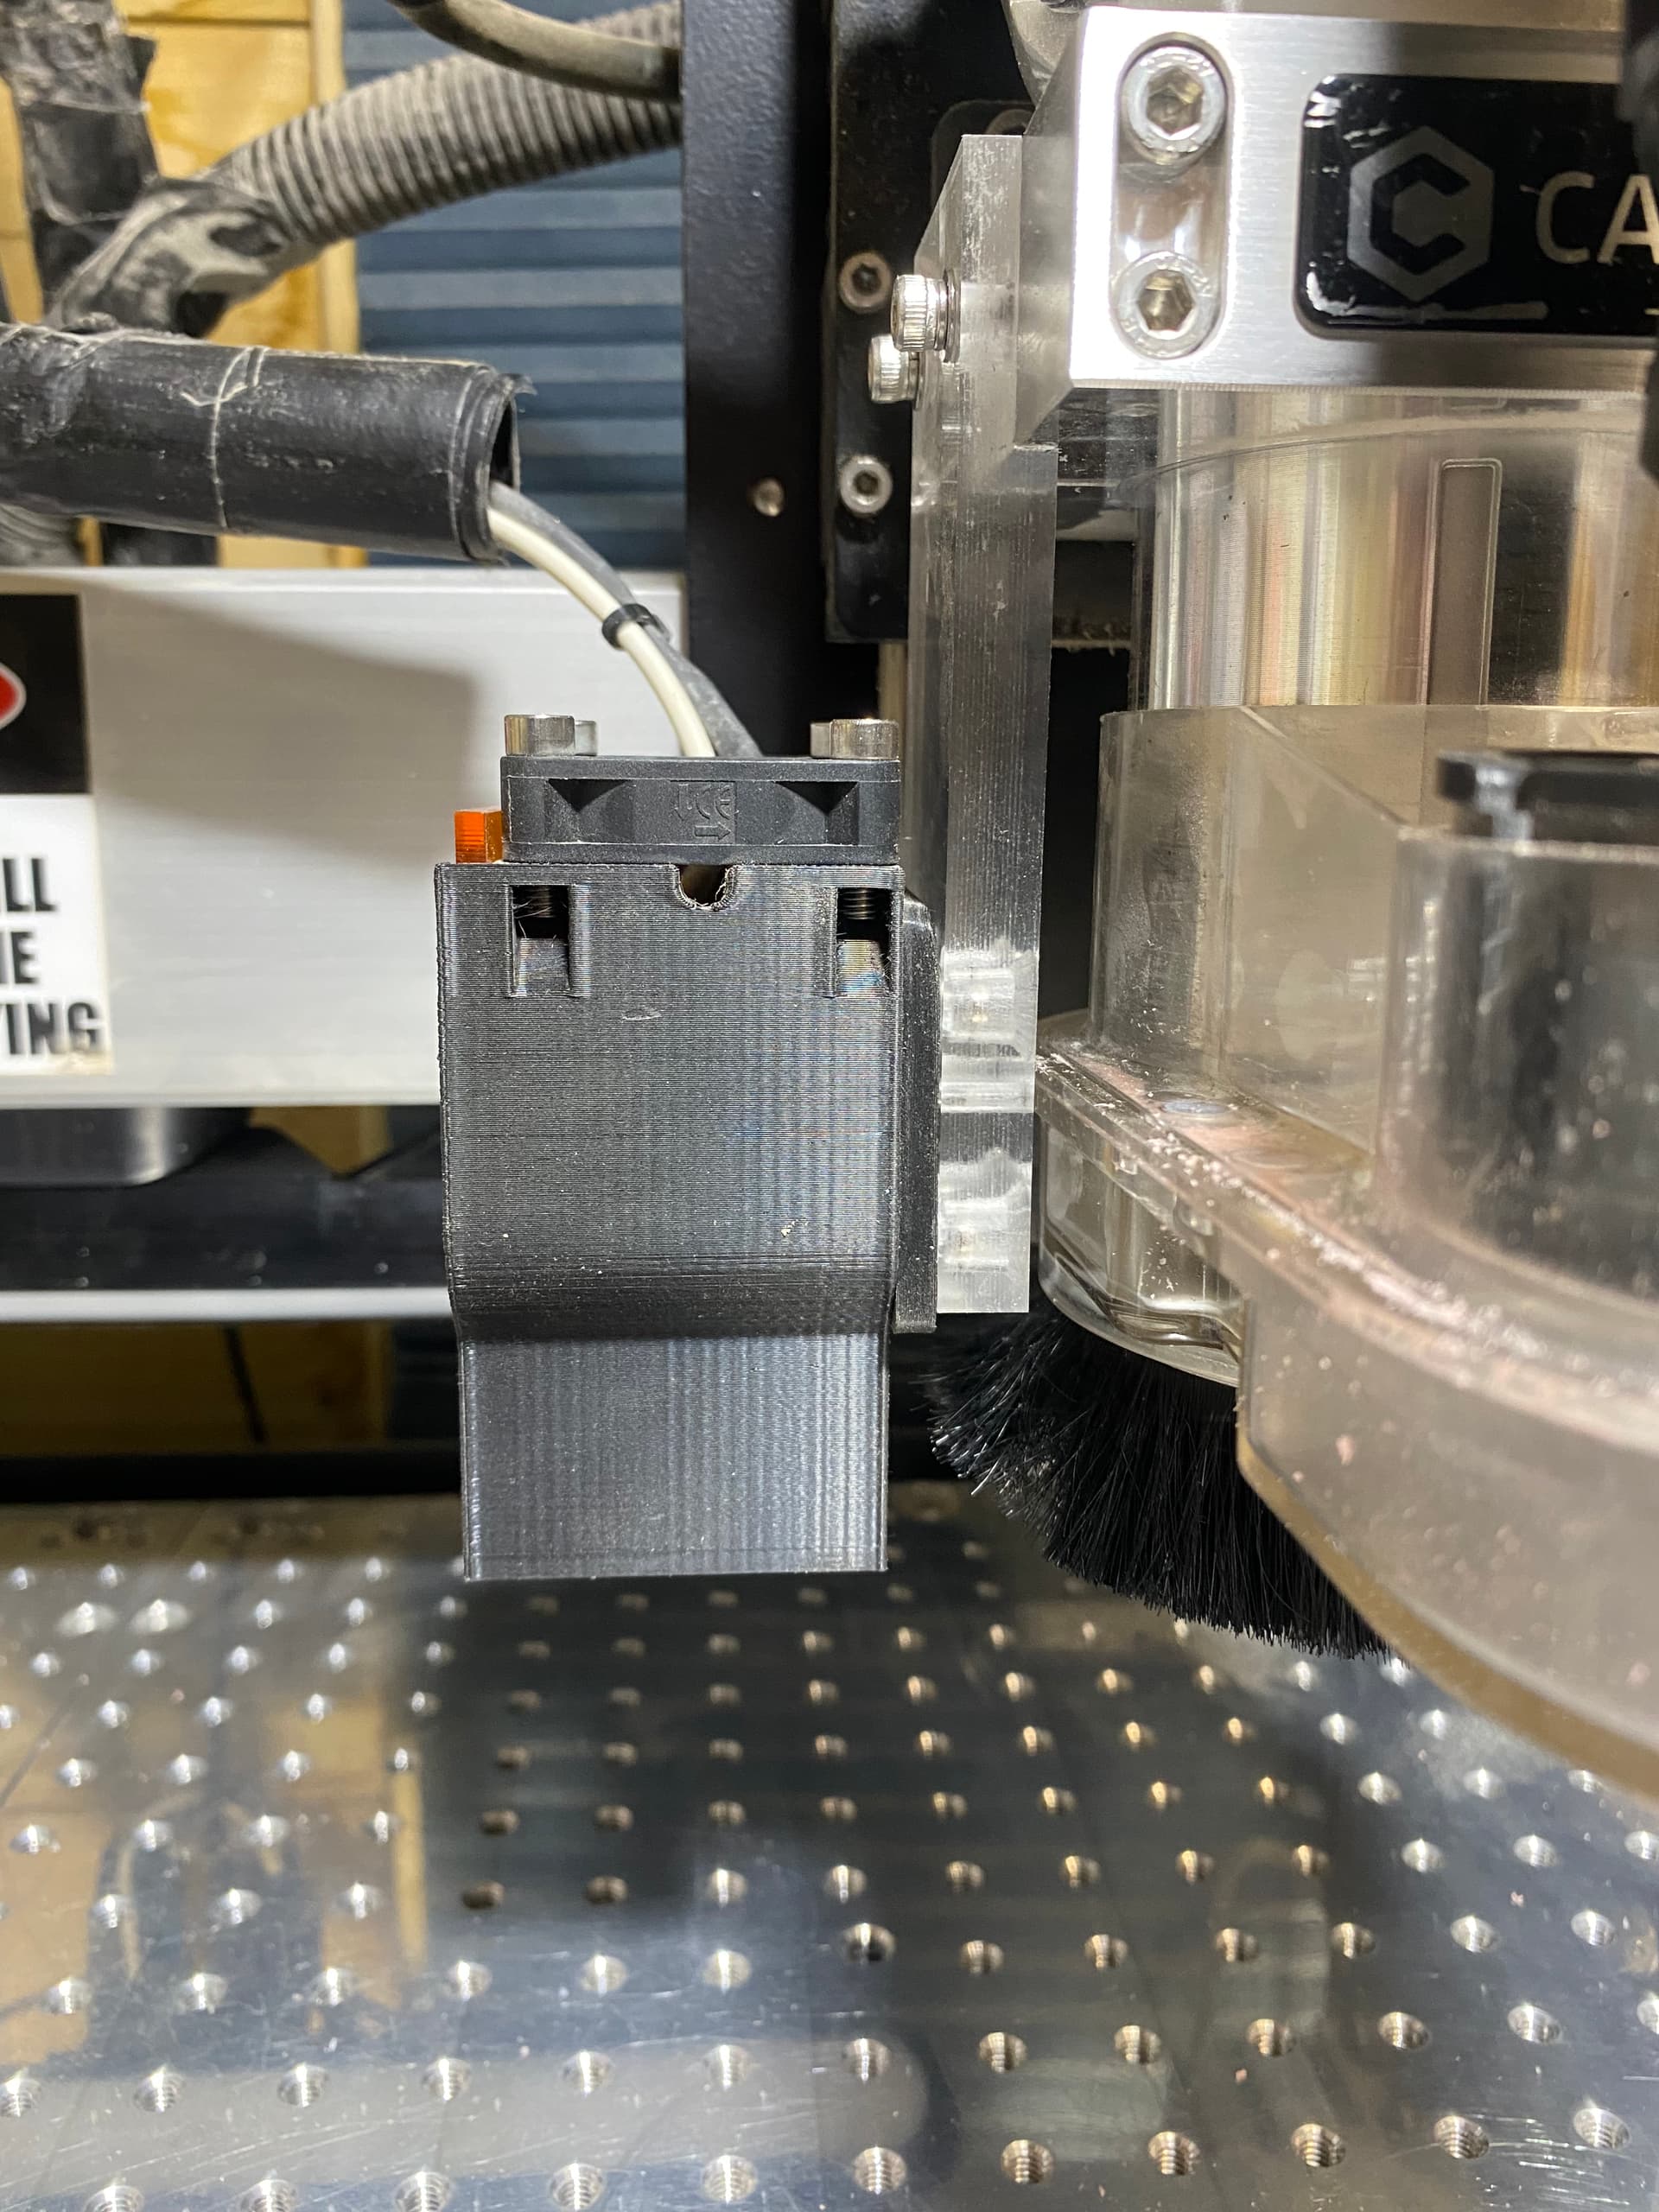
Looking from front of CNC machine showing aluminium laser mount
A few additional images to show how I have used the JTech 4.2Watt laser. The images demonstrate a few different techniques for glass and ceramics.
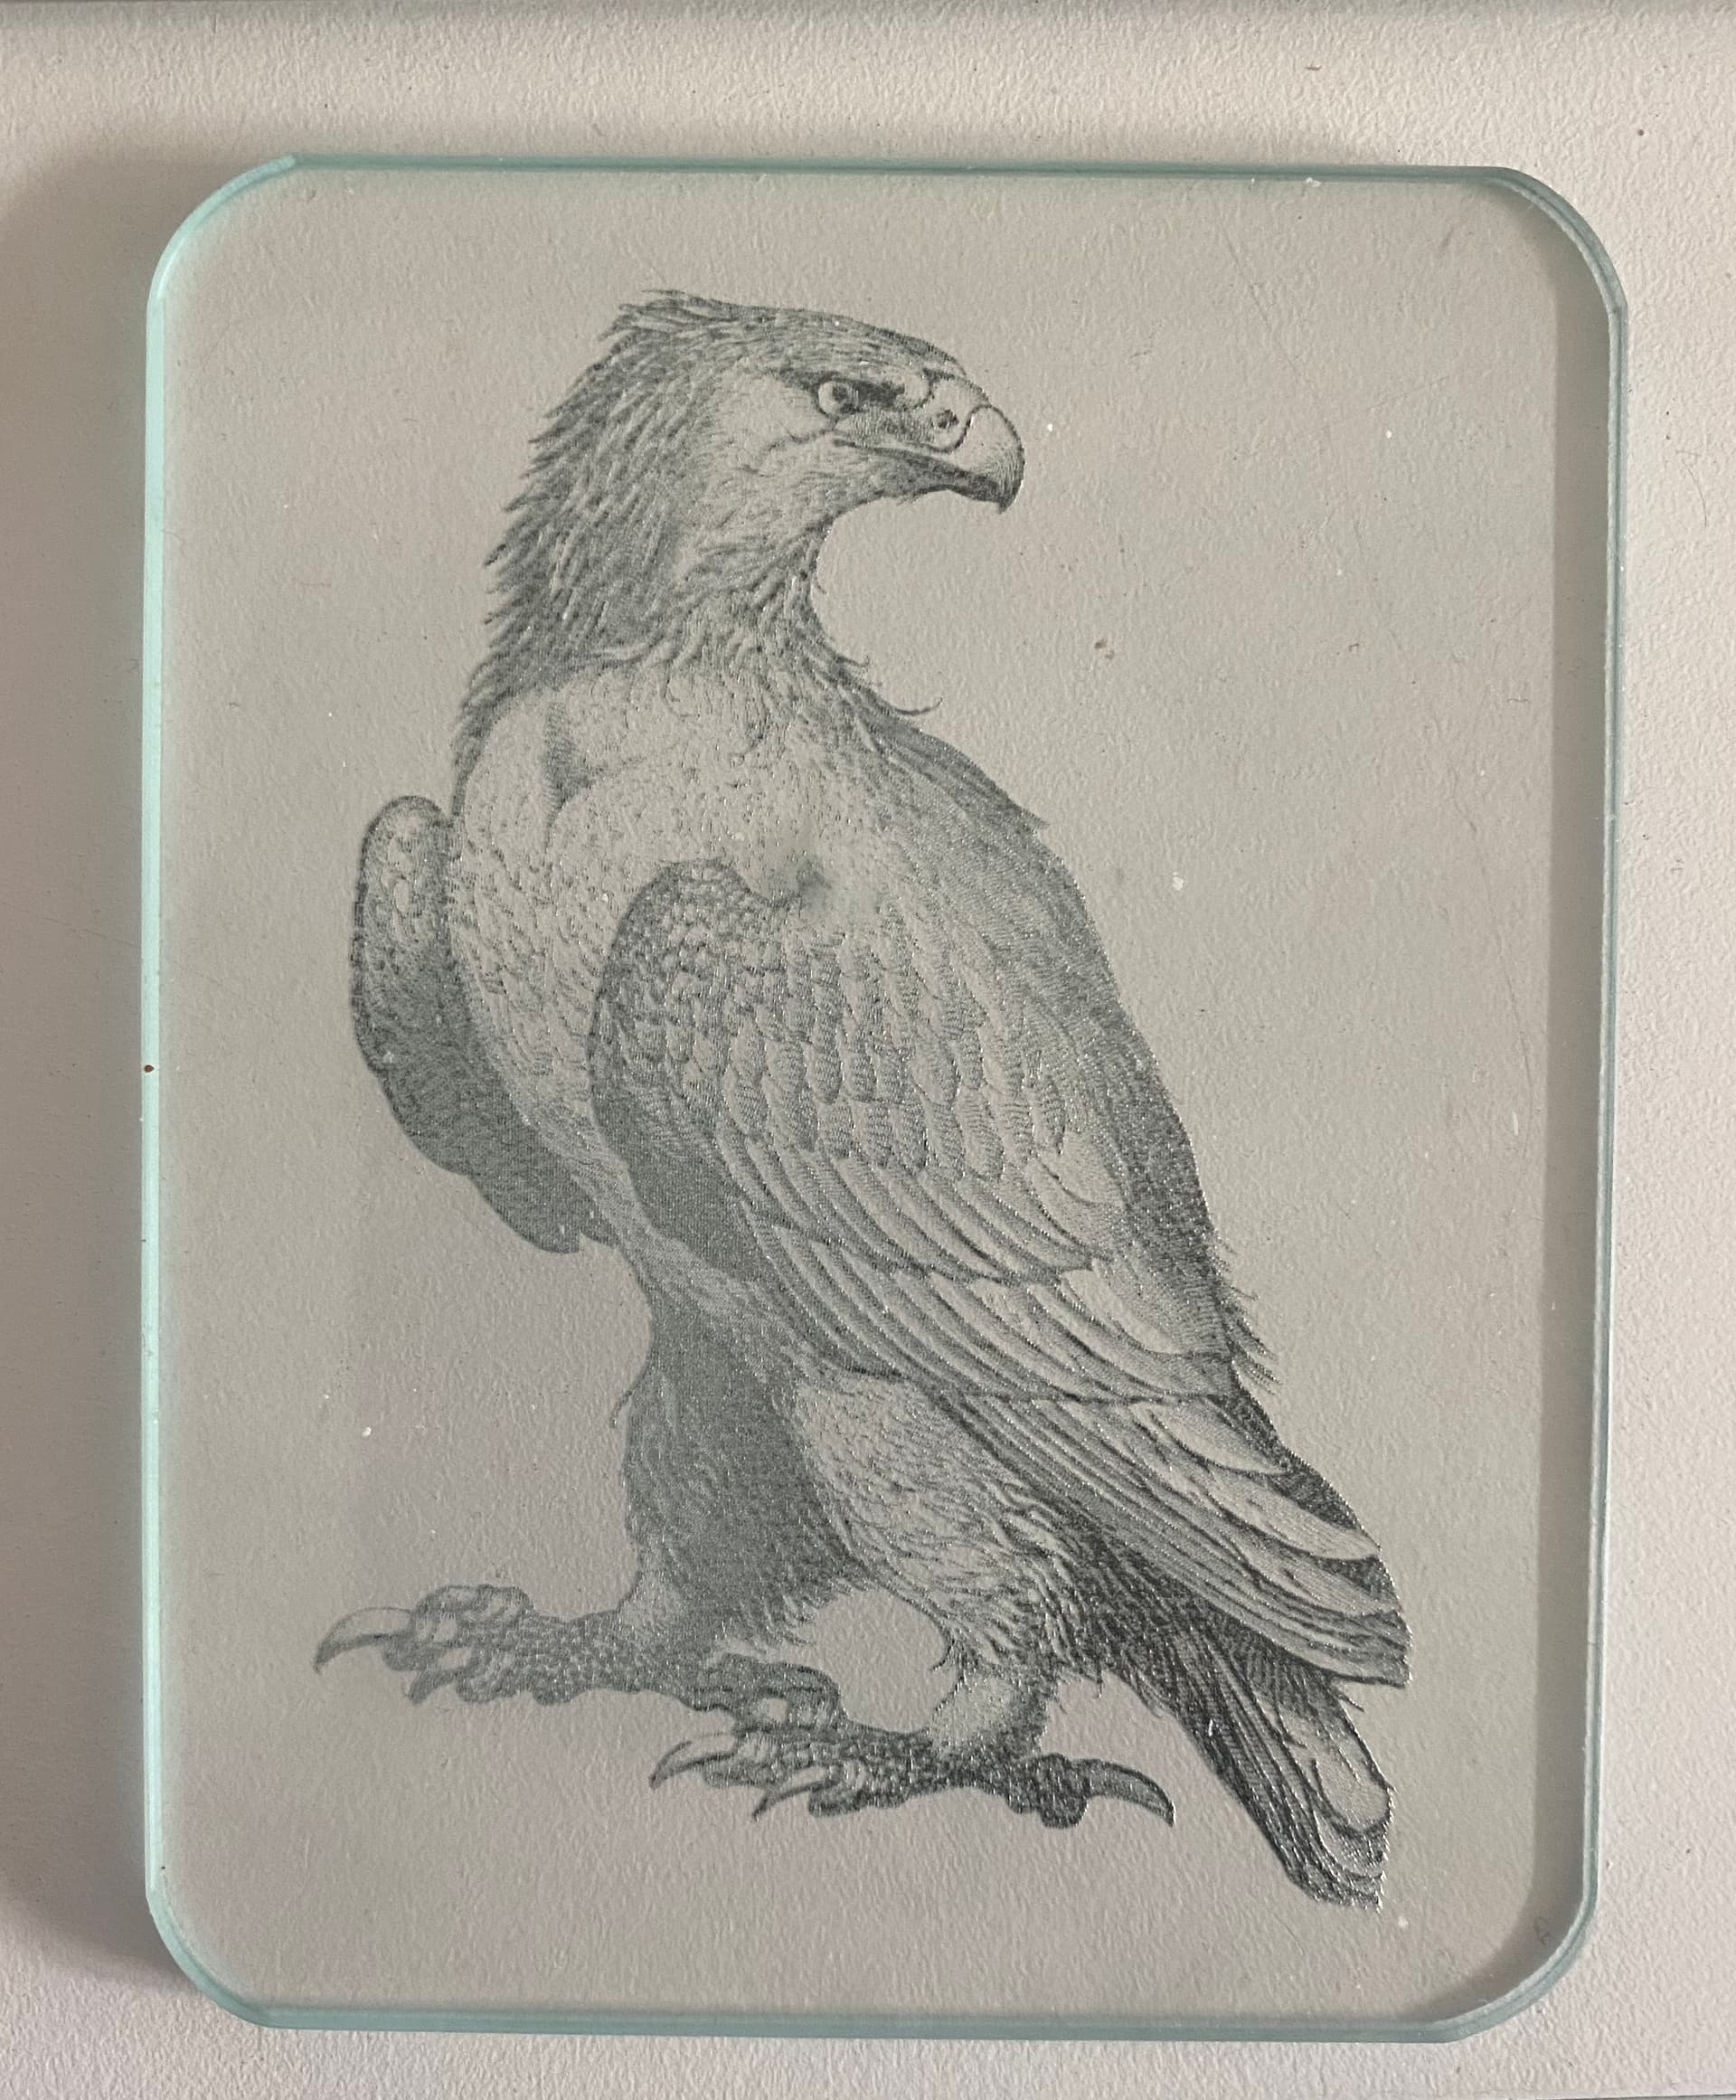
This bird of prey was engraved onto a 4mm thick glass coaster using black card placed behind the glass. The focus point was 3mm into the glass.
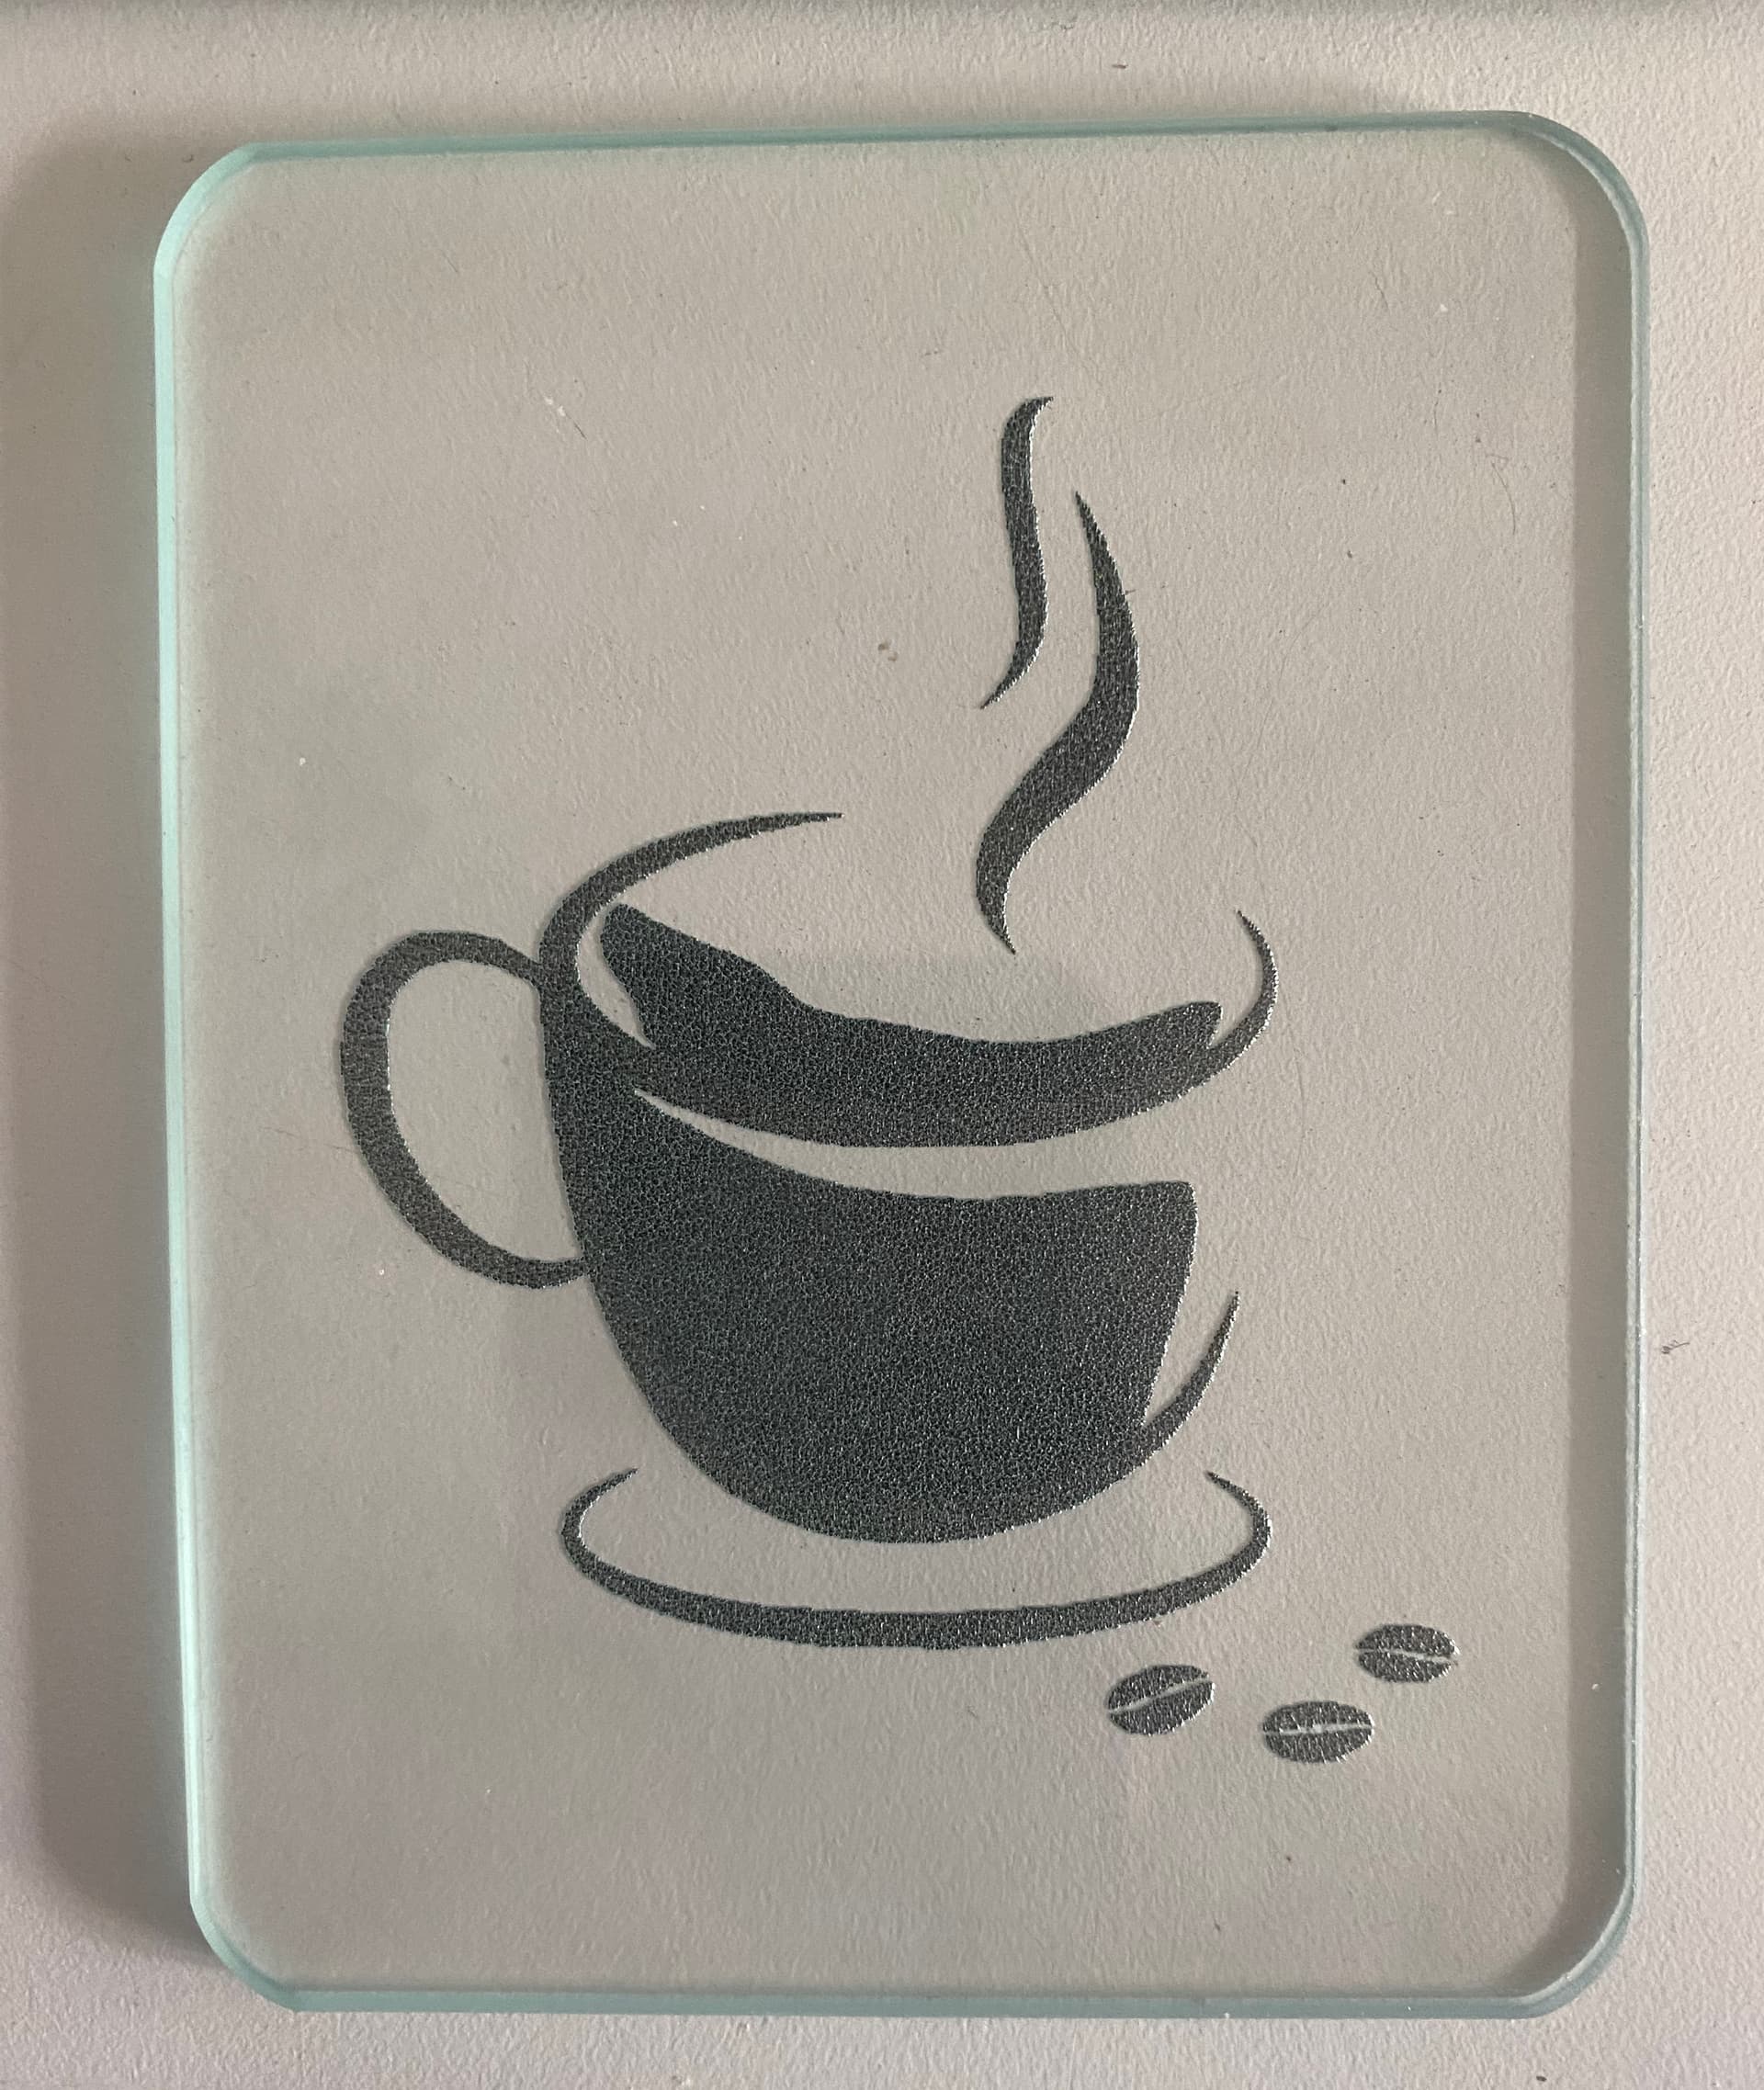
The coffee cup was also engraved using the indirect black card method. The shadow behind the image is because I used a piece of paper when photographing this piece of 4mm glass and had not noticed the paper had something printed on the reverse side.
The cat was engraved using a technique which had a white background behind it. I wanted to generate enough heat in the laser to engrave directly. The focus was 3mm into the 4mm thick glass and you can see the outline of the cat as light. It is a good technique for simple items that may have light shined through them. It is displayed on grey card. The image is made visible by the heat of the laser causing myriads of micro-fractures in the glass.

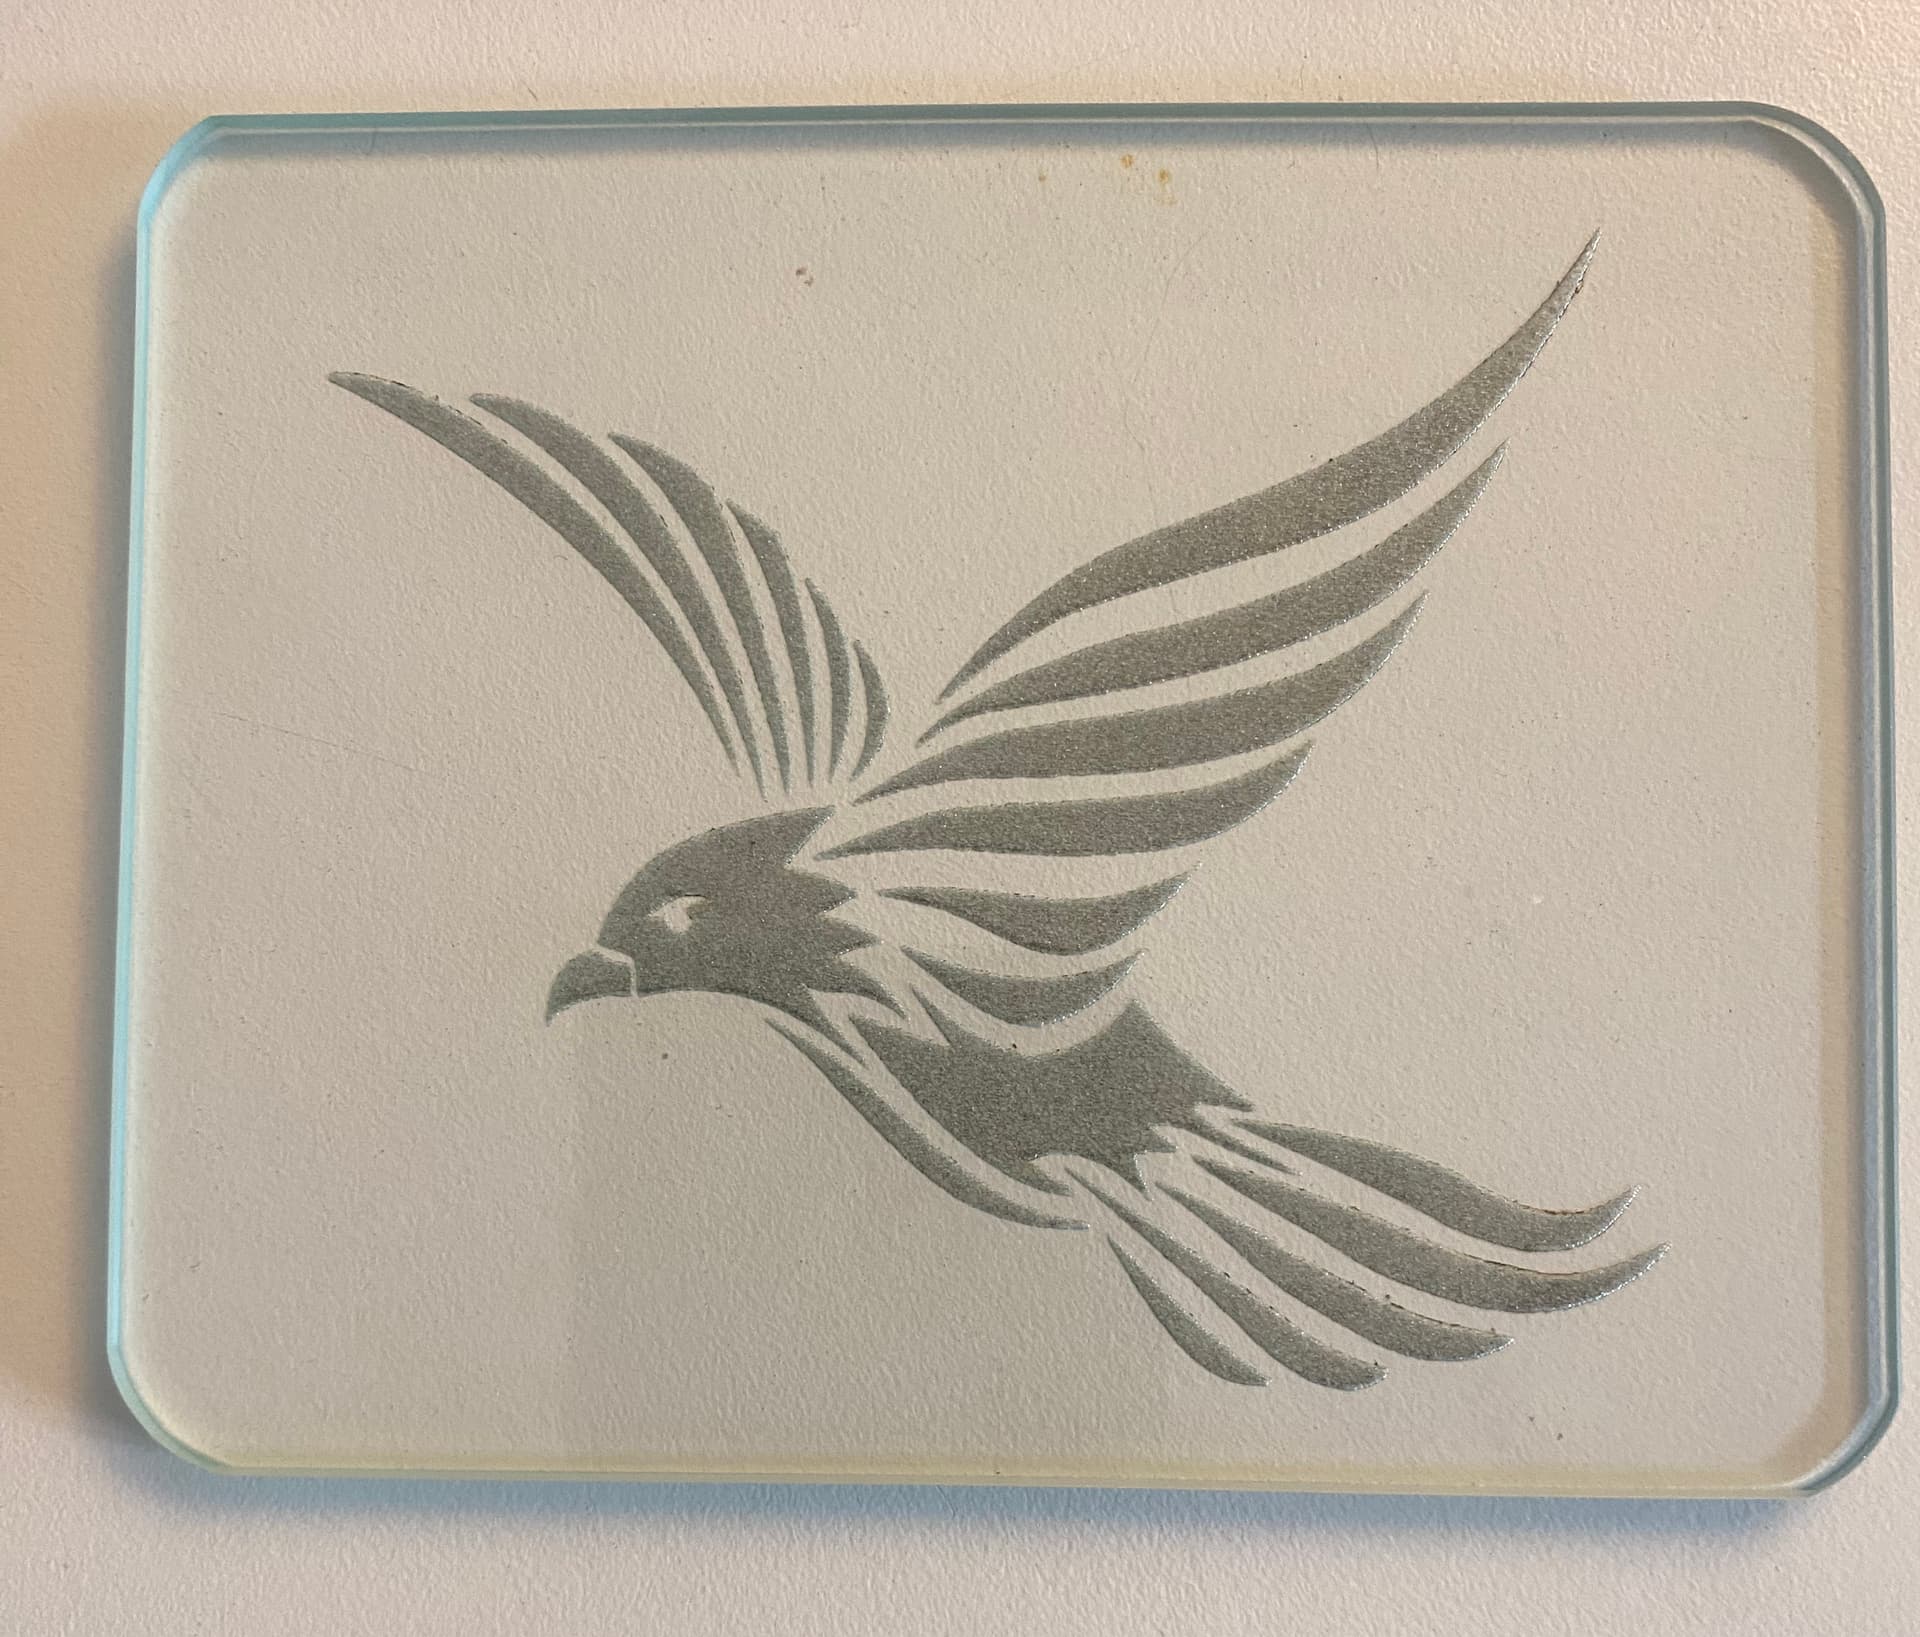
Tribal art bird. This was engraved using the Norton method of white paint so that the Titanium Dioxide in the paint reacts to the laser light and leaves behind a dark image. This one does not have the typically deep blacks because I had left the focus point at 3mm into the 4mm thick glass.
Norton method ceramic tile, 6 x 6 inch. This was a coloured image which I adjusted to monochrome and then red filtered to accentuate the clouds. I wanted this picture to be redolent of an old abandoned railway line by way of a news/documentary type of picture.
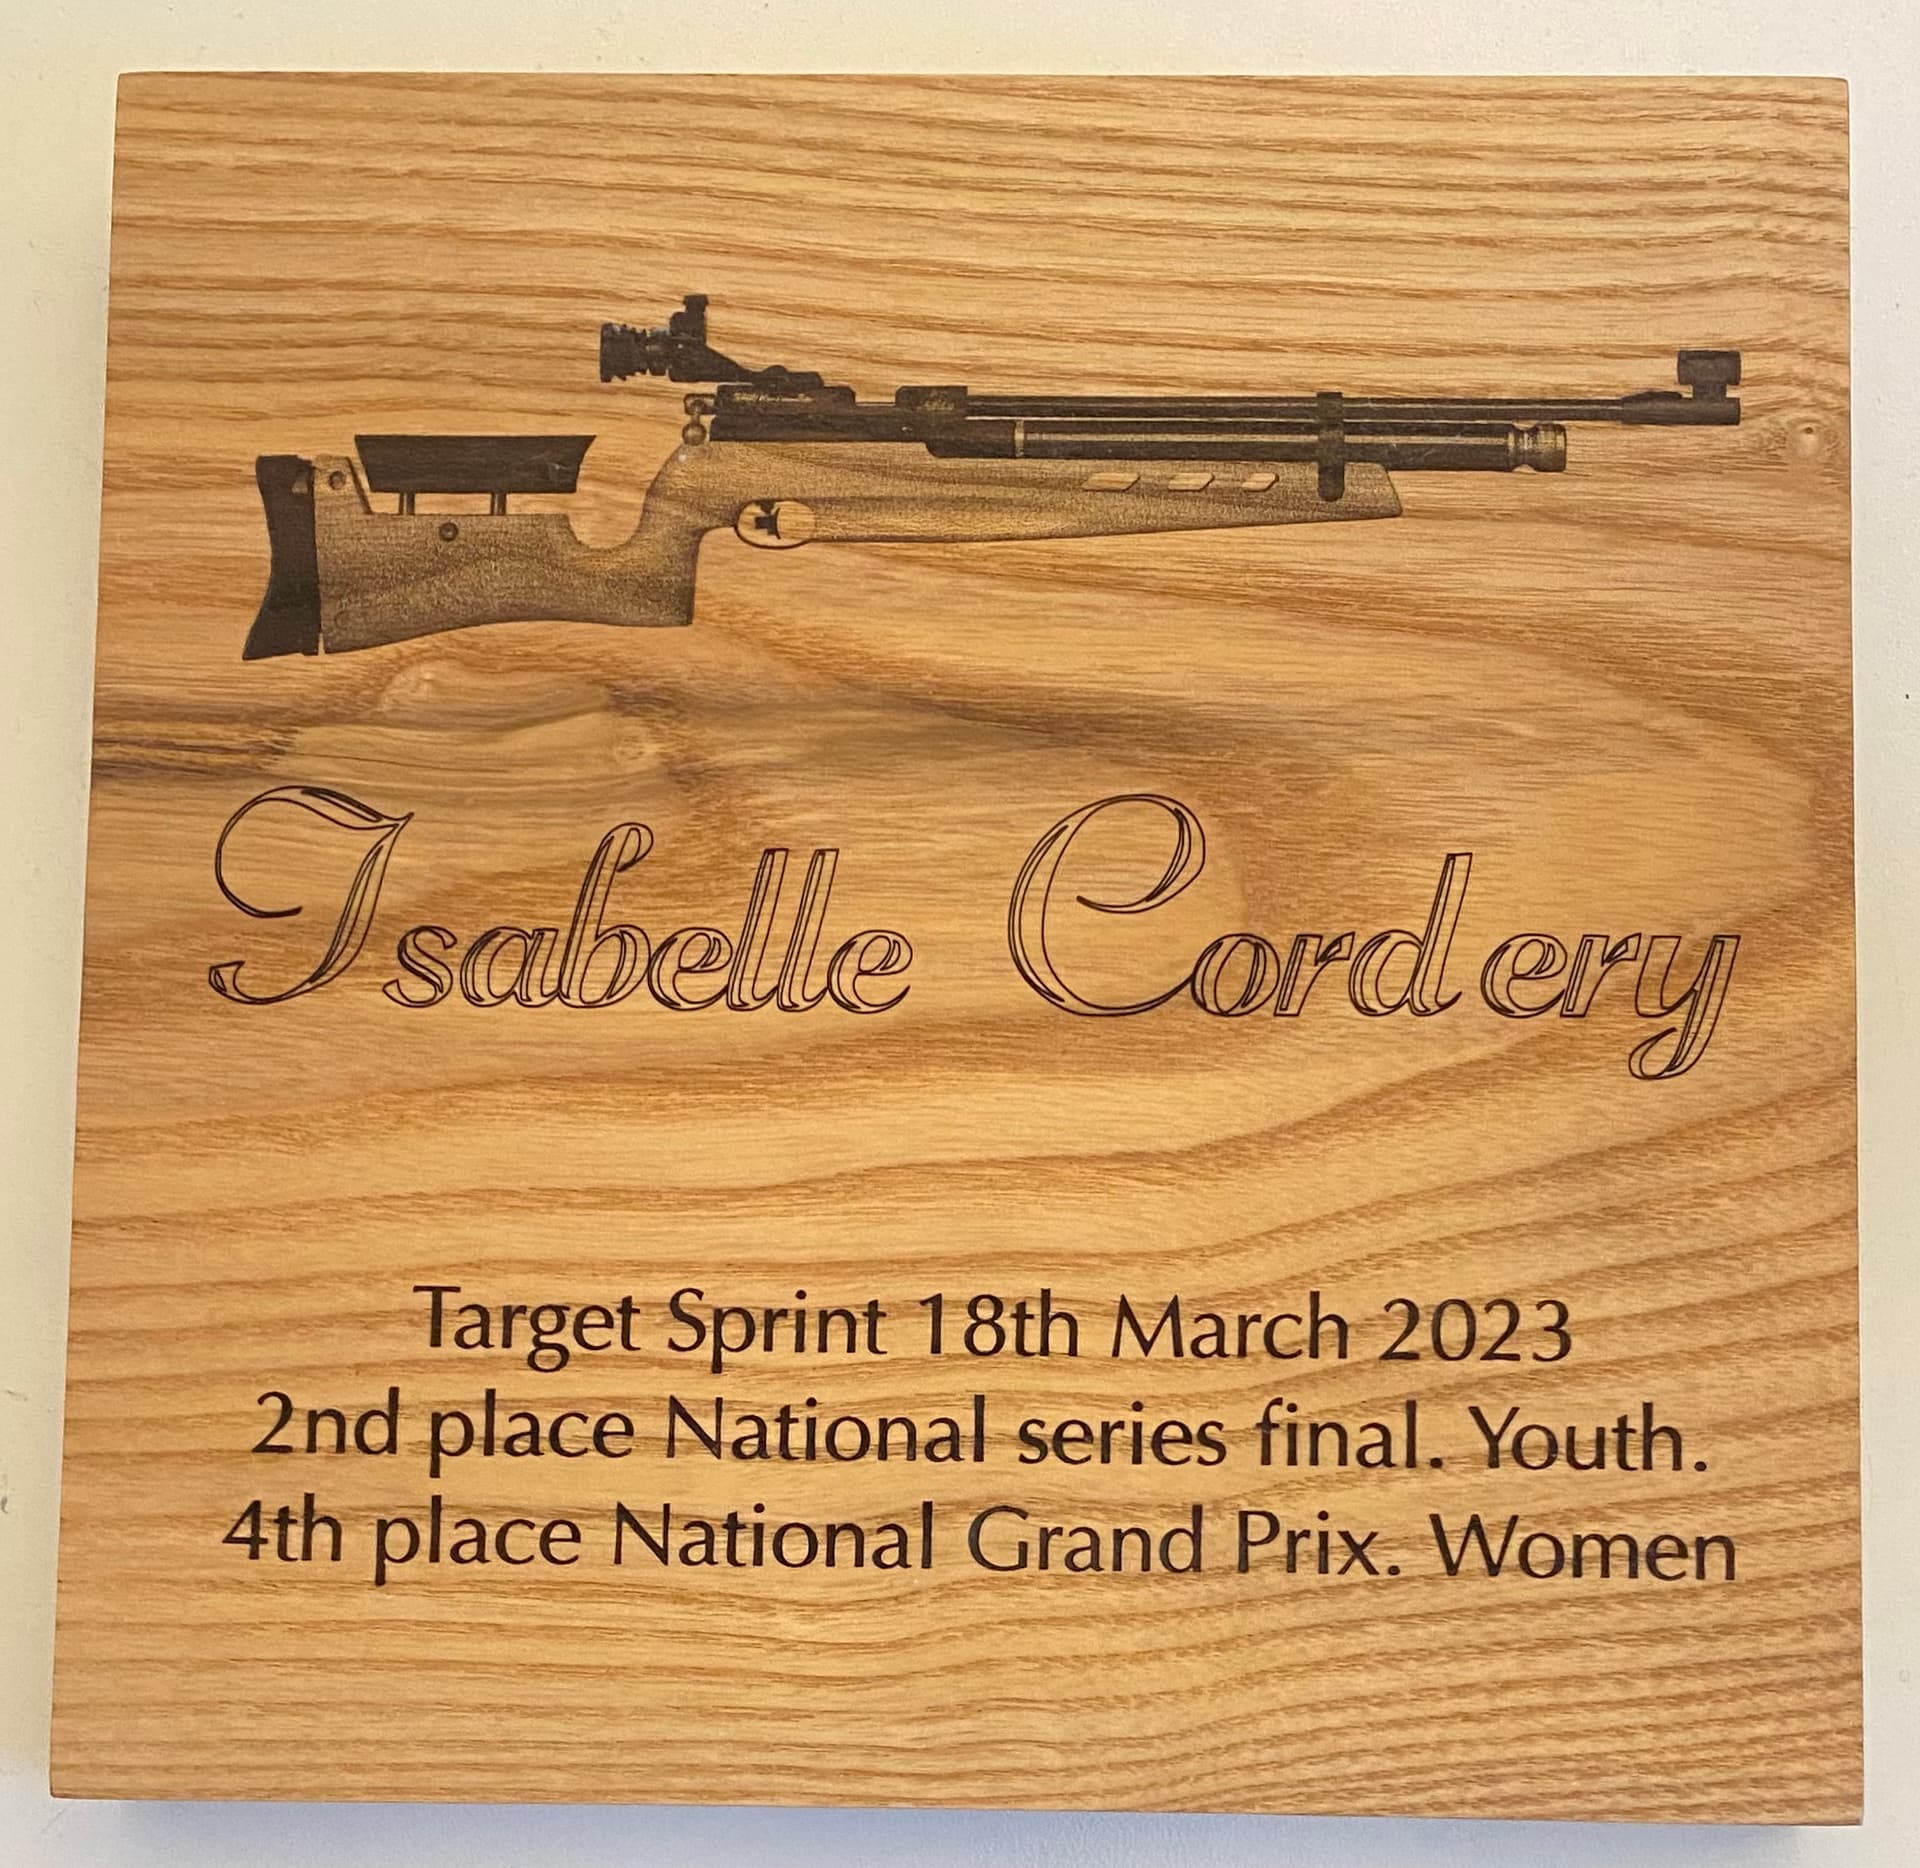
This was a trophy for a friend’s daughter. She is very likely to becme an English olympic shooter in a few years time. This was done to encourage her. I rendered her target sprint rifle as an SVG file from a photo I created of her rifle.
7 Likes
Amazing work. What kind of runtime do you get. It looks like some of those would take quite a while.
1 Like
Thank you for your kind words.
The vanising point tile required an hour because it used the raster setting to produce the photograph. SVG files use a diffent engraving method to raster and one can choose the order that each component is engraved. 60% power and 500mm/min was the LightBurn setting and I used Jarvis dithering. Some dithering is still evident in the image because I chose to enlarge an image smaller than the tile dimensions. It would work better if the image was several feet wide and then reduced.
The cat required about 15 minutes at 100% power and 100mm/min. The wood engraving required about 45 minutes at 250 mm/min and 30% power. The coffe cup required about 30 minutes at 250 mm/min and 80% power. The bird of prey required about an hour and a half at 70% power and 200mm/min. The tribal art bird needed 50 minutes at 80% power and 300mm/min.
1 Like
Very nice and faster than I would have thought. This looks amazing and is with the lowest power laser that they have. I have been mulling it over for a while and thought I needed more juice but if not using it to cut it doesn’t look like it.
Do you wish you had more power?
1 Like
Jeff, how did you determine where your focus point is?
I sometimes think that but you work with what you have. I am retired and do this stuff to stop myself from climbing the walls. I have no production constraints nor any need to work super efficiently. My usual method when testing new materials is to find a setting that makes the faintest marks and then work out my power settings from there.
The higher the power output, the more smoke and scorching there is. I aim to use sufficient power for the engraving effect and no scorch or smoke marks left behind for me to clean up. On wood it also keeps the lines as thin as the laser can manage. Where the pass is too light, it can always be done again. I have cut through 3mm plywood in two passes but that left a huge amount of smoke and scorch mark removal and very black edges.
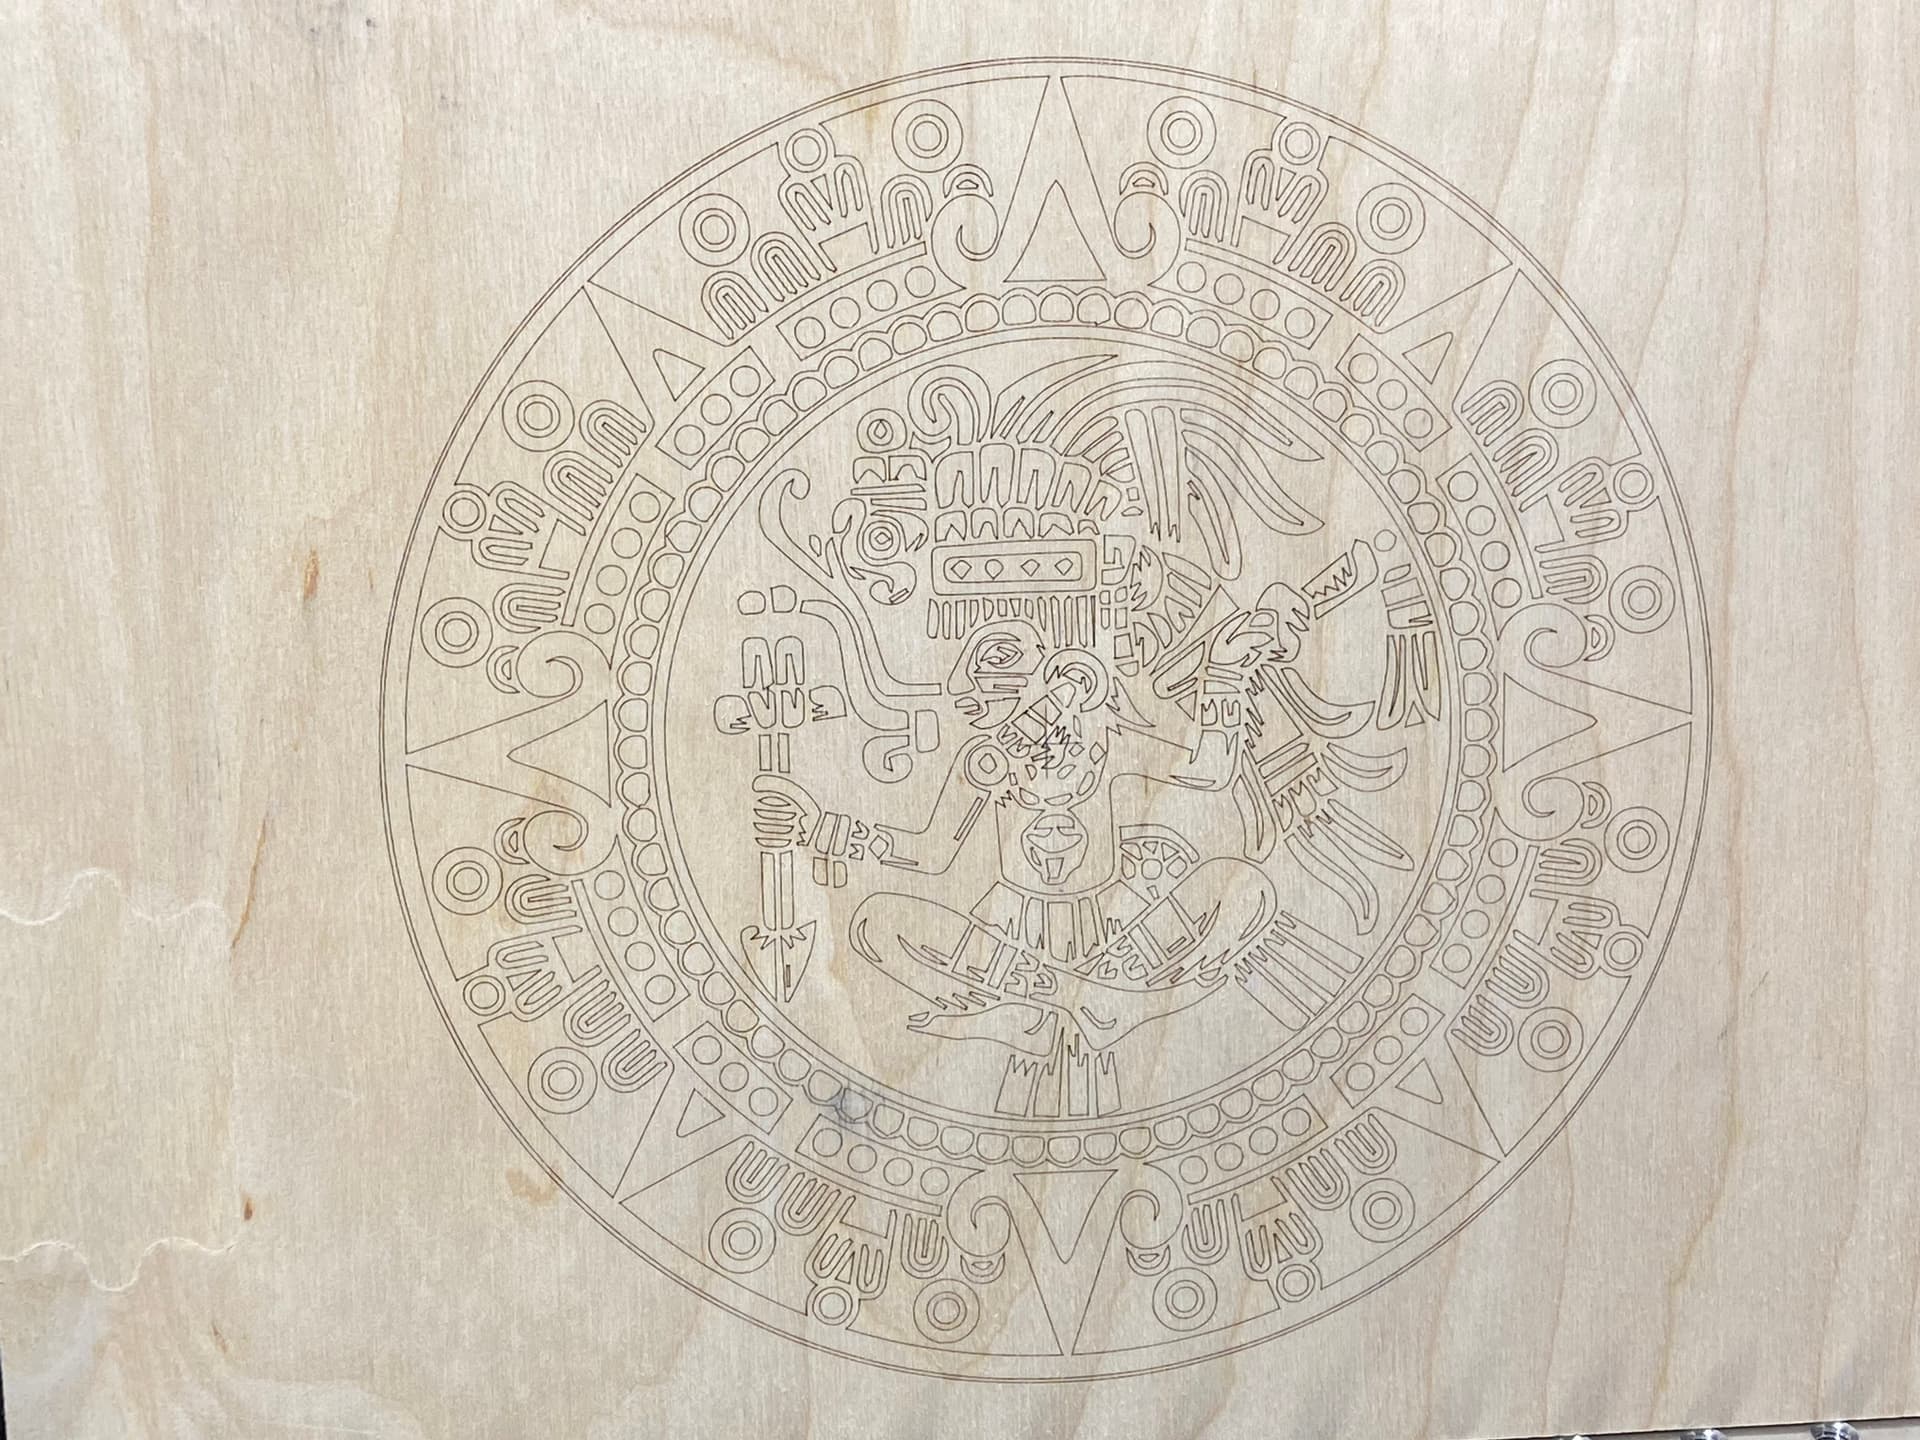
Outlines from a single pass, using low power at 20% and workpiece traversal at 500mm/min on American maple. This was an SVG file so LightBurn does not use a raster pattern to engrave these items for which it treats each closed vector as a separate component part. There is little in the way of smoke or scorching.
2 Likes
Hi Tex. The laser was supplied to me with a JTech shroud and a high resolution lens. Jay had fixed the focus point of the laser to be 3mm from the base of the shroud. I use a 3mm piece of ply wood under the shroud to just rest the shroud on (using a piece of paper). At that point I know that any engraving on the workpiece top surface will be precisely in focus.
The glass was 4mm thick and I wanted the image to appear inside the glass so that the top and bottom surfaces were smooth and not engraved. I used the LightBurn Move tab to show me the Z position of focus and added 3mm to that setting to reduce the Z height of the laser focus point. That gave me my laser engraving point of 1mm from the bottom surface of the glass or 3mm from the top surface.
1 Like
So, you reduced the clearance distance between the laser housing and the workpiece top surface by 3mm? I’m confused, I guess, how that isn’t touching the top surface.
My mistake. I added almost 3mm otherwise yes, it would have touched the top.
I may still be confused, but I’m pounding down some coffee to clear it out! ![]()
Ok, this is normal zeroing for burning something into the top surface.
Ok. This is just what interested me, too. I didn’t think I had the laser to do it with, but mine is the JTech 7 watt version.
So, here’s where the confusion (still) comes in. I suppose I don’t know how “LightBurn Move” works. I can see that if you were focused on the top surface, and you wanted to move your focus 3 mm further into your part that you would move the laser 3 mm closer to the top surface of your part, but in this case that would put the laser housing into an interference state with the top surface of the part. Most likely you didn’t do that, and I don’t see how moving the laser 3 mm further away from the top surface will do what must have happened to accomplish the task.
Not trying to be a pedant, but the details are important here because your result is so successful.
What are you planning on using the laser for? The 44W OCTO PRO Laser is definitely over kill if you are planning to just do some engraving. I have the 24W QUAD PRO Laser and very rarely need that much power,only when cutting thick stock.
2 Likes
Excellent question, I was trying to figure that out too. I’ve been using the Vectric laser module. Maybe I need to take a closer look at Lightburn.
2 Likes
No worries. I moved the Z axis down as near as I could to the glass surface (having the whole 3mm focussing distance in hand) and just did not touch the glass. In all probability, the shroud of the laser was probably 0.1mm away from touching the workpiece.
The get position section of the move tab in Lightburn permits very fine control over movement of the Z axis. When I centre the beam on a piece of work, (using a measured centre mark) I will often move the Z axis in X or Y directions by a small amount no larger than 0.01mm in an effort to accurately position the beam at the required starting point.
1 Like