I got my Shapeoko 3 XL back in September. I had a lot newbie issues (set screws, belts that needed to be tightened, stiff bristles on a dust shoe!) that I had to work through. I received a lot of help from support at Carbide3D and from people here on the forum, and I really appreciate it. I just wanted to show a few of the first real things I’ve finally been able to make. Note: I am a 52-year old geek, so they are all geek related!
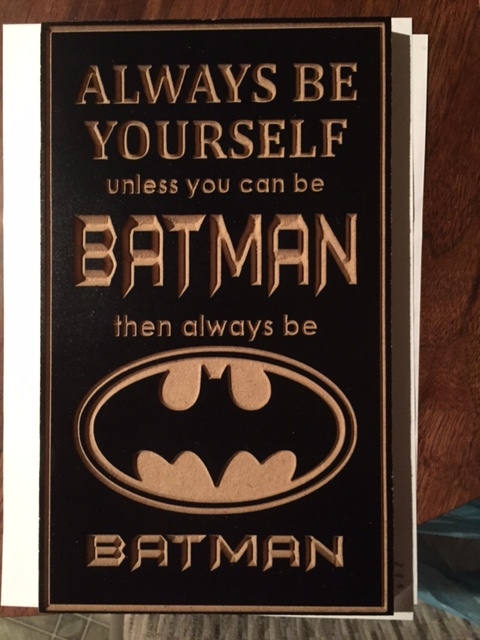
This first one is a modified version of a sign I found in the Vectric forums. I modified it and shrunk it down.
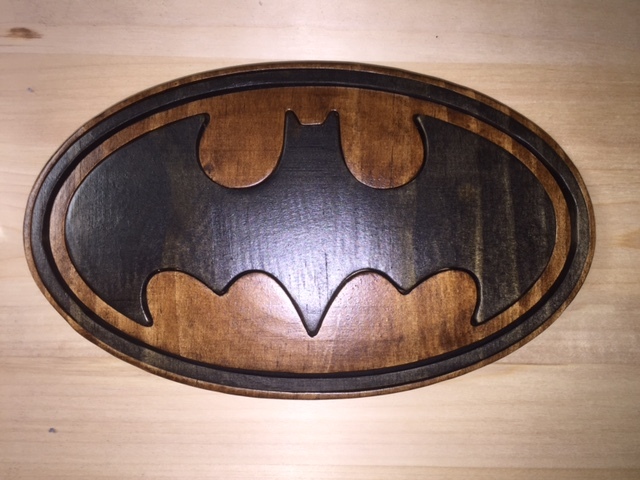
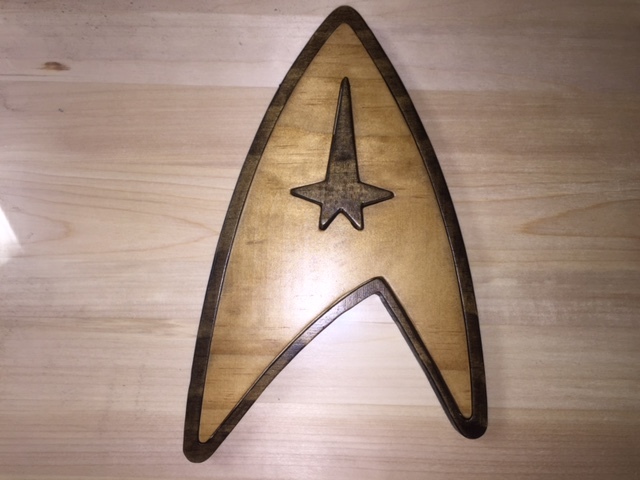
I also made these two inlay designs. It is hard to see from the picture, but they are not flat, 2D or 2.5D designs. I did a 3D dome surface, then cut the parts into that 3D design, so all the parts are slightly curved.
Now I am moving on to making more Christmas presents for family and friends…
Thanks for the kind words. For the two inlay designs, this is what I did:
I cut out a slight dome 3d shape, using a .25 inch endmill for roughing, and then a .25 inch ballnose for the shaping. The material started out as .75 inches thick.
Then, I cut out the pockets for the inlays and the outline of the shapes using a 2D design. Once again, using a .25 inch endmill for the large areas, and finishing it up with a .125 inch endmill. The pockets were .65 inches deep from the top of the material.
I then cut another identical size 3d dome shape, and cut out the inlay items (the bat and oval for Batman symbol, and the main part of the Starfleet design). So, those pieces were are a little thicker than the depth of the pockets.
I sanded and stained everything, glued them together, and then put polyurethane on them.
So, the inlay pieces do have the same curve to them, but they stick out about .1 inch above the pockets.
After making some Christmas presents that I need to do, I’ll make a Superman shield, a Green Lantern symbol, and some other things.
When I first saw this, I thought you ran the 3D shape on the base, put the inlays in as square top pieces, and then ran the 3D shape again with a .1" offset to trim down the inlays. Your approach makes a lot more sense and makes staining easier.
I really like that the inlays stand proud. Thanks for sharing.