I got my Shapeoko 3 XXL last week. I’m really digging it. After going back and forth trying various modeling programs I ended up buying Vcarve Desktop. First thing I did was make my wasteboard and made various hold down parts on my 3D printer.
Then I got down and made my first sign. It’s about 5 1/2 x 7 1/4" Aldar 4 /2 hours print time. 1/4" roughing bit, 1/16" tapered ball nose for the finishing and 1/2" 60* V-bit for the text.
Until I scrolled down to the image, I thought that you’d actually done a thing on your 3D printer which I’d been considering: actually making a spoilboard in sections, on a 3D printer — my idea was to dramatically increase the number of fasteners, basically a doubled up grid, and in-between the ones around a typical threaded fastener location would be smaller ones, and the spoilboard parts would be cut along the interstices so that they were fastened at each corner and you could remove say a small 2" x 2" section of the spoilboard and replace it as needed.
Welcome to the club! That’s a stunning first project! Mine was a square pocket with a profile cut around it
There are plenty of good options but I think you made a wise choose in Vcarve, I use vectric Aspire about 90% of the time, for signs and most projects it’s can’t be beat. For the more mechanical projects or where I need several parts to fit together I use Fusion360, it has a lot steeper learning curve but free and very powerful.
Look forward to seeing what you make, share it all!
I think that is a nice idea but from what I have been reading it would be a nightmare to keep a level bed. Maybe aluminum would work for something like that.
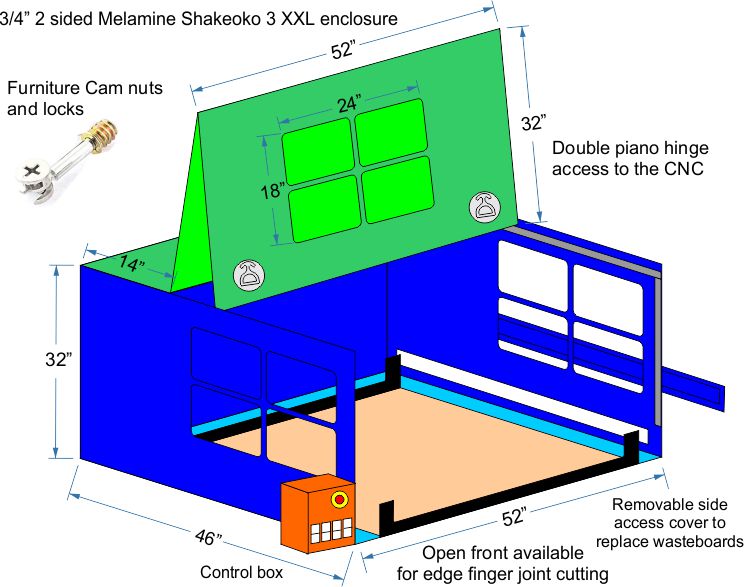
I have been looking at everyone’s amazing cabinet designs and learning what is working and what some have said they wished they did different. I took all that in consideration and designed one that I think will work for me. This does not include the extra stuff like the lights, vacuum lines, etc. just the basic box. I picked up a couple of 3/4" sheets of Melamine and acrylic sheets today but will have to go back and get the hardware now that I made my measurements. I want to use the CNC to do as much of the work as I can like cutting the window pockets.
I miss read that. The above was for the 3D artwork. As for the hold downs I designed all but the top center one. I made the spacers at the center so you can torque them down without bending them.You can find the STL files here.
I am getting ready to build the box but the first thing I had to do was tear down the embarrassment of a bench I threw together just to test the Shapeoko out. Now that I know it works I took it partially apart, tore down the desk and started a new one with a 60" x 34.5" x 24" cabinet. I doubled it up to make a box in the back for a small shopvac and dust catcher. My goal for tonight was to get the Shapeoko on the top and away from the wife’s laundry area.
I made sure to take my time and level out the top in both axis. I can see how taking off the leveling feet stiffens it up before I even put the wood back on.
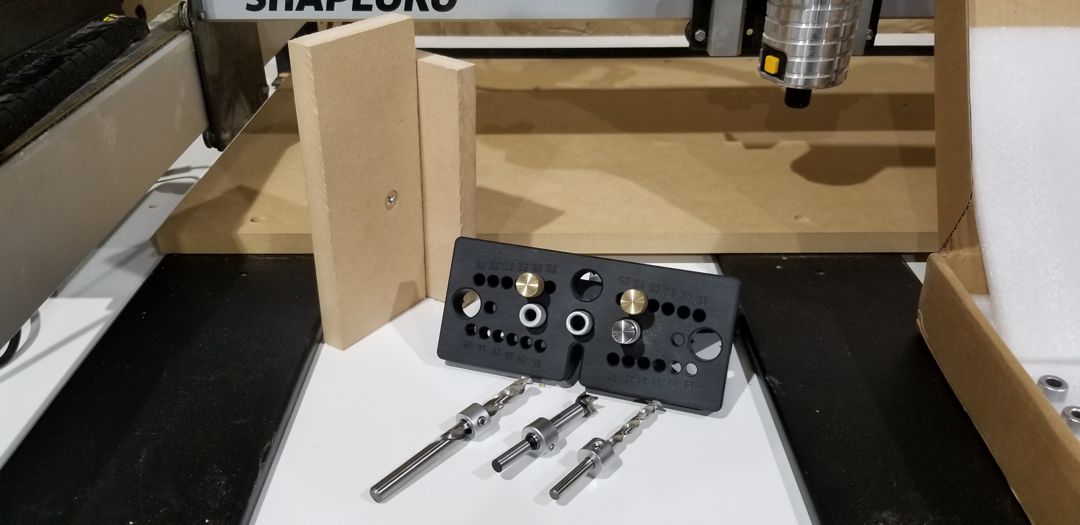
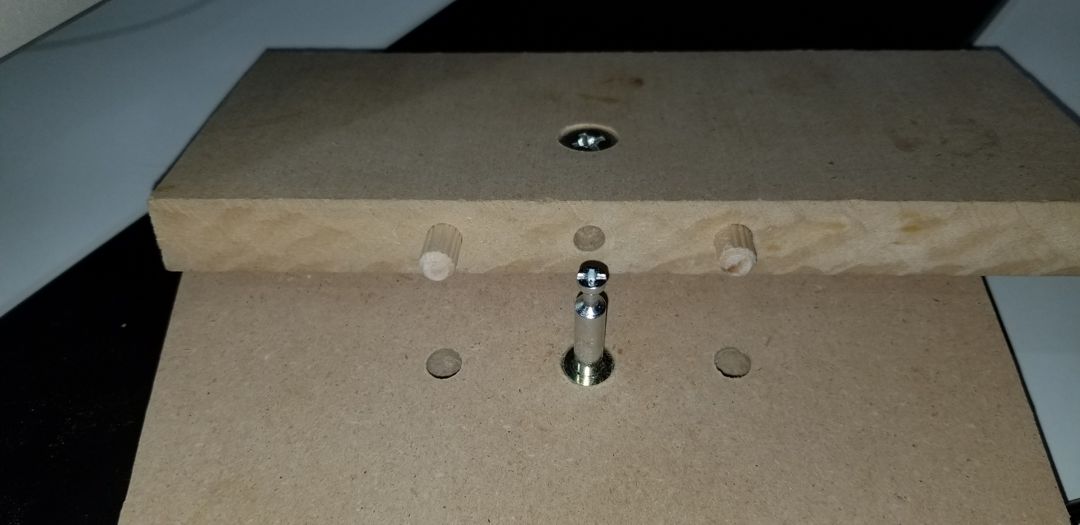
I want to use furniture Cam lock and nut connectors for the cabinet since they make a strong connection and make it easy to remove and reinstall any of the panels as needed. I bought 32 Furniture Cam Fittings a bunch of dowels and a jig to install them off Amazon.
I tested it out on a couple scraps of MDF and it worked perfectly. I’m sure I will use this jig for many other projects since I now own it.
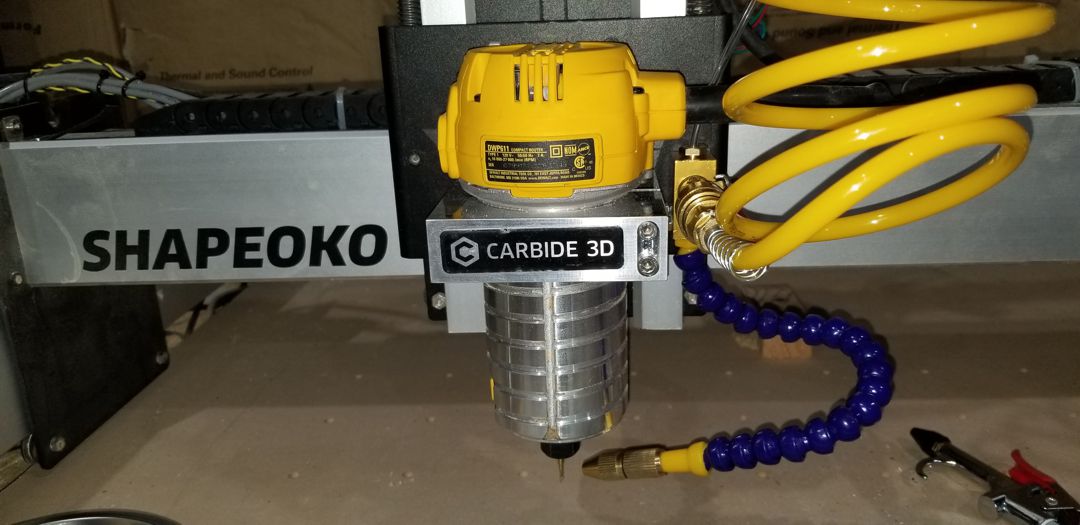
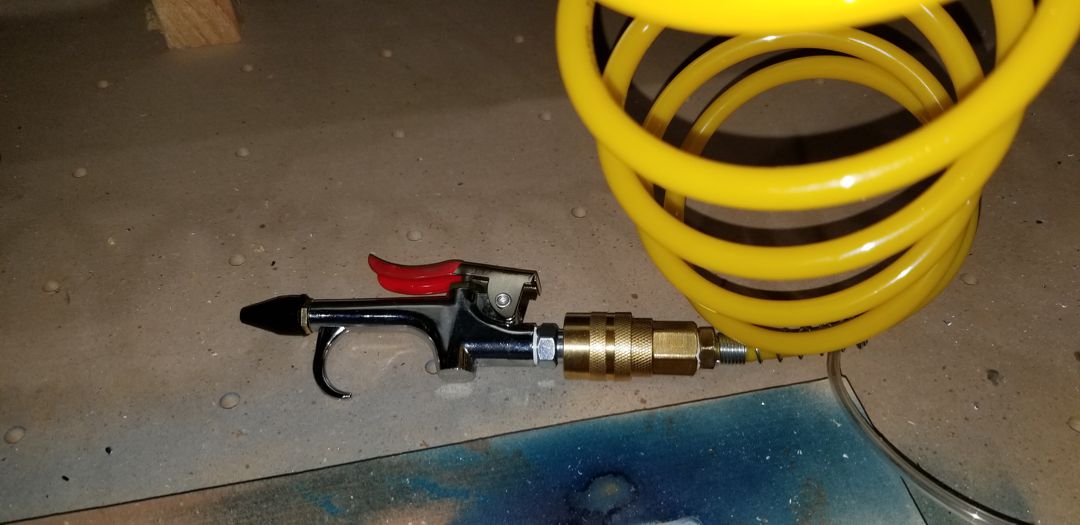
I’m cutting Aluminum and brass now so I decided to add a nozzle. This one will do air and liquid. Very cheap online. I stopped by a HF and picked up an air hose kit for $18. I removed the 1/8" hose connection and fit it with a quick connect.I had to space it out from the router mount so it would easily work. Yes you have to remove the Z axis mount to drill and tap some holes to mount it.
Adding the nozzle is a huge improvement. Not only does it knock the chips away it also keeps the end mills nice and cool. This has been running for 10 hours and is almost done. It looks way better in person than in the picture. The only bad thing is the air compressor scares the crap out of me every time it starts up.
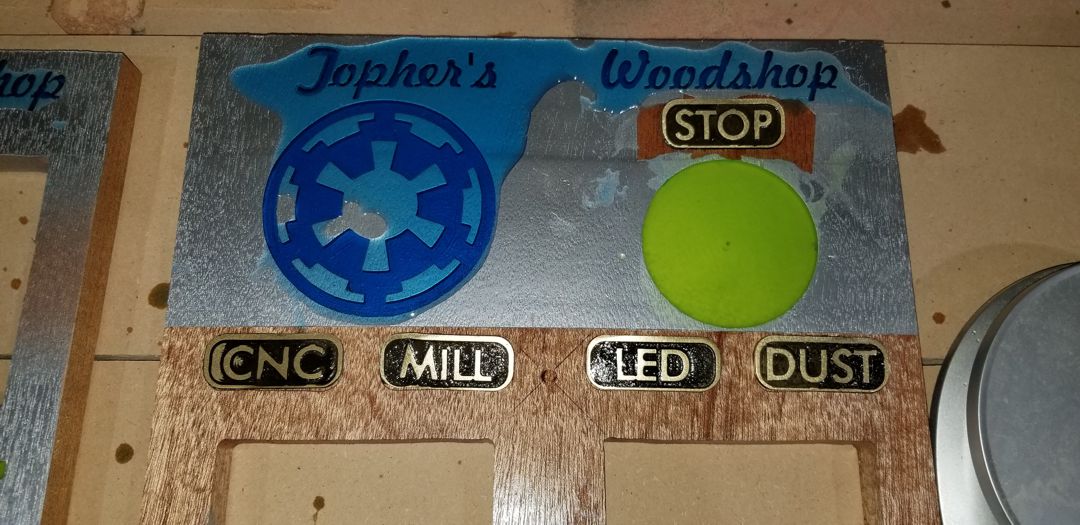
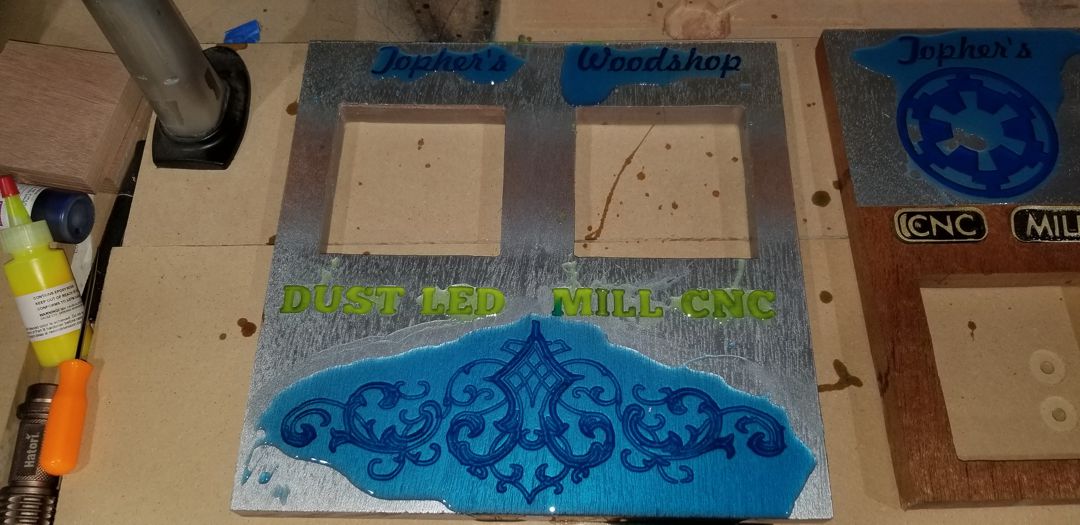
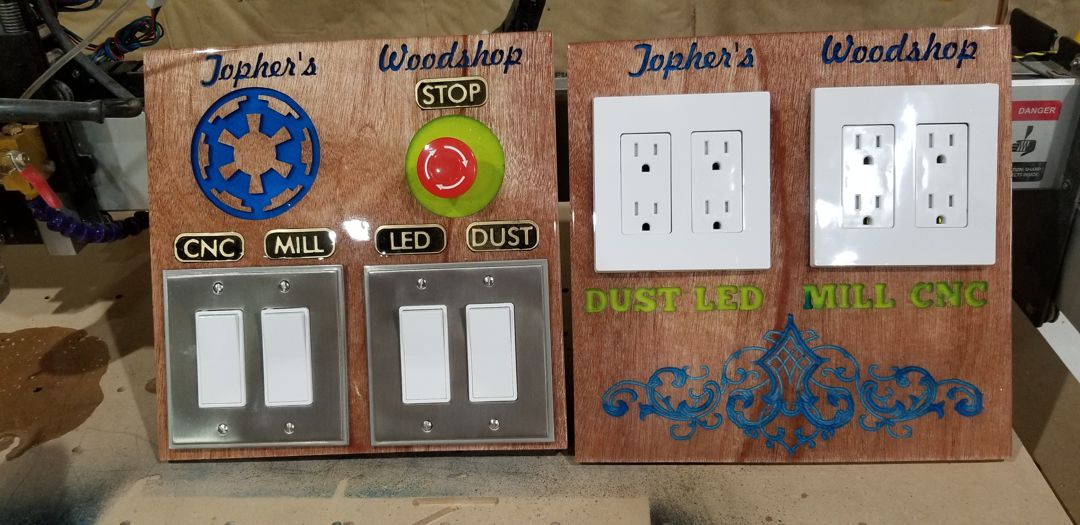
Now I am building a control box to go outside the CNC to hold all the electronics. It will be kinda large itself so I want to make it pretty. After cutting out what I needed on the CNC I painted on a clear coat to protect the mahogany. Then I sprayed a chrome paint to give the next step a better look.
Once it dried I mixed up some acrylic latex with color to fill in the voids. I set my brass inlays there to show where they will go. This is the front where the switches and Emergency stop will go.
I’ve mixed in a product called Micro Balloons with epoxy resin several times. It thickens the mess a little and makes it way easier to sand. I’ve heard of folks mixing in cornstarch as well for same effect. I’ve used this with 30 minute epoxy+micro balloons+dye powder for doing inlays on wood with pretty good success.
The problem with microballoons is that they are glass…which when abraded by sanding can put a lot of silica in the air, which is not so great for your lungs. Try cotton flox instead - the tiny fibers thicken the epoxy better than microballons. Cheaper too. Structurally, the two have totally different uses, but for the purposes here, they’re pretty interchangeable.
Yup, can’t disagree with that at all. Thing is even breathing sawdust is no good (walnut for one is very acidic and many exotics can carry diseases). I have a friend who is a professional gun stock maker. In his early days he put himself in the hospital from breathing sawdust, and still had issues until upgrading to a full face forced air respirator. None of this stuff is good to breathe, albeit some are worse than others (glass probably worse than cotton, but epoxy by itself not great either). Use good dust collection, wear a respirator when needed, follow those dumb “caution” labels few of us read and take care of your health.
I would add, “Don’t wait until you are in the emergency room to think about actually measuring the dust levels in your shop with an air quality monitor.”
I have asthma so I wear a respirator most of the time. It depends on what I’m cutting. I usually have a shop fan blowing and a portable AC when it gets too hot in the garage.
The reason I made the control box so large is I have a bunch of stuff to put inside it. It is going to be fun cutting a lot of wires and soldering extensions on them. I also am going to have to flip the track rails to the other side of the CNC so I can mount the control box on the right side instead of the left. I will need to do this because of the place it is setup in my garage.