Knife Handle Project Overview and files

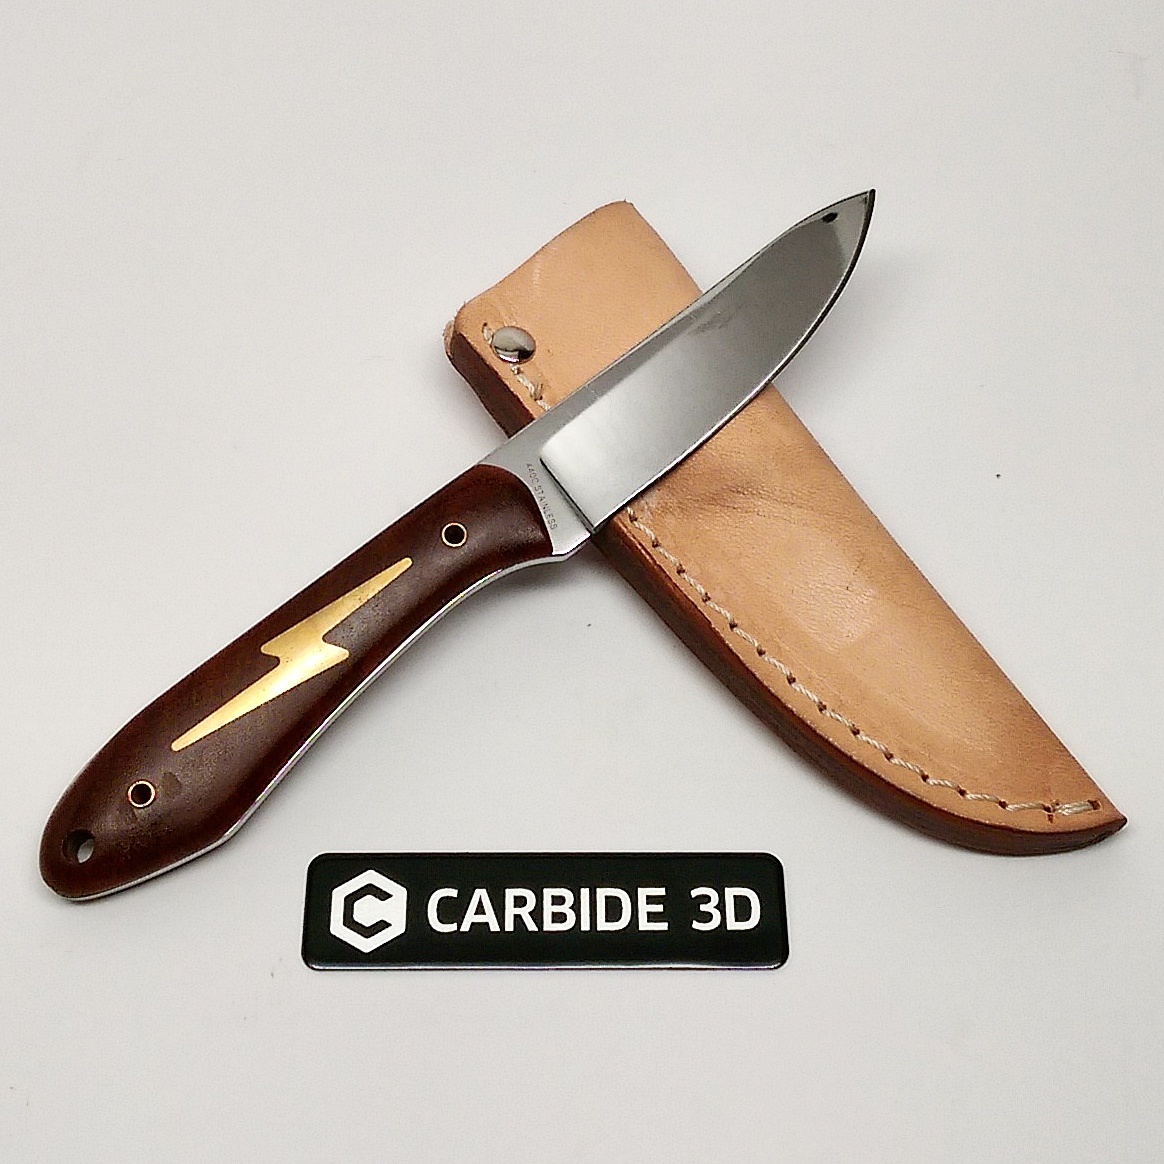
Making Custom Knife handles with an Inlay-

Making Custom Hardwood handles with a metal inlay has its challenges, and by nature any “Custom Inlay” will have its own unique challenges depending on the overall form and specific Inlay design.
Here are some Tips that I found during the process that will help when you regardless of your design.

A-Test your file in Renshape or other modeling stock first to perfect your profile, these hardwoods can be expensive and hard to find.

B-Wood Grain orientation is key-
If you find tear out occurring in the wood, change your grain orientation or your parallel finish direction in meshcam. I found cutting down into the endgrain worked best.

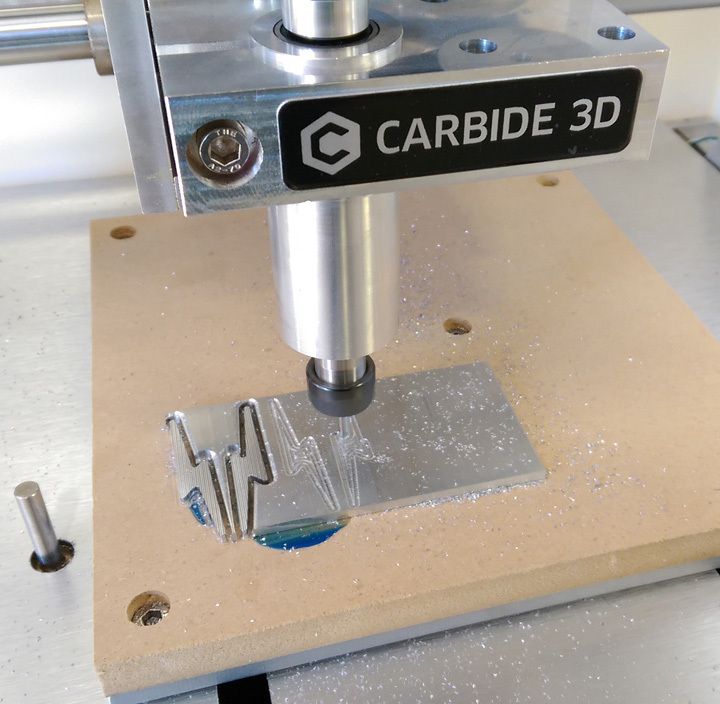
C-Separate your Final pencil / cutout pass as a last and separate job, because I used double sided tape the parts can rip free if you cut through the stock too early.

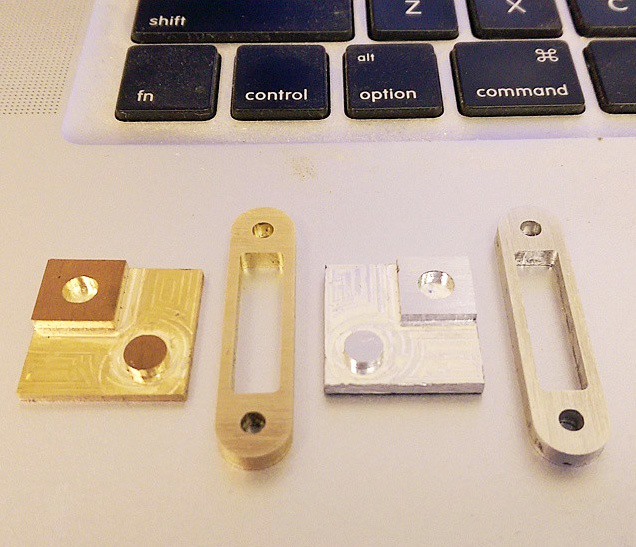
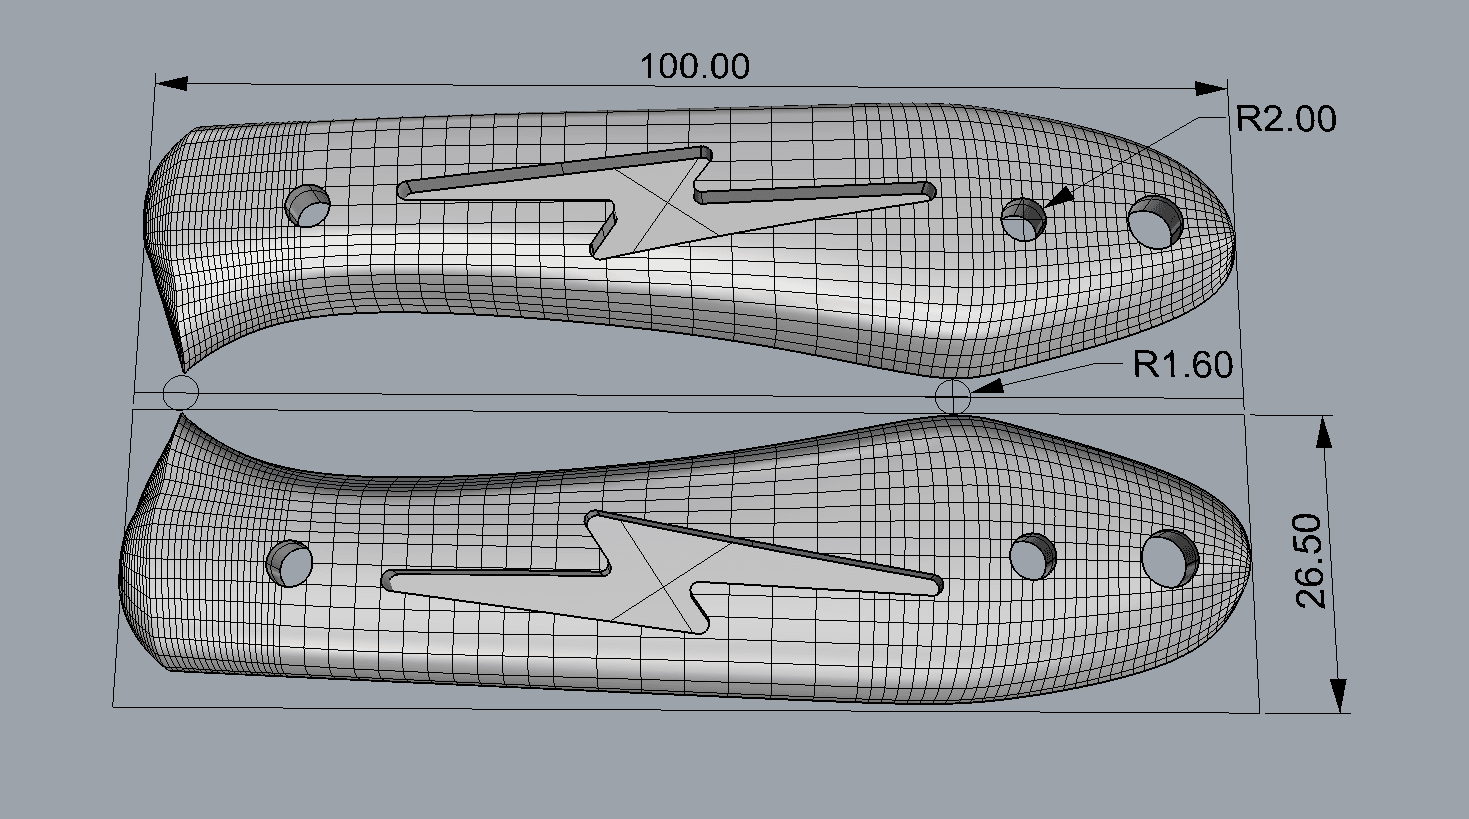
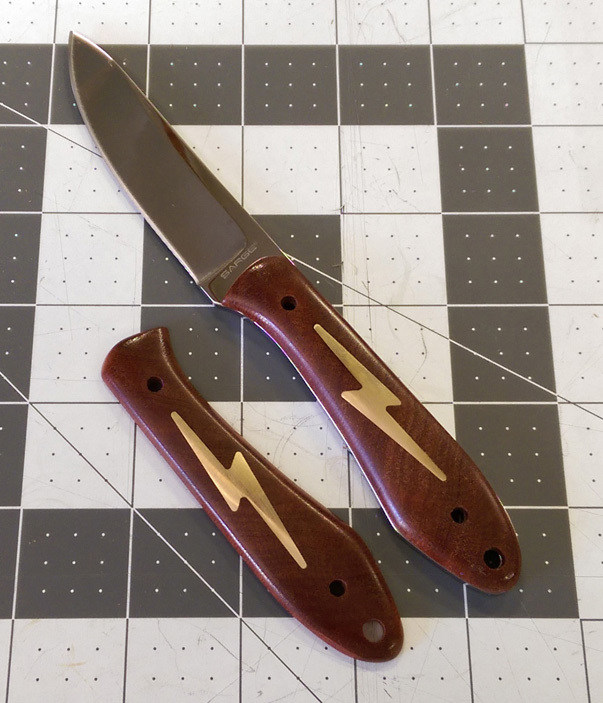
D-The gap between my wood handle and the metal inlay is .1 mm and is a very tight fit.

<img src="/uploads/default/original/1X/65d87d27101dda206a8c4dbf369e1f8cb1f167ae.jpg" width=“416”

Purchased Supplies:
200-400-600-800 sand paper
cheap polishing kit from amazon
super thin super glue
knife blank of your choice
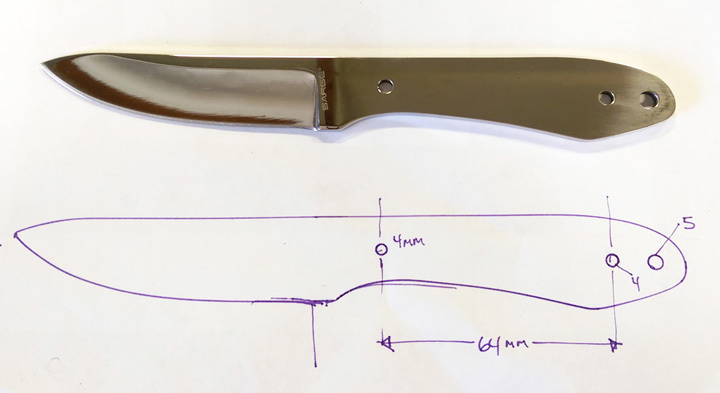
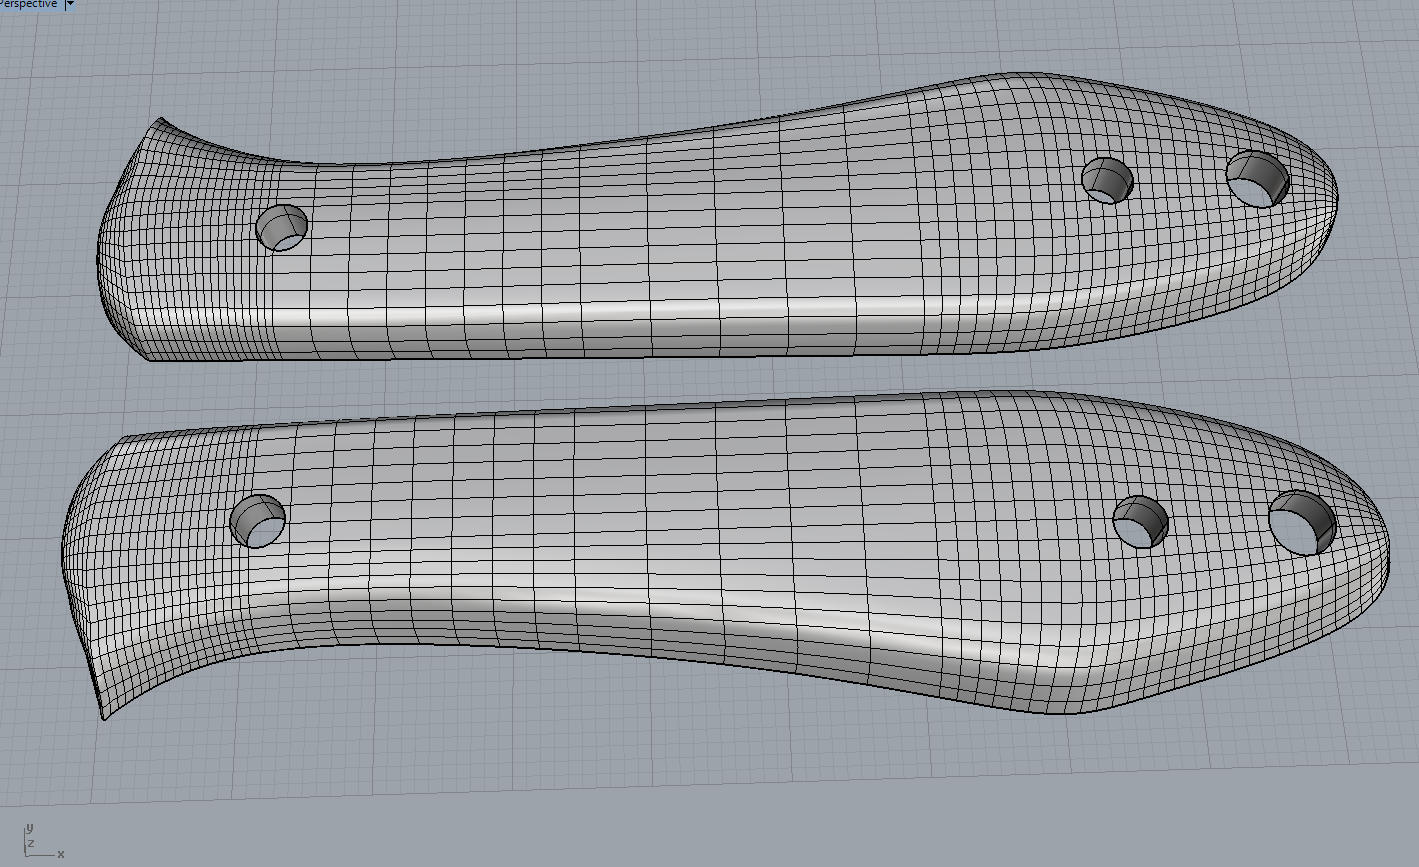
Outline Your Blank

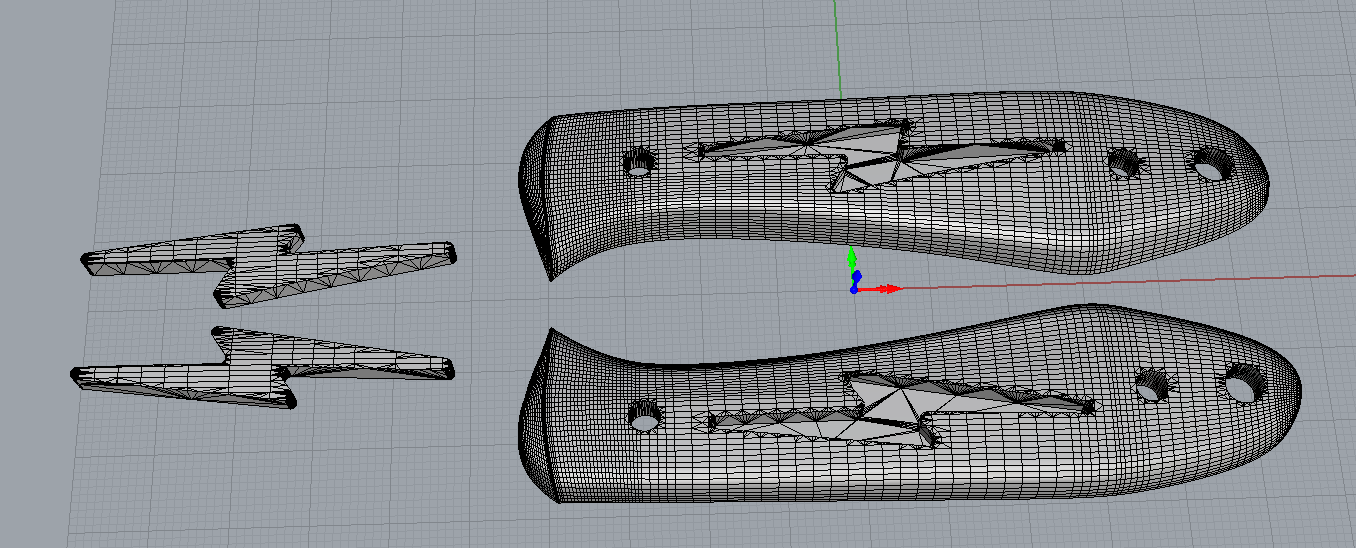
I used Rhino for this project, but most programs have a “Background image” option. I knew the holes in the blade to be 4mm so I could scale the sketch to those features.


6061 aluminum 1/8 thick
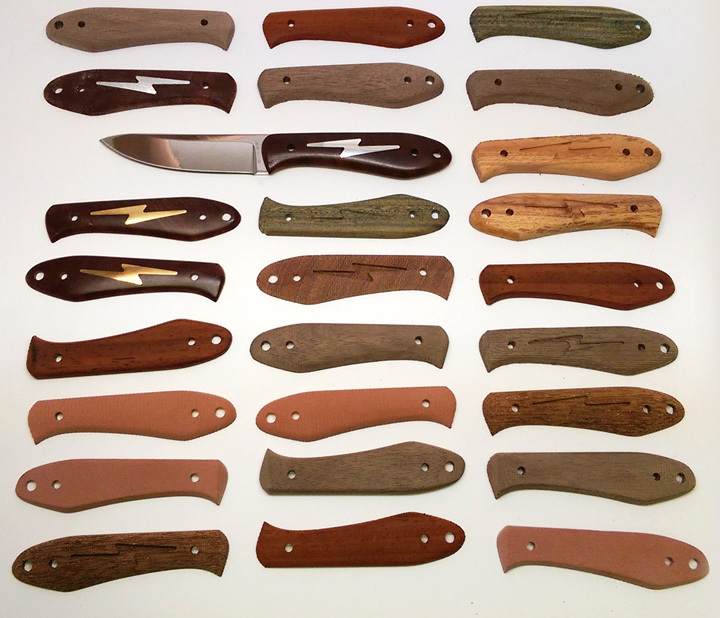
Mahagony endgrain matched blanks.

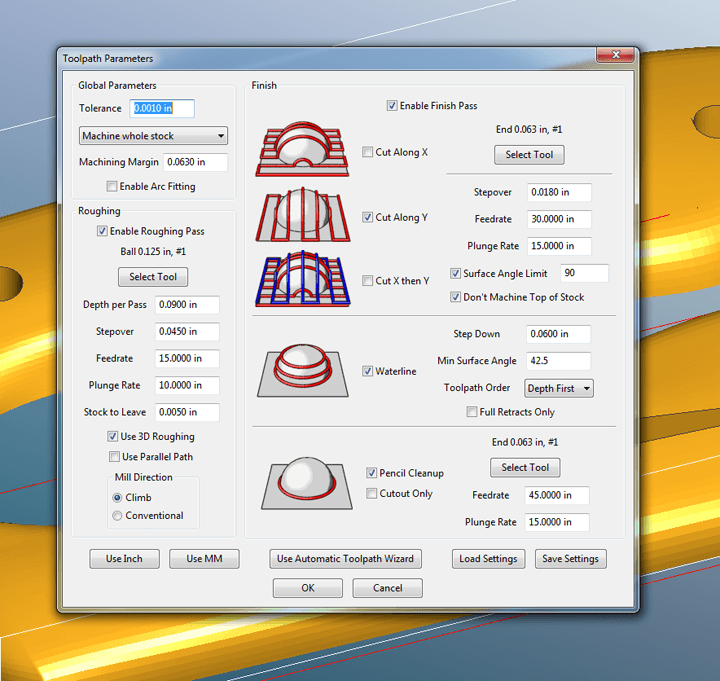
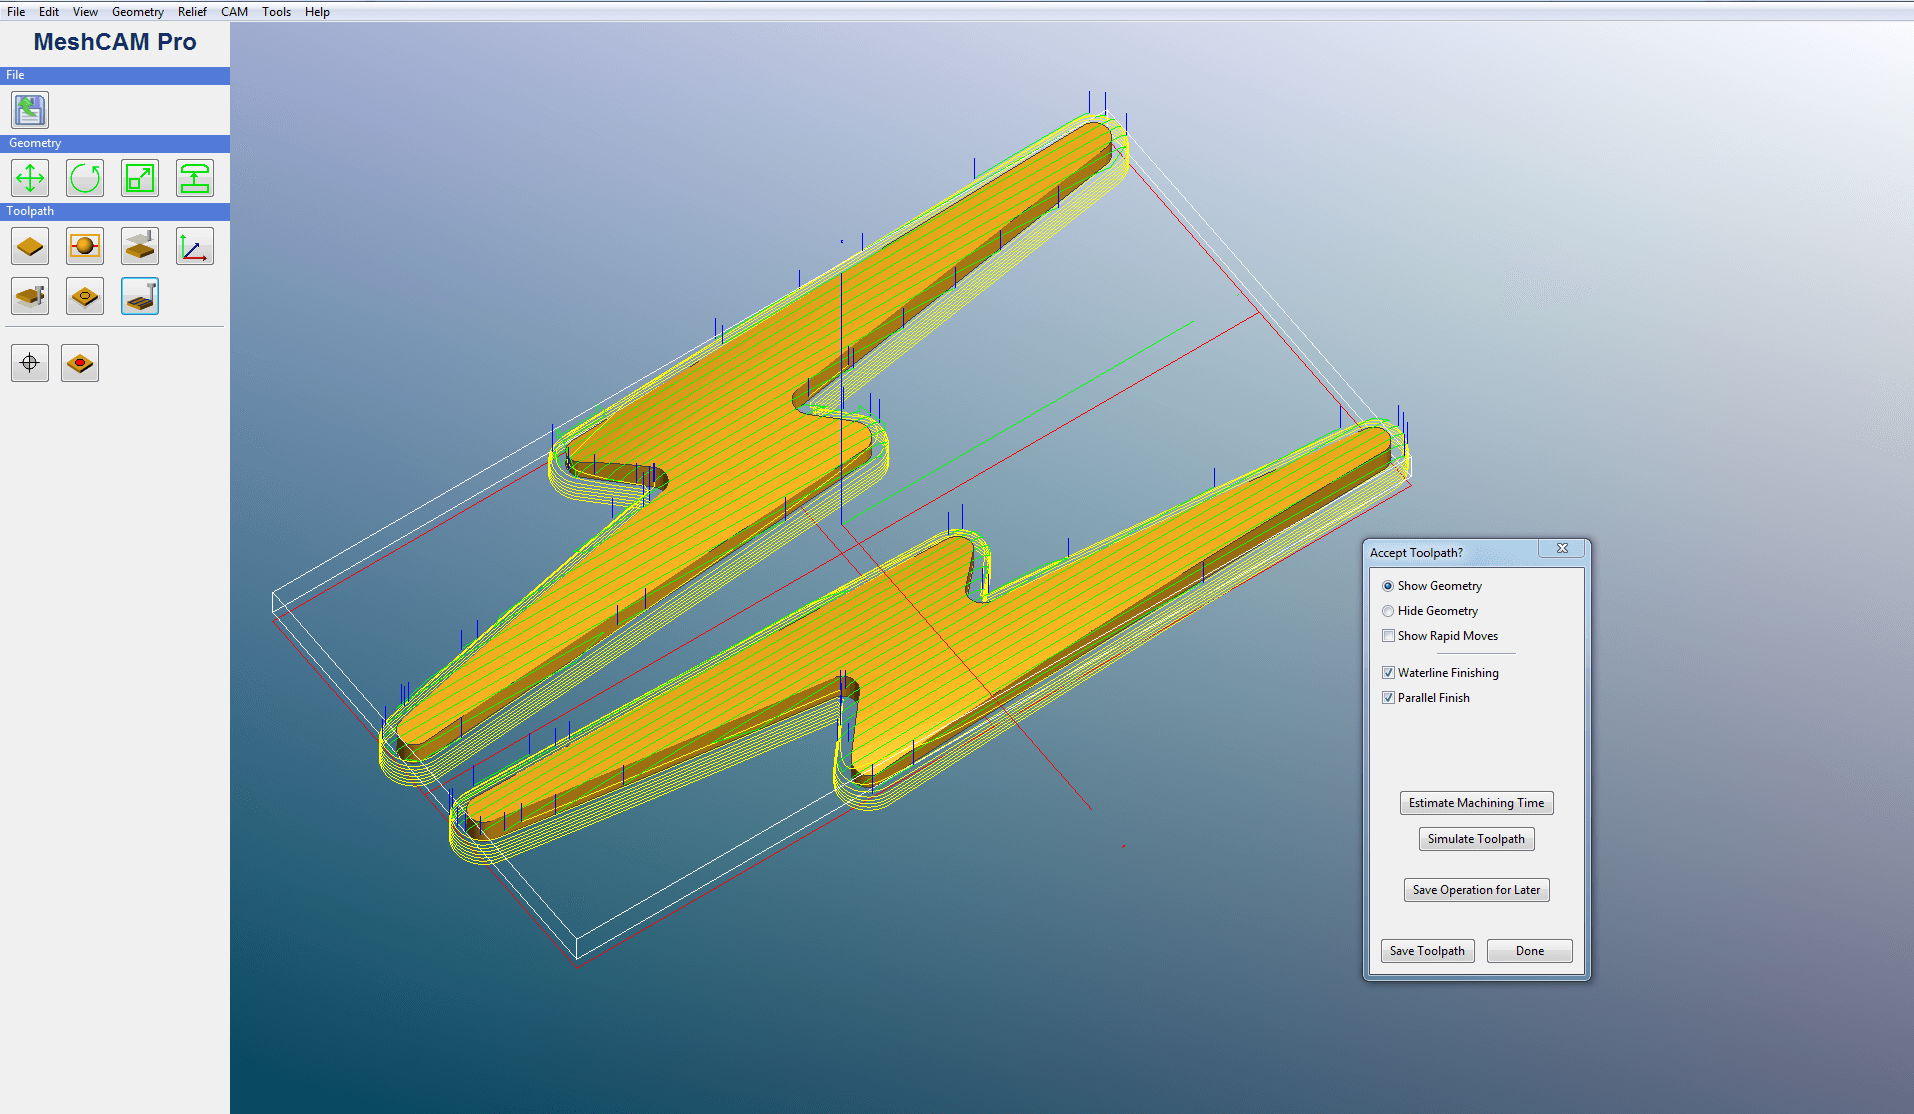
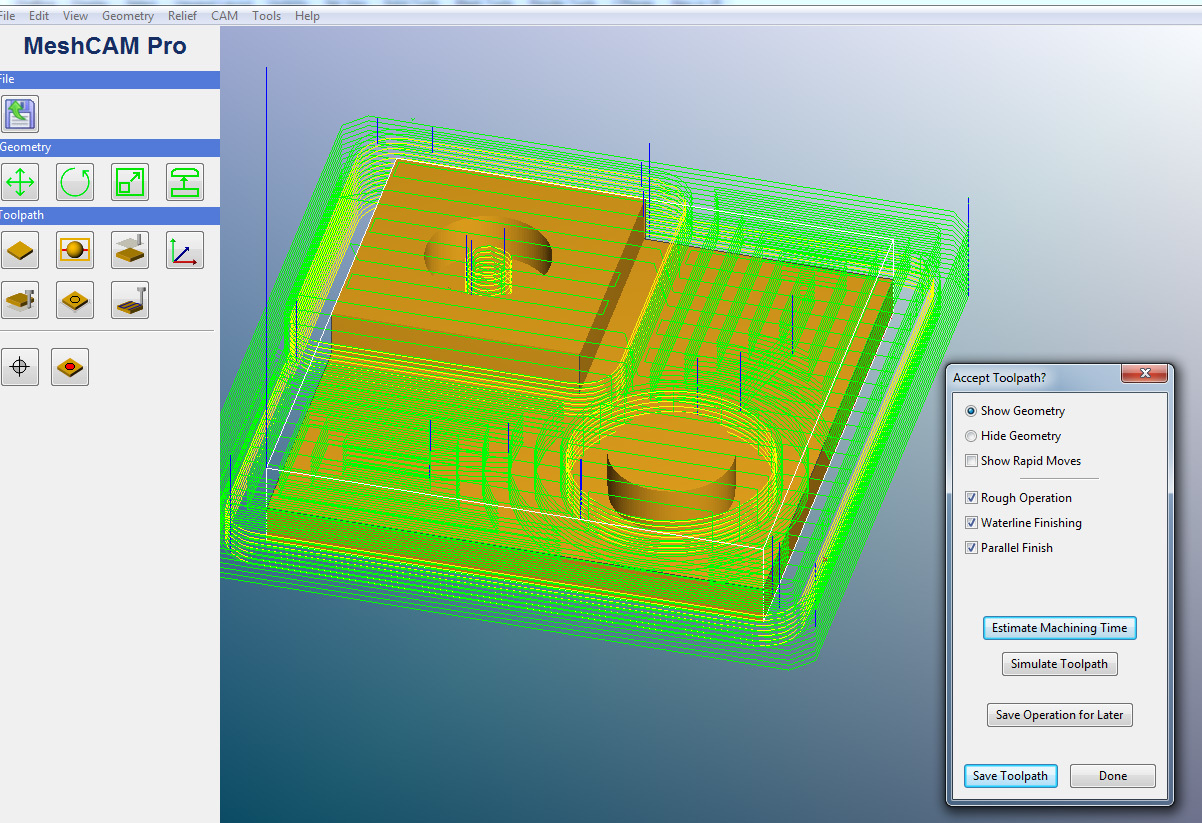
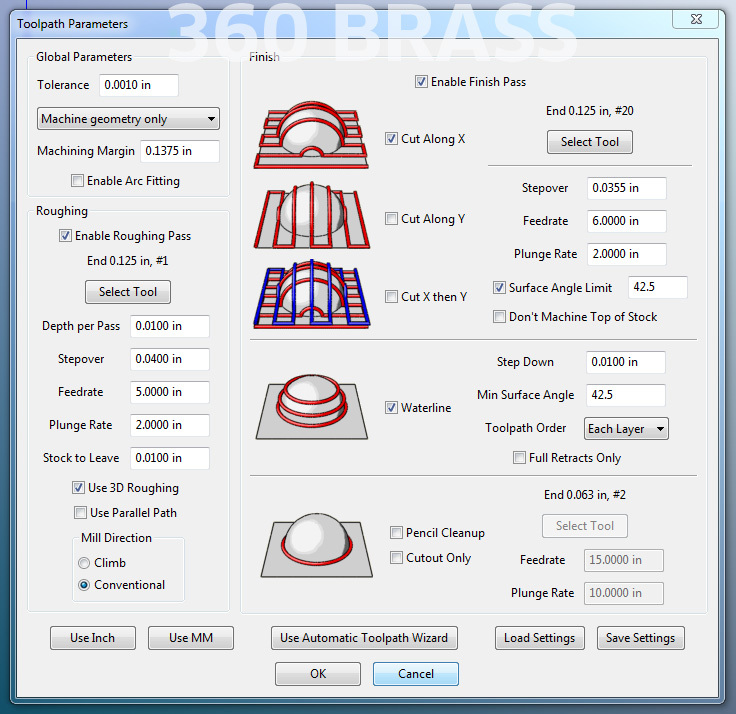
Usually it would not be recommended to parallel finish a 3d contoured part with a square endmill, but since my inlay pocket needed it, and it worked…

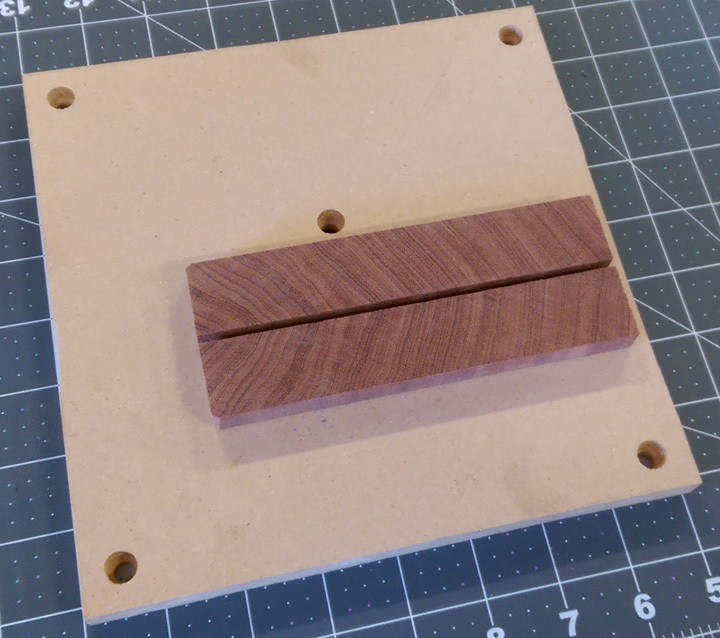
I used a 1/8th thick piece of stock to separate the wood blanks as well as keep them parallel to each other. clamp the stock to the wasteboard and give the tape a chance to grip by wiping your surfaces clean of dust or oil.

This is a tricky place to be, these endgrains are short and want to break, so little by little work the handles free.

This blue fixturing wax is available in the Carbide 3D store:

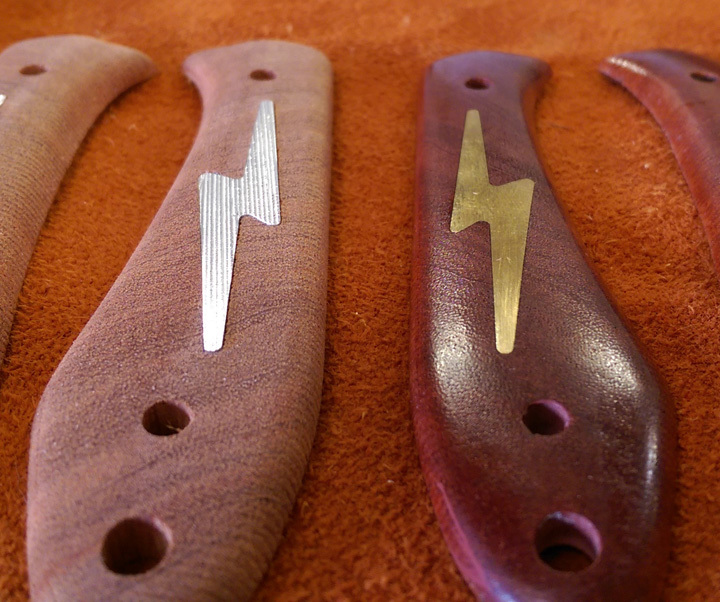
A little pressure and the inlays went into the recess.
Take the usual precautions to make sure you dont glue your self and your work to your work surface and paint on the super glue. your not done until the entire surface has a thin coat. allow to dry - longer the better, I left them over night to cure.


After much sanding I polished with the kit from amazon, and I was very impressed with the results.

Now lets see how i can share these stl files…

3 Likes

@ApolloCrowe

Thanks for sharing your knife handle technique. Great project, well written and
very informative.

What were the toolpath parameters you used for the aluminum and brass cutting?

Beautiful results.

1 Like

Steve,
Thank you for being so active on the forum!
Im really impressed with the work being posted,…
The Carbide3D community is an amazing group of people, and potential.
Im humbled and honored to be able to participate.

Here is a screen capture of the tool path I used for that part:

<img

—These were all cut dry- and I occasionally vacuumed the chips out of the channels when waterline cutting the perimeters of these metal parts.

Heres some other small parts and settings:


As more people start experimenting with metals, a couple pointers;
Securely Hold your work, the wax is great, tape wont do it here.
Check your spindle belt tension, remove any slack from the belt, the four 2.5mm heads to adjust the belt tension can be accessed through the bottom of the Z carriage.

Happy Saturday, and Happy Fathers Day!
-Apollo

1 Like

Thank you for posting this, Apollo! I am in awe of what you and others have been doing.

I’m waiting on some wood stock to arrive and I have a couple ideas for creating an “art” project that’s inlaid as a gift for my wife and our third child due in December. I’m curiously watching the forums for tips and what-not and I’m also very impressed and thankful with what I’ve been seeing folks post. Great community going here!

  • Darricke

Apollo, than you guys for being so inclusive with all of us. I’m at the very beginning of my CNC journey and getting good results and jumping on fun projects keep the juices flowing and the spirits high. Always a good thing at the beginning of any endeavor. Are there any CNC groups worth checking?. I’m in the NY area. Would be great to be able to join one and have one on ones with people and learn from more advanced people.

I noticed that you mill end-grain stock. Does this choice improve the result? I’d have used edge grain, because of the figure and because finishing would be (much?) simpler. However, I admit that I’ve not tried this myself. Thank for the post.

Dick

That is great Apollo, thanks so much! I will try the same as my next project to improve skills :slight_smile:

One question: Where did you find the custom knife kit? EDIT: Never mind, i found it: [here]I was able to find the Polishing kit at Amazon (http://amzn.to/1SRjPnz) too.

If you have dropbox, would it be possible to post the links for your STL files so we have a easy template that is known to work for that type of knife? That would help immensely to try the first time. That way we know that if it doesn’t work, its not the STL’s fault :smile:

Maybe even post one without the Lightning Bolts so we can surprised our loved ones with a knife with their name engraved or so? Might show them that the NOMAD is not just a toy :wink:

bump :wink: any chance we could get those files Apollo? Really interested in trying that :smile: Especially the one without the Lightning bolt, that way we don’t need to use aluminum if we don’t want to. Pretty please? :wink:

Oliver

How do you know if your belt has sufficient tension? How tight should it be?

Just remove any slack.
If you press on the belt with your index finger, in the middle of the pulleys, 2mm deflection is a good target.

Project Files available below.


Heres the knife kit on Amazon:

STL files for the Sarge “Semi Skinner” Knife kit.

Z bolts inlays Sarge Semi Skinner handles.stl (68.3 KB)

Sarge Semi Skinner handles with Z bolts.stl (1.1 MB)

Blank Handle:
Sarge Semi skinner handle blanks.stl (2.0 MB)

DXF of Sarge Semi-Skinner handle
Sarge Semi skinner handle outline.dxf (618.1 KB)

Additional Knife Source:
http://www.knifemaking.com/