So I’ve done my Hello World and it looks like everything is working nicely.
I have a question about wasteboard levelling. I see two variations of T-Track setup. One has ~23" tracks and MDF extending the full width and depth of the table. The second appears to only have MDF in the actual working area of the tool head.
If I plan to level the wasteboard, I am presuming that the only option is to use the reduced size. Otherwise any piece that is larger than the levelled area will defeat the benefits of a levelled wasteboard?
I’d add on a supplementary MDF wasteboard, just inside the work envelope of the machine (how large it can actually cut), then level that. If you use larger pieces that need to extend off the edges, it’ll be fine.
I’ve gone through possibly every variety of smart-guy workholding solution that exists. In the end screws and hot glue are simple, fast and never fail. Not to mention cheap
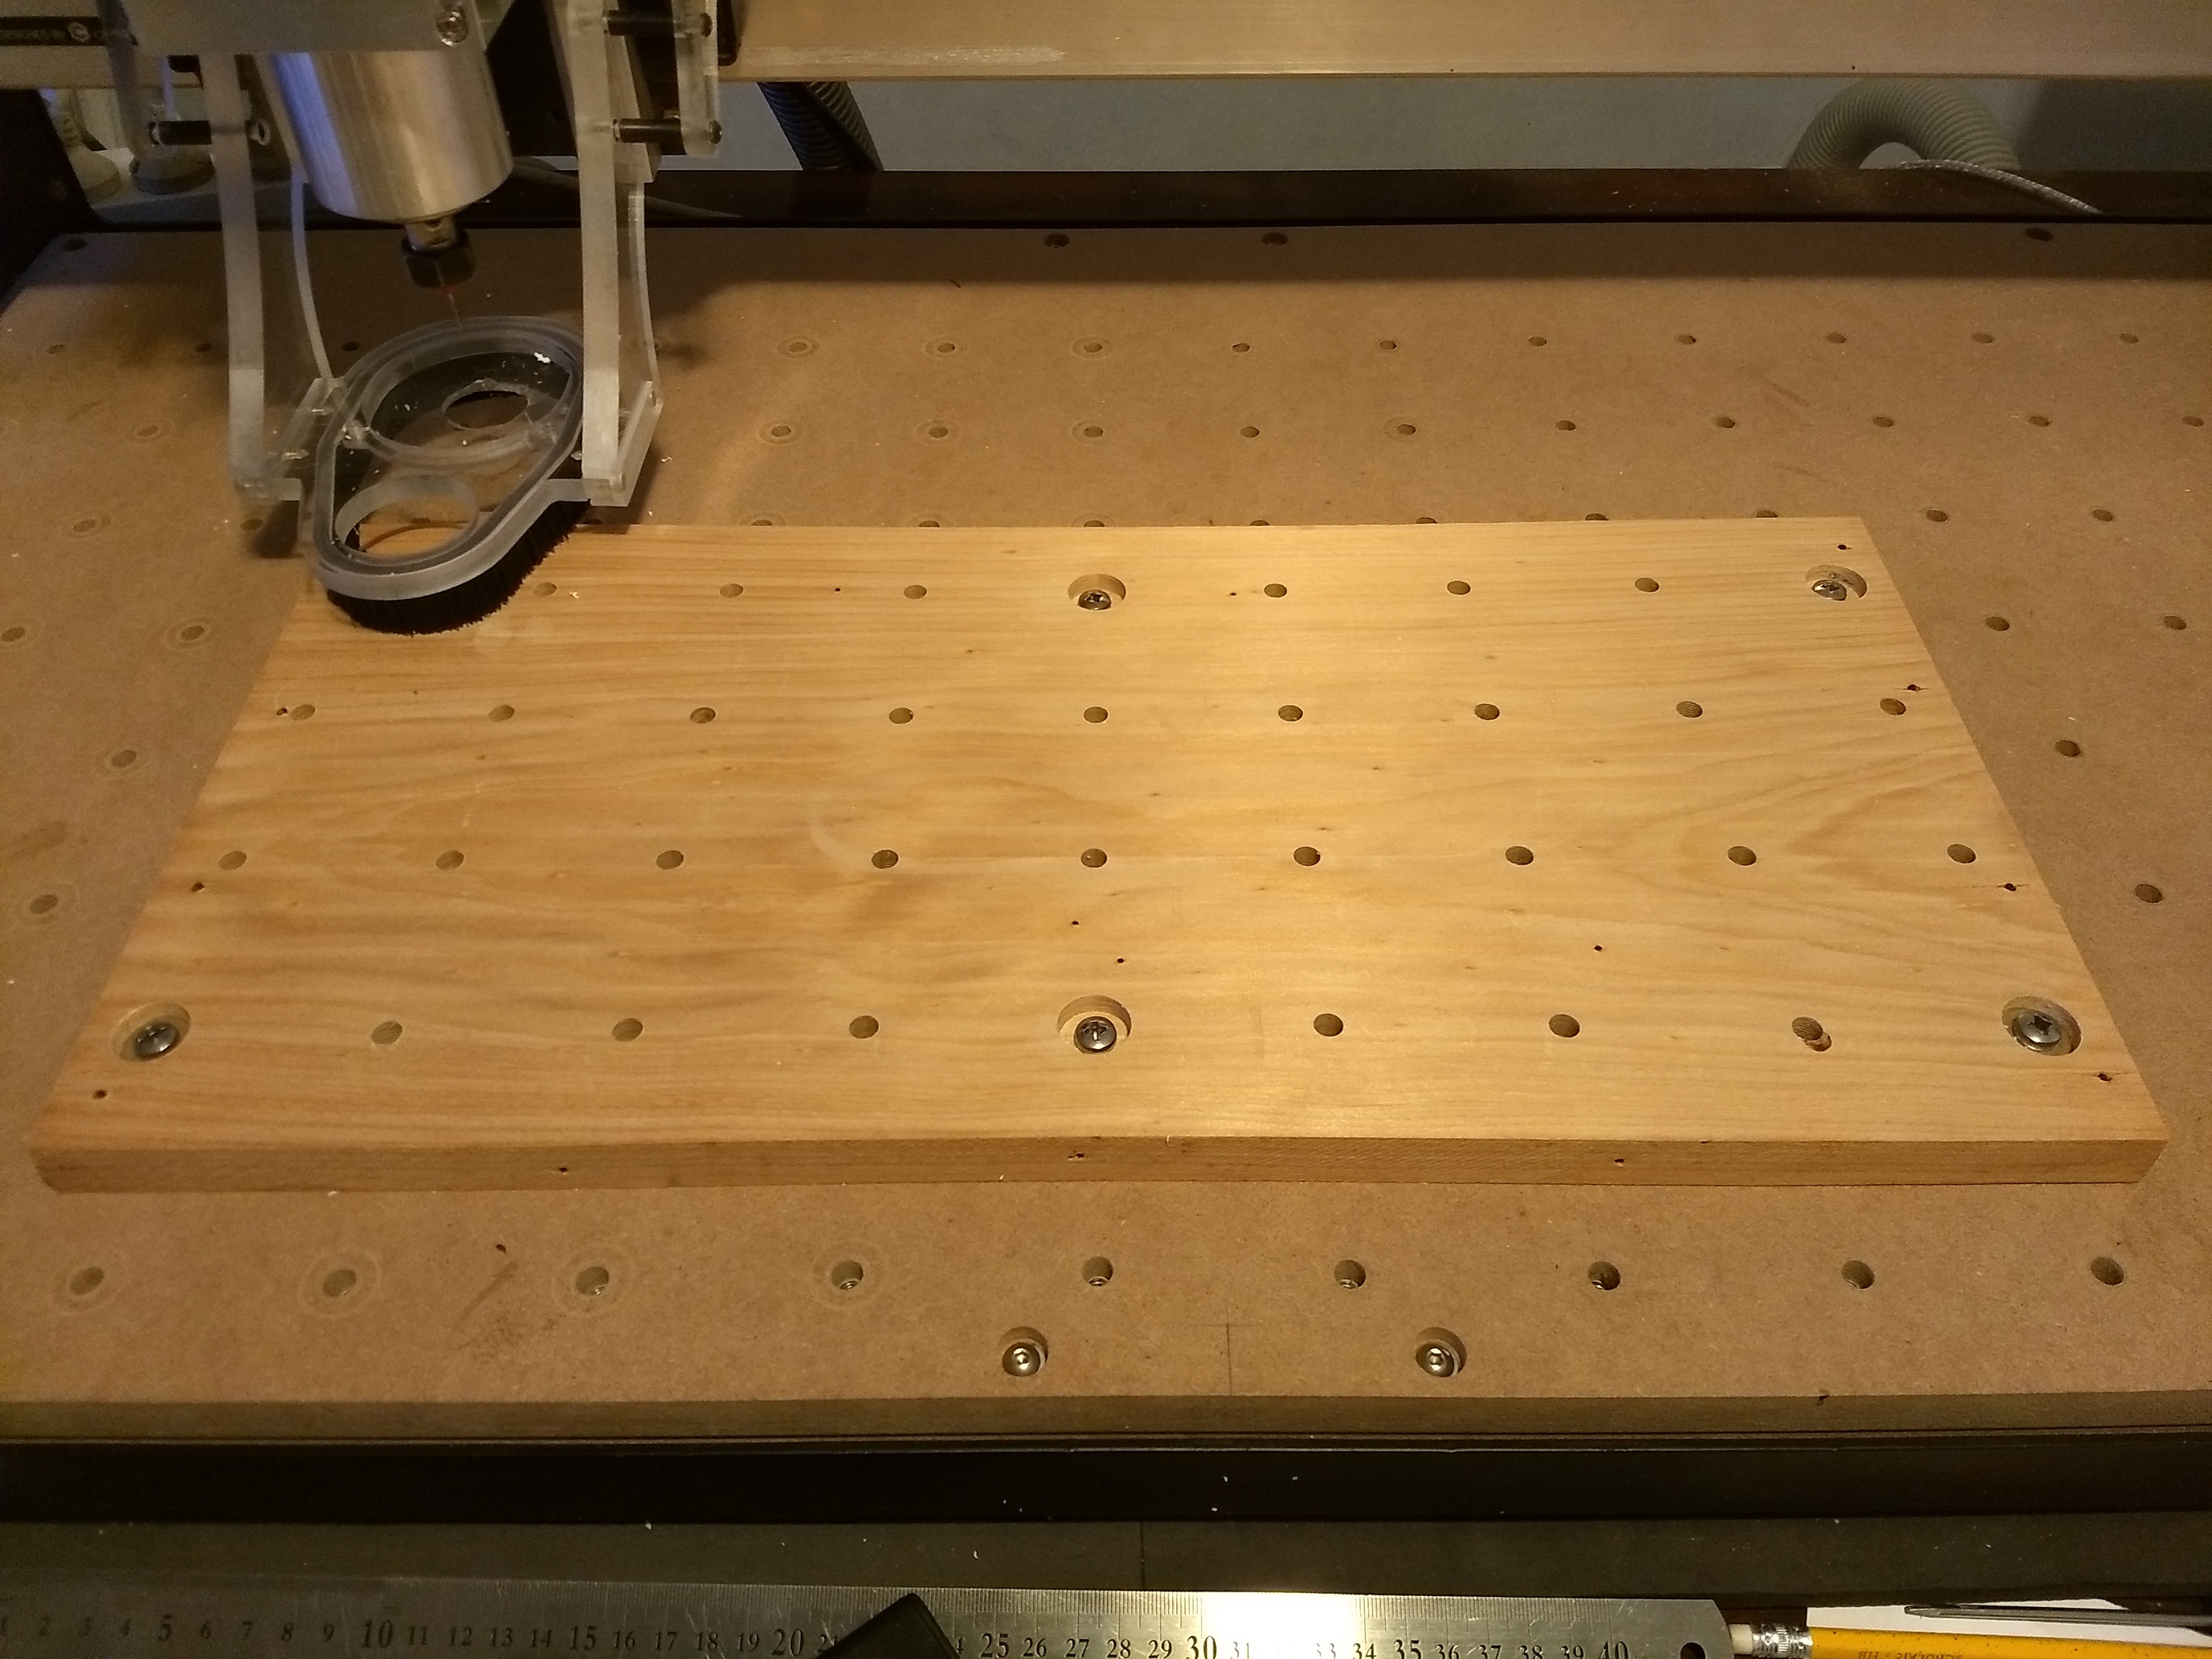
Ben, I have an XL but most of the work I do is much smaller. As Adam says make a supplementary wasteboard. Mine is about 550mm x 275mm. As you can see from the pix I have the main XL wasteboard drilled and fitted with M6 threads. My supplementary wasteboard (an old piece of pine) sits on top and is not threaded but has 7 or 8mm dia. holes drilled through with 6 hold-down screws pocketed so that I can skim the top a number of times. If I need a larger work area I just drop off the supplementary board and while it hasn’t been skimmed it’s pretty close to flat (for my purposes anyhow). This works beautifully for me. My thread pattern by the way is a 2.5" grid although in retrospect a 2" grid would have worked better.
Like Adam I too have used a number of different hold-downs. I like M6 screws and I especially like the masking tape/superglue solution.
Thanks, that makes a ton of sense. I’ve cut all the MDF based on this design that I like:
As an aside - Is there a tutorial on how to drill all those holes? Given you can’t reach the entire board I’m kind of confused how it’s done, unless it’s just the old fashioned way
Excellent that you have worked out your hold-down ideas and t-tracks are certainly an ideal way to go.
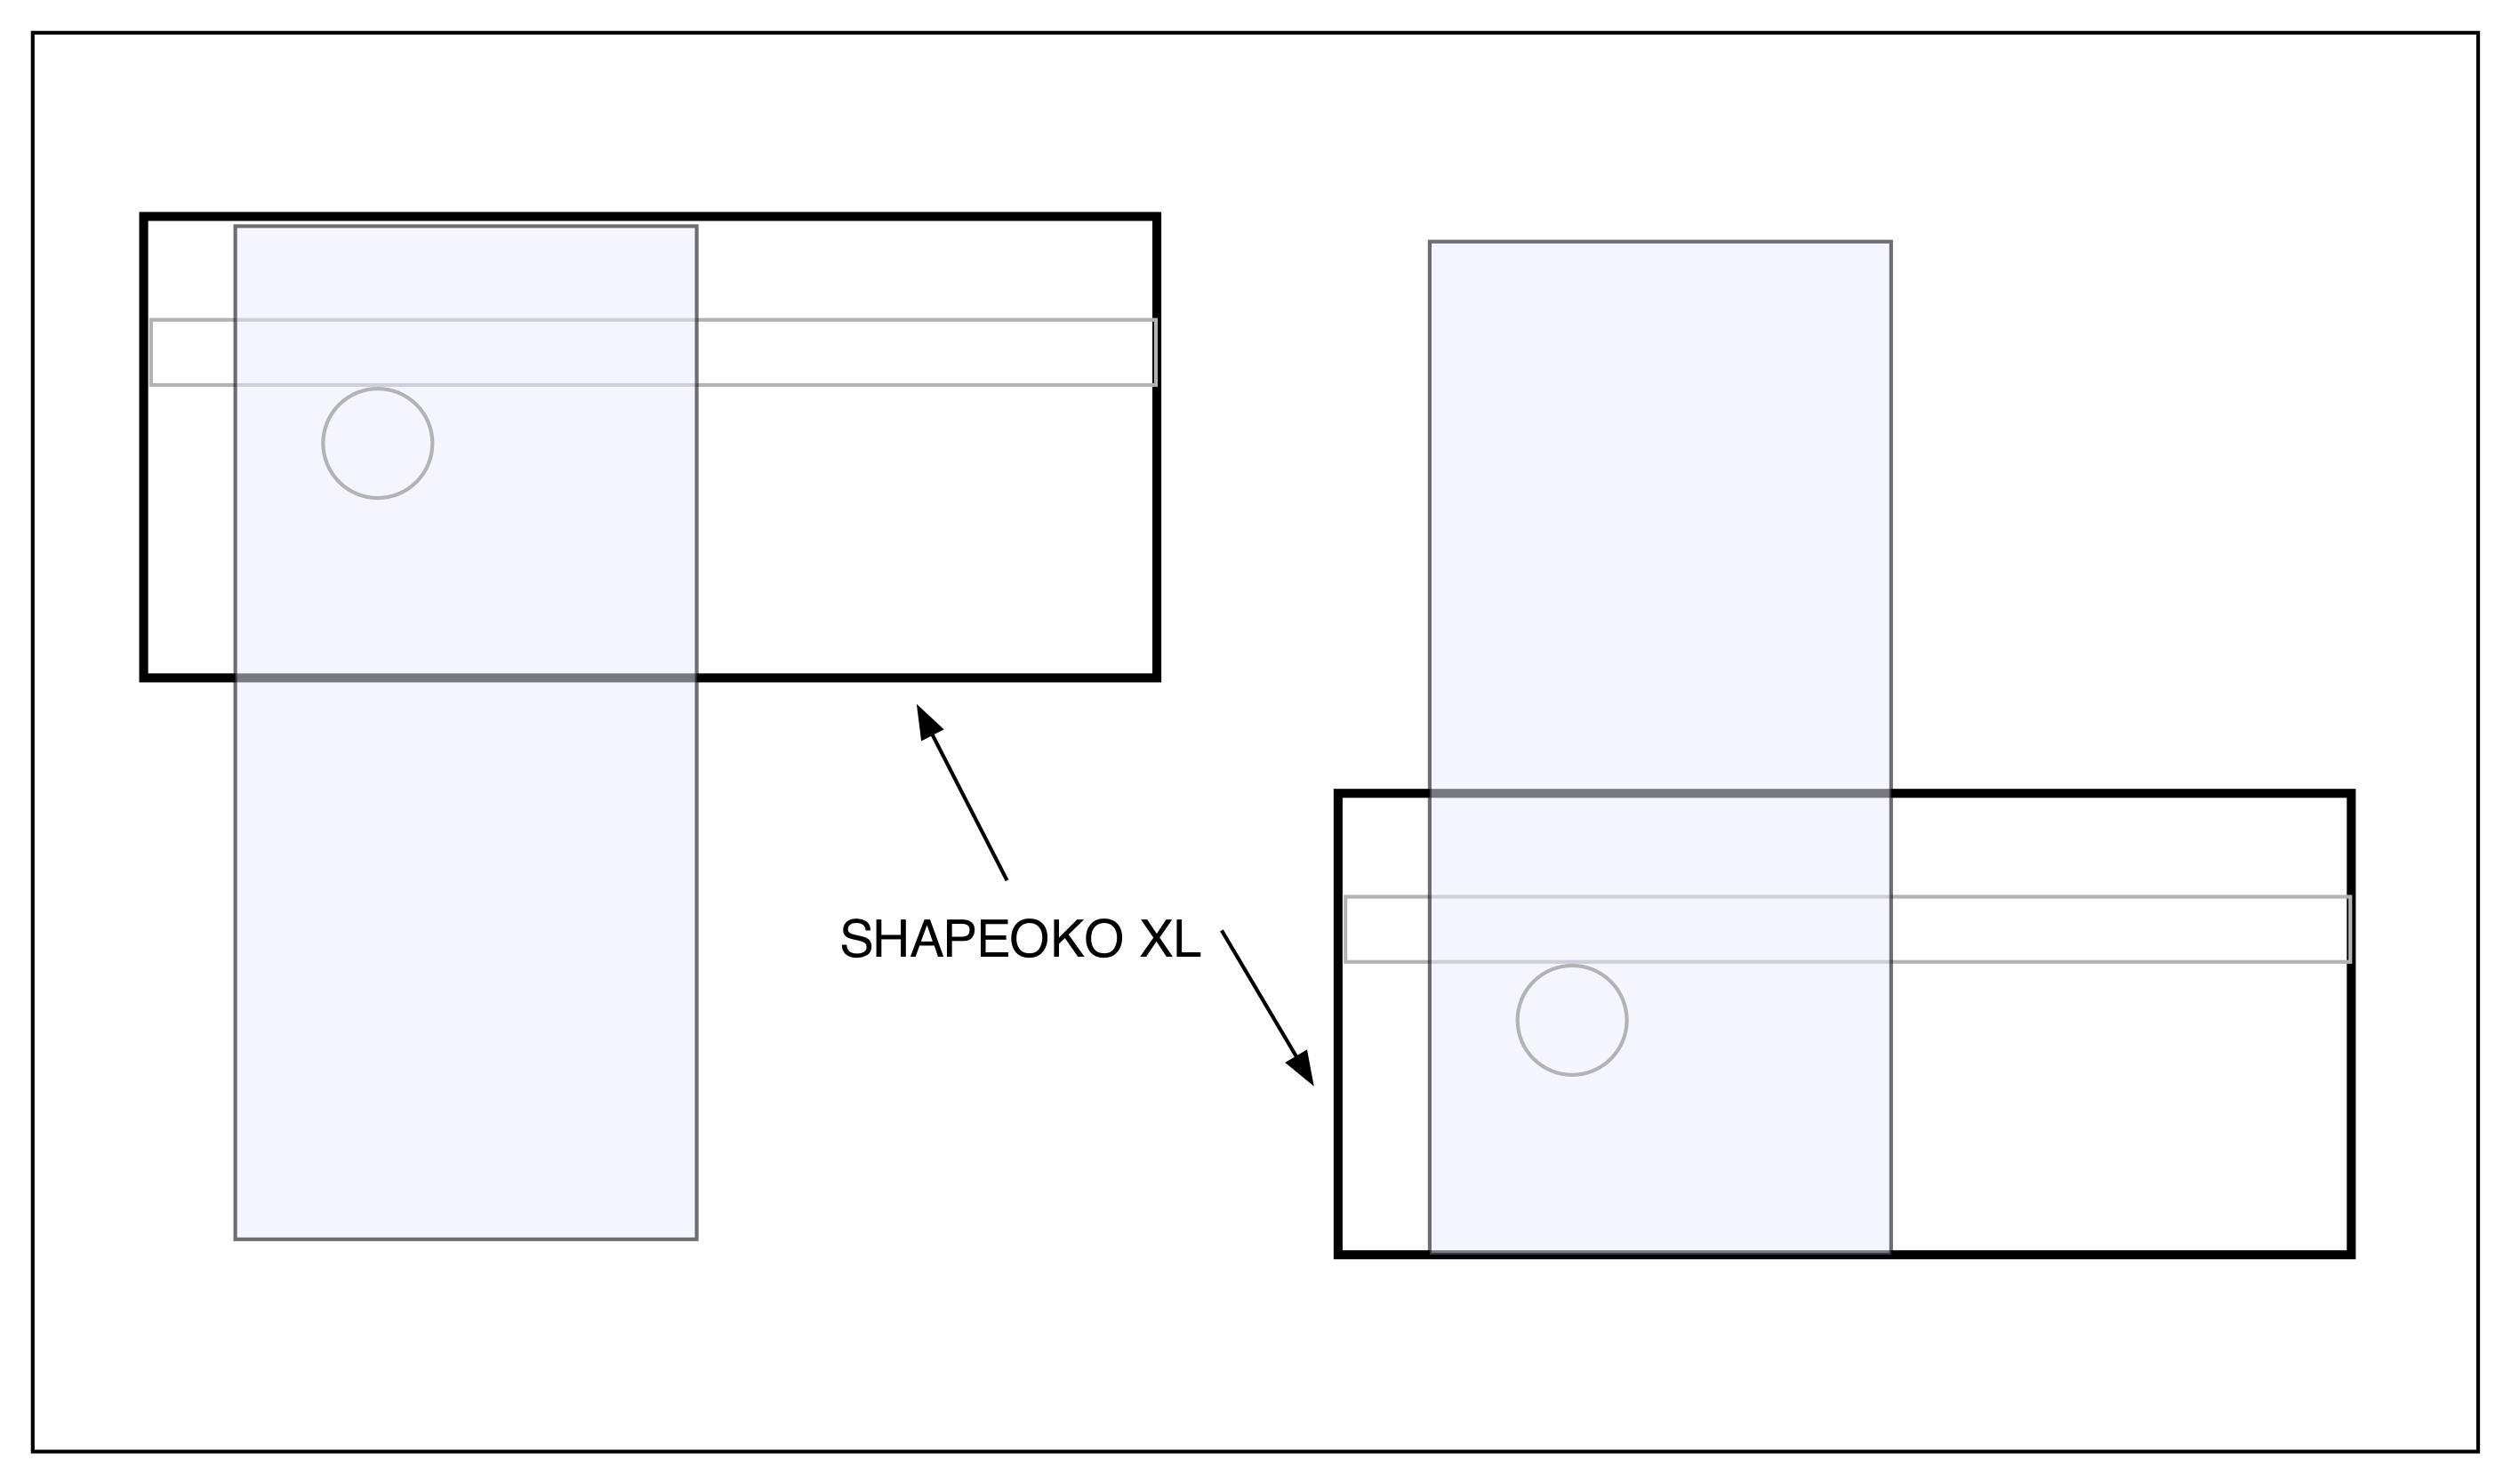
Bearing in mind that I have an XL I did mine in two goes (or three, I can’t remember exactly) by what is called tiling. Hopefully the diagram below may explain.
Where abouts on the globe are you? Our timezones seem close.
Thanks, I have the XL as well so that makes sense. I thought there might be a less obvious solution! And I’m guessing rigidity is less of an issue when you’re just drill holes. Now I just need to figure out if I need to do both.