Nomad and SO3: Custom Enclosures (the enclosure zoo)

Thanks Nick for opening this thread. Some really good ideas are out there and hopefully folk will rally to post some photos also (a picture tells a thousand words) highlighting their achievements.

I haven’t worked with wood yet, only aluminum (larger T6-6061 blocks), but found it immediately necessary to a) change the bed to accommodate the stock and b) build an enclosure in order to limit the mess (also add some form of shielding for the onboard electronics).

So far so good, with the low cost additions.

• Added the 80/20 bed and legs (to increase z-axis range) - $180 plus $50 nuts and bolts, made the Leg Plates from scrap lying around

• Added Pillar blocks and Clamps (to hold the work down) - $150

• Added the Perspex cover - $150 plus duct tape, scrap aluminum angle etc

• Added energy chain and limit switched (currently not used) - $25 est (3D printed ends and mounts for the micro switches)

• Added Electronics and Fan cover - $6 for the screen plus 3D printed cover and perimeter

I’ve attached some photos of the larger completed jobs (stock slide 1” x 6” x 14”) and am about to embark on a 2” x 2” x 30” latticework stock next month once I get the overlap working.

Hope you thread sparks even more interest, bringing innovative ideas to the table (pardon the pun)?

16 Likes

VERY NICE @sliso!

Your T-Slot bed is very nice. I especially like the well adaptation for tall parts and how easily you can open and close the well. I’ve seen this before but this is one of the nicest executions I’ve seen.

The raising legs are a nice touch! For large scale machines I try to get the bed at waist height as this seems to make loading stock easiest. Looks like you’ve got it in just the right place for you.

Your see-through enclosure is delightfully minimalistic - maximum visibility.

mark

1 Like

@sliso wow… That is a mighty fine set-up you have there!

I definitely need to do something about covering the driver board of my machine, especially when I start working with more aluminium.

Do you have a grill or shield underneath the driver board to stop any chips being flung up from underneath?

I really need a 3d printer to make little mods like this, so useful!

Yes Nick, it is essential to cover the bottom of the driver board also. Both the upper and lower covers are identical.

No reason why they can’t be cut/milled (using your SO3) from perspex/plastic/wood etc, if you don’t have access to a 3D printer? I used the printer only because i needed to some contribution from it to justify its existence now that its built and its initial task is complete…

Good point, I think I will try both and compare! I woke up after a new years party and discovered I had ordered a Prusa the night before… so I guess now I have one haha

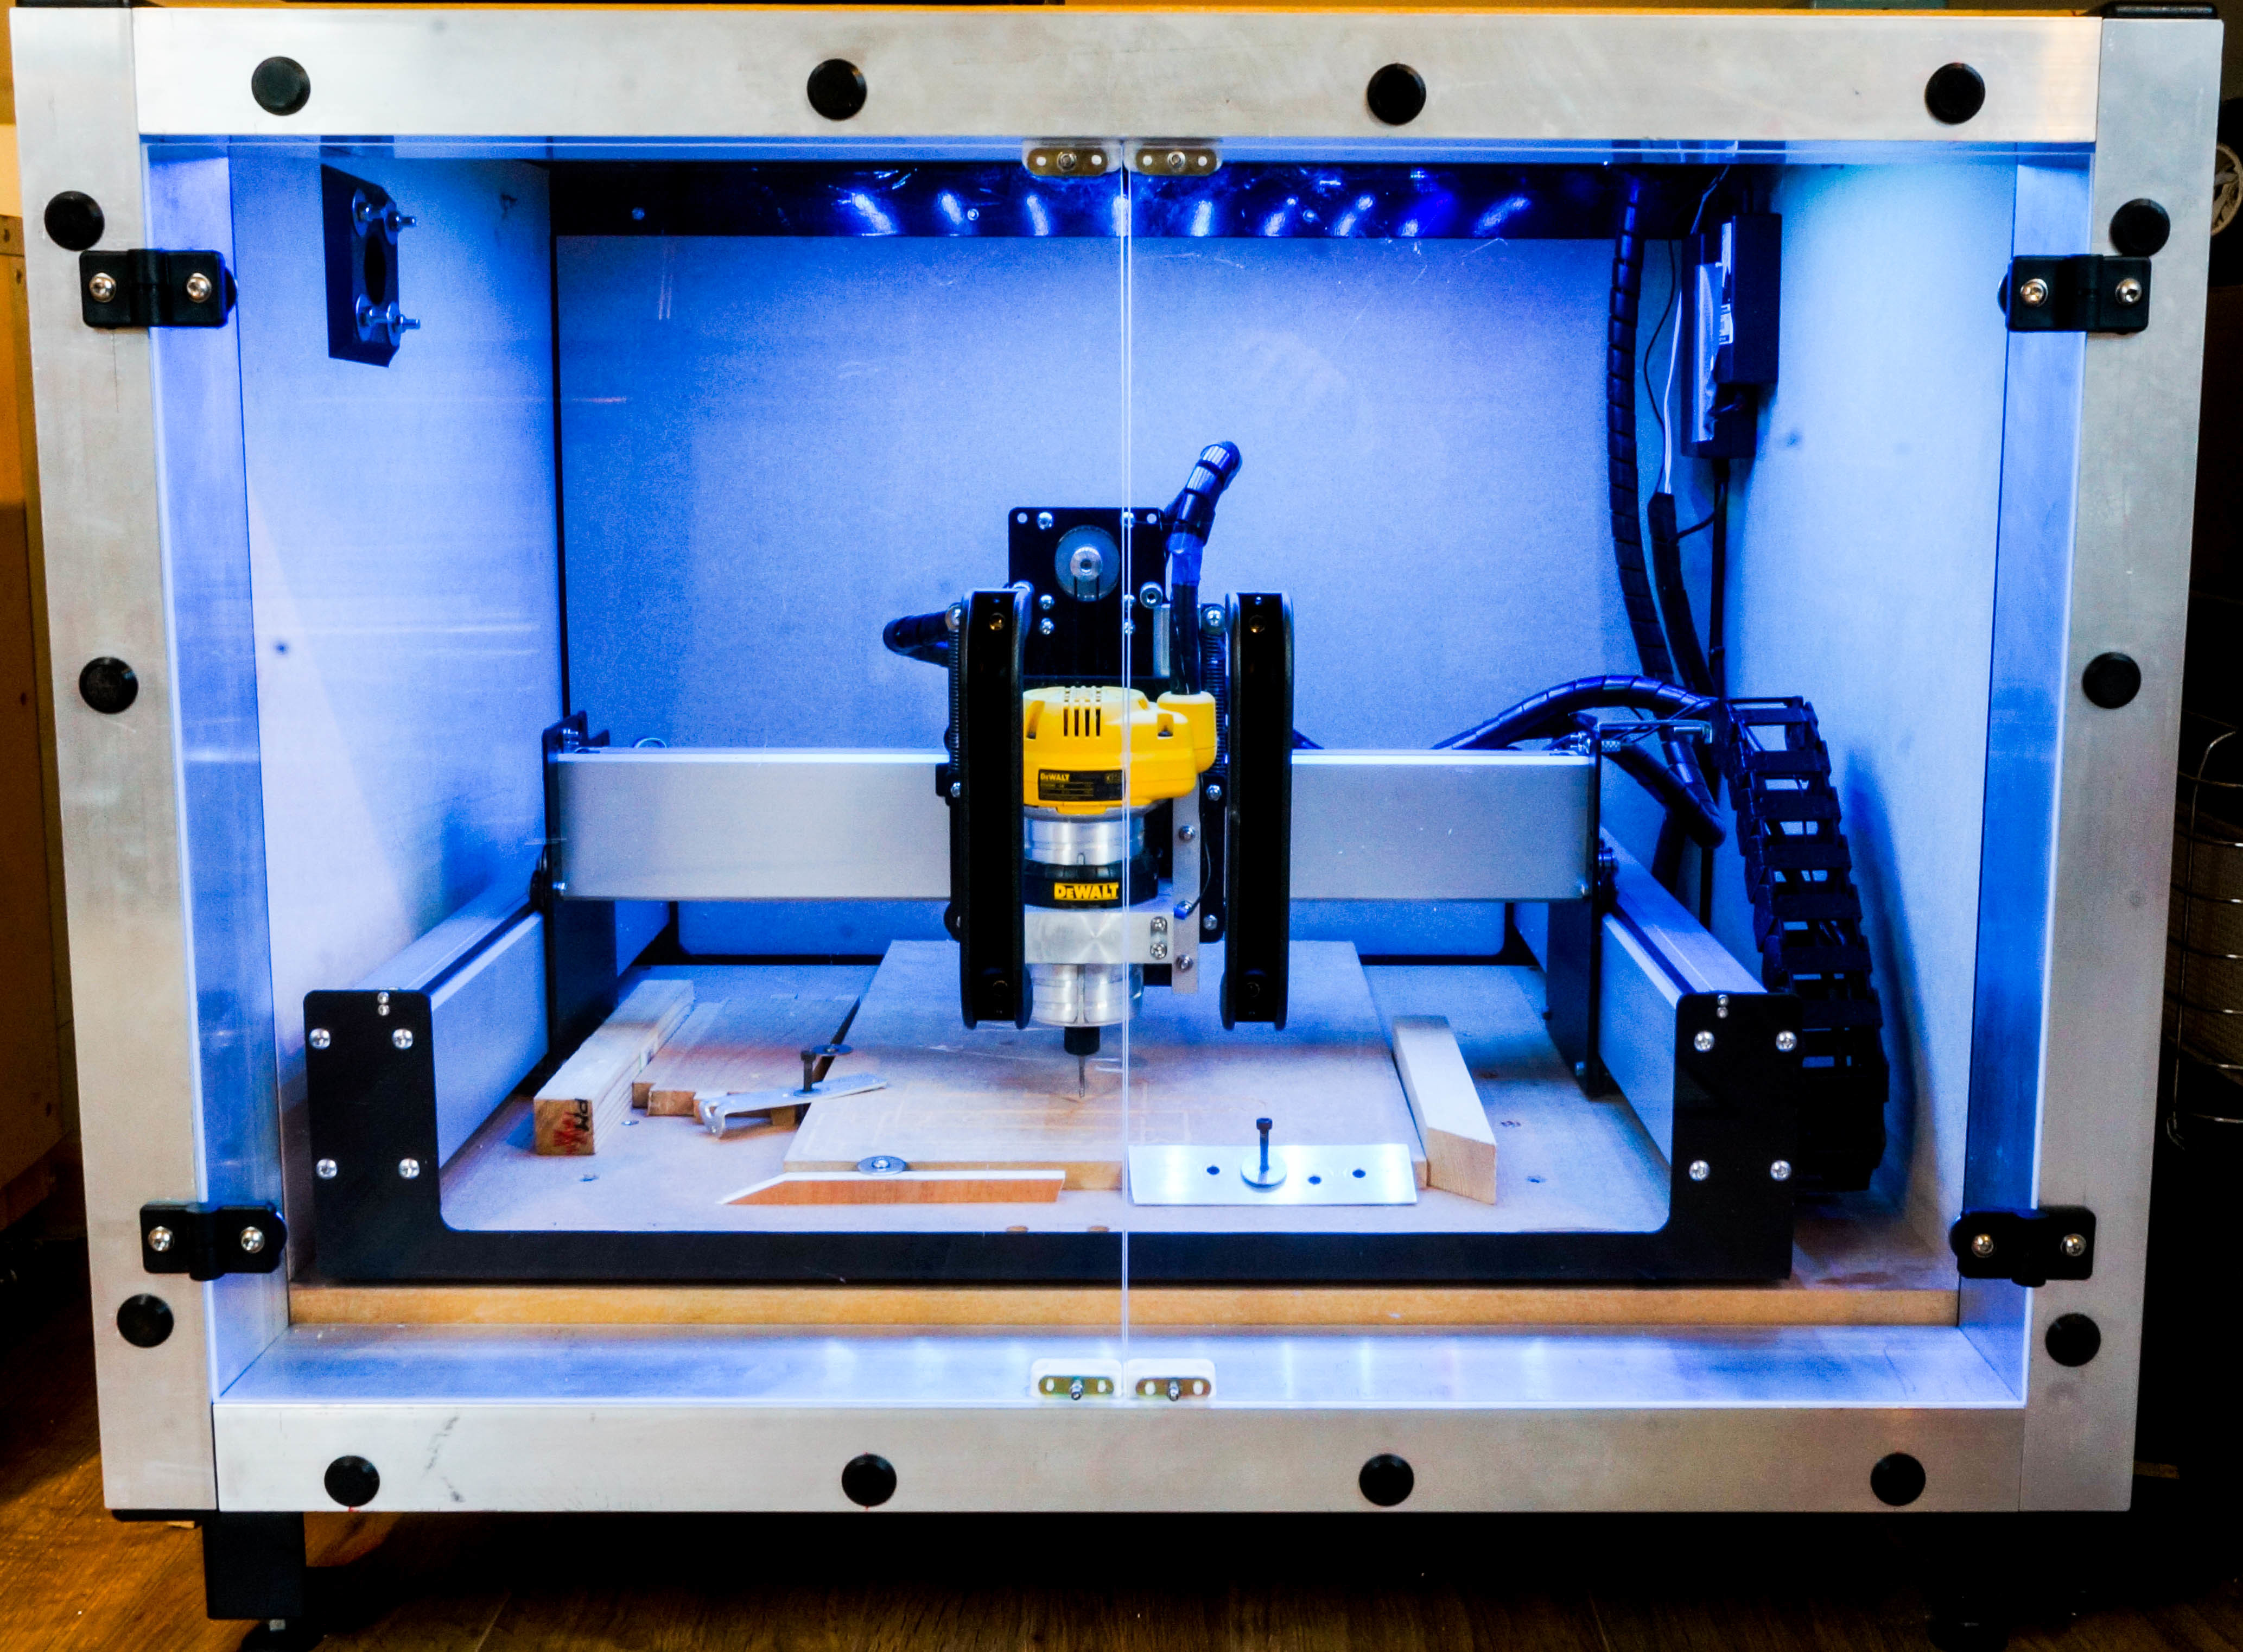
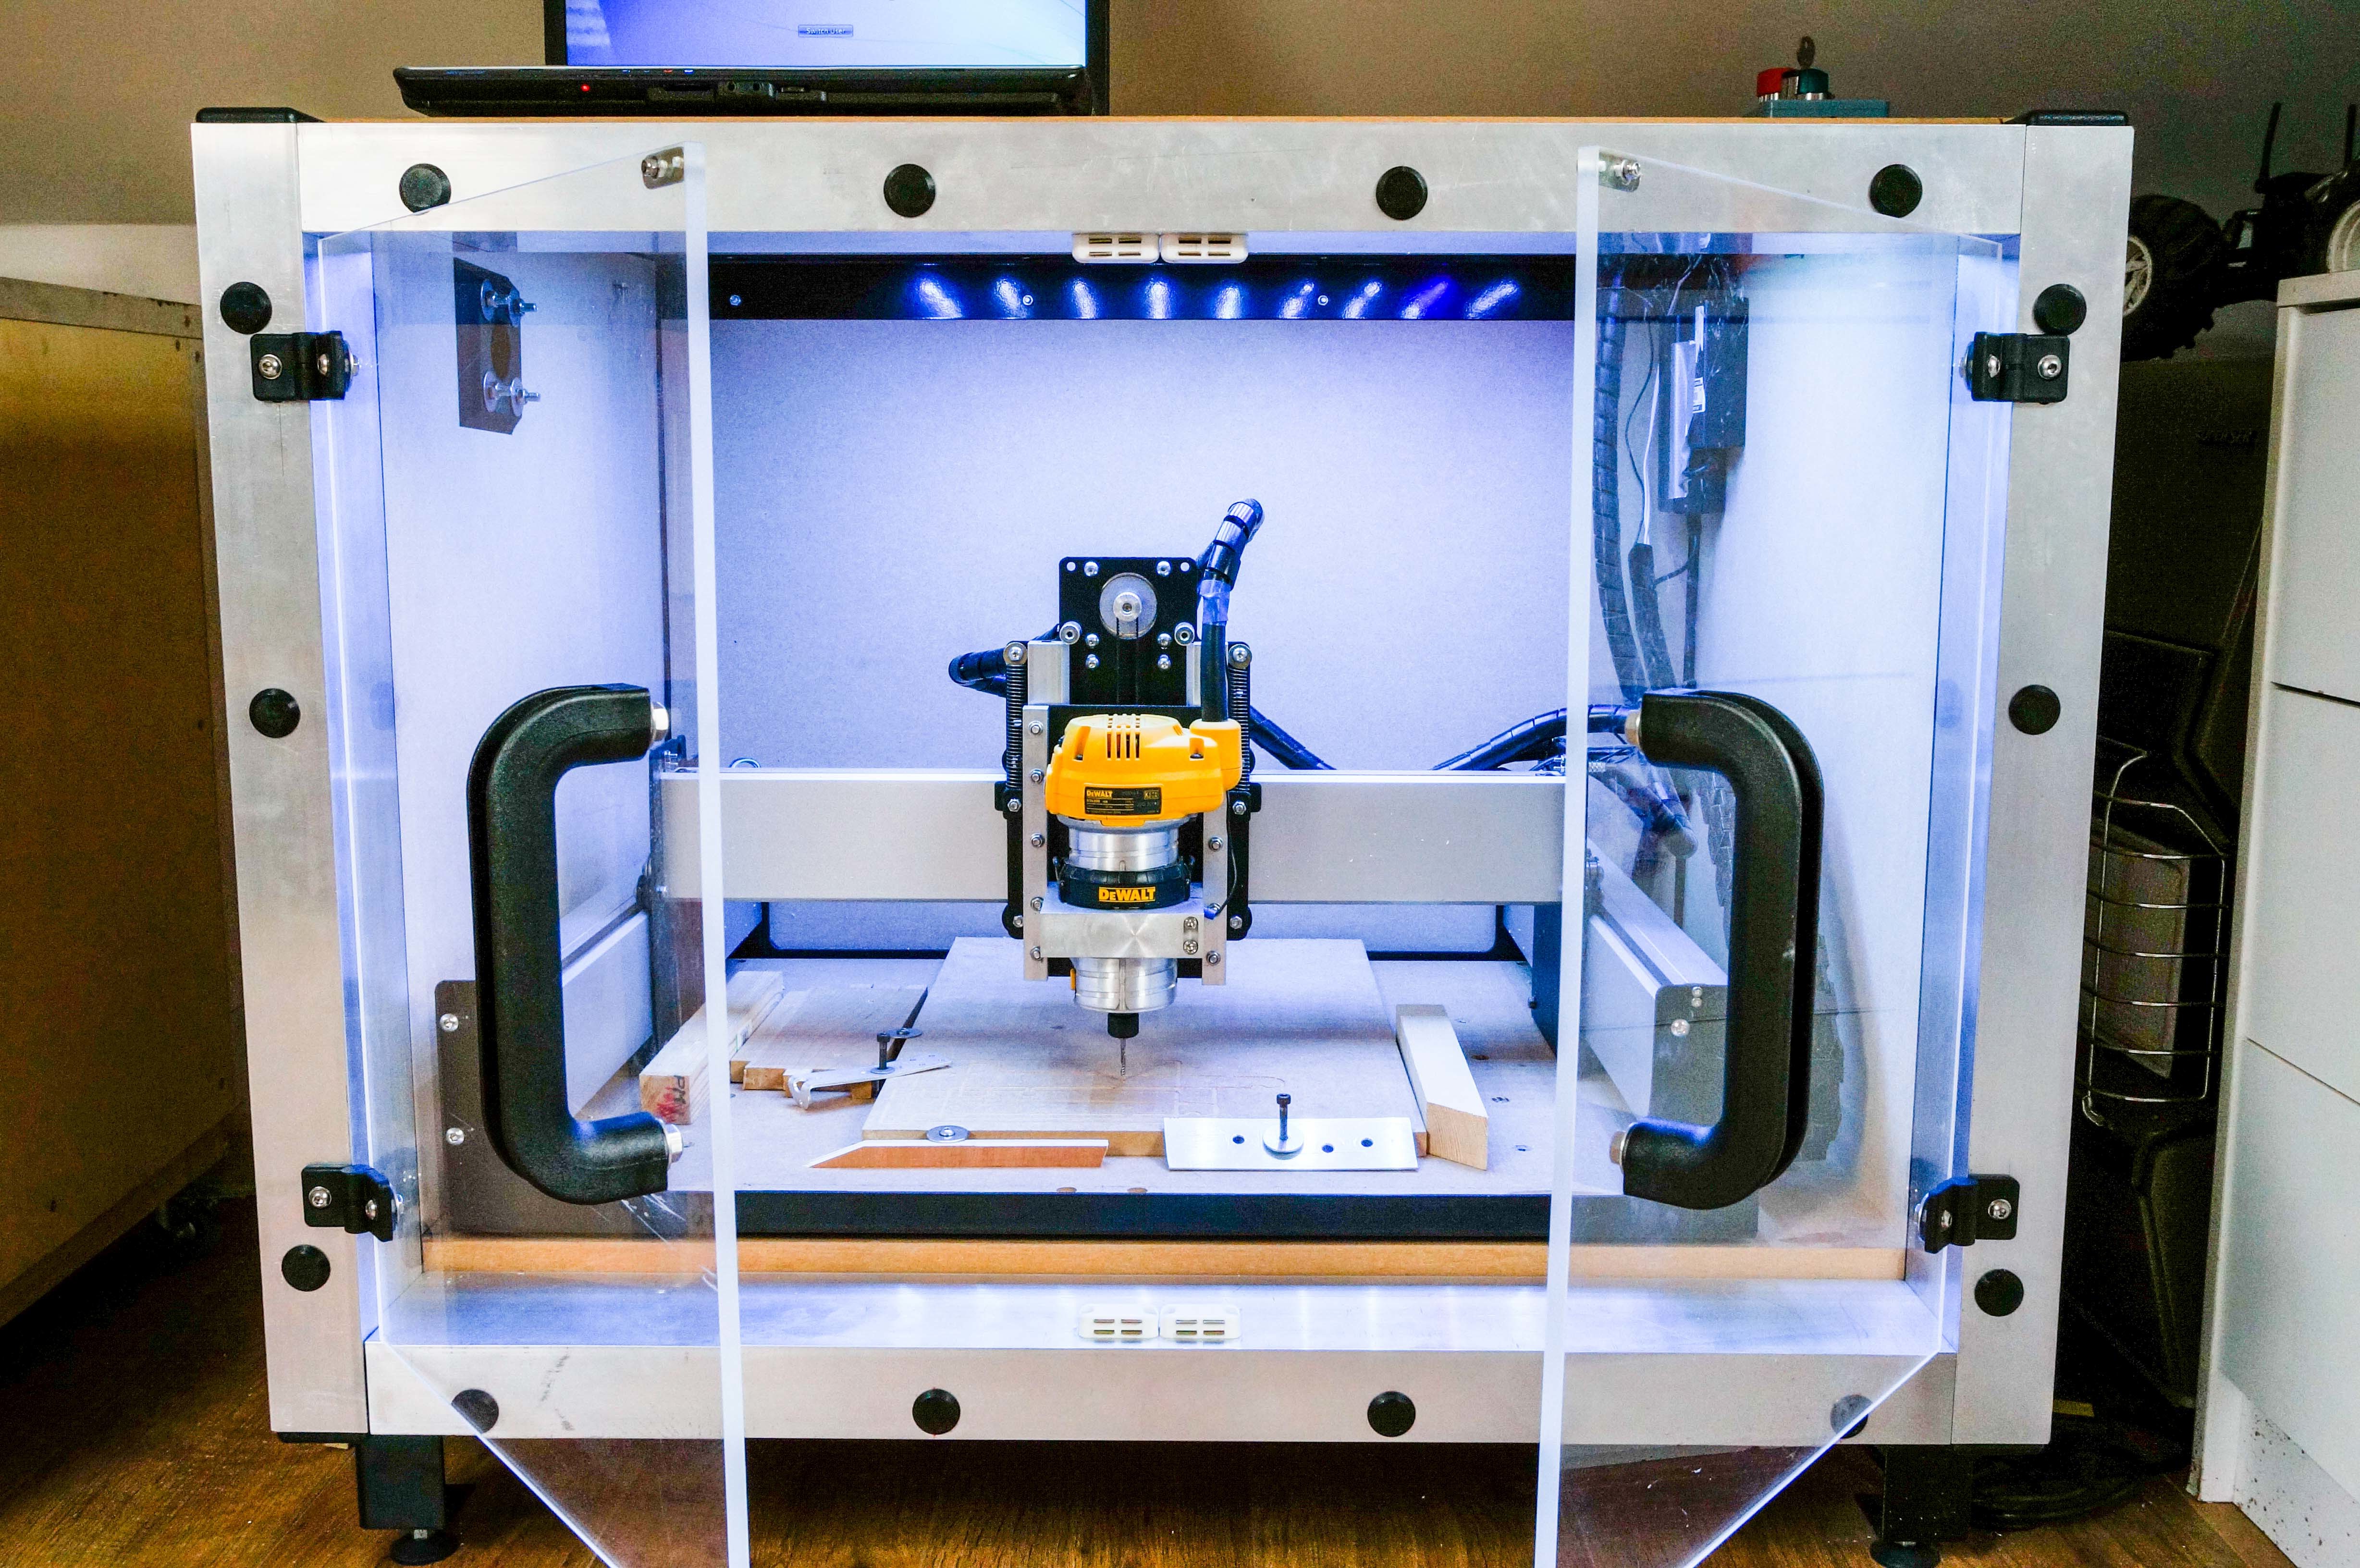
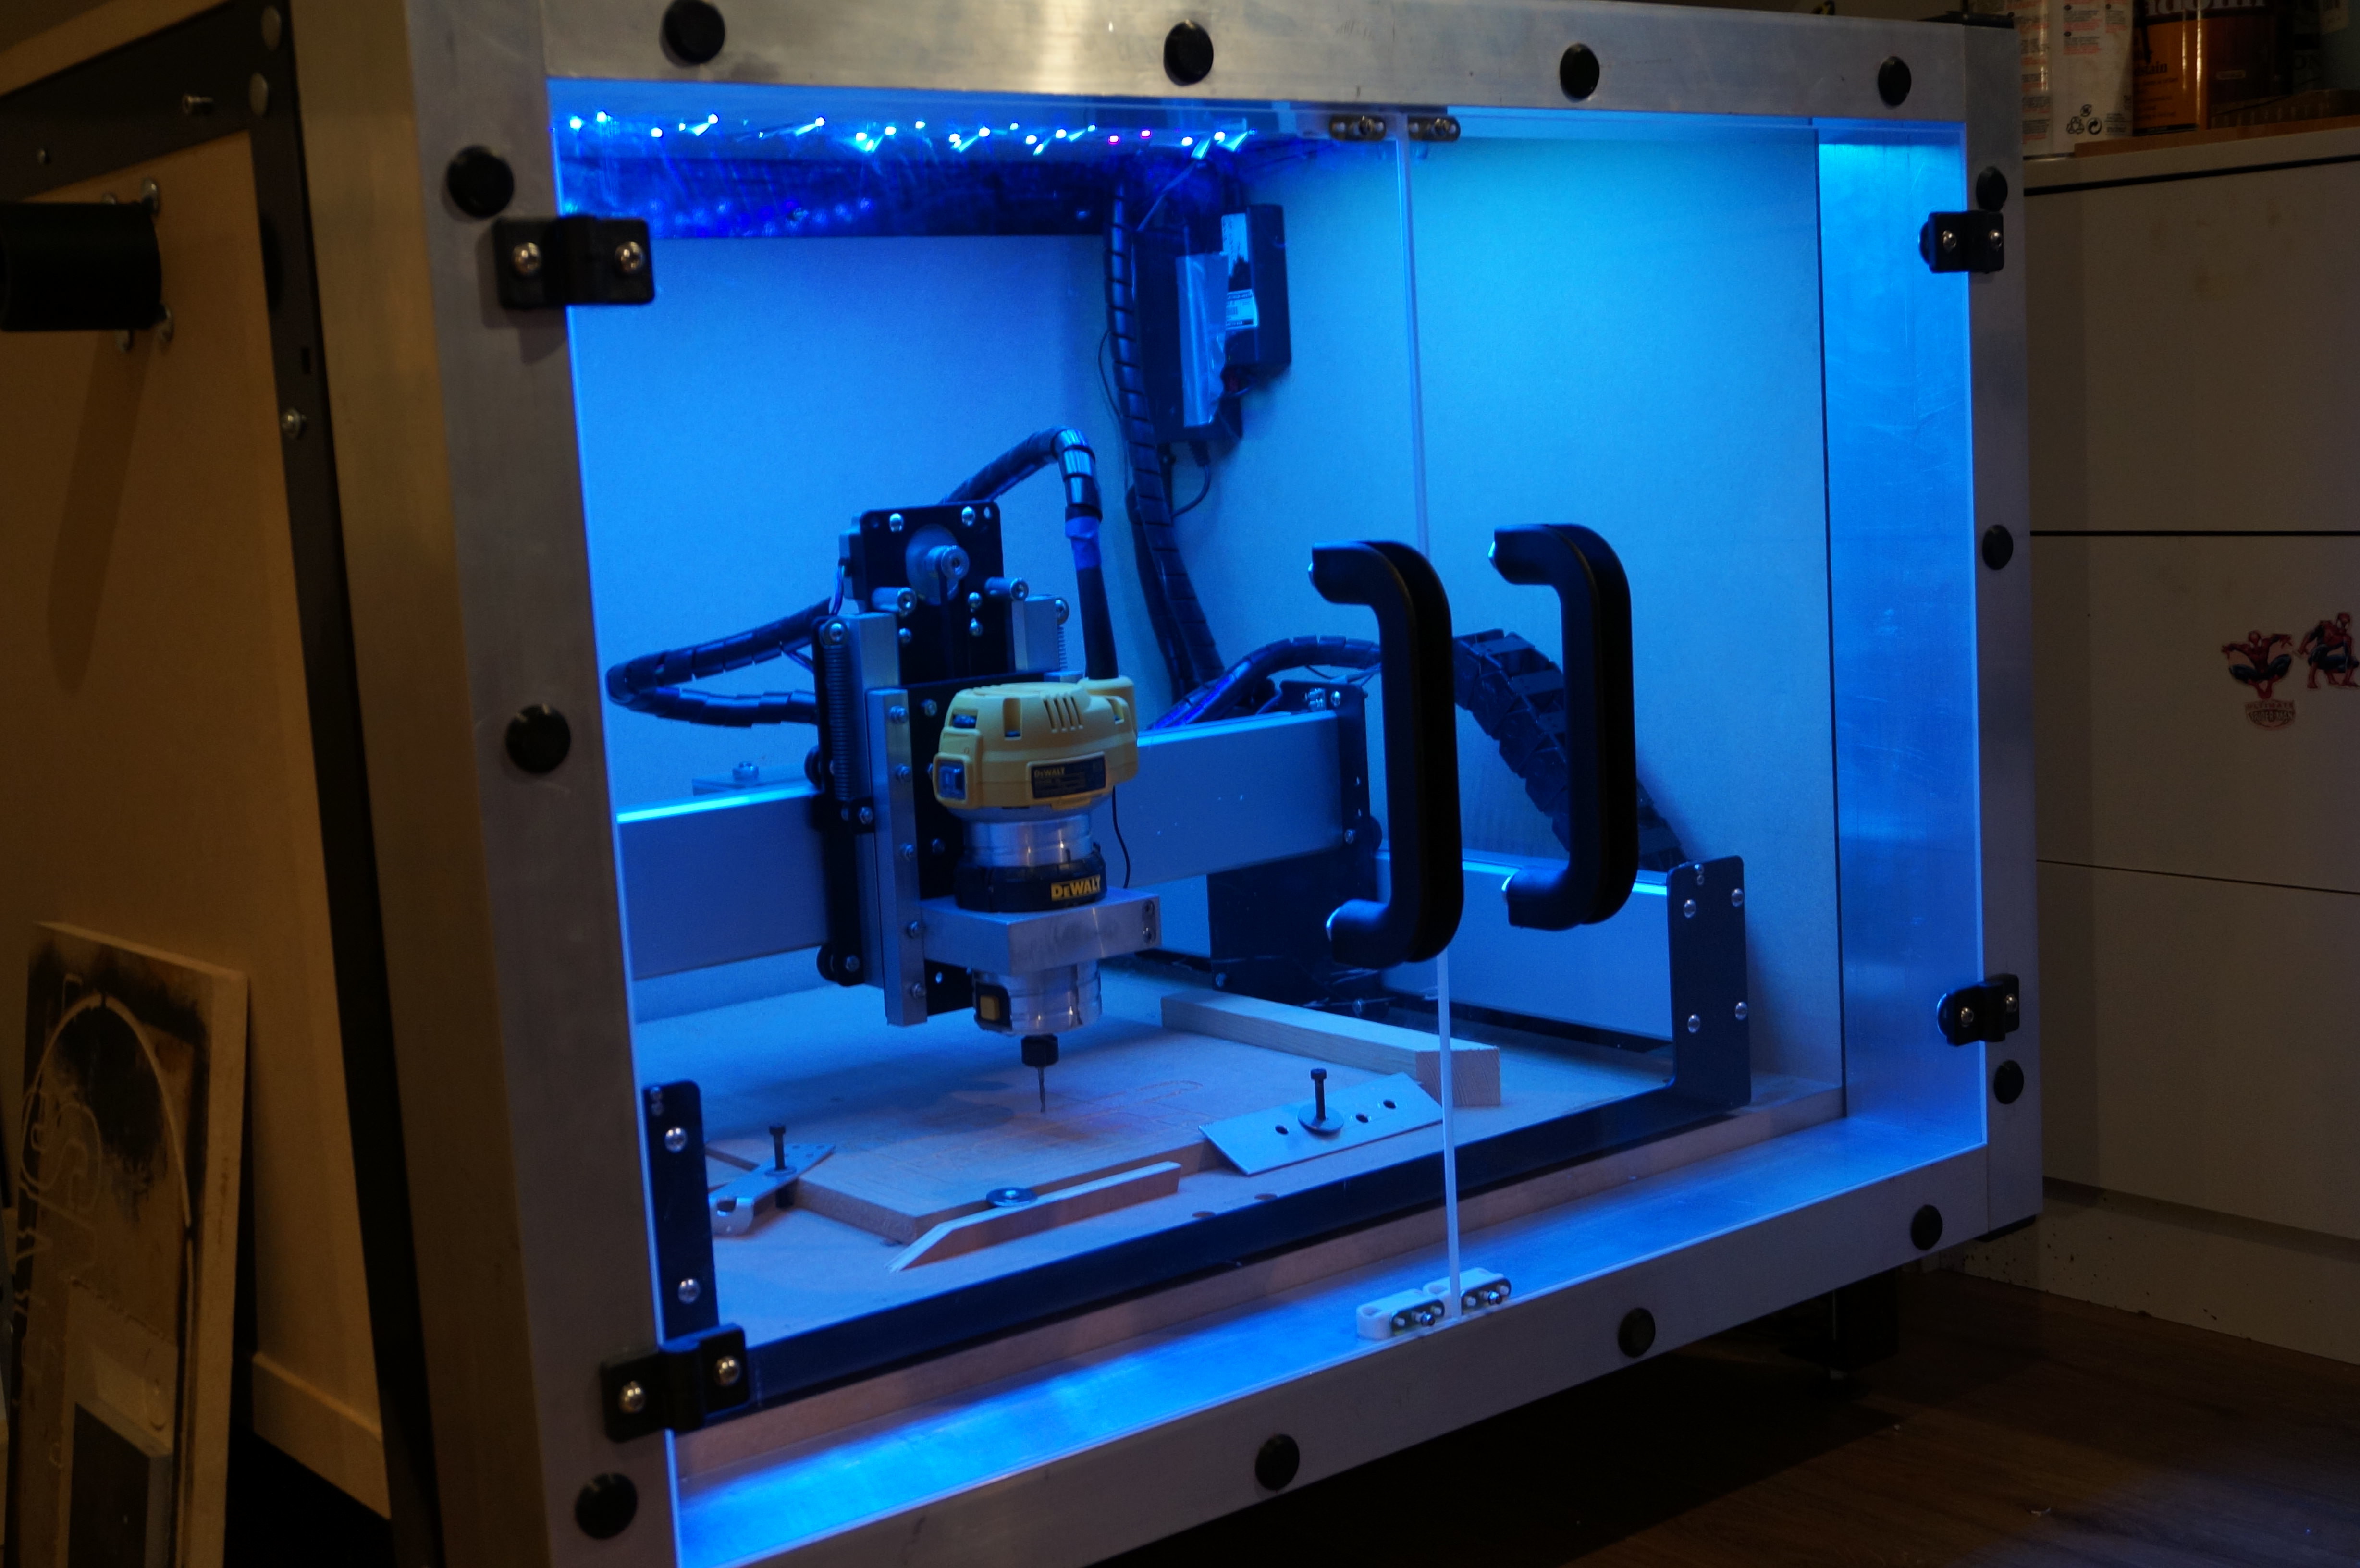
She’s done! full build log to come soon on my blog and on instructables


8 Likes

Really Nice Work here, Thanks for Sharing!
I really like seeing the different material choices and solutions.

WOW! AWESOME SAUCE!

Really nice work! I love the doors and handles!

I see a vacuum inlet. Vacuum pulling out means air has to come in somewhere. Where?

Is there going to a dust head? Anything special?

Do the LEDs change color?

mark

Thanks! I’m very please with how it turned out! Yes so the vacuum connector is to create negative pressure inside the enclosure so any airborn dust trying to escape through any gaps.
There is a thin gap between the top of the doors and the frame to aid this process so there is air flowing into the enclosure keeping the dust in.
Seems to work so far!

And yes the LEDs do change colour but I have them set at a slight bluey shade of white, I think it makes it look cool haha

1 Like

Thanks! I’m very please with how it turned out!

You should be! Very nice work!

Yes, so the vacuum connector is to create negative pressure inside the enclosure so any airborn dust trying to escape through any gaps.

Gotcha. With a HEPA filter on the vacuum you’ll be plenty safe. With a cyclone added, your HEPA filters will last much longer.

Any plans to modify the vacuum port on the inside and use tubing to go to a dust head? If so, the cyclone becomes almost a necessity (the volume of particles goes way up and they include the big/visible ones)

See here:

Another has come up with a Dewalt top plate for a dust head.

There is a thin gap between the top of the doors and the frame to aid this process so there is air flowing into the enclosure keeping the dust in. Seems to work so far!

Ah! It wasn’t obvious from the pictures where the inlet ports were. No whistle or uncomfortable noise then?

And yes the LEDs do change colour but I have them set at a slight bluey shade of white, I think it makes it look cool haha

… and they accuse me of being over the top! :joy:

WAY COOL! A design suitable for all moods and peoples! :joy:

mark

1 Like

Well done Nick, it looks fantastic, also looks like you have some very good noise dampening attributes through your choice of materials.

Thanks! Here is the main write up of the build process: http://www.makealittlemore.co.uk/2016/02/10/diy-cnc-router-enclosure/

1 Like

AWESOME WRITE UP!

mark

1 Like

http://www.makealittlemore.co.uk/2016/02/19/shapeoko-3-enclosure-sound-isolation-test/

The sound test! It didn’t go perfectly but you can get an idea of how much difference it makes!

EXCELLENT!

My enclosure keeps my Nomad to ~52 dBa when cutting. If I try to hog (really aggressive roughing) it goes up to around 54 dBa.

mark

That’s impressive! I haven’t been able to get a decent reading with my phone, I think my microphone is quite broke…

That’s impressive! I haven’t been able to get a decent reading with my phone, I think my microphone is quite broke…

There is trick to reaching these levels of sound suppression… no windows. If you look at my enclosure, it has not windows; there is a video camera inside that I use to watch the job.

Windows are a good way to let sound out. It is possible to design windows that are “decent” at sound suppression - but one has to work at it. In particular, they need to be double paned and use thick materials.

Hello-I have been reading the forums for while but this is my first post. I have gained so much great information from everyone that has contributed and I hope to do the same for others in the future.

I have recently ran into an issue with my Nomad Pro. I live in a loft that has concrete floors and the woman below me has complained about a noise that sounds like loud bass coming from a video game, I know it is the Nomad she is speaking about. I have the Nomad on some padding that I bought from Amazon that someone else mentioned on the forums and that sits on a wooden workbench with metal legs.

I am thinking that an enclosure is necessary but I do not know where to start. I don’t think that I have the ability or knowledge to build my own. I have never worked with t-slots… I have read that mbellon builds these for others. I’m not sure if he has sold any for other Nomad users? I am very interested in any solutions or suggestions!

Hello @Martsy!

I design and help design enclosures for CNC machines and I can help you. Yes, there a lot of factors that go into an enclosure… but before we go there, there are a bunch of things to try.

The noise through the floor issue is an example of “coupling” where the machine couples with the enclosure and the enclosure couples with the floor and… :slight_smile:

Is the noise the only reported issue? Are there other things you want to do? Super noise reduction? Super dust/particle safety?

Is the neighbor cooperative? Would they be open a quick test (I’m going to make you happy… but I want to try a short serious of things; would you be willing to tell me what you think when I tell you I’m going to make noise)? If so, we can try to decouple the Nomad enclosure as is and potentially avoid the time and effort of a “super” enclosure (which doesn’t have to be expensive - T-Slots is not the only way to handle things).

Get one of these (we need it for a “super” enclosure too):

http://www.amazon.com/Shop-Fox-W1322-Anti-Vibration-24-Inch/dp/B000OQTV2I/ref=sr_1_1?ie=UTF8&qid=1459985728&sr=8-1&keywords=neoprene+sheet

Cut two pieces that cover the underside of the Nomad enclosure and stick out about 1/2".

mark

1 Like

Hi Mark!

Thank you very much for your response,Mark - it sounds like you have the potential to be my hero. This may sound horrible but I did not confess that it was my cnc that was causing the problem. My fiancé received an email from the HOA regarding the complaint. I couldn’t confess to him because I promised him the Nomad would be the quiet solution to all the power tools I was using in the house. I think he would be pretty upset that I was the cause of the problem. I would like to fix the issue without anyone knowing that I am the issue. The reality is I am a closet CNCer :slight_smile:

My goal is to minimize the noise as much as possible, super noise reduction would be fantastic. I only work in plastics and have used a ShopVac or Dyson for the clean up, and that has worked well so far. The noise and vibration are my main issues for now. I will order the pad you referenced tonight. Do you think I should put anything under the metal legs of the table? I am willing to spend some money on a solution if it means I can use my machine. Thanks again!