I’m trying to engrave this world map, but as you can see, it would take a LONG time with an 1/8" bit, but my 1/4" obviously can’t get the details. Any ideas? From what I understand, other programs will let you do a roughing pass with a bigger bit, but is this possible in Carbide Motion with some kind of work around?
Hi @Tsamb
This is what you can do in Carbide Create to treat your first toolpath as a “roughing” and a second toolpath as a “Finish”:
You already have a POCKET toolpath (currently with a .125") - Change the tool to a .25" in that toolpath, to speed the job up you can set the stepover on the .25" to .2"
Now select your continents, and create a second toolpath, this time use a 1/8th or even a 1/16th cutter and use the “Cut outside” option.
This will allow the smaller cutter to just run around the shoreline and get into all the details.
FWIW, the finest level of detail possible w/ a CNC can be had w/ a V-bit — try calculating how deep / wide a path the V-bit would need to carve to remove the detail which a bit left uncut, then draw in an offset path which would allow it to make the balance of the detail.
A neat feature for CC would be for it to allow one to bias a V-carve so as to cut only get the detail on one side, saving time cutting air.
Basically run the pocket with a 1/4th bit and then do an outline cut with a smaller 1/8th bit to finish the edge detail.
I have a 2mm and a 1mm bit for extremely find edges (1/8th inch is 3.175mm) but they have to run really slow as to not snap the bit (I can see you have some spaces the 1/4th can’t get into that’s why I mentioned it).
If you want to speed it up even more you can get a 3/4th straight bit for the pocket but would probably have to run the edges with 3 progressively smaller bits IE: pocket cut with 3/4th then outline with a 1/2 to 1/4th to 1/8th.
If you plan on doing this type of carving a lot the 3/4th is worth the investment
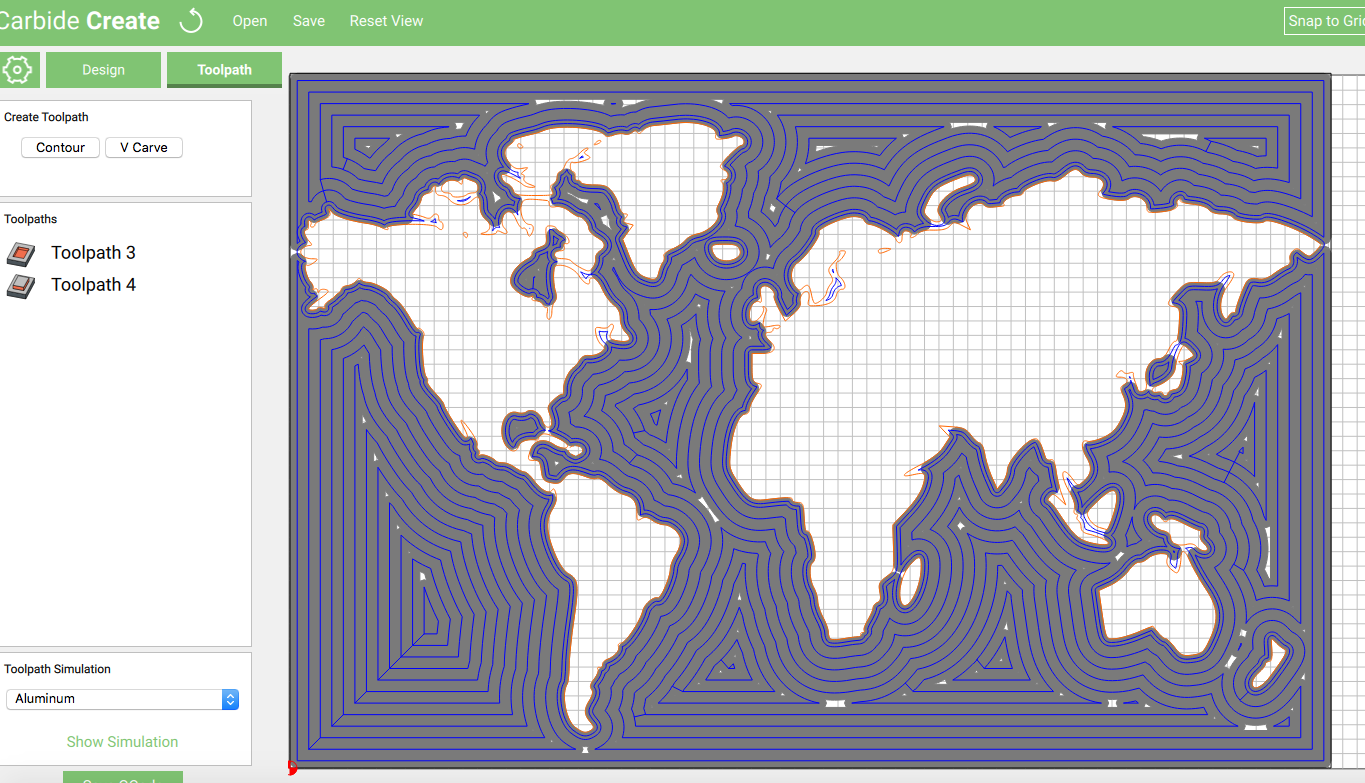
THANK YOU, guys! Now that you mention that, it seems obvious; but I haven’t dealt with tool changes before. This looks MUCH better (see below). but my follow up question is whether the program will automatically pause for me to switch out the bit? Any other tips on that, i.e., will I need to re-zero from the exact same point I started from, or completely turn off the machine or the router? I know, I know, I’m a worrier, but I want to be triply sure before messing up some nice wood and/or losing my fingers
@Tsamb
Based on your preview you may want to reduce the stepover on your pocket toolpath - I see “Islands”
For the tool change, save this job as 2 jobs-
Job 1 - .25" roughing
Job 2 .125" Finish
You can disable a toolpath by right clicking and choosing disable:
So do you mean save two separate g code files? If so, what’s the best way to get things to line up for the second job? I’ve heard of guys drilling a hole at their zero point, but I’d love to avoid this if possible to not ruin the wood.
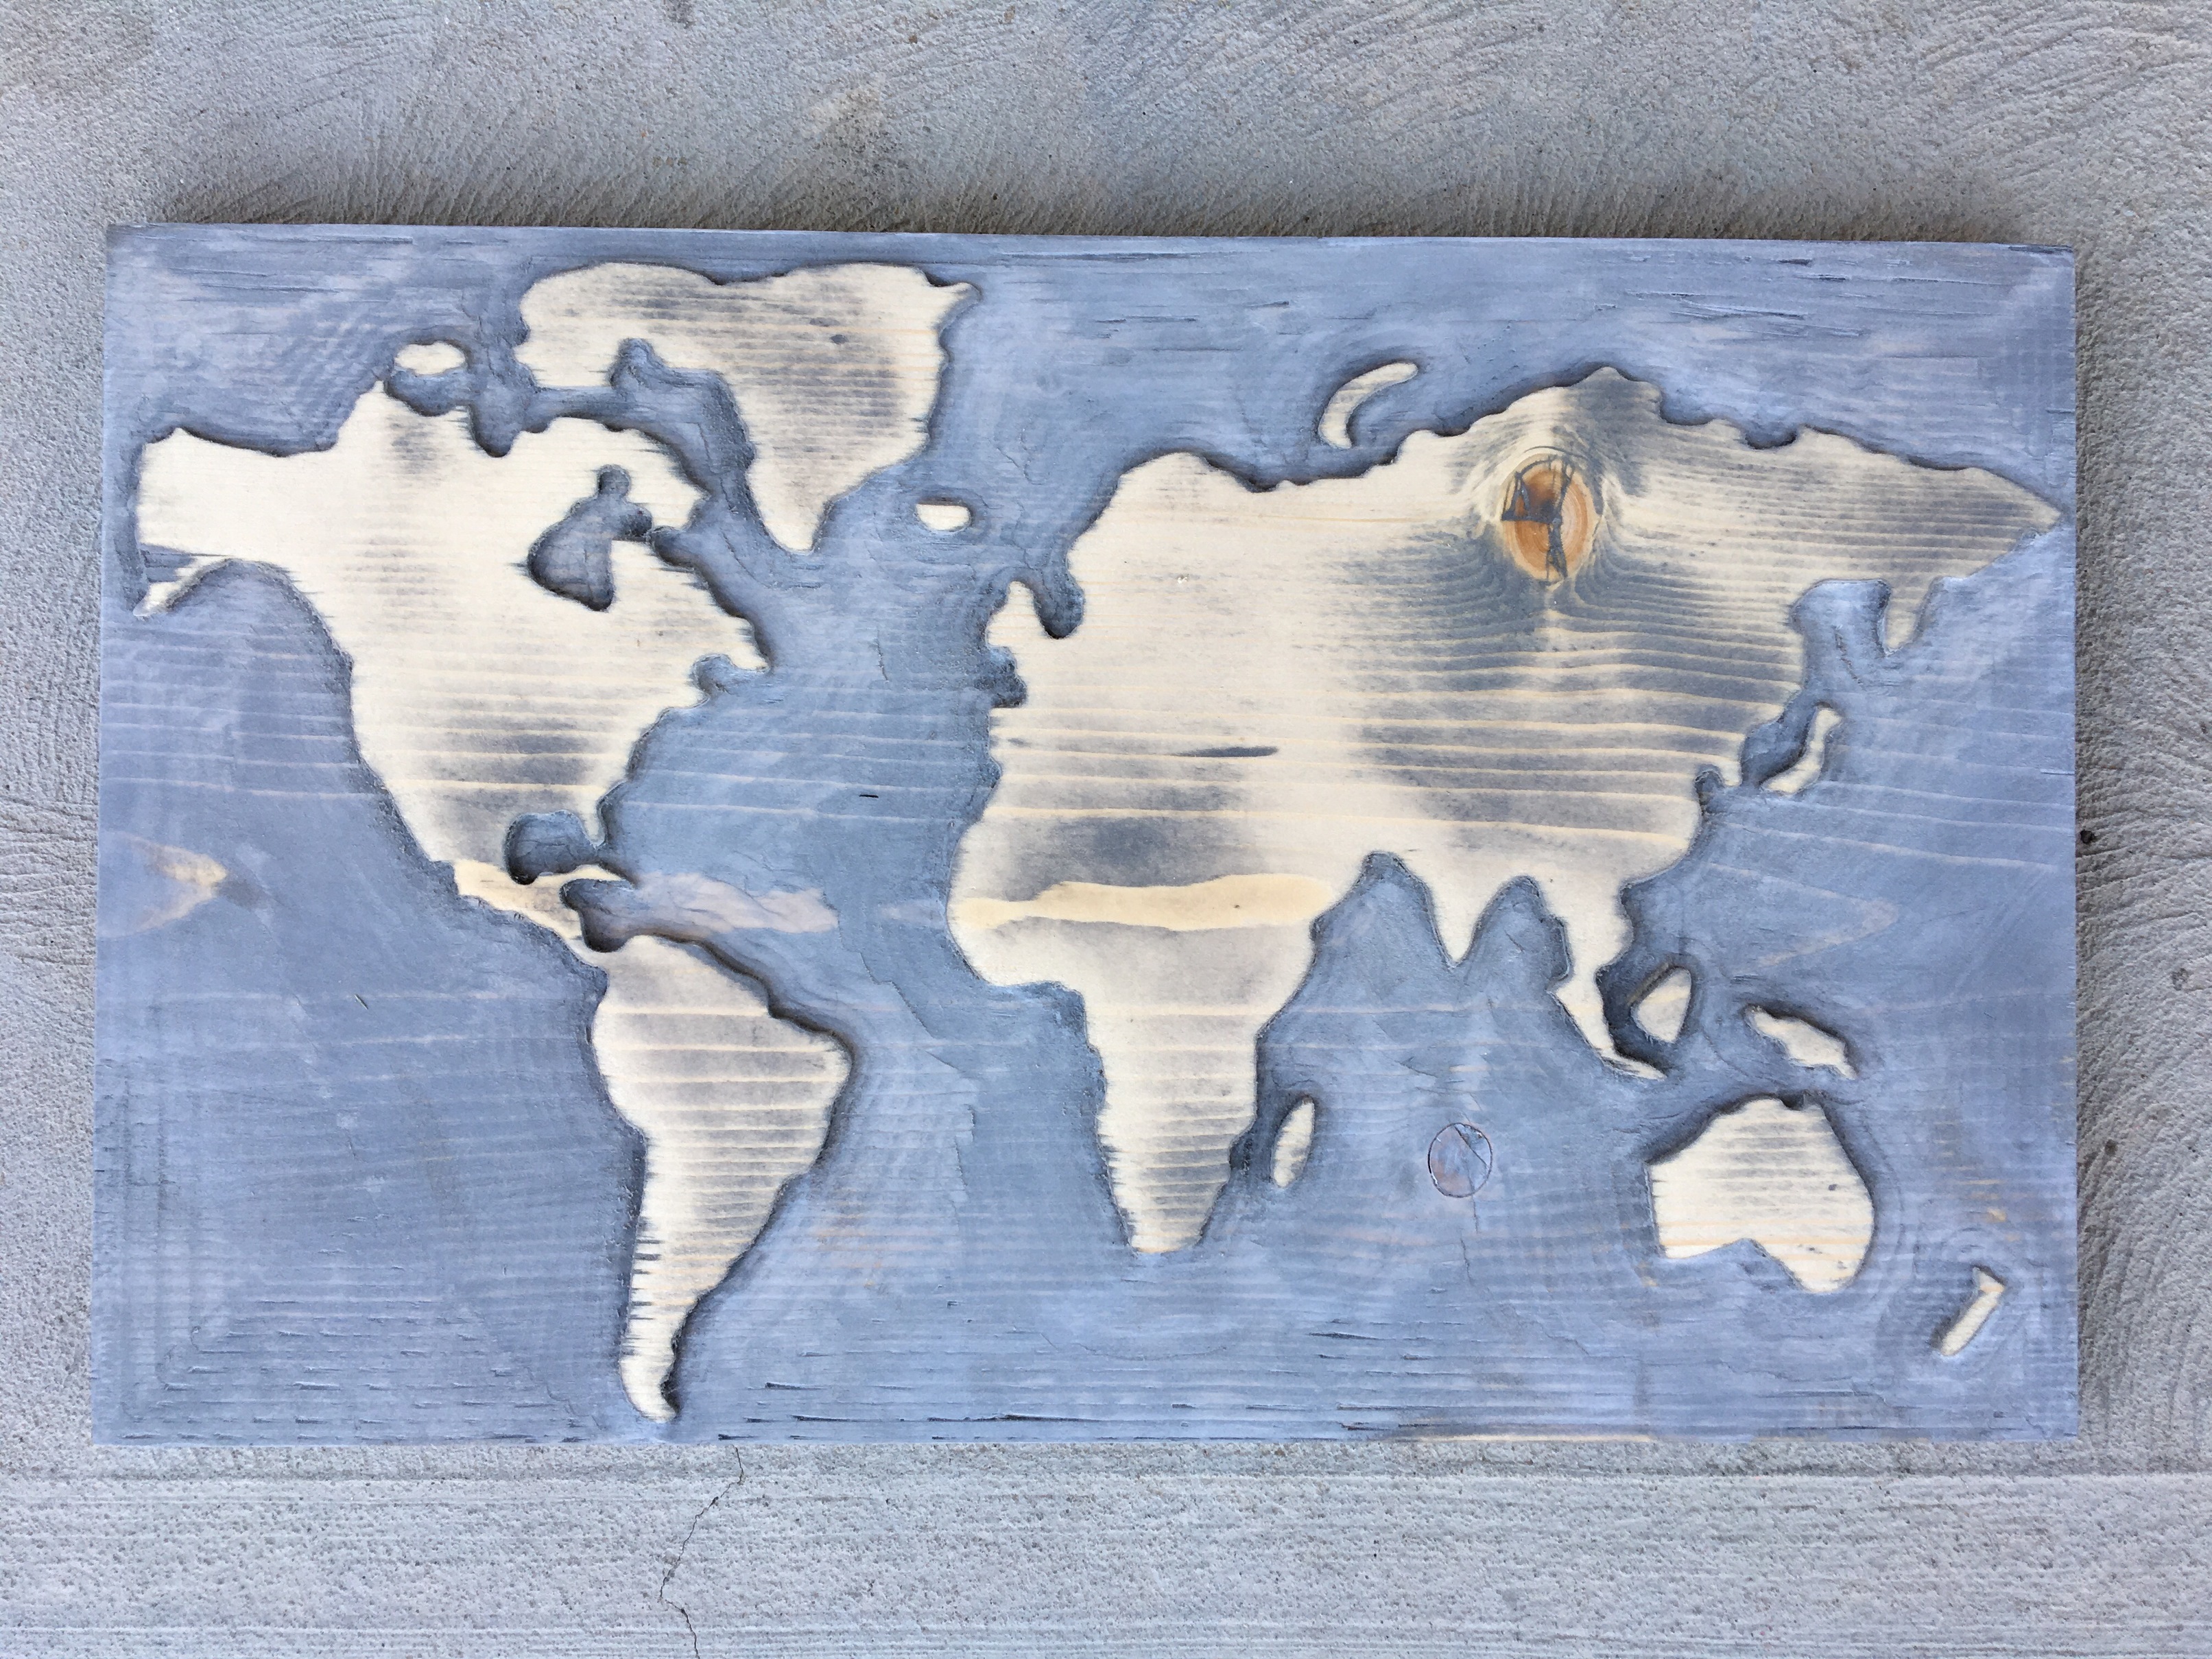
@ApolloCrowe, I finally took a stab at the map, and it went reasonably well. The pocketed ocean bottom wasn’t terribly smooth, so I suspect I’ll need to slow things down. Also, after the tool change, I rapid repositioned to my starting point, but it still started going in midair, so next time I suppose I’ll try manually re-zeroing the z and rapid reposition to the x and y. Does that plan sound like I’ll be more successful?
@Tsamb
Looks good from here, The floor could be smoother, agreed.
When you switched to the second tool, did you set the zero at top of the same surface as the first tool?
How long did it take?
Did you use a stain?
I just rapid repositioned x, y, and then z plus the 6mm, then scooted it down that 6mm. It looked like just where I started, but I supposed I should manually go grab the z from South America or something like you had suggested?
It took 26 minutes for just the 1/4" bit path. And yeah, I tried staining, but it brought out the imperfections of the bottom a lot more, so I tried white washing on top of that and it helped a bit. I’ll probably end up just cutting the continents from some 1/4" wood and gluing to a backer board, but I would definitely like to learn how to get a smoother pocket, so I’ll mess around with the settings

 This looks MUCH better (see below). but my follow up question is whether the program will automatically pause for me to switch out the bit? Any other tips on that, i.e., will I need to re-zero from the exact same point I started from, or completely turn off the machine or the router? I know, I know, I’m a worrier, but I want to be triply sure before messing up some nice wood and/or losing my fingers