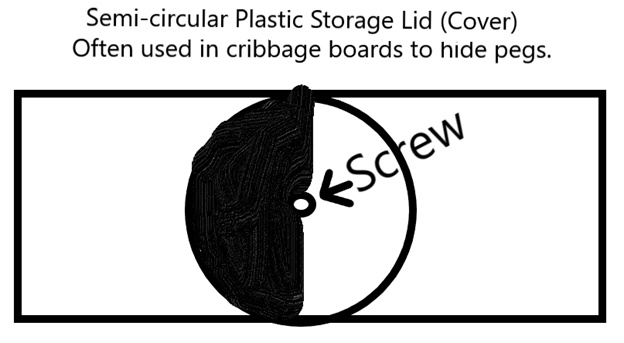
I am trying to create a semi-circular storage compartment in the back of my cribbage board, using my Shapeoko 3, to hold the pegs. Does anyone know the name of this compartment cover or know where one can be purchased? I have seen black plastic ones in some crib boards on Etsy but have been unable to track down where they may be purchased.
I know that Uline stocks brass disks. Maybe you could machine a large hole on one side, cut a center hole for a screw and Bob’s yer Uncle, you’ve got a cover. If you just need a couple, PM me and I might be able to send you a couple in the mail (Out of my 200+ tags)
Thanks Bob for the offer,
I’m continuing to think about this in my sleep and may make the cut-out covers of the same type wood stock as the board and countersink a screw hole to allow a flush fit.
I went to my local Woodcraft and grabbed a few of their ~3" x 24" x 1/8" S4S pieces of wood (purpleheart, zebrawood, wenge, . . .) for covers for the crib boards I make. I think it looks nice with a highly contrasting wood compared to the board wood. Unfortunately, I only have a picture of the purple heart cover.
You could cut the circle and pocket like BoscoBob suggested and even put a small magnet in the underside of the lid and in the board so when it is closed, it “locks” in place so it can’t accidentally open unintentionally.
Thanks MadHatter,
I was thinking last night when I was supposed to be sleeping and interestingly enough, your solution is essentially what I arrived at, except circular for the pegs but rectangular for the cards. The contrasting wood colour effect is interesting. Did you do the lid cover at 1/8 " depth?
Your pics look great.
The different pieces of wood I picked up varied from 0.124in - 0.140in depending on the piece. I preferred the look and feel of the lid slightly below flush, so what I did was use my SO3 to cut out the lid and make the 0.25in dia x 0.0625in deep holes for the magnets (0.25in dia x 0.063in thick from KJMagnetics).
Then I epoxied the magnets in and measured the thickness. Since I just clamped the wood strips down and they flexed a bit, sometimes the hole was not exactly the depth I wanted, so I would epoxy them in before measuring the final thickness of the lid.
I made the cut out for the lid to be the total thickness with magnets + 0.03in so the lid was just slightly below flush. Then I would make the magnet holes in the board (using 0.25in dia x 0.25in thick magnets) deep enough so I could put them just below flush. Then the magnets would hold, but not cause the lid to protrude above flush.
Thanks once again,
All excellent helpful hints. I spent the day completing the drawings so I am close to cutting some temporary pieces, although my magnets are in the mail. I seem to be learning to cut less often and think and measure more.
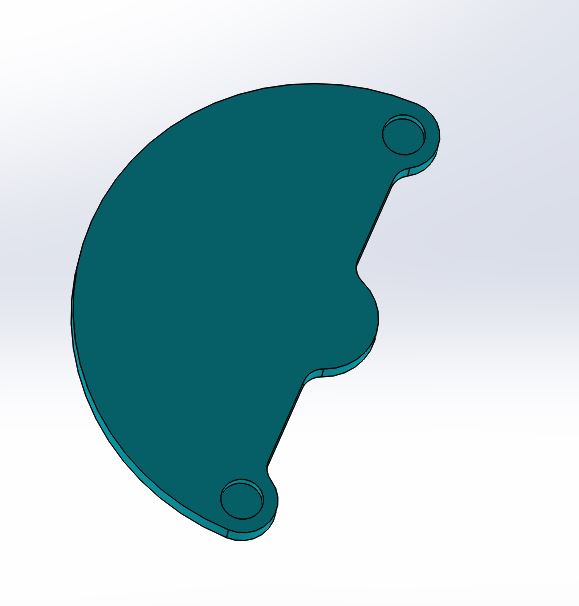
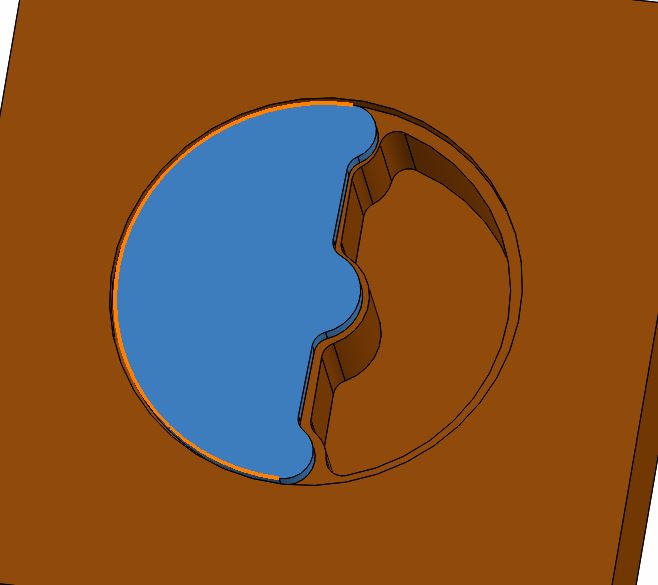
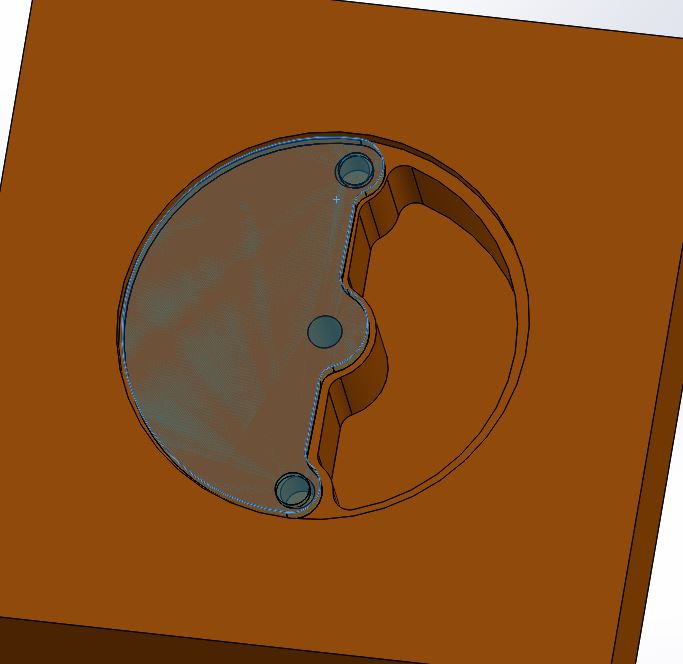
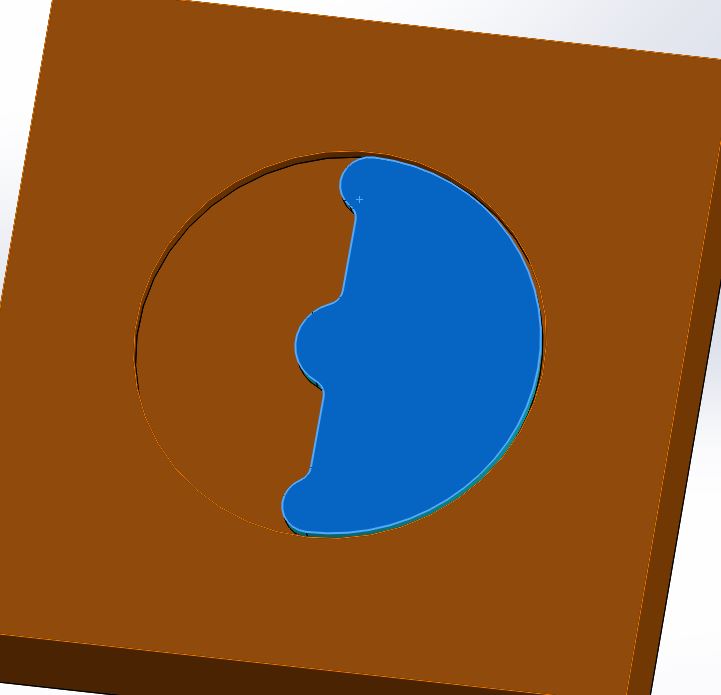
I had some time while helping my son with his math homework, so I threw something together in SolidWorks real quick. This is what I would do if I were making it out of 0.125in thick wood. The pockets are for 0.25in dia magnets. The magnets will hold the door closed and opened - if you get the polarity right.
I think I got a little carried away punching quarter inch holes in the wood. I guess I would just punch a very small hole to make sure the lid rotation point was centered, probably 0.031in for a small brass nail. Maybe a small hole and countersink in the lid for the nail and head.