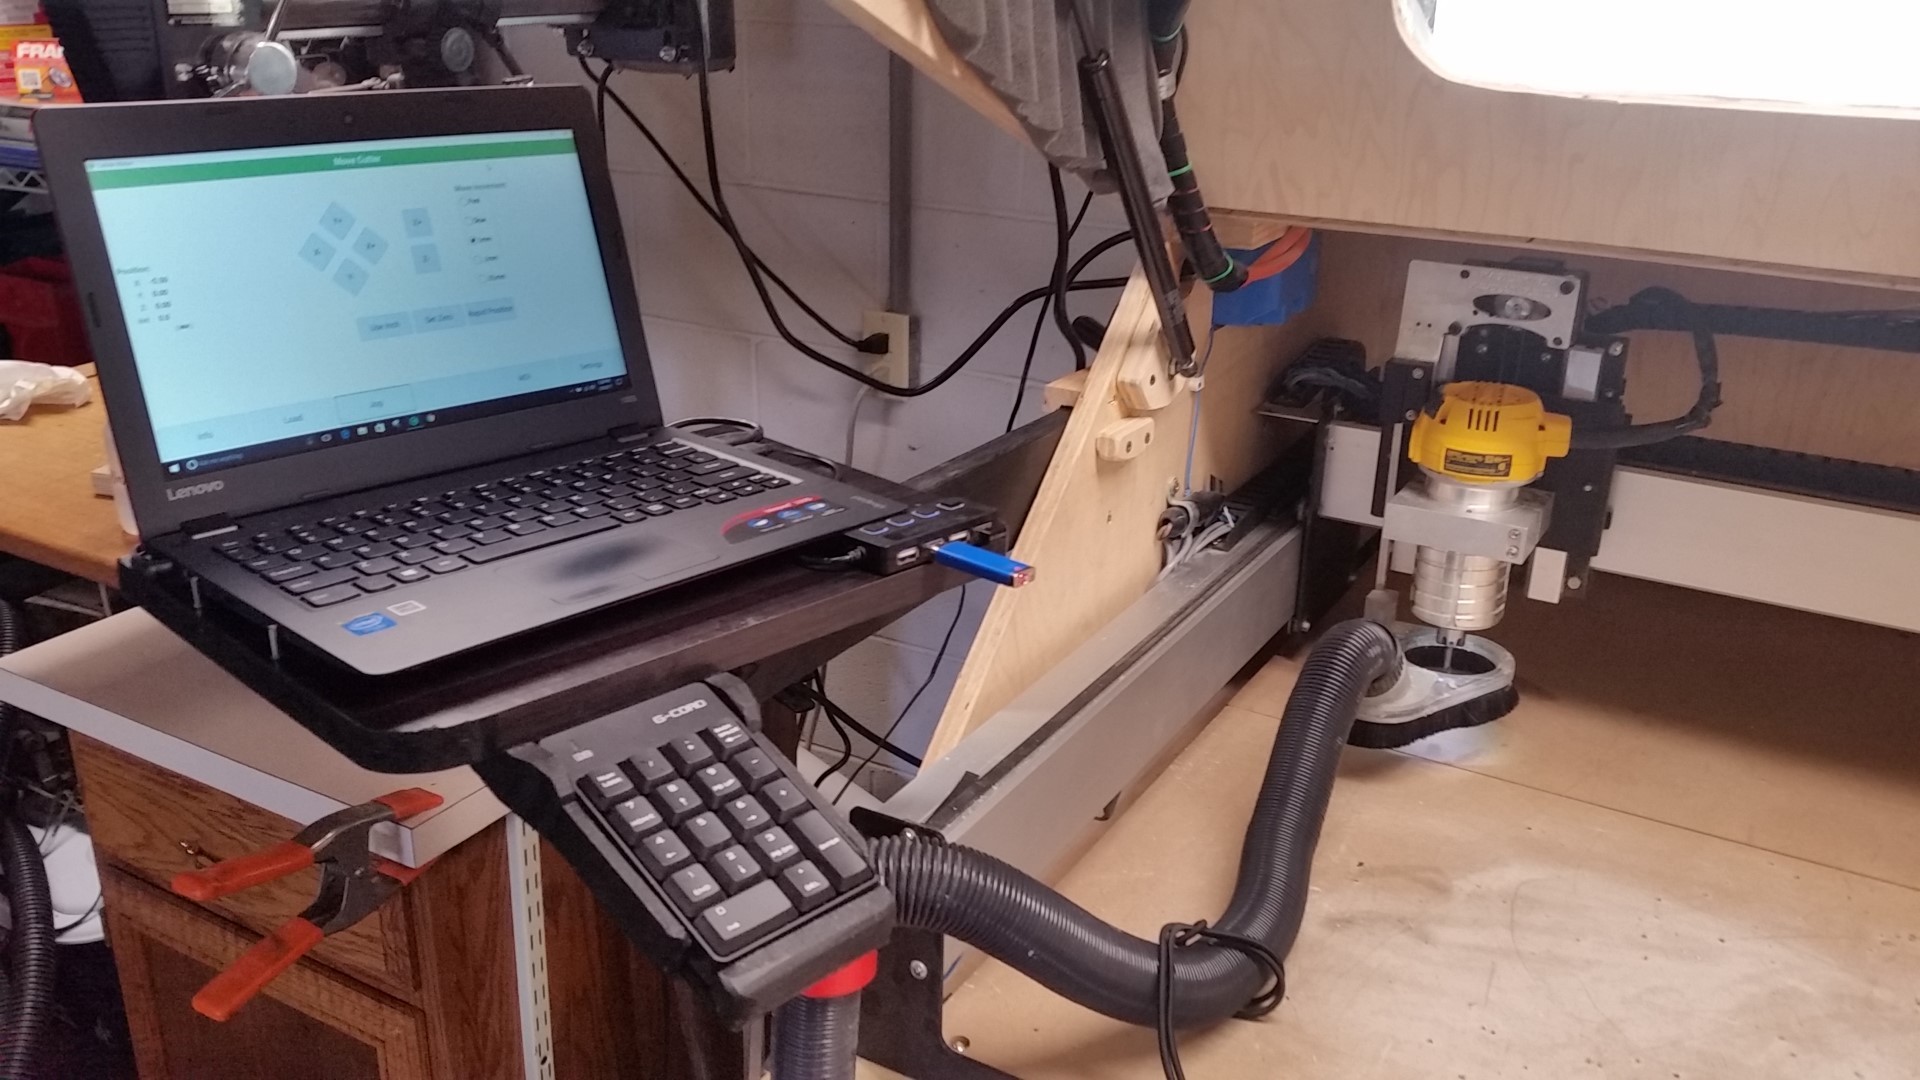
Sliding/Pivoting computer shelf with wireless keypad holder
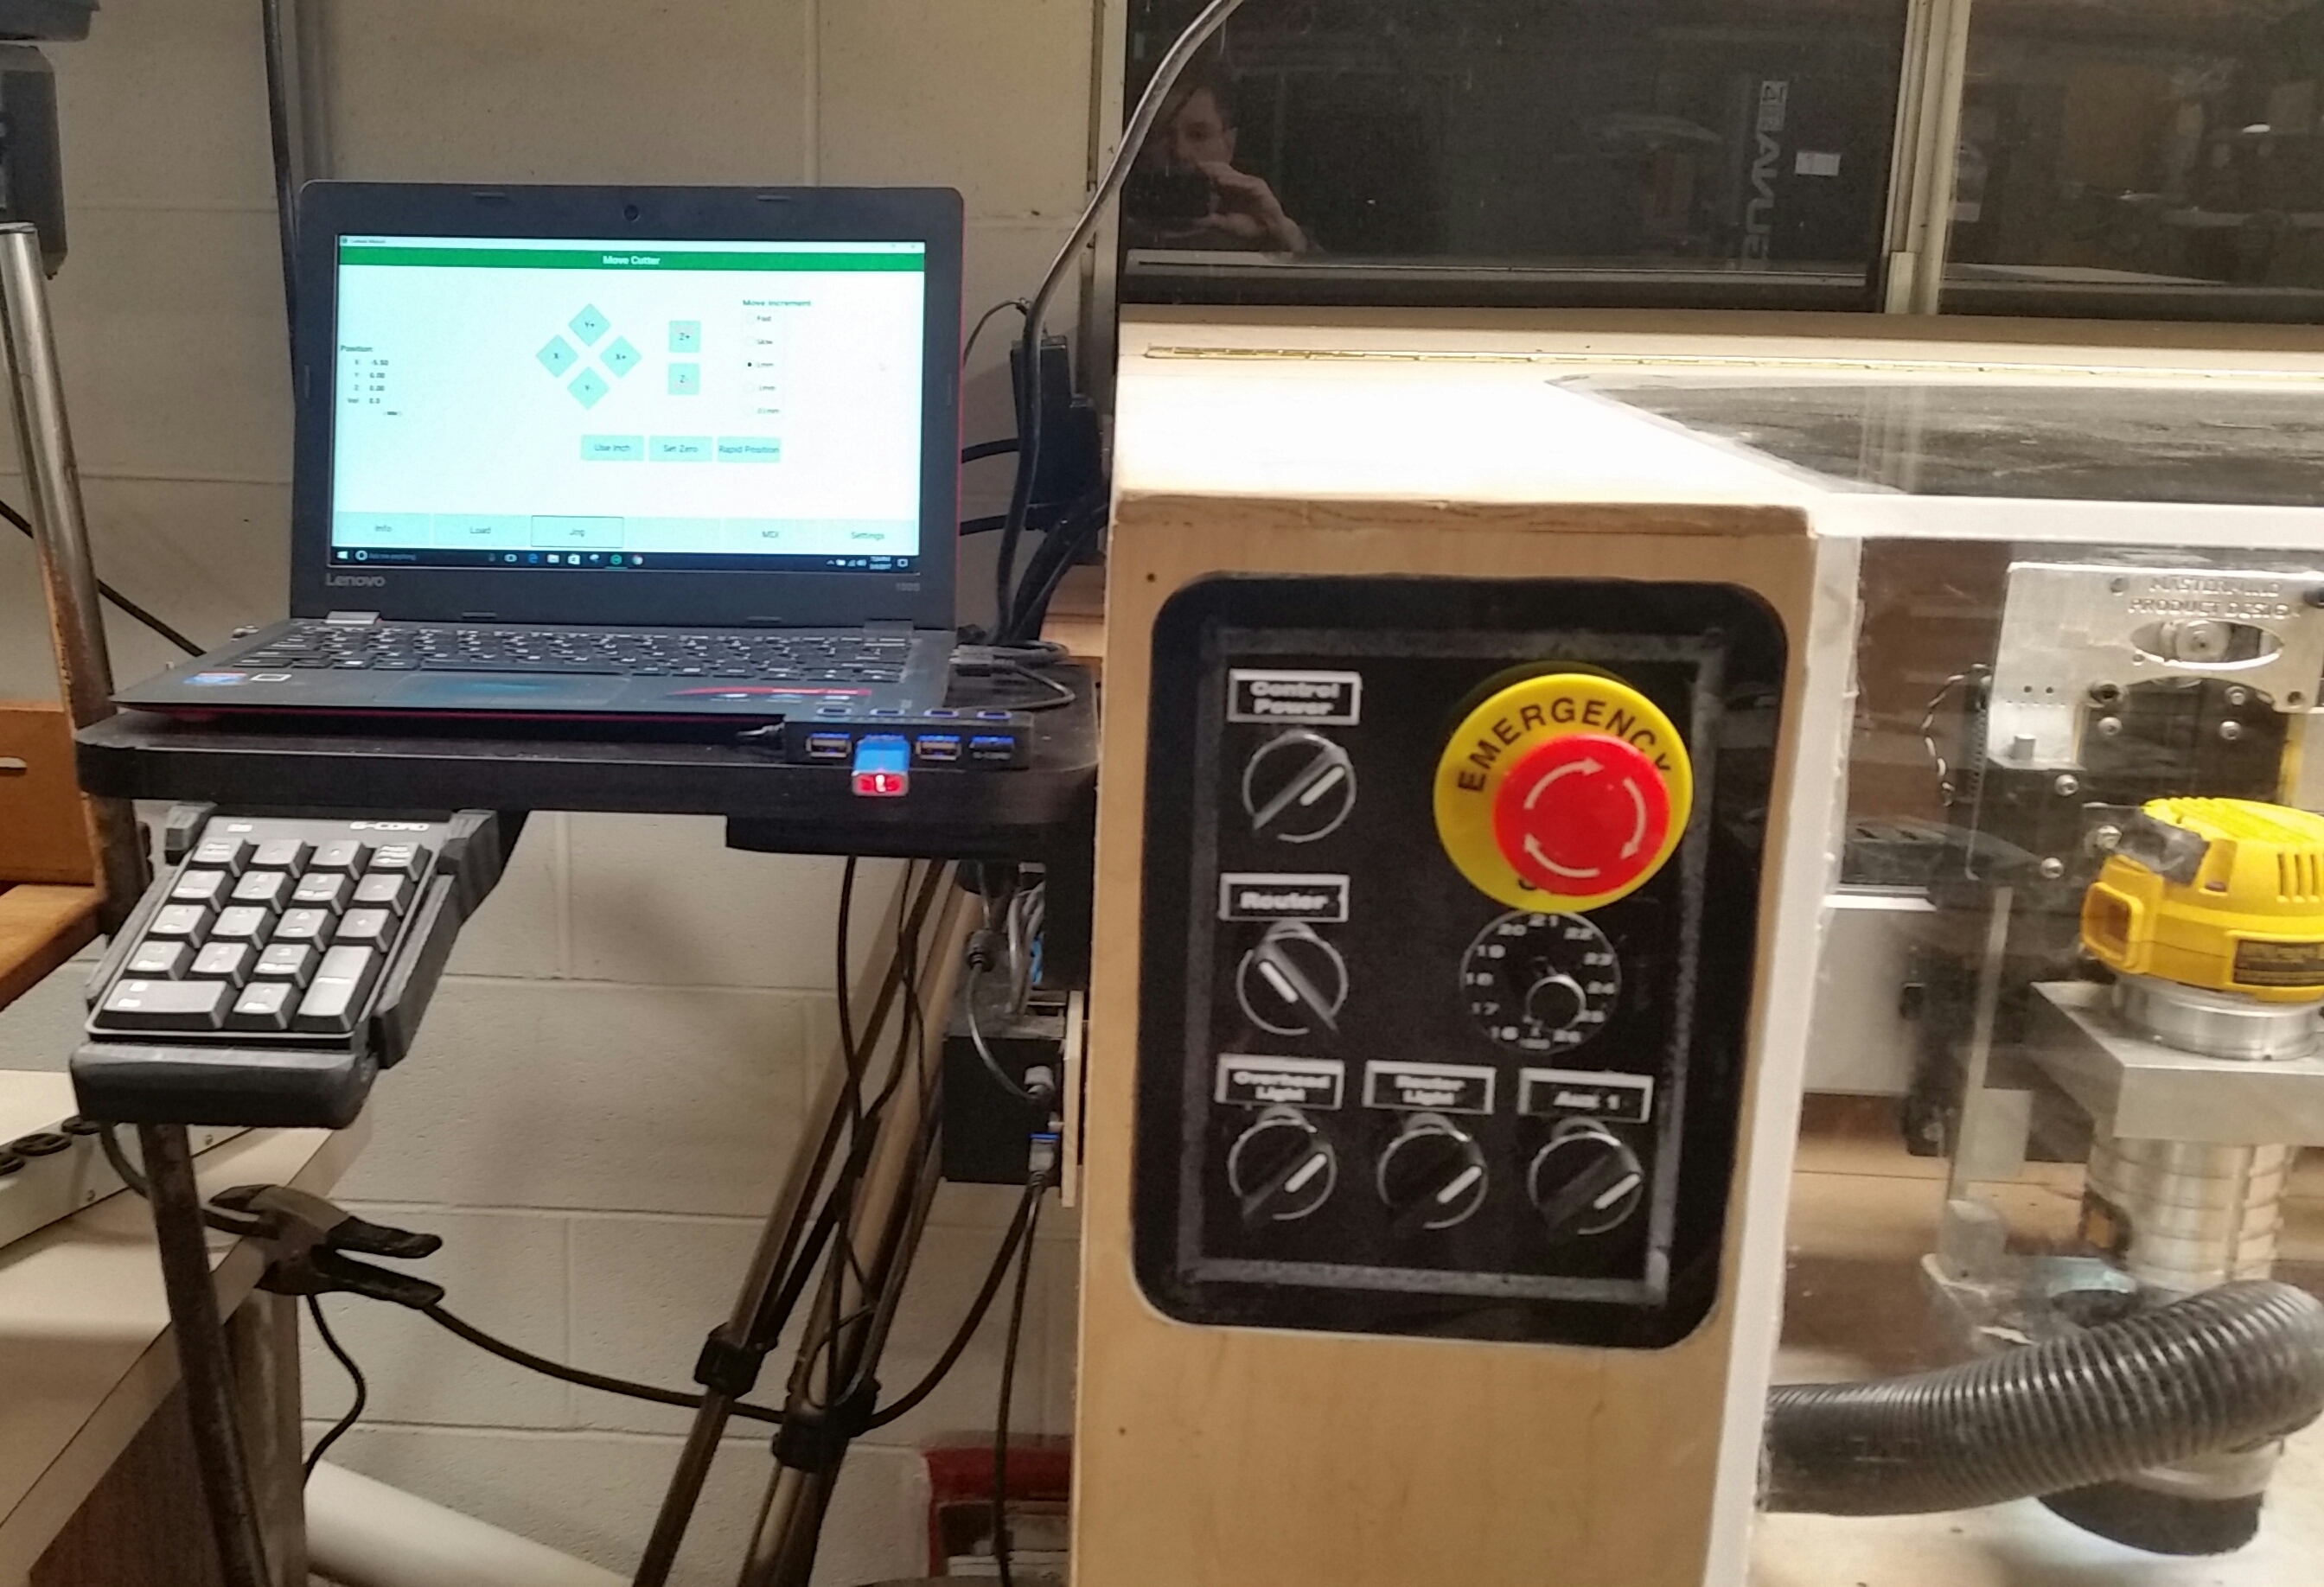
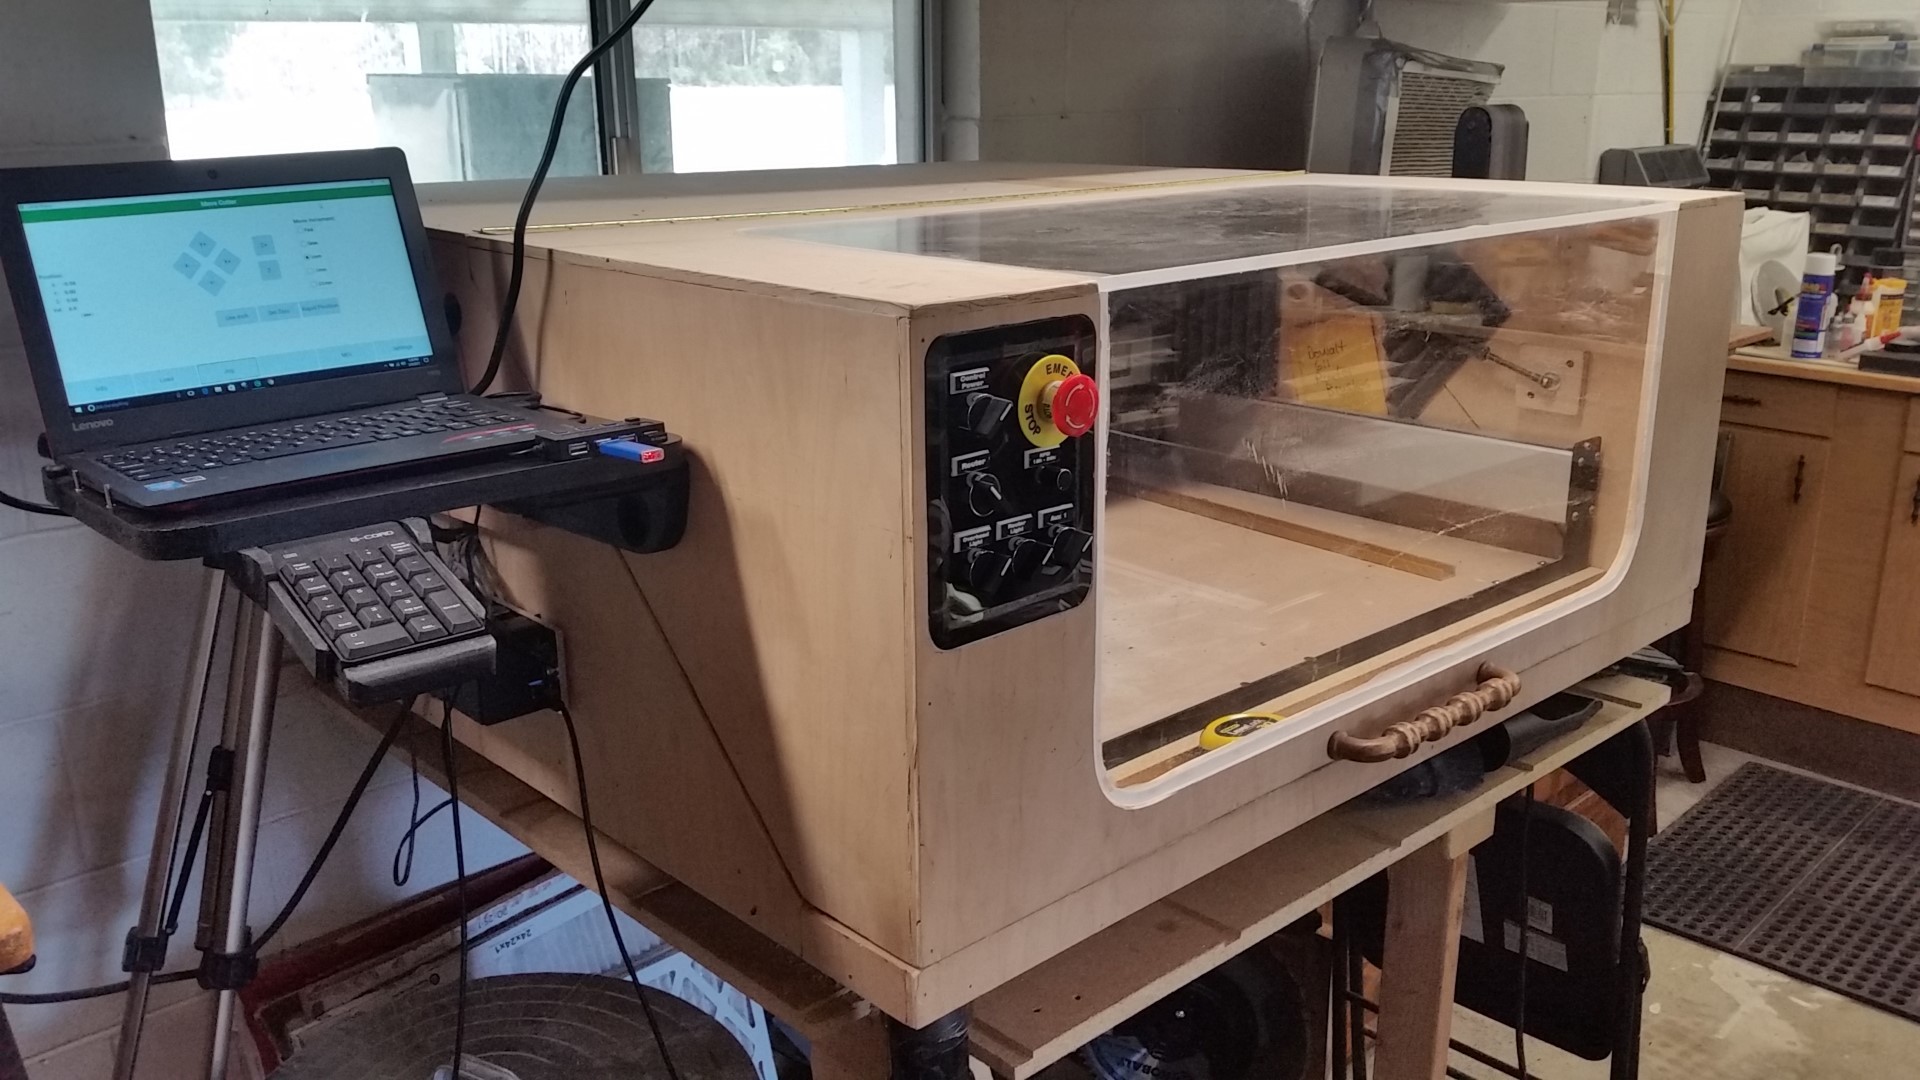
Labels for the control panel
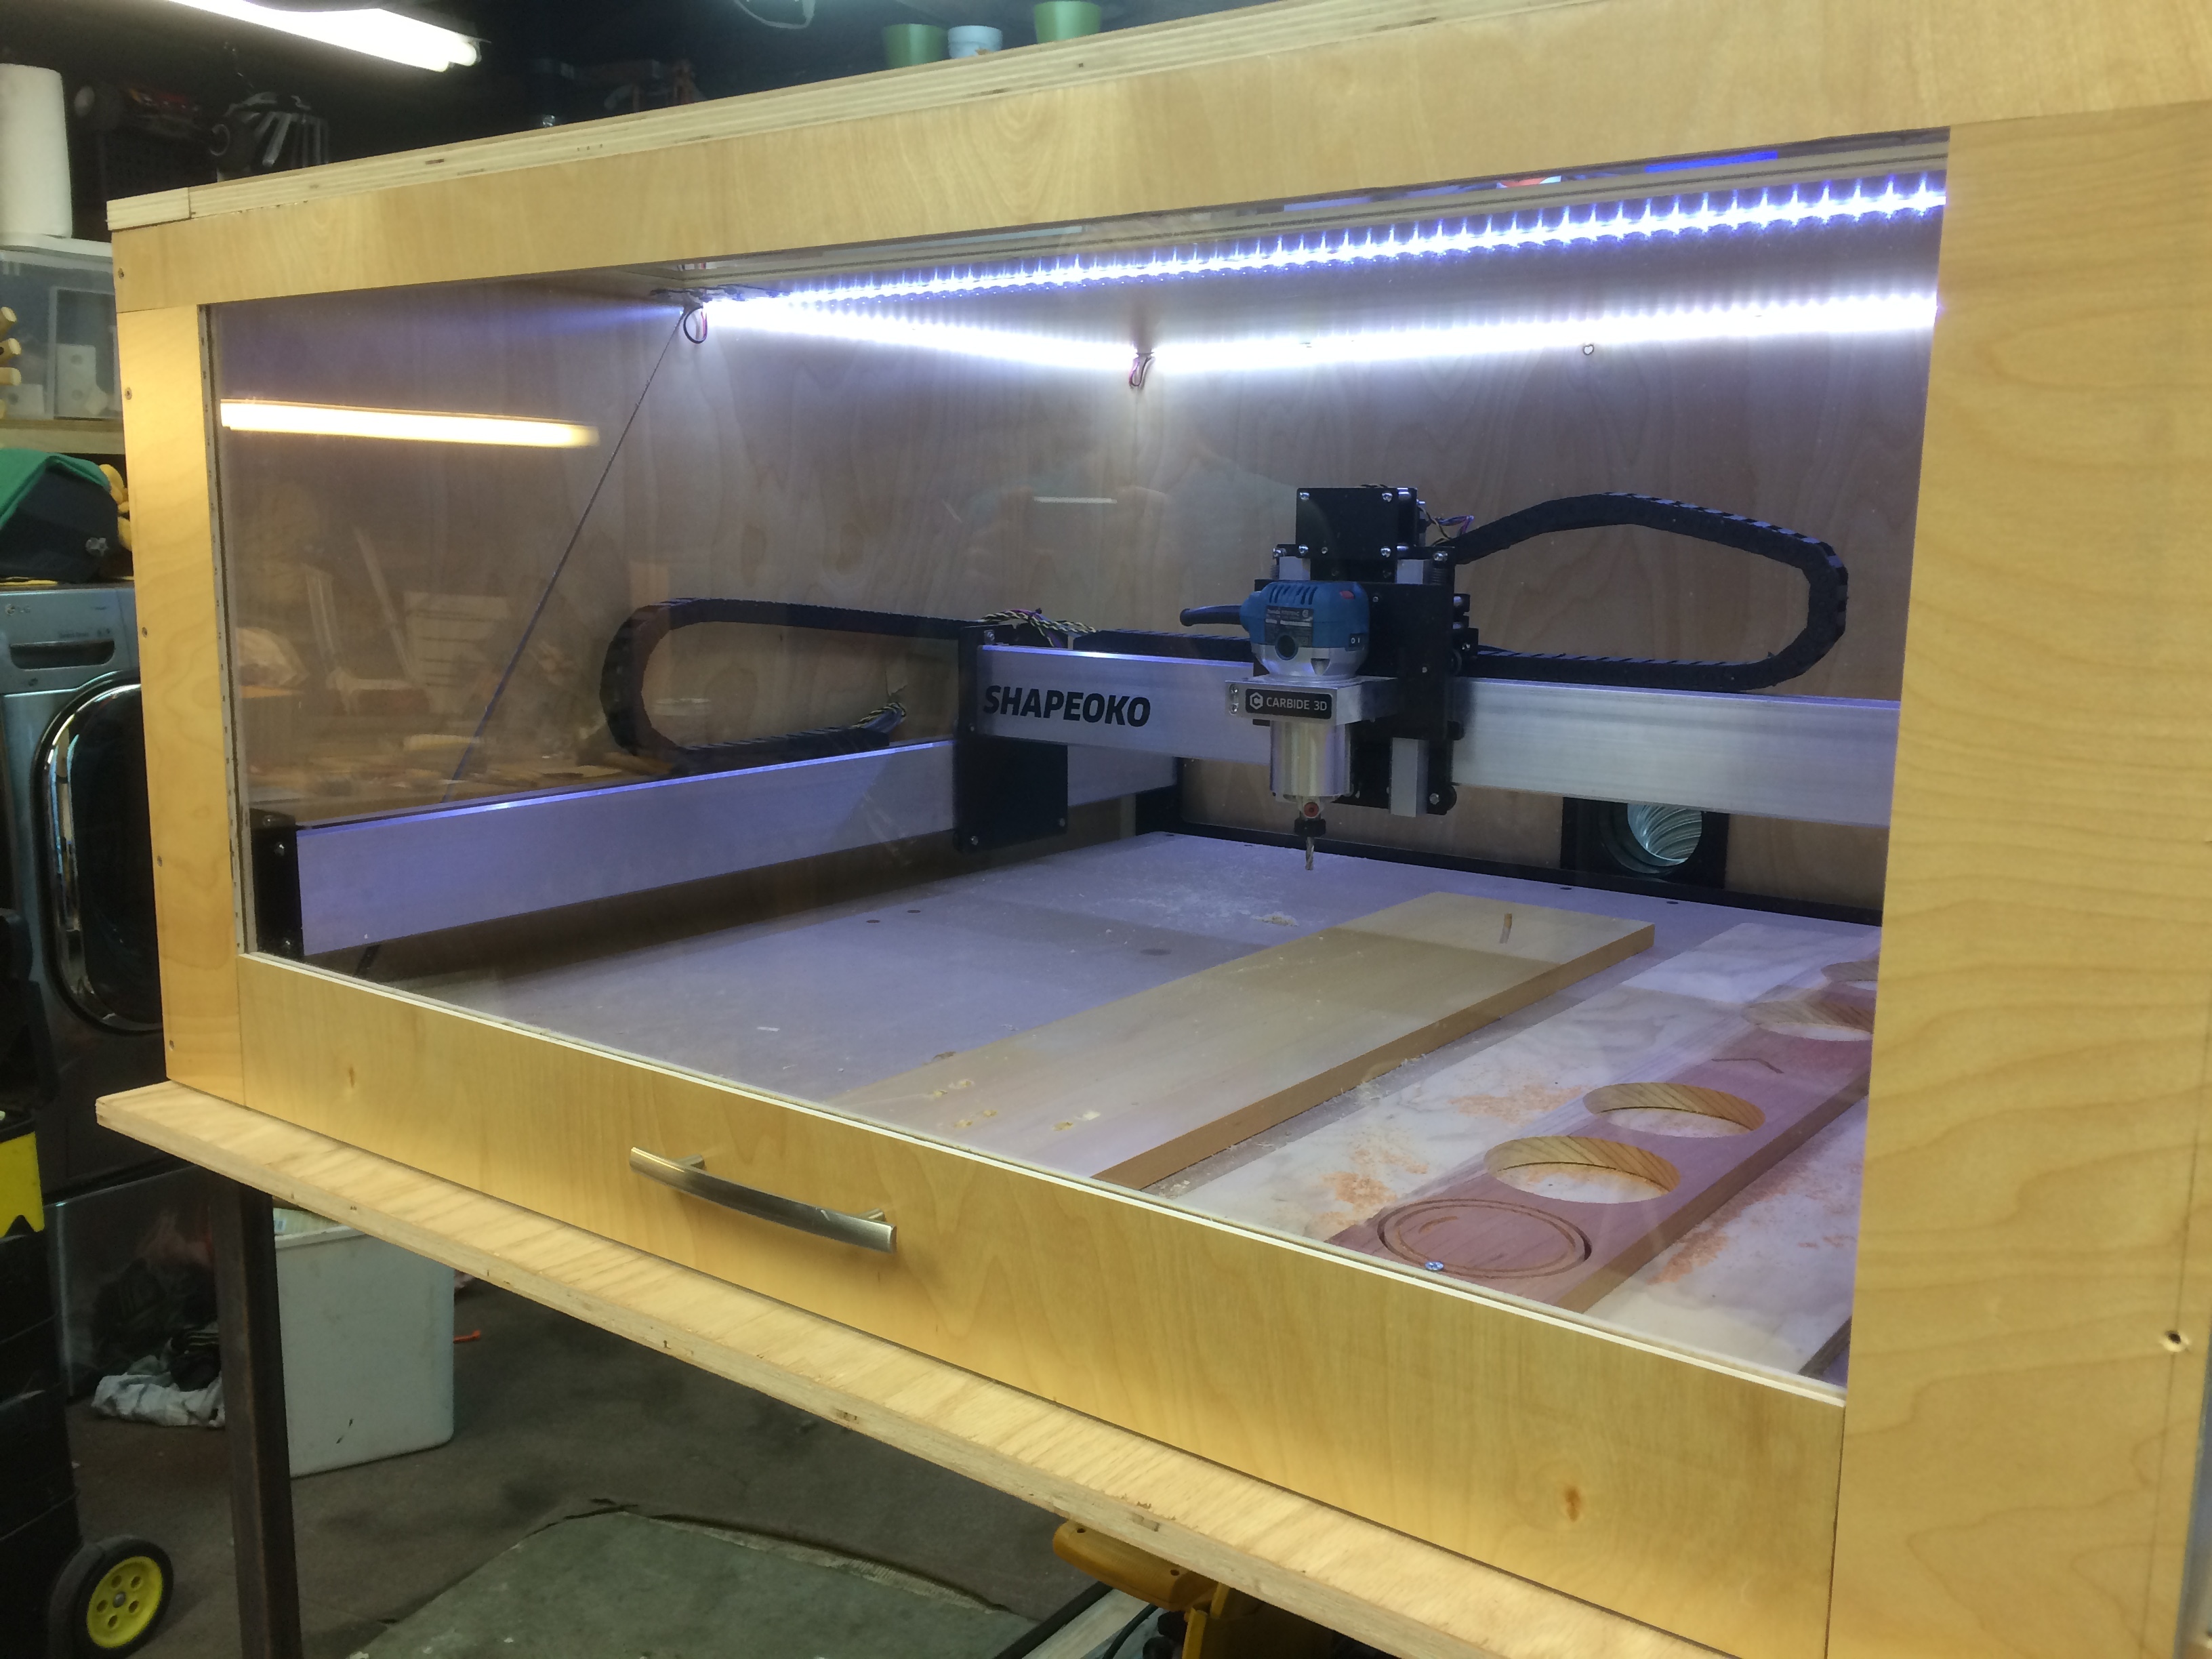
I love this enclosure. It cuts noise way way down and contains 100% of the dust, including fine dust.
This picture shows the shelf in the stowed position as well as the control panel labels. You will notice that I remote wired the speed control and light switch for the DeWalt DW611 router. The speed control lets me adjust speed accurate to better than 250 rpms of my target speed. The DW611 has closed loop feedback to maintain the rpm setting under load. You can read how hack the DW611 at the following link…
This one shows the wireless keypad removed for easier jogging. the following link will show you how to install a wireless jogging keypad in less than 5 minutes and under $20…
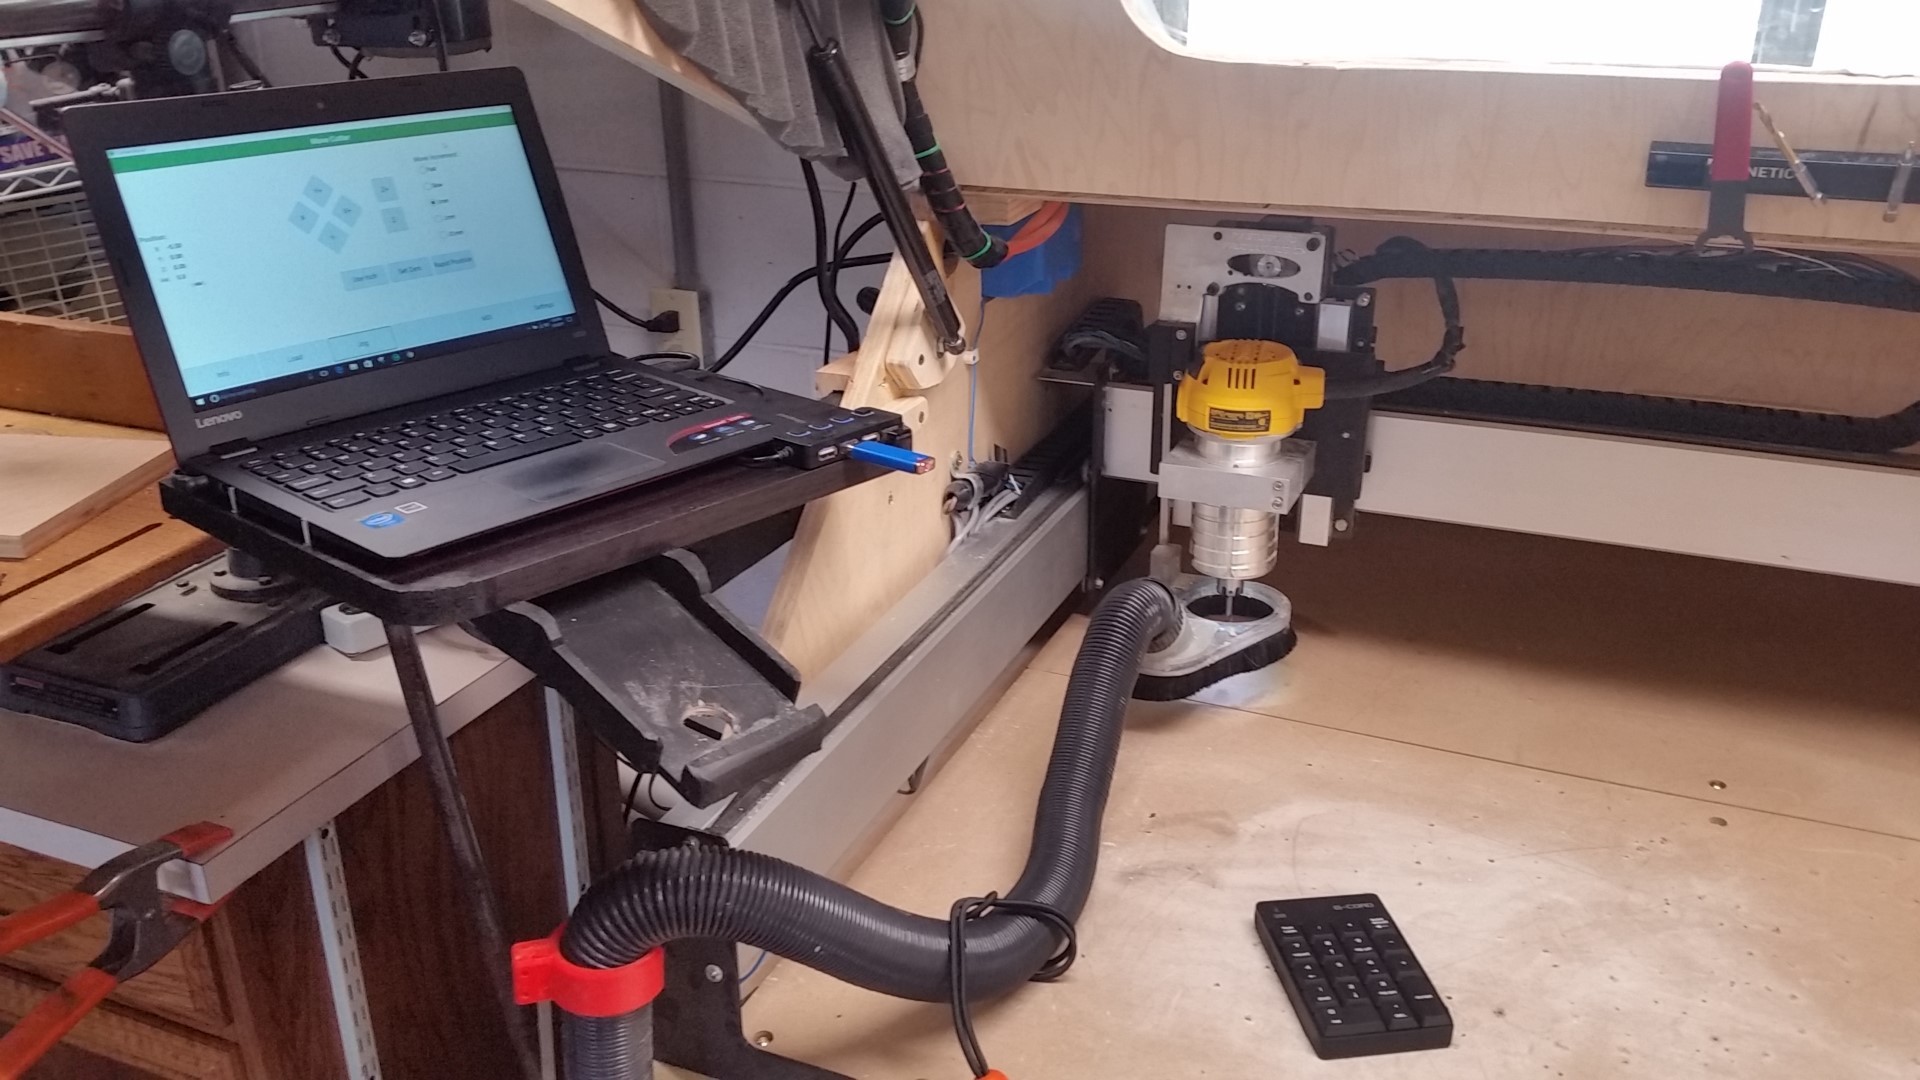
The following picture shows the shelf in the retracted position. This is where I put it to keep it out of the way when I’m not setting zero or jogging. The shelf is just a couple pieces of plywood screwed together and I used some scrap wood to make a track for the vertical piece to slide in. The table top is bolted to the horizontal piece of ply so it can rotate in and out of the cabinet.
I didn’t change them. I was thinking they weren’t included in the original write-up. Opps. If they were there then they haven’t changed. If I were to do it again I would probably try to get some that are about 10 lbs stronger but these work well.
I think you can get them in 25 lb increments at McMaster Carr if I remember correctly. That or tie a weather balloon to the door… that might work too
Another option would be to put a latch rod on one side that holds it up when its open if you are having trouble with it staying open. Mine works well except when the garage gets really cold which lowers the pressure in the springs.
Yes but if they are too strong it won’t stay closed. Another option would be some kind of cable and counterweight that runs down the back if you can’t find stronger springs with the right force.
I had some other gas springs laying around that were a LOT stronger but they were just too strong and it wouldn’t stay shut even when I used a strong magnet for the closure.
Terrific work Tony. I’ve used a very similar design based off of your info.
I have put a few extra holes in my lid by trying to size the appropriate strength gas lifters. Bought them at an auto parts store. Should have just gone McMaster Carr.
I’m installing some torsion hinges this weekend when I have time.
Question: I have a 4" suction out the back, but without a positive air draw I’m getting nearly zero collection. (Although with the shopvac running the door is sealed shut!). Where are you drawing air in?
I’m thinking of using a front inlet by putting a pvc pipe across the inside bottom of the front door which would penetrate the sides of the front door and draw from those two out points. I’m thinking this will draw enough air across the surface to clear it off.
I also have a dust shoe on the way.
Plus some cool looking switches for activating everything.
I’m just using a shop vac so I’m only drawing around 150 CFM. I didn’t seal the door seam so I think there’s enough air passing there to prevent a vacuum inside the housing. I was going to seal the door seam but cuts the noise down so much as it is I didn’t feel the need to take it any further. My guess is that the one really long skinny crack that I have is probably better for attenuating sound than one large hole somewhere unless you were to make a tubular labyrinth lined with foam.
Hi there; love the enclosure. Quick question for anybody about dust hose relief. In your setup, the hose comes in on the bottom… How do you stop it from getting in the way or pinched when the machine comes up to the front, or from stretching/pulling when it’s at the back? Thanks.
If I had it to do again I would have it come in from the top front and I would have made the enclosure a little taller and longer to keep the hose from getting bunched up if the router gets close to the front. However, 99% of the parts I make don’t require the full cut area so the one or two times that the hose getting too close to the front I just left the door open. You will notice that I have it supported about 12" above the floor. That helps keep it from dragging or bunching up.
The hose is off of a home vacuum cleaner that I got for $10 at a yard sale. It has spring steel wire inside so it can stretch to 5x its compressed length without exerting much force on the dust shoe even when the router is in the opposite rear corner. It hasn’t lost its spring so the spring steel wire coil is effective. I suspect that most decent home vacuum hoses are constructed this way. Considering the Z carriage on the SO3 isn’t very stiff, the hose probably does affect cut accuracy some as the force it exerts changes but its not been an issue so far. I was going to make an articulating arm to support the hose until I saw that it works great as is.
I worried a little about using a small diameter vac hose but it works very well for the fine particles. The way my dust shoe is constructed it does allow some of the larger chips to escape but they don’t go far and only take 10 second to sweep up when I’m done.
Feel free to ask more questions. I’m happy to share the information and to see how other people improve on the design as time goes by.
Great; thanks for the feedback. I figured that might be the case. I like another poster’s idea of using a dryer vent hose, but can’t think of how to combine it effectively with an enclosure. I have some of the 4" and the 2 1/2" Flexible PVC Dust Collection Hose (from Amazon) that I’d like to use; it’s very flexible, but it’s pretty heavy too.
Dryer vent hose would work if you are using a dust collector which has a much higher air flow rate (600+ CFM for a dust collector vs. 125 CFM for a shop vac in this configuration). The force of the vacuum trying to pull the hose together would be something to think about too. It probably would only be a few lbs though.
The vacuum cleaner hose isn’t light but its own weight isn’t significant for the SO3 unless you are needing extra close and repeatable tolerances. If you see a vacuum cleaner at a yard sale, grab it for $10 and you’ll have a good hose and a nice vacuum pump to use on this or other projects.
Right. I have a 1HP dust collector dedicated for this and my drum sander (I can switch using blast gates), which is why I was leaning towards the dryer vent or the 4" PVC hose. Thanks for the exchange!
For a dust collector you will probably need a hose that is at least 2" inside diameter or larger to get enough flow. 3" would be more than enough. Dust collectors typically produce less than 0.5 psi max so they don’t handle restrictions very well. A shop vac or home vac will pull 2 to 4 psi max which makes them better suited for smaller hoses since it doesn’t affect their flow rate very much.
You might want to play with different size hoses connected to your dust shoe just to see which ones give enough flow. Depending on your dust shoe design, it will likely be a significant restriction (pressure drop). The good news is that you really only need around 75-100 CFM to effectively remove all of the small (most dangerous) particles if the dust shoe is designed correctly.
Those hinges are still sitting in the box. I’ve threaded the table, cut 1/4" aluminum, made a ton of fidget spinners for my son, re-leveled and squared my machine, built a led shadow box for a wedding and probably 10 other projects while those hinges sit.
The hack solution was a bike hook in the ceiling, a rope tied around the handle of my enclosure and a good knot with a loop for slipping over the hook. Not innovative, but it works.
