I wanted to share my experience using tiling in Vcarve for beginners who may not have tried it yet:
I’m working on a piece of furniture and one piece will feature a decorative carving. Because of the size of my workpiece (6” x 27”) I would have to figure out how to cut multiple sections on the same workpiece. The design itself is really simple and drawn by hand. I tried to talk my wife into something fancier like a bas relief carving, but she wanted it to match another piece that is an antique and carved by hand many years ago. So it had to be simplistic. Also notice, that because of where this final piece will be used, I did not want to use dowels as alignment guides, which is typically the way you would do it.
-
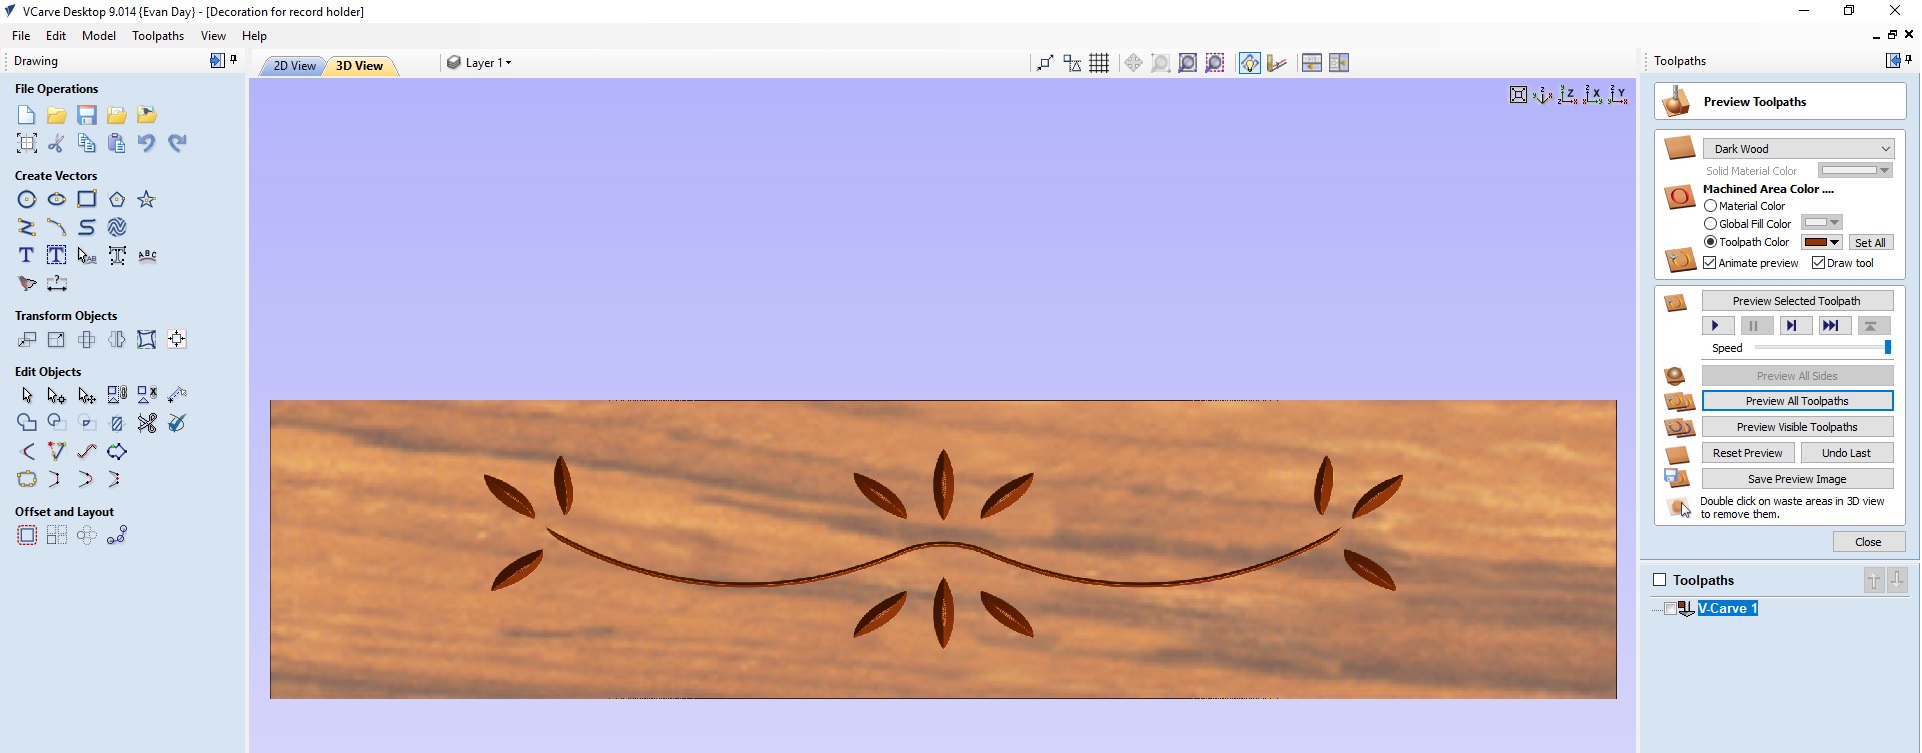
I start out by setting up my workpiece in Vcarve with the long axis of the piece as the X axis. I draw the design by hand and do a lot of mirroring to ensure symmetry and get everything how I want it. I check for open vectors and set up my vcarve toolpath using a .25” 60 deg V-bit. I preview it and adjust the flat depth a few times till I’m happy with the result. Picture:
-
In order to cut this design I will have to feed it through the Y-axis direction on my machine. So I next flip my measurements in my stock setup, now 27” for Y axis and 6 for X, essentially rotating my stock 90 deg. I then can rotate my vectors as a group and re center things in both directions. Picture:
-
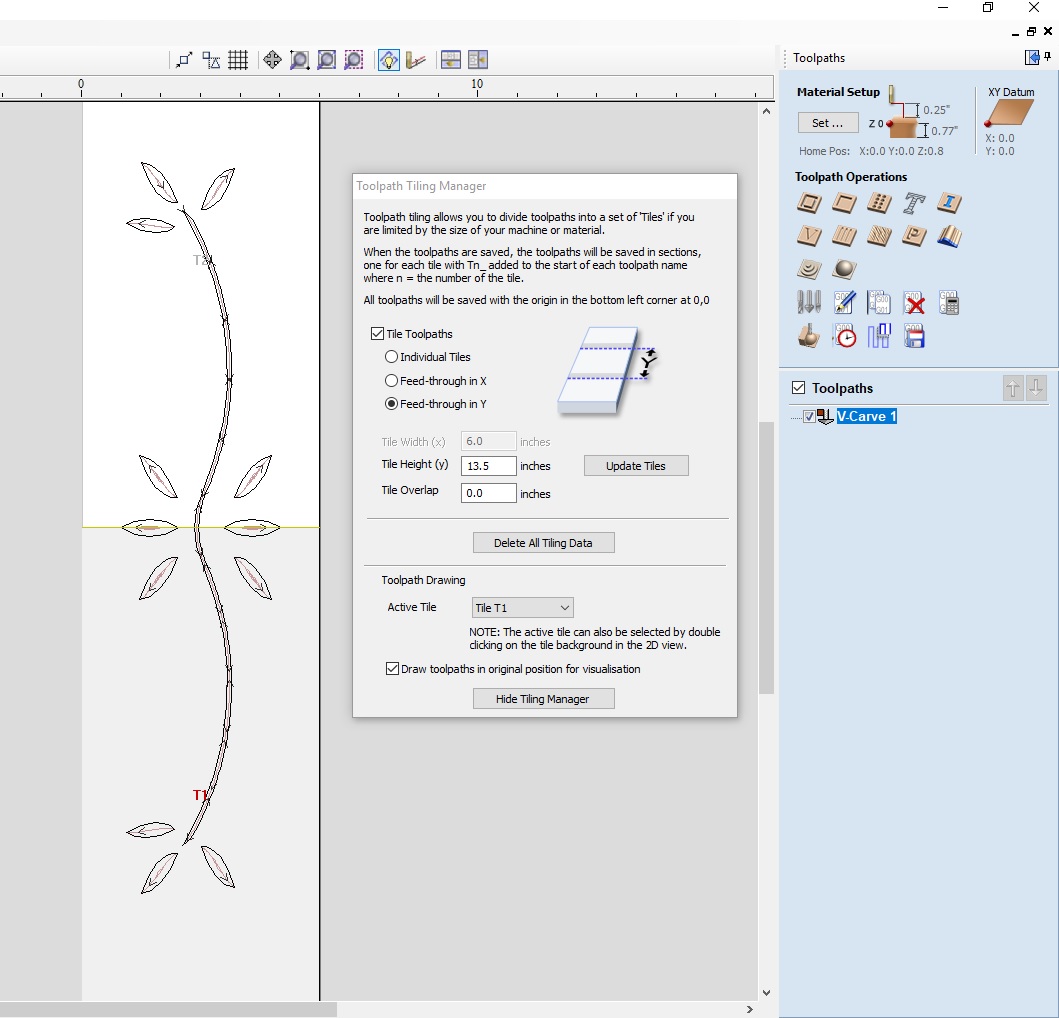
I used a video from Vectric to walk me through the tiling process. I re calculate the toolpath to match the rotated vectors. I hit the tiling button and adjust my tile to feed through the Y axis and make each tile length 13.5”, half my workpiece. Doing it in halves will allow me to align things in this design nicely. No further adjustments to the toolpath required. Note: Your origin has to be set to the lower left for this to work. Picture:
-
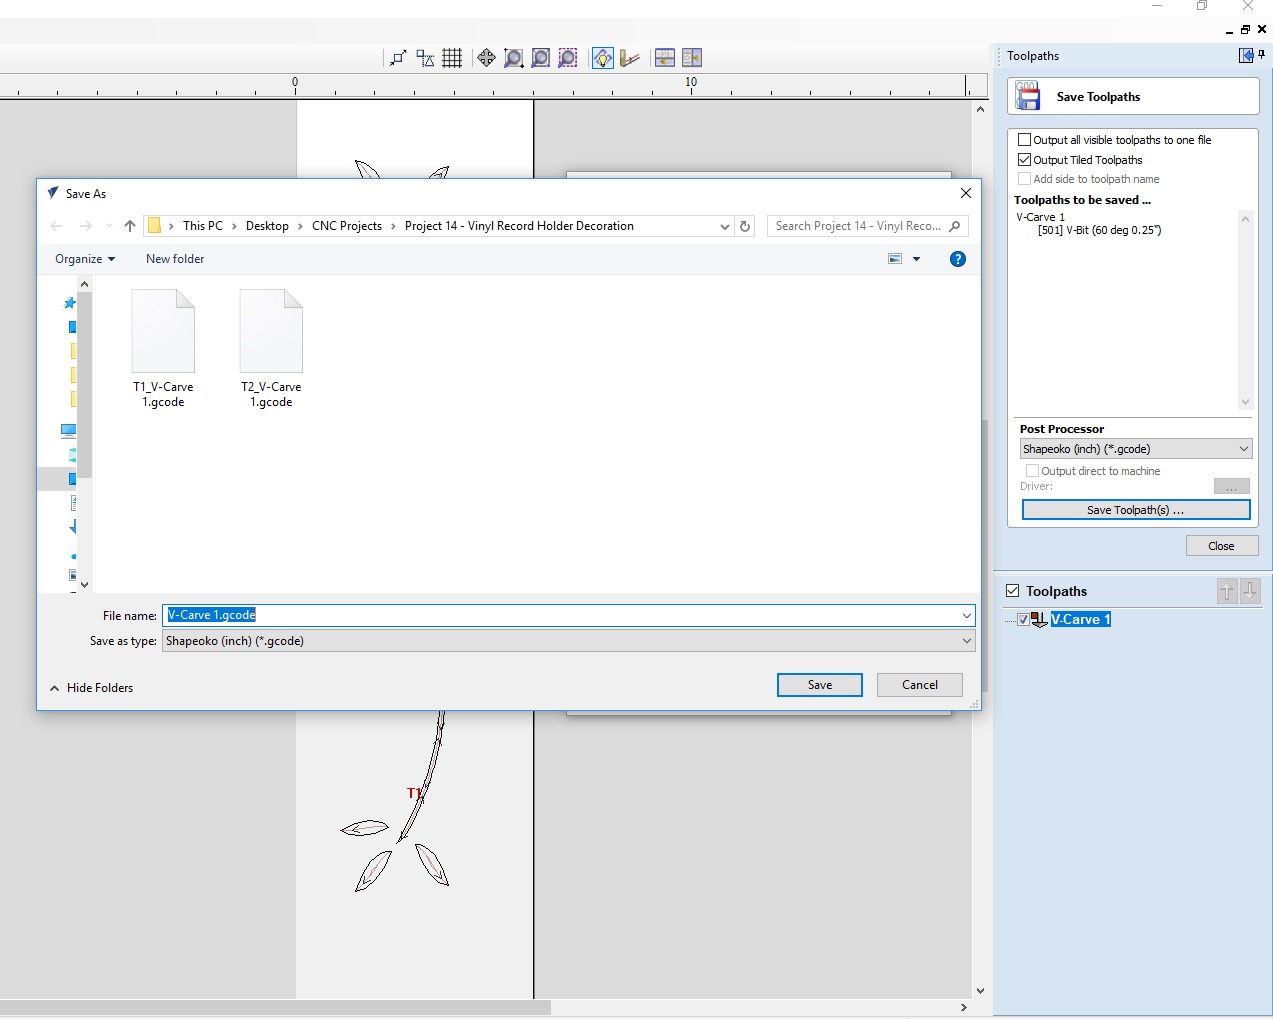
When you save the toolpath it will appear to be saving one file, but you will get one file per tile per toolpath, so 2 files saved at once in my case. The filenames automatically get renamed with T1, T2, etc for the tiles.
-
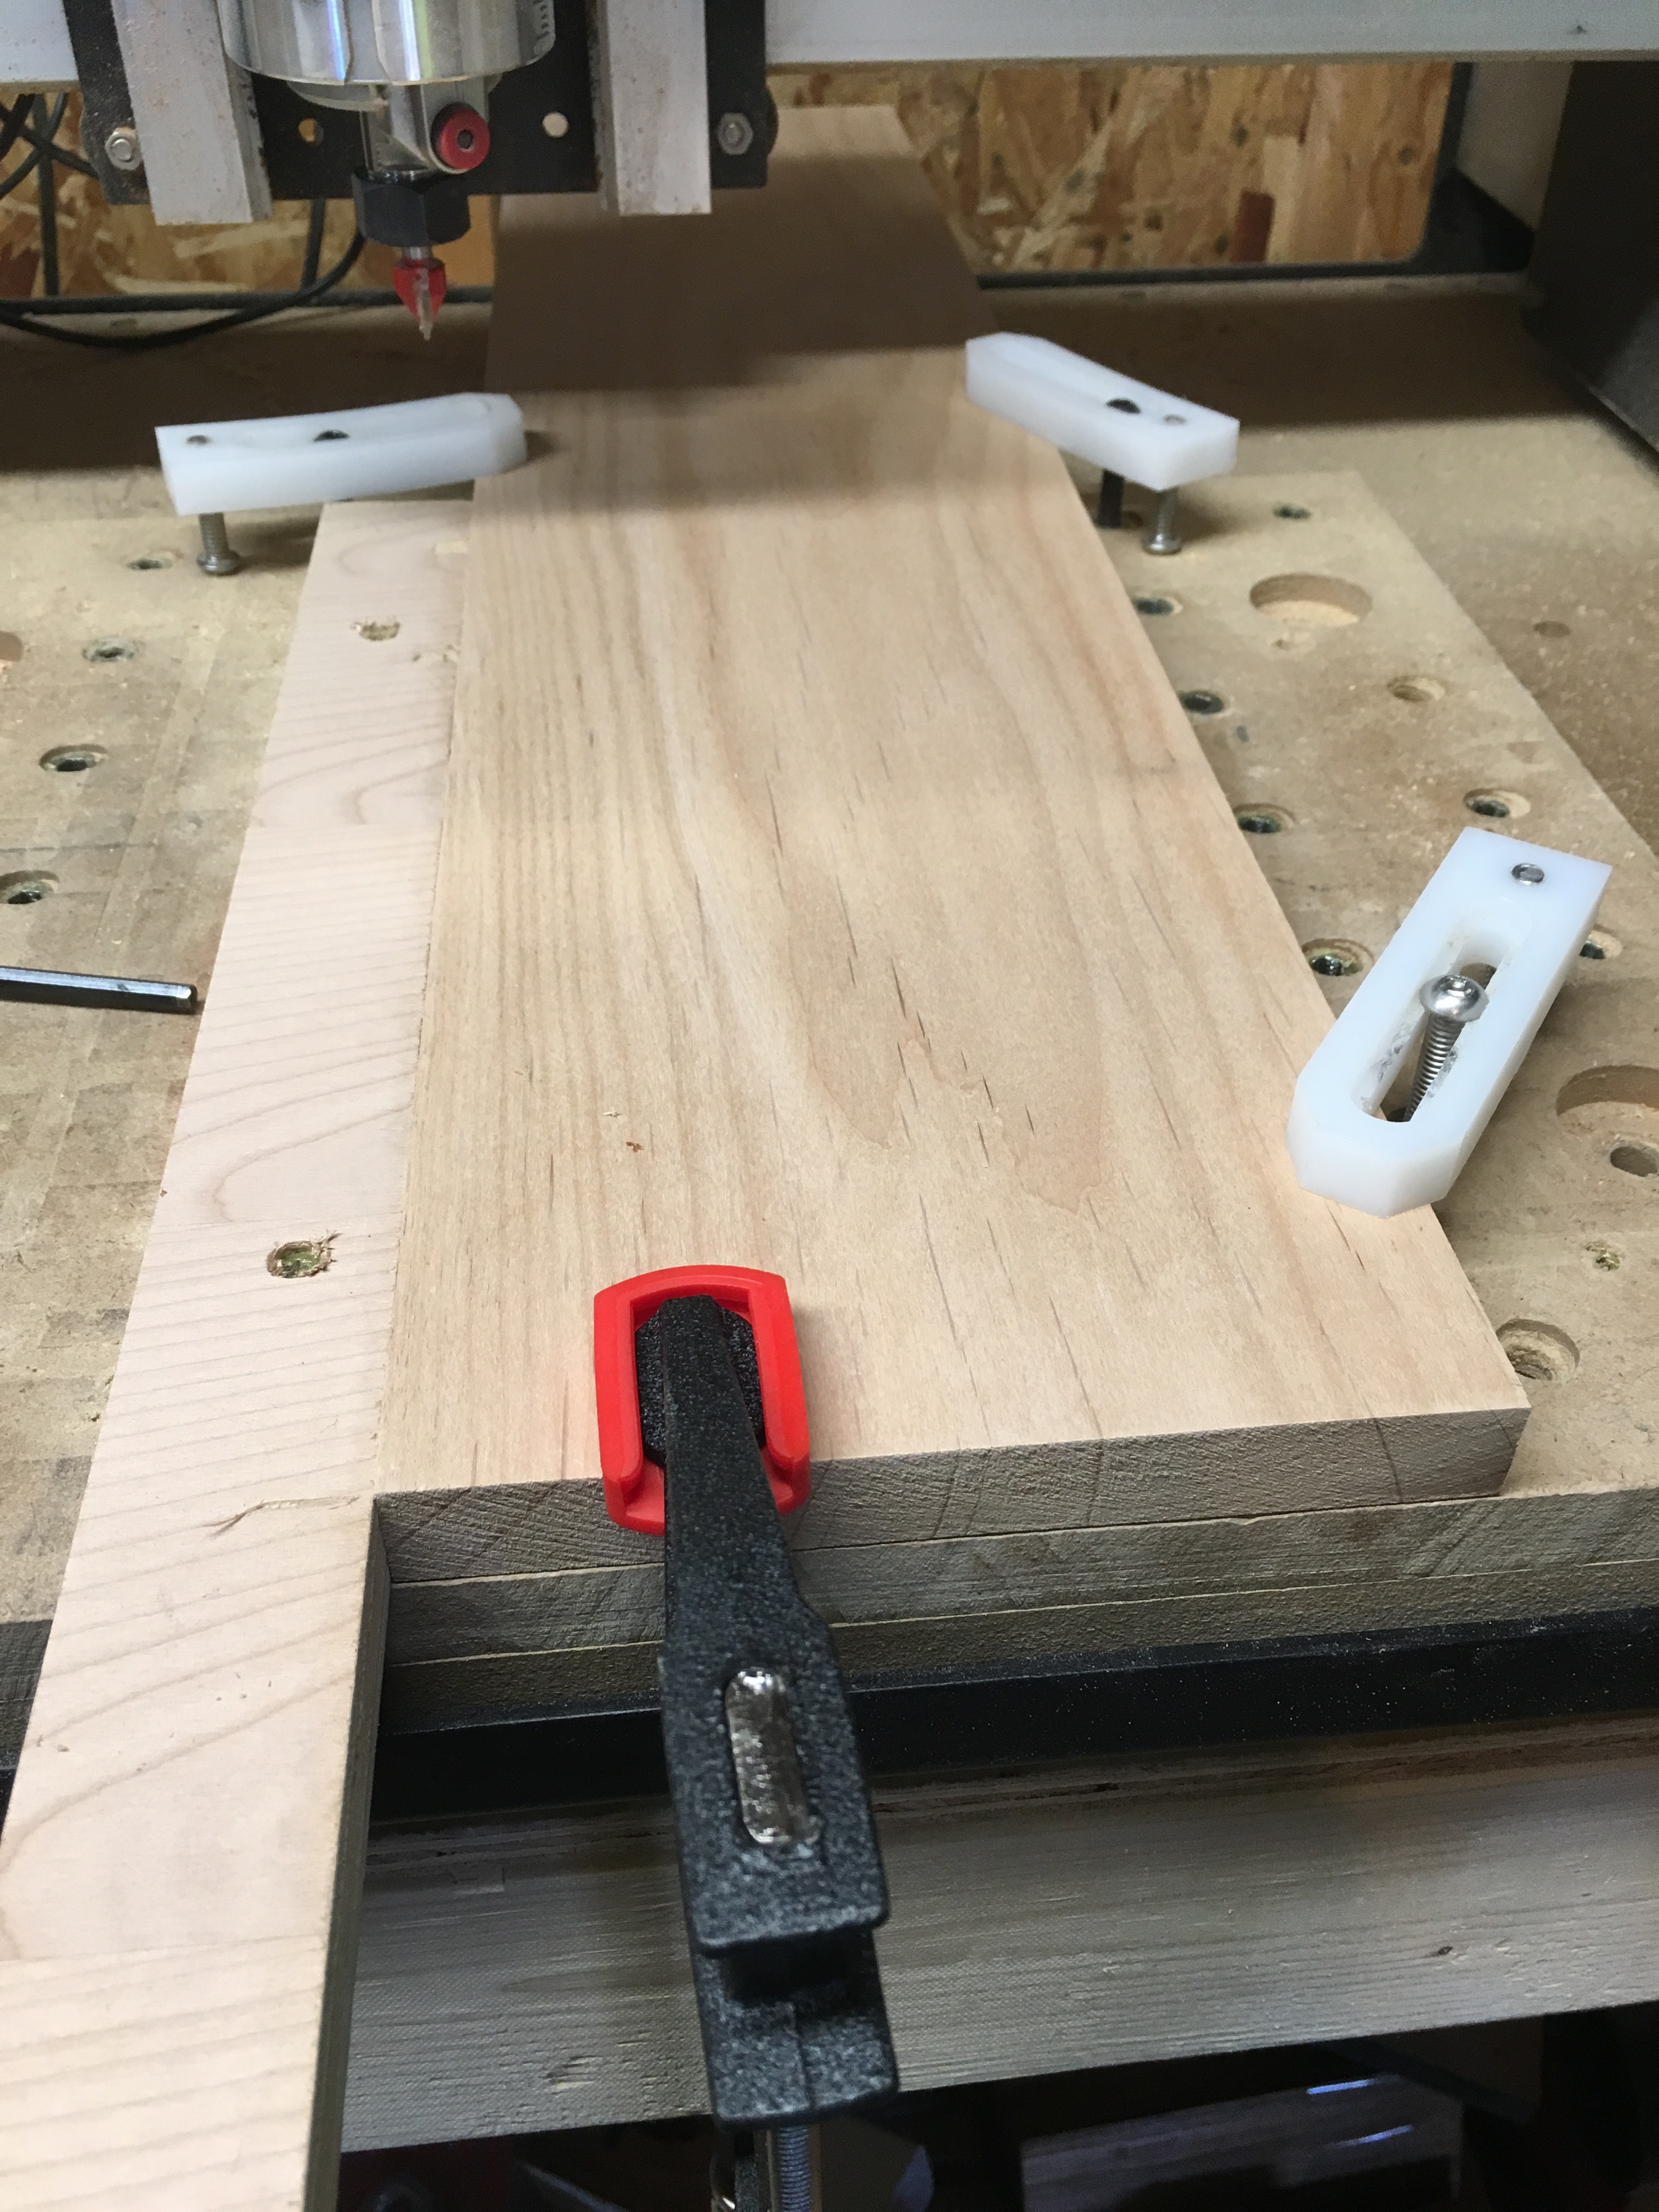
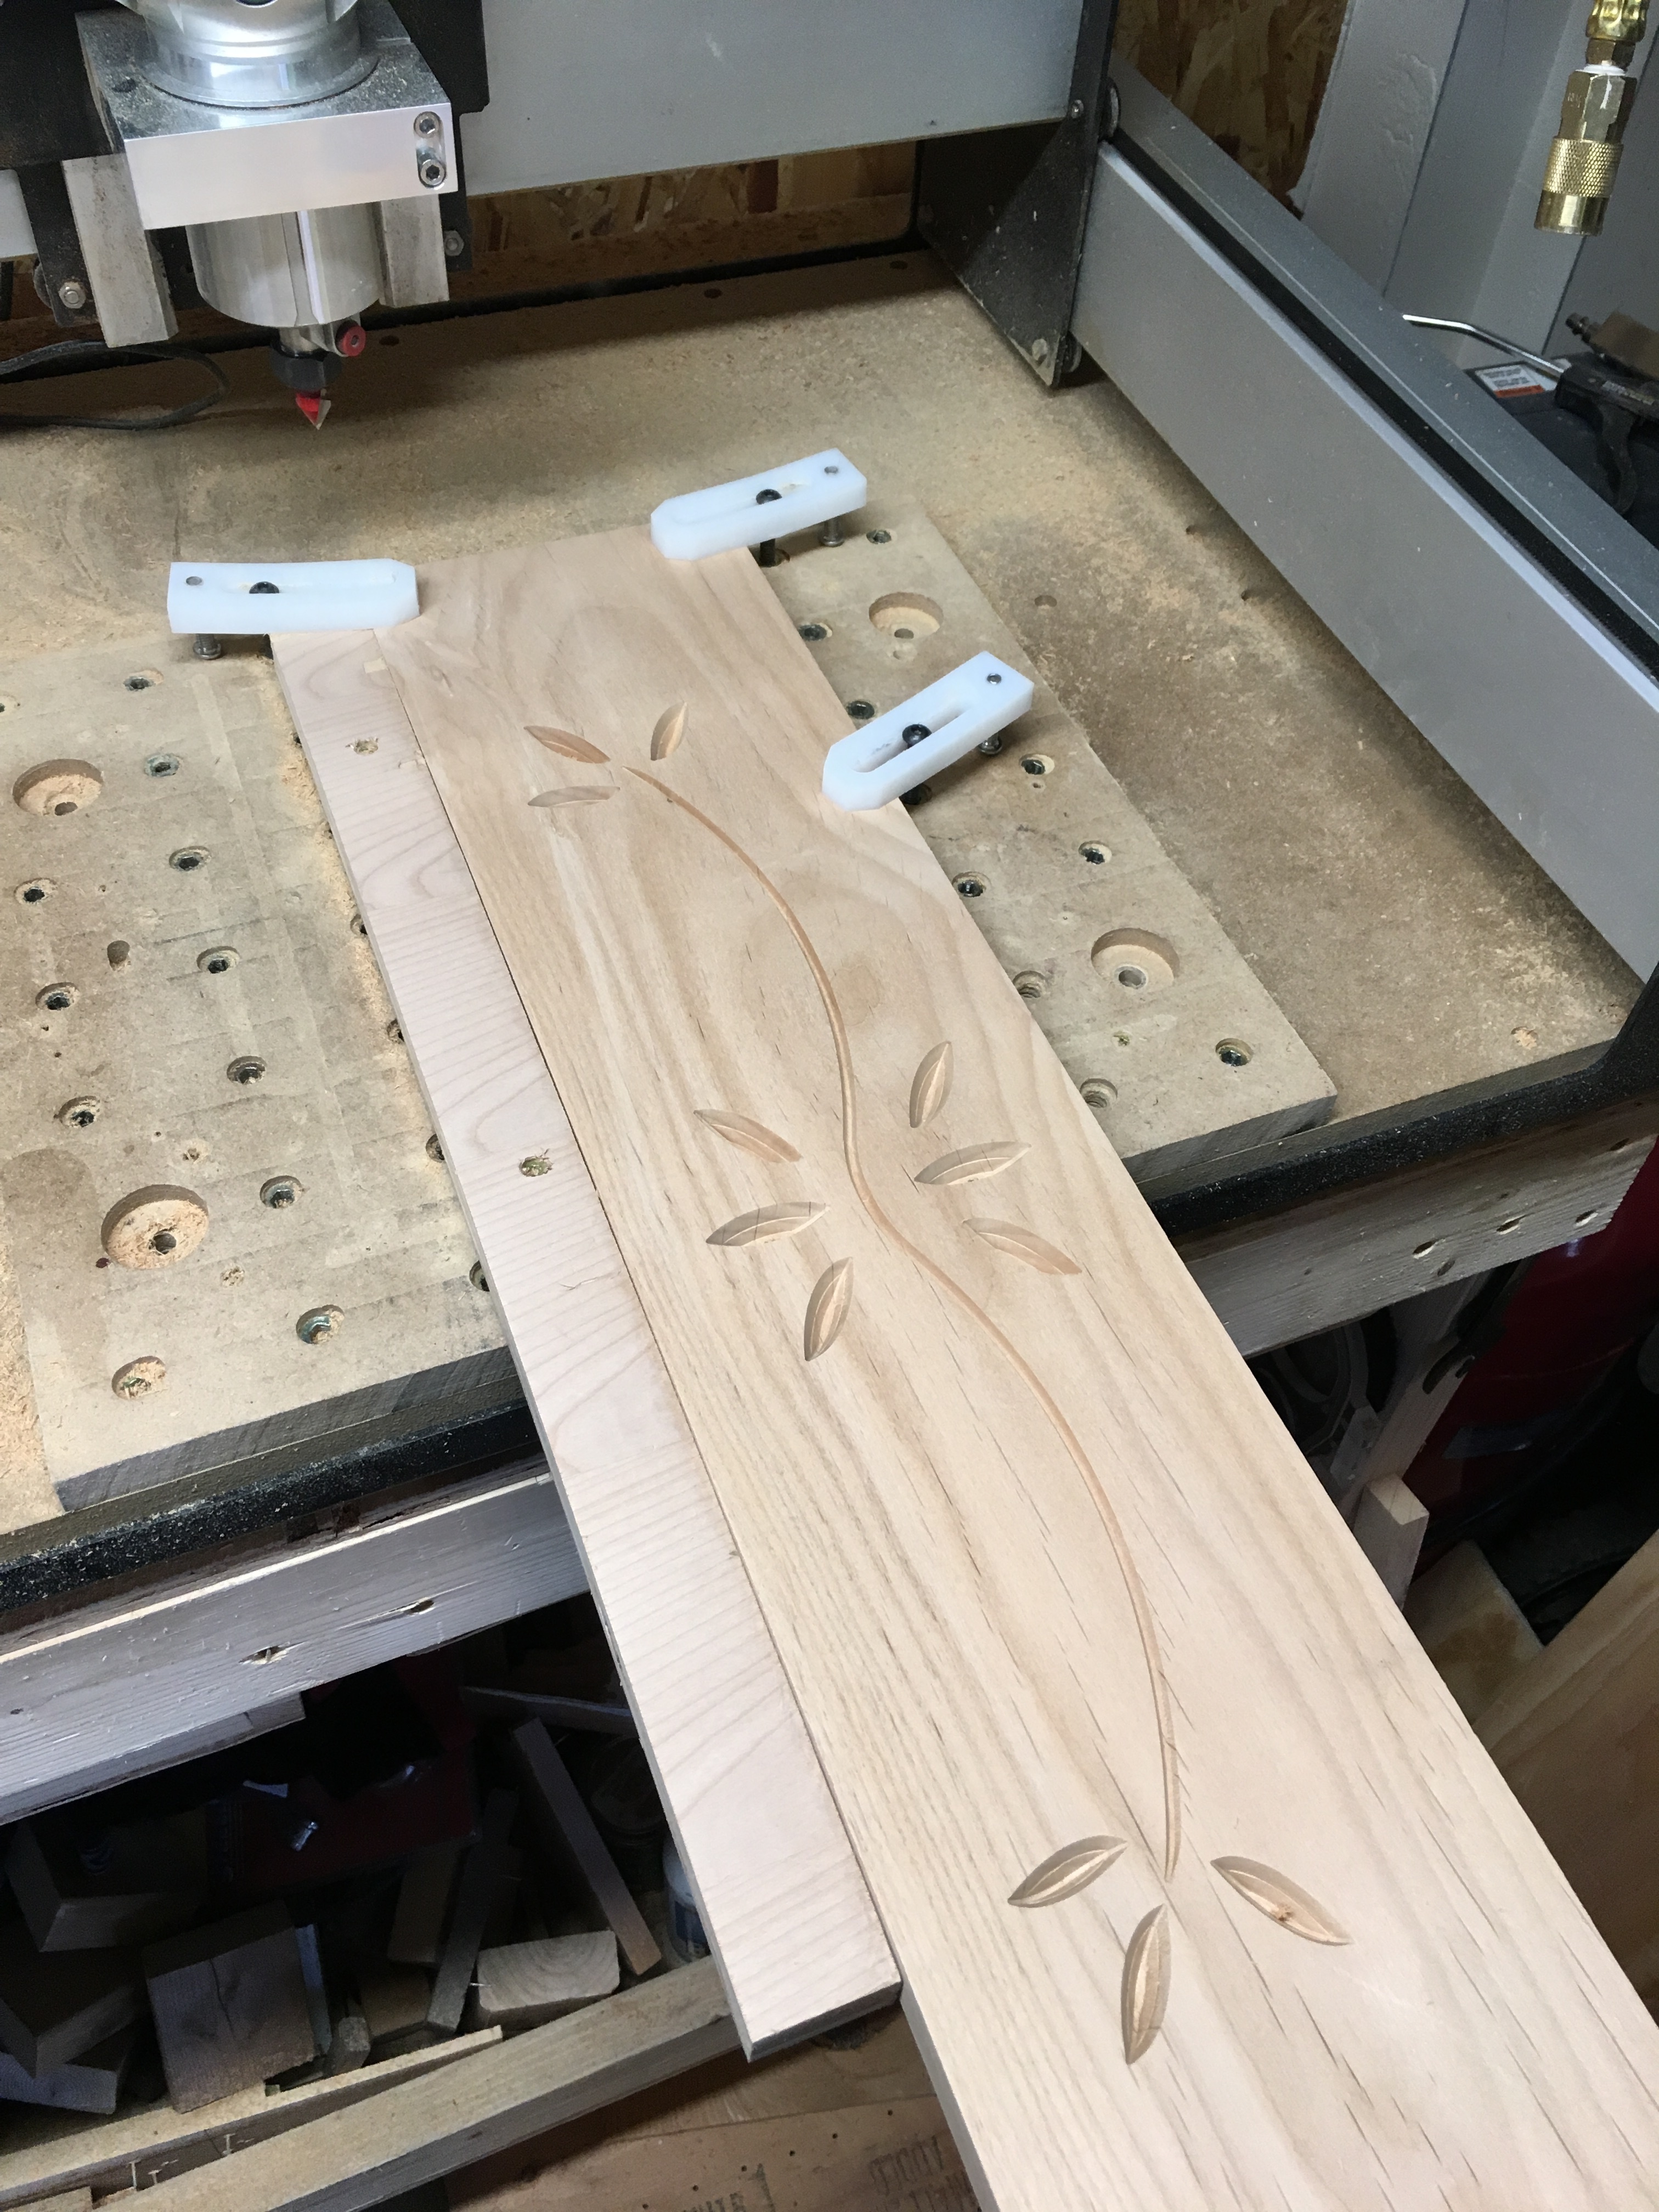
I did a few tests in scrap, mainly to make sure I had the alignment process down cold. I had already spent time jointing, planing, and sanding my stock, so I only had one chance. I would have to make sure the tiles aligned from both an X and Y direction. I made sure that my workpiece edge was parallel to my Y-axis travel and then screwed a straight board in place to ensure alignment after I move the stock. Notice that even though I have metal clamps, I’m using my softer HDPE ones to avoid marring my stock. You don’t need a lot of hold down force for most Vcarves. I also had to use a large clamp on the front because my stock wanted to bow up just slightly. Picture:
-
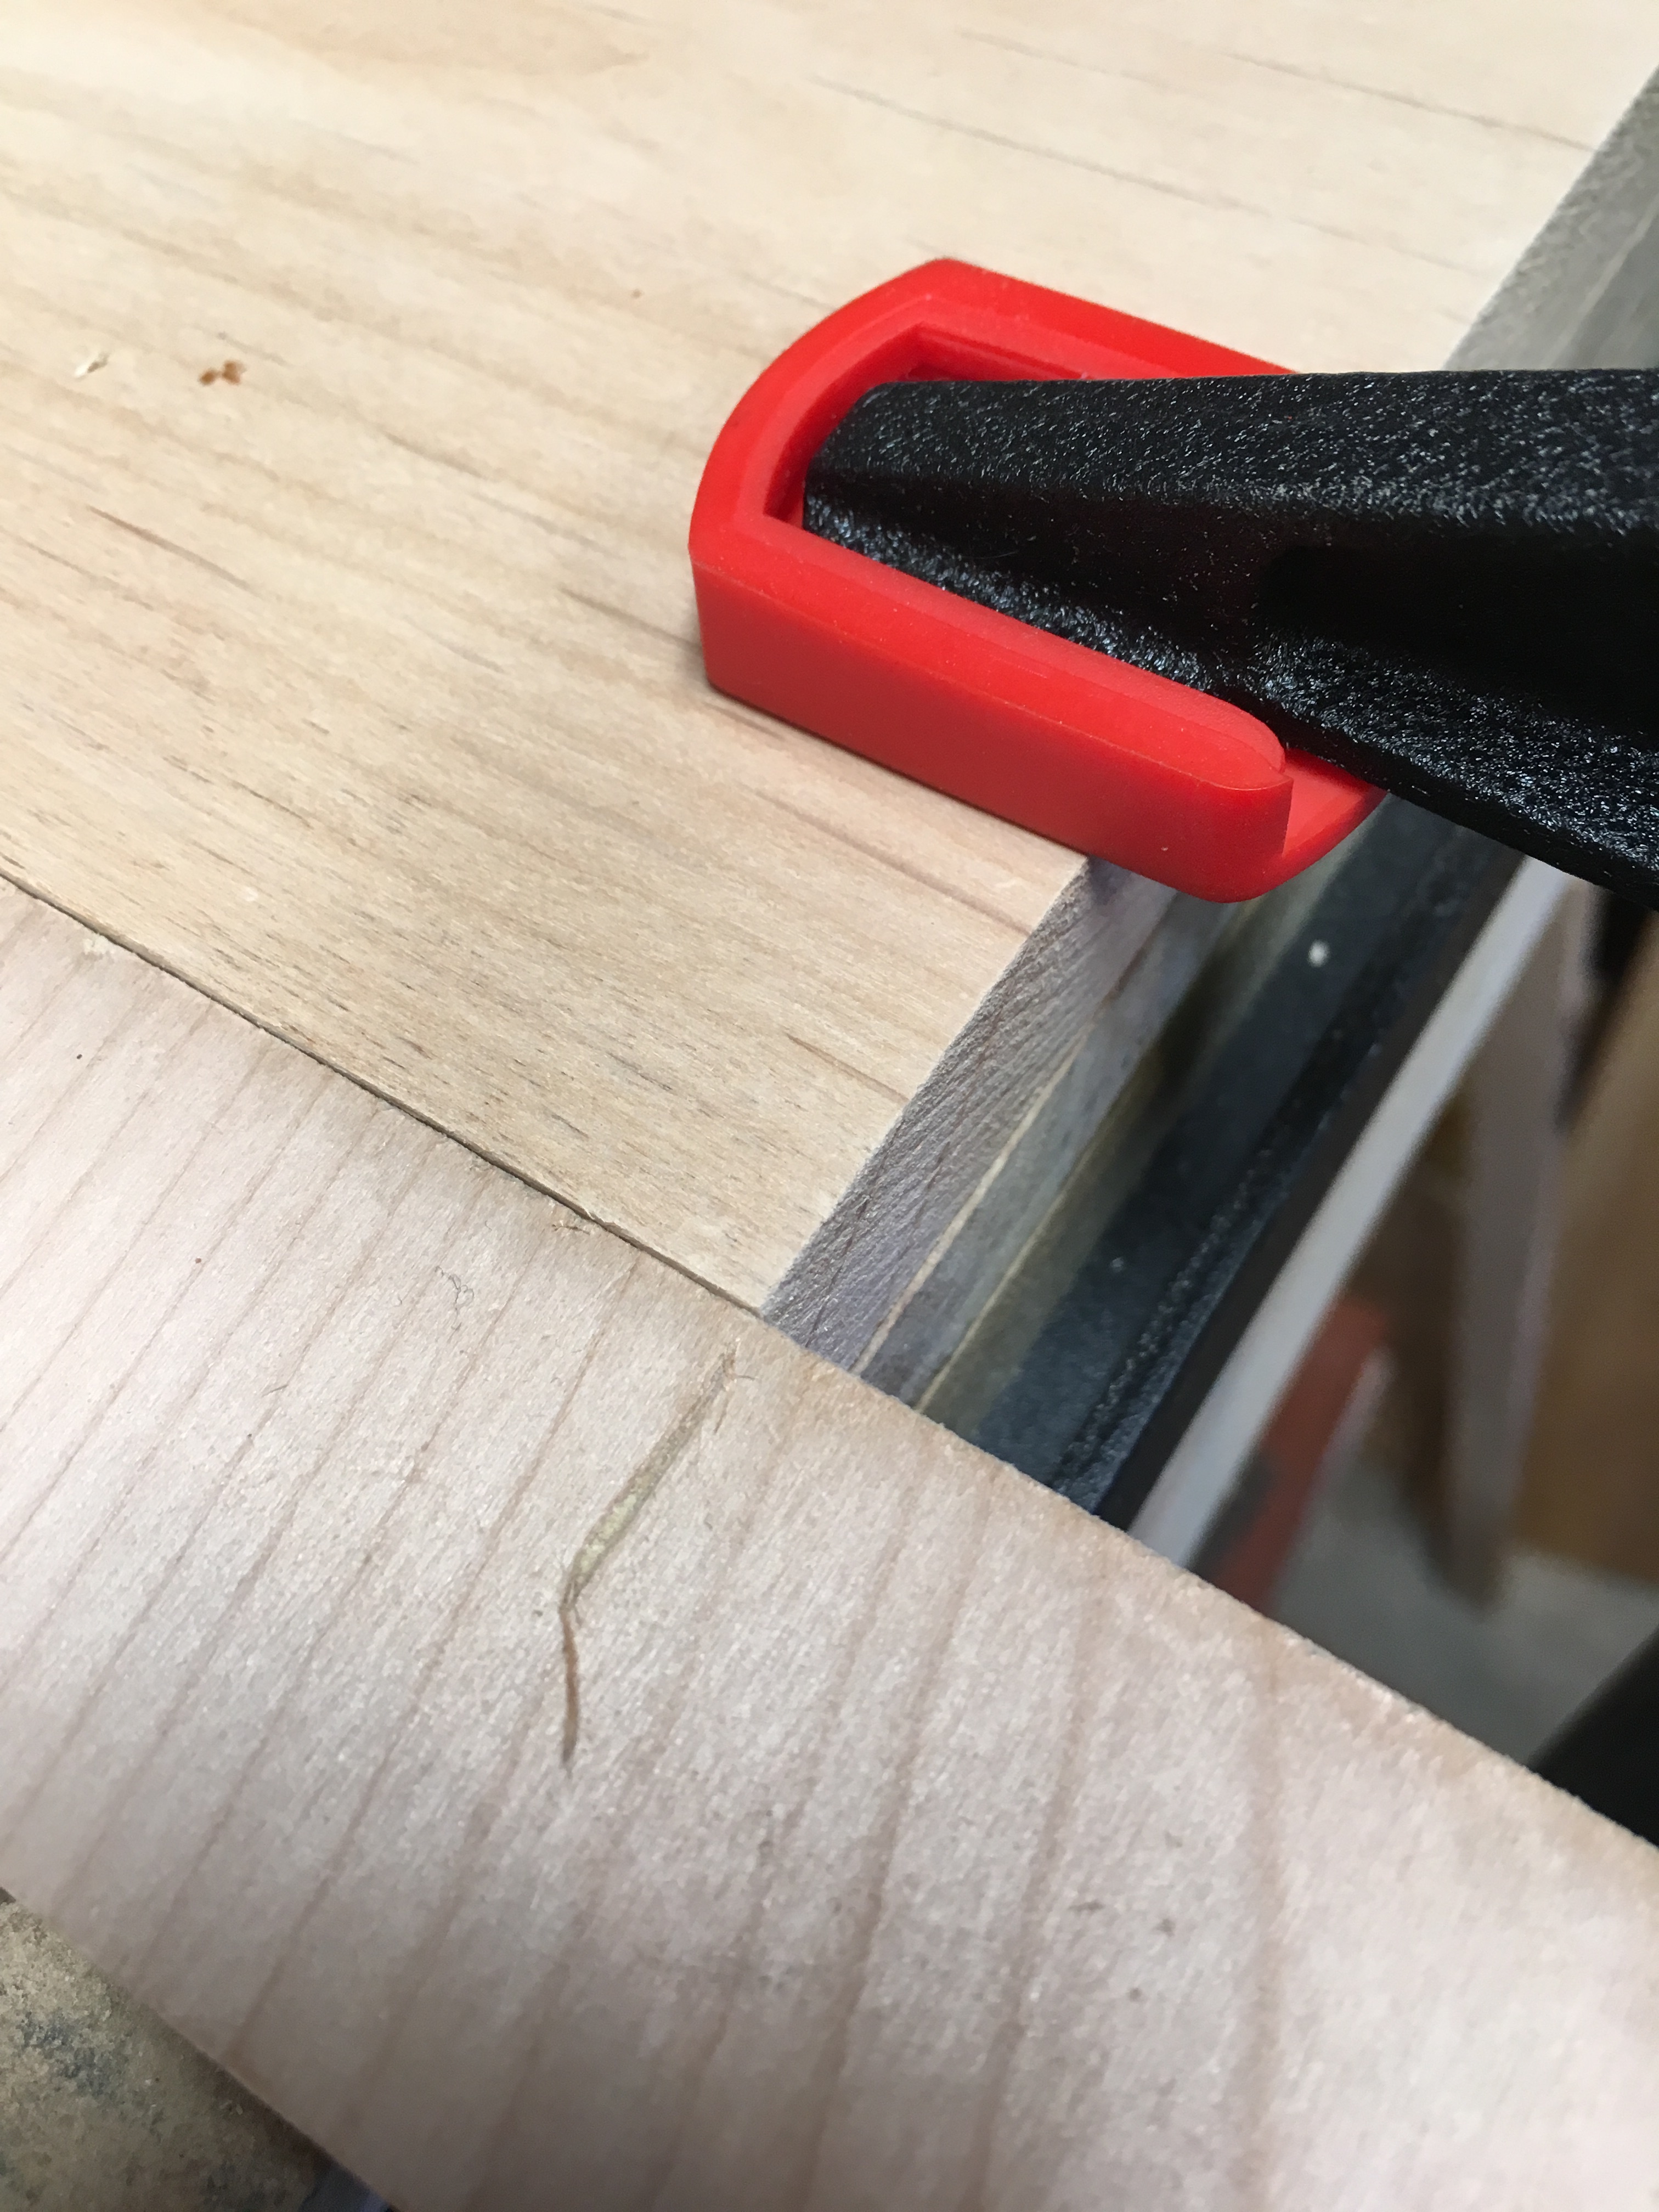
When I set up my zero in my lower left corner, I then manually dragged the V- bit just across the surface of the other board to make an alignment mark. That mark should be in line with the zero. Picture:
-
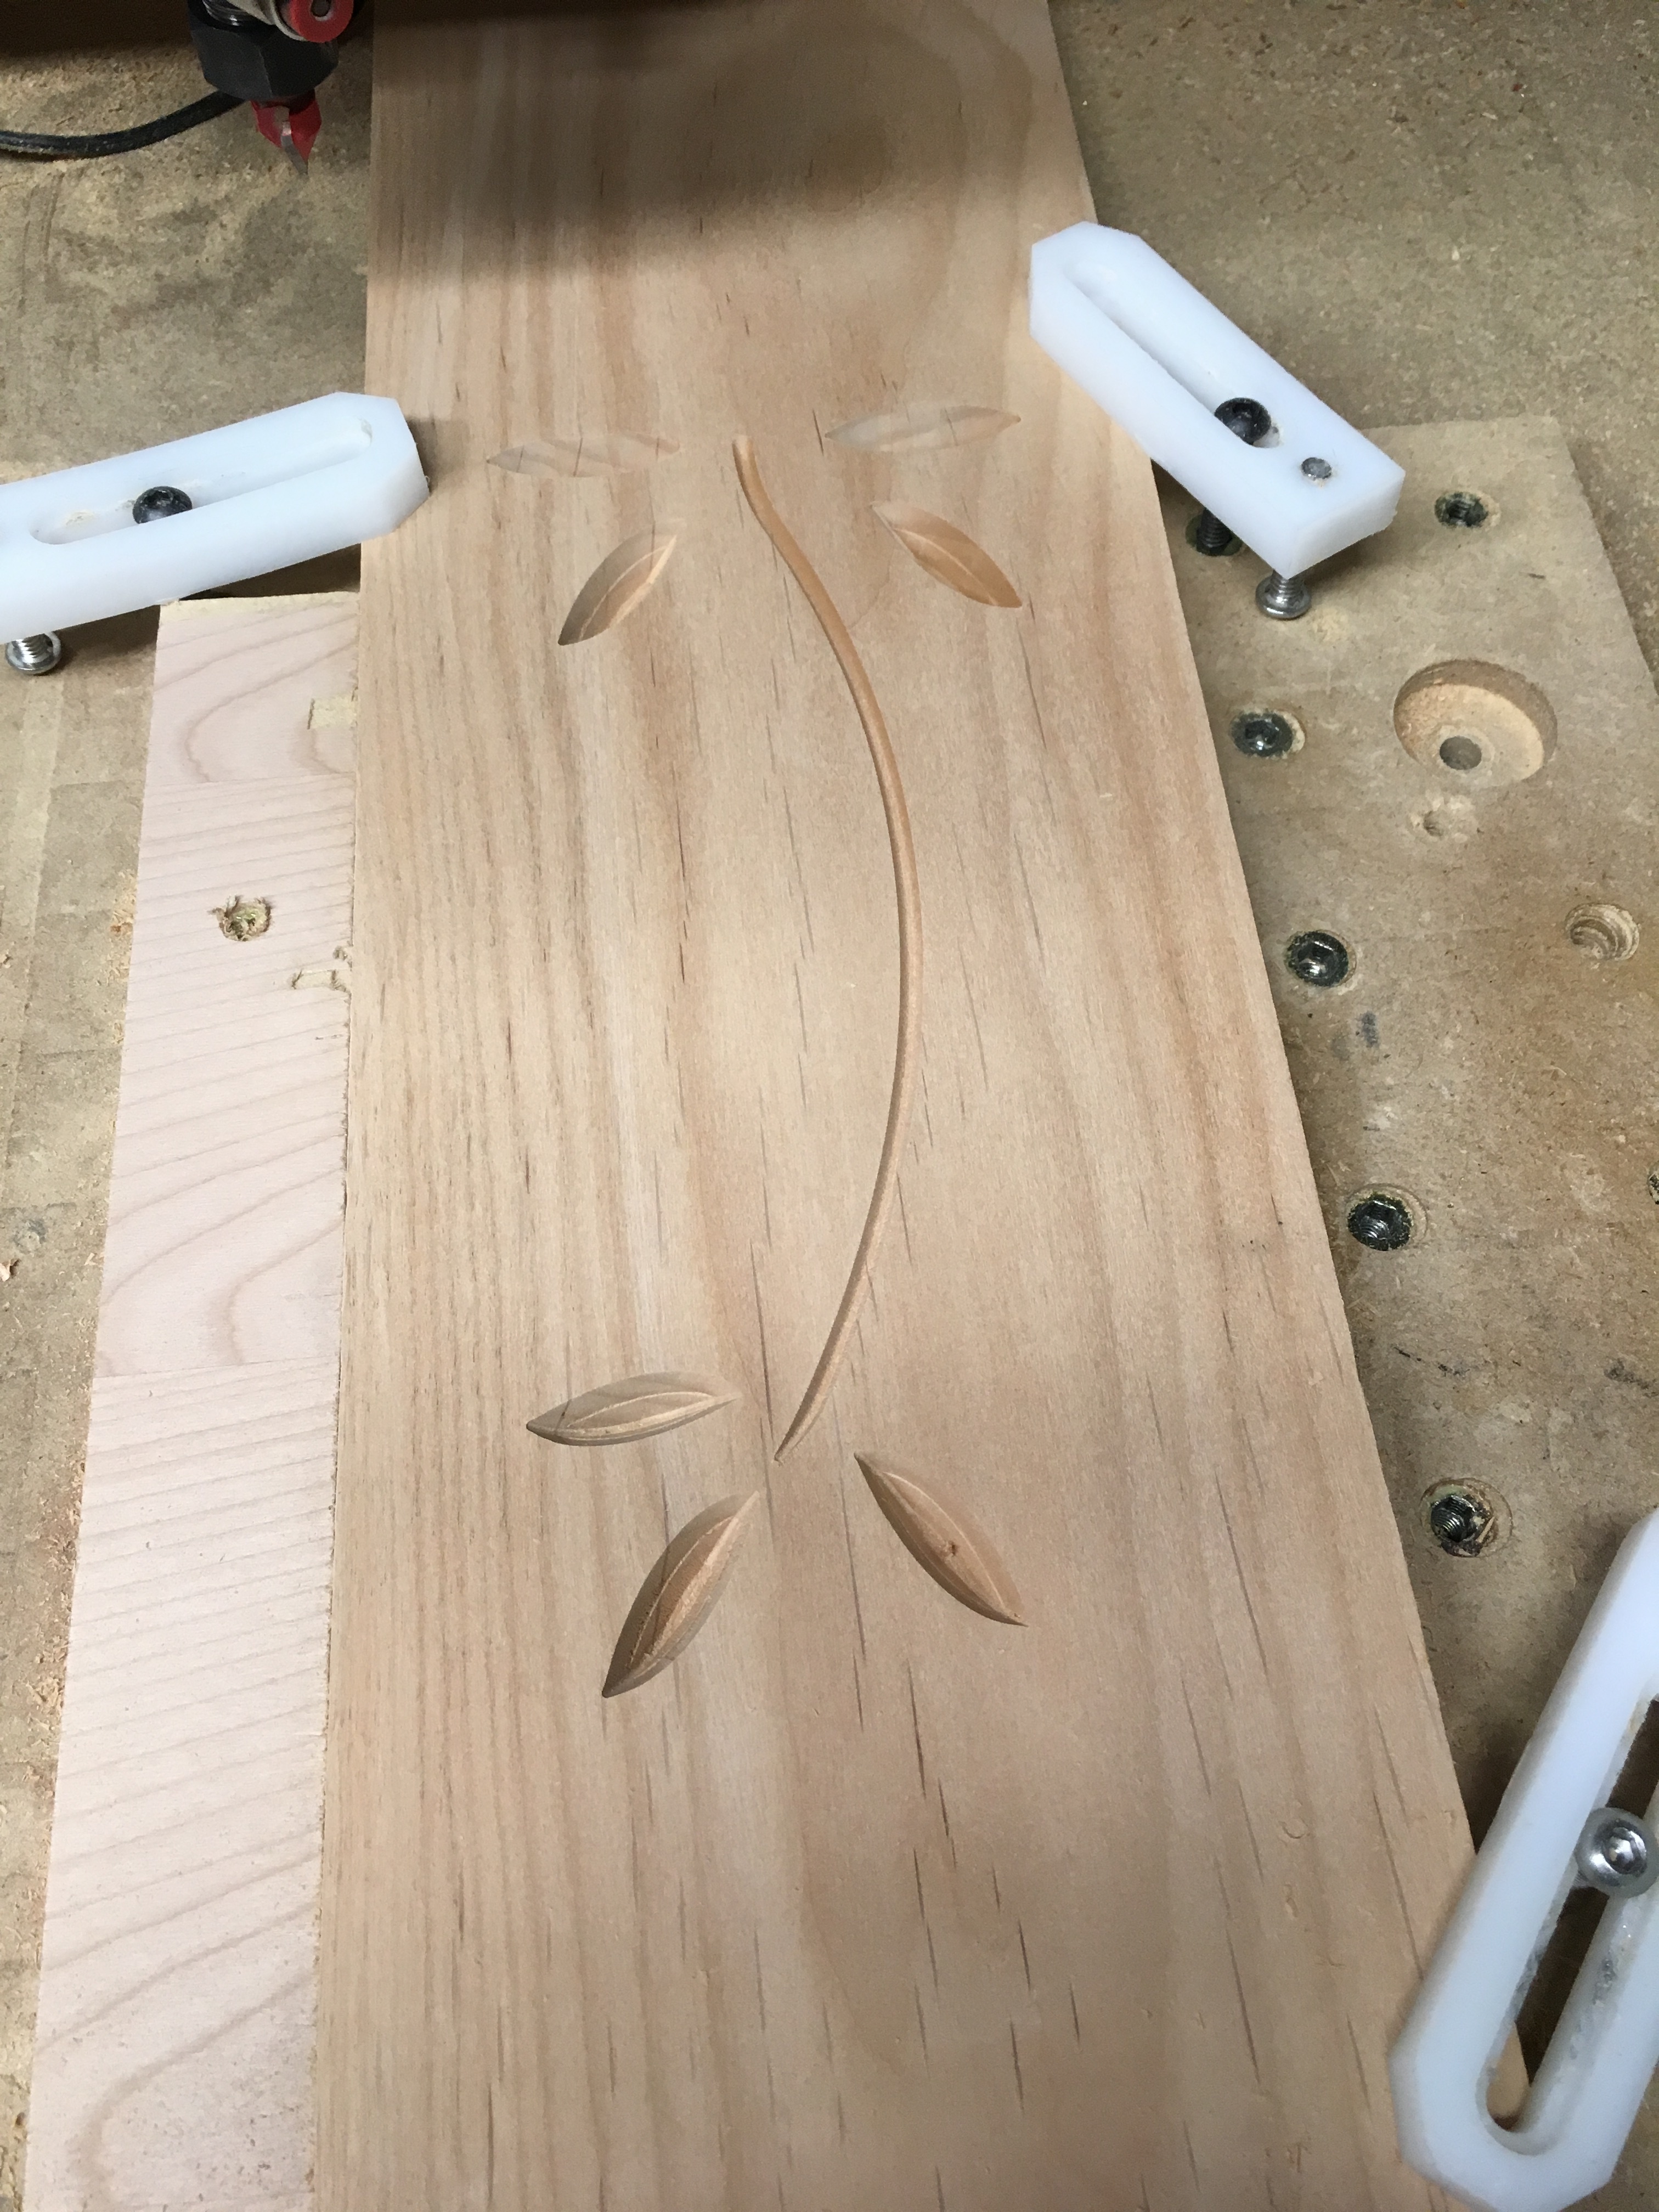
First file run and first half of the design carved:
-
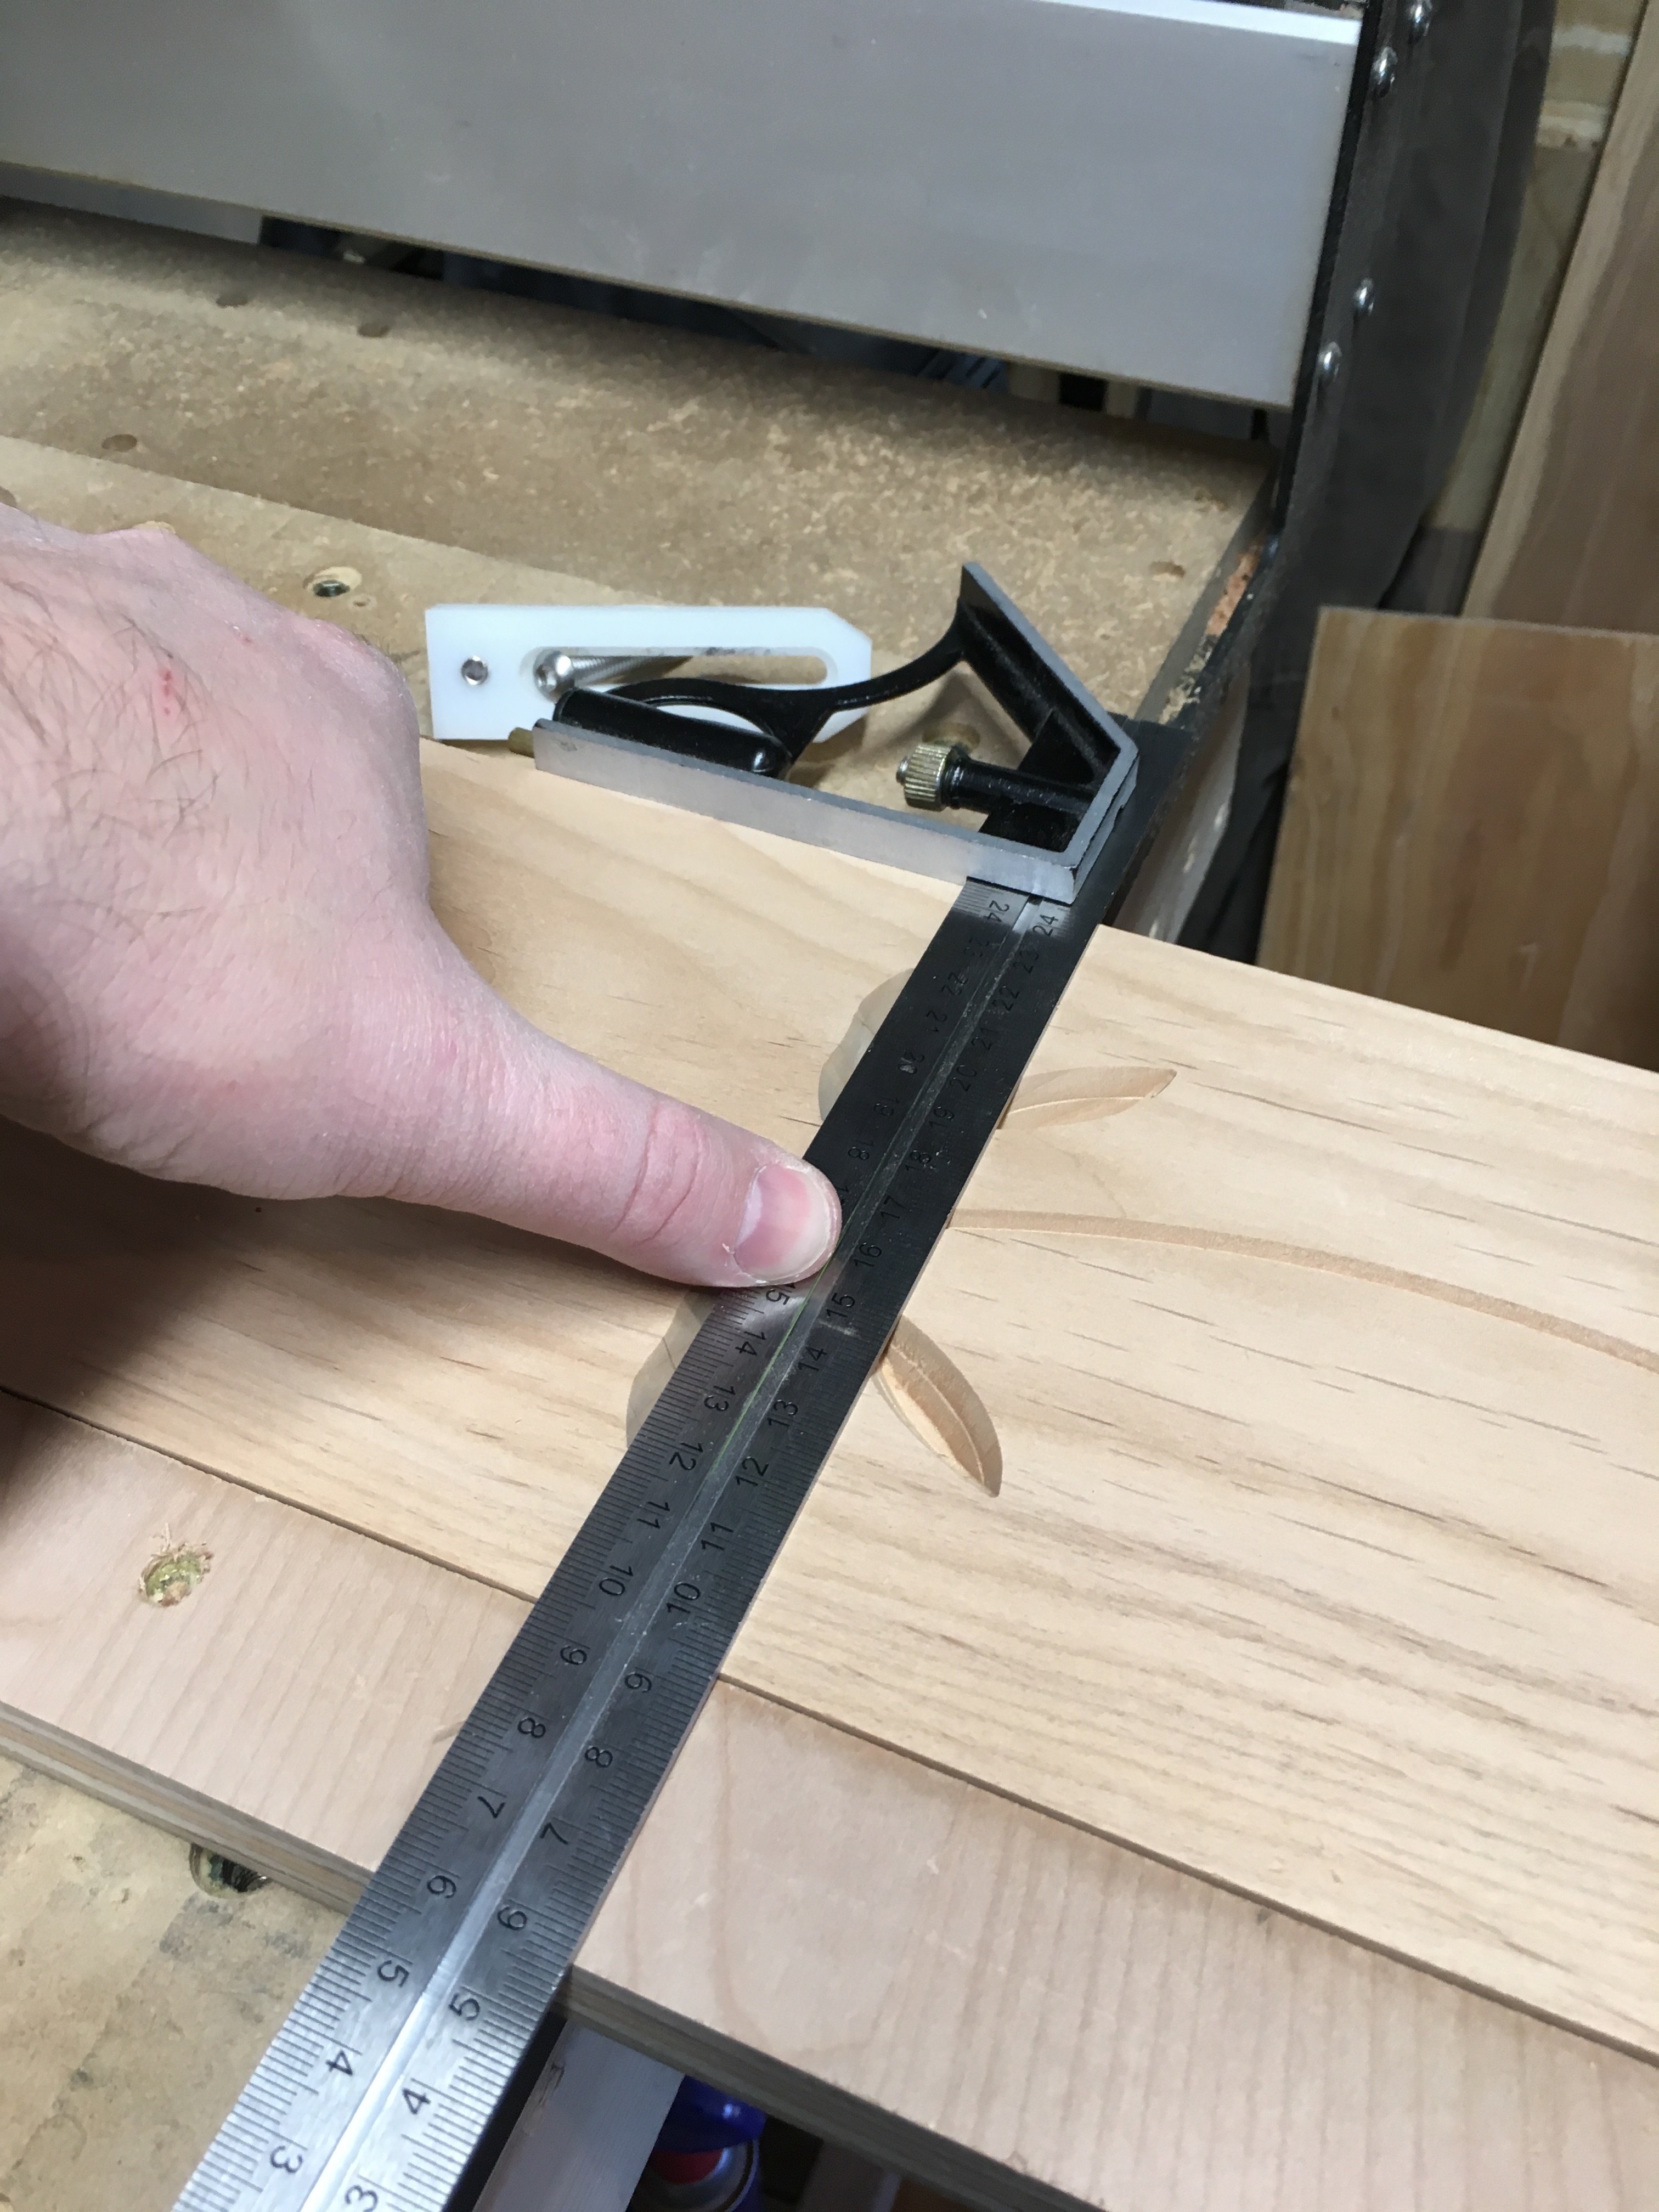
After sliding the stock forward, using a straight edge to align the centers of the leaves (midpoint of the whole design) with the alignment mark made earlier:
-
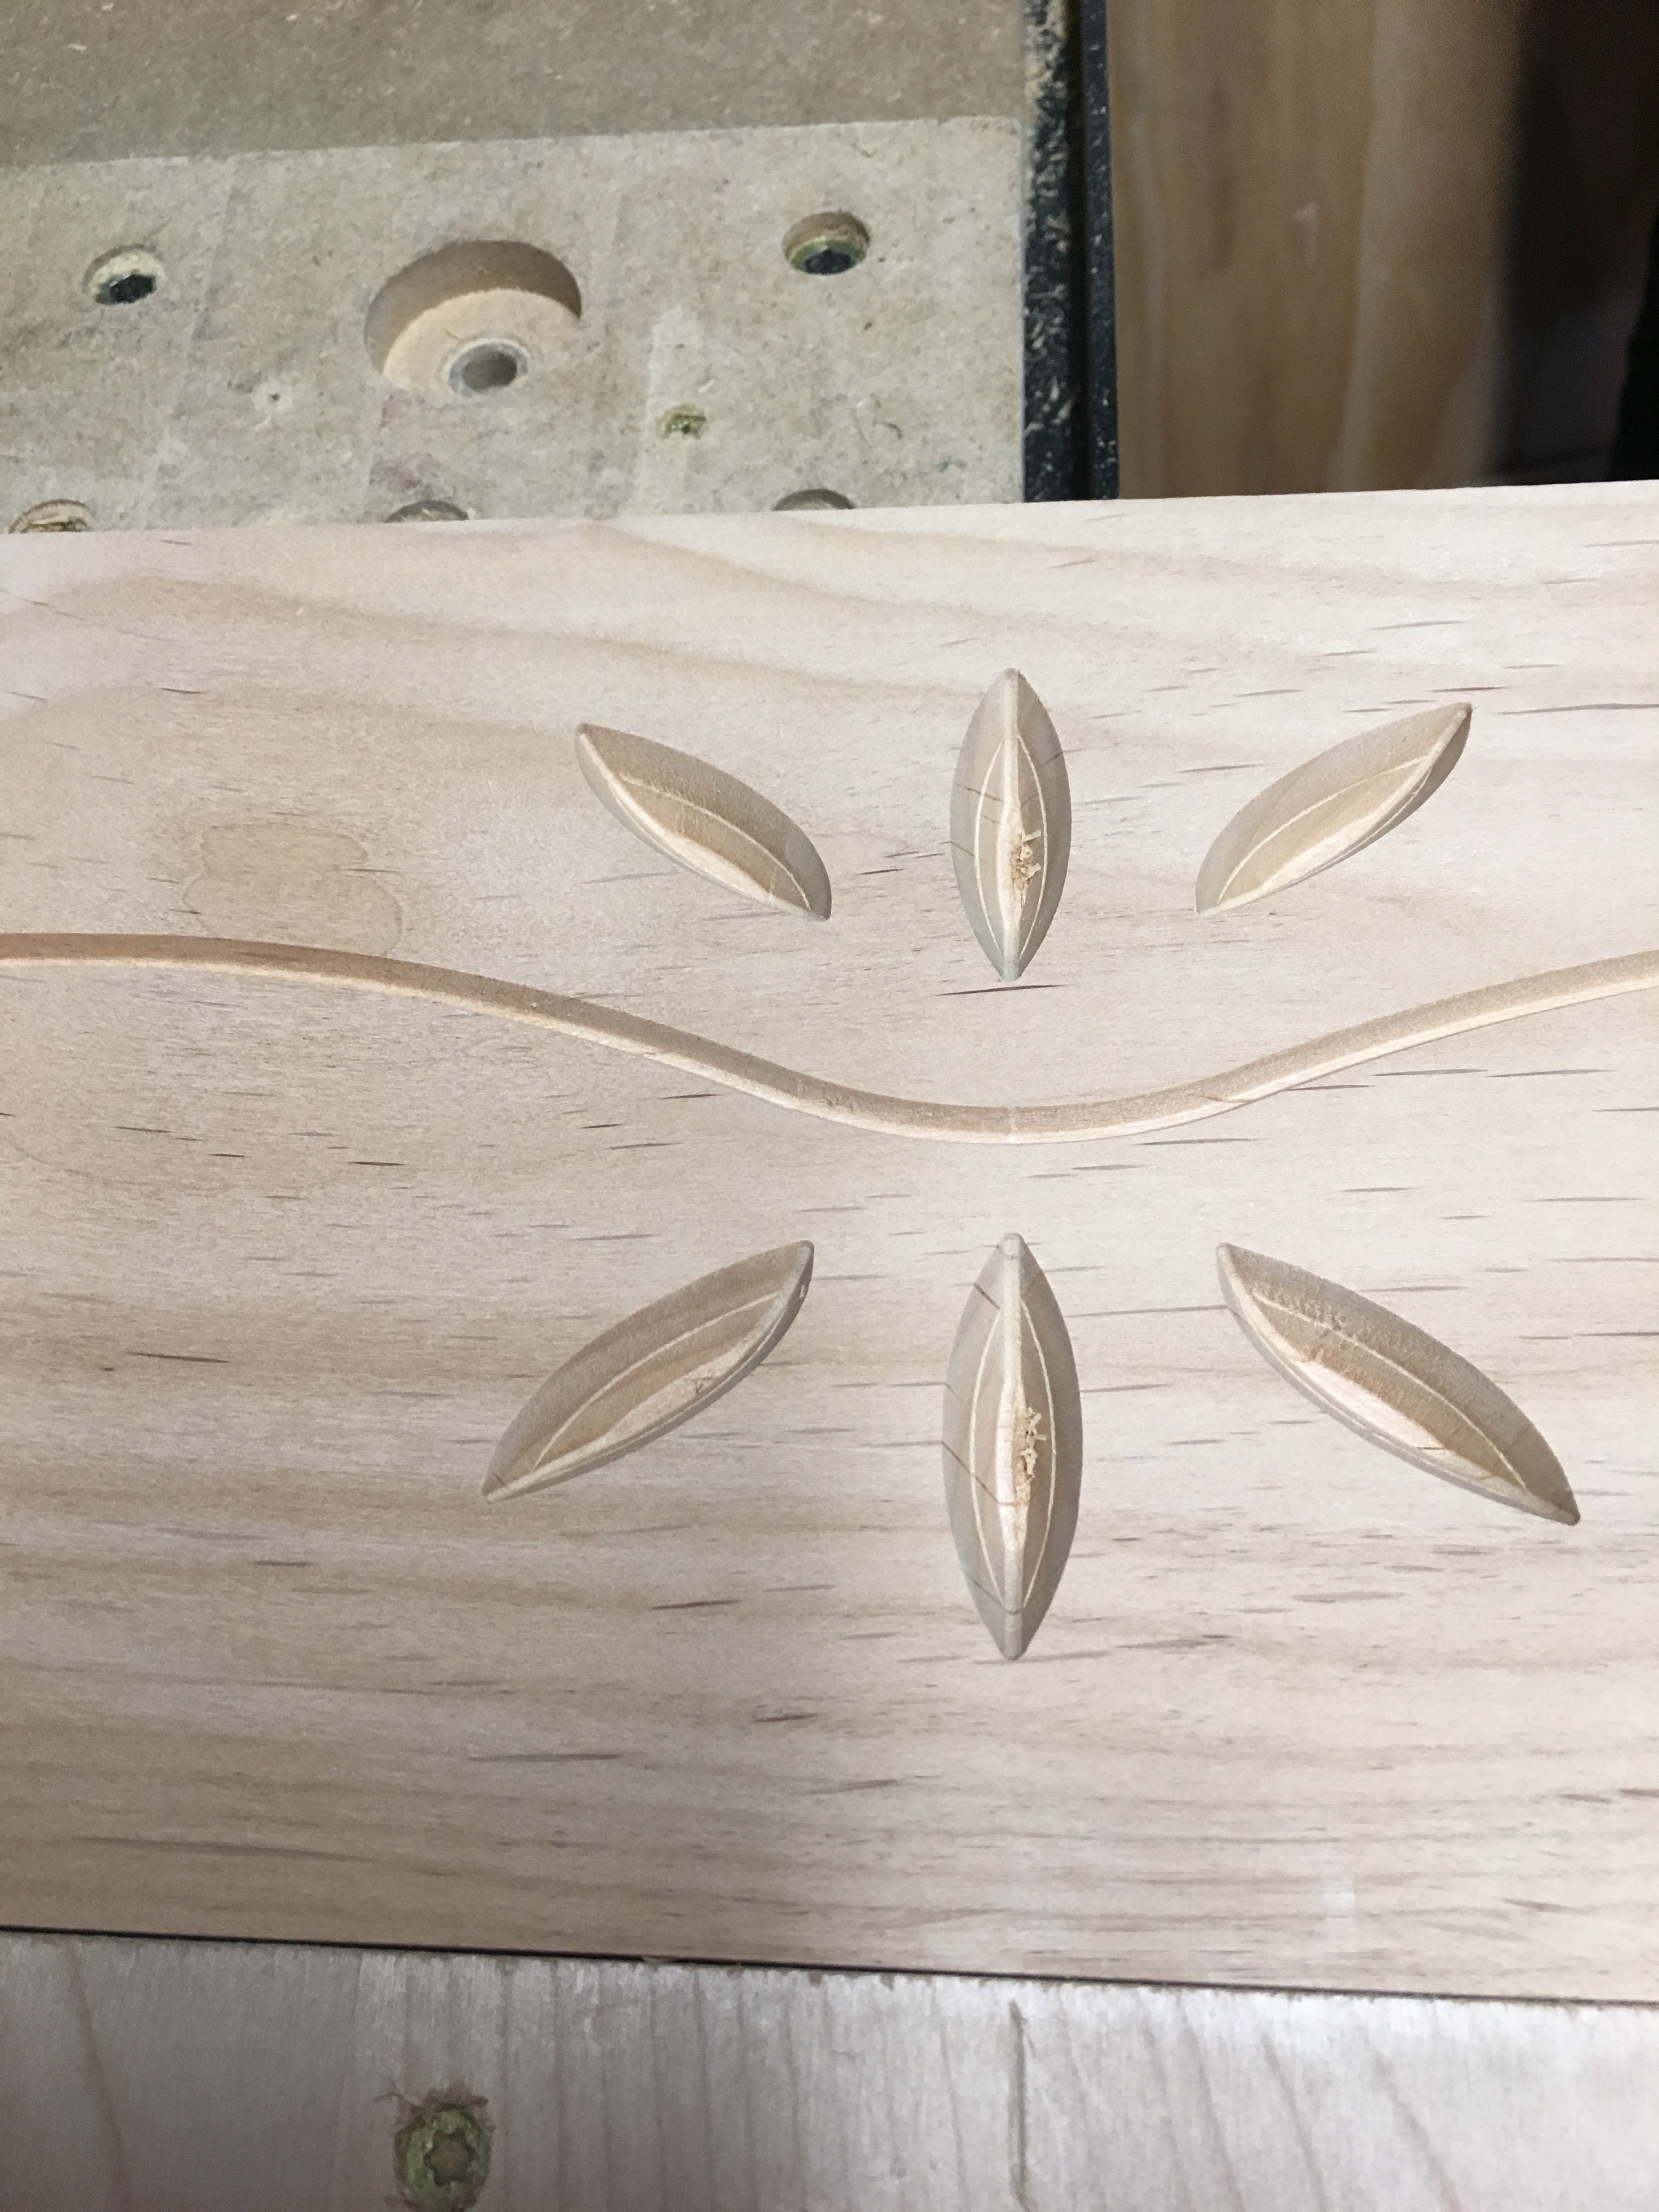
Jogging the machine manually just to check the alignment in the leaves one more time. If anything is off, this area is where it will show after the second carving:
-
Second file complete:
-
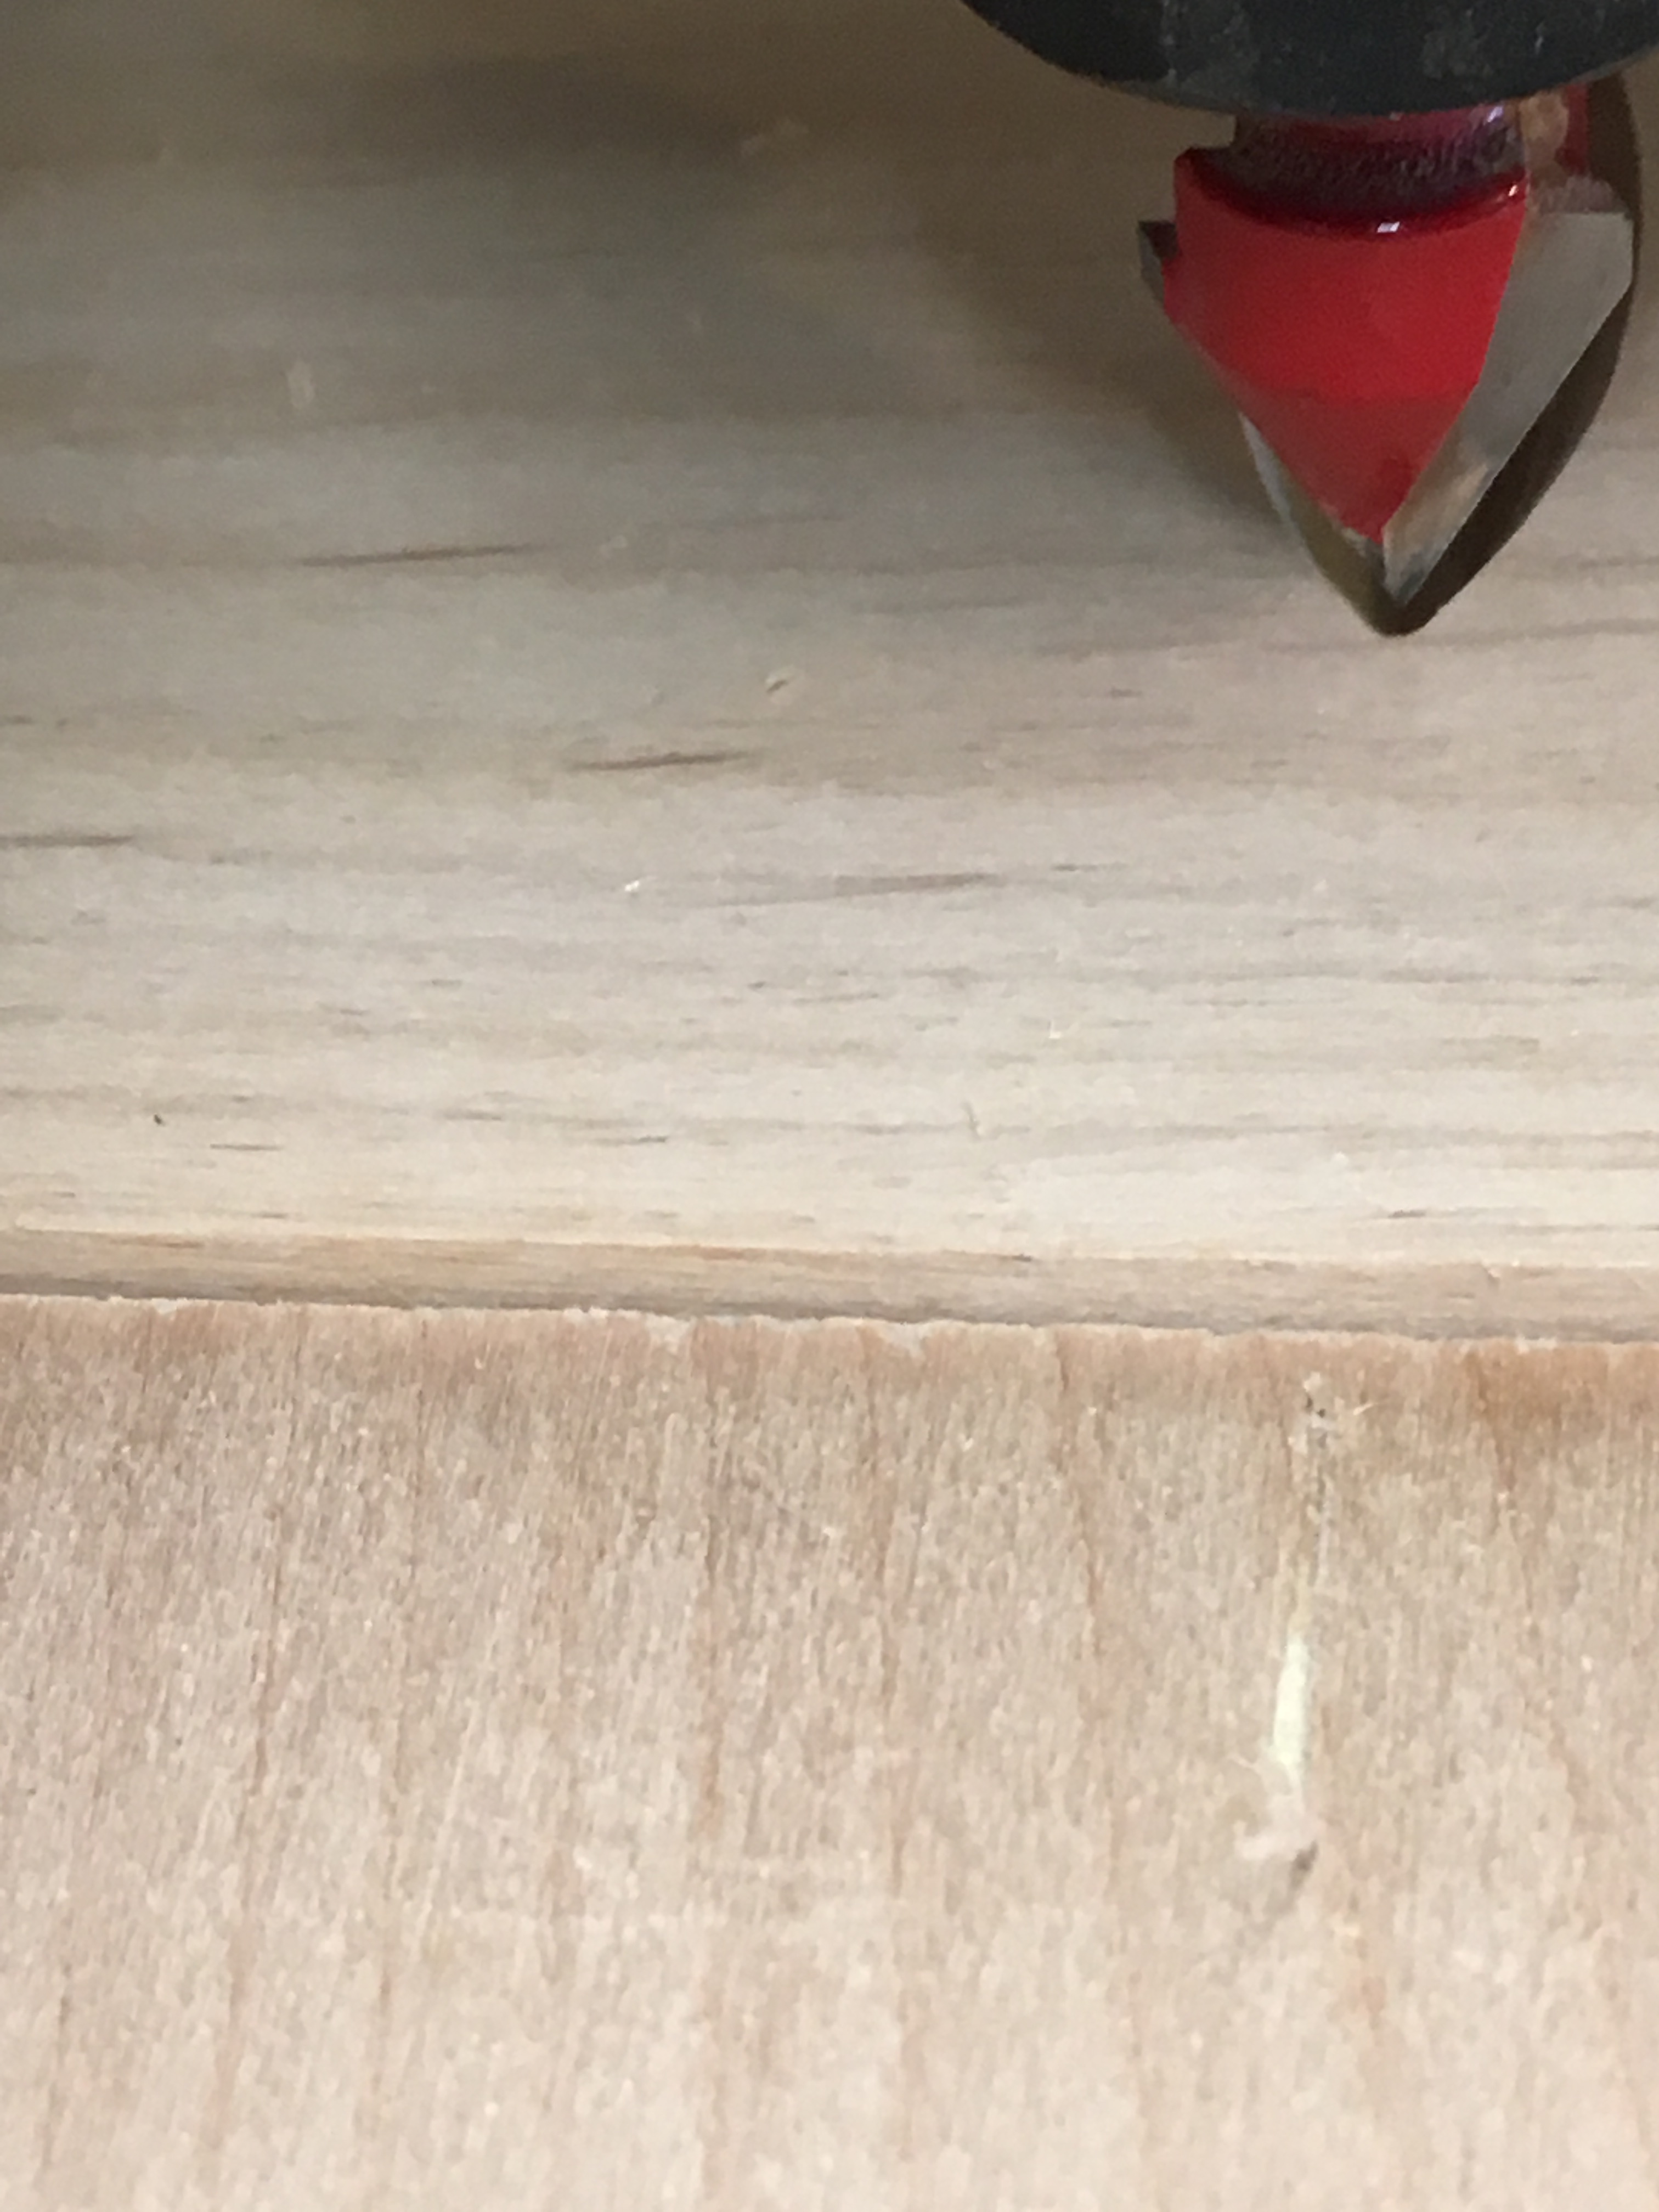
Final view of the center. The two halves are off by a hair, but a tiny sanding and you won’t be able to tell. Hopefully I’ll finish the full project soon to post that as well, but I have lots of carpentry and finishing to do. I know the carving isn’t that complex, but hopefully this helps other beginners who want to try tiling.