Hello everyone. I am running some belt stretch calibration tests to keep my machine accurate. I have noticed that my Z accuracy is 0.03" short (too shallow) consistently. I’m on a Nomad Classic. Is this normal?. Is there a way to correct this?.
Huh. That seems really strange. Is Z on the classic a belt or a lead screw like it is on the pro?
It’s on a lead screw.
How are you measuring that?
Cut two pockets. One circle, one square. One at 0.25 and another at 0.125. Measured with calipers. The diameter of circle and sides of square are within tolerance. The depth of pockets is not.
How are you zeroing your Z? If the error isn’t in the zeroing, and it is consistent, I’d recalibrate your steps/mm for the Z.
Possible causes of this:
- backlash
- miscalibration of the steps / mm of the lead screw
- deflection of the material as its cut
- endmill slipping in the collet
Use a soft, but dimensionally stable material such as HDPE or Delrin and cut a series of steps, then measure them — try setting up the G-Code so that backlash will be minimized (always go up to retract/safety height in-between each depth) — try setting the steps / mm for the Z-axis based on that — see: http://docs.carbide3d.com/shapeoko-faq/how-to-calibrate-the-machine-for-belt-stretch/
2 Likes
This eliminates any error with your first cut depth.
Thank you @WillAdams and @neilferreri. Will try this tomorrow. I has using the synthetic wood sold by Carbide3D. Will try with HPDE. Have lots of it. Great suggestion. Will, I guess the belt stretch technique works with lead screws also. I assumed different because it was not a belt. My bad. I was doing that with the X and Y already.
2 Likes
This is particularly strange because with the lead screws, there shouldn’t be a need to “calibrate for belt stretch” - the mechanism works, but it really shouldn’t be necessary.
2 Likes
Agreed, but would the same test compensate for backlash?. How does one calibrate the stepper motors on the z-axis if not this way?.
You would do it this way - though, the turns/inch is fixed - it should be a number defined by the manufacturer of the leadscrew. You’re not caiibrating the stepper, so much as tell the conoller the number of turns the stepper needs to do for a given distance moved. This -does not- help with backlash though, that’s a different creature (and what the anti-backlash nut is for - it essentially automatically takes care of this)
What I’m is saying is that yes, you can do this calibration this way, but I’m questioning why you need to do it…a leadscrew doesn’t stretch or change dimensions. It should have the same turns/inch that it had when it was made.
I suggest getting in touch with support - this might be an issue with the tool length switch, or maybe something else, but you shouldn’t need to be in this situation with a nomad.
2 Likes
@patofoto Let us know the results of a stepped carve test. I wouldn’t change any settings at this point.
Any chance your anti backlash nut is loose?
2 Likes
Thanks everybody. I will run the stepped test tomorrow. Did I understand the test properly?. Mill something like this?. Then measure the depth of steps and their accuracy?.
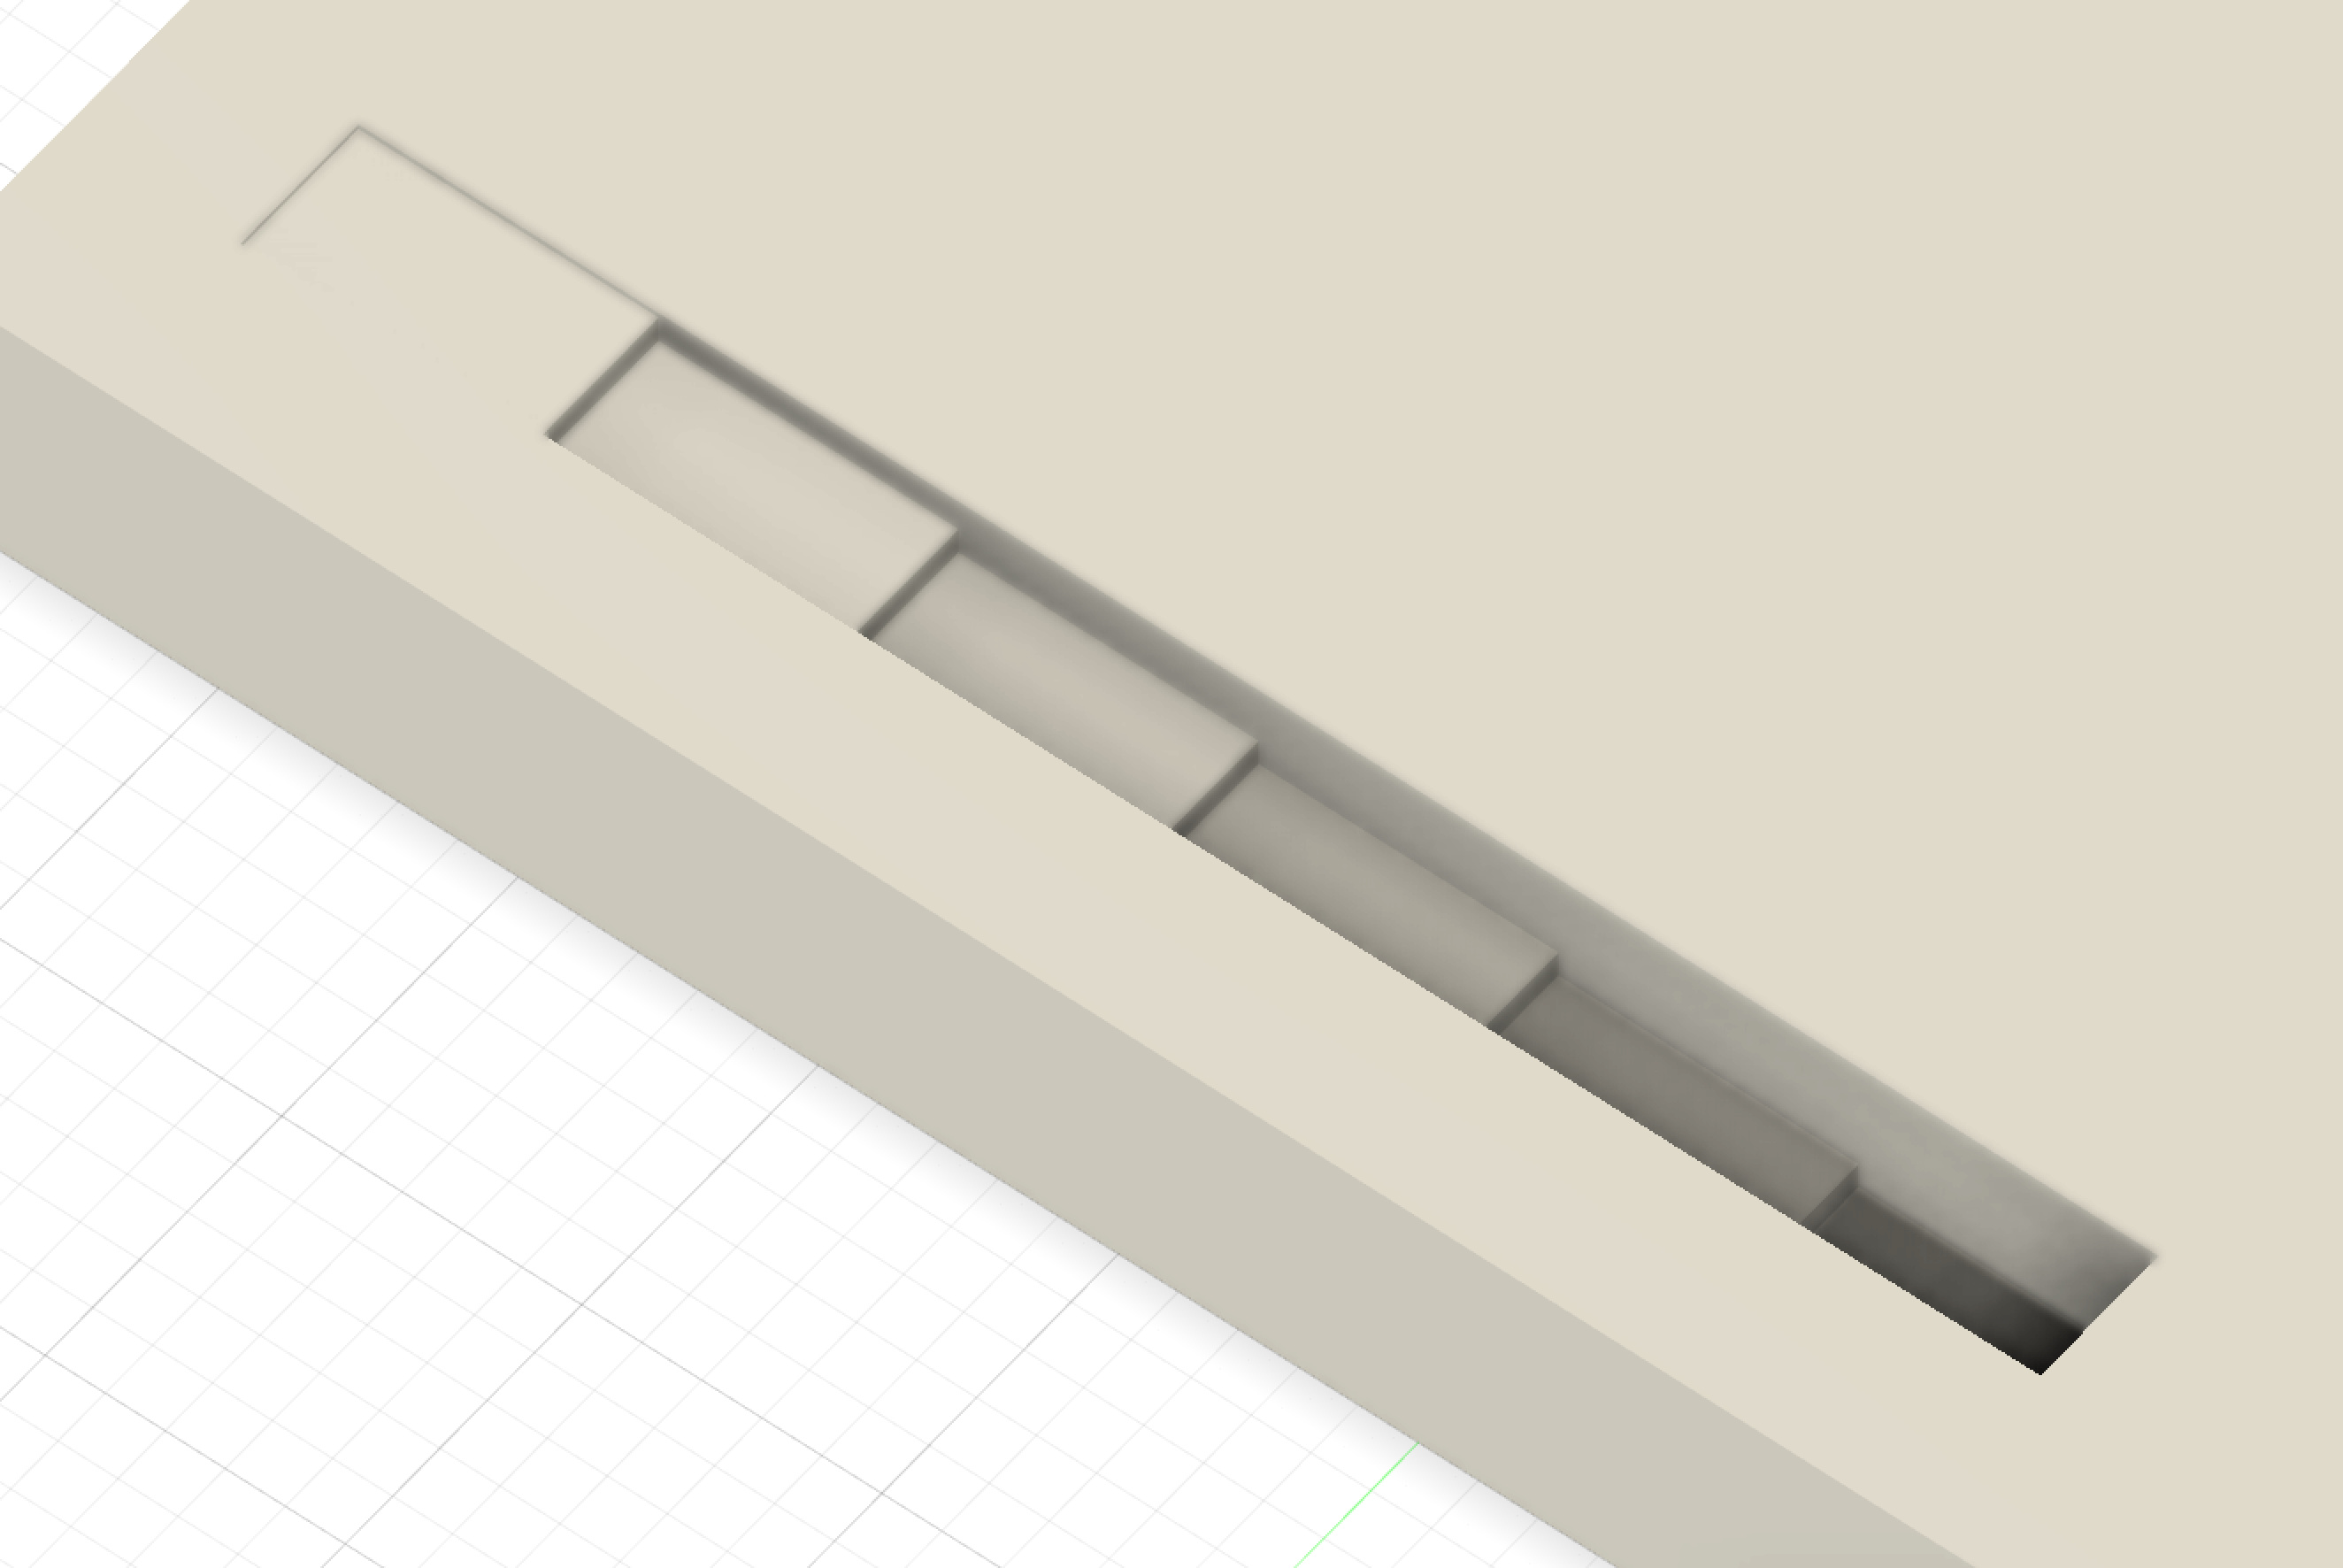
The first step is at 0.01" to get a good reference start. Each other one is spaced 0.05". The only HPDE I have available is 0.5" thick.
2 Likes
That’s the idea.
I tend to use circles for tests like this, so you don’t have as many corners and changes of direction. It also helps with ramping options.
3 Likes
Good tip Neil. Thank you. Will adjust test.
Thank you all again. Just to report that my Nomad is very accurate and that the step test was a great suggestion.
2 Likes
Excellent! What I suspected was that the inaccuracy you were setting seeing was in your initial zeroing. Anything that needs that level of precision, I’d recommend a facing operation to ensure you’re zero is zero across the stock.
1 Like
Lesson learned!. Thank you so much.
This topic was automatically closed 30 days after the last reply. New replies are no longer allowed.