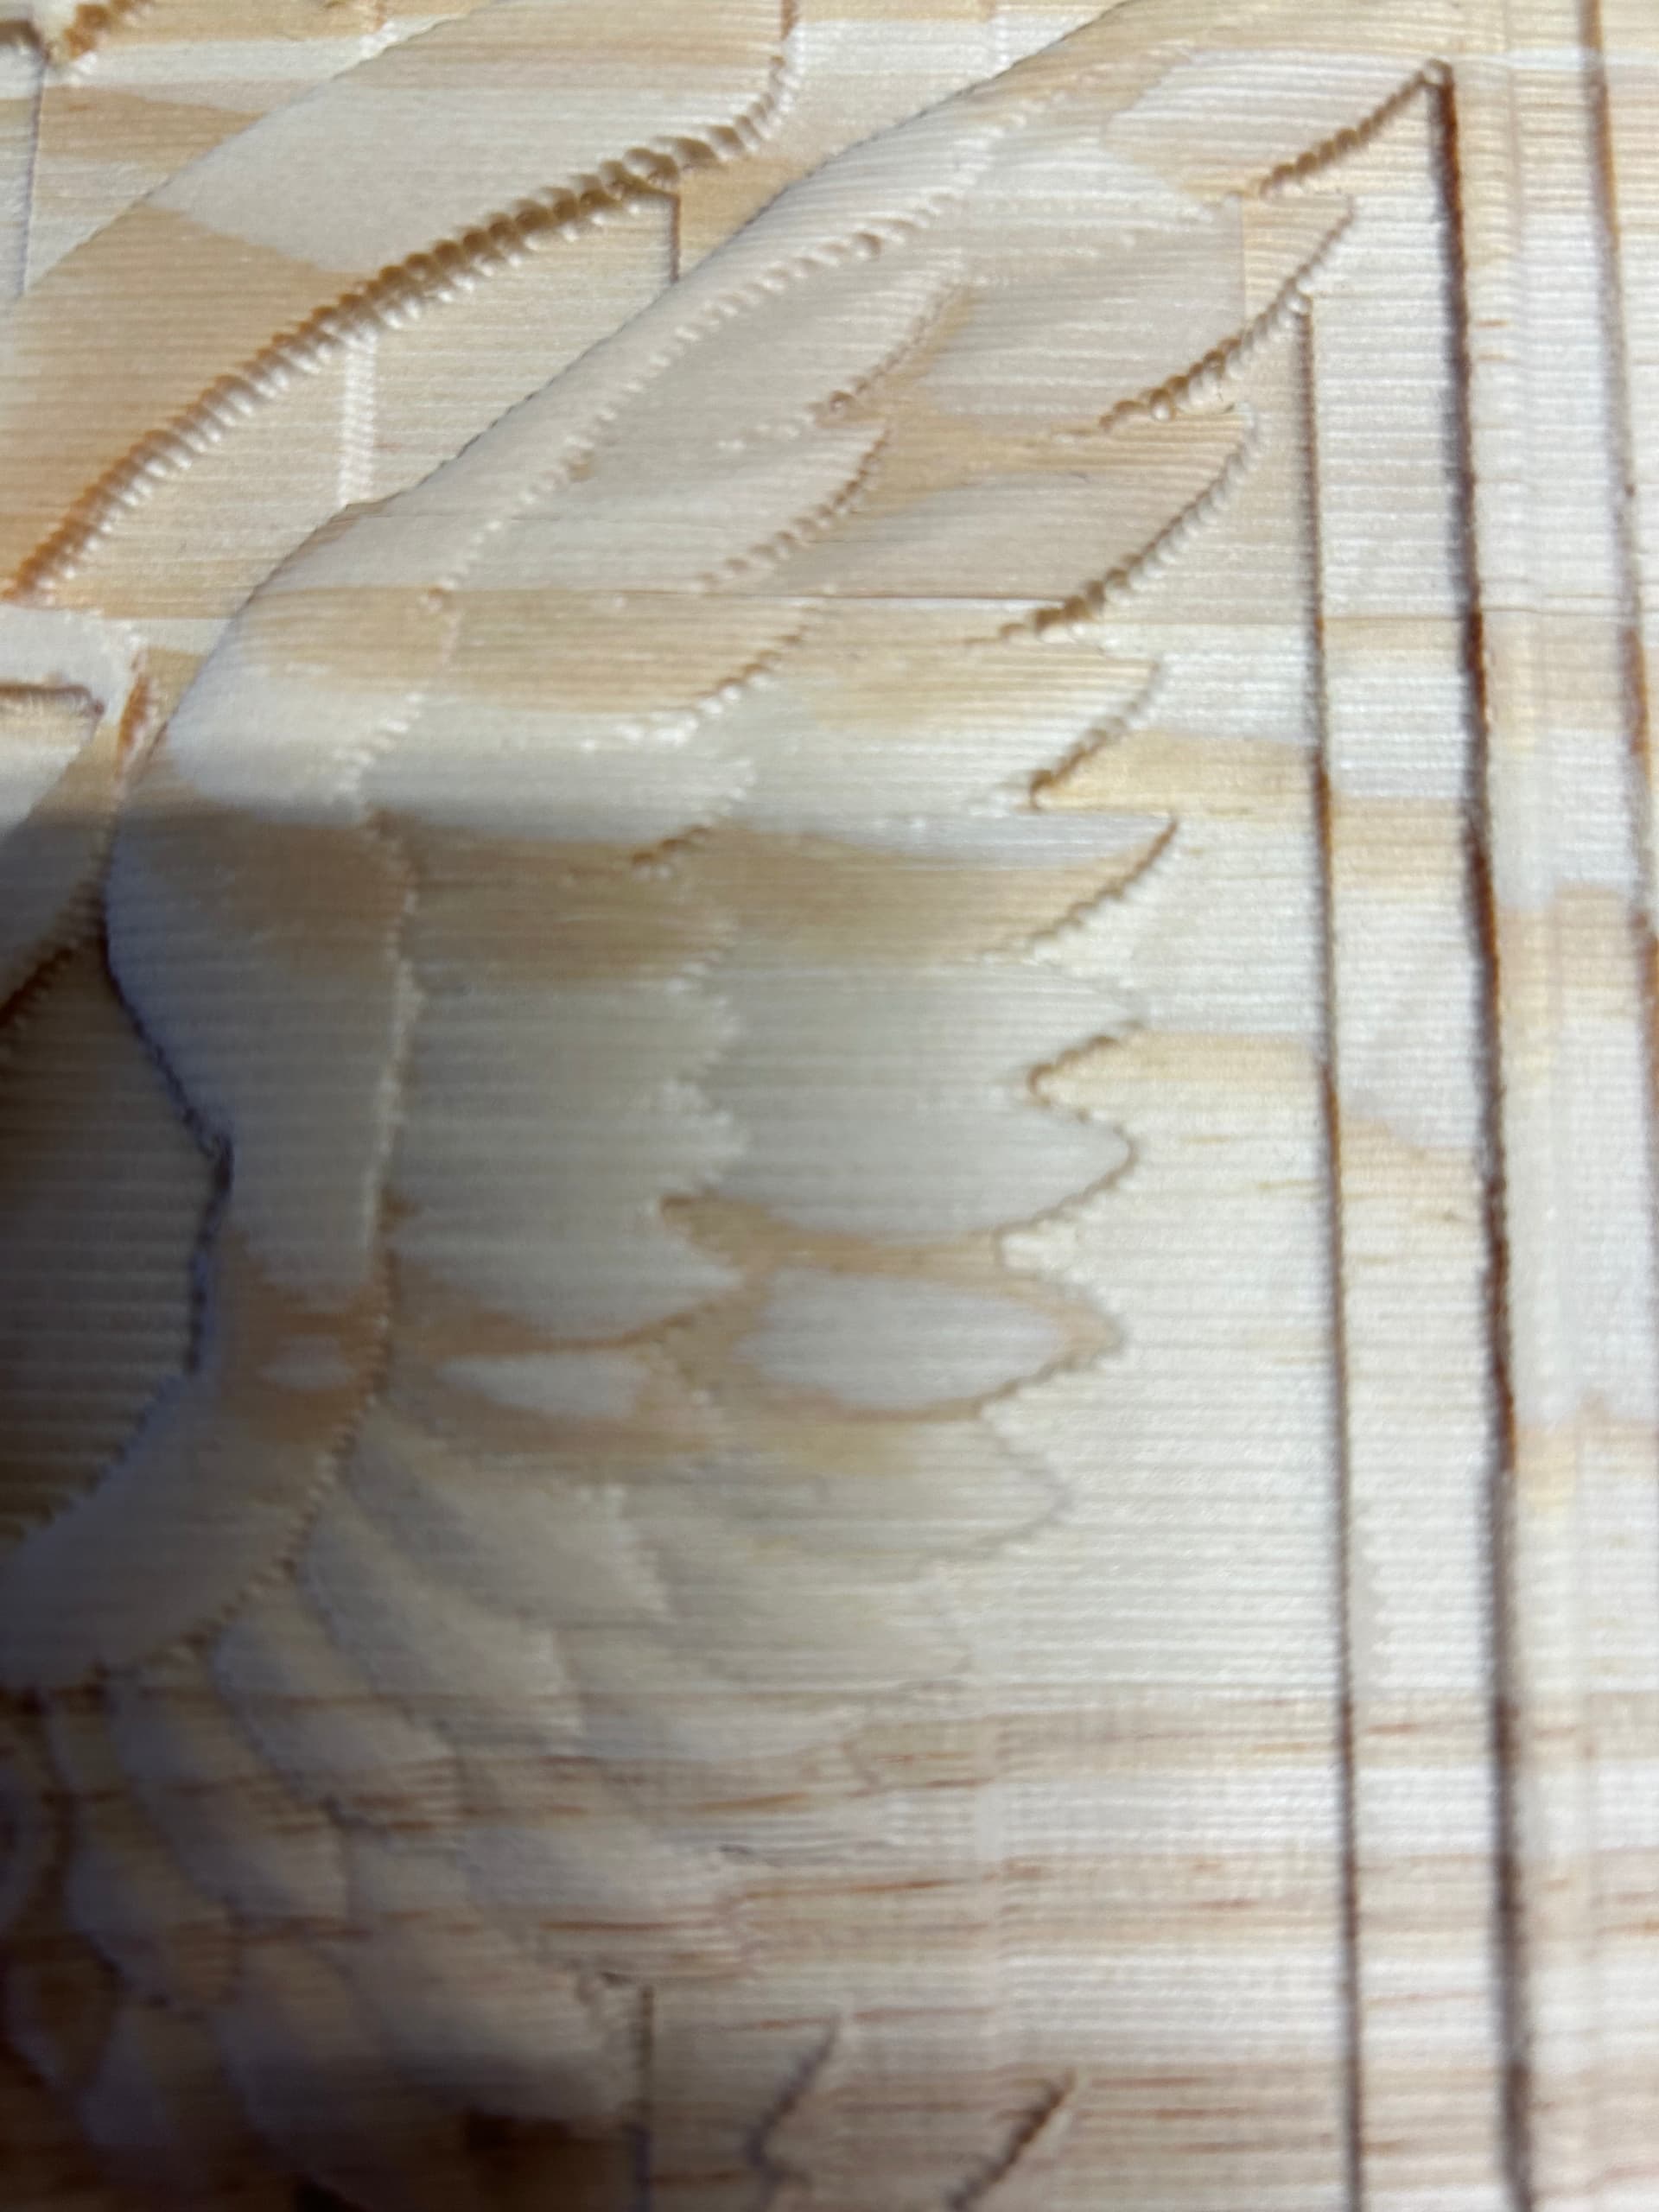
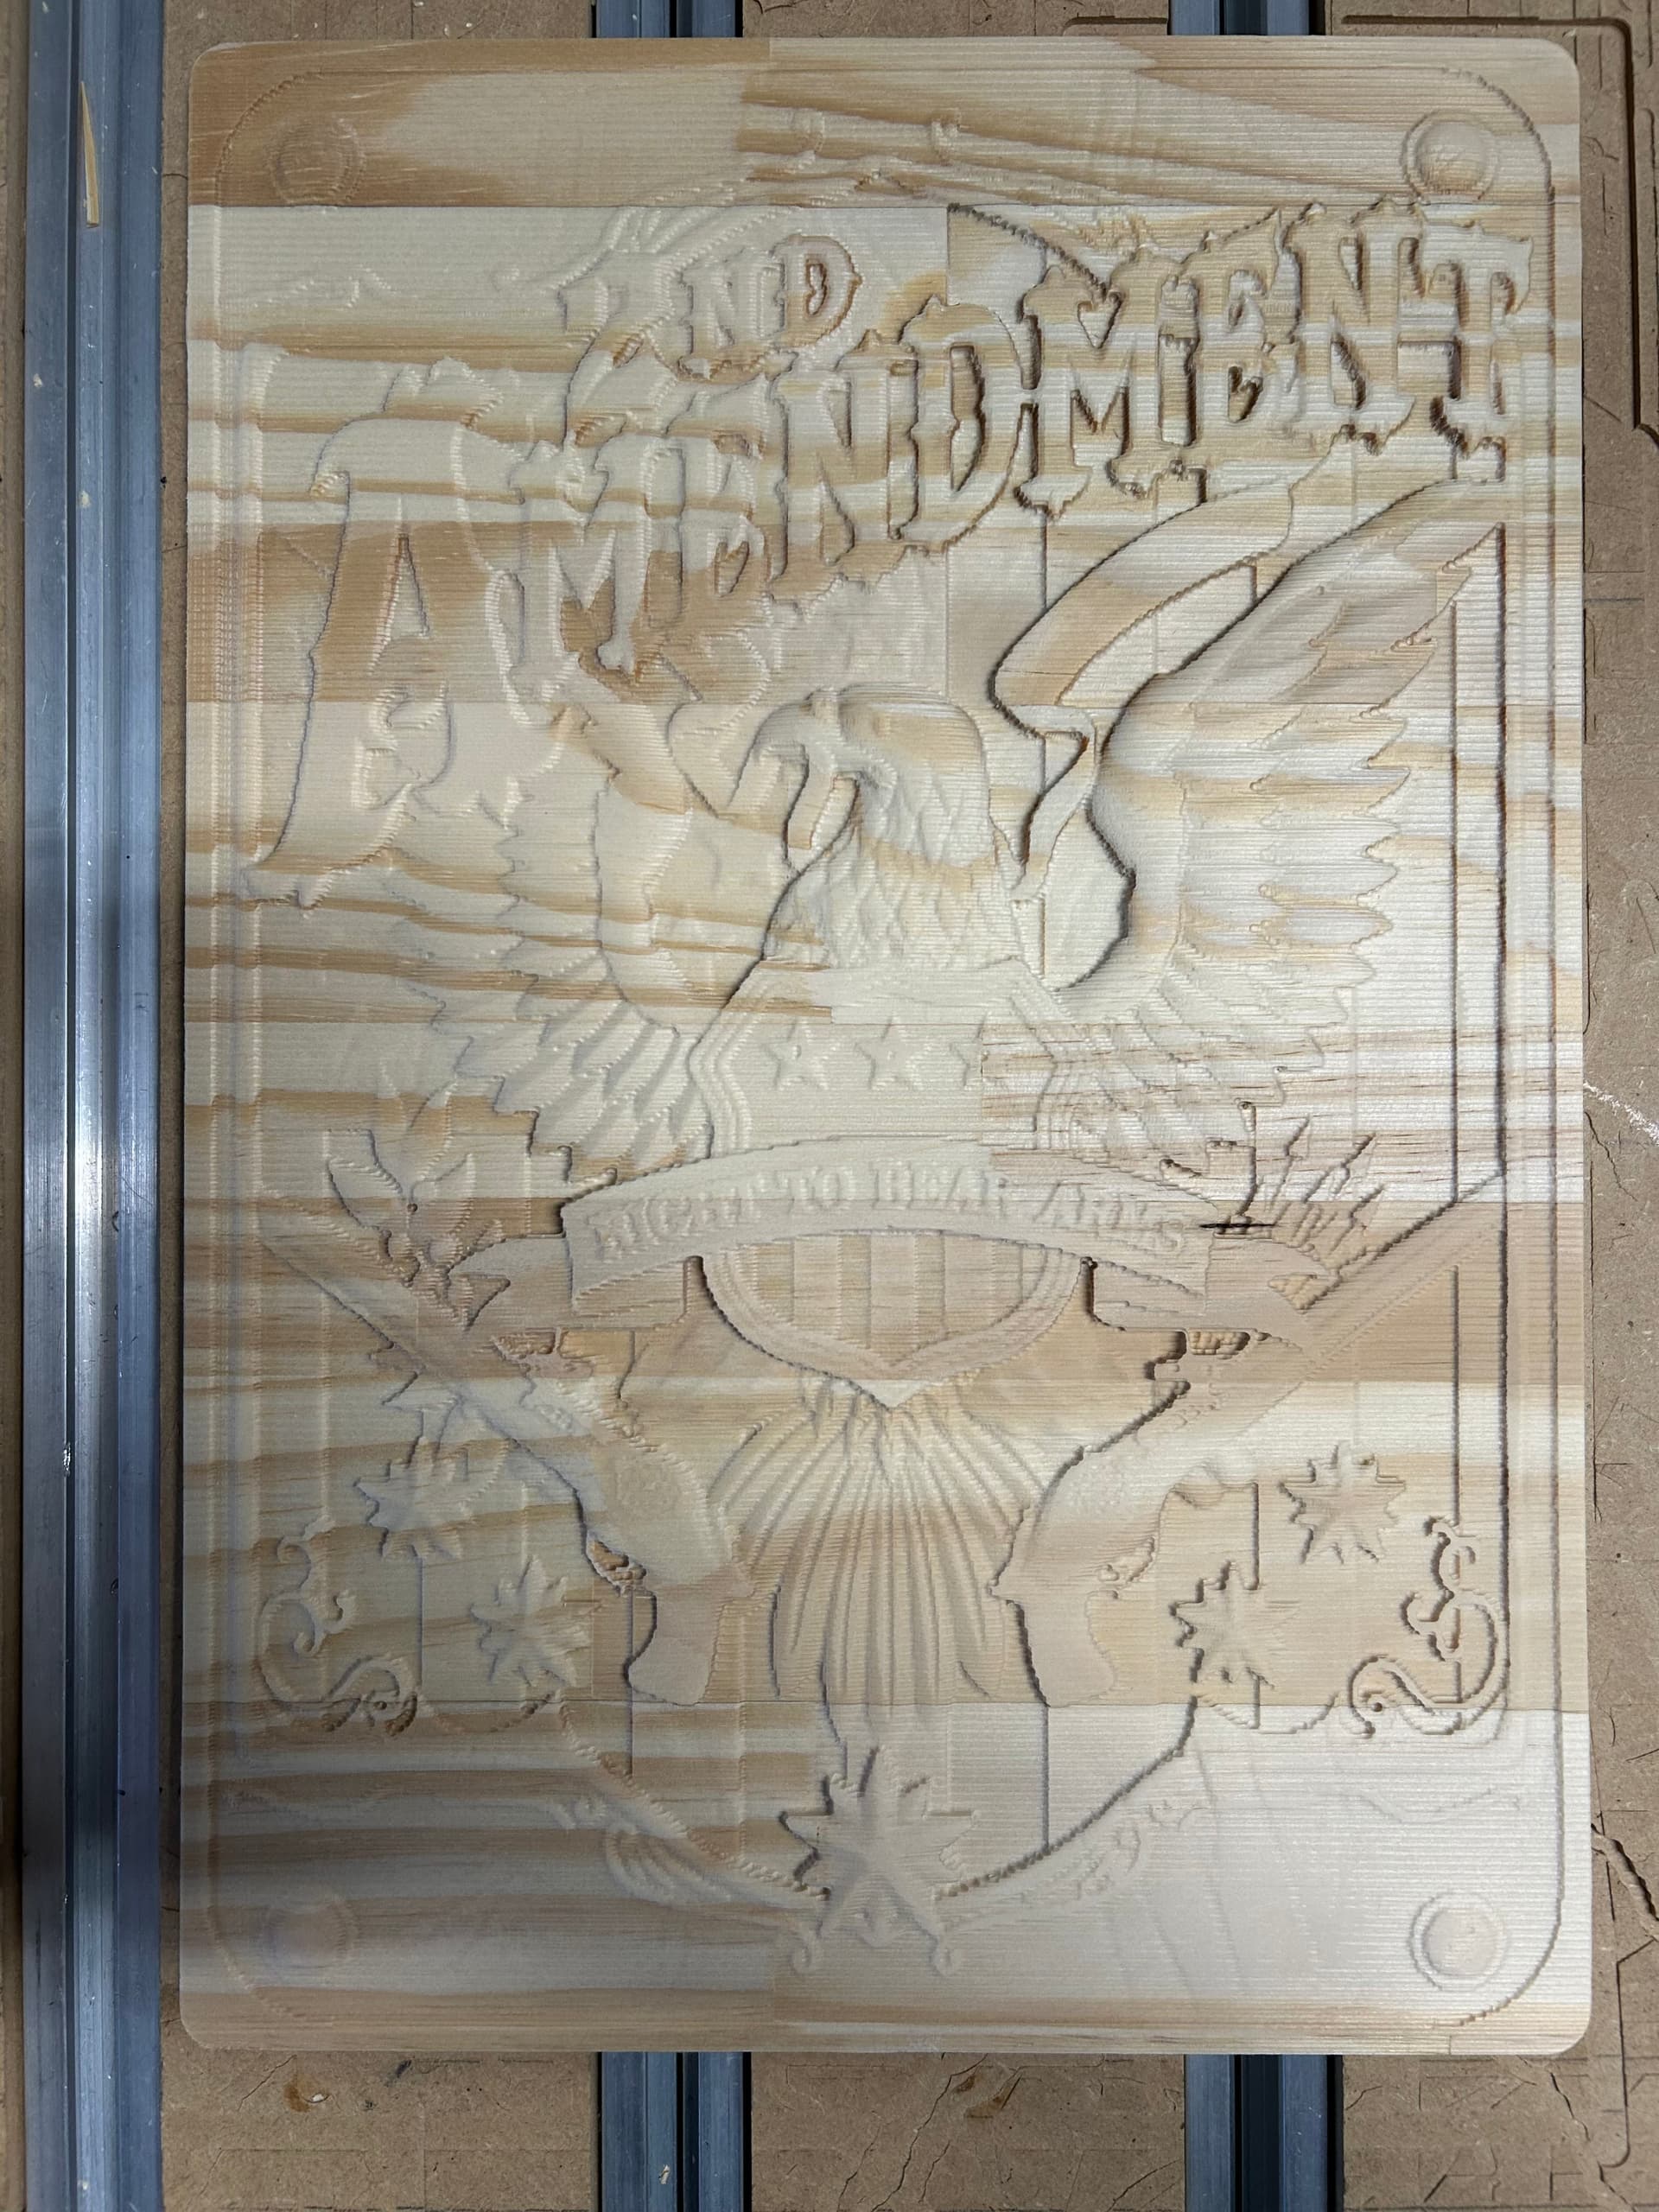
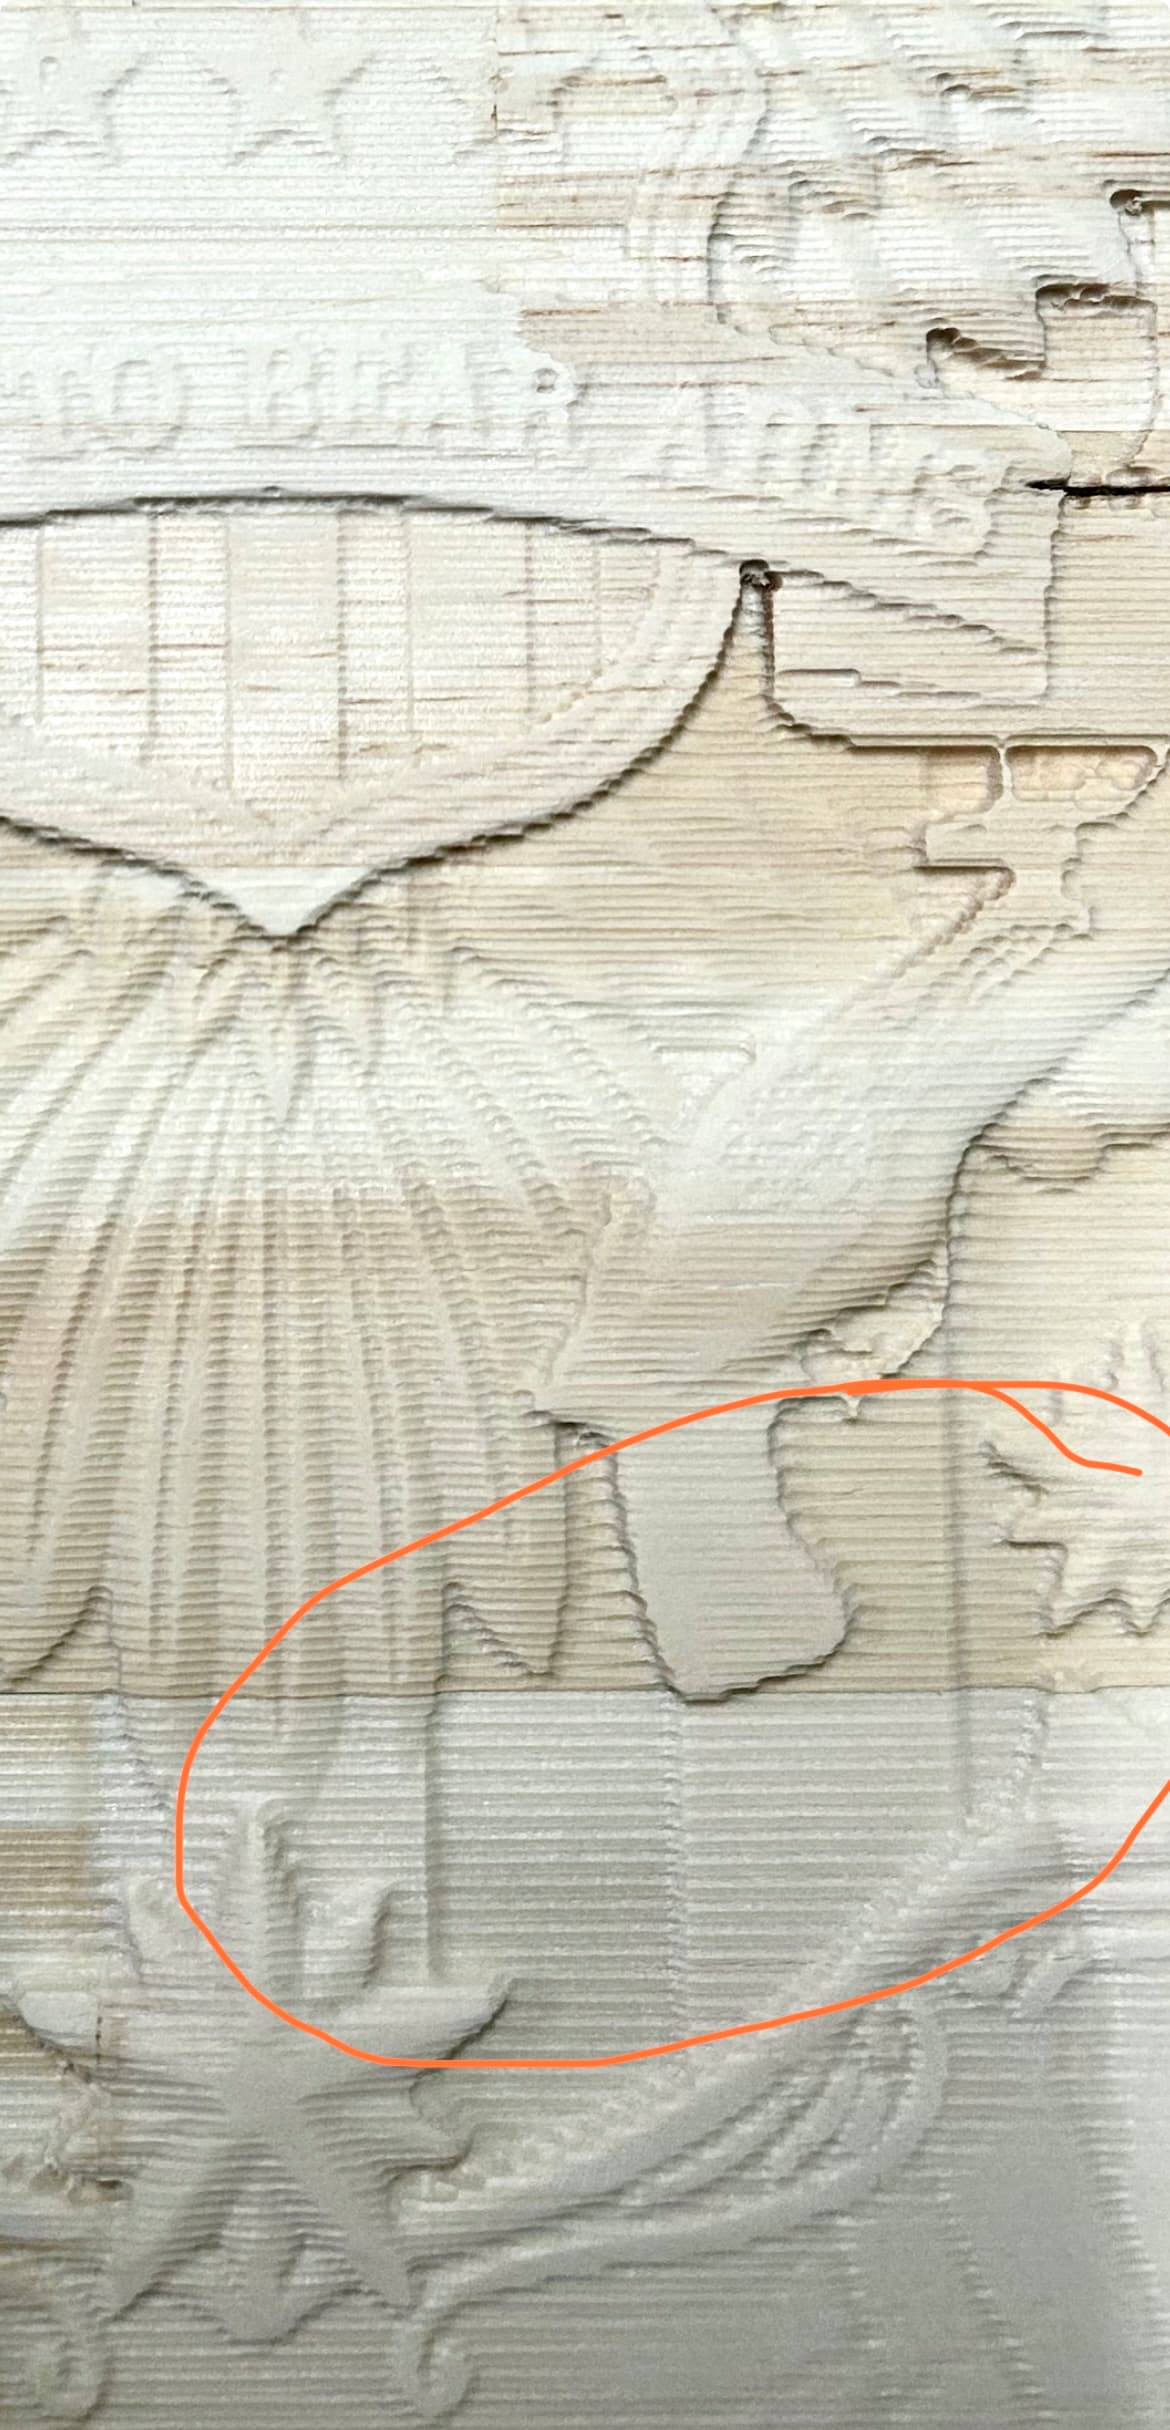
I did my first 3D carve yesterday on a cheap piece of pine, just to try/test it out. I just bought the STL file off of Esty for a couple of bucks, & I only used the 3d rough & finish toolpaths in CC using just a regular 1/4" endmill for rough & a 1/16" ball nose endmill to finish. I left the finish at the standard settings that were already in CC (like .019 thousandths I believe). I also just left the stepover on the finish the same too (.03). Anyways this maybe a dumb question, but I’m not understand if all these lines across the entire project are normal when doing 3d projects?? Or if it’s because of the wood, or toolpaths used or not used, or the stepover, or if instead of leaving the angle at 0 I should of ran it at maybe a 45deg angle or something. Or if all these lines are normal when you do 3d jobs & they just have to be sanded out every time?? If so what kind of sander/grit do y’all use that won’t remove all the detail while still taking out the lines?? Again any help/answers/suggestions would be greatly appreciated in helping me understand 3D.
Ball mills need a very small step-over value to make the scalloped machining marks imperceptible for 3D finishing. However, because very little material is being removed with each pass, the feed rate can be as fast as the machine can go while maintaining steps/accuracy.
Often I use 0.125-0.2mm(0.005-0.008") stepovers.
Also be sure that the 3D Roughing is leaving 0.002" of stock for the finishing pass to remove.
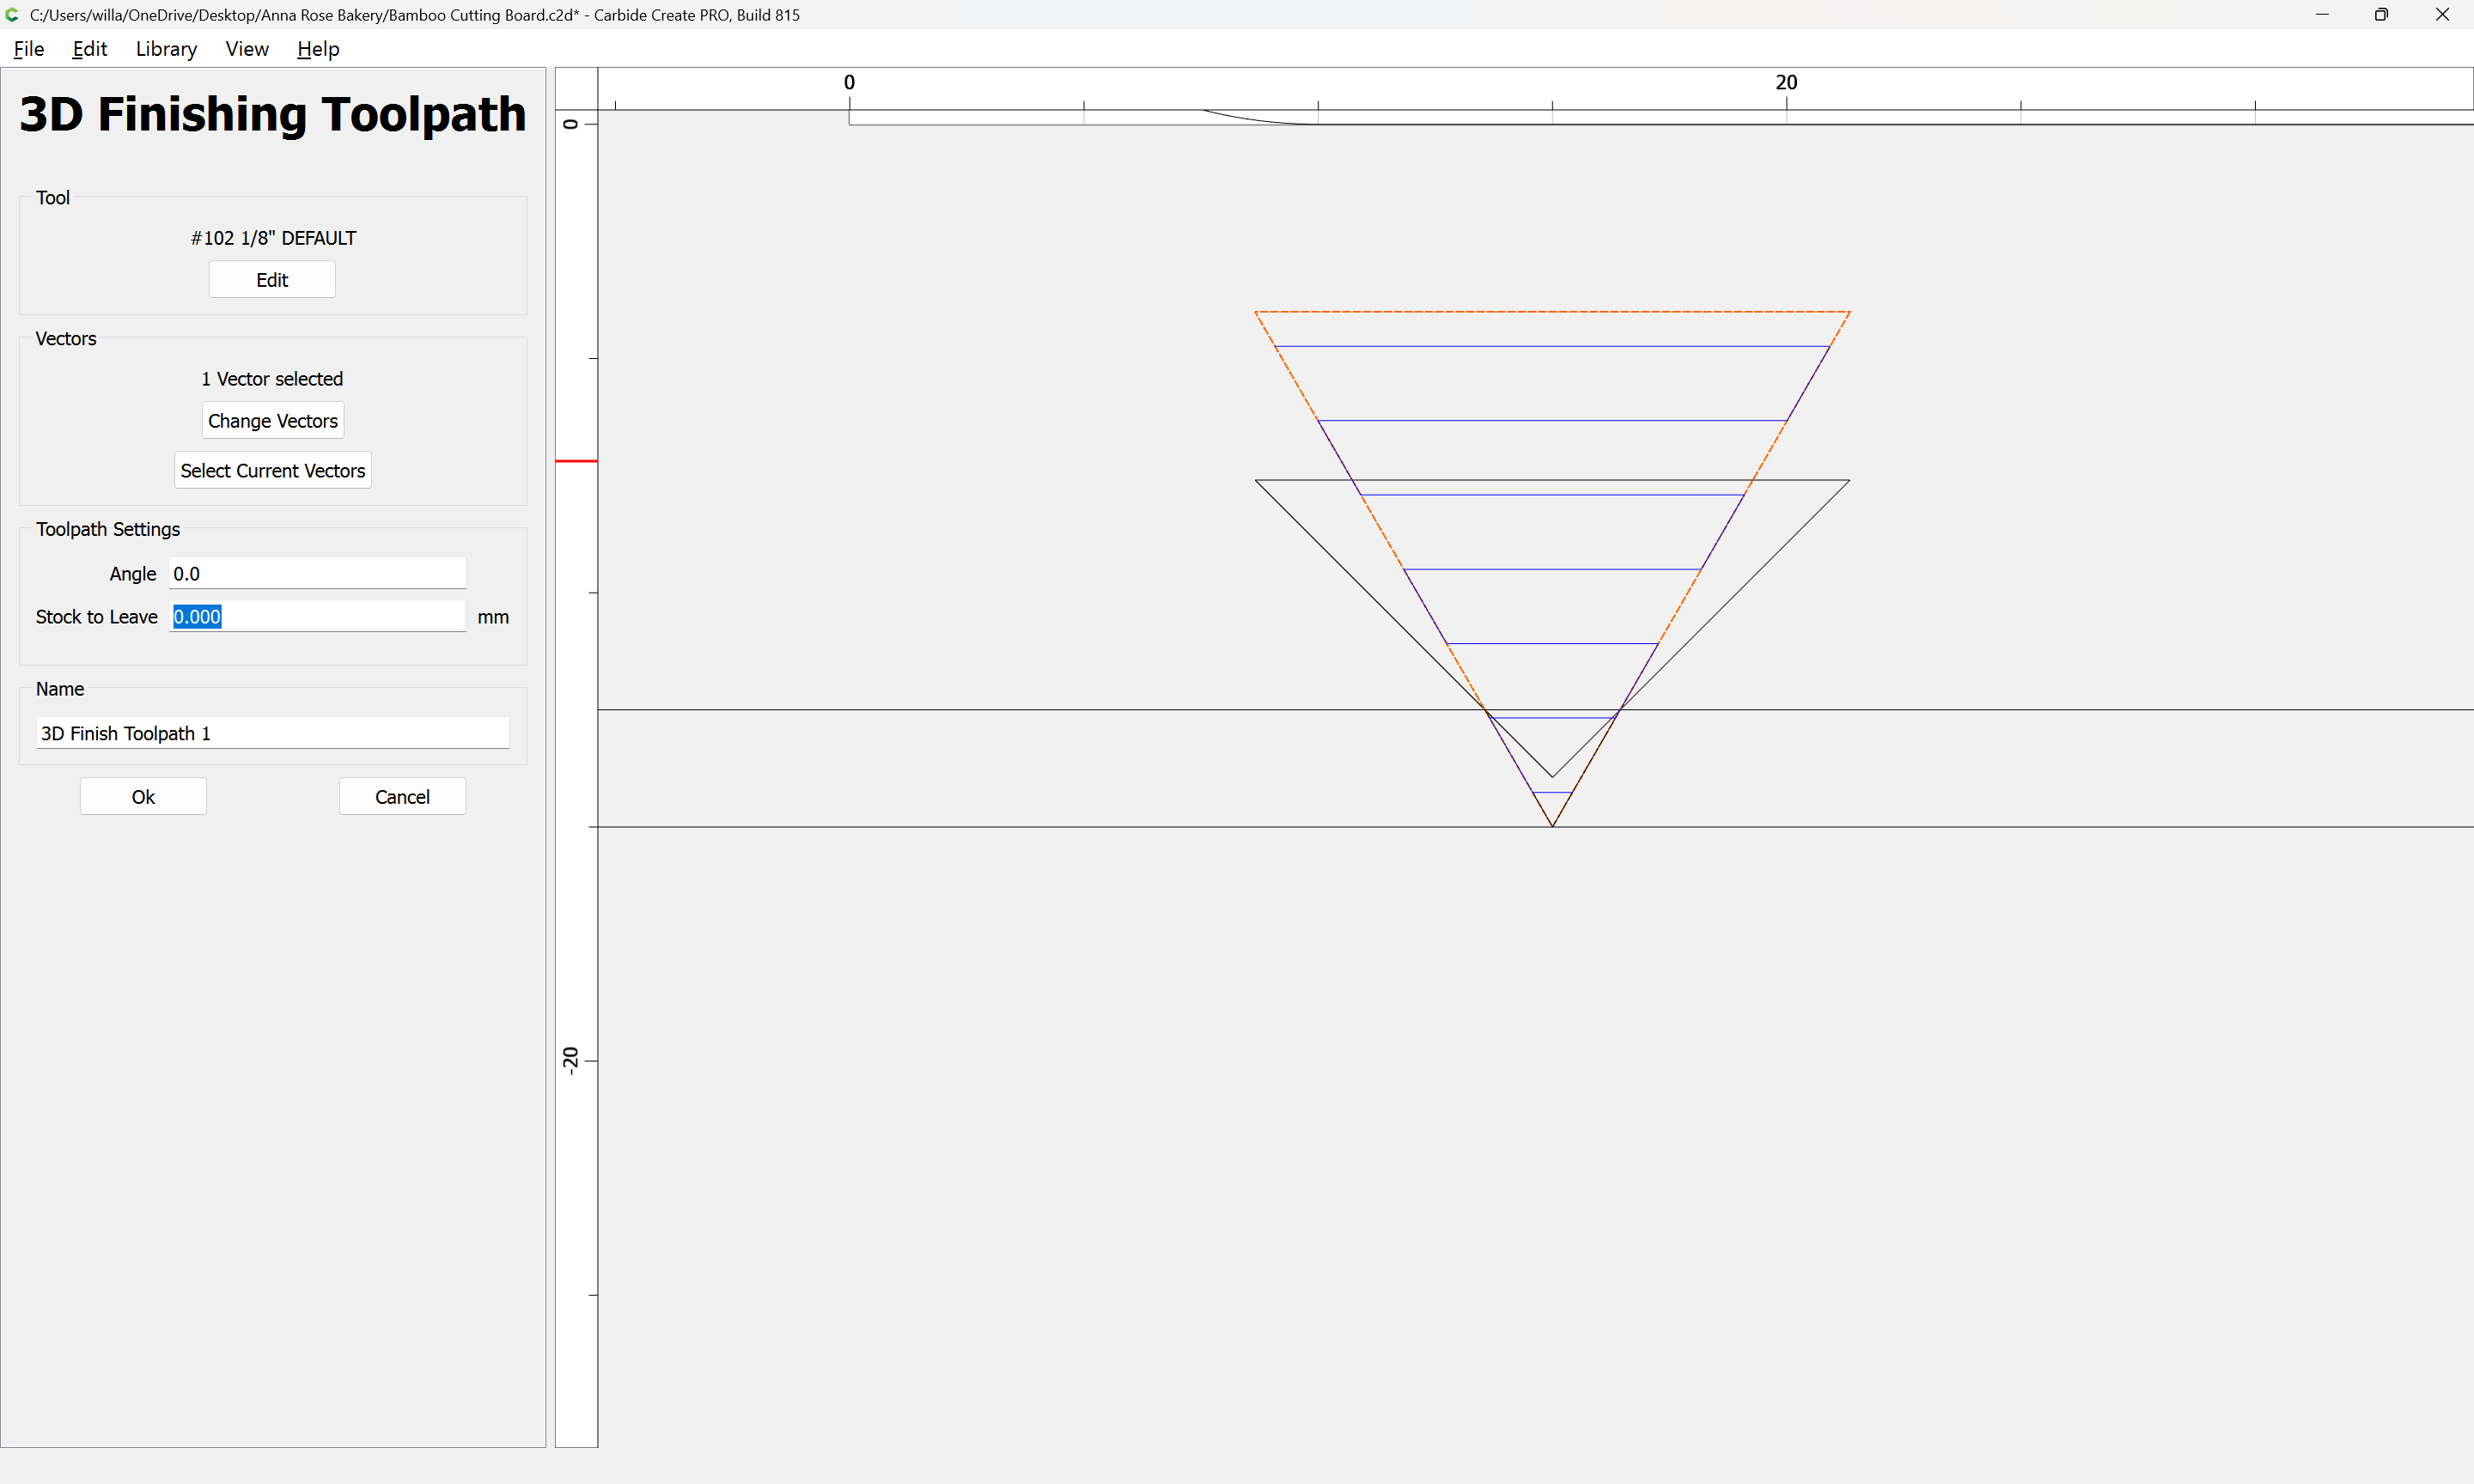
I like to run the finish pass twice. Once at zero angle and the second time at 45.
You can get “good enough” detail; if you are looking for near-perfect, you’ll need to run a smaller bit and/or the finish pass at multiple angles. IE Zero, 90, 45.
Keep in mind that you are working with wood, so it’s never going to be perfect.
** And ultimately I was thinking of running the finishing pass 2x yesterday (one at 0°… how I originally ran it, & then the other at 90°), but just didn’t want to take the time & re-run it not knowing. Probably should’ve , but I will reduce my step over & re-run a couple of passes at different angles on my next ones.
(matching the same setting for 3D Roughing toolpaths)
My understanding is that this would be an ever smaller dimension, so that each successive cut is cutting, rather than rubbing, with the ultimate 3D Finishing Toolpath having 0 for this value (working forward from there is probably easiest, the penultimate pass should leave at least chipload thickness for the next path, the one before that chipload thickness for the last two paths, &c.