Hi, I am newbie both with Shapeoko pro 5 and fusion. I have been able to cut some interesting 3D models in wood already (I am a woodworker). however I am stuck with the following issue: 2D contour does an excellen job at cutting a slot around the silhouette of my piece. Alternatively 3D adaptive clearing is doing an excellent job at shaping the 3D structure (e.g. slanted surfaces, fillet, etc,…) but it also clears the entire stock around my piece. I wish I could use first 2D contour, and then 3D adaptive clearing starting from the silhouette shaped previously by 2D contour, instead of miling the rest of the stock. Anyone?
I have tried #1, For some reason, 3D adaptive clearing ignores the “Rest machining” from previous operation". I will look into #2. As for exporting and posting my Fusion file, I need to figure that out! but thanks.
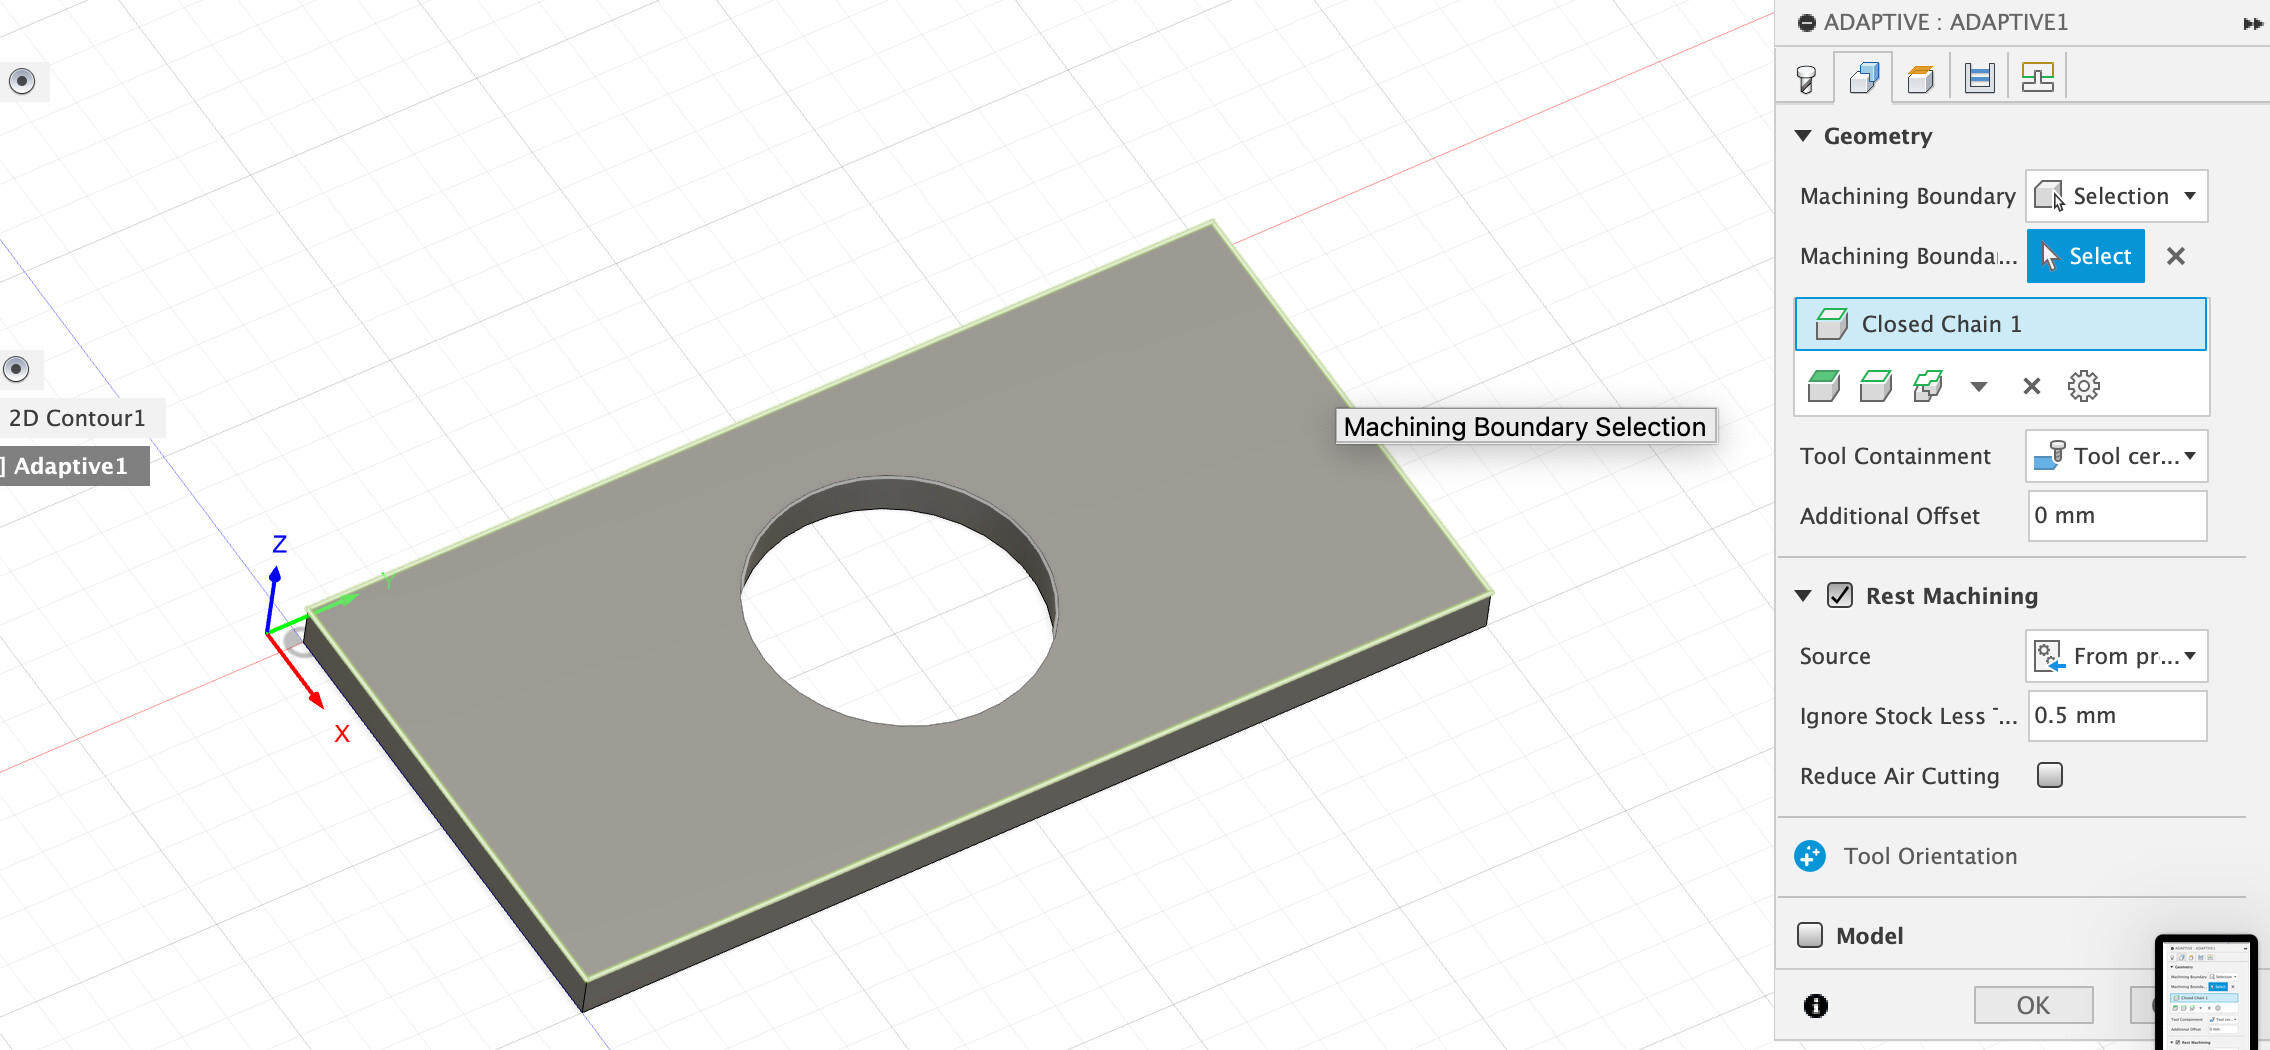
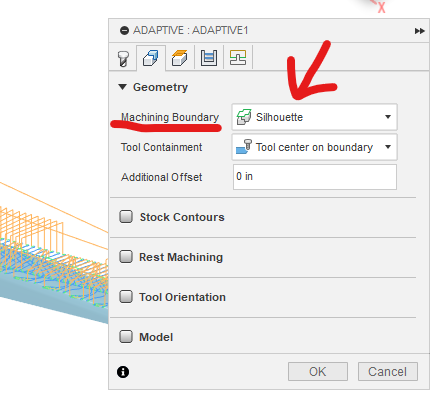
Here’s a really simple example, with the adaptive clear bounded to the perimeter of the part and ‘tool center on boundary’ selected as the bounding limit.
@doomey What do you have selected for your “Machining Boundary”. I’d probably use Silhoette with tool centered on boundary (possibly with an offset) depending on toolpath settings and tool. Keep in mind that adaptive toolpaths are not typically used for finishing.
As Neil says, what are you trying to do with the adaptive, you’ve not got much stock left and I’d move to a finishing toolpath at this point, assuming you’re machining wood.
Neil, I used the toolpath geometry you suggested and it does the job indeed. The problem is that i) the toolpath generation takes for ever and more problematic the machining time is over 2h! So like you guys said I am trying to use adaptive clearing for finishing, not a good use of the tool. I tried a few things to reduce the time, such as increasing tolerance etc,… but the gain is marginal.
Earlier I had tried a combination of 2D contour and 3D contour, but the latter gave me some funky machining.
What endmill are you using for the adaptive? You should be able to make that go pretty quickly because of the greater depth. I’d follow up maybe with a morphed spiral path.
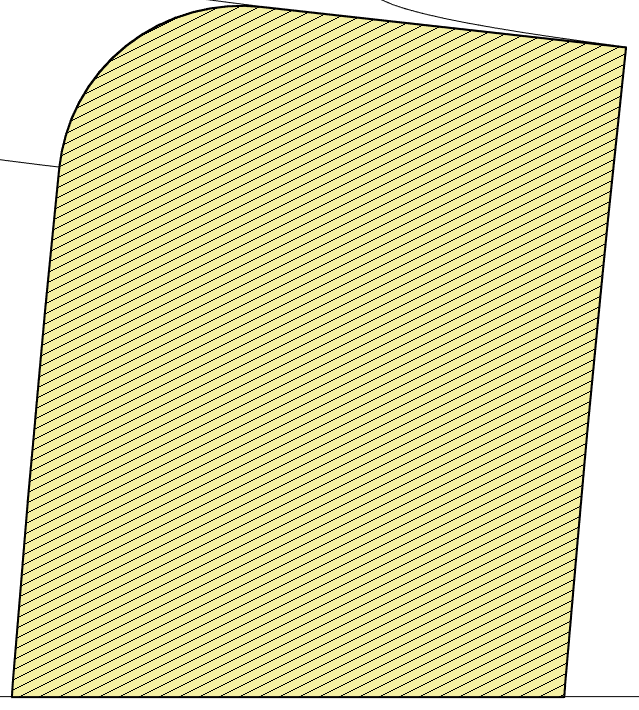
That said, the part you’ve designed will be tricky to machine because of the slant. The side walls are not perpendicular to the endmill, and one side is an undercut. you’d have to do this as a two sided job.
Here is a cross section…the bottom is flat on your wasteboard. The right side is not reachable with your machine. The left side will need more than a simple contour.
@ doomey, I checked your file, 3D Contour is the strategy you would want to use without any other tools. I would check your tool parameters also, and if you haven’t yet, download the manufactures tool database with the pre-loaded parameters. The parameters you had loaded looked funky to me for the speed, feeds, and also the dimensions of your tools. I used a pre-set Amana TBN for reference.
The concern is your model, and I think that’s why the toolpath looks so funky because you have a negative slope on the backside of your model and your machine is unable to machine that negative slope. You can run a 2D Contour and bound the depth to your bottom to cut everything out.
@neilferreri yep, that’s one of the reasons why there’s an issue. I’d have to play with the options and contact points to get Fusion to do a complete cut on this model.
I am using the 1/4" flat mill provided by Shapeoko (the brand is Nomad, but I have not found the exact characteristics yet). I had to change the distance from the bit end to the holder (set at 0.85" by default) to 1.5" to reach out to the bottom of the stock without colliding without he piece
I am aware of the negative slop on the right side. Like you said this would require a two-sided job (but I am not there yet, need some more mileage on fusion!). This is something I can live with for now because I can manually sculpt it afterwards.
@Merick01 indeed after adding a 2D Contour I got the full model completed for about one hour machining time, which I guess is acceptable, right?
What seems to be critical is the tool selection. Well I will have to buy it.
Thanks a lot, you guy rock!
Your endmills are still super good, no need to go out and buy duplicates with a different company. There were some posts about inputting Carbide3D cutters into Fusion, I’m out in the town right now and can’t search, but definitely search the forums.
I could of swore there was a Carbide tool library for download.
I would deep dive into different end mills and there applications. Carbide3D did a couple of YouTube videos on the purpose and use for the main ones. It’s definitely a critical piece of knowledge when first starting out and can be pretty daunting, but once you get the main ones down (upcut, downcut, ball nose…ect), your projects become more enjoyable using the CNC.
Super cool model you have, excited to see what it will be.
There’s a few on the forums, searching for Fusion tool library
Here’s one
I spotted in the model file that the 1/4" cutter seemed to be set up to run very slow, 5,000RPM and was only feeding at 40ipm which is at the low end of the feed rates too.