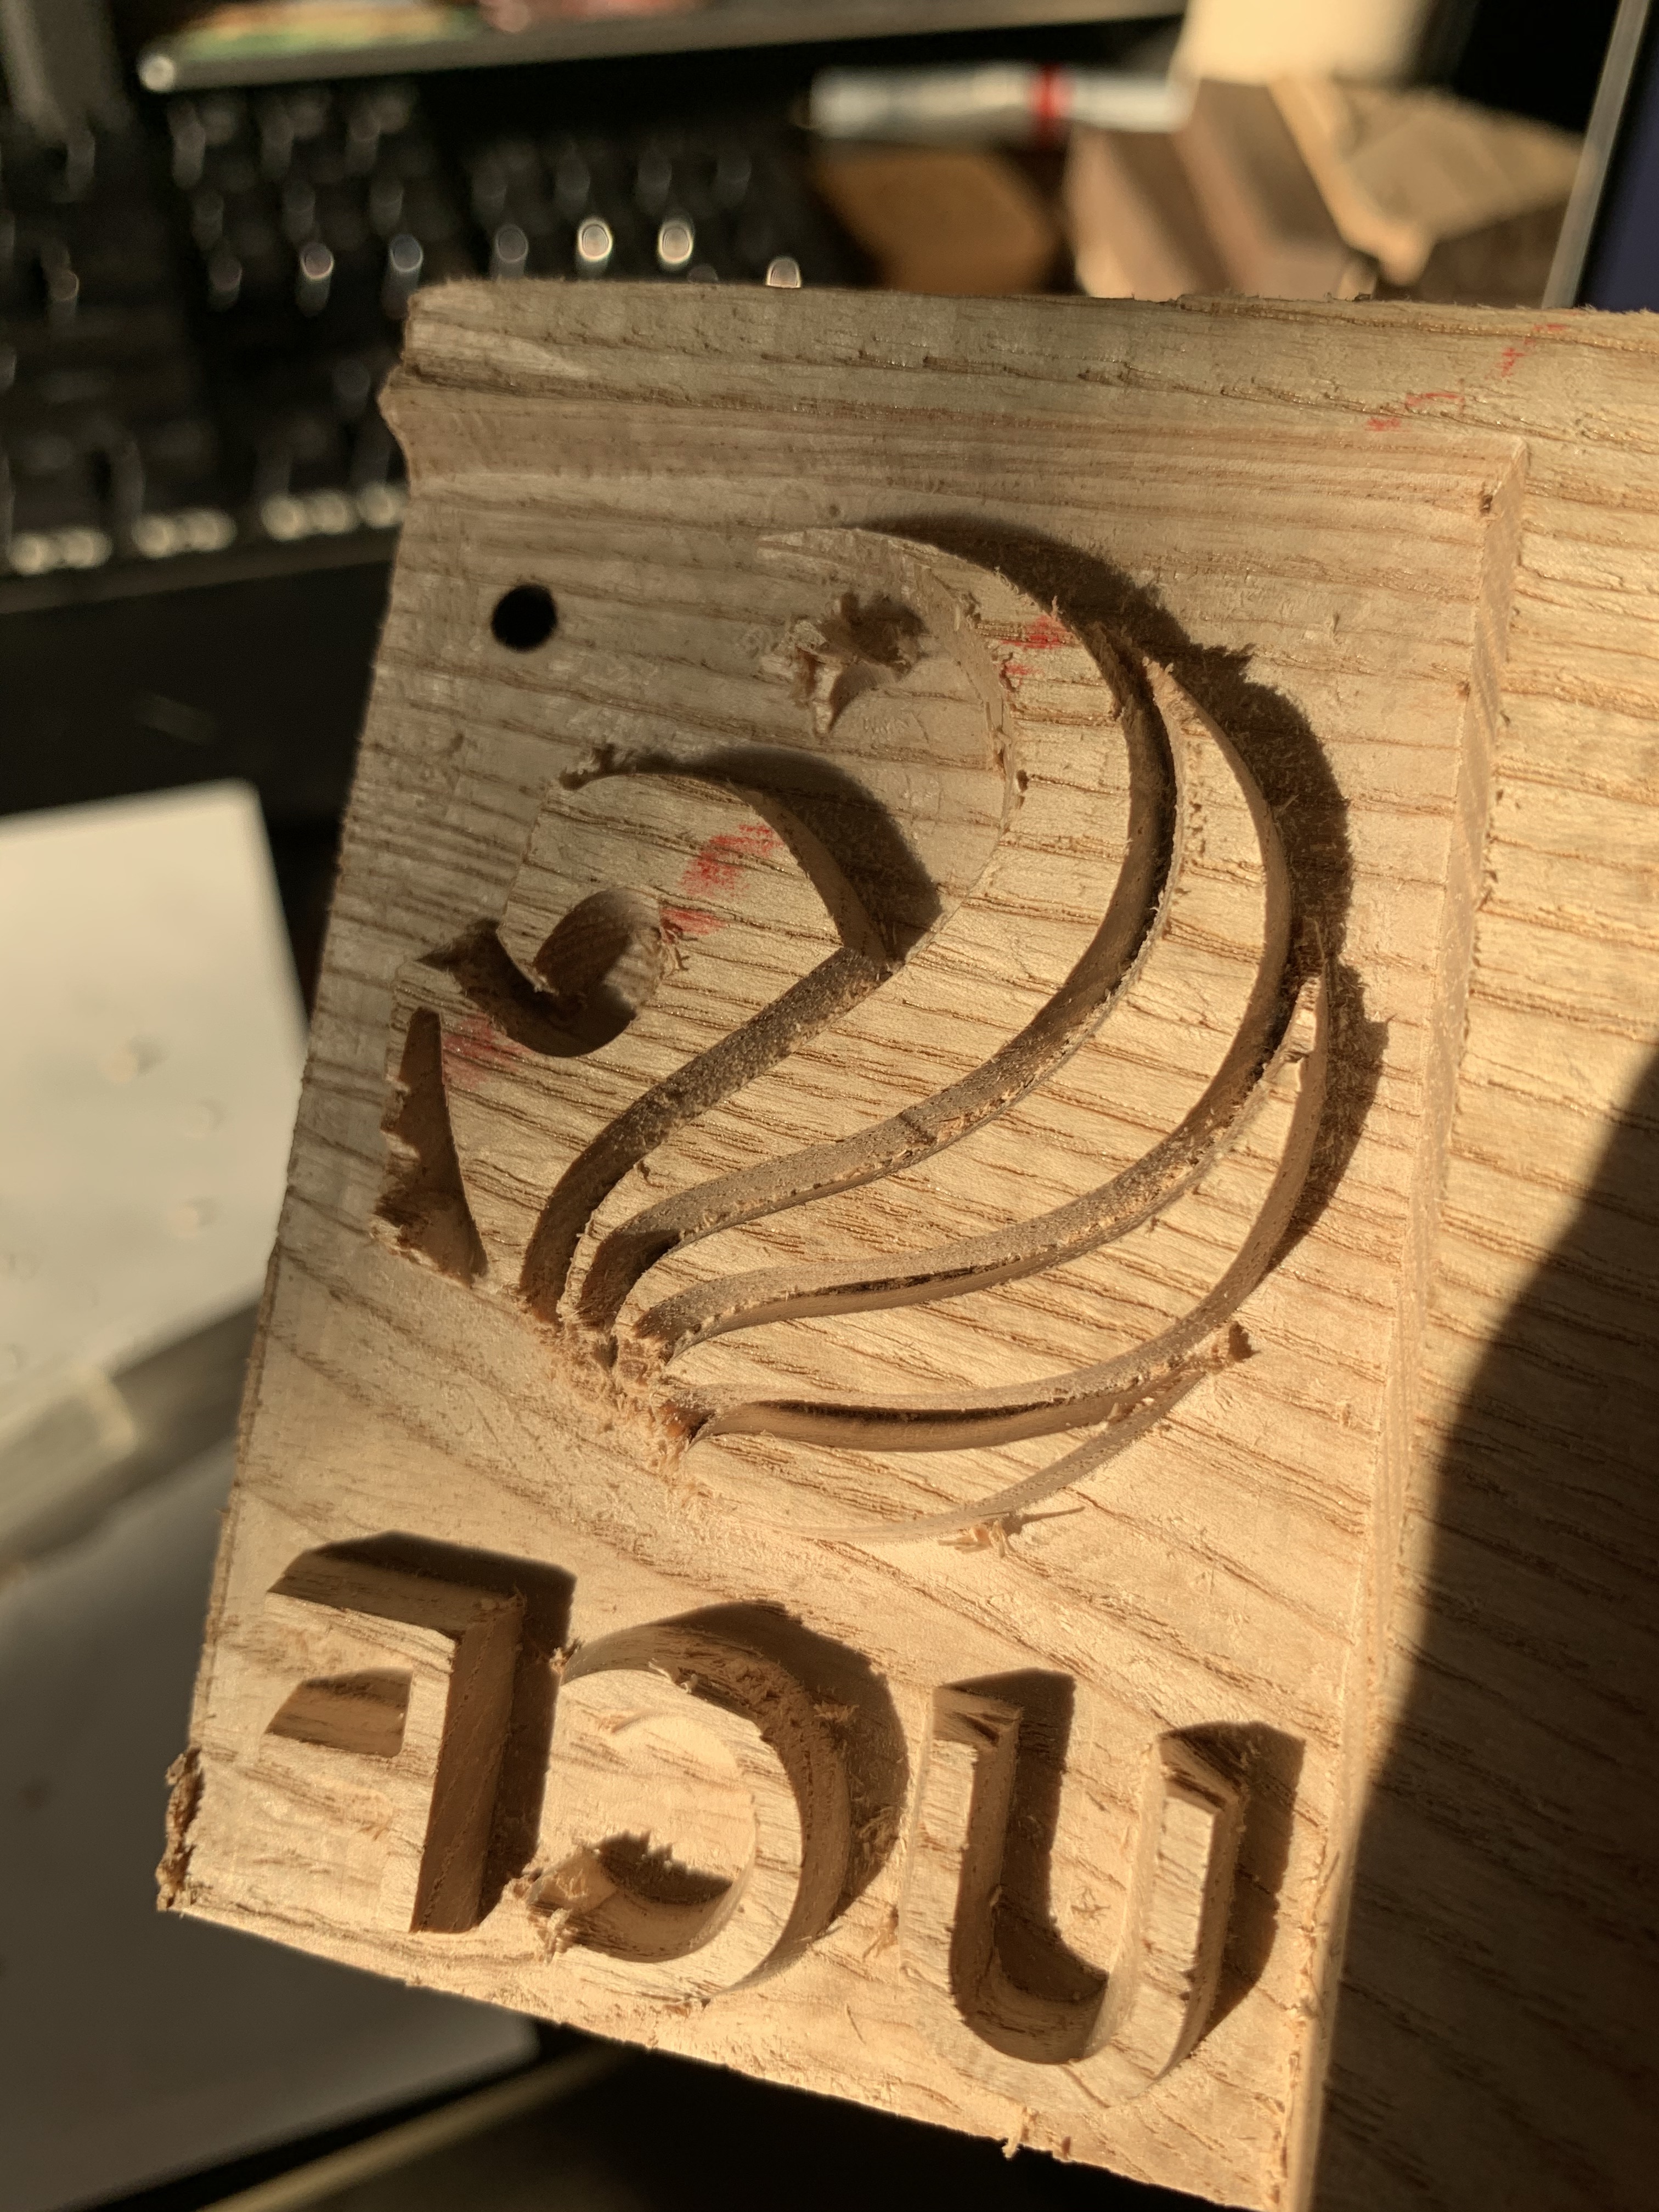
I just got a new v bit, 30º this time, so I could carve finer detail. It worked fairly well for a negative pocket of an inlay, but when I tried to carve the plug it ended up causing massive chipping in two different woods I’ve tried. I am wondering if this is related to the grain, or if something else is happening here? Could the bit be at fault or the feed/RPM (ran it with 30IPM/6000 RPM)? I’ve also noticed that this bit leaves tons and tons of splinters on the resulting piece which I have to manually clean up using an x-acto knife. I wouldn’t be surprised if the splintering/tear out is related to those splinters being left over. I haven’t assembled this thing yet, but I can already tell that it is going to be fairly underwhelming and probably not very nice to look at.
Here are some pictures of the negative and positive parts:
The pocket was 0.2” deep. The plug has a start depth of 0.1” and a total depth of 0.18”. Those are values I’ve used successfully with my 60° v bit. Should they be deeper?
I remember you recommending that on my previous post! I will give that a try. The wood chipped fairly early on though, but I let the paths finish anyway. The finishing pass could help with all those splinters, not sure if it is going to help with general tear out/breakage?
tear out is (in addition to depending on the wood) also depending on the forces and speeds… finish passes have (by design) less forces applied, and the pre-finish pass will leave thicker areas so also less like to tear out…
I’ve picked up a 30° engraving bit from Whiteside. I know, it isn’t Amana but while I’m learning I’d rather not break a $50-100 bit the 60° one worked fine on a a previous carving. Do you mean starting shallower in general as to gain more experience or for this piece? I’m not sure Carbide Create allows the v bit to plunge the whole depth in multiple passes. I’d have to create multiple tool paths for that and adjust the max depth right?
Actually Whitesides are good bits. They are up their with Amana.
Your full depth is .2 your start is .1. Try starting at .05 or .025 to break the surface. Same principle as scoring plywood for splintering. As Suggested above.
Well that is great to hear! How would I best do this in Carbide Create? Use multiple tool passes and set the start depth smaller but at the same time also decrease the final depth so as to not cut as deep? The wood is definitely dry so I will try to moisten it a bit as well!
Given that I don’t really know which wood I have (got a box of scraps) I wouldn’t know if it by definition is splintery/chippy. So I would run a initial cut which starts at 0 maybe and then just goes to a final depth of maybe 0.05 before running my main cut?
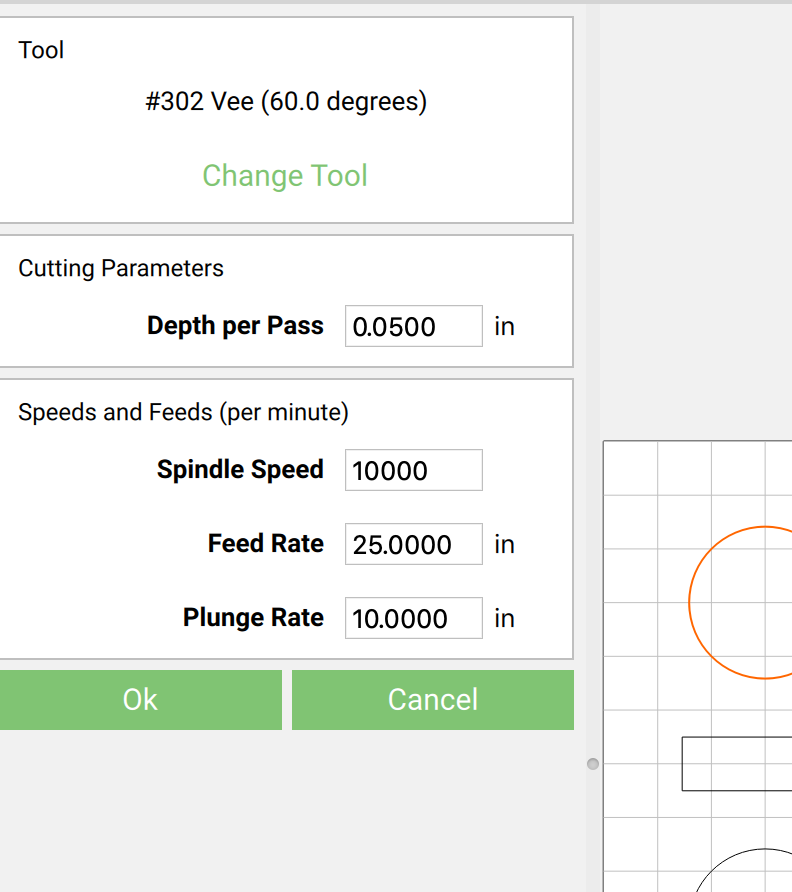
If using v-carve tool path click edit under the bit. Cutting parameters is .050 depth per pass.
This is the 302 bits default.
If you have some more of this wood look at the end grain and see which way the growth rings are. Take a piece and carve both sides to see how the wood cuts. Learn to read the wood.
Oh yeah I know that parameter. For some reason I thought it was being ignored for v carving. If that is actually working then I’ll have to lower it and try again!
Yeah you’re probably right. It did work out for my previous inlay and actually looks very nice once finished. But I guess the finer the detail the less suitable it becomes.
That’s true! I’ll try another cut with all these suggestions people so kindly provided and will work with the better one. I have to finish it somehow, defeat is not an option


 the 60° one worked fine on a a previous carving. Do you mean starting shallower in general as to gain more experience or for this piece? I’m not sure Carbide Create allows the v bit to plunge the whole depth in multiple passes. I’d have to create multiple tool paths for that and adjust the max depth right?