3D Design Question

I am trying to plan a 3D carve on the top of a box that I just made. The box top is 3.25x8 inches and 1.75 thick. I have the inside pocket already carved out to .75 and want to leave a .25 buffer and then allow .75 for the carve.

I have limited experience with the 3D aspect so the best approach is not clear to me. I bought an STL file that looks like a good fit for the shape more or less but there are some issues.

I created a vector and added a base of 1" for the pocket plus buffer.

Then I imported the STL and used an add operation with a thickness of .75.

The front view looks good:

But from the side you can see that the lip at the top is kinda ugly. It has a couple of craggly bits at the bottom but they are small and can probably be cut/sanded.

Is there a better way to model this? Should I shift it upward so that the upper line aligns with the stock even though it will move the horses off center?

Is there a better way to smooth that cliff off (I don’t have a good way to edit that STL but I could do something else and subtract.

Is that too thick to attempt this carve? Thoughts?

box_top_carve.c2d (3.8 MB)

You’ll need a very small, very long tool to effectively cut all that detail and those essentially vertical planes.

What tooling are you planning on using?

I have some 1/16 and 1/32 tapered ball nose bits. I haven’t really looked at the model closely enough yet to determine if the tapers will be a problem. I have the 102 and some other very small ball nose straight bits but they don’t have much reach.

I don’t really need the carve to be that thick, I wanted a decent amount of detail and also to reduce the effective thickness of the top so it isn’t so chunky.

Better to surface it some and make a shallower carve?

Yes, I believe the design will both look better, and be more tractable modeled less thickly.

Please note for the tapered ball noses that they will cut away vertical surfaces and this will not be shown in the 3D preview in Carbide Create.

Yes, I will have to see what height works best. Too bad I have to delete and re-add the components constantly to retry rather than edit the settings.

Is the process I used legit? If I decrease the cut height do so need to add the thickness to the base component or can I just add to the base height in the carve component? Or maybe that doesn’t matter if I want to slice an extra 1/2” off the top before starting the carve.

Lower carve relief may eliminate that annoying shelf as well.

All of the possible approaches seem valid — it’s just a matter of what is convenient for the resources one is working with and how one wishes to approach things.

When you import the STL, there is a “Remove Z Height” option that will remove material from the bottom of the STL model.

I don’t have your STL, but I exported an image from your file & reimported it at 0.25 & 0.375 and it looks pretty good.

1 Like

Thanks, I hadn’t thought of that?

.25 and .375 in the height or the remove Z field?

I paid for the STL so didn’t want to redistribute.

Your choice, try both. I think it looks OK at that height without removing anything.

2 Likes

I will give that a look later tonight. Then I have to figure out if I want to remove some height from the top before the carve. Right now the bottom and top are equal height and the top weighs a good bit more given that its pocket is not as deep.

I guess I could carve it as is and if I don’t like the look flatten and go again :blush:

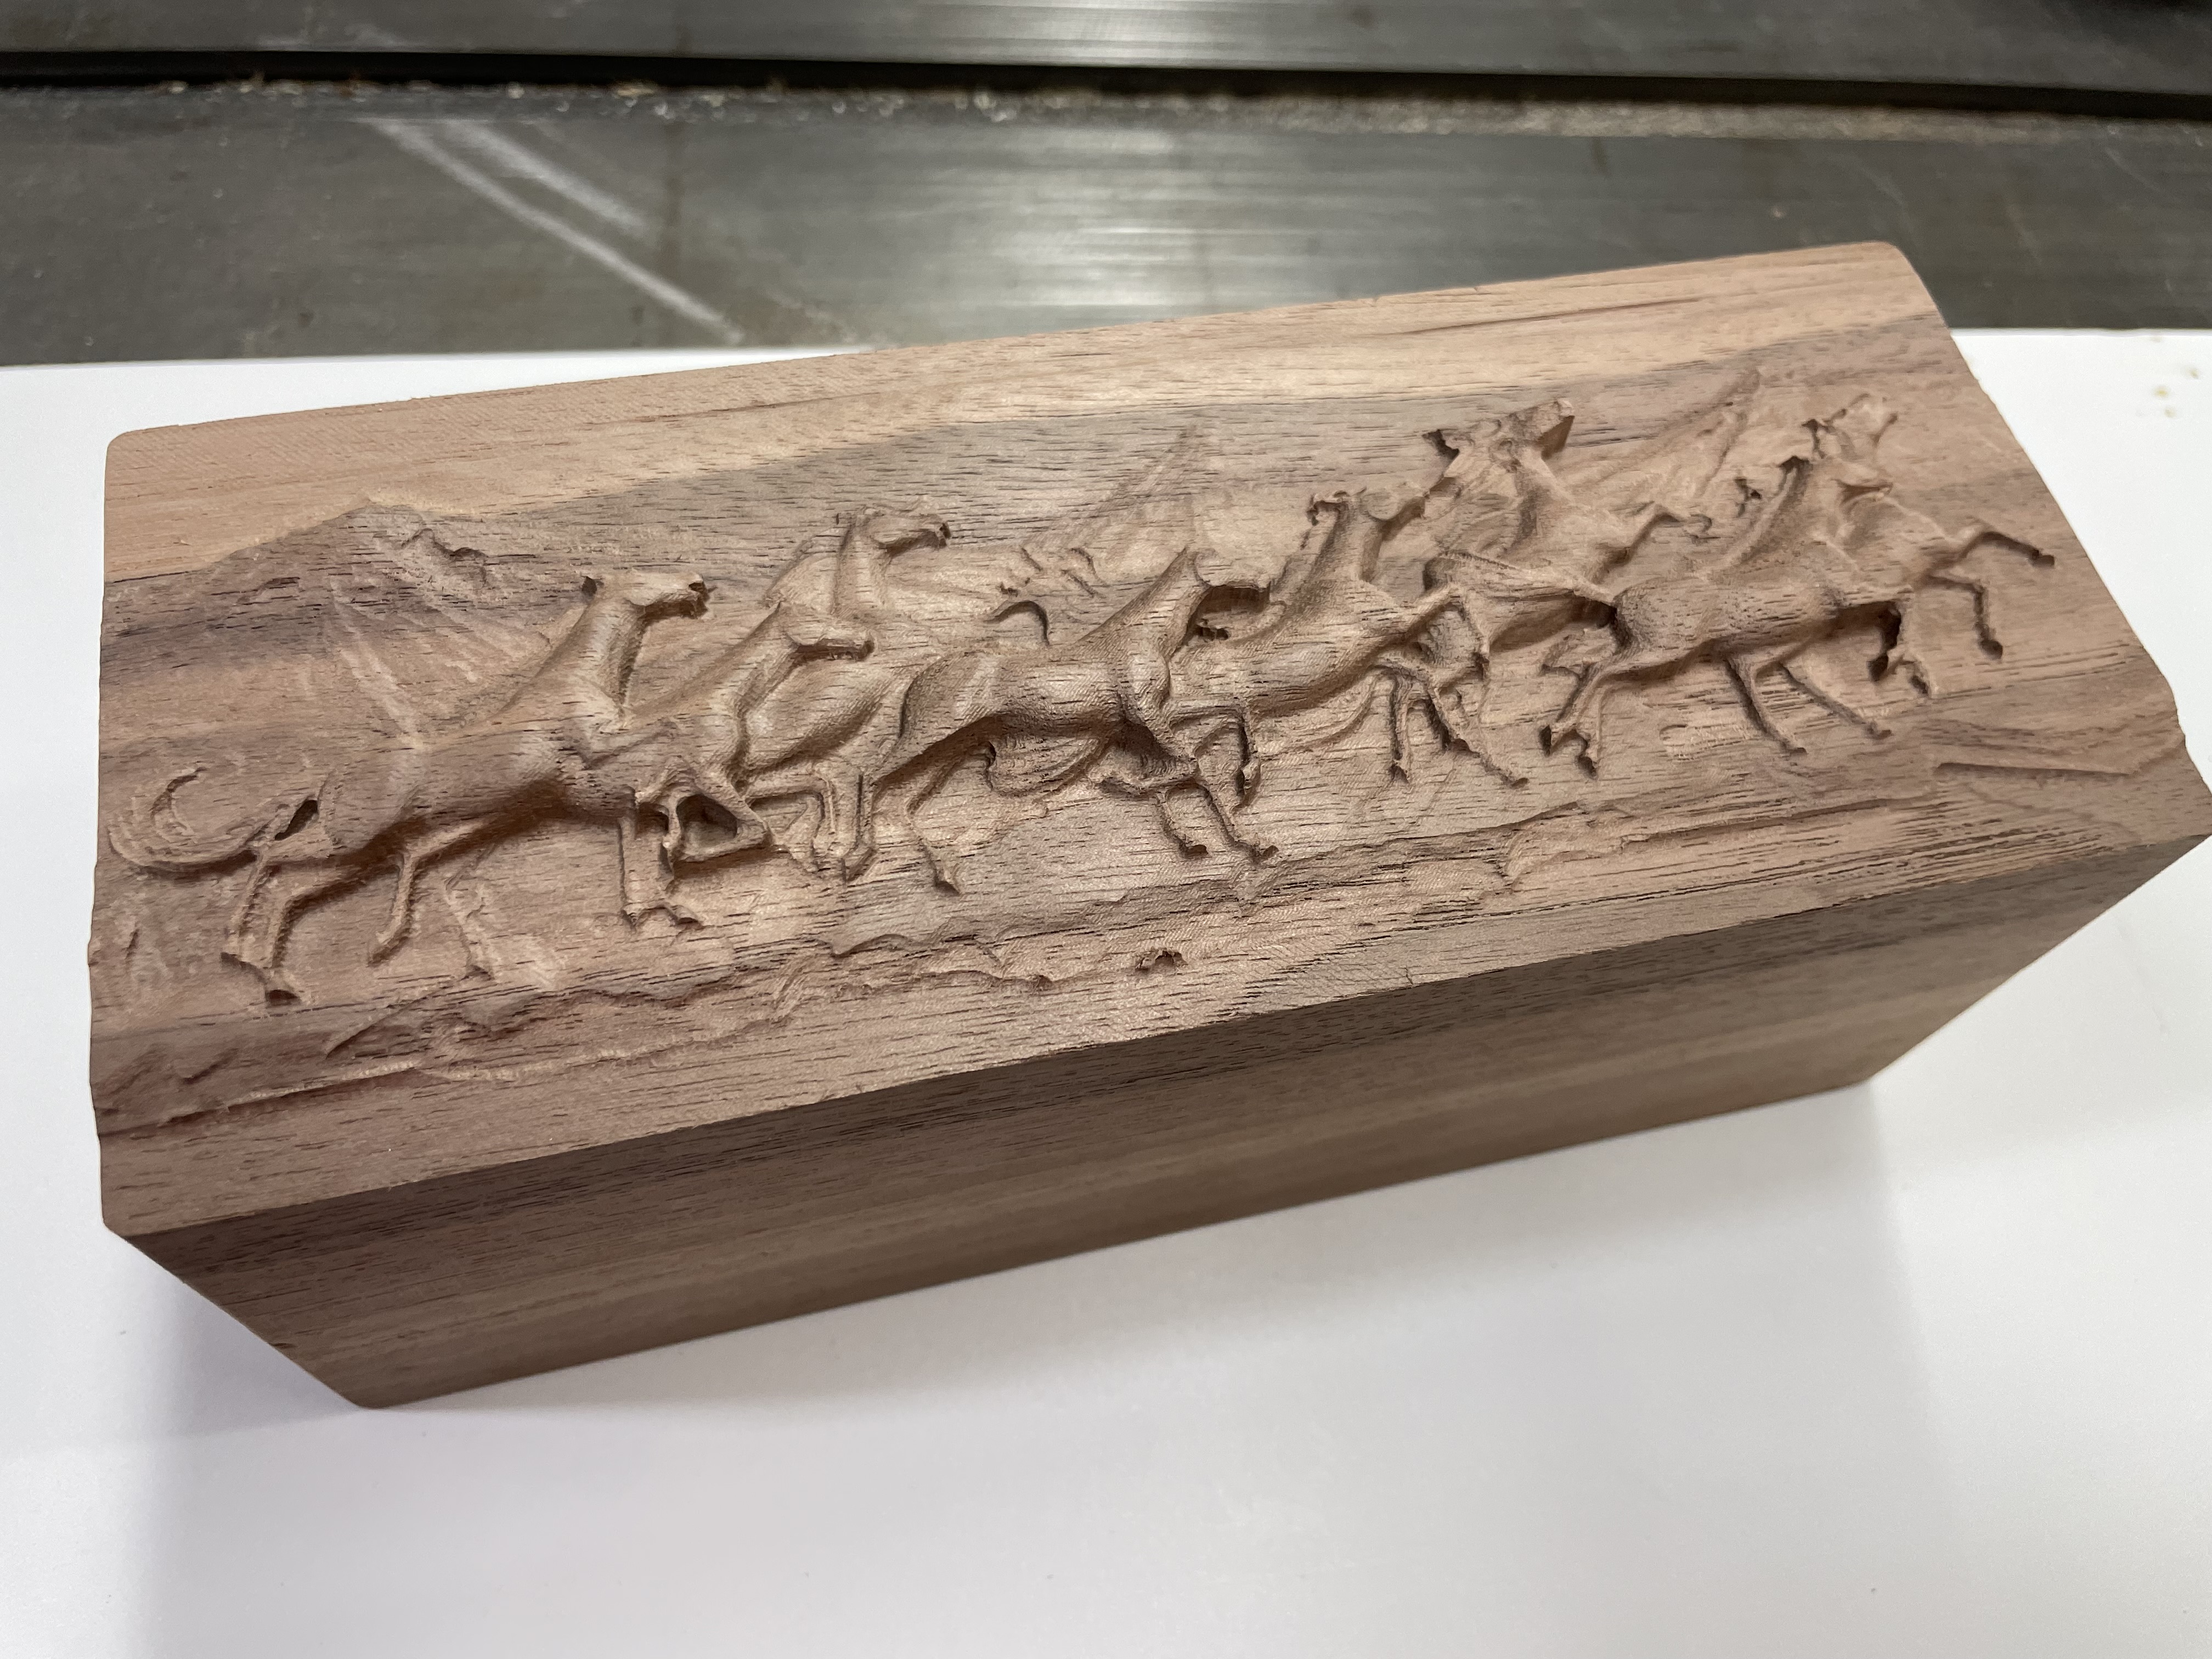
I ended up going with .375 height and adding some geometry at the top and the bottom to even out the shelf effect it had.

I did a test in MDF.

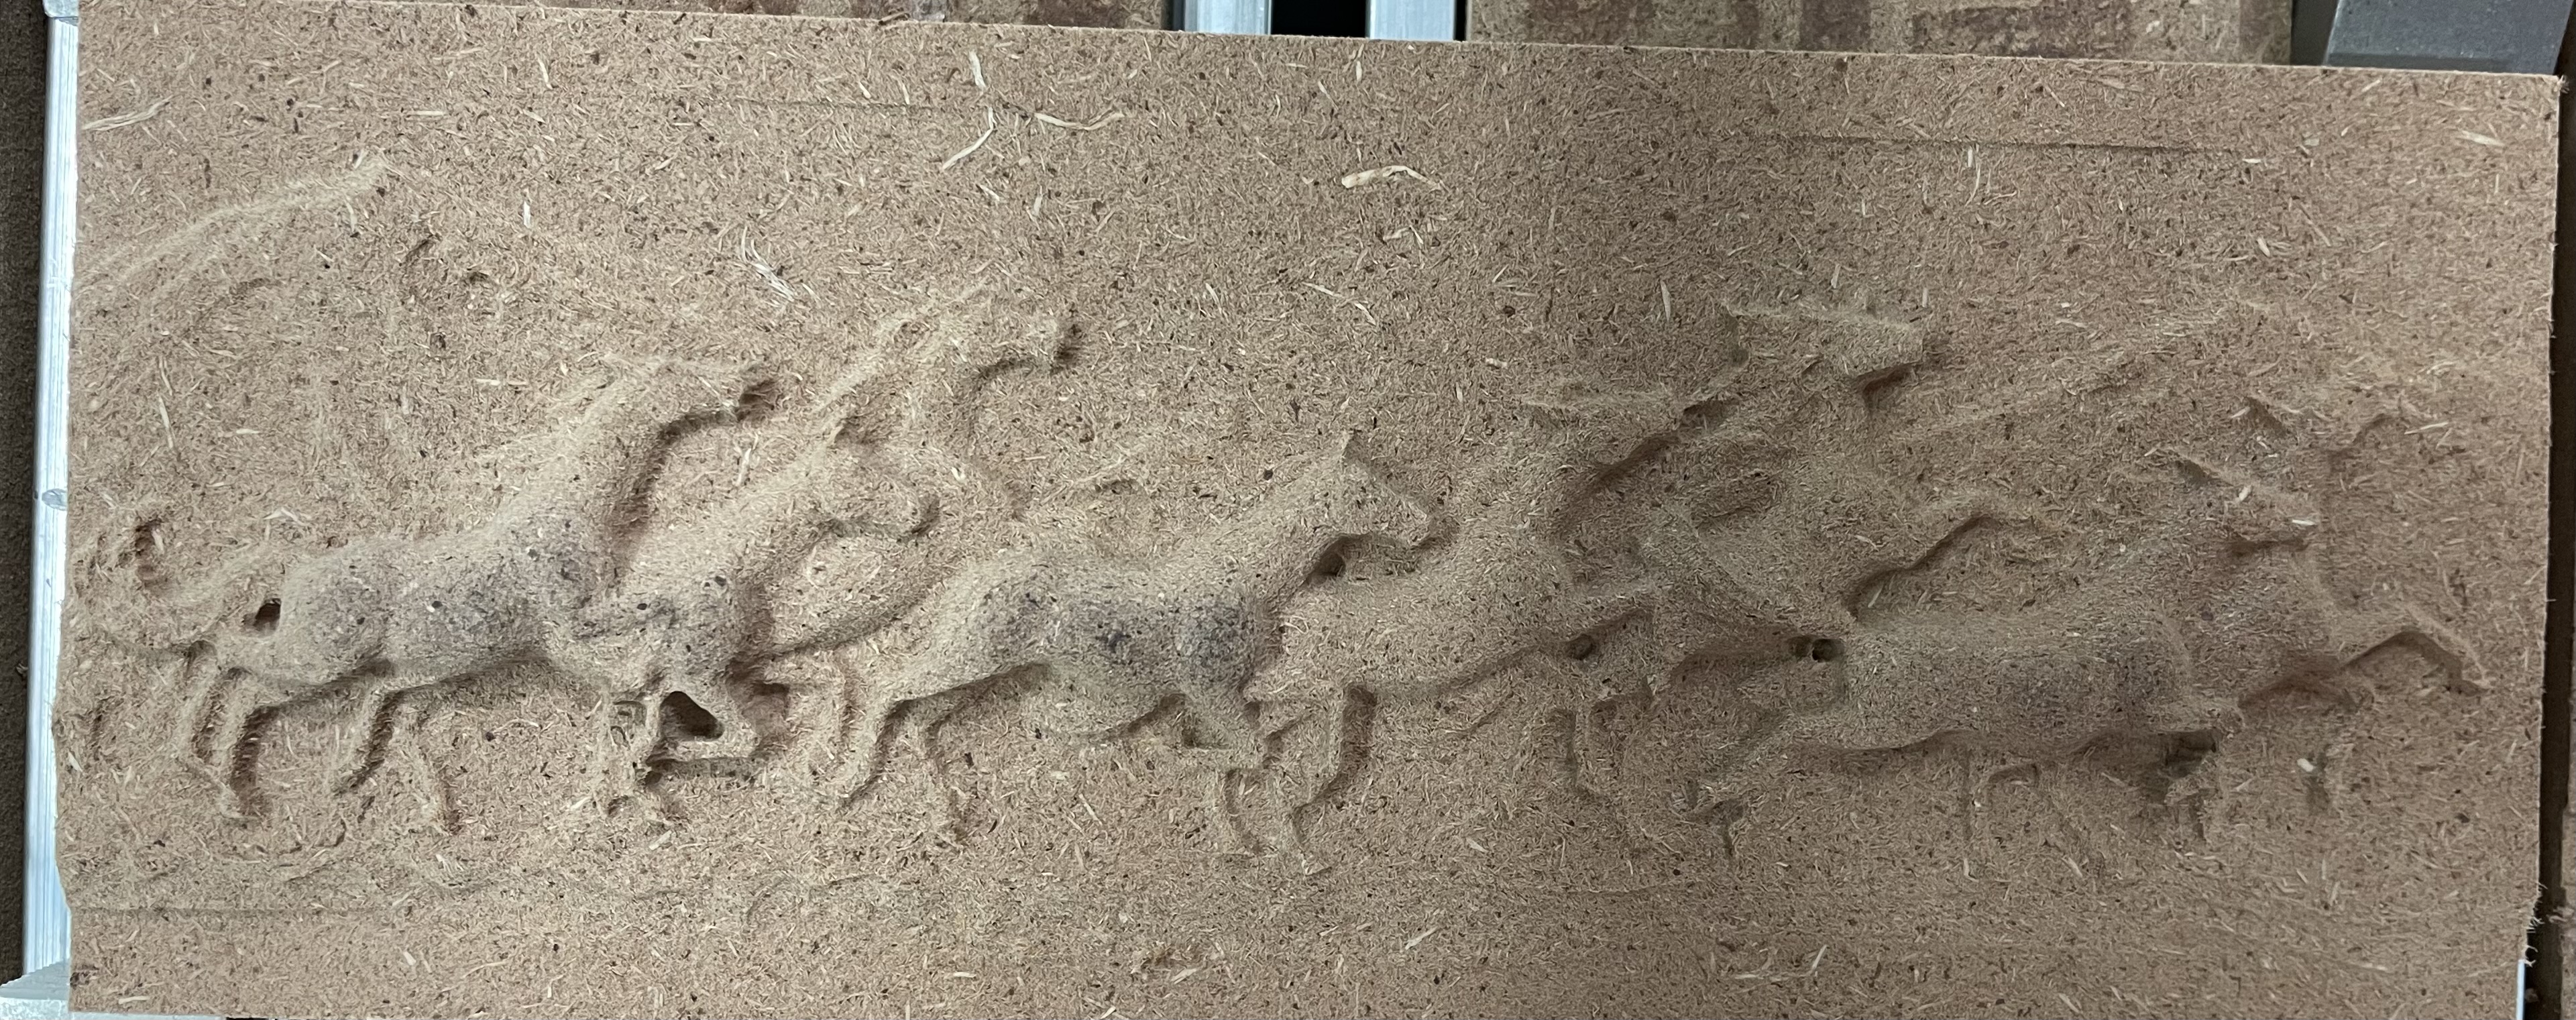
And that looked good enough so I built a jig to hold the top of the box and then let it roll.

I did not do this on purpose but the grain color difference and the mountain in the upper left look really cool.

As I mentioned earlier, the top of the box was the same thickness as the bottom and I had originally planned to carve deeper to make it look less chunky.

The top is 1.75 total height with a .75” cavity inside. Of the remaining 1” the new carving brings the flat surface down .375. I am trying to decide if I like it this way or is I should just flatten the carving and recarve from that level. The way the grain swoops under I would lose that cool effect on the mountain though.

I used a .25” for the roughing pass and then 1/8, 1/16 and 1/32 tapered ball nose bits. The tapered bits may have actually helped in this case with the horse bodies.

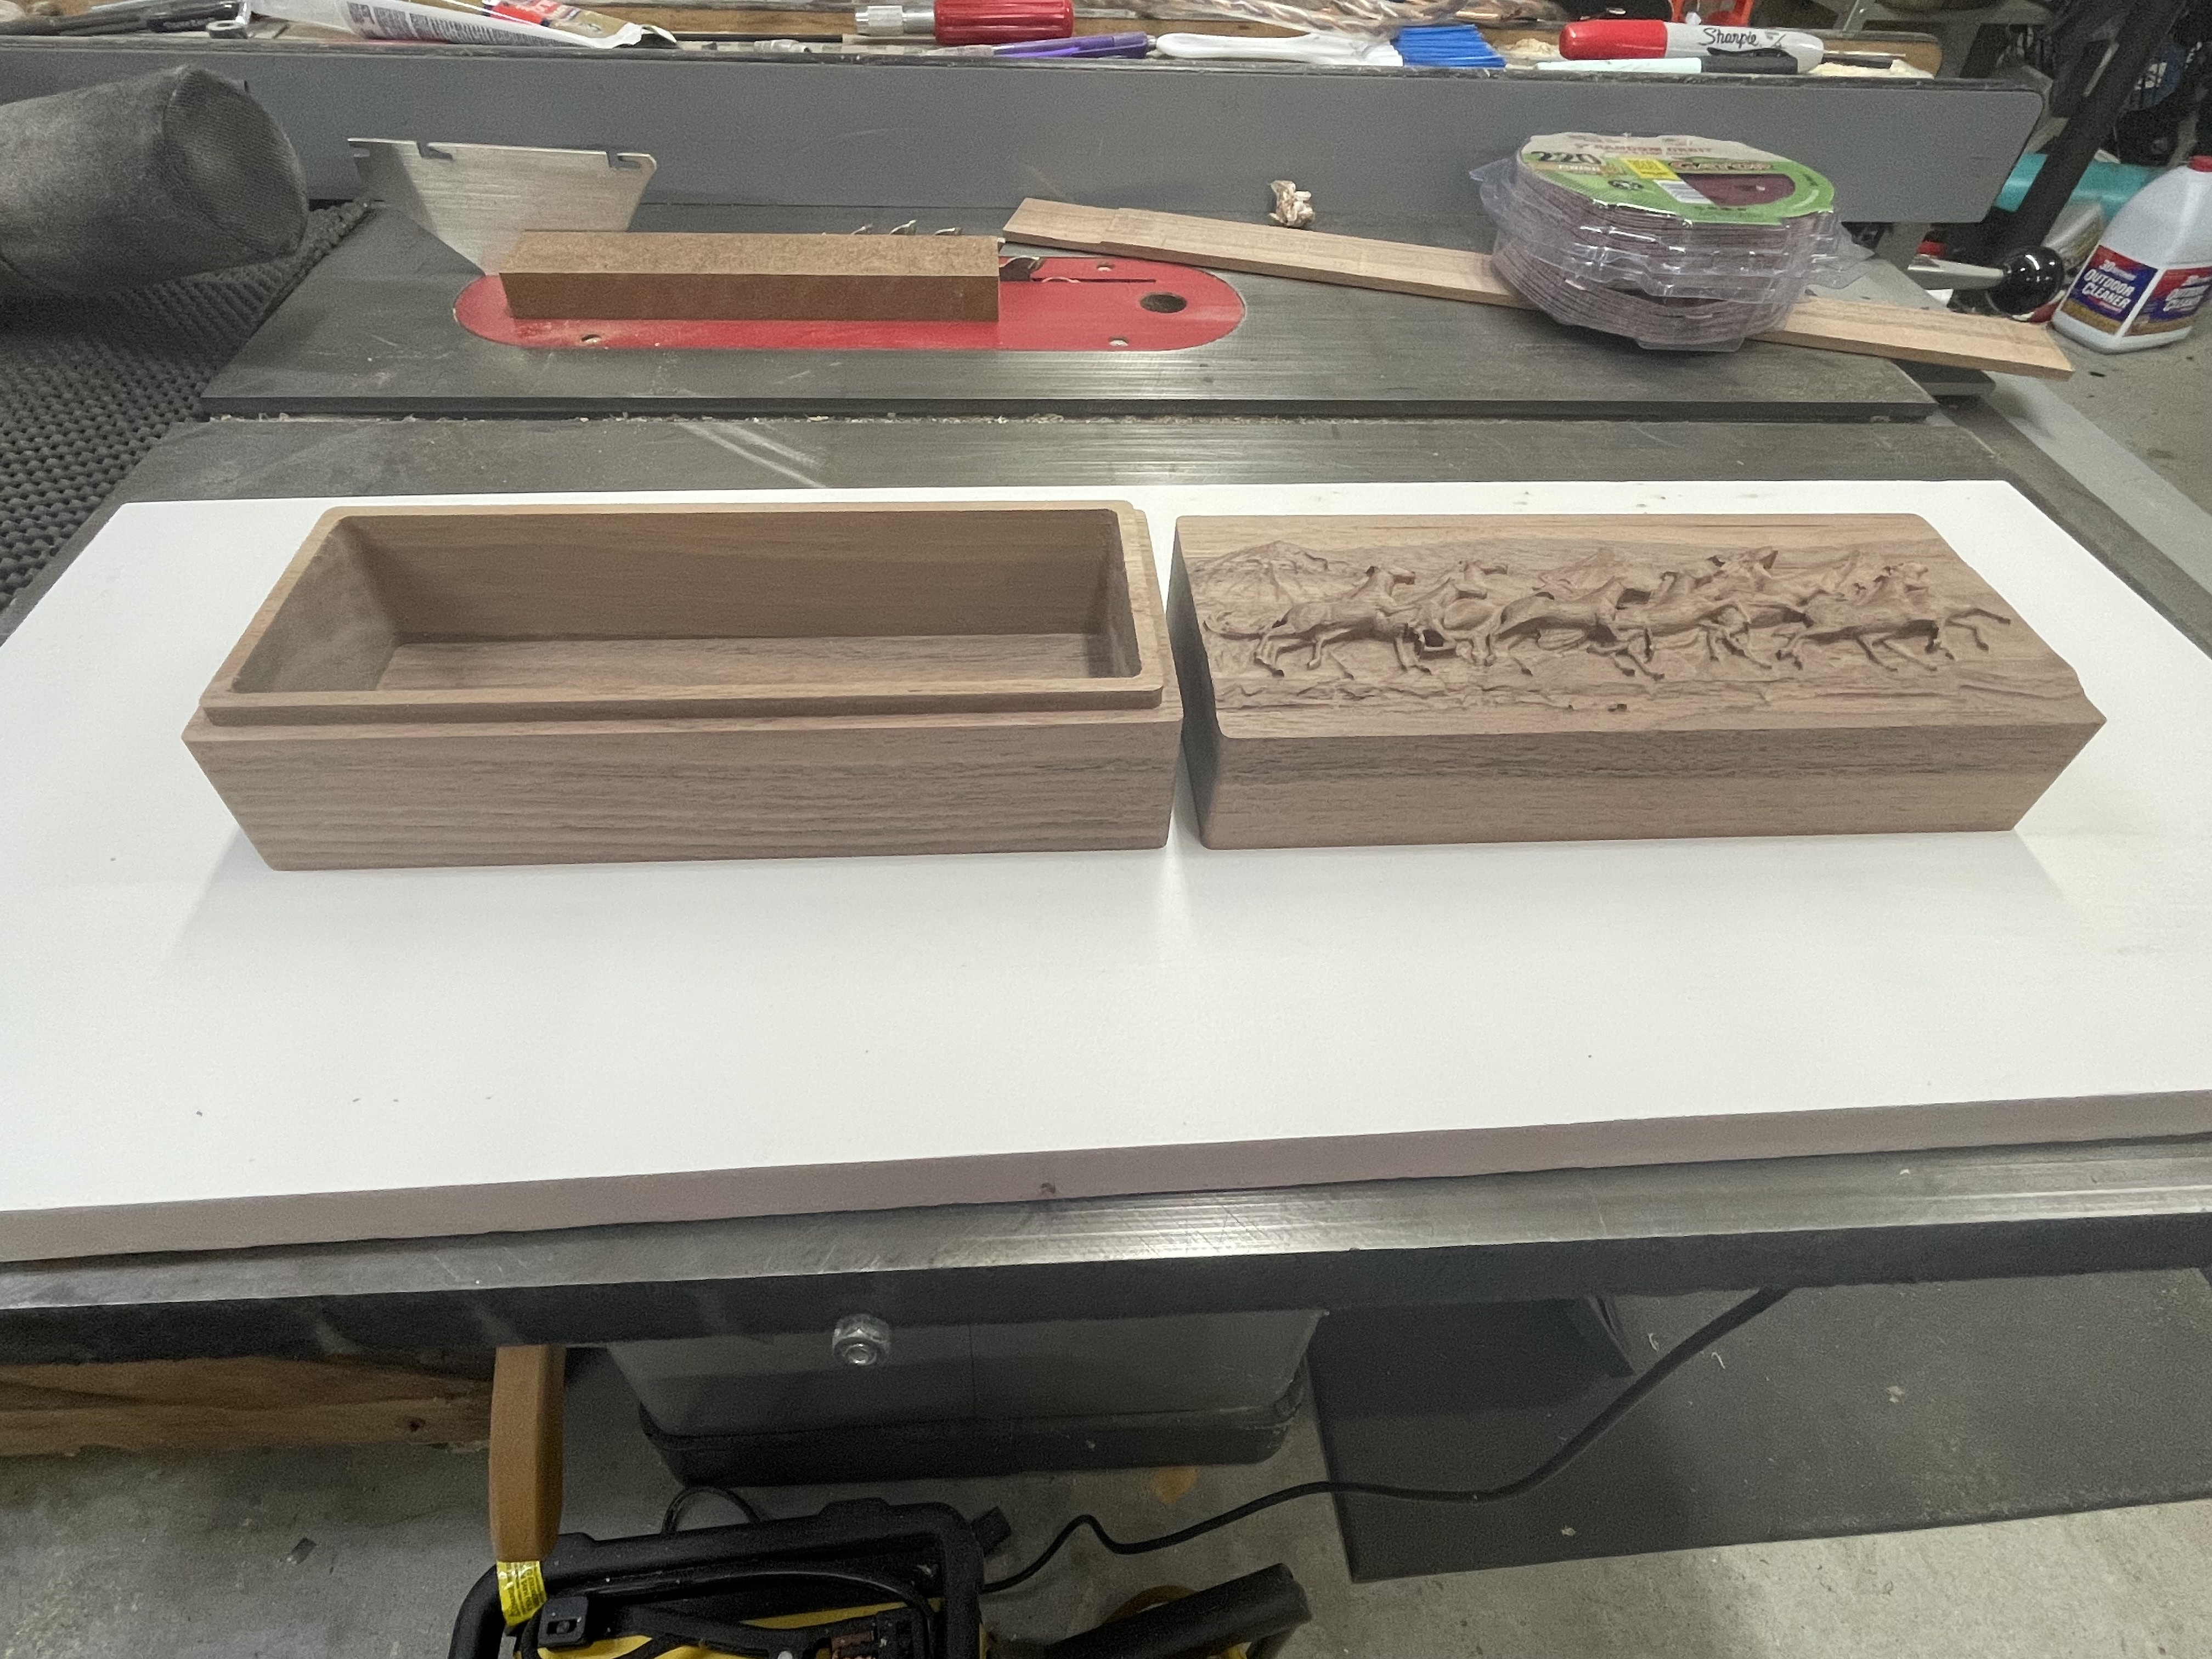
I have sanded the sides and bottom already. After decide about the carving I will put some danish oil and shellac. Normally on walnut I use the Watco Dark Walnut danish oil but in this case that may lose some of the detail so I may try a lighter one.

Not sure if I want to do that to the inside.


13 Likes

I love it. Fantastic work

That turned out really well. I wouldn’t mess with the top at all. The grain in the mountains looks awesome.

3 Likes

Thanks. I plan to make a few more for some other kids at the barn. Now I will try to keep the grain in mind but it will never work out that way again. As long as my daughter gets this one it should all be good :blush:

3 Likes

I started another box this weekend. I moved the outer pocket out slightly and set up a full depth cleanup pass for the perimeter taking something like .002 off if I remember.

All went well until about 1 seconds left in the job. As the bit rounded the final corner on the bottom the box came loose. Stupidly I had the outer pocket go all the way through leaving the box secured only with tape. It seemed ok but I guess not quite good enough.

Wasted about 2.5 hours. Next time I will have the outer pocket stop about .125 from the bottom. The final cleanup pass will only be fully engaged for that bit. Maybe add tabs or maybe not. The tape may be OK with the material from the pocket still remaining.

Oh well, live and learn. Good news is the outer surfaces were much better until that mess up.

I’d glue a wooden dowel in the groove, finish it down, and then listen to the others as they try to figure out why you added that feature.

5 Likes

Hmm. Interesting. It’s not a bug it’s a feature.

1 Like

This topic was automatically closed 30 days after the last reply. New replies are no longer allowed.